Dash Refresh
 12-31-2011, 10:15 AM
#1
4th Gear Member
Thread Starter
Join Date: Aug 2008
Location: FL
Posts: 1,173
This is a little write-up I just finished, a lot of people had questions on how to remove the trim rings and passenger air bag, so hopefully this will help clear things up a bit. I know this has been done before, so I can't lay claim to being the first, anyway here's what I did:
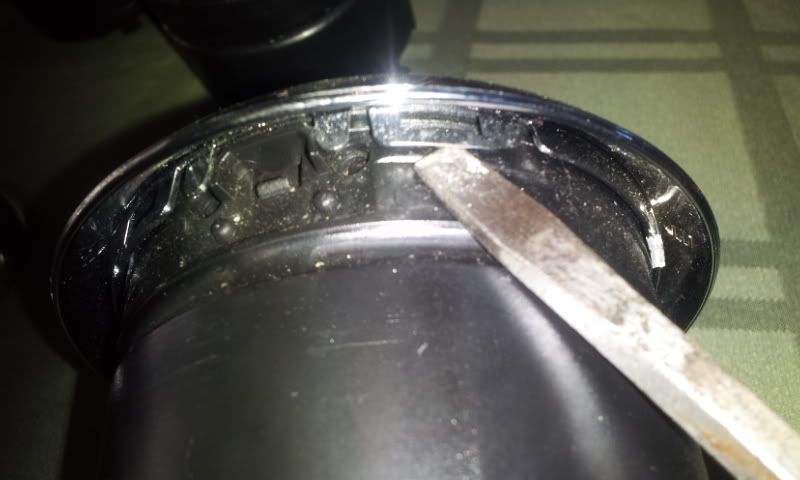
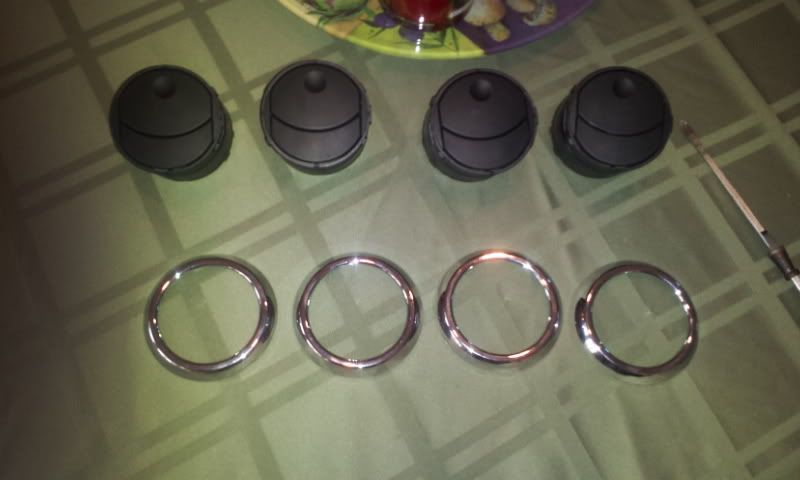
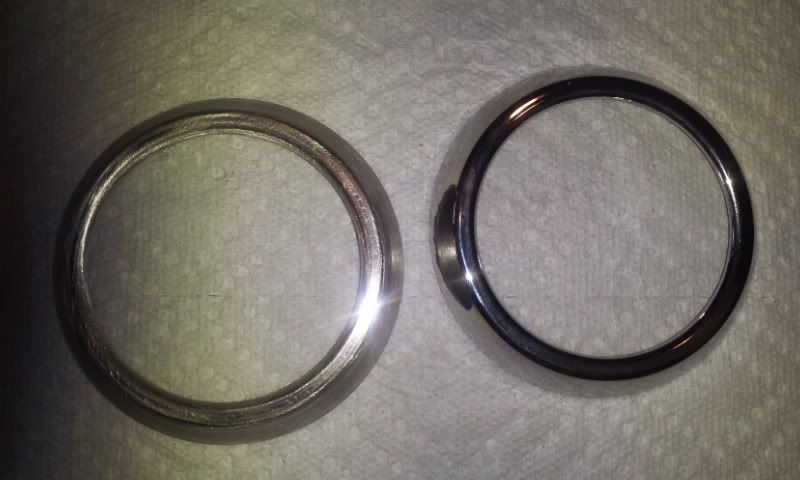
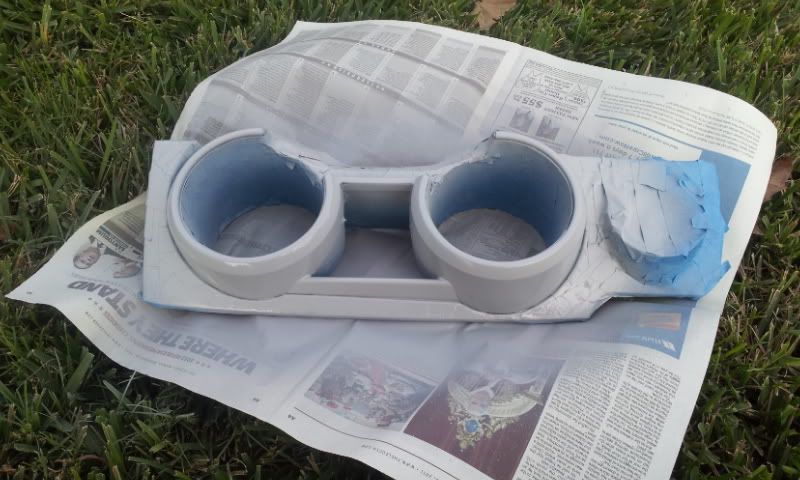
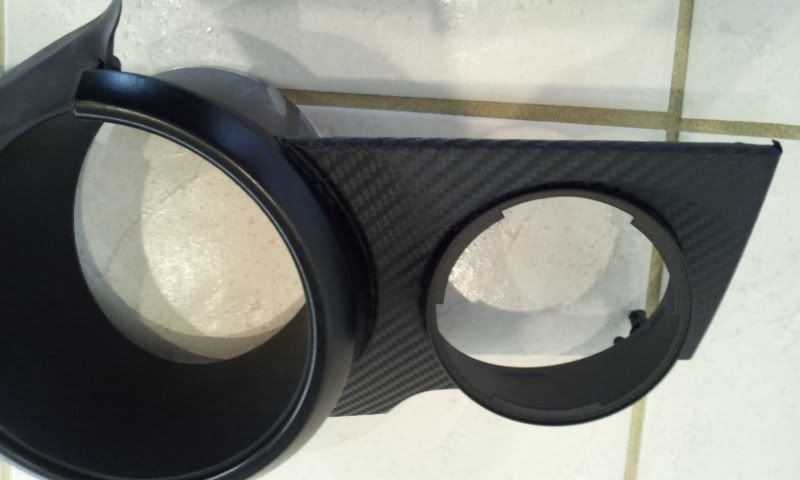
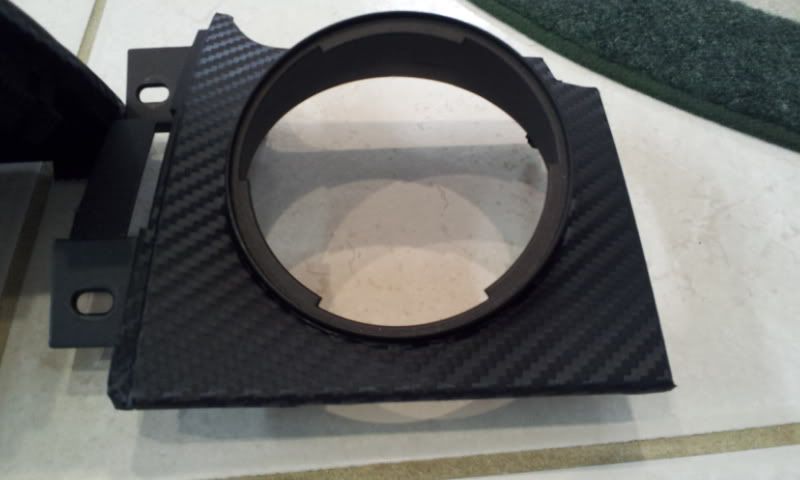
so the first thing I did was remove the chrome trim rings, here are the tabs (the vents come out easy just pull out):
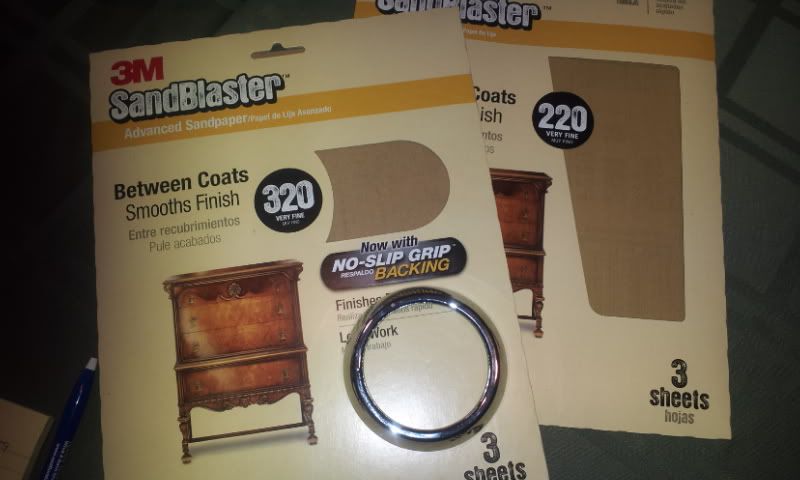
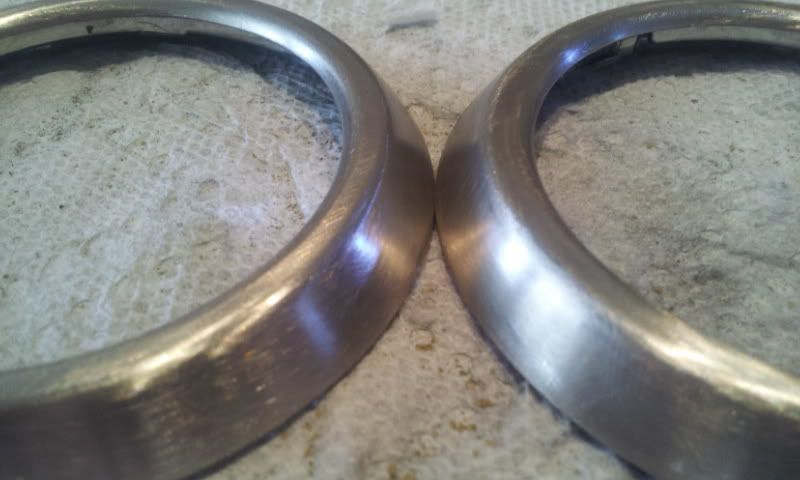
then use 220, then 320 grit sand paper to rough them up:
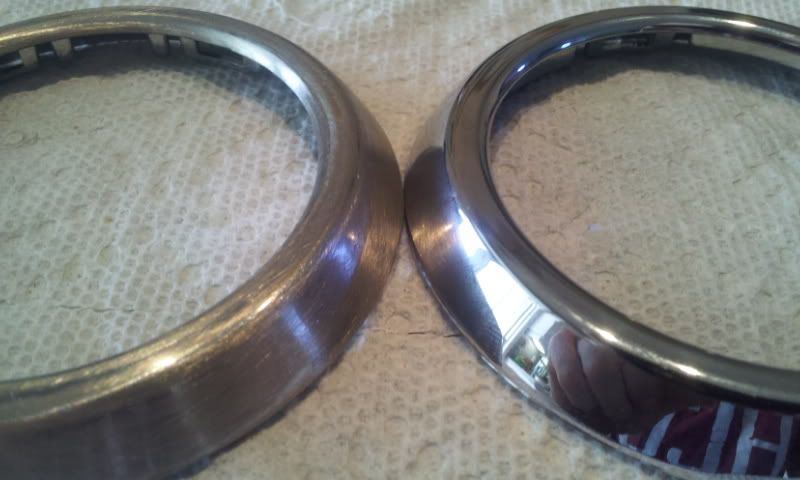
before and after pics of sanding (220):
220 vs. 320 (little difference):
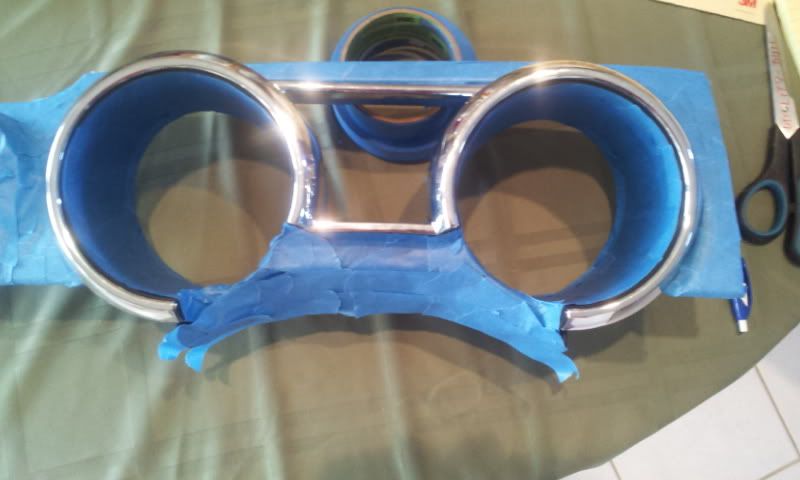
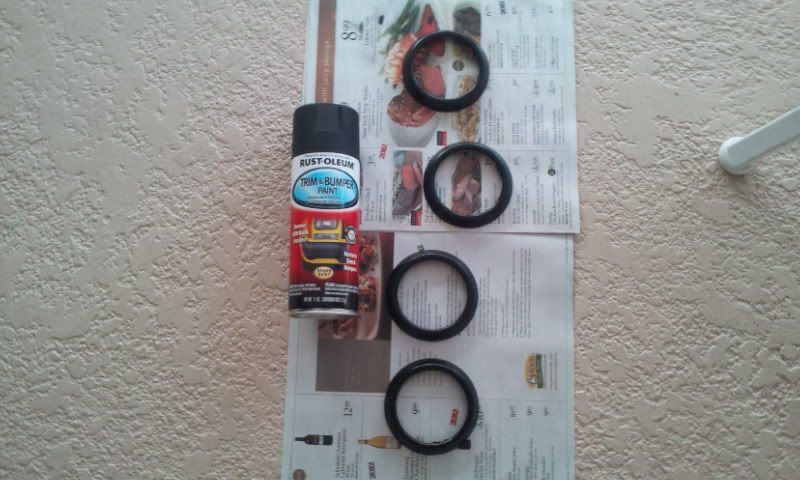
mask off the gauges chrome piece:
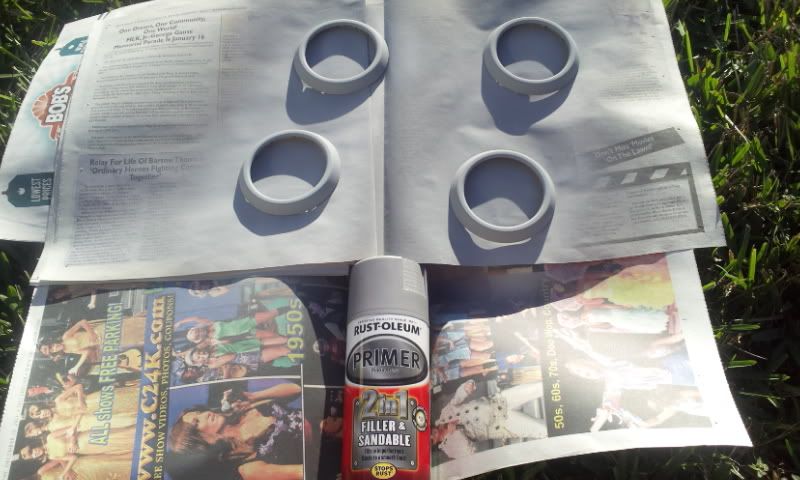
primer (2 coats):
paint (2 coats):
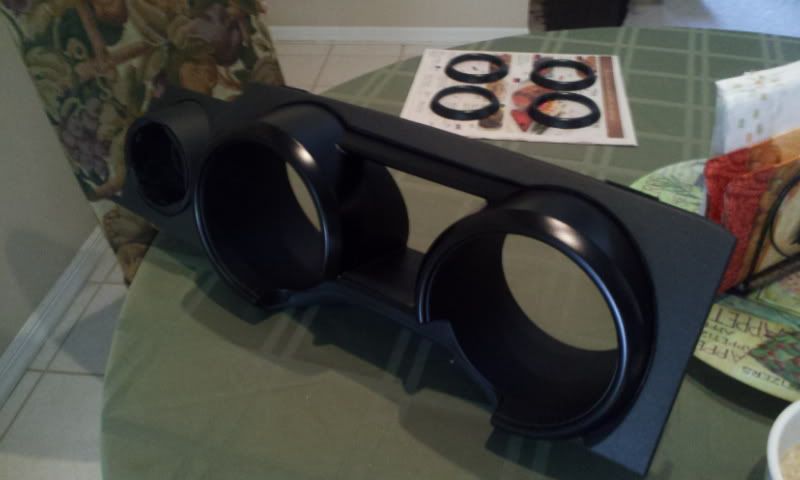
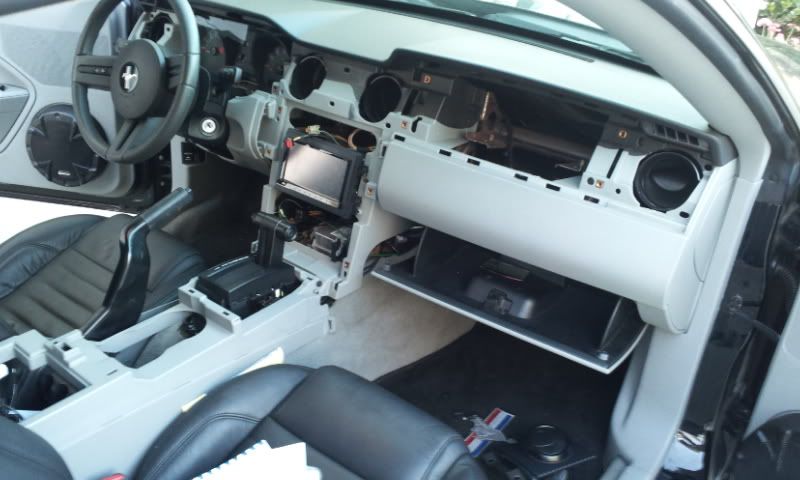
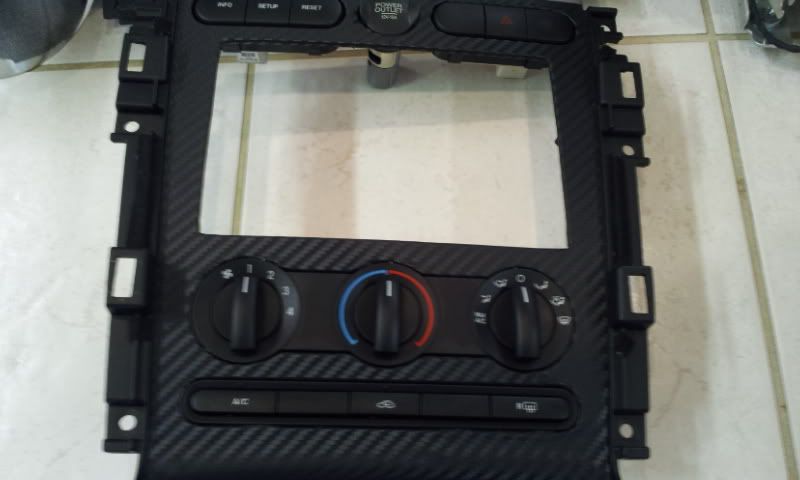
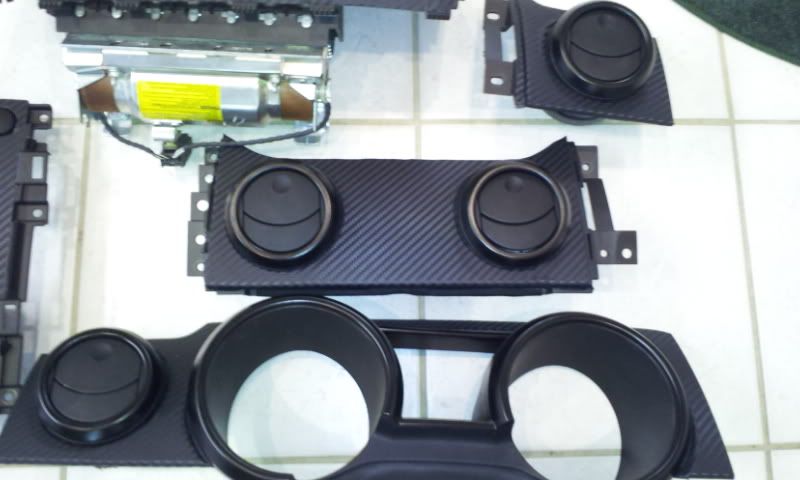
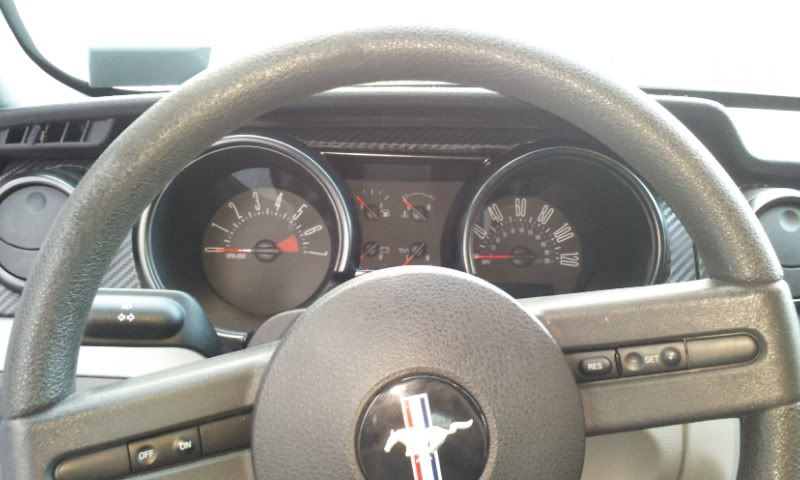
Next take apart the dash: Start with the piece around the gauges, just put the steering wheel all the way down and it can be popped off with a screw driver, then remove the center console (2 screws under lid in the back, it also popps off) then remove the center trim piece around the HU (side panels pop off just pull bottom toward rear of car, 6x 7mm screws hold on trim piece). Removal of the passenger air bag is the best way to get the panel off: look through the glove box and you will see two 8mm screws, remove them and it will slide out, disconnect it from the harness and its free with the panel attached, you kind of have to wiggle it free (no need to take the panel off it unless you want to). Then finally the passenger side vent has 2x 7mm screws and the other side just popps off. when your done it should look like this:
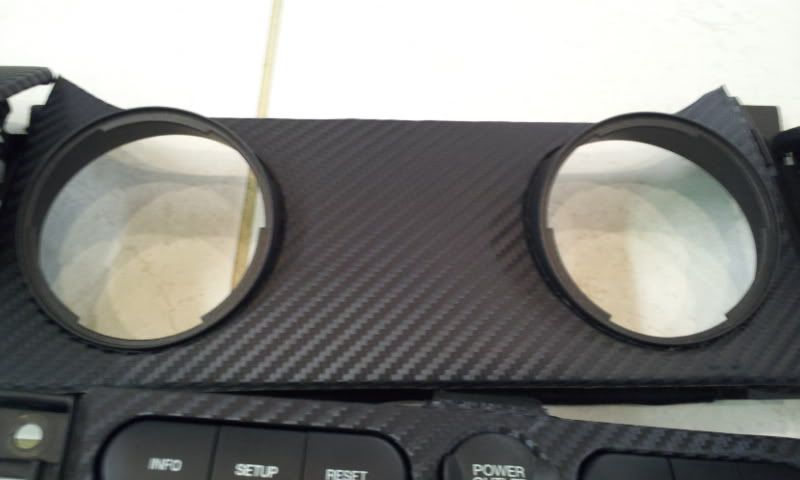
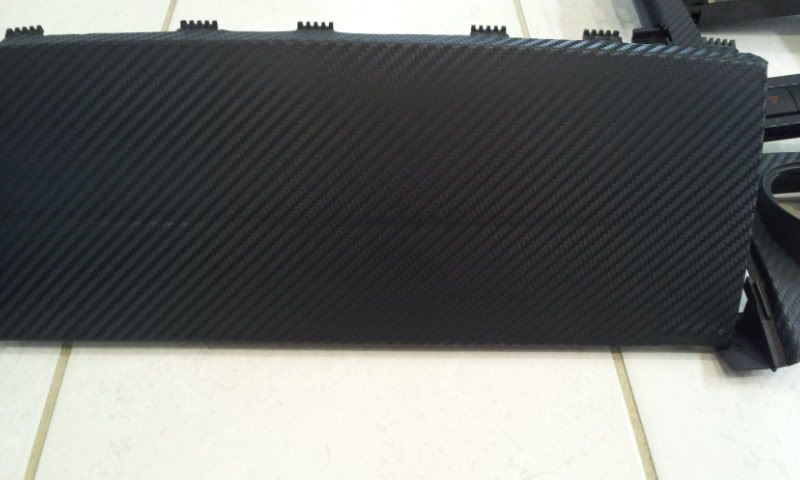
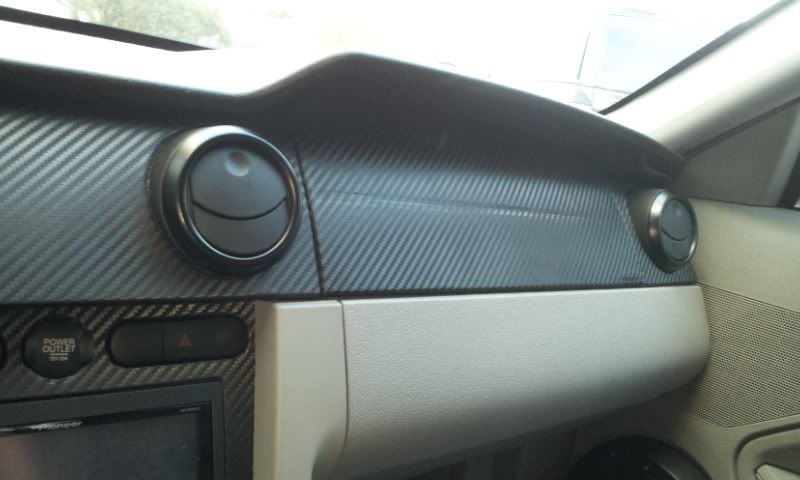
Applying the 3M Di-Noc was fairly easy, just make sure to take your time and use the hair dryer to smooth everything out. Start with a strait edge and the pattern will line up properly. The easiest way to do this was to make paper templates that fit the pieces, but cut out the 3M a bit smaller and cut little slits around the a/c vents and work it on, then push it down into the grooves with a small screwdriver, cut off excess. It helped to wrap and finish off the edges first this way everything pulled tight.


TOTAL TIME INVESTED: 8HRS.... I'll probably never do it again haha
*UPDATE*
more pics to come i finished up the door panels the past weekend, no how-to but ill tryto be inciteful with the pics i have, just need to upload them sometime this week.
TOTAL TIME INVESTED: 4HRS.... I can't believe I did it to the doors!
so the first thing I did was remove the chrome trim rings, here are the tabs (the vents come out easy just pull out):
then use 220, then 320 grit sand paper to rough them up:
before and after pics of sanding (220):
220 vs. 320 (little difference):
mask off the gauges chrome piece:
primer (2 coats):
paint (2 coats):
Next take apart the dash: Start with the piece around the gauges, just put the steering wheel all the way down and it can be popped off with a screw driver, then remove the center console (2 screws under lid in the back, it also popps off) then remove the center trim piece around the HU (side panels pop off just pull bottom toward rear of car, 6x 7mm screws hold on trim piece). Removal of the passenger air bag is the best way to get the panel off: look through the glove box and you will see two 8mm screws, remove them and it will slide out, disconnect it from the harness and its free with the panel attached, you kind of have to wiggle it free (no need to take the panel off it unless you want to). Then finally the passenger side vent has 2x 7mm screws and the other side just popps off. when your done it should look like this:
Applying the 3M Di-Noc was fairly easy, just make sure to take your time and use the hair dryer to smooth everything out. Start with a strait edge and the pattern will line up properly. The easiest way to do this was to make paper templates that fit the pieces, but cut out the 3M a bit smaller and cut little slits around the a/c vents and work it on, then push it down into the grooves with a small screwdriver, cut off excess. It helped to wrap and finish off the edges first this way everything pulled tight.
TOTAL TIME INVESTED: 8HRS.... I'll probably never do it again haha
*UPDATE*
more pics to come i finished up the door panels the past weekend, no how-to but ill tryto be inciteful with the pics i have, just need to upload them sometime this week.
TOTAL TIME INVESTED: 4HRS.... I can't believe I did it to the doors!
Last edited by Stang-aholic; 01-10-2012 at 09:39 AM.

 12-31-2011, 11:45 AM
#4
4th Gear Member
Thread Starter
Join Date: Aug 2008
Location: FL
Posts: 1,173
Thanks and no not rubbery at all, just the same finish as regular paint. the reason I went with that is because my car is black so during the summer it gets really hot, I wanted the paint to be durable and not flake or chip as easily, so i figured this would be more durable than regular paint. its fairly flat black has a hint of shine, but thats it.


 01-02-2012, 11:38 AM
#8
4th Gear Member
Thread Starter
Join Date: Aug 2008
Location: FL
Posts: 1,173
Thanks guys, and I just put one piece over the airbag, its not thick material at all, if the airbag were to deploy im sure it would just rip. and I originally calculated 4sq feet would be plenty to do the pieces I covered, but it was on sale for 20% off on http://www.carbonfiberfilm.com/ for the holidays and I picked up 12 sq feet to do the door trim and a few other pieces if i wanted to later.
and I cant wait to get rid of this steering wheel, what a pos! im looking for just a regulat IUP/leather one off a wrecked car or something. Since im goin with a grey/black scheme I dont want red stitching in the GT500. Bulitts look nice too but expensive, I was also considering the grey/black one from AM, just a lil bit $$$
and I cant wait to get rid of this steering wheel, what a pos! im looking for just a regulat IUP/leather one off a wrecked car or something. Since im goin with a grey/black scheme I dont want red stitching in the GT500. Bulitts look nice too but expensive, I was also considering the grey/black one from AM, just a lil bit $$$
01-04-2012, 03:23 PM
#10
1st Gear Member

Join Date: Dec 2011
Location: Colorado
Posts: 85
Damn, that makes me want to pull mine out  .
.
A bit offtopic but they have a newer type of window tint (a bit pricey) called CCX or something along those lines that is suppose to reflect around 80% of heat from the sun, regardless of tint percentage. Certain shops will do your windshield for you as well.
A bit offtopic but they have a newer type of window tint (a bit pricey) called CCX or something along those lines that is suppose to reflect around 80% of heat from the sun, regardless of tint percentage. Certain shops will do your windshield for you as well.