Brake upgrade visually
 06-15-2014, 02:16 PM
#11
3rd Gear Member
Thread Starter

Join Date: Jan 2010
Location: Louisiana
Posts: 738
Looks great. 
Be aware that spray can stuff is not as durable as sprayed paint with catalyst (hardener) in it.
Also, chemical cleaning product and heat will take its toll on the finish as well.
Powder coating is a good durable solution on most of this stuff nowadays.
Another trick that I used for years with great results is to spray calipers (and intake manifolds on old cars) with Acrylic Enamel single stage paint.
Mixing ratio is 8 parts of paint to one part of catalyst.
Of course, you need compressed air and a paint gun for that...
I have a 50 gal air compressor, just no gun/
Last edited by gmoran1469; 06-15-2014 at 02:19 PM.

 06-15-2014, 07:02 PM
#13
S197 Section Modder-ator
Join Date: Sep 2007
Location: Orlando FL
Posts: 13,373
I'm just always skeptical when it comes to rattle can (ceramic or else) but it doesn't mean that it will fail for sure.
06-15-2014, 07:52 PM
#14
1st Gear Member
Join Date: Jun 2014
Location: South Florida
Posts: 114
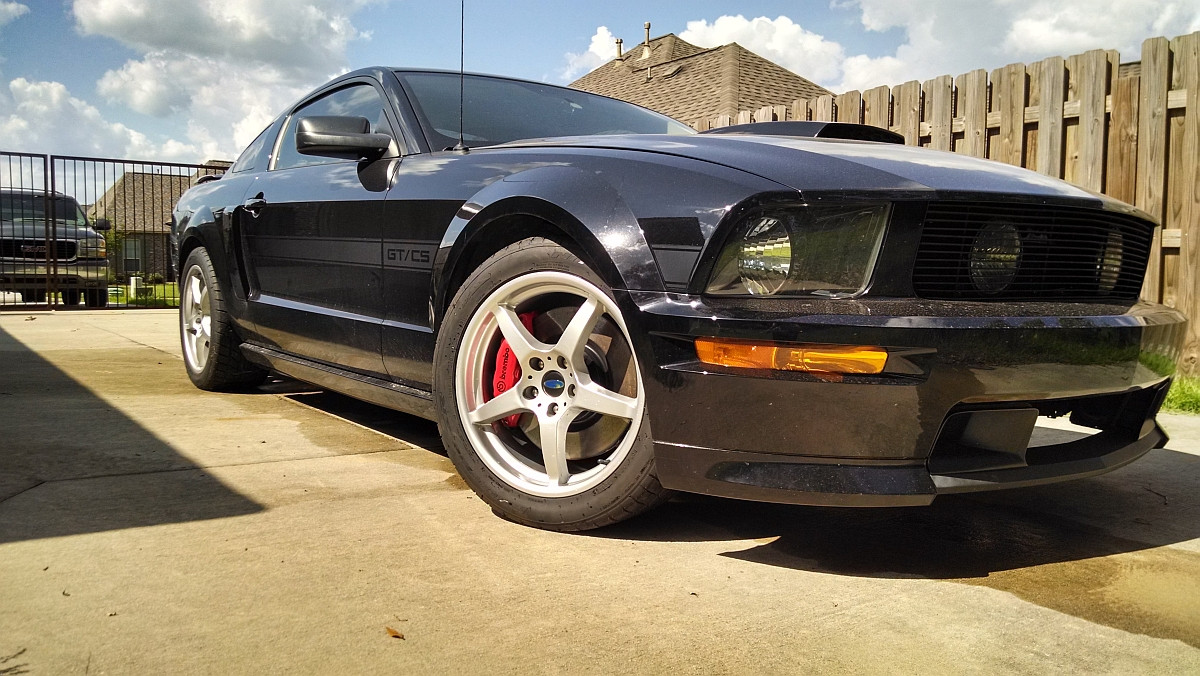
Wow, those calipers look amazing. I wonder how the paint will hold up after driving for a few months? I have had mixed results with caliper paint on a few of my cars. Some calipers still looked good after a year and some peeled, not sure why.
06-16-2014, 01:31 PM
#15
3rd Gear Member
Thread Starter
Join Date: Jan 2010
Location: Louisiana
Posts: 738
Crossing my fingers that it will hold up well. I baked in between each coat and scuffed with red scotch brite then cleaned with wax & grease remover, then blew everything off with compressed air before shooting. It's not a DD anymore so that should reduce wear and tear on them. I just laid the first coat of clear on the back halves about an hour ago during lunch. Gonna bake them when I get home and then lay another coat. I'll probably run out of clear with the second coat.
Last edited by gmoran1469; 06-16-2014 at 01:38 PM.
06-16-2014, 08:42 PM
#16
1st Gear Member
Join Date: Jun 2014
Location: South Florida
Posts: 114
Crossing my fingers that it will hold up well. I baked in between each coat and scuffed with red scotch brite then cleaned with wax & grease remover, then blew everything off with compressed air before shooting. It's not a DD anymore so that should reduce wear and tear on them. I just laid the first coat of clear on the back halves about an hour ago during lunch. Gonna bake them when I get home and then lay another coat. I'll probably run out of clear with the second coat.