
Taco Bill's How To's, All TSBs, and other Tech Info
 11-09-2006, 01:45 PM
#1
MF Administrator
Thread Starter
Join Date: May 2005
Location: South Carolina
Posts: 8,191
Below are links to the threads that had been stickies in the general S197 section, with new ones subsequently added.
The following listing are TECHNICAL/HOW-TO THREADS about S197's:
The following listing are INFORMATIONAL THREADS about S197's:
If you know of Technical "How-To" or Informational threads here on MF that would be helpful to other members, or if you want to write your our technical thread, just shoot a PM to either pascal,SOLDSHORT, mygt500, howarmat, Joolander, Professor Wizard, wilkinda, ODDYSEY or 28HopUp. Writing a Technical thread will earn you a Contributor icon under your username.
The following listing are TECHNICAL/HOW-TO THREADS about S197's:
- ELECTRONICS DISCUSSION... Audio, Visual, Lighting...
- How To: Replace Downstream O2 Sensors for the Mechanically Disinclined
- How To: Replace Ebrake Cable for the Mechanically Disinclined
- How To: Remove Evap Canister, Possible Fix for Fuel Filling Issue
- Sound Deadening tutorial
- Replacing the stock throttle body
- Dealing with Window Tint Scratching
- K Member Brace & Torque Limiter Install
- Installing Agent 47 Side Mirrors
- Fixing Rattle in Side Mirrors
- Nitrous Oxide FAQ
- DIY 1-Piece Driveshaft Install
- Downloading Tunes to your SCT 2
- Amp Install
- Increase Passenger Seat Height
- Installing a New Fuel Filter
- Installing Hood Pins
- Installing Clear Front Turn Signal Lenses
- Installing Clear Rear Sidemarker Lenses
- Installing New 3rd Brake Light
- Custom Antenna Delete Tutorial
- Adding Sound Deadening Material
- Removing Front Fender
- AVIC D3 Install
- AVIC Z1/Z2/Z3 Install Thread
- Does (insert random part here) need a tune?
- How To Install Carbon Fiber Dask Kit
- How To Paint Your Stock Wheels
- How To Install Dual Solenoid Line Locks
- Shock and Spring Install
- BBK Shortie Header Install
- Upper Control Arm Install
- Hurst Install
- Sunvisor Sticker Removal
- Transmission Fluid Change
- Change LED color for radio/steering wheel
- How To Paint Your Engine
- GT500 Spoiler Installer
- GT500 Front Fascia Install thread
- Upgrade to the MYCOLOR cluster
- How To: Saleen Supercharger Install
- How To: Install Gauges
- How To: Tighten E-Brake Cable
- How To: Install Homelink
- How To: Install SHR louvers
- How To: Install GGT500 Fuel Pump
- How To: Install TCI Ratchet Shifter
- How To: Install Tint for Head and Tail Lights
- How To: Change Automatic Transmission Fluid
- How To: Install Lighted Door Sills
- How To: Make Your Own Shorty Antenna
- How To Program Your Car with a SCT X3
- How to: Turn Advance Trac Off 2010+
The following listing are INFORMATIONAL THREADS about S197's:
- Where to get NON PERFORMANCE Items for your 05 and UP!
- Your Warranty!
- Informational Documents
- What is a Torque Converter?
- Cross Over Exhaust Pipe Explained...
- Definitive 05/06 Ducktail + Spoiler Thread
- Front Door Speakers
- iPOD Aux Input
- Water Leak Issue
- Frozen/Stuck Emergency Brake
- Slotted and Drilled Rotors
- LCA Angle & Relocation Brackets Explained
- RWHP & Dyno Sheets
- Solution for sticking throttle
- Front Suspension Thunking Thread
- 2005 & 2006 Production Numbers
- S197 Designation
- The DIY One-Stop Shop
- List of Aftermarket Companies
- What do these letters mean!!
- Spark Plug Removal Problem/Solutions (GT Only)
- Gears, wheels, tires, revs, RPMs and MPHs
- Stuck in PARK? (emergency fix)
- Where can I find Chaser taillights?
- S197 Mustang Axlbeback Exhaust Guide
- Changing Brake Pads
- A Guide to Weight for parts of the S197
If you know of Technical "How-To" or Informational threads here on MF that would be helpful to other members, or if you want to write your our technical thread, just shoot a PM to either pascal,SOLDSHORT, mygt500, howarmat, Joolander, Professor Wizard, wilkinda, ODDYSEY or 28HopUp. Writing a Technical thread will earn you a Contributor icon under your username.
Last edited by howarmat; 07-13-2020 at 07:58 PM.
 04-16-2007, 08:38 PM
#2
5th Gear Member

Join Date: Mar 2006
Posts: 2,553
Tacobill is known for his amazing write ups and now has graciously decided to share his write ups with Mustang Forums.
He will be adding more how to guides so keep an eye out.
This is the link to TMS page with all that he has over there.
http://forums.bradbarnett.net/showthread.php?t=441678
He will be adding more how to guides so keep an eye out.
- How to: Change Your Own Oil
- How to: Install MGW Shifter
- How to: Install Moleskin for Window Tint
- How to: Install Sequential Tail lights
- How to: Install Pypes Off-Road H-Pipe
- How to: Install Steeda Lowering Springs
- How to: Install Metra Amplified Antenna
- How to: Install K&N AirCharger CAI
- How to: Install Saleen Short Throw Shifter
- How to: Install Rotorpros Drilled/Slotted Rotors
- How to: Install FRPP/Borla Stinger Exhaust
- How to: Install CDC Shaker Hood
- How to: Install SCT Xcal2 Tunes from computer to Xcal2
- How to: Install CDC Chin Classic Chin Spoiler
- How to: Install CMCV Delete Plate
- How to: Install Steeda Underdrive Pulley
- How to: Install Ford Racing 3-Valve Cam Covers
- How to: Install Speed of Sound (SOS) Switch Plate
- How to: Install Alpine IVA-W205 & Lorex SG4933R Rear Camera
- How to: Install Raptor Shift Light - PMP Billet Mount
- How to: Install Fading Rocker Stripe
- How to: Install MGW Oil Dipstick Handle
- How to: Install Coast Driveline 1-piece aluminum driveshaft
- How to: Install BMR Lower Control Arm (LCA) and Relocation Bracket
- How to: Install Steeda Billet LCA's
- How to: Install Prothane Bullet Motor Mounts
- How to: Install 3.5" dia Shaftmaster Driveshaft
- How to: Install Steeda Adj. Panhard and Brace
- How to: Install New pinion Flange
- How To: Install Boost-A-Pump
- How to: Install GT, GT/CS, and GT500 Rear Bumpers
This is the link to TMS page with all that he has over there.
http://forums.bradbarnett.net/showthread.php?t=441678
Last edited by Joolander; 10-05-2009 at 09:33 PM.
12-31-2008, 04:14 PM
#3
Try this for some help:
- Power up the device by plugging in to either a vehicle's OBDII port or a computer's USB port. (usb cable not included)
- Once powered up, scroll all the way down to device info.
- Press select, this will display firmware version and serial number.
- Press select again, and this will display the Tuner Status. NOTE: If it does not take you to the Tuner Status Window, and instead kicks you back to the Device Info Screen, Your Firmware is Old and will Need to be Updated to check the status. There is an FAQ section for this.
- Status will either be: Stat=Stock, Stat=Aftermarket, or Stat=Unused.
*This is the breakdown of what each one means:*
- Stat=Stock - Your tuner is half locked, but fixable. Go the the tech support page, select the Ford Xcalibrator 2 in the first drop down, select Device Update Software in the second drop down and hit Search. Download Liveload 3 by clicking the "Click Here to Download" next to it. Install this application, once installed open it up, plug in the X2. The program asks the X2 to be on the main menu. Program Vehicle is the main menu of the X2s. Press the unlock button within the liveload application. This will change the status to Unused and the tuner will then be ready to tune a new vehicle.
- Stat=Aftermarket - The vehicle is VIN locked, you need to either return the vehicle it is currently locked to back to stock, or you will need to call Tech Support and Get a Return Authorization, send it the Device and pay an Unlocking Fee.
- Stat=Unused - Your tuner is not locked, go tune.
04-21-2009, 12:56 PM
#4
5th Gear Member
Join Date: Feb 2005
Location: Anaheim, California
Posts: 4,205
Howdy Group.....
OK, so the Bullitt got a ton of attention yesterday, so today I turned to the 05...I finally decided to install HID's on the 05. Karen's Bullitt already has the factory HID's, and I love em. I don't believe every Bullitt comes from the factory with HID's, so this kit could be used on the Bullitt as well......
This is the 6000K Bixenon Kit from Stangmods.com The 6000K is a blueish white, without going over the edge to the solid blue....I felt this to be the right choice for me....This is a very complete, plug and play kit, meaning there is no wire splicing involved, just plugs....
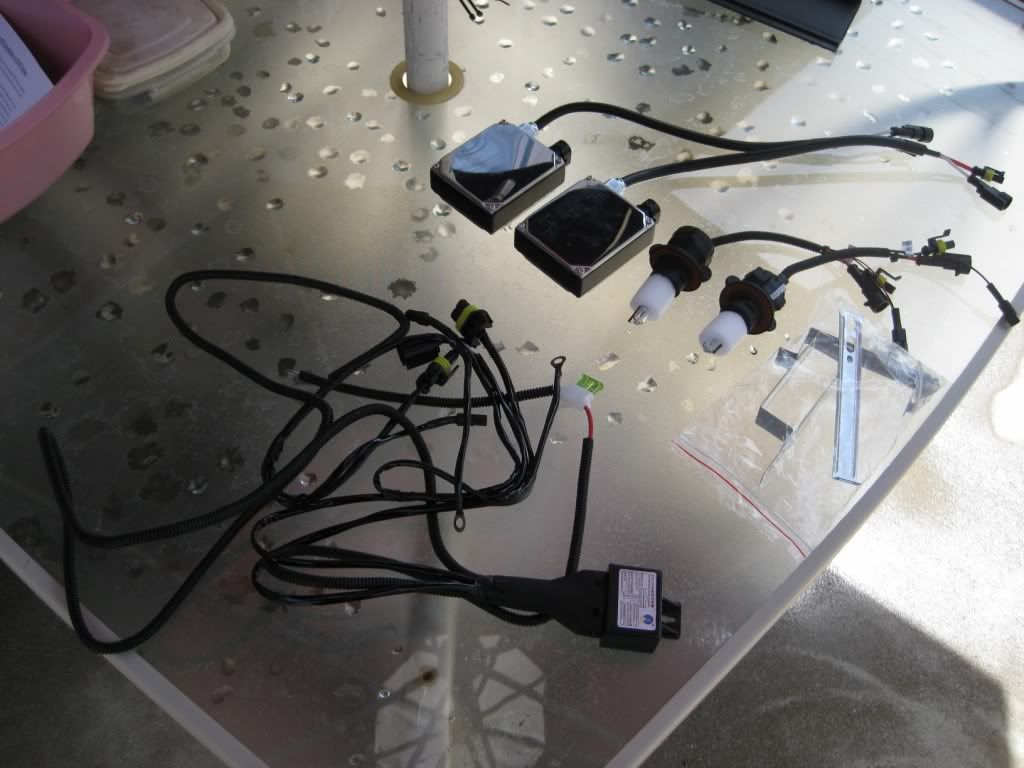
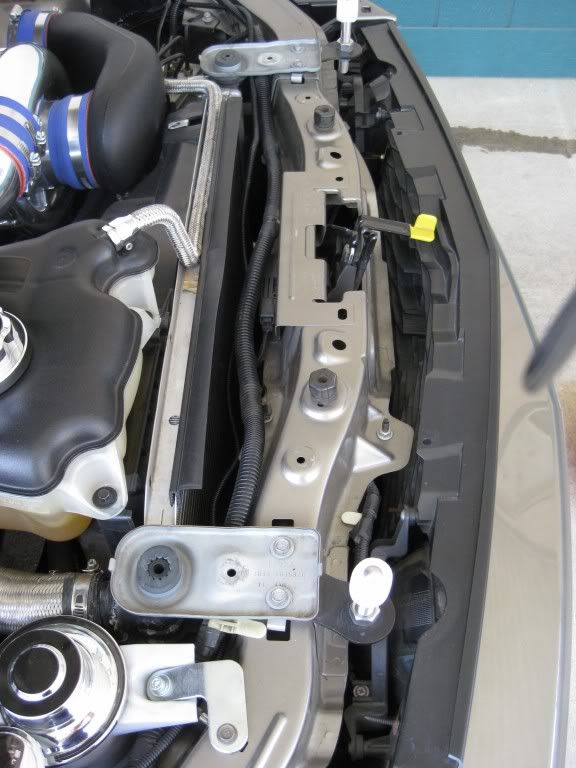
First step for me was to remove the radiator cover, as well as the radiator extensions, if you have them....This gives you all the room you need up front for routing of wires....
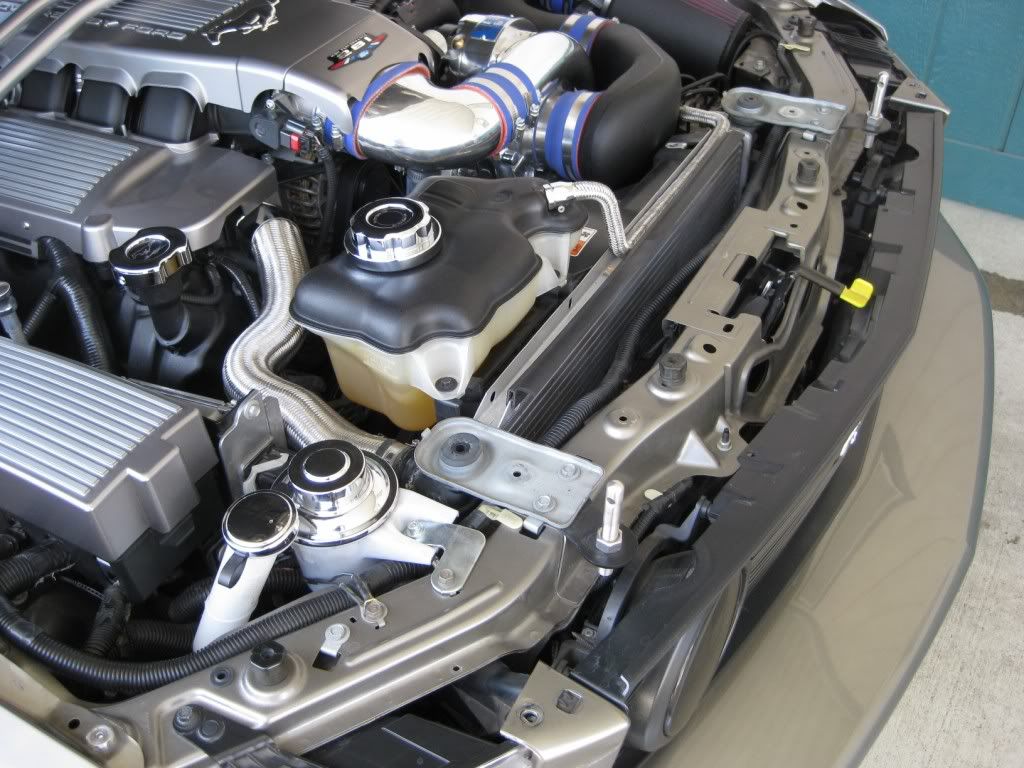
Fairly simple to get to the passenger side stock bulb. Remove the factory bulb..

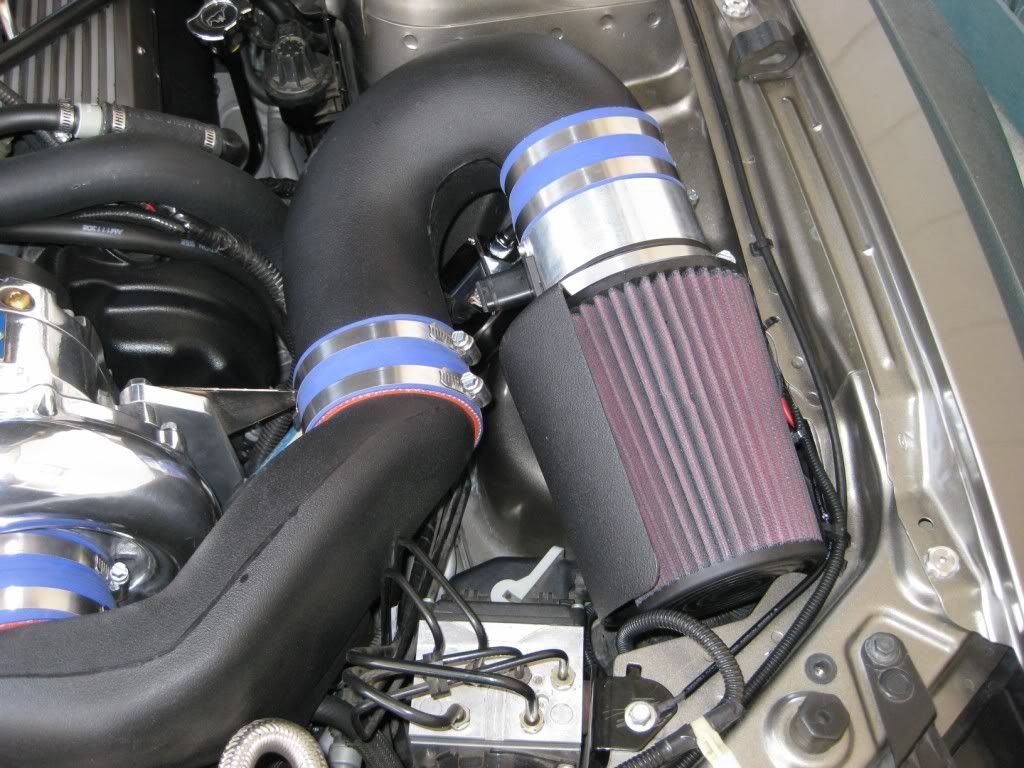
Driver side for me was a bit more complicated, only because of the Vortech CAI...But simple enough to deal with...
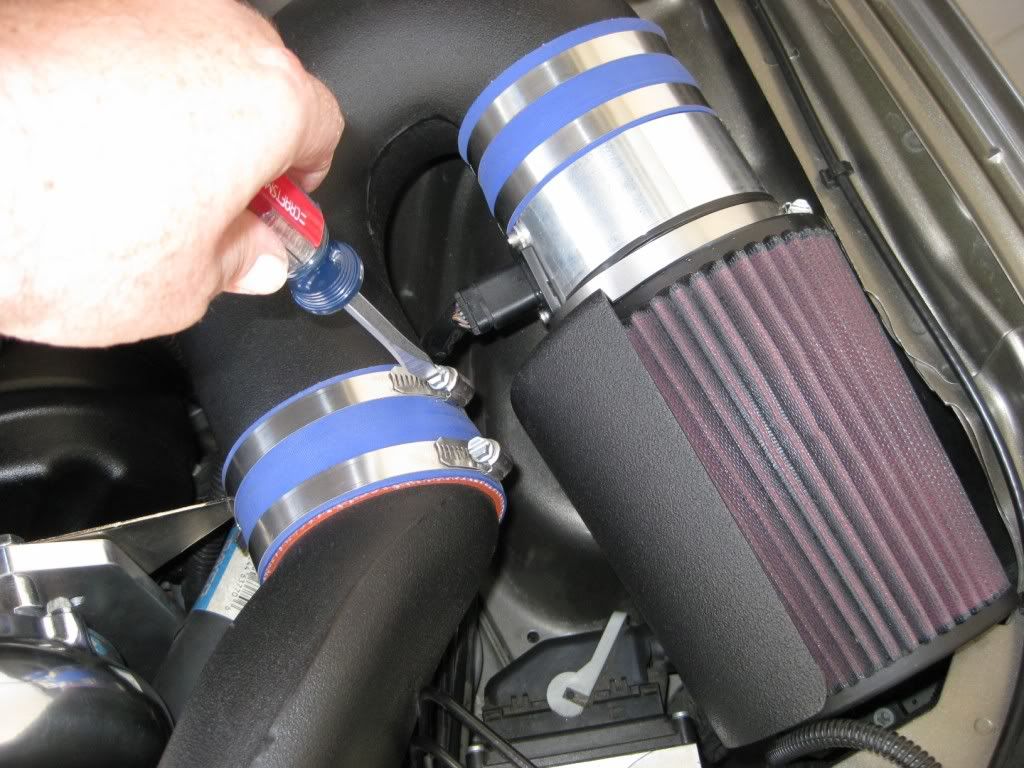
Once the CAI is out of the way, ton of room to get to the factory bulb...

Twist and remove the factory bulb. Take note that there is a very good chance there will be a rubber gasket left behind on the headlight.
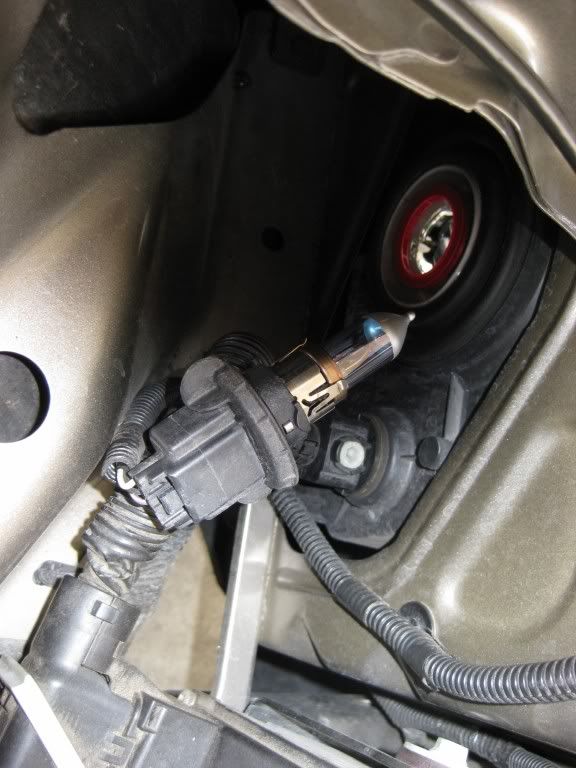
Remove the rubber gasket from either the headlight, or the factory bulb, and transfer it onto the HID base...
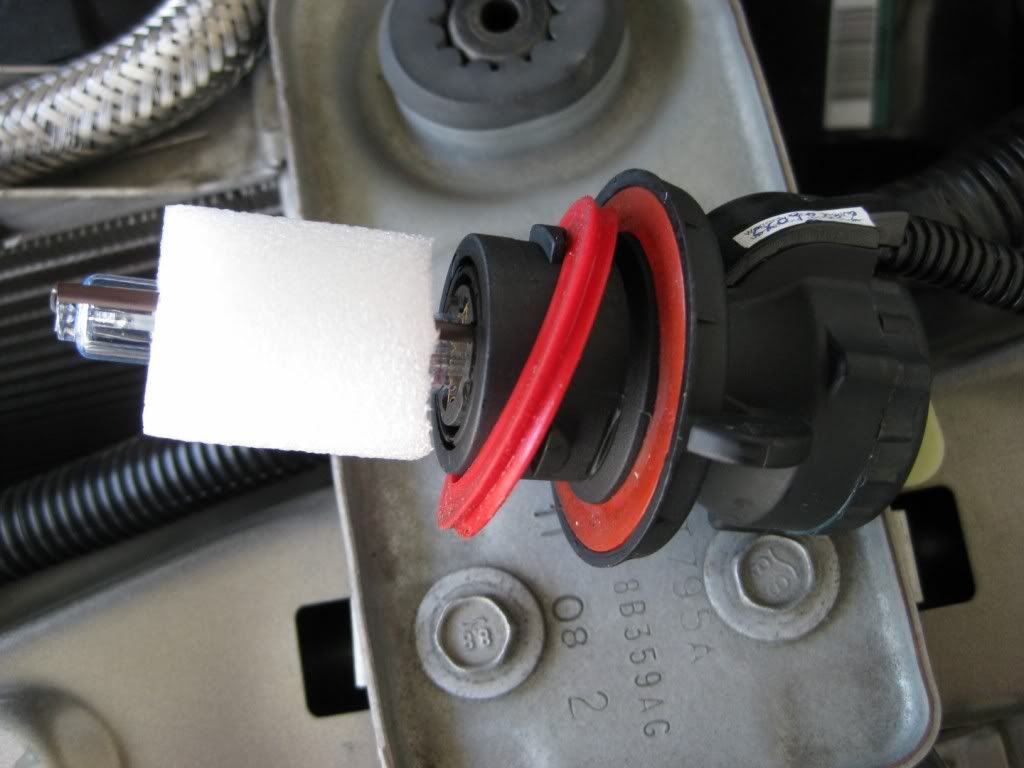
Both sides should now have the stock bulb removed, and the HID bulbs installed...

Now, remove the cover of the fuse box. At the rear of the fuse box, you will see the bolt that carries the main power into the fuse box.
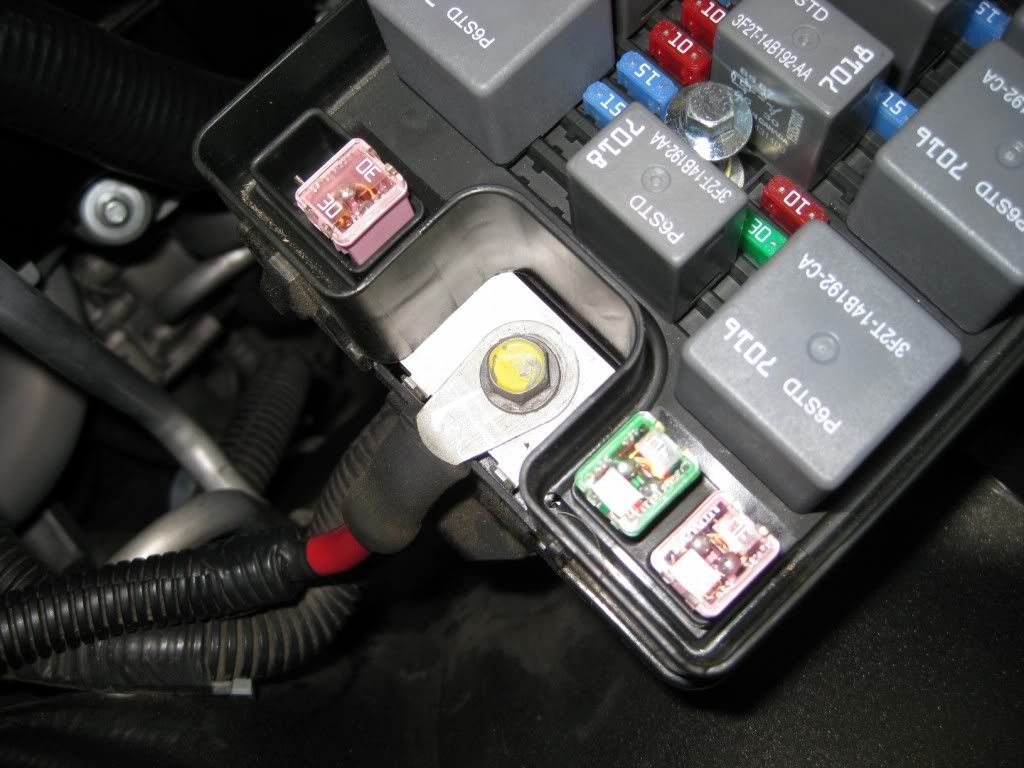
Remove this bolt, and install the supplied power wire from the HID kit...

After this is done, you can re-install the fuse box cover. Down at the base of the fuse box, on the fender well, there are a couple of bolts securing it. This is a great place for your ground lead from the kit...

I opted to use the bolt toward the front grille, so there was enough slack in the HID harness for the other connections...

At this point, this is pretty much what you have on the passenger side of the car...
Following the black wire loom that runs across the front of the engine bay, run the other cables from the HID harness over to the drivers side of the car...
CONTINUED NEXT POST.......
OK, so the Bullitt got a ton of attention yesterday, so today I turned to the 05...I finally decided to install HID's on the 05. Karen's Bullitt already has the factory HID's, and I love em. I don't believe every Bullitt comes from the factory with HID's, so this kit could be used on the Bullitt as well......
This is the 6000K Bixenon Kit from Stangmods.com The 6000K is a blueish white, without going over the edge to the solid blue....I felt this to be the right choice for me....This is a very complete, plug and play kit, meaning there is no wire splicing involved, just plugs....
First step for me was to remove the radiator cover, as well as the radiator extensions, if you have them....This gives you all the room you need up front for routing of wires....
Fairly simple to get to the passenger side stock bulb. Remove the factory bulb..
Driver side for me was a bit more complicated, only because of the Vortech CAI...But simple enough to deal with...
Once the CAI is out of the way, ton of room to get to the factory bulb...
Twist and remove the factory bulb. Take note that there is a very good chance there will be a rubber gasket left behind on the headlight.
Remove the rubber gasket from either the headlight, or the factory bulb, and transfer it onto the HID base...
Both sides should now have the stock bulb removed, and the HID bulbs installed...
Now, remove the cover of the fuse box. At the rear of the fuse box, you will see the bolt that carries the main power into the fuse box.
Remove this bolt, and install the supplied power wire from the HID kit...
After this is done, you can re-install the fuse box cover. Down at the base of the fuse box, on the fender well, there are a couple of bolts securing it. This is a great place for your ground lead from the kit...
I opted to use the bolt toward the front grille, so there was enough slack in the HID harness for the other connections...
At this point, this is pretty much what you have on the passenger side of the car...
Following the black wire loom that runs across the front of the engine bay, run the other cables from the HID harness over to the drivers side of the car...
CONTINUED NEXT POST.......
04-21-2009, 12:58 PM
#5
5th Gear Member
Join Date: Feb 2005
Location: Anaheim, California
Posts: 4,205
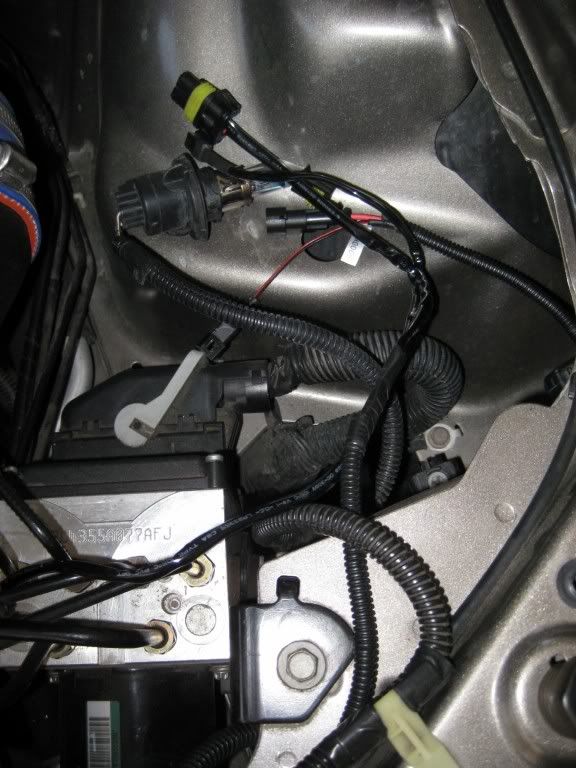
Once all the wires are run across, and the plug from the HID bulb is there, this is what you will have....
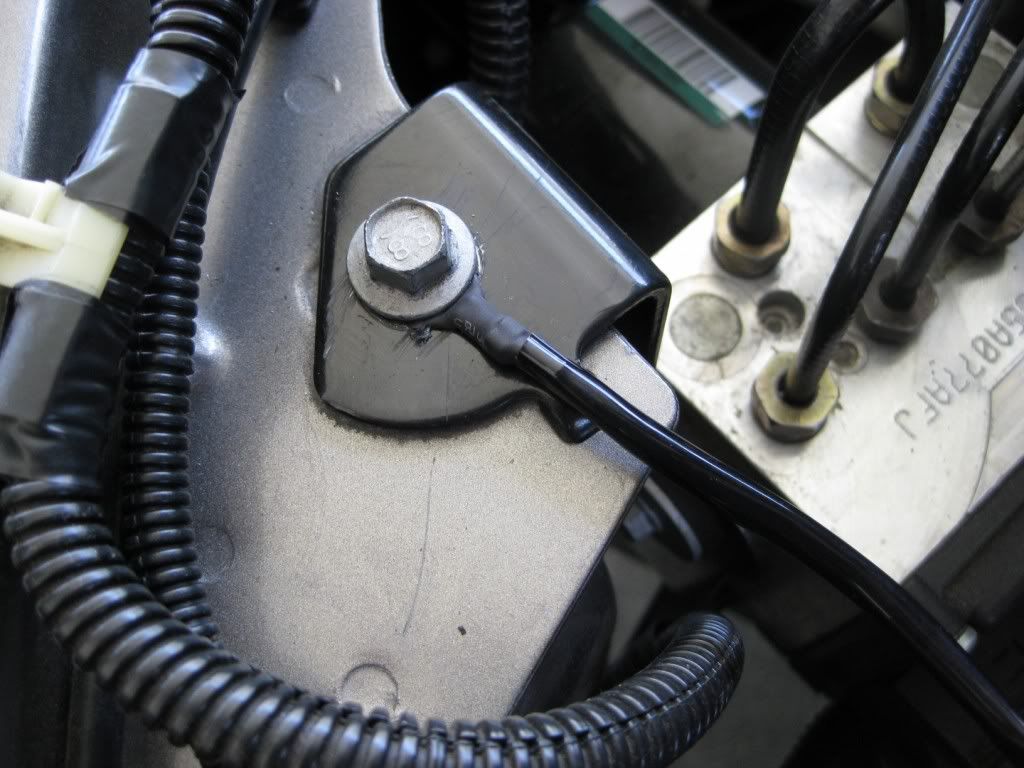
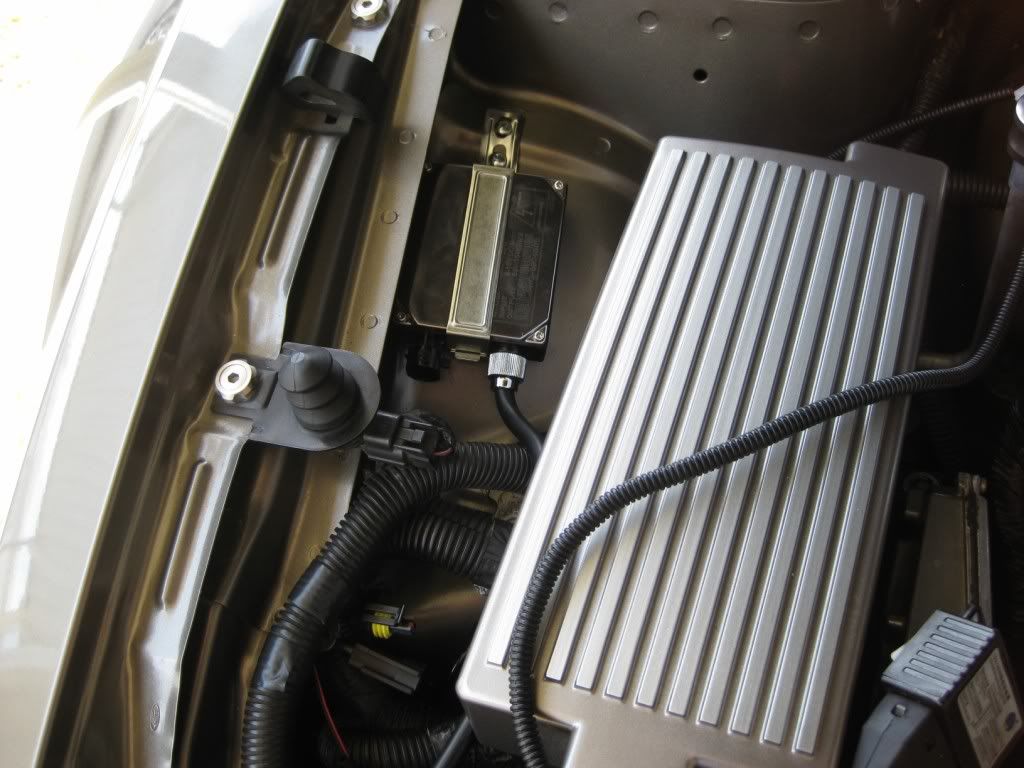
On the drivers side, you will see this bolt right on top. This is an excellent location for the ground that is necessary on the drivers side...
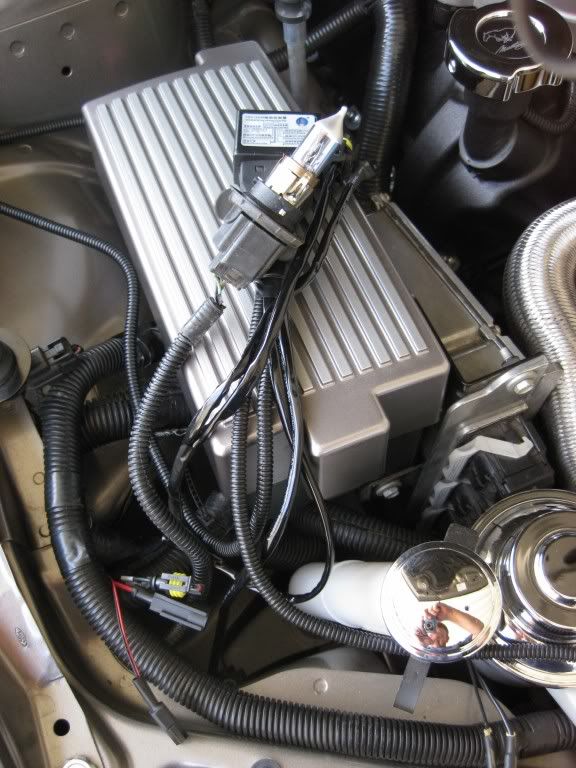
Now, still on the drivers side, it is time to mount the ballast for this side. I had to take into consideration the CAI from the Vortech, but the same would apply for the Bullitt CAI. This was the best location I could find. I bent the install bracket a bit, and marked the location on the wheelwell...
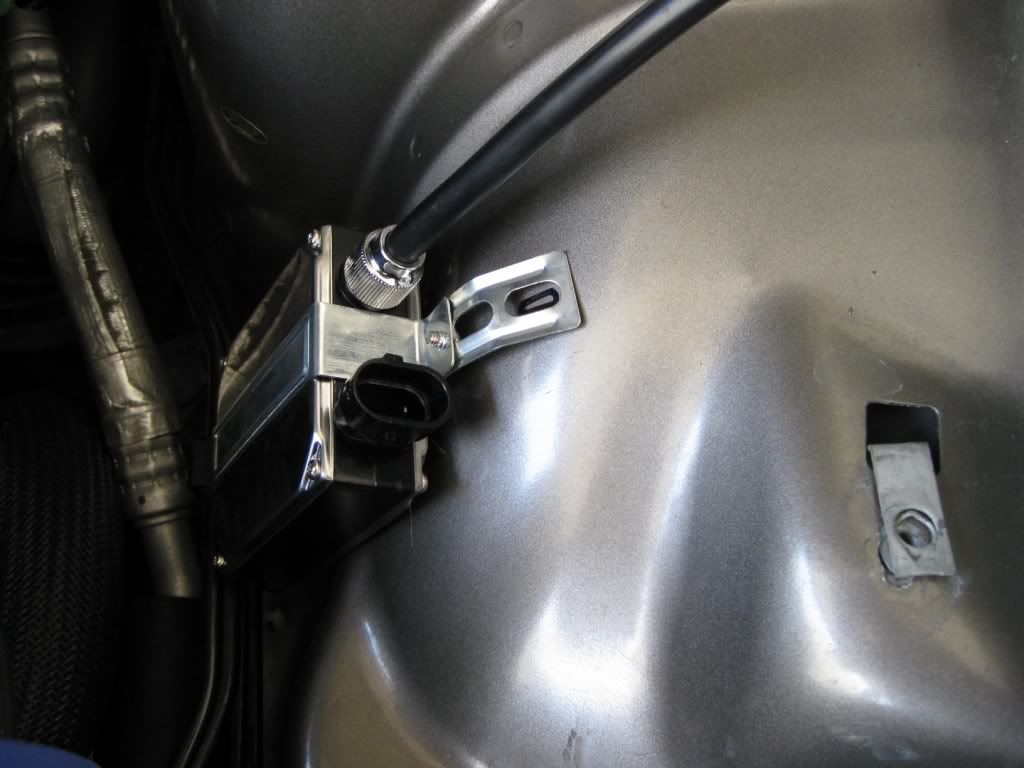
I re-installed the driver's side ballast, and secured it in place....

There are not a lot of options as far as locations on the passenger side. Same process, find your location, drill mounting holes, and secure....
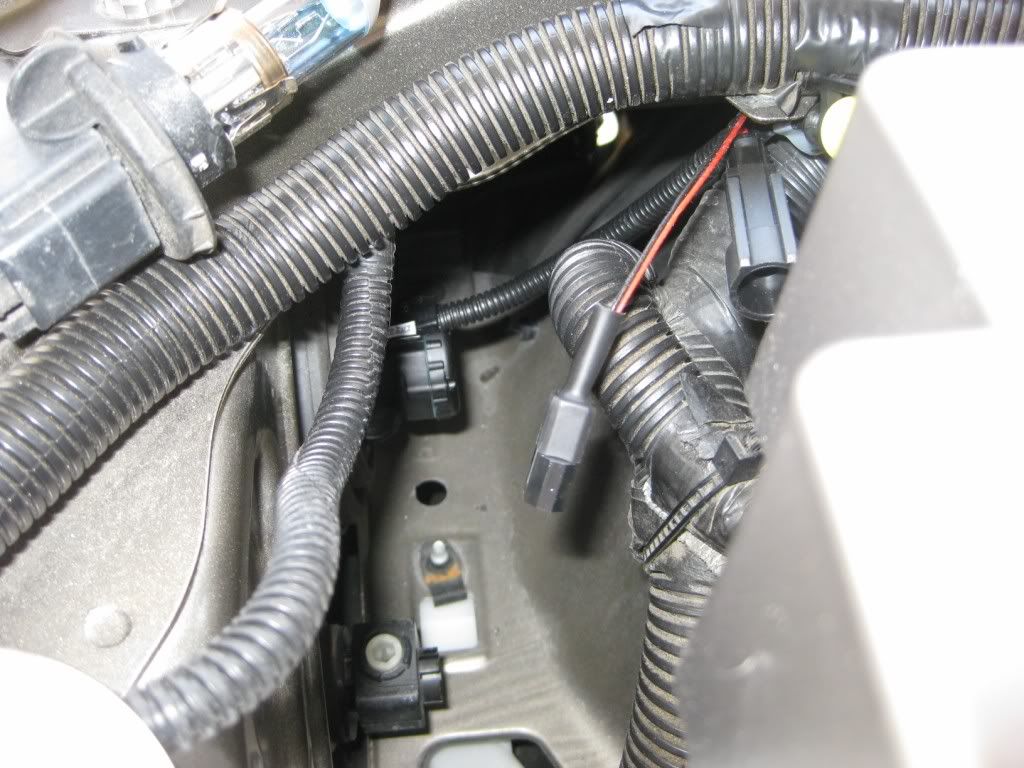
Now, on the driver's side, take the connection that is meant to go to the factory headlight bulb, and plug it into the harness from the HID kit. Note...This same connector on the drivers side DOES NOT plug into a harness, and is not used....
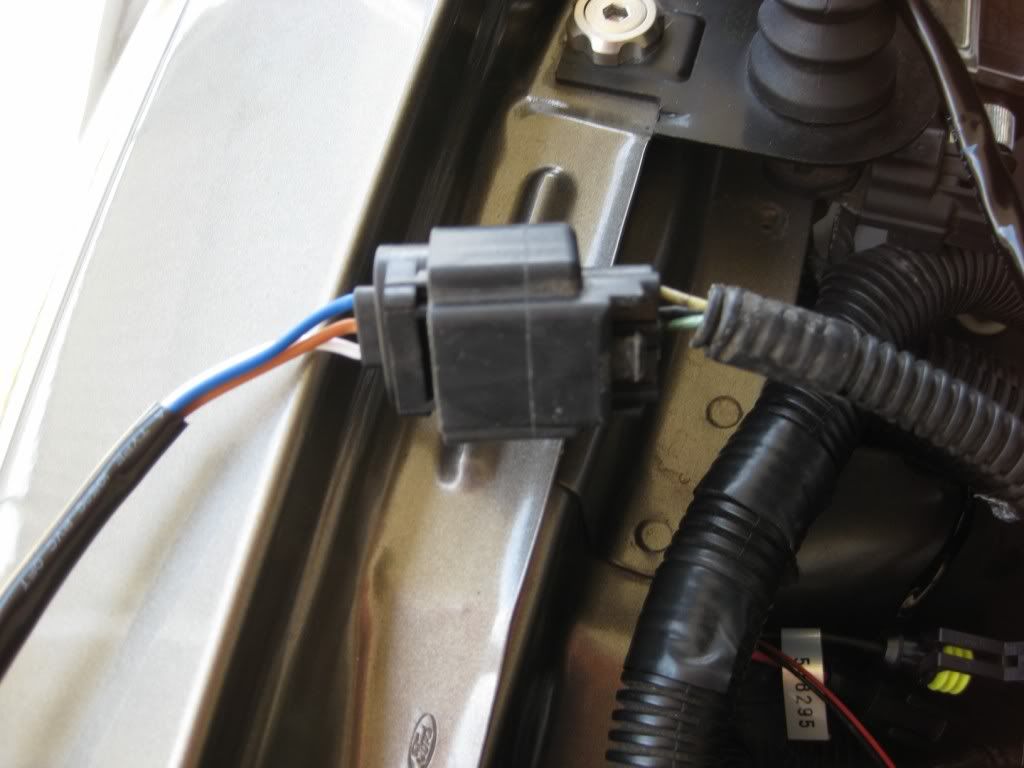
There are three other connectors on the passenger side that all bolt up to the HID harness...
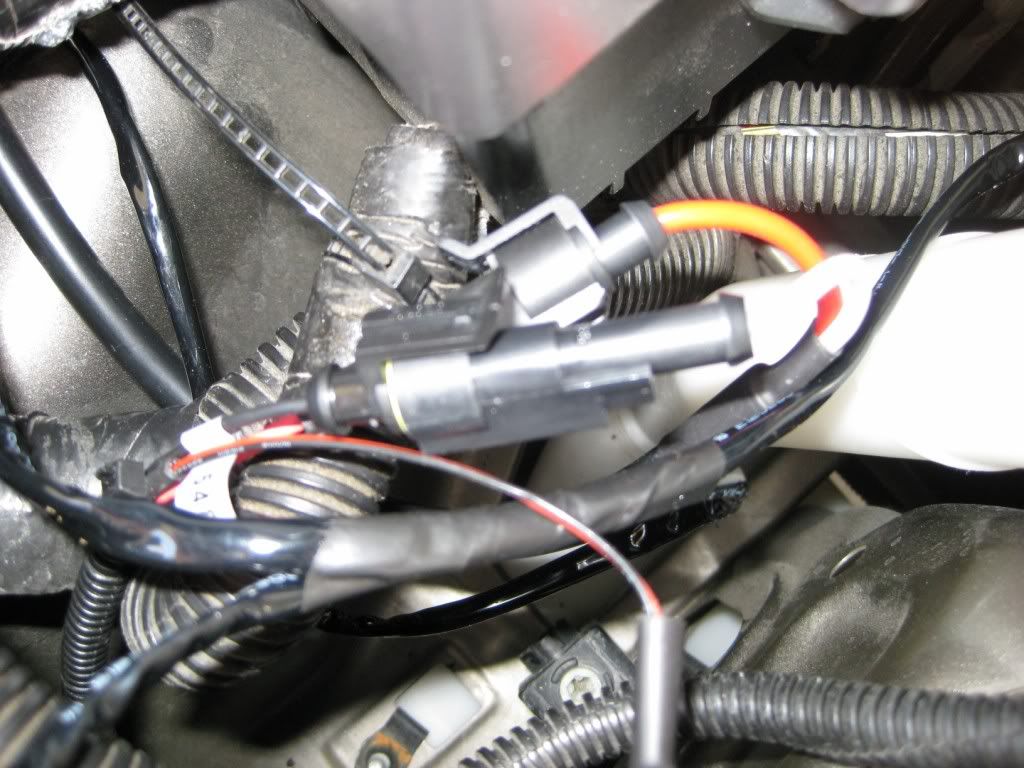
Finally, there is the plug from the HID harness that plugs into the passenger side ballast...
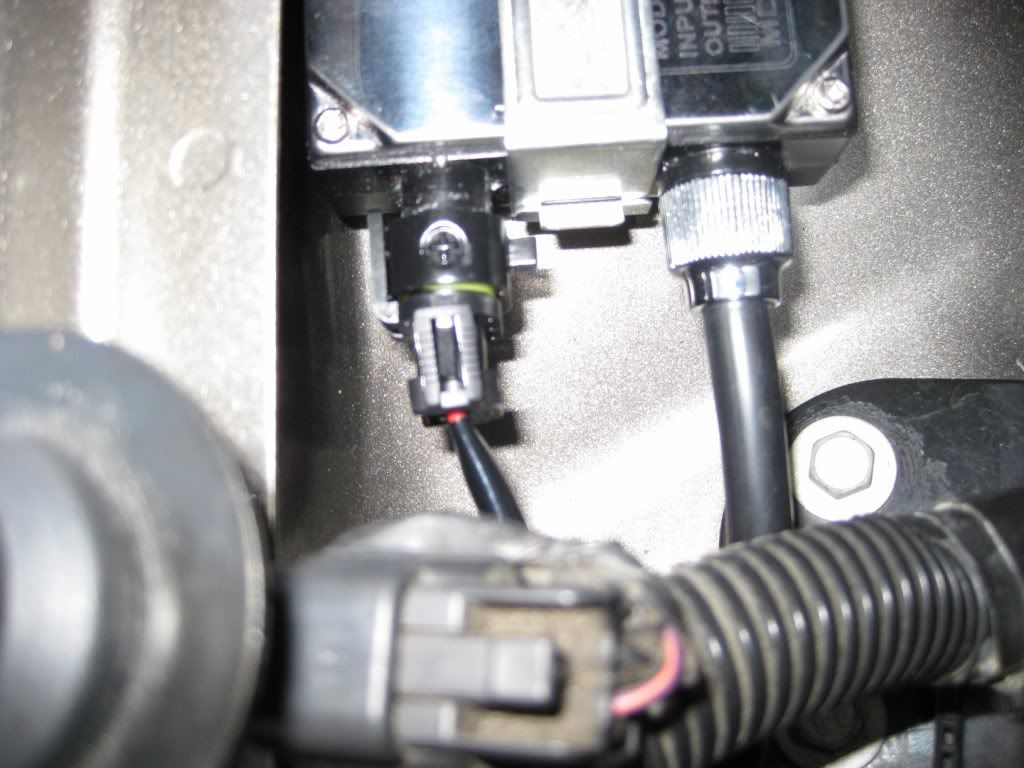
Now, repeat all the same connections on the drivers side. As mentioned earlier, the plug coming from the stock wiring harness that went to the factory headlight bulb does not get used. Zip tie this connector out of the way....

Now, reinstall either your aftermarket, or stock Bullitt CAI after zip tieing all the wires securely....
Make sure all the wires and harness are also zip tied and hidden on the passenger side as well....

Finally, replace your radiator cover, as well as your radiator extensions, should you be so equipped. Very clean install, and nothing too obvious screaming after market kit....

Here are a few shots of the finished product, in broad daylight. I will try to get some additional pics at dusk that should show them off a bit better.....
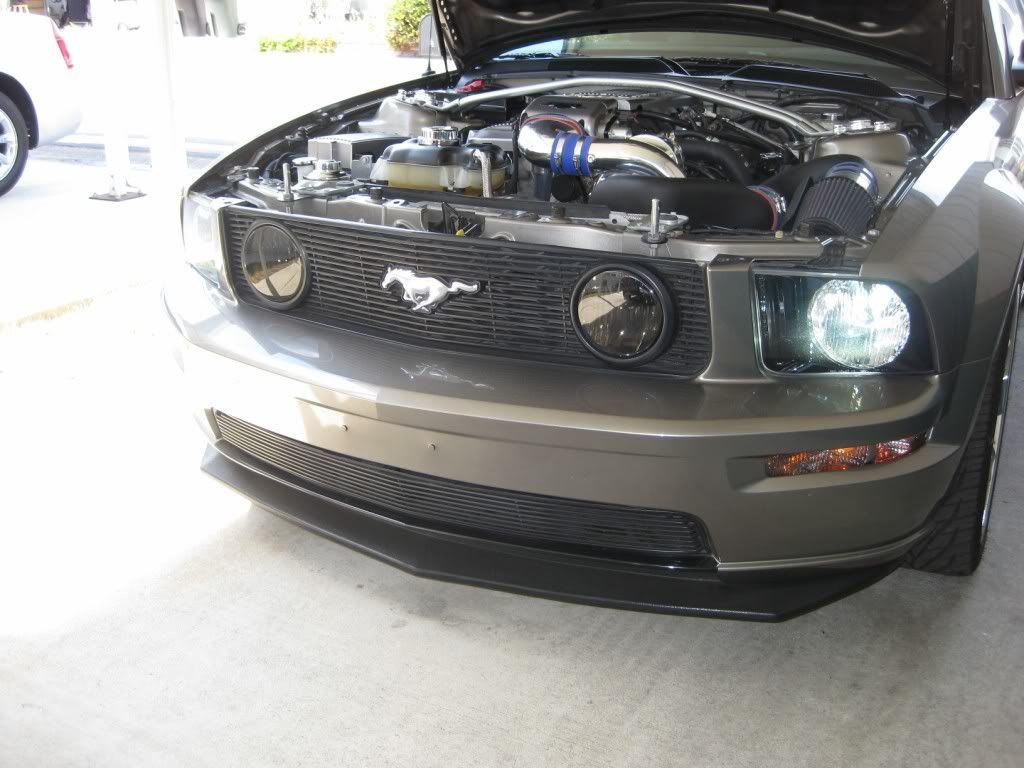
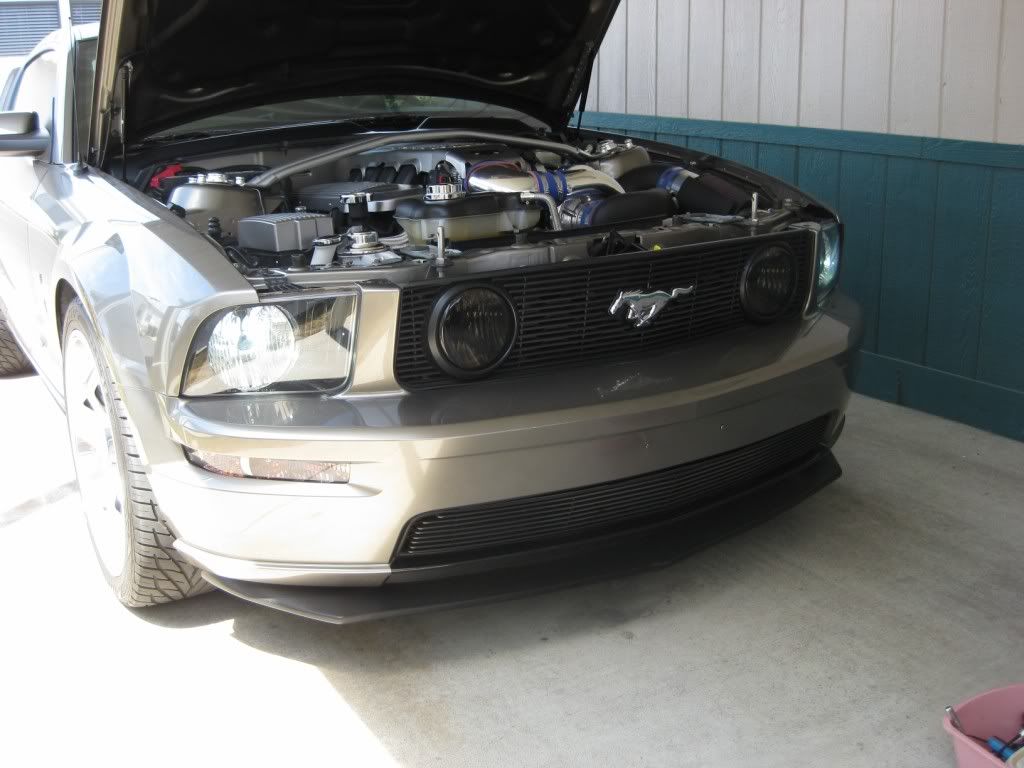
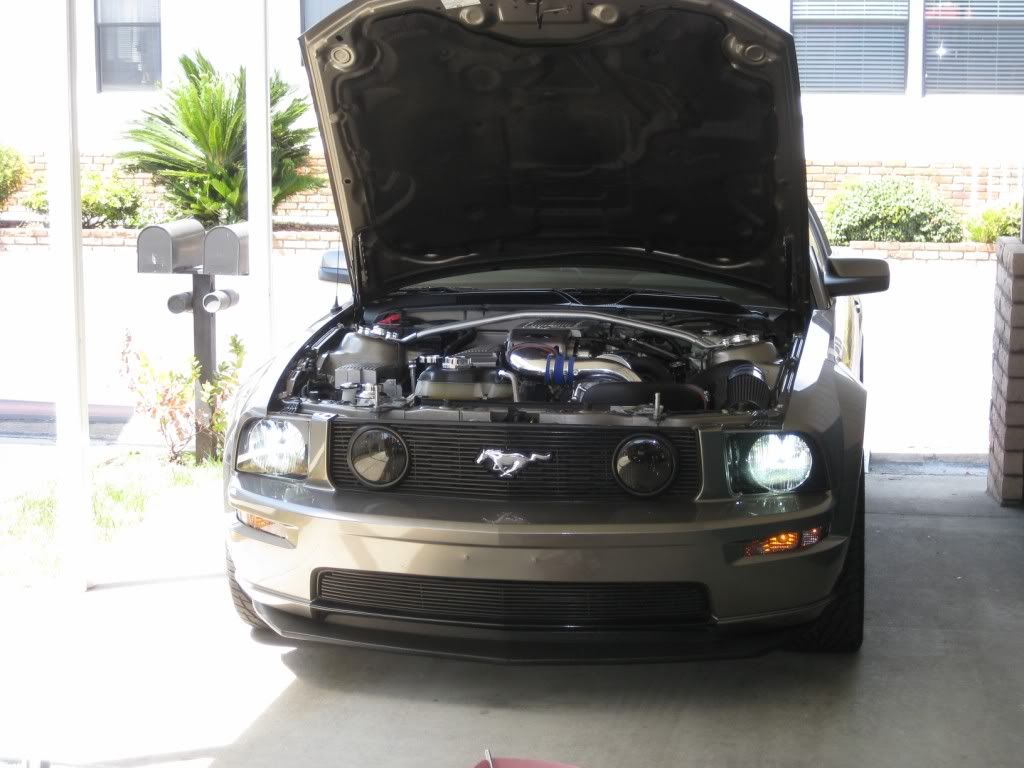
Hope this helps out somebody that does not have the stock HID's. It is a very straight forward install, and looks a ton worse than it really is.....
Good Luck with yours.....
Mike and Karen
On the drivers side, you will see this bolt right on top. This is an excellent location for the ground that is necessary on the drivers side...
Now, still on the drivers side, it is time to mount the ballast for this side. I had to take into consideration the CAI from the Vortech, but the same would apply for the Bullitt CAI. This was the best location I could find. I bent the install bracket a bit, and marked the location on the wheelwell...
I re-installed the driver's side ballast, and secured it in place....
There are not a lot of options as far as locations on the passenger side. Same process, find your location, drill mounting holes, and secure....
Now, on the driver's side, take the connection that is meant to go to the factory headlight bulb, and plug it into the harness from the HID kit. Note...This same connector on the drivers side DOES NOT plug into a harness, and is not used....
There are three other connectors on the passenger side that all bolt up to the HID harness...
Finally, there is the plug from the HID harness that plugs into the passenger side ballast...
Now, repeat all the same connections on the drivers side. As mentioned earlier, the plug coming from the stock wiring harness that went to the factory headlight bulb does not get used. Zip tie this connector out of the way....
Now, reinstall either your aftermarket, or stock Bullitt CAI after zip tieing all the wires securely....
Make sure all the wires and harness are also zip tied and hidden on the passenger side as well....
Finally, replace your radiator cover, as well as your radiator extensions, should you be so equipped. Very clean install, and nothing too obvious screaming after market kit....
Here are a few shots of the finished product, in broad daylight. I will try to get some additional pics at dusk that should show them off a bit better.....
Hope this helps out somebody that does not have the stock HID's. It is a very straight forward install, and looks a ton worse than it really is.....
Good Luck with yours.....
Mike and Karen

Thread
Thread Starter
Forum
Replies
Last Post
bill, bills, convertible, homelink, how-to, installation, installing, instructions, mirror, mount, mustang, prothane, s197, sticky, taco, ups, write