
Rotorpros Cross-Drilled/Gas Slotted rotors install (w/pics)
 04-20-2007, 06:06 PM
#1
2nd Gear Member
Thread Starter
Join Date: Jun 2006
Location:
Posts: 415
This install covers the installation of rotors (both front and rear) on a 2006 Mustang GT.
Rotors are of the cross-drilled/gas slotted type from Rotorpros.
Install
Jacking: Use your preferred method to get the front wheels off the ground high enough to removethe wheel and tire.
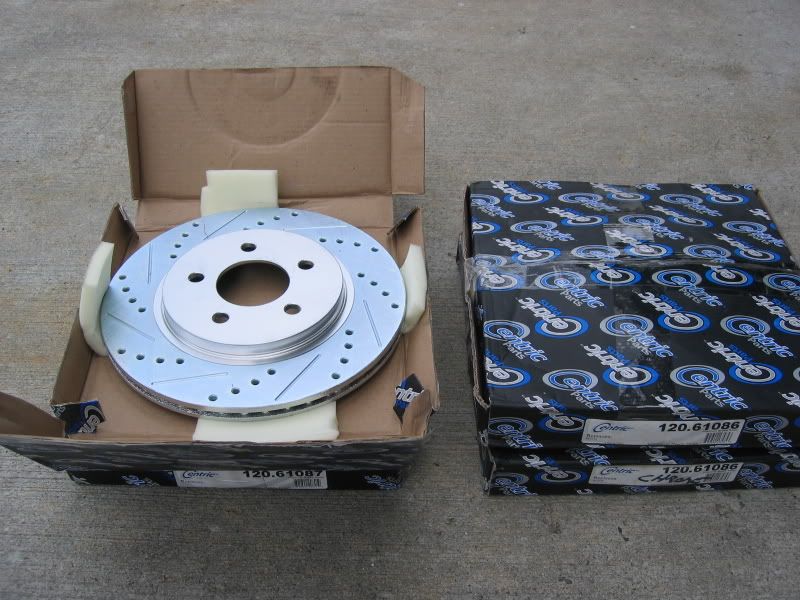
Rotors: Packaged well and they're very heavy. Overall quality/workmanship I give it a 9 (scratch on the silver painted hub surface, not a big deal, non-appearance), drilled holes and gas slots look great.
Front Install: Those 2 bolts holding the caliper assembly to the spindle were on TIGHT! (you can see the factory blue Loctite everywhere), had to use a 1/2" breaker bar just to crack them loose. In hindsight, I would've sprayed some penetrant oil on the bolts.
The calipers slid off the OEM rotors no problem. I had a helper swap out the rotors while I held the calipers up. Can be done alone, just need to get a little creative.
Re-installation of the caliper assembly was no problem either; slid right back on. Installed the the 2 bolts, slapped the wheels back on.. done.
As you'll see from the pics below, just rolling back down the driveway, the rotors are starting to get a more 'shiny' finish to them from the 'frost' machined finish. I'm sure after several miles of driving/braking, most all the frost will be gone.
Sound: Because my OEM pads haven'tmated with the new rotors, is sounded very 'gritty' (best way to describe it). After a short time of driving, all is quiet.
Here's the pics...
Fresh out of the box (notice the different part numbers for front & rear).
Easy way to tell the difference, just like the stock ones, thicker rotors go up front, narrower rotors out back.
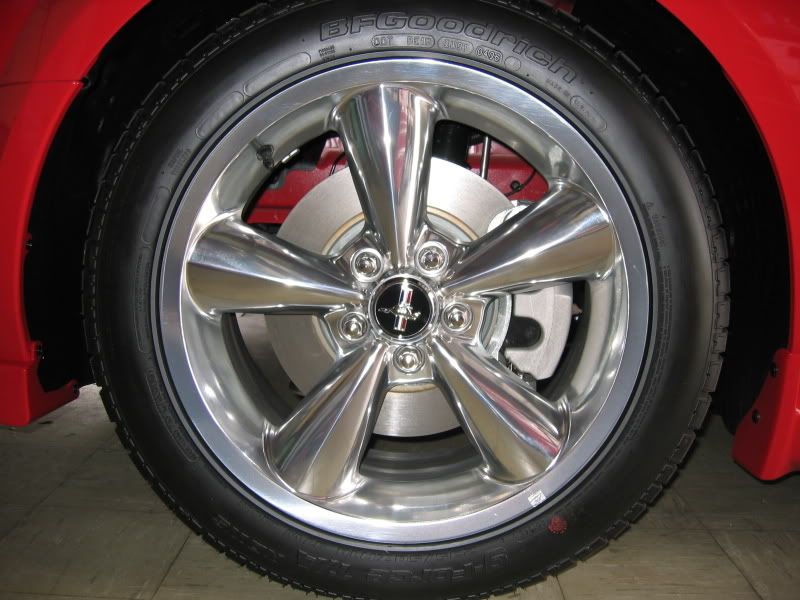
Stock - DRIVERS SIDE - FRONT
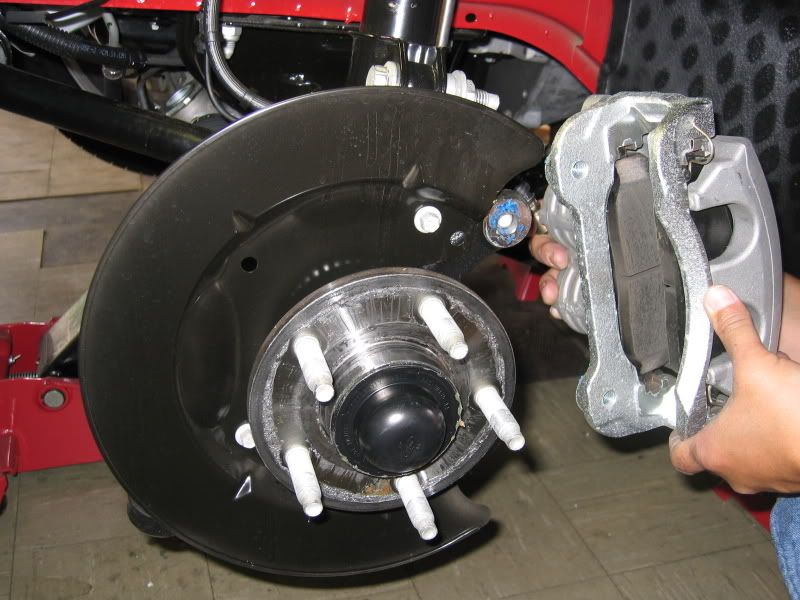
Backside - the 2 bolts that must be removed - silver caliper to black spindle.

Retaining rings removed and discarded (not required, only used for assembly at the factory).
Note: Some wheels may have as many as 3 of these retaining rings.
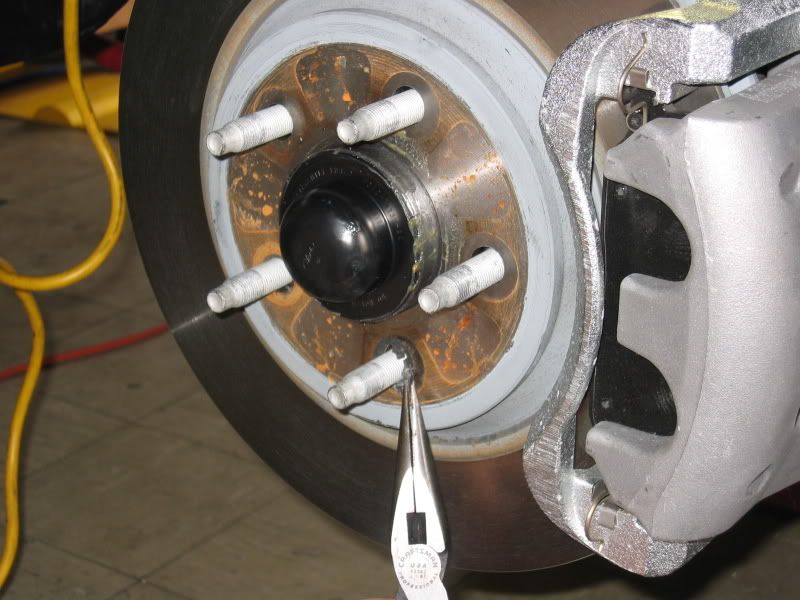
Remove the 2 caliper bolts referenced above. Use penetrant oil and breaker bar as required.
Once the bolts are out, the caliper can simply be slid out from the rotor.
The rotor is now free, it can be pulled off.
Note: If the factory rotor won't budge and feels like it's frozen on the hub, don't worry, it's just surface rust that's sticking them together. Get a hammer, place something solid and flat up against the rotor and shock it (ie.hit it with the hammer like you're playing 'Whack-A-Mole').
OEM rotor removed and caliper assembly supported by me.
Position new rotor onto the studs and slide the caliper back on. Re-install the 2 bolts and tighten.
Torque: 115Nm (85 lb-ft)
IMPORTANT: Pay particular attention to the rotational direction of thedrilled holes and slotted vanes. The inner most holes (closest to the hub) contact the brake pad FIRST when rolling forward. This orientation has been verified by Rotorpros.
Note: Different rotor manufacturers may differ in the rotational direction of the holes and/or vanes.
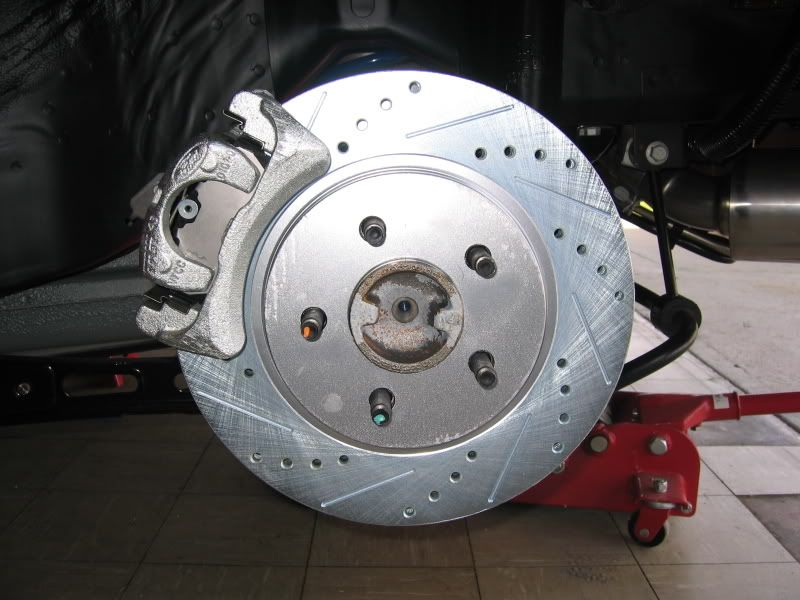
Rotorpros rotor installed.
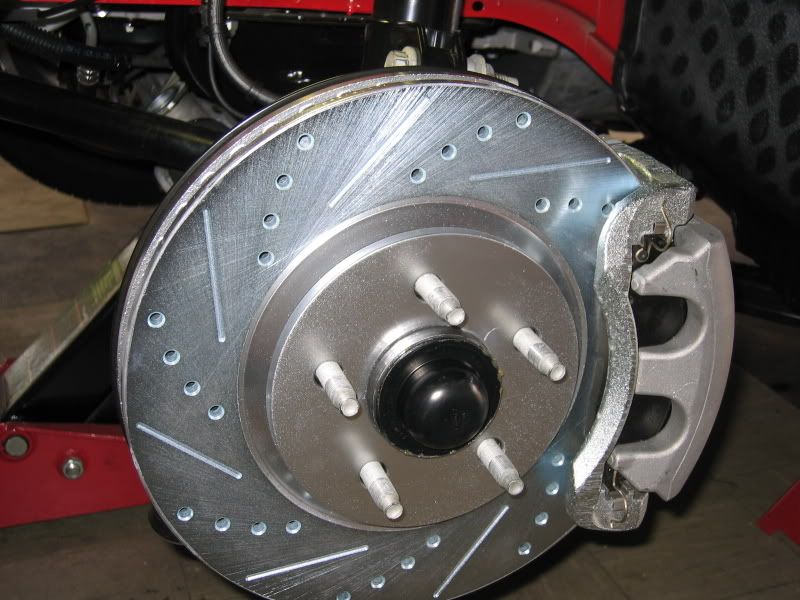
Front rotors complete
Rear rotor install
Install seemed easier than the fronts, maybe because I had a clue what was going on this time around.
Installation directions are exactly as the fronts.
The bolts (2 each, like the fronts) broke loose much easier than the front ones, which is a good thing because a 1/2" breaker barwill not fit due to tighter clearance to the parking brake mechanism and the brass fitting of the brake line. A 3/8" breaker worked like a charm.
Note: Spray penetrant oil on bolts if required.
Stock - DRIVERS SIDE - REAR
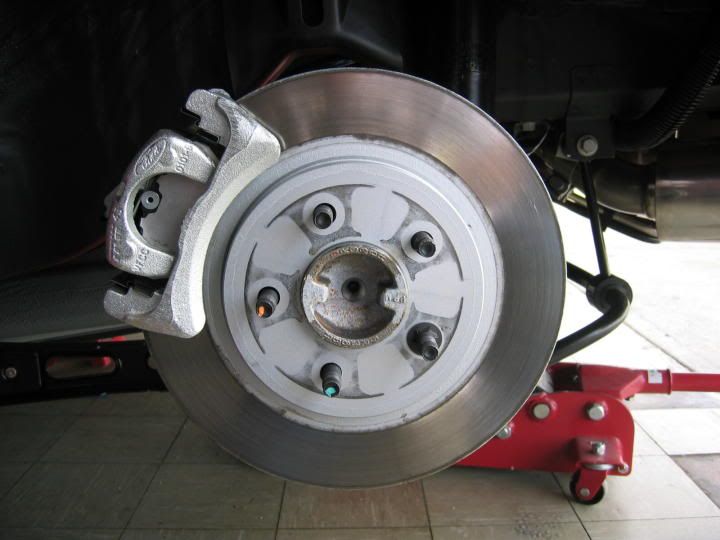
Caliper removal bolts

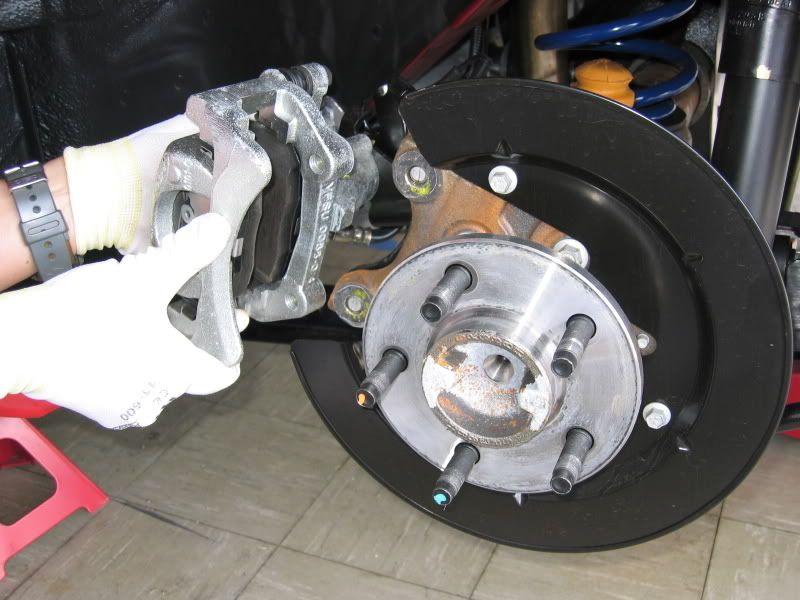
Caliper removed
Position new rotor onto the studs and slide the caliper back on. Re-install the 2 bolts and tighten.
Torque: 103Nm (76 lb-ft)
IMPORTANT: Pay particular attention to the rotational direction of thedrilled holes and slotted vanes. The inner most holes (closest to the hub) contact the brake pad FIRST when rolling forward. This orientation has been verified by Rotorpros.
New rotor installed - lower caliper bolt not in yet, that's why it looks a bit crooked in this pic.
Rear rotors complete
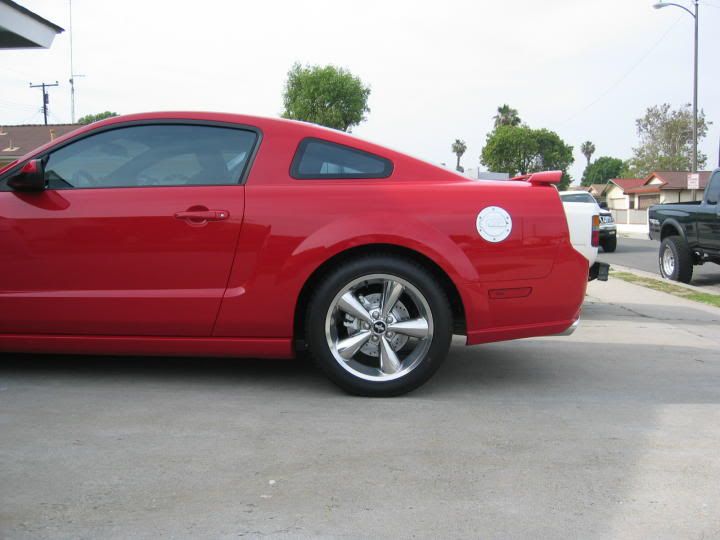
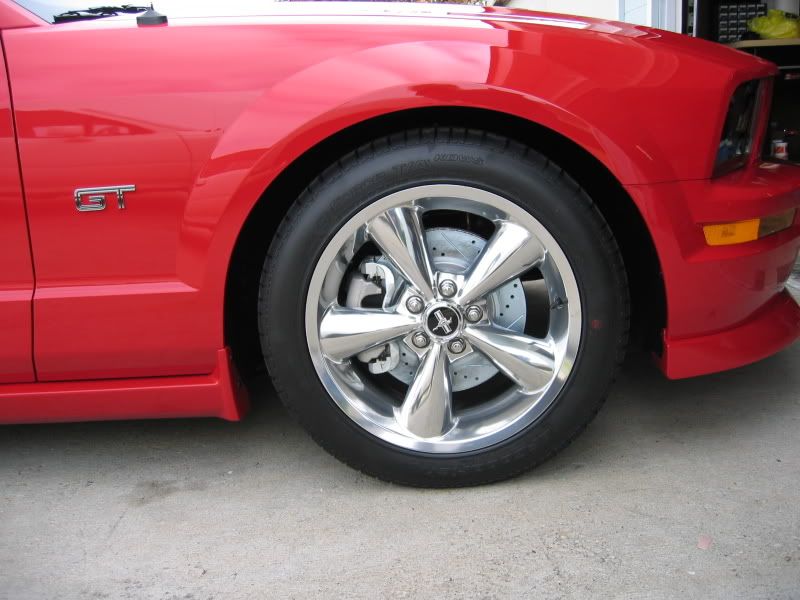
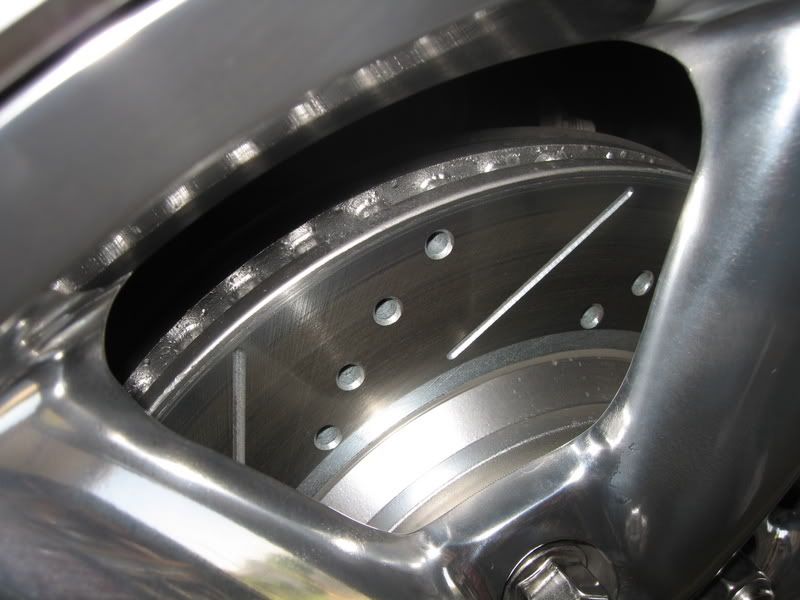
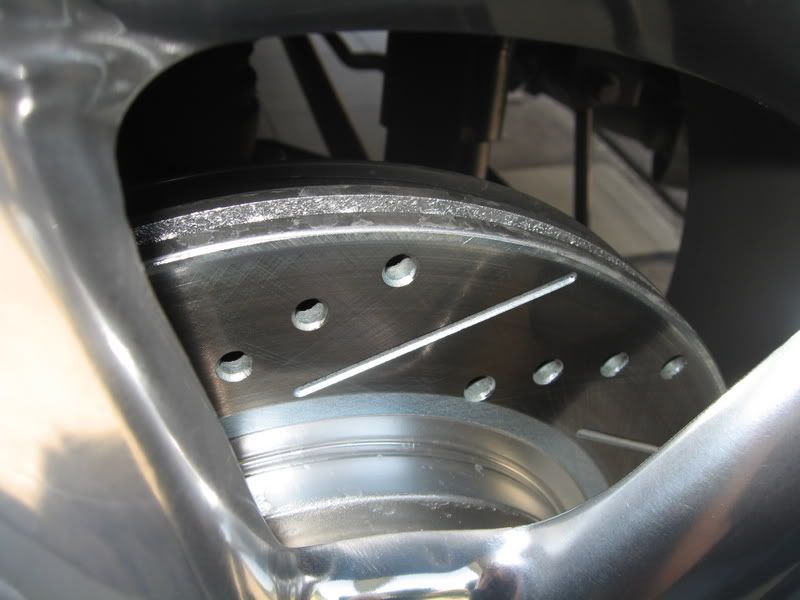
After several hundred miles, the Rotorpros have a nice silver finish to them.
Front:
Rear:
Rotors are of the cross-drilled/gas slotted type from Rotorpros.
Install
Jacking: Use your preferred method to get the front wheels off the ground high enough to removethe wheel and tire.
Rotors: Packaged well and they're very heavy. Overall quality/workmanship I give it a 9 (scratch on the silver painted hub surface, not a big deal, non-appearance), drilled holes and gas slots look great.
Front Install: Those 2 bolts holding the caliper assembly to the spindle were on TIGHT! (you can see the factory blue Loctite everywhere), had to use a 1/2" breaker bar just to crack them loose. In hindsight, I would've sprayed some penetrant oil on the bolts.
The calipers slid off the OEM rotors no problem. I had a helper swap out the rotors while I held the calipers up. Can be done alone, just need to get a little creative.
Re-installation of the caliper assembly was no problem either; slid right back on. Installed the the 2 bolts, slapped the wheels back on.. done.
As you'll see from the pics below, just rolling back down the driveway, the rotors are starting to get a more 'shiny' finish to them from the 'frost' machined finish. I'm sure after several miles of driving/braking, most all the frost will be gone.
Sound: Because my OEM pads haven'tmated with the new rotors, is sounded very 'gritty' (best way to describe it). After a short time of driving, all is quiet.
Here's the pics...
Fresh out of the box (notice the different part numbers for front & rear).
Easy way to tell the difference, just like the stock ones, thicker rotors go up front, narrower rotors out back.
Stock - DRIVERS SIDE - FRONT
Backside - the 2 bolts that must be removed - silver caliper to black spindle.
Retaining rings removed and discarded (not required, only used for assembly at the factory).
Note: Some wheels may have as many as 3 of these retaining rings.
Remove the 2 caliper bolts referenced above. Use penetrant oil and breaker bar as required.
Once the bolts are out, the caliper can simply be slid out from the rotor.
The rotor is now free, it can be pulled off.
Note: If the factory rotor won't budge and feels like it's frozen on the hub, don't worry, it's just surface rust that's sticking them together. Get a hammer, place something solid and flat up against the rotor and shock it (ie.hit it with the hammer like you're playing 'Whack-A-Mole').
OEM rotor removed and caliper assembly supported by me.
Position new rotor onto the studs and slide the caliper back on. Re-install the 2 bolts and tighten.
Torque: 115Nm (85 lb-ft)
IMPORTANT: Pay particular attention to the rotational direction of thedrilled holes and slotted vanes. The inner most holes (closest to the hub) contact the brake pad FIRST when rolling forward. This orientation has been verified by Rotorpros.
Note: Different rotor manufacturers may differ in the rotational direction of the holes and/or vanes.
Rotorpros rotor installed.
Front rotors complete
Rear rotor install
Install seemed easier than the fronts, maybe because I had a clue what was going on this time around.
Installation directions are exactly as the fronts.
The bolts (2 each, like the fronts) broke loose much easier than the front ones, which is a good thing because a 1/2" breaker barwill not fit due to tighter clearance to the parking brake mechanism and the brass fitting of the brake line. A 3/8" breaker worked like a charm.
Note: Spray penetrant oil on bolts if required.
Stock - DRIVERS SIDE - REAR
Caliper removal bolts
Caliper removed
Position new rotor onto the studs and slide the caliper back on. Re-install the 2 bolts and tighten.
Torque: 103Nm (76 lb-ft)
IMPORTANT: Pay particular attention to the rotational direction of thedrilled holes and slotted vanes. The inner most holes (closest to the hub) contact the brake pad FIRST when rolling forward. This orientation has been verified by Rotorpros.
New rotor installed - lower caliper bolt not in yet, that's why it looks a bit crooked in this pic.
Rear rotors complete
After several hundred miles, the Rotorpros have a nice silver finish to them.
Front:
Rear:


 04-20-2007, 07:08 PM
#5
2nd Gear Member
Thread Starter
Join Date: Jun 2006
Location:
Posts: 415
ORIGINAL: mAnYsTyLeS
How much did you pay for them?
How much did you pay for them?
Included was an additional $20 to have the hubs painted silver (comes black if no paint option is selected).
FYI.. the whole rotor is zinc plated and hubs painted with hi-temp paint.
If your pads are somewhat worn, Rotorpros offers a set of low dust performance pads for$90(complete set). I used my factory pads due to the limited amount of miles I had at the time. I have a couple friends who did the rotor swap at around 10k miles and still kept the factory pads, it's really up to you.
Please keep in mind that these prices were from May of 06. My suggestion is to contact them for the most current prices.
info@rotorpros.com or (714) 309-3620
04-20-2007, 08:43 PM
#6

Join Date: Apr 2007
Location: Texas City, Texas
Posts: 7
Ok... In the 6th picture I notice that the caliper on the rotor is on the wrong side of the rotor (On the front instead of the back of the rotor), is that right? Or am I just looking at it wrong? Just thought I'd make sure lol.
NM, I see it now... Thanks for the write up! And the rotors look awesome!
NM, I see it now... Thanks for the write up! And the rotors look awesome!
04-20-2007, 08:50 PM
#8
4th Gear Member

Join Date: Aug 2006
Location: NYC
Posts: 1,516
They look great....thanks.
ORIGINAL: TacoBill
I paid $330 shipped (they're also in CA). Was told it would be $20 more for shippingoutside of CA.
Included was an additional $20 to have the hubs painted silver (comes black if no paint option is selected).
FYI.. the whole rotor is zinc plated and hubs painted with hi-temp paint.
If your pads are somewhat worn, Rotorpros offers a set of low dust performance pads for$90(complete set). I used my factory pads due to the limited amount of miles I had at the time. I have a couple friends who did the rotor swap at around 10k miles and still kept the factory pads, it's really up to you.
Please keep in mind that these prices were from May of 06. My suggestion is to contact them for the most current prices.
info@rotorpros.com or (714) 309-3620
ORIGINAL: mAnYsTyLeS
How much did you pay for them?
How much did you pay for them?
Included was an additional $20 to have the hubs painted silver (comes black if no paint option is selected).
FYI.. the whole rotor is zinc plated and hubs painted with hi-temp paint.
If your pads are somewhat worn, Rotorpros offers a set of low dust performance pads for$90(complete set). I used my factory pads due to the limited amount of miles I had at the time. I have a couple friends who did the rotor swap at around 10k miles and still kept the factory pads, it's really up to you.
Please keep in mind that these prices were from May of 06. My suggestion is to contact them for the most current prices.
info@rotorpros.com or (714) 309-3620

