
FRPP / Borla Stinger exhaust install (w/pics)
 04-24-2007, 03:40 PM
#1
2nd Gear Member
Thread Starter
Join Date: Jun 2006
Location:
Posts: 415
This install guide covers the Ford Racing M-5230-5GT Stingers. The following guide can be used for any axle-back exhaust system and is not limited to just the Stingers.
Install time: 1 hour (or less)
All you need are basic hand tools (metric wrenches and sockets).
Jacking up the rear will be helpful, but I've read it's not necessary (unless you need to get to the mid-pipe clamps).
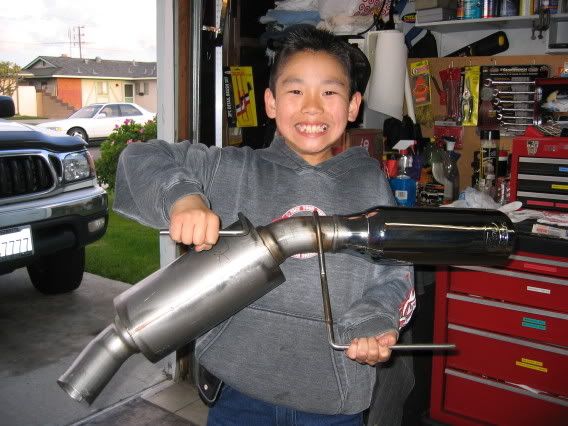
Fresh from the box!


First thing to do is plan to work on one side at a time.
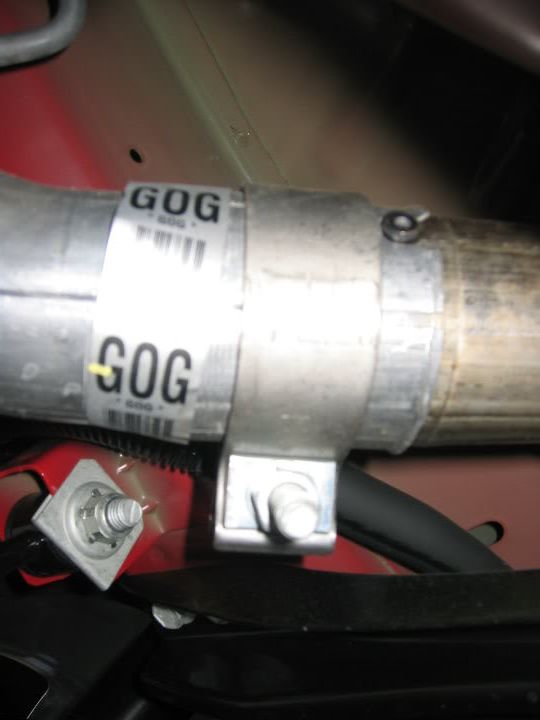
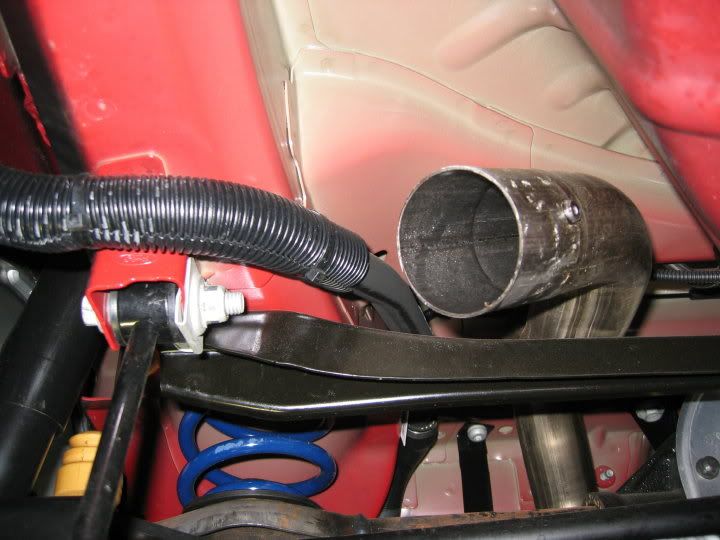
Loosen the over-axle clamp just forward of the muffler.
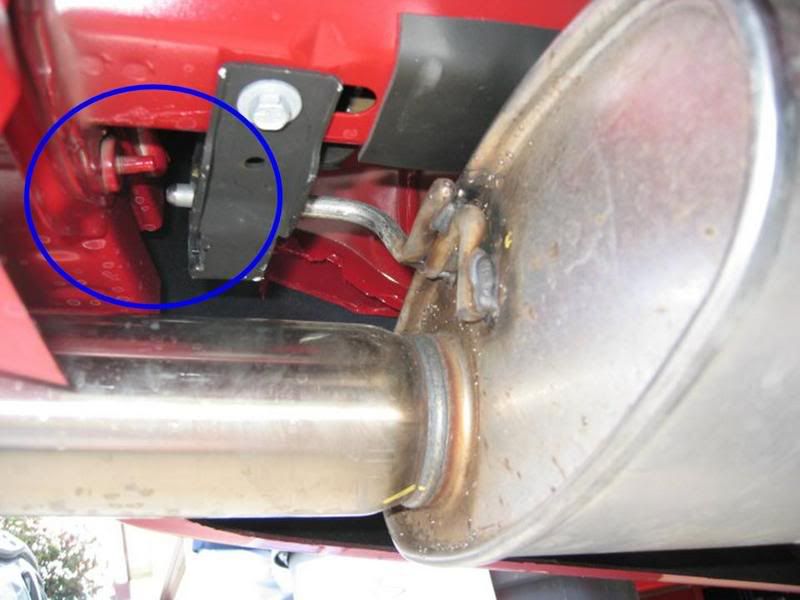
Unbolt the 2 muffler hanger supports (2 bolts each) off from the body/frame. Leave the black hangers ON THE MUFFLER. Yes, access to some of these bolts will be difficult. If you have one of those ratcheting box-end wrenches (13mm), use it.

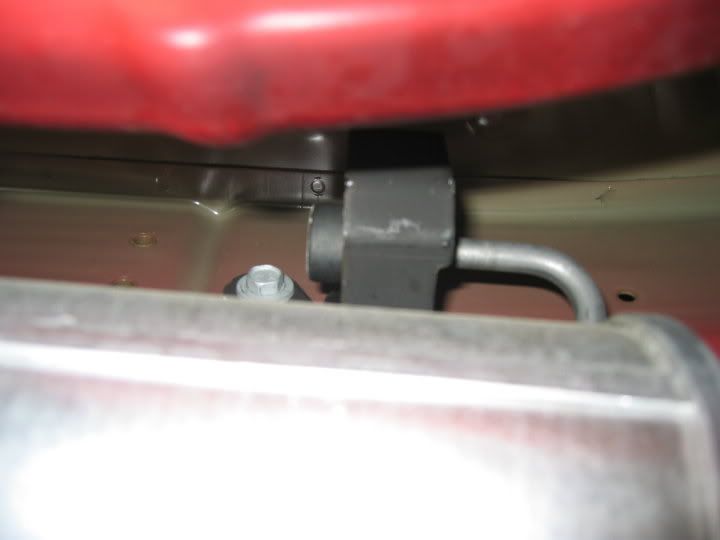
With the 2 hanger mounts unattached, slip the muffler out from the car.
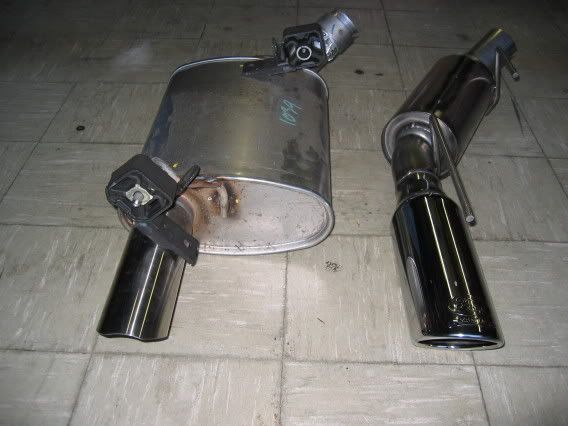
Here’s the OEM muffler next to the Stingers.
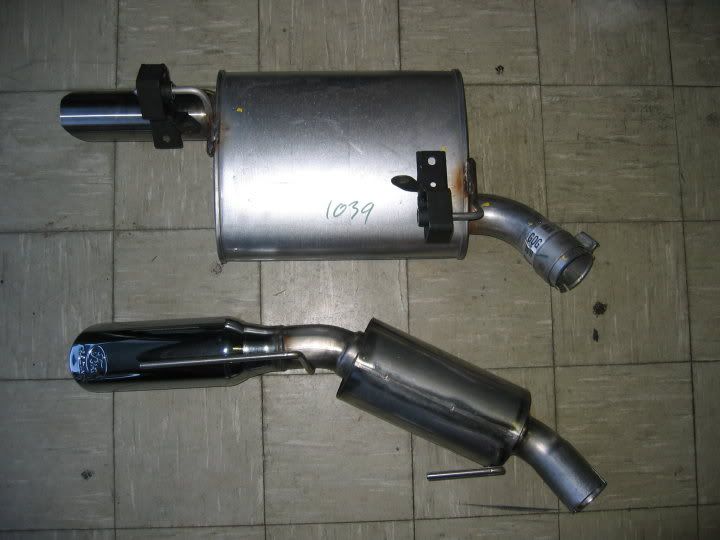
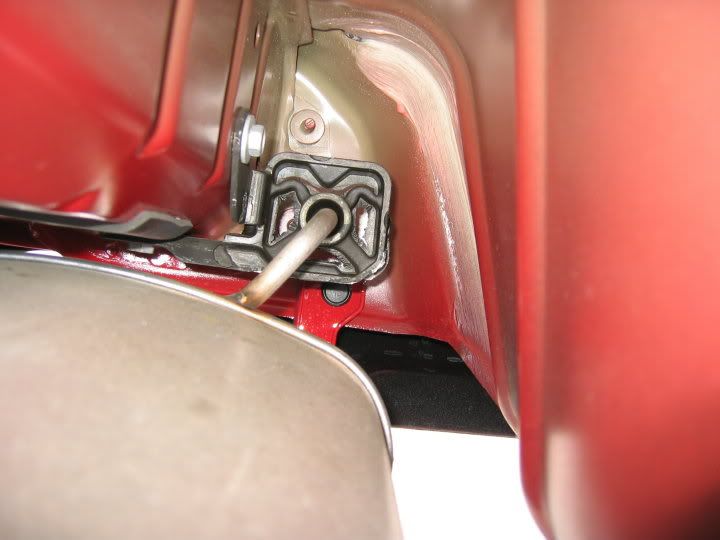
Transfer the black hanger mounts one at a time to the Stinger hanger rods keeping the same orientation.
Position the new Stinger over the mid-pipe tube (with the supplied clamp on) so you can free your hands to line up the two hanger mounts back to the frame. Being that the Stingers are smaller, you now have more room to access those bolts.
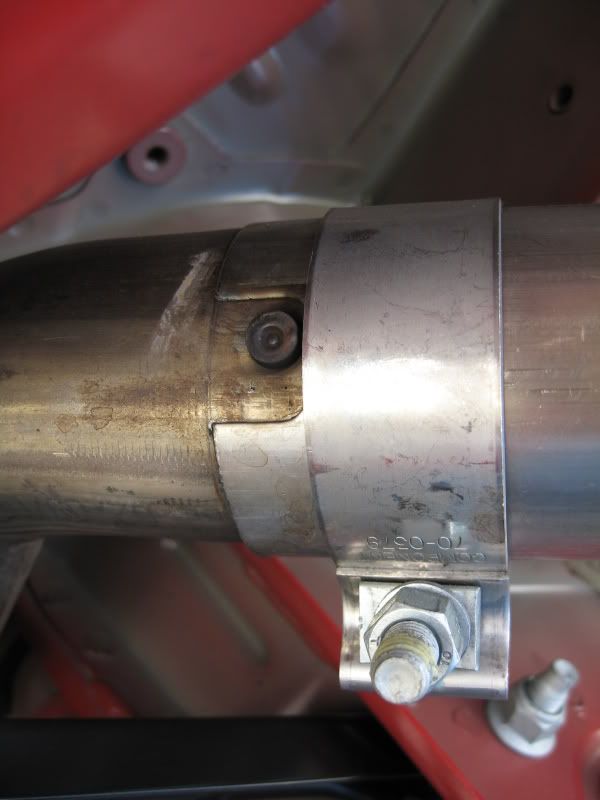
After you have the hanger support brackets installed nice and tight, you may notice one or both sides of the Stinger pipe pulling away from that indexing rivet on the mid-pipe or that the tips are not centered within the bumper cut-outs. This is due to preload of the pipes. From my experience, what you’ll need to do at this point is to get to the mid-pipe clamp and loosen the two 15mm nuts on it. No need to loosen it all the way, just enough to where there’s slop in the pipes (you’ll feel it).

With both clamps loose (over-axle and mid-pipe), center your exhaust tip in the bumper cut-out and make sure the Stinger pipe is indexed all the way in that notch where the rivet is. This is where an extra pair of hands will come in handy… have someone hold the position of the exhaust tip while you tighten the over-axle clamp first, then the mid-pipe clamp last.
Some may argue that the best way to center the tips is to bend the hanger rods. Although this practice may work, why bend and alter something if you don't have to?

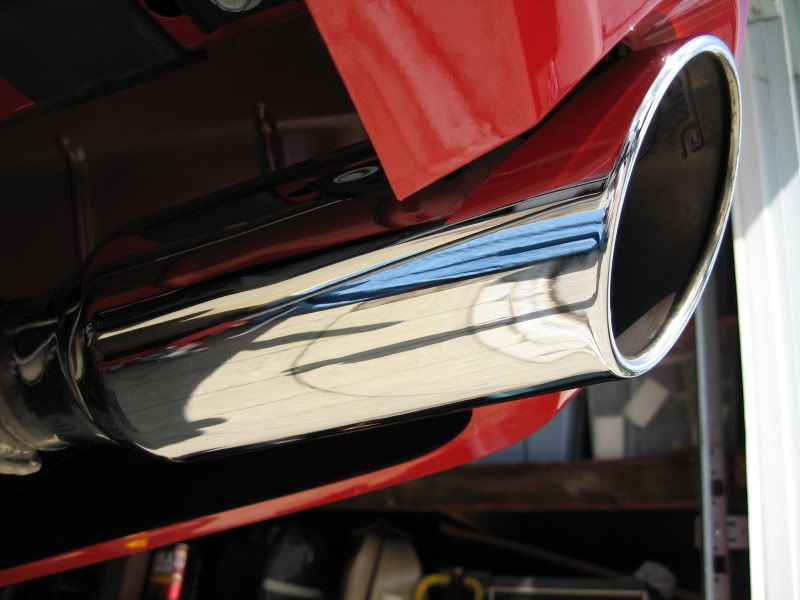
You’re done!
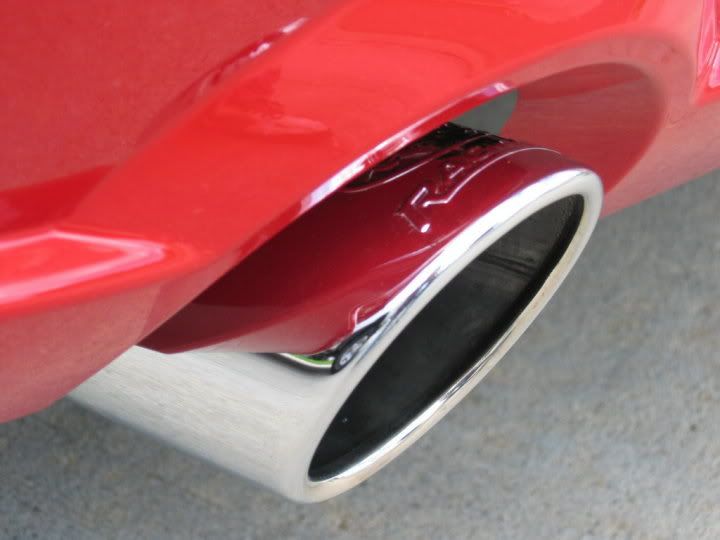
All that’s left is to clean up those 4” rolled tips!
NOTE: On a few Flowmaster American Thunders, I've seen the end of the Driver's side hanger rod too close to the rear bumper. What happens is everytime you drive over a dip or uneven road, the hanger rod hits the bumper and transmits a loud metal to metal rubbing sound. Solution is to loosen the mid-pipe clamp and push the tip farther back into the bumper cut-out (creating a greater distance between the rod and bumper) or trim off a section off the end of the hanger rod (not too much! It still must go through the rubber isolator for support).
Install time: 1 hour (or less)
All you need are basic hand tools (metric wrenches and sockets).
Jacking up the rear will be helpful, but I've read it's not necessary (unless you need to get to the mid-pipe clamps).
Fresh from the box!
First thing to do is plan to work on one side at a time.
Loosen the over-axle clamp just forward of the muffler.
Unbolt the 2 muffler hanger supports (2 bolts each) off from the body/frame. Leave the black hangers ON THE MUFFLER. Yes, access to some of these bolts will be difficult. If you have one of those ratcheting box-end wrenches (13mm), use it.
With the 2 hanger mounts unattached, slip the muffler out from the car.
Here’s the OEM muffler next to the Stingers.
Transfer the black hanger mounts one at a time to the Stinger hanger rods keeping the same orientation.
Position the new Stinger over the mid-pipe tube (with the supplied clamp on) so you can free your hands to line up the two hanger mounts back to the frame. Being that the Stingers are smaller, you now have more room to access those bolts.
After you have the hanger support brackets installed nice and tight, you may notice one or both sides of the Stinger pipe pulling away from that indexing rivet on the mid-pipe or that the tips are not centered within the bumper cut-outs. This is due to preload of the pipes. From my experience, what you’ll need to do at this point is to get to the mid-pipe clamp and loosen the two 15mm nuts on it. No need to loosen it all the way, just enough to where there’s slop in the pipes (you’ll feel it).
With both clamps loose (over-axle and mid-pipe), center your exhaust tip in the bumper cut-out and make sure the Stinger pipe is indexed all the way in that notch where the rivet is. This is where an extra pair of hands will come in handy… have someone hold the position of the exhaust tip while you tighten the over-axle clamp first, then the mid-pipe clamp last.
Some may argue that the best way to center the tips is to bend the hanger rods. Although this practice may work, why bend and alter something if you don't have to?
You’re done!
All that’s left is to clean up those 4” rolled tips!
NOTE: On a few Flowmaster American Thunders, I've seen the end of the Driver's side hanger rod too close to the rear bumper. What happens is everytime you drive over a dip or uneven road, the hanger rod hits the bumper and transmits a loud metal to metal rubbing sound. Solution is to loosen the mid-pipe clamp and push the tip farther back into the bumper cut-out (creating a greater distance between the rod and bumper) or trim off a section off the end of the hanger rod (not too much! It still must go through the rubber isolator for support).


 04-24-2007, 04:44 PM
#6
3rd Gear Member

Join Date: Jul 2006
Location: Garden State Parkway Exit 100
Posts: 503
I used this writeup to do my install. I should have read it before I was ready to go. Tools you should use: 15mm Deep Socket, medium length socket extension, 13 mm box wrench (ratcheting would be ideal), torque wrench. I also used one of those magnetic trays to hold the bolts, works great under the car. Additionally, cheap mechanics gloves ($15) from Strauss protect your fingers from the scrapes when the wrench flies off the bolt, and also allow you to hand test for leaks without getting burned. I love TacoBill's writeups and pictures. Definitely an asset to the forum!
04-24-2007, 05:11 PM
#7
2nd Gear Member

Join Date: Jan 2007
Location: Ontario, Canada
Posts: 398
Hey TacoBill. Can you please disassemble your car take pictures and reassemble so we can all see how its done? LOL Thanks for taking the time, once again great job!!
Do you have the details for the shaker install? Thats next on my list.
Do you have the details for the shaker install? Thats next on my list.
04-24-2007, 05:23 PM
#9
2nd Gear Member
Thread Starter
Join Date: Jun 2006
Location:
Posts: 415
ORIGINAL: pegasusphototx
Wow, your tips sit more recessed into the bumper than mine. I wonder why that is? Hrmmm
Wow, your tips sit more recessed into the bumper than mine. I wonder why that is? Hrmmm
ORIGINAL: 1sloGT
are the bolts really metric?
are the bolts really metric?

ORIGINAL: Drop Top 06
.. I also used one of those magnetic trays to hold the bolts, works great under the car. Additionally, cheap mechanics gloves ($15) from Strauss protect your fingers from the scrapes when the wrench flies off the bolt, and also allow you to hand test for leaks without getting burned.
.. I also used one of those magnetic trays to hold the bolts, works great under the car. Additionally, cheap mechanics gloves ($15) from Strauss protect your fingers from the scrapes when the wrench flies off the bolt, and also allow you to hand test for leaks without getting burned.
ORIGINAL: 05 Mustang GT
Do you have the details for the shaker install? Thats next on my list.
Do you have the details for the shaker install? Thats next on my list.
04-24-2007, 05:27 PM
#10
I ♥ Acer

Join Date: Apr 2007
Location:
Posts: 41
Stangster - try right click on picure and select "Show Picture" Good luck.
ORIGINAL: stangster06
I can't see the pictures - anyone know why? (just see the little red "X".) Thanks.
I can't see the pictures - anyone know why? (just see the little red "X".) Thanks.