

 10-22-2015, 03:52 PM
Last edit by: IB Advertising
See related guides and technical advice from our community experts:
Browse all: Ford Mustang Exterior Guides
- Ford Mustang V6 and Mustang GT 2005-2014: How to Install Front Lip
Step by step instructions for do-it-yourself repairs.
Browse all: Ford Mustang Exterior Guides

How To: Amp Install (w/ Pics! 56k warning)
06-04-2007, 01:31 AM
#1
4th Gear Member
Thread Starter
Join Date: Feb 2007
Location: Northern Virginia
Posts: 1,459
When I was looking around for info on installing an amplifier into my Mustang, I found most of the information I needed (no pictures though) in a bunch of different locations so I decided to take some pictures and try to assemble it all in one place. This is for the stock Shaker 500 radio but will work similar for an aftermarket or the base radio also. I decided to gear this more towards where to route wires and how to take off panels than to explain everything about amplifier installation, but I would be happy to answer other questions related too. Please take note, this is not an advanced guide, just a simple how to for someone who may need a bit more info.
Tools you will need:
8mm socket
10mm socket
13mm socket
Flathead screw driver
Shorty philips head screw driver
Wire cutters
Wire Strippers
Electrical Tape
Optional:
Wire splicers (highly recommended)
Before disconnecting the battery, make sure to pop the trunk and turn the wheels all the way to the driver's side.
Disconnect the negative terminal of the battery by unscrewing the 8mm bolt and pulling the clamp off the battery post.
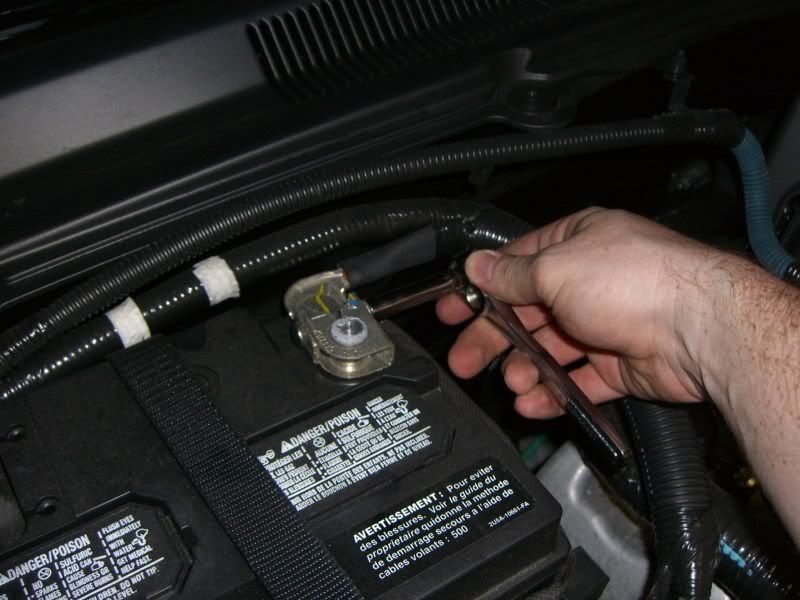
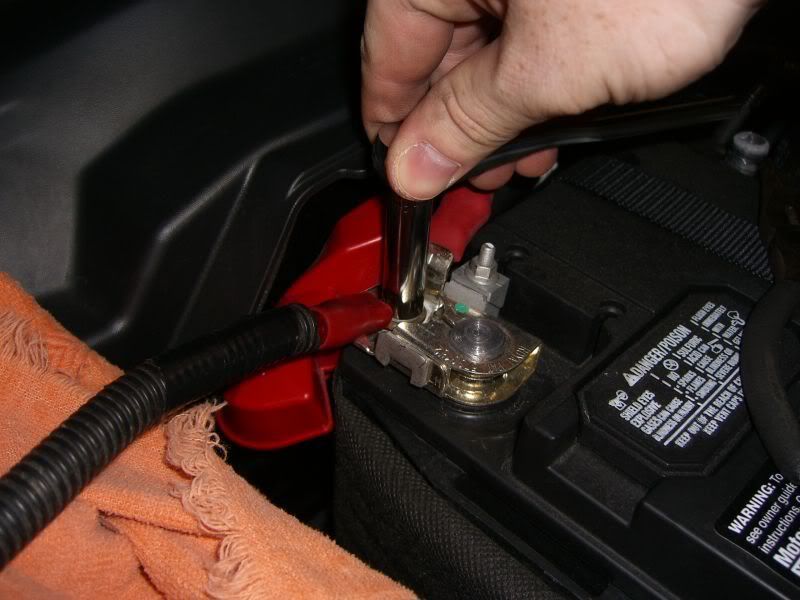
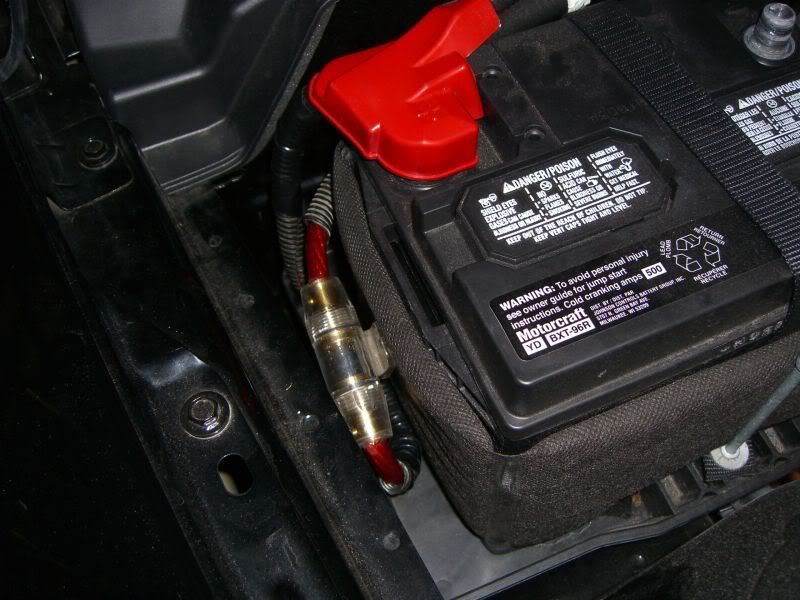
In order to install the main power wire, you will need to remove the main power wire bolt but not the entire clamp. Unscrew this with a 10mm socket.

Place the amp power wire over that bolt and tighten it back down again. Please be sure you have an inline fuse within a foot or so of the battery.
Remove the 4 screws in the back of the front passenger's side wheel well. You do not need to remove the ones from the front, only the top to the back. These are not normal screws but will only unscrew about 1 turn, and then the whole assembly pops out.

Slide the rear half of the wheel well cover out and around the tire to expose the gromet in the firewall.
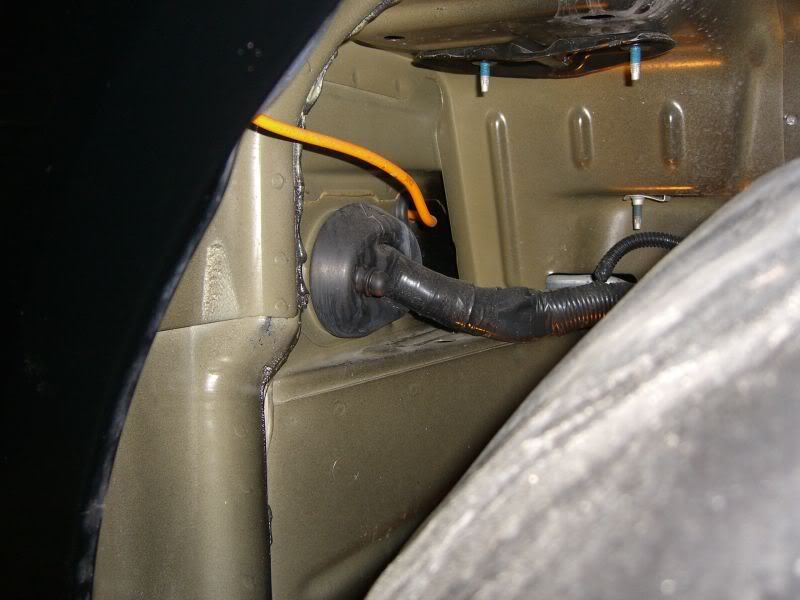
Route the power wire next to the firewall towards the engine and then up to the battery tray. If your power wire has an inline connector that does not let you separate the two wires, reverse this process. Route the wire down from the battery and into the wheel well.
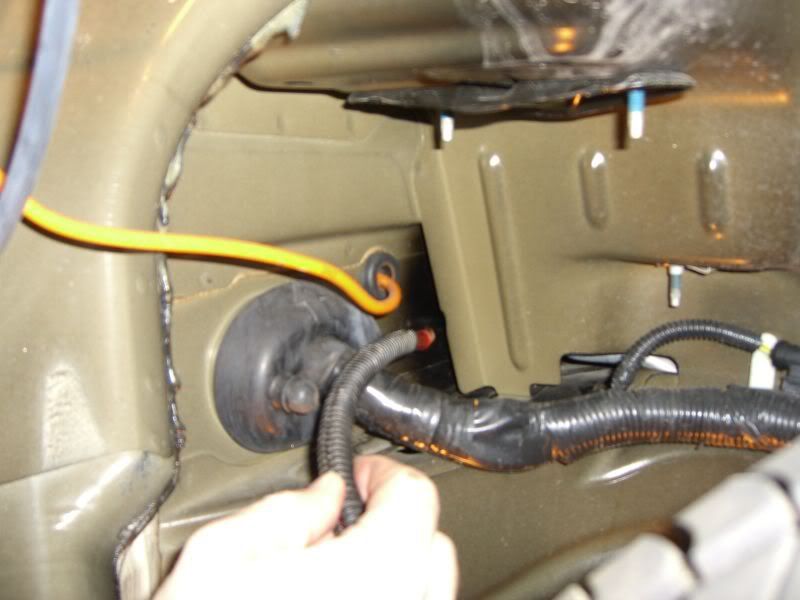


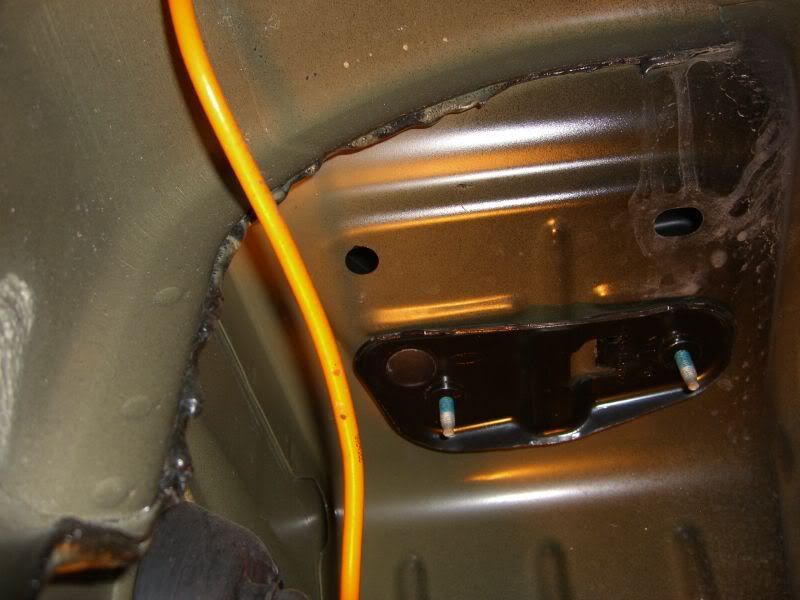
If you are using something thinner than a 4 guage wire, you can also choose to route the power wire up under the battery tray using this hole. If you do use this hole, please make sure to properly protect the power wire so the sharp sheet metal does not fray the cable and cause a nasty short. My 4 guage wire would fit up there but not with the protective plastic so I decided not to use it.
Connect the power wire that was just routed through the wheel well to the power wire attached to the battery.
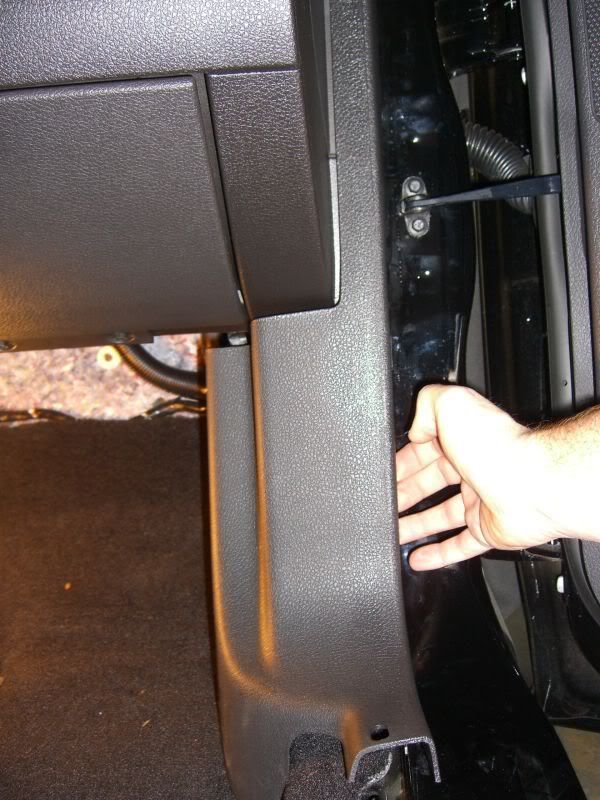
Move to the inside of the car and remove the passenger side rocker panel molding. It is both clipped to the car and taped but simply pulling up will release it.

To remove the kick panel, remove the fuse plate and pull lightly towards the drivers side to unclip it from the side.

Pull towards the back of the car to release the other clips on the kick panel and remove it.
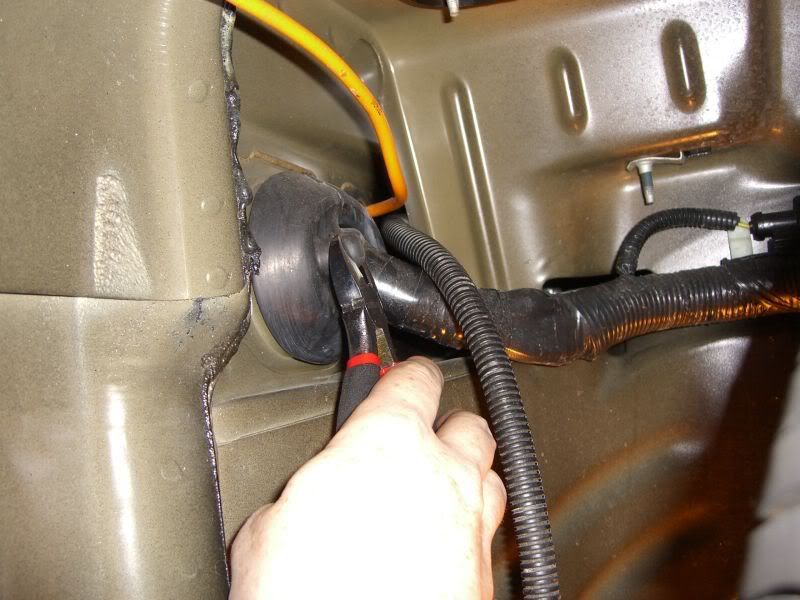
Using the wire cutters, clip the end of the nipple off the gromet in the firewall. *EDIT* It was suggested to simply poke a hole in the gromet (or drill) so that it is a tighter fit and better water sealed. This is a good idea.
Route the power wire through the hole and into the car. When the wire is completely pulled through the gromet, tape the end to prevent any water from entering the car.

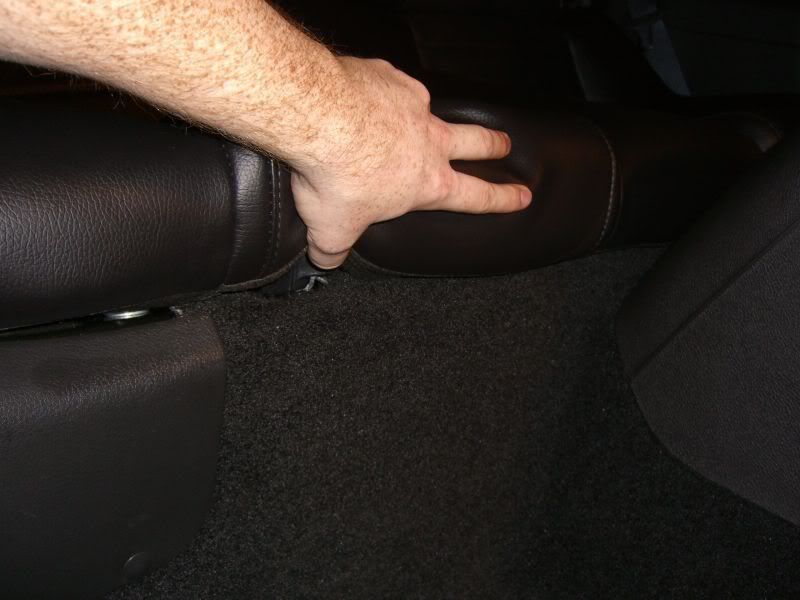
Remove the back seat by pressing the tab under the edge of the seat bottom on either side and lift it out.
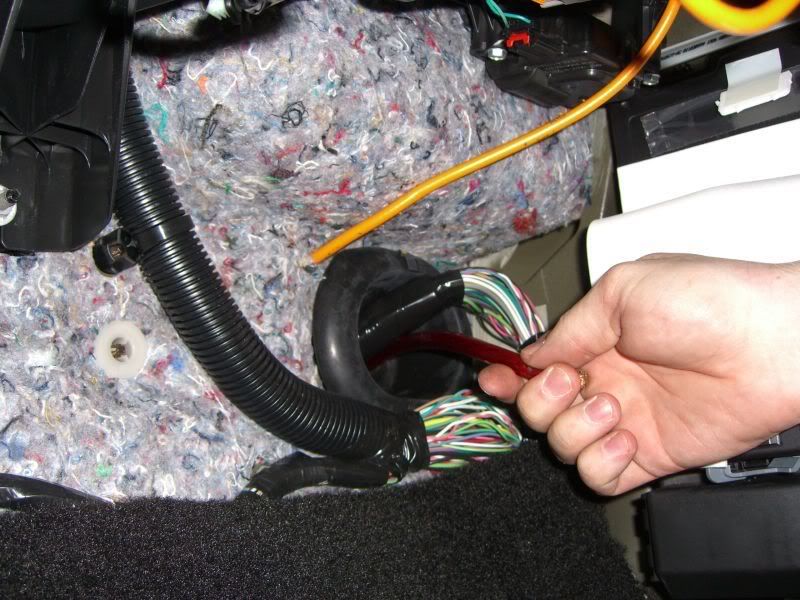
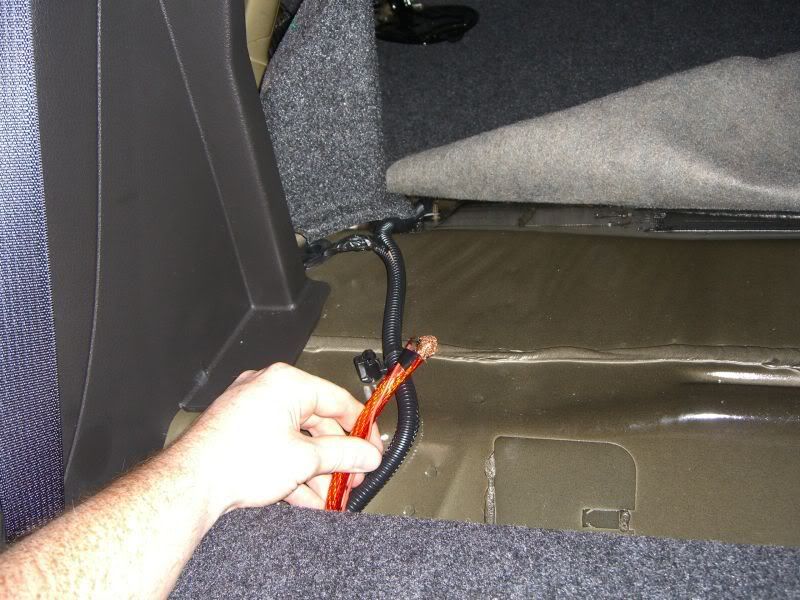
Hide the power wire under the carpet until you get to the rear quarter panel. Tape the amp turn on lead to the main power wire and feed them both up the door sill and under the rear quarter panel. You should be able to push it up enough to reach in and grab the other end with your fingers from the rear seat.

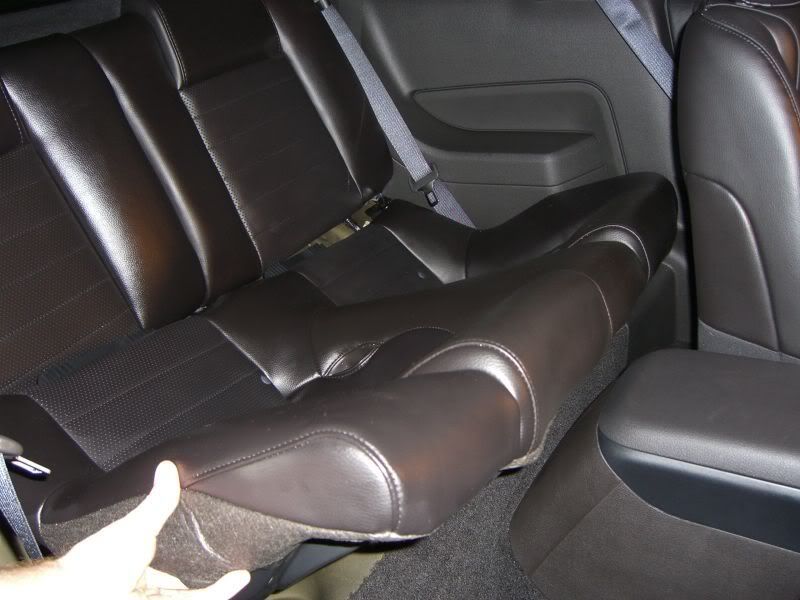
Pull down the back seat and route the power wire under the seat and into the trunk.
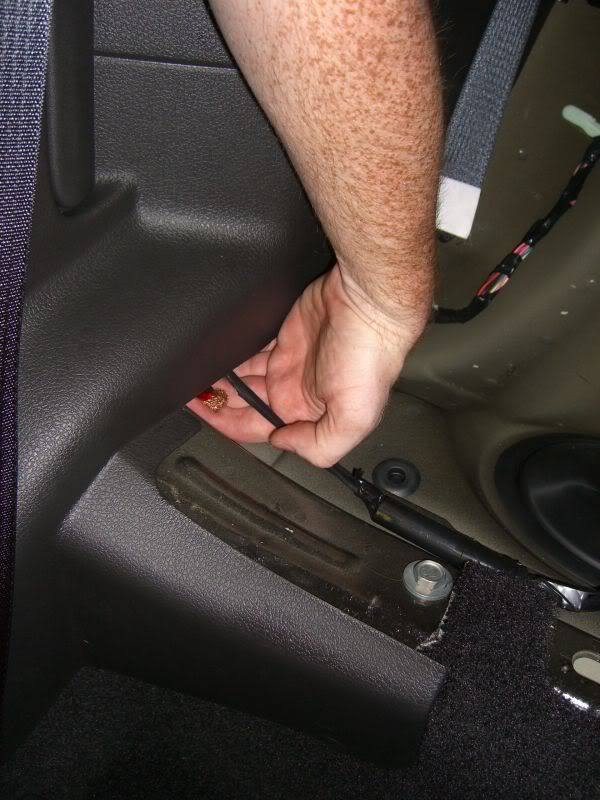
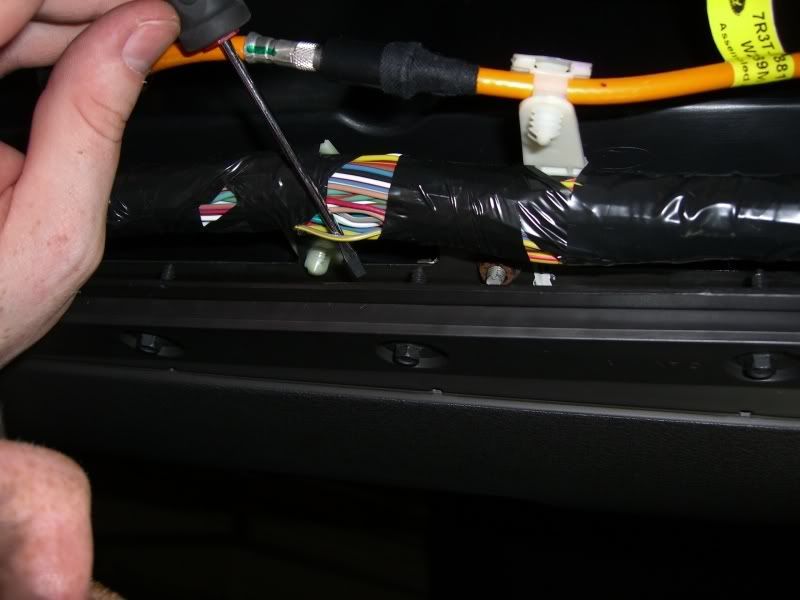
I chose to connect the amp turn on lead to the run/accessory wire that the radio uses (pin 2 on the back of the radio). You can access this wire in the passenger footwell up under the dash. There is a bundle of wires there, you will just need to find the GY / YE wire and use a wire splicer to connect the two.
Since there are many different ways you can mount and setup the amp, I will show you how I did mine for ideas but yours may vary greatly.
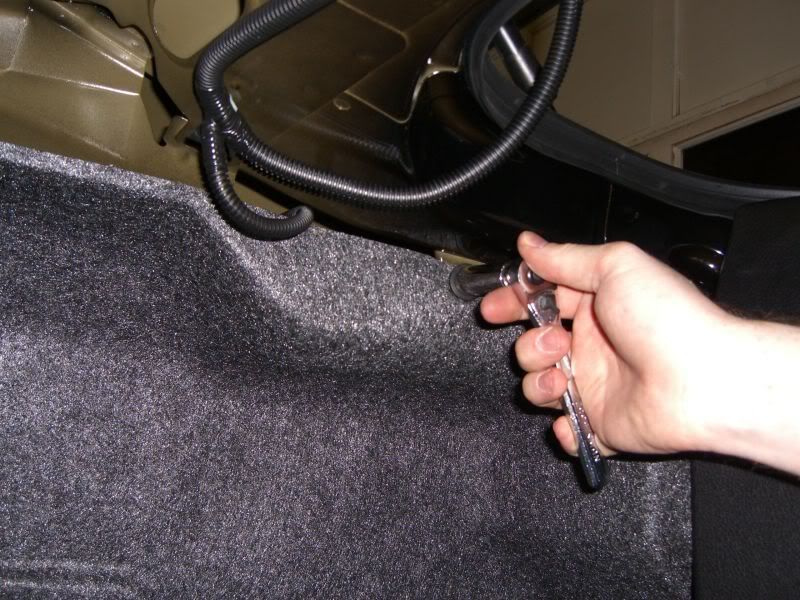
I decided to mount my amp where the stock Shaker 1000 system goes as it is a very large open spot in the carpet. Unfortunately there is not much behind the carpet in which to secure my amp to, so I made my own. Remove the side carpet using a 13mm socket and a flat head screw driver to pry out the "Christmass Tree" clip.
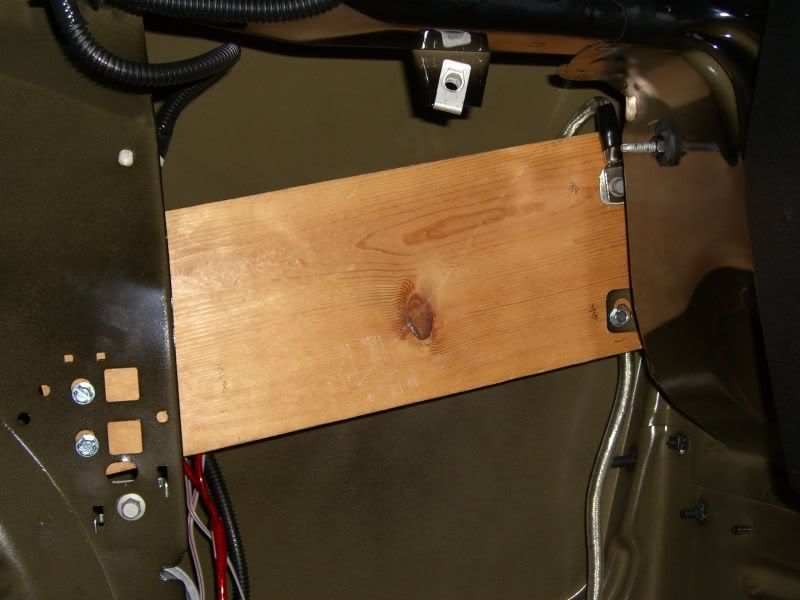
I cut a 1x6 to length and bolted it in place using existing holes and tabs. I sanded down the upper tab next to the brake lights and attached the ground wire to it.
Since I am using the stock Shaker 500 sound system and it does not have RCA or sub level outs, I pulled speaker level inputs from the 2 rear speakers and ran them into a line out converter I mounted to the back of the 1x6 amp support.
The rear speaker wires are not labled positive and negative so here are the colors of each:
Left Rear Positive: GY / LB
Left Rear Negative: TN / YE
Right Rear Positive: OG / RD
Right Rear Negative: BN / YE


Re-attach the side wall carpet, hold the amp up and make a 2" slit in the bottom to run the wires through. Pull all the amp wires through the slit and screw down the amp. Attach all the wires to the amplifier.


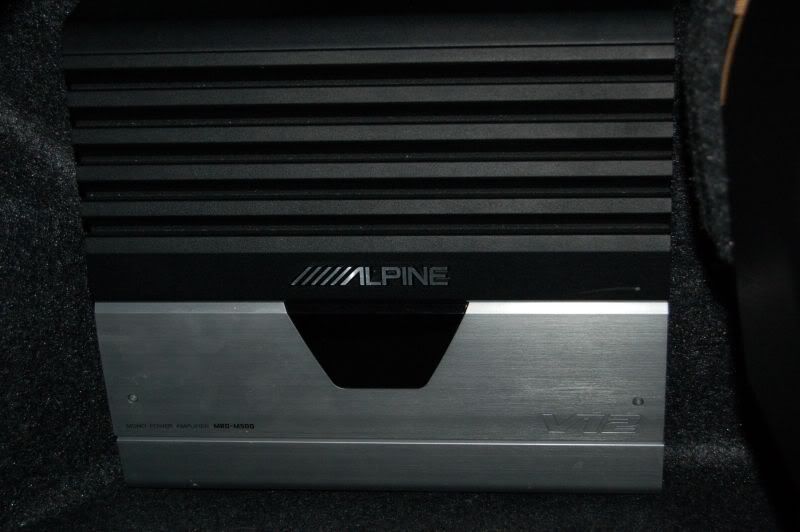
Once you have everything how you like it, re-attach all trim pieces, put the rear seat back in, and put the wheel well cover back in place. Re-connect the battery, put the fuse in the power cord for the amp and power everything up. My final install ended up looking like this.
I know everyone that looks at this will not all have the Shaker 500, so here are a few other tidbits I gathered while looking for the info I needed.
- The rear sub speaker wires for the Shaker 1000 are not present in cars with the Shaker 500 or base system.
- There is no rca output for the Shaker system.
- The 2 amps for the front subs on the Shaker system are mounted on the drivers side footwell fender.
- If you are using an aftermarket radio, run the RCA wires down the OPPOSITE side of the car as the power wires to avoid interference.
- If you are using an aftermarket radio and keeping the stock Shaker 500 amps for the front and experience a popping noise when you turn on the radio, you will need a Voltage Regulater (Part # 7805). This will take the 12v signal coming out of the amp turn on lead (usually blue) and convert it to a 5v signal that the stock amps use.
- The way I have my amp turn on lead wired, it will turn the amp on whenever the car is on or in accessory mode. Unfortunately I have not yet found a good way to get around this.
Hopefully someone will find this info useful. Please feel free to leave suggestions!
Tools you will need:
8mm socket
10mm socket
13mm socket
Flathead screw driver
Shorty philips head screw driver
Wire cutters
Wire Strippers
Electrical Tape
Optional:
Wire splicers (highly recommended)
Before disconnecting the battery, make sure to pop the trunk and turn the wheels all the way to the driver's side.
Disconnect the negative terminal of the battery by unscrewing the 8mm bolt and pulling the clamp off the battery post.
In order to install the main power wire, you will need to remove the main power wire bolt but not the entire clamp. Unscrew this with a 10mm socket.
Place the amp power wire over that bolt and tighten it back down again. Please be sure you have an inline fuse within a foot or so of the battery.
Remove the 4 screws in the back of the front passenger's side wheel well. You do not need to remove the ones from the front, only the top to the back. These are not normal screws but will only unscrew about 1 turn, and then the whole assembly pops out.
Slide the rear half of the wheel well cover out and around the tire to expose the gromet in the firewall.
Route the power wire next to the firewall towards the engine and then up to the battery tray. If your power wire has an inline connector that does not let you separate the two wires, reverse this process. Route the wire down from the battery and into the wheel well.
If you are using something thinner than a 4 guage wire, you can also choose to route the power wire up under the battery tray using this hole. If you do use this hole, please make sure to properly protect the power wire so the sharp sheet metal does not fray the cable and cause a nasty short. My 4 guage wire would fit up there but not with the protective plastic so I decided not to use it.
Connect the power wire that was just routed through the wheel well to the power wire attached to the battery.
Move to the inside of the car and remove the passenger side rocker panel molding. It is both clipped to the car and taped but simply pulling up will release it.
To remove the kick panel, remove the fuse plate and pull lightly towards the drivers side to unclip it from the side.
Pull towards the back of the car to release the other clips on the kick panel and remove it.
Using the wire cutters, clip the end of the nipple off the gromet in the firewall. *EDIT* It was suggested to simply poke a hole in the gromet (or drill) so that it is a tighter fit and better water sealed. This is a good idea.
Route the power wire through the hole and into the car. When the wire is completely pulled through the gromet, tape the end to prevent any water from entering the car.
Remove the back seat by pressing the tab under the edge of the seat bottom on either side and lift it out.
Hide the power wire under the carpet until you get to the rear quarter panel. Tape the amp turn on lead to the main power wire and feed them both up the door sill and under the rear quarter panel. You should be able to push it up enough to reach in and grab the other end with your fingers from the rear seat.
Pull down the back seat and route the power wire under the seat and into the trunk.
I chose to connect the amp turn on lead to the run/accessory wire that the radio uses (pin 2 on the back of the radio). You can access this wire in the passenger footwell up under the dash. There is a bundle of wires there, you will just need to find the GY / YE wire and use a wire splicer to connect the two.
Since there are many different ways you can mount and setup the amp, I will show you how I did mine for ideas but yours may vary greatly.
I decided to mount my amp where the stock Shaker 1000 system goes as it is a very large open spot in the carpet. Unfortunately there is not much behind the carpet in which to secure my amp to, so I made my own. Remove the side carpet using a 13mm socket and a flat head screw driver to pry out the "Christmass Tree" clip.
I cut a 1x6 to length and bolted it in place using existing holes and tabs. I sanded down the upper tab next to the brake lights and attached the ground wire to it.
Since I am using the stock Shaker 500 sound system and it does not have RCA or sub level outs, I pulled speaker level inputs from the 2 rear speakers and ran them into a line out converter I mounted to the back of the 1x6 amp support.
The rear speaker wires are not labled positive and negative so here are the colors of each:
Left Rear Positive: GY / LB
Left Rear Negative: TN / YE
Right Rear Positive: OG / RD
Right Rear Negative: BN / YE
Re-attach the side wall carpet, hold the amp up and make a 2" slit in the bottom to run the wires through. Pull all the amp wires through the slit and screw down the amp. Attach all the wires to the amplifier.
Once you have everything how you like it, re-attach all trim pieces, put the rear seat back in, and put the wheel well cover back in place. Re-connect the battery, put the fuse in the power cord for the amp and power everything up. My final install ended up looking like this.
I know everyone that looks at this will not all have the Shaker 500, so here are a few other tidbits I gathered while looking for the info I needed.
- The rear sub speaker wires for the Shaker 1000 are not present in cars with the Shaker 500 or base system.
- There is no rca output for the Shaker system.
- The 2 amps for the front subs on the Shaker system are mounted on the drivers side footwell fender.
- If you are using an aftermarket radio, run the RCA wires down the OPPOSITE side of the car as the power wires to avoid interference.
- If you are using an aftermarket radio and keeping the stock Shaker 500 amps for the front and experience a popping noise when you turn on the radio, you will need a Voltage Regulater (Part # 7805). This will take the 12v signal coming out of the amp turn on lead (usually blue) and convert it to a 5v signal that the stock amps use.
- The way I have my amp turn on lead wired, it will turn the amp on whenever the car is on or in accessory mode. Unfortunately I have not yet found a good way to get around this.
Hopefully someone will find this info useful. Please feel free to leave suggestions!


 06-04-2007, 04:40 AM
#5
2nd Gear Member

Join Date: Mar 2007
Location:
Posts: 186
@ Aziraphale ...Thanks for the good write up. I have one question. I just replaced my factory rear speakers in my car last week and I ran into the same problem of them not being marked. How or where did you find the information of which wire was positive/negative. I could not find the color codes so I tested mine with a DMM. I will have to look when I get home from work, but if I recall I found positive voltage opposite of what you have posted. I will double check later. Good post, thanks again.
06-04-2007, 11:31 AM
#6
4th Gear Member
Thread Starter
Join Date: Feb 2007
Location: Northern Virginia
Posts: 1,459
ORIGINAL: 05Stang4Me
@ Aziraphale ...Thanks for the good write up. I have one question. I just replaced my factory rear speakers in my car last week and I ran into the same problem of them not being marked. How or where did you find the information of which wire was positive/negative. I could not find the color codes so I tested mine with a DMM. I will have to look when I get home from work, but if I recall I found positive voltage opposite of what you have posted. I will double check later. Good post, thanks again.
@ Aziraphale ...Thanks for the good write up. I have one question. I just replaced my factory rear speakers in my car last week and I ran into the same problem of them not being marked. How or where did you find the information of which wire was positive/negative. I could not find the color codes so I tested mine with a DMM. I will have to look when I get home from work, but if I recall I found positive voltage opposite of what you have posted. I will double check later. Good post, thanks again.
There are many good manuals listed in that thread ( http://www.2005stang.com/viewtopic.php?t=1087 )
Also, thank you to the other people who left nice comments


 06-04-2007, 01:19 PM
#10
1st Gear Member

Join Date: May 2007
Location: long island, NY
Posts: 111
im going to disagree with your methods, but i may be talking out of my *** since i do not yet owna mustang (waiting for 08)
i NEVER install power wires through the wheel well. ive seen too many wires corrode and cause shorts (and therefore, fires) from that. i always run it through the firewall, through the main grommet. if there is no grommet (im not sure on a mustang...but most newer cars have one) then i drill one. this is a difficult method, and best left to pros, but the RIGHT way to do it.
i NEVER install power wires through the wheel well. ive seen too many wires corrode and cause shorts (and therefore, fires) from that. i always run it through the firewall, through the main grommet. if there is no grommet (im not sure on a mustang...but most newer cars have one) then i drill one. this is a difficult method, and best left to pros, but the RIGHT way to do it.
