
s197 fender badge how-to/pics and hole measurements
 10-10-2007, 04:01 PM
#1
3rd Gear Member
Thread Starter

Join Date: Mar 2007
Posts: 573
This is a picture tutorial about changing your fender badges. It includes measurements of the mounting holes in the s197 fenders, which I haven't found anywhere else. I know this is a basic task, but hopefully this information which is from several threadswill be of help to someone. Note: thereare many other methods, feel free to chime in.
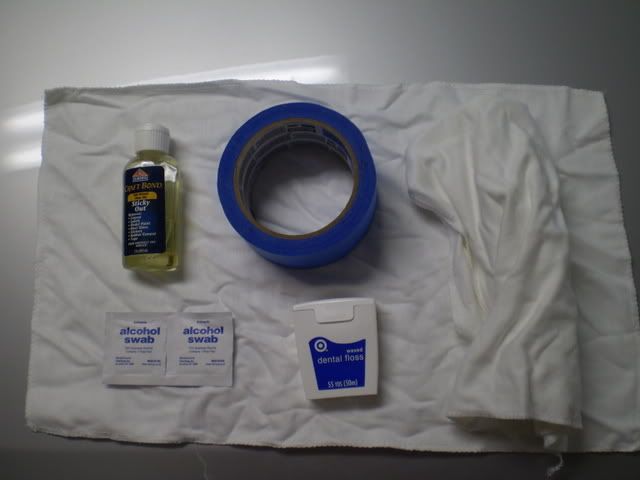
The first thing to do is to get your stuff together: besides the badges, you need
1) painters masking tape
2) sticky out (or some other citrus-safe goo remover)
3) WAXED dental floss
4) alcohol pads
5) cotton rag
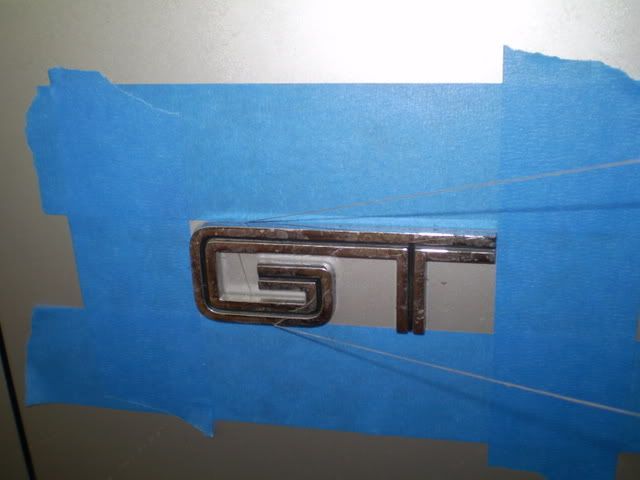
Frame the present badge with tape for reference later. (I find this a LOT easier than measuring.) Then, use the dental floss trick to take the badge off. This takes a certain knack to do. Be patient and experiment. Some people use a hair dryer, but I don't feel comfortable doing that.
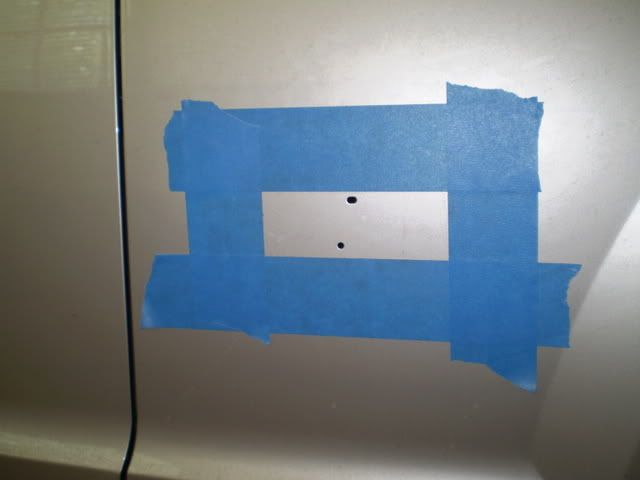
This photo shows the famous fender holes that everyone asks about:
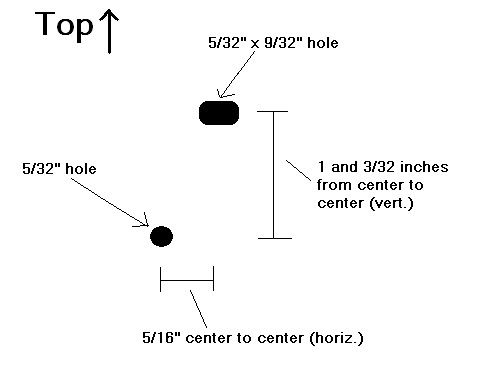
Here is a crude diagram I made of the dimensions of these holes, in case you want to know if your new emblem will cover them. (Horizontal and Verticle measurements are from hole center to center):
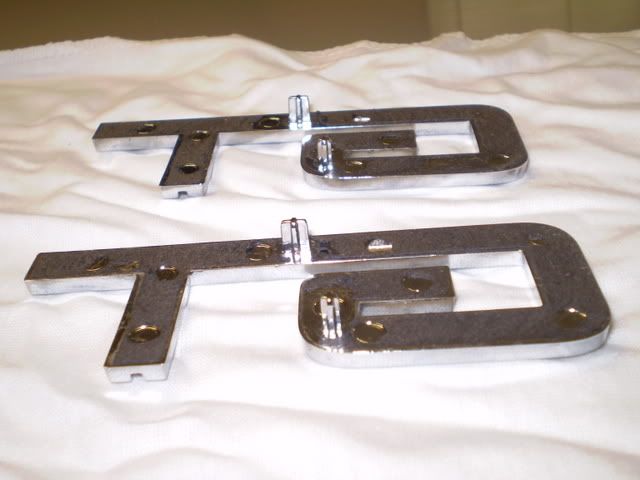
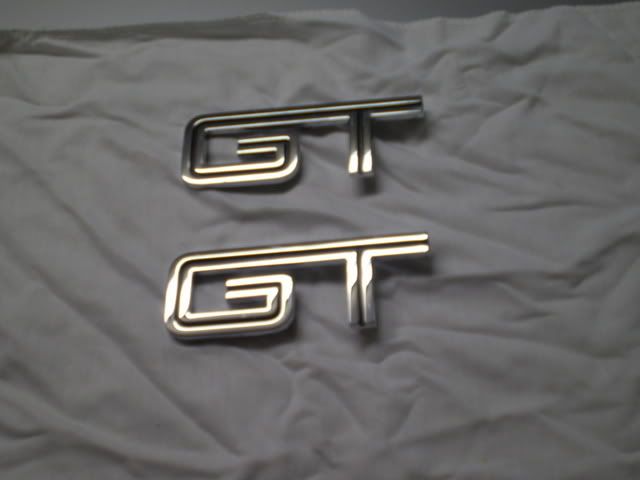
Here are the emblems removed, showing the mounting prongs.Note that the left and right fenders have identical, NOTmirror-image hole patterns.
If you are careful when you remove the stock badges, you can re-use them because no harm will come to them.
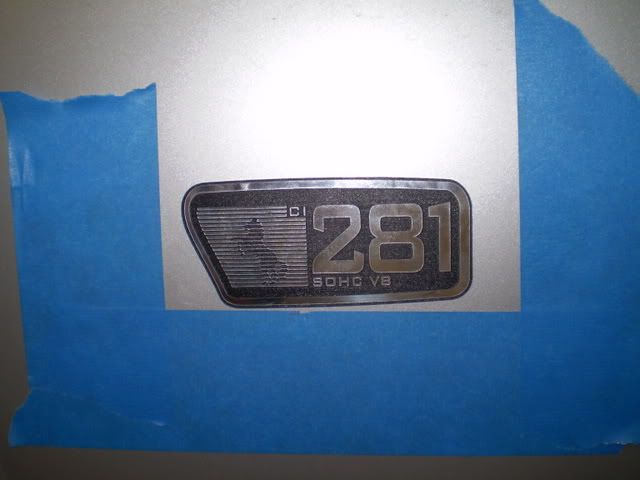
After cleaning the fender with the goo-gone, then alcohol, then drying with the rag. The badges are put on using the tape as reference. This badge has an irregular shape, so I lined up the bottom of the numbers with the top edge of the lower tape.
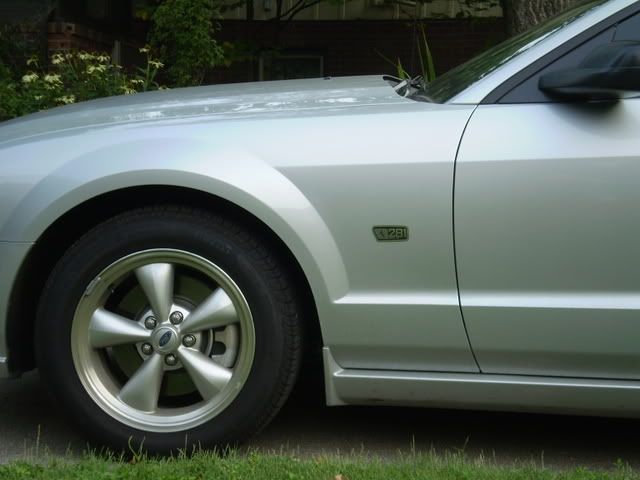
Here's the new badge on the car. I think it better fits my understated, spoiler-deletecar than the stock "GT" does, but I'm still looking for a "281" with the checkered flags.
Hope this was helpful, or at least enjoyable!
Sleeper2
The first thing to do is to get your stuff together: besides the badges, you need
1) painters masking tape
2) sticky out (or some other citrus-safe goo remover)
3) WAXED dental floss
4) alcohol pads
5) cotton rag
Frame the present badge with tape for reference later. (I find this a LOT easier than measuring.) Then, use the dental floss trick to take the badge off. This takes a certain knack to do. Be patient and experiment. Some people use a hair dryer, but I don't feel comfortable doing that.
This photo shows the famous fender holes that everyone asks about:
Here is a crude diagram I made of the dimensions of these holes, in case you want to know if your new emblem will cover them. (Horizontal and Verticle measurements are from hole center to center):
Here are the emblems removed, showing the mounting prongs.Note that the left and right fenders have identical, NOTmirror-image hole patterns.
If you are careful when you remove the stock badges, you can re-use them because no harm will come to them.
After cleaning the fender with the goo-gone, then alcohol, then drying with the rag. The badges are put on using the tape as reference. This badge has an irregular shape, so I lined up the bottom of the numbers with the top edge of the lower tape.
Here's the new badge on the car. I think it better fits my understated, spoiler-deletecar than the stock "GT" does, but I'm still looking for a "281" with the checkered flags.
Hope this was helpful, or at least enjoyable!
Sleeper2

 10-10-2007, 04:38 PM
#4
5th Gear Member
Join Date: Nov 2005
Location:
Posts: 2,227
ORIGINAL: sleeper2
This is a picture tutorial about changing your fender badges. It includes measurements of the mounting holes in the s197 fenders, which I haven't found anywhere else. I know this is a basic task, but hopefully this information which is from several threadswill be of help to someone. Note: thereare many other methods, feel free to chime in.
The first thing to do is to get your stuff together: besides the badges, you need
1) painters masking tape
2) sticky out (or some other citrus-safe goo remover)
3) WAXED dental floss
4) alcohol pads
5) cotton rag
Frame the present badge with tape for reference later. (I find this a LOT easier than measuring.) Then, use the dental floss trick to take the badge off. This takes a certain knack to do. Be patient and experiment. Some people use a hair dryer, but I don't feel comfortable doing that.
This photo shows the famous fender holes that everyone asks about:
Here is a crude diagram I made of the dimensions of these holes, in case you want to know if your new emblem will cover them. (Horizontal and Verticle measurements are from hole center to center):
Here are the emblems removed, showing the mounting prongs.Note that the left and right fenders have identical, NOTmirror-image hole patterns.
If you are careful when you remove the stock badges, you can re-use them because no harm will come to them.
After cleaning the fender with the goo-gone, then alcohol, then drying with the rag. The badges are put on using the tape as reference. This badge has an irregular shape, so I lined up the bottom of the numbers with the top edge of the lower tape.
Here's the new badge on the car. I think it better fits my understated, spoiler-deletecar than the stock "GT" does, but I'm still looking for a "281" with the checkered flags.
Hope this was helpful, or at least enjoyable!
Sleeper2
10-10-2007, 04:47 PM
#5
Cut & Paste Expert
Join Date: May 2007
Location: NW Arkansas
Posts: 13,322
Here is for adding Ponies to V6s that dont have holes.
By the way, great write up Sleeper2.
https://mustangforums.com/m_3942723/tm.htm
By the way, great write up Sleeper2.
https://mustangforums.com/m_3942723/tm.htm

 10-10-2007, 05:43 PM
#9
3rd Gear Member
Join Date: Oct 2006
Location: Sunshine State
Posts: 588
ORIGINAL: mdg
Thanks for putting this together. It's a simple process but always reassuring to have pictures and steps.
Thanks for putting this together. It's a simple process but always reassuring to have pictures and steps.
