
FRPP girdle install
 11-03-2007, 11:10 AM
#1
1st Gear Member
Thread Starter

Join Date: Mar 2007
Location: WA
Posts: 109
Did the FRPP differential girdle and bearing cap stud kit install. It's one of those 'cute panty' mods: you can't see it but it puts a smile on your face knowing thatthe object of your affection is wearing them!
I performed the installwith jackstands under the unibody in front of whereeach LCA attaches. The rear axle wasallowed to hang down.
Removed stock thin walled rear differential cover bolts, 13mm, and cover. No acess for draining or filling gear oil.
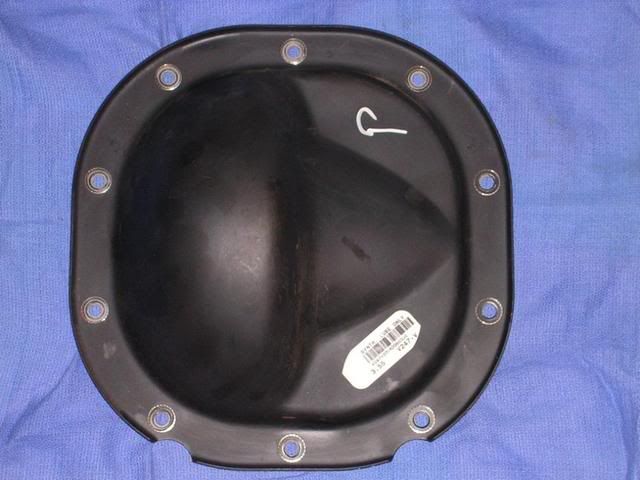
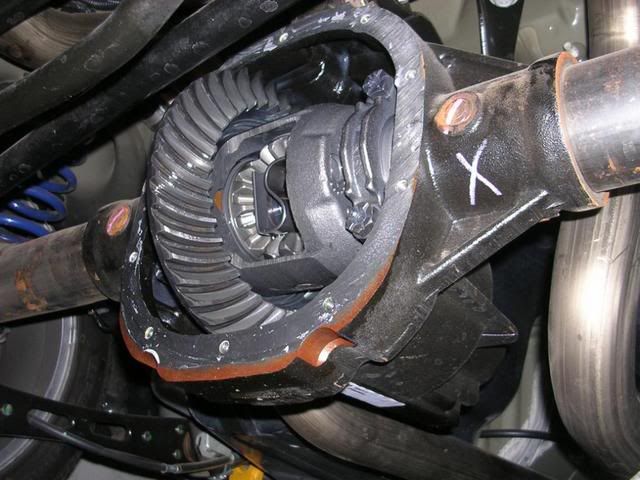
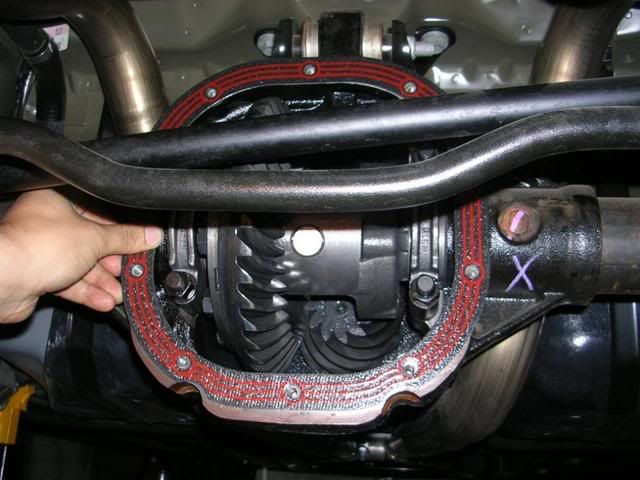
Rear diff, cover removed by gently prying with flathead screwdriver. Luckily didn't mar the mating surface. Glorious gears are revealed. Oil was grey with suspended metal particles and stinky! I'm not sure if lint contamination in the gear oil is important or not but I used a shop rag that appeared to be low-lint to remove the oil sequested in recessed sections at the bottom of the differental.
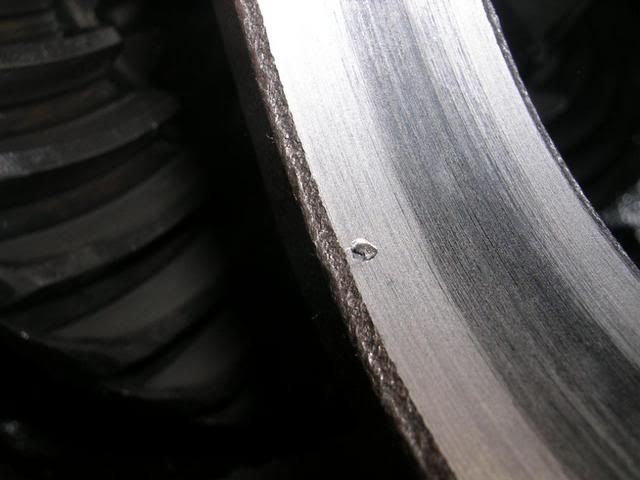
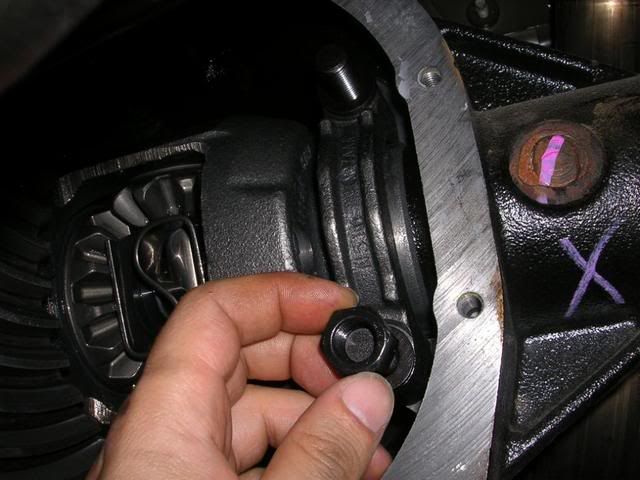
Removed the passenger side bearing cap bolts, 19mm, and bearing cap
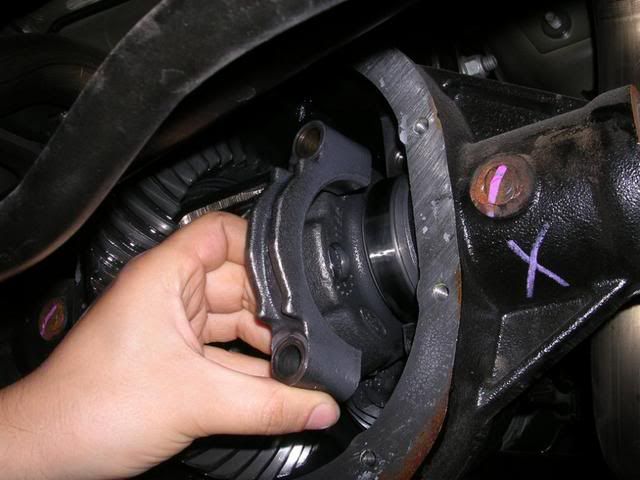
The bearing contact surface of the cap had a small pit (the drivers side cap had no similar imperfections).
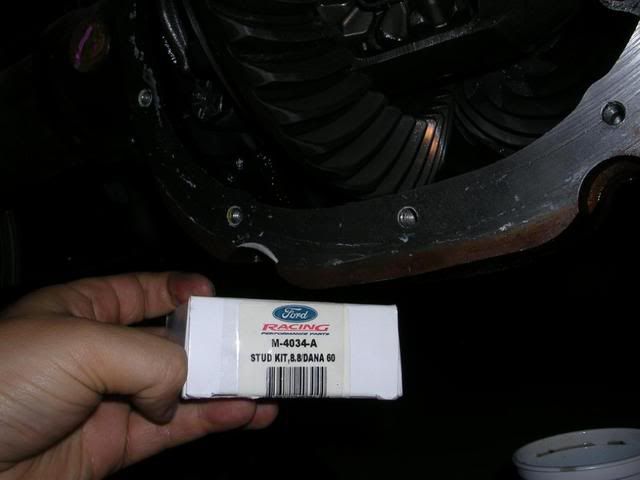
Bearing cap stud kit
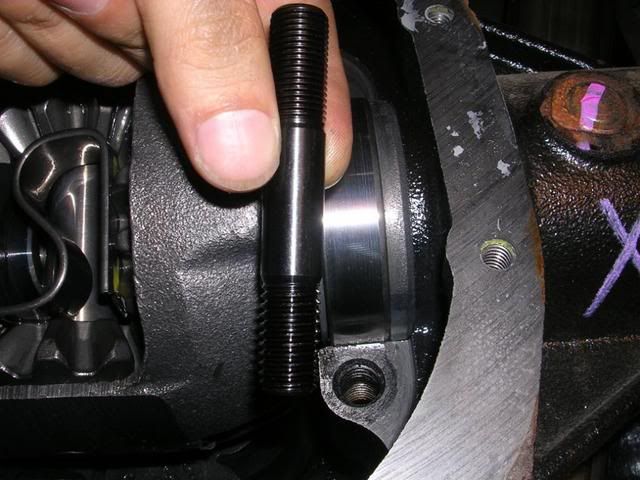
Stud has coarse and fine threads. The coarse side should be threaded into the bearing housing "finger tight" according to the FRPP hotline technician I spole with.
The bearing cap bolts are in place
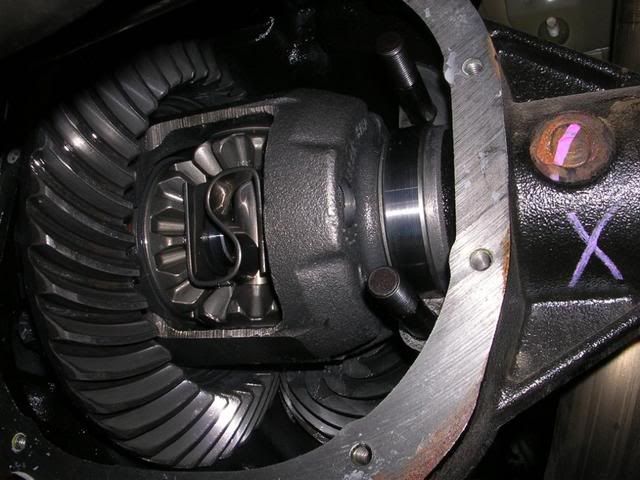
The bearing cap is back in place and after the washer is put in place, the nut is treaded ontothe bolt (don't forget the washers!).
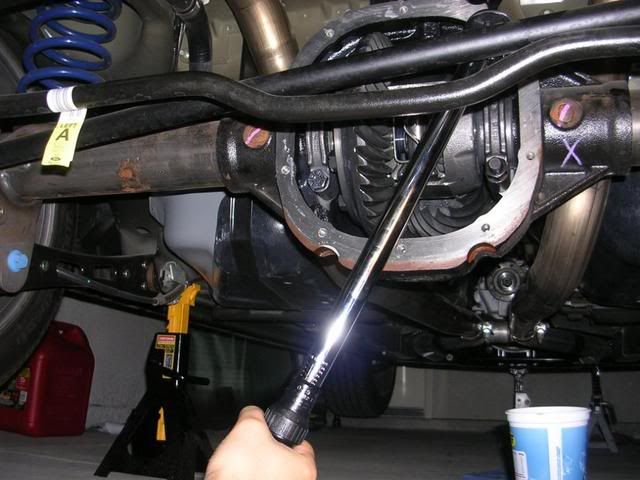
The bearing cap stud nuts are torqued to 80 ft-lb according to the FRPP technician.
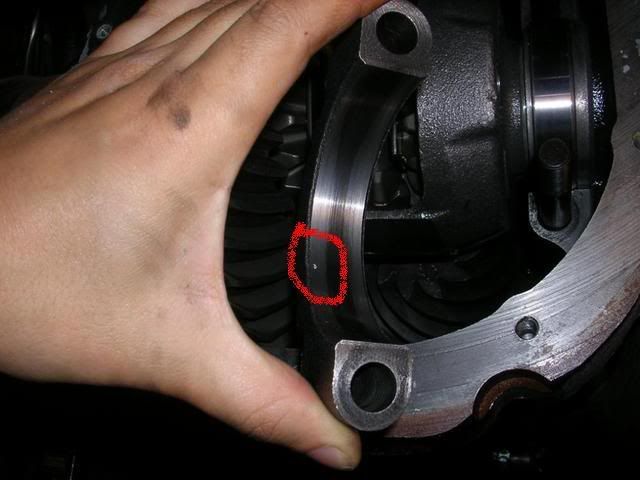
I removed any silicone sealant left on the differential mating surface and wiped it down with alcohol. Ford Racing includes a paper gasket in the box with the girdle but it evidently is widely known outside of the paper gasket factory thatpaper gasketsinvariably leak. I could have used silicone gasket maker butI decided to trythe rubberized steel gasket mentioned by Moosestang.
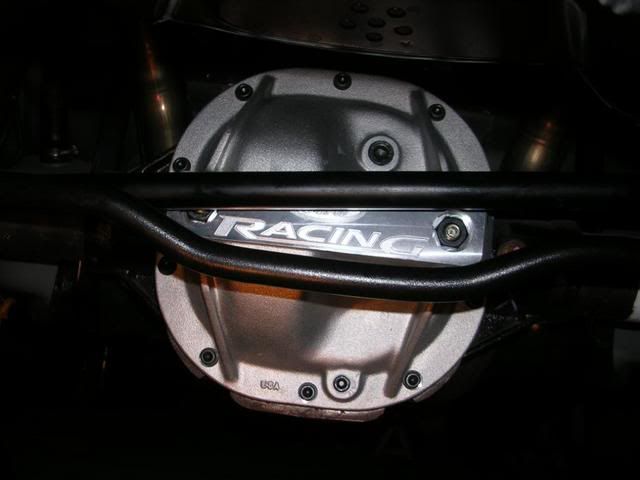
Although the still attached panhard bar had allowed enough clearance to remove the stock differential cover I was unable place theFRPP girdle in position.So Iremoved the passenger side side panhard barbolt and while leaving the drivers side bolt attached I rotated the bar downward to better access to the differential. I prepared the FRPP girdle by removing the fill hole plug, backing out the two load bolts. I applied teflon sealant to the load bolts and drain hole plug.
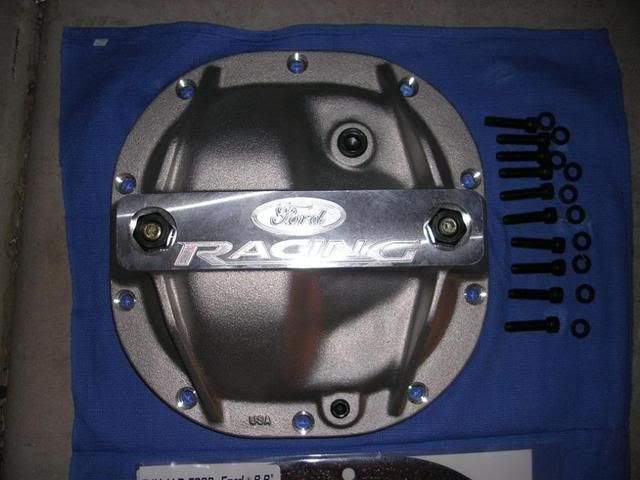
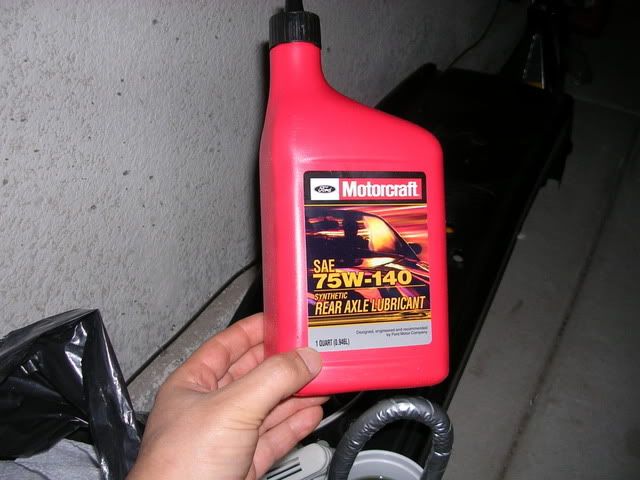
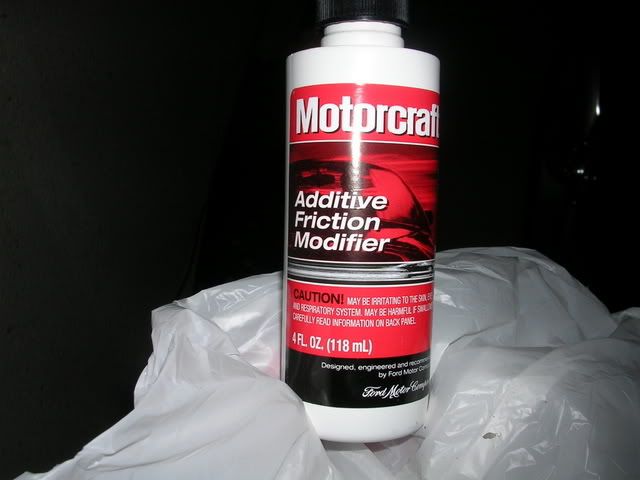
FRPP girdle installation instructions recommendthegirdle-to-differential bolts be torqued to 20 to 25 ft-lbbutthe rubberized girdlegasket instructions recommend a 15 ft-lb pass followed by a final torque of 30 ft-lb. Then the load bolts are finger tightend untilresistanceis encounteredindicating that the load bolt has encountered the bearing cap.Then the load bolts are then tightened to 8 ft with an Allen wranch attachment. The jam nuts on the outside of the load bolts are then tightened to 30 ft-lb. Iadded three quarts ofFord synthetic gear oil and one bottle of friction modifier by squeezing the oil directly from the oil containers into hole in the upper portion of the girdle..
I replaced the girdle fill hole plug after smearing some teflon sealant on the threads. All done!
I performed the installwith jackstands under the unibody in front of whereeach LCA attaches. The rear axle wasallowed to hang down.
Removed stock thin walled rear differential cover bolts, 13mm, and cover. No acess for draining or filling gear oil.
Rear diff, cover removed by gently prying with flathead screwdriver. Luckily didn't mar the mating surface. Glorious gears are revealed. Oil was grey with suspended metal particles and stinky! I'm not sure if lint contamination in the gear oil is important or not but I used a shop rag that appeared to be low-lint to remove the oil sequested in recessed sections at the bottom of the differental.
Removed the passenger side bearing cap bolts, 19mm, and bearing cap
The bearing contact surface of the cap had a small pit (the drivers side cap had no similar imperfections).
Bearing cap stud kit
Stud has coarse and fine threads. The coarse side should be threaded into the bearing housing "finger tight" according to the FRPP hotline technician I spole with.
The bearing cap bolts are in place
The bearing cap is back in place and after the washer is put in place, the nut is treaded ontothe bolt (don't forget the washers!).
The bearing cap stud nuts are torqued to 80 ft-lb according to the FRPP technician.
I removed any silicone sealant left on the differential mating surface and wiped it down with alcohol. Ford Racing includes a paper gasket in the box with the girdle but it evidently is widely known outside of the paper gasket factory thatpaper gasketsinvariably leak. I could have used silicone gasket maker butI decided to trythe rubberized steel gasket mentioned by Moosestang.
Although the still attached panhard bar had allowed enough clearance to remove the stock differential cover I was unable place theFRPP girdle in position.So Iremoved the passenger side side panhard barbolt and while leaving the drivers side bolt attached I rotated the bar downward to better access to the differential. I prepared the FRPP girdle by removing the fill hole plug, backing out the two load bolts. I applied teflon sealant to the load bolts and drain hole plug.
FRPP girdle installation instructions recommendthegirdle-to-differential bolts be torqued to 20 to 25 ft-lbbutthe rubberized girdlegasket instructions recommend a 15 ft-lb pass followed by a final torque of 30 ft-lb. Then the load bolts are finger tightend untilresistanceis encounteredindicating that the load bolt has encountered the bearing cap.Then the load bolts are then tightened to 8 ft with an Allen wranch attachment. The jam nuts on the outside of the load bolts are then tightened to 30 ft-lb. Iadded three quarts ofFord synthetic gear oil and one bottle of friction modifier by squeezing the oil directly from the oil containers into hole in the upper portion of the girdle..
I replaced the girdle fill hole plug after smearing some teflon sealant on the threads. All done!
 11-03-2007, 12:49 PM
#4
3rd Gear Member

Join Date: Sep 2005
Location: CA
Posts: 600
So that is what the stud kit was for. I guess I should have asked here. I bought them because where I got them it said it was recommended. I couldn't figure out what they were for so I didn't replace them. I still have them, so if I ever decide to get in there again, I can install them then. Unless they are important. I don't have alot of mods, and it is my DD so I don't hammer it all the time.
 05-05-2008, 12:09 PM
#6
4th Gear Member
Join Date: Oct 2007
Location: Harrisburg PA
Posts: 1,778
Very nice write-up, thank you. These are so helpful.
So, the stock cover has no drain or input hole. I understand how to drain it, just remove the cover. But how the heck do you fill the stock one?
So, the stock cover has no drain or input hole. I understand how to drain it, just remove the cover. But how the heck do you fill the stock one?
05-06-2008, 02:39 AM
#8
1st Gear Member
Thread Starter
Join Date: Mar 2007
Location: WA
Posts: 109
fosman, I'm not sure if the bolt is single use or not but I reused it. I don't remember if I torqued it to spec or to my always fallible 'torque sense'. The rubberized steel gasket works great, by the way. Haven't had a drop of gear oil slip past it.
05-06-2008, 07:41 AM
#9
4th Gear Member
Join Date: Oct 2007
Location: Harrisburg PA
Posts: 1,778
ORIGINAL: fosman77
There's a plug on the front side or the pumpkin. Fill till it runs out.
There's a plug on the front side or the pumpkin. Fill till it runs out.
Question for YTIX - can you tell us a little more about this gasket, like wear you get it from and cost. TIA.
