
Shaftmasters 3.5" Driveshaft Install (w/pics)
 01-11-2008, 08:22 PM
#11
Moderator
Join Date: May 2006
Location: Michigan again!
Posts: 8,576
ORIGINAL: mygt500
Considering I live 20 minutes away from Shaftmasters I should buy from them! Thanks for the write up and do they do installs.....LOL J/K (I already checked the site). J
J
Considering I live 20 minutes away from Shaftmasters I should buy from them! Thanks for the write up and do they do installs.....LOL J/K (I already checked the site).
J

 09-26-2008, 02:39 PM
#14
1st Gear Member

Join Date: Sep 2008
Location: British Columbia
Posts: 83
Is there a different manufacturer for the flange that goes on the pinion flange to make it 4bolt compatible? I dont really like how on the one that is shown the threaded holes are close to the holes that are countersunk. Is there a reason they have to be so close?
Anyways, kickass walkthrough
Anyways, kickass walkthrough
11-10-2012, 02:05 PM
#17
5th Gear Member
Join Date: Mar 2006
Location: ATL
Posts: 2,955
Thanks for this. I followed most of your guide and did my 2011 GT DS today. Here's my story.
Had the car up in the air at 11:00am. On the ground with garage cleaned back up at 3:20pm. This included a 15min run to autozone and me having to fabricate an aluminum pinion flange puller since nothing autozone had would work. Also included me re-torquing all my lca relation bracket bolts since I just used the impact to do it earlier in the week (I knew I was coming back for the DS install).
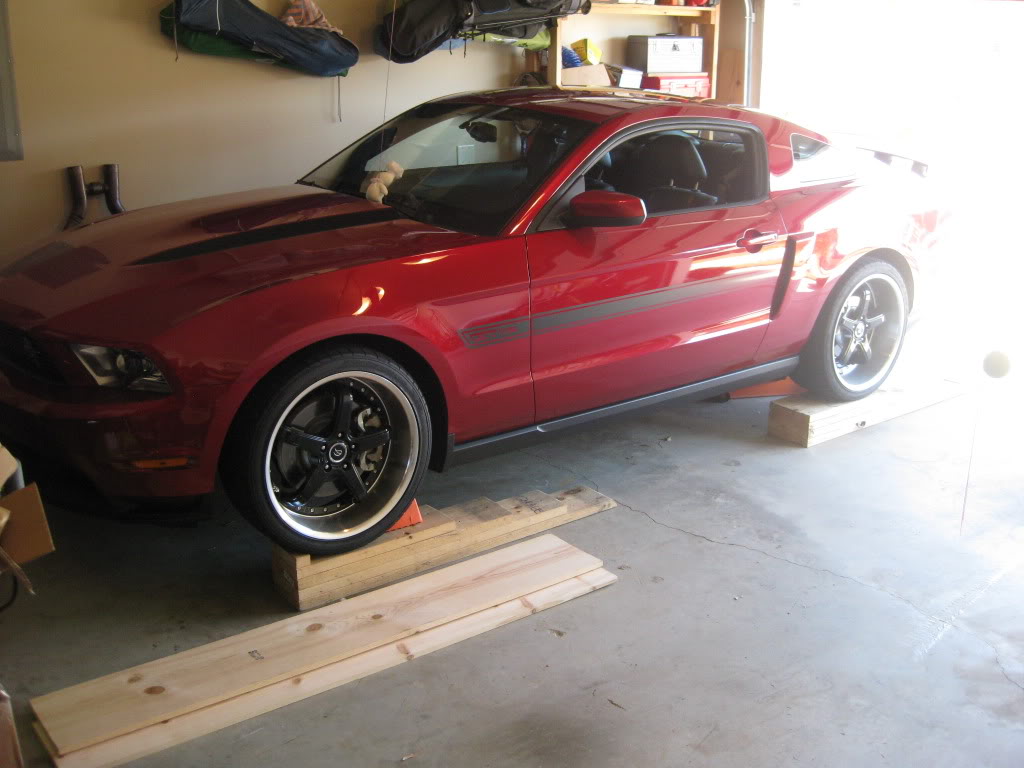
Here's my ramp setup. Wooden ramps under all wheels (drove it up like that) then I jacked up the rear axle so I could spin the tires.
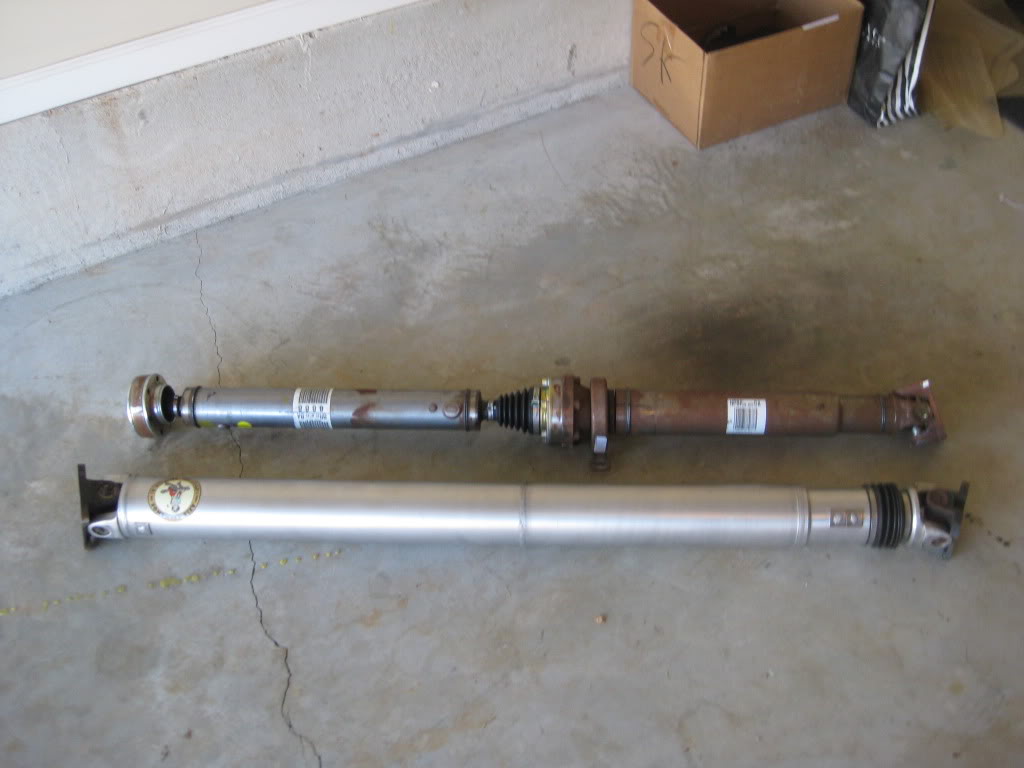
Old and new (to me) drive shafts.
This is honestly an easy job as long as you have decent strength and cardio AND aren't overweight. I'm 6' 180lbs (with a gut) and can slide under the car relatively easily. Removing the pinion flange was the only hard part (over an hour spent here) and that's because I could not find the proper tool and had to make one. Once that was done it took less than 2 mins to remove it. Getting the pinion nut off was not that bad (less than 5 mins). My electric ryobi impact was not up to the task so I had to use my 18" breaker bar which did take every ounce of muscle I had in that tight confinement. It broke loose after 2 tries. Then I used the impact for the remaining threads. I did spray it with PB Blaster and let that sit for over 5 minutes while I cleaned the threads of all the DS bolts I was reusing.
Oh, when you do get that pinion flange off, be quick with the replacement. It leaks the stink oil fast. I was ready, but bobbled a little bit.
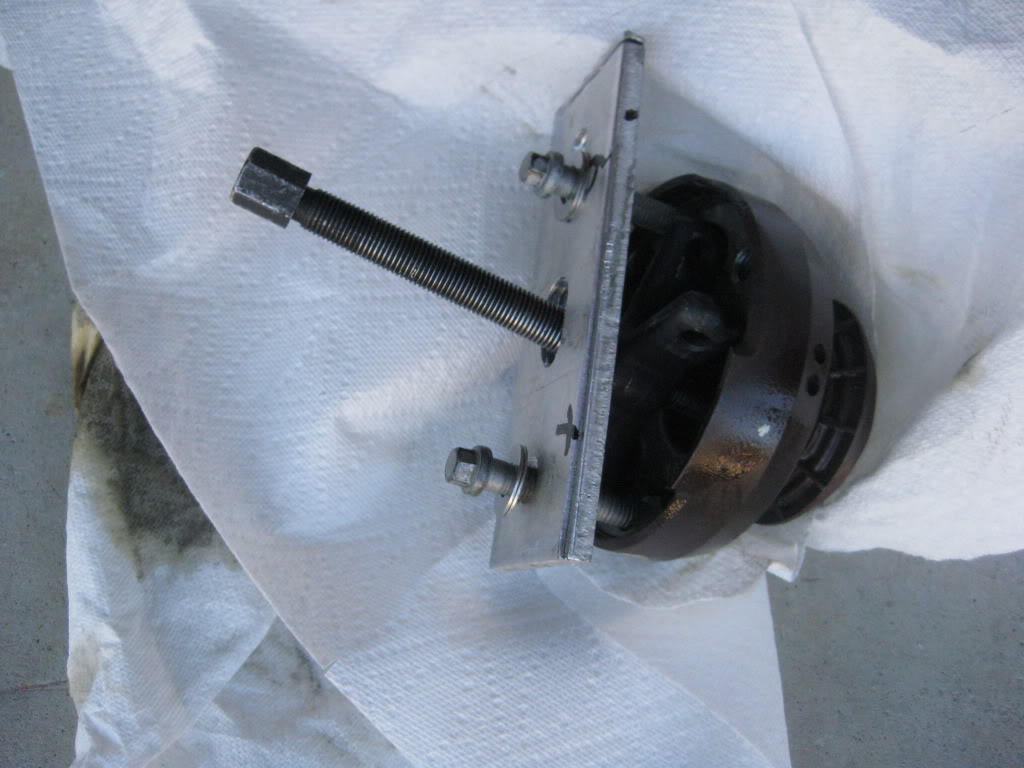
Here's a pic of my custom flange puller. It uses parts from the gear puller I rented from autozone.
Cardio comes in for all the times you have to do this sequence:
Crawl from under the car, loosen the hand brake (or put car in neutral), crawl under the car and spin the shaft, get back in the car and pull the hand brake (or put car in park), crawl back under the car and loosen/tighten the bolt.
I did that over 25-30 times.
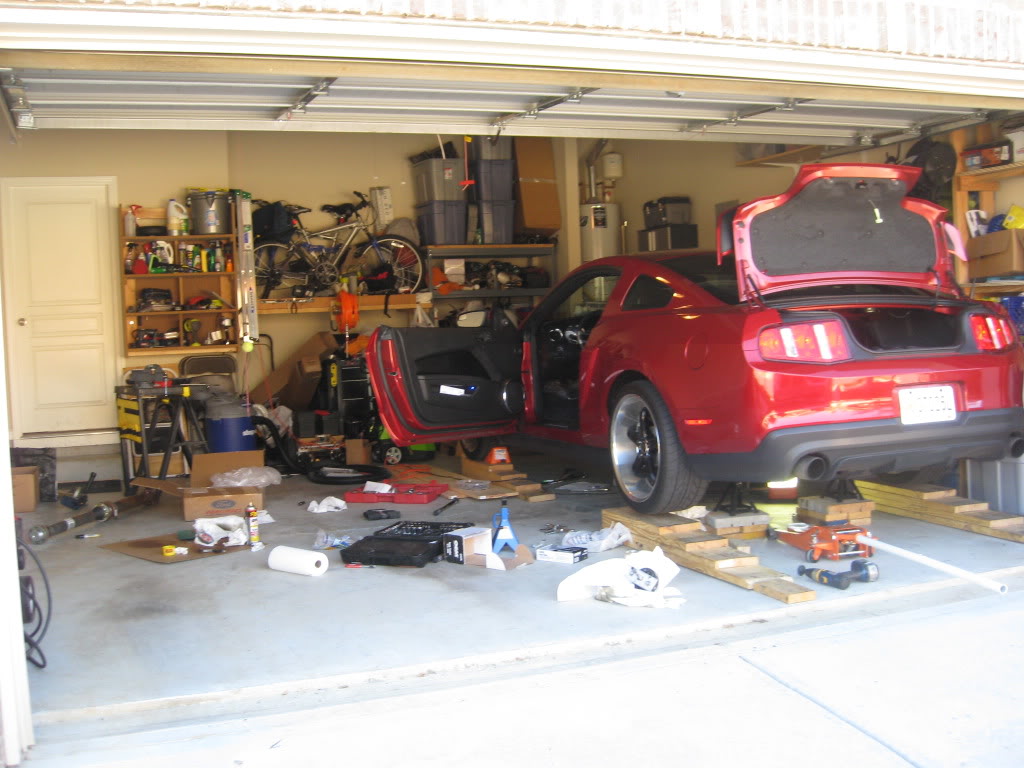
What my garage looked like as I was nearing the finish line.
Done.

I've been up to 90mph with no hint of vibration. Looking good so far.
Had the car up in the air at 11:00am. On the ground with garage cleaned back up at 3:20pm. This included a 15min run to autozone and me having to fabricate an aluminum pinion flange puller since nothing autozone had would work. Also included me re-torquing all my lca relation bracket bolts since I just used the impact to do it earlier in the week (I knew I was coming back for the DS install).
Here's my ramp setup. Wooden ramps under all wheels (drove it up like that) then I jacked up the rear axle so I could spin the tires.
Old and new (to me) drive shafts.
This is honestly an easy job as long as you have decent strength and cardio AND aren't overweight. I'm 6' 180lbs (with a gut) and can slide under the car relatively easily. Removing the pinion flange was the only hard part (over an hour spent here) and that's because I could not find the proper tool and had to make one. Once that was done it took less than 2 mins to remove it. Getting the pinion nut off was not that bad (less than 5 mins). My electric ryobi impact was not up to the task so I had to use my 18" breaker bar which did take every ounce of muscle I had in that tight confinement. It broke loose after 2 tries. Then I used the impact for the remaining threads. I did spray it with PB Blaster and let that sit for over 5 minutes while I cleaned the threads of all the DS bolts I was reusing.
Oh, when you do get that pinion flange off, be quick with the replacement. It leaks the stink oil fast. I was ready, but bobbled a little bit.
Here's a pic of my custom flange puller. It uses parts from the gear puller I rented from autozone.
Cardio comes in for all the times you have to do this sequence:
Crawl from under the car, loosen the hand brake (or put car in neutral), crawl under the car and spin the shaft, get back in the car and pull the hand brake (or put car in park), crawl back under the car and loosen/tighten the bolt.
I did that over 25-30 times.
What my garage looked like as I was nearing the finish line.
Done.
I've been up to 90mph with no hint of vibration. Looking good so far.
11-12-2012, 06:45 AM
#19
5th Gear Member
Join Date: Aug 2007
Location: Hollister, CA
Posts: 2,041
I did this mod a few weeks ago. I went with Shaftmaster 3.5 once piece DS. By far one of the best mods you could ever do. It really changes the driving experience and eliminates the clunk from the stock DS.
Did you notice the sticker on the stock DS, "Scrap if dropped".
Did you notice the sticker on the stock DS, "Scrap if dropped".


