
I installed my stripes! Here are my tips if you want to install them too.
 07-02-2008, 09:52 AM
#1
2nd Gear Member
Thread Starter

Join Date: Apr 2008
Location: MI
Posts: 231
I decided to write down some thoughts after doing my stripe install. I certainly learned alot. Check it out.
Tips for installing over the top, bumper to bumper, double racing stripes on an 05+ Mustang.
I did these in about 10 hours overall, but could do it quicker next time around. I did 10" wide, with 2" gap. The kit I used was Baltimore Street Mods kit. Cost was about $165 shipped. I recommend the kit, as it was very well cut in my opinion.
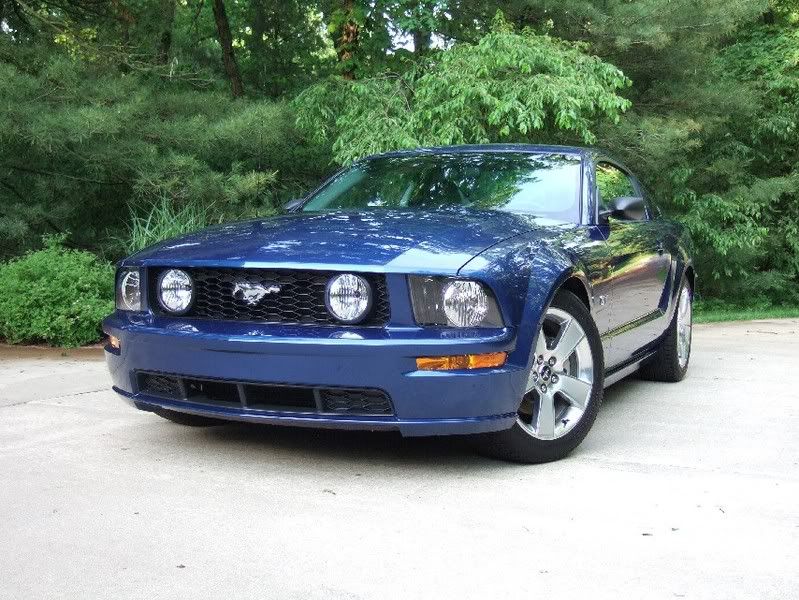
Here is mine before stripes:
BEFORE YOU START:

I recommend the BSM kit, but no matter what, make sure you use 3-m vinyl. It will make a difference in application, stretching, and durability over time. It is worth the money.
Apply them inside with the garage door closed. Do not open and close the garage doors during the application. Dirt and dust can get under the stripes easily and mess things up.
Proper lighting is necessary. Dim 100 watt bulbs are not enough.
Apply when it is more than 75F, but less than 90F. Too cold, and the stripes are not as flexible, too hot and the adhesive sets up too fast and the solution dries too quickly.
Car must be stone cold. NO heat from the engine, and not hot from sitting in the sun.
I had transfer tape on the roof and hood pieces. This prevents scratching the vinyl from careless squeegee-ing, and help prevent the vinyl stretching when pulling off the backing. I found it harder with the transfer tape and do not recommend it. It is a pain and not worth it. If you do have transfer tape, you will need to remove it after the stripes are dry (2-3 hours minimum), otherwise you will pull up the stripes. Even after a few hours you will still have to be very careful.
Make sure to clean the backside of panels where the material wraps around. The front and rear edge (underside) of the hood and trunk. Gook collects here and the material will not stick here if you don not clean it properly.
Here are the steps I took with tips. Your experience and techniques MAY be different, I am just passing along what I learned when doing mine.
1) Wash the vehicle with blue Dawn liquid (no other brand, no other color). It will strip all wax and do a very good cleaning. Take your time, get all the bugs, etc. Dry thoroughly. If the surface is not very smooth, you should do clay bar after washing it too. If for some reason you have a polymer sealant like I did (Rejex for example), it must be mechanically removed with a polish.
2) The spray solution is 20oz water, � tsp dishwash liquid, � tsp rubbing alcohol. Have 2 bottles ready (or else have more mixed up to pour into the sprayer). I used 3 batches during my install. Test your sprayer ahead of time. Nothing worse than having a crappy sprayer when you need it most.
3) Before cutting the pieces apart (they arrive in one long strip) mark the back of EACH piece for orientation and direction. I put arrows and words noting front, dr, pass, etc. Also note if they are Pass or Dr side pieces. This way when you cut them apart, you know how they sit on the car. This MAY not be obvious, many pieces look the same. Cut them all apart and lay them out where they go on the car. Do not set them on the floor or anywhere dirty, it will get under the stripes. You need to be paranoid about dirt and dust.


4) Locate the center of the roof, and mark it with 1.5inch wide tape on the front and rear edges (you do not need full length). Then do the same with the trunk, hood, and front bumper. Use the 3m green stuff or whatever else won't come off when wet with the solution (maybe test it). 3m blue stuff and regular masking tape comes off when you get it wet. MAKE SURE you have properly located the center. Measure a bunch of times.
5) Wash your hands, your helper (if you have one) too.
6) Wipe off the all panels one last time with a damp rag before you do each section. Then ALSO gently wipe the stripes (with the backing and all) gently with a lightly damp towel to get any dust or dirt off.
Start with the roof (do both pieces at the same time). Then the hood, then the rear trunk, then the bumpers. This way you move from easiest to hardest.
ROOF
Spray the roof with the solution until it is fully dripping wet. Plan on having dripping solution everywhere. Have a helper carefully peel off the backing SLOWLY and CAREFULLY. You each grab two corners and slowly step away from each other. Especially without transfer tape you need to be careful to NOT stretch the vinyl. Then the helper should spray the back of the vinyl before you set it down sticky side down on the roof. Both roof and vinyl is now very wet, set it down and slide it into place. Do the same for the 2nd piece. If it starts to not slide so easy, just lift up the end and spray generously under the stripe. Place the vinyl 1/4" off the tape you put down. There will be some overhang on the front and back, that's ok.
TAKE A BREATH. You do not need to rush. At any time, spray more solution and move it around. I found myself rushing for NO reason. Just relax and take your time.[/b]
Use the raw plastic squeegee to push the solution out. Start from the center and go to the sides and either end (see photo). Do not just go lengthwise, go from the center out the short way too. Start with very little pressure until most of the liquid and bubbles are out, then do it again with more pressure. Keep the top of the stripes wet so that the squeegee slides over the surface easily. When both stripes are 95% down, use a soft cloth and dry the area of the roof, avoiding the front and rear edges, you do not need fabric strands under the material. It should lay mostly flat, with only tiny wrinkles at the rear edge.

Go to the FRONT edge, gently push the squeegee between the seal and the roof next to the stripes. Then carefully slide the squeegee (still between the seal and roof) over, and slide the ends of the stripe into the place between the seal and roof. As you move across, continue until the whole stripe is down. At the front edge, wrap a small cloth around your finger, and rub down the front edge in the seal at at the corner. This will push it down (finger pressure) and pull out what solution you can from the area with the towel.


Now move to the back of the roof and with your fingers, gently fold the ends in the pocket between the roof and rear glass. It will not lay down. Gently use the squeegee, wedged against the glass, to squeegee out the little tail in that rear pocket between the rear edge of the roof, and the rear glass (see picture). If it does not stay down, go do another area and come back, some of the solution just needs to dry out. Use the finger wrapped in a cloth trick back here too, it will help dry the solution and make it stick.

This is a good time to tell you that you will have to take breaks from the difficult parts that won't lay down. For example, the hood was done except for the wrinkles at the front edge. I went ahead and did the trunk, then came back to the hood, because most of the solution had dried, allowing it to stick down.
TIP: I found the most effective TRICK for getting the wrinkles out was wrapping the cloth around my finger(s) or the squeegee. It quickly layed the wrinkles flat because it sucked up rest of the solution in all problem areas.[/b]
Wipe the whole roof down carefully, squeegee-ing out any remaining bubbles. I used the squeegee with a cloth over it, so it slid over the surface easily. When the top of the stripes and the squeegee are dry, it will not slide easily, and may scratch it.
The roof took me about 30 minutes total.
HOOD
Remove the washer nozzles: Open the hood, reach under the hood liner, squeeze the clip on each side of the nozzle, and push up through the hole with the hose still attached. You may need to push FORWARD a bit to get the nozzle to pop out. Now with the nozzle out with hose attached, twist the hose to nozzle and pull them apart. Save the nozzles for reinstallation later.
As with the roof, wipe the hood and un-applied stripes down with a damn cloth. Spray the hood with solution. Peel off the backing like described above, spray the stripe, and apply it to the hood. FIRST align the washer nozzle holes in the vinyl with those on the hood. Then keep the stripe gap constant and straight at the tip of the hood. Squeegee from the center like shown on the roof. Do the whole thing, leaving the rear edge hanging. The front edge will wrap around the corner, but will have wrinkles. I did the whole trunk, then cam back to the hood edges.

Rear hood edge: wrap it around the rear edge gently with your fingers. Then wrap your fingers around a cloth and push it down, mopping up the excess solution. As soon as the rest of the solution squeezes out, it will stick. Be careful to do this evenly (from the center out) so there are no wrinkles.
Front hood edge. Wrap the edge all the way around the hood. Carefully dry the area, not touching the sticky side of the stripe. Using the squeegee wrapped in a cloth, work the wrinkles one at a time using firm pressure from top to bottom. Move to the next wrinkle, come back to the first, and so on. The more solution you mop up with the cloth, the better it will stick. Some people use a hair dryer, but I was afraid to damage the vinyl, so I did not. Eventually you will have it mostly stuck down, and you can wrap the cloth around the underside where the end of the vinyl is, and use your fingers to stick it down. Be careful and take your time. If a hard crease starts as you are pushing it down, stop immediately as you could deform the vinyl permenantly.

The hood took me about 45 minutes, not including coming back to the front edge to wrap it around.
TRUNK:
I would recommend removing the 3rd brake light from the trunk. I did not and it would have made this process much easier.
Clean, spray, peel, spay, set on (just like above). Use your tape and the 3rd brake light as your guides. Top of the trunk is easy. When you have the piece in place squeegee the top down. Then carefully squeegee the area to the side and below of the 3rd brake light down. You WILL have lots of wrinkles at the sides and corners of the brake light opening. This is ok, it will work, I promise. Here is what mine looked like at this stage. Mostly flat except around the brake light opening.


With the squeegee wrapped in a cloth, slowly try to work out the wrinkles and wrap the edges. The material is very stretchy, it will lay flat and go into the corners. After a short time of this, move to using your fingers wrapped in the cloth. Wrap the flat top and bottom edges first. As you wrap the edge with your finger, the solution will squeeze out, and into the cloth. Each time you do it, more solution comes out, and it sticks better. Keep working in the corners using your cloth covered finger. You may have to go away for 20-30 minutes and come back to have it sit flat.
Front edge of trunk: Wrap the material around just like at the rear of the hood. The solution needs to be dry before it will stick. Use your fingers.
Faux gas cap area:
My Mustang has a honeycomb panel here, so I did NOT need to do it. I have no tips other than those techniques described above.
The whole trunk took me about 40 minutes, not including coming back to do the brake light area.
REAR BUMPER:
Clean, spray, peel, spray, set on (like above). Use the tape as your guide side to side, and start to squeegee when in position. Use the license frame opening also as a guide up down. Make sure the overlap into the opening is even including top and bottom. Squeegee the top first, then sides and below the license frame. Do not do the most bottom area below the body crease yet, we'll get to that in a minute. There WILL be wrinkles around the frame. You deal with these exactly like you did with the 3rd brake light. Just take your time and do some waiting until the solution is mostly dry and it will go fine.

Below the license frame is a sharp crease in the body. Use the squeegee to hold the vinyl into the crack while laying the material down below it. This way you have to stretch no material into the crease later. Underneath the bumper you will have a few wrinkles you will have to remove using the cloth over squeegee technique.
The crease in the rear bumper is not perfectly straight and you will have some material bridging across. I had to wait until the next day until all the solution was gone to make it stick. I did use one finger covered with a dry cloth to get it most of the way (as you push across the crease, it pushes the solution out the end of the crease and into the cloth). Doing this over and over will get it down.
Rear bumper took me about 45 minutes. By this time I was getting the technique down pretty good.
FRONT BUMPER:
I have no license frame, and my kit came in 2 pieces, one for the top of the bumper, and another for the vertical part. I did the top first, but I think I was supposed to do it the other way around. The top bumper piece was the hardest part of the whole car. First clean, spray, peel, spray, and lay down the stripes as before. Line it up so the rear edge just BARELY goes under the front grill. If you were really motivated, you could remove the grill beforehand (which is a simple 5 minute job if you know how to do it). If the grill is in place. First get the stripe into place, squeegee the top parts to stick it mostly down. Then use a plastic trim stick, which is a plastic wedge tool you can buy at the auto parts store to gently make a gap between the grill and bumper to gently slide the material under. This was hard and required 2 fiber sticks on mine. Once under, I pushed the squeegee along the top rearward, so that the solution was squeezed out behind the grill. Then I gently pushed the squeegee in the tiny gap between the bumper and grill. Don't force this, but you can do it.
The front edge of the piece hanging down will have massive wrinkles. It looks impossible, but is not. Like the front of the hood, use the cloth covered squeegee to push down a little at a time. It took me 40 minutes plus, just for this spot. Take your time.
The lower front bumper pieces are quite easy and I had no wrinkles. The top edge overlapped the piece above, and the bottom edge tucked in-between the bumper and lower trim piece just like the grill above. These took me about 15 minutes
The chin piece was just like the rest. You will have wrinkles underneath that you have to push out with a cloth covered squeegee.
OTHER TIPS:
Go back over each area and look carefully for bubbles and gently re-squeegee the edges using the cloth covered squeegee. I found a bit of solution was left at the edges everywhere.
Do not forget to put the washer nozzles back on!
Go back about 15-30 minutes after you get wrinkles down, as they may pop back up. It is ok, just do them again.
The first sunny day after you are done, park it outside in the bright sun to help dry the leftover solution. Look for any areas which need to be pushed down like crevices and tight corners.
Do not wash your car even with plain water for at least a week.

Here are a few good outside pictures with the stripes on. I also did the rocker stripes at the same time as the roof, those were very easy using the same wet application method.


Tips for installing over the top, bumper to bumper, double racing stripes on an 05+ Mustang.
I did these in about 10 hours overall, but could do it quicker next time around. I did 10" wide, with 2" gap. The kit I used was Baltimore Street Mods kit. Cost was about $165 shipped. I recommend the kit, as it was very well cut in my opinion.
Here is mine before stripes:
BEFORE YOU START:
I recommend the BSM kit, but no matter what, make sure you use 3-m vinyl. It will make a difference in application, stretching, and durability over time. It is worth the money.
Apply them inside with the garage door closed. Do not open and close the garage doors during the application. Dirt and dust can get under the stripes easily and mess things up.
Proper lighting is necessary. Dim 100 watt bulbs are not enough.
Apply when it is more than 75F, but less than 90F. Too cold, and the stripes are not as flexible, too hot and the adhesive sets up too fast and the solution dries too quickly.
Car must be stone cold. NO heat from the engine, and not hot from sitting in the sun.
I had transfer tape on the roof and hood pieces. This prevents scratching the vinyl from careless squeegee-ing, and help prevent the vinyl stretching when pulling off the backing. I found it harder with the transfer tape and do not recommend it. It is a pain and not worth it. If you do have transfer tape, you will need to remove it after the stripes are dry (2-3 hours minimum), otherwise you will pull up the stripes. Even after a few hours you will still have to be very careful.
Make sure to clean the backside of panels where the material wraps around. The front and rear edge (underside) of the hood and trunk. Gook collects here and the material will not stick here if you don not clean it properly.
Here are the steps I took with tips. Your experience and techniques MAY be different, I am just passing along what I learned when doing mine.
1) Wash the vehicle with blue Dawn liquid (no other brand, no other color). It will strip all wax and do a very good cleaning. Take your time, get all the bugs, etc. Dry thoroughly. If the surface is not very smooth, you should do clay bar after washing it too. If for some reason you have a polymer sealant like I did (Rejex for example), it must be mechanically removed with a polish.
2) The spray solution is 20oz water, � tsp dishwash liquid, � tsp rubbing alcohol. Have 2 bottles ready (or else have more mixed up to pour into the sprayer). I used 3 batches during my install. Test your sprayer ahead of time. Nothing worse than having a crappy sprayer when you need it most.
3) Before cutting the pieces apart (they arrive in one long strip) mark the back of EACH piece for orientation and direction. I put arrows and words noting front, dr, pass, etc. Also note if they are Pass or Dr side pieces. This way when you cut them apart, you know how they sit on the car. This MAY not be obvious, many pieces look the same. Cut them all apart and lay them out where they go on the car. Do not set them on the floor or anywhere dirty, it will get under the stripes. You need to be paranoid about dirt and dust.
4) Locate the center of the roof, and mark it with 1.5inch wide tape on the front and rear edges (you do not need full length). Then do the same with the trunk, hood, and front bumper. Use the 3m green stuff or whatever else won't come off when wet with the solution (maybe test it). 3m blue stuff and regular masking tape comes off when you get it wet. MAKE SURE you have properly located the center. Measure a bunch of times.
5) Wash your hands, your helper (if you have one) too.
6) Wipe off the all panels one last time with a damp rag before you do each section. Then ALSO gently wipe the stripes (with the backing and all) gently with a lightly damp towel to get any dust or dirt off.
Start with the roof (do both pieces at the same time). Then the hood, then the rear trunk, then the bumpers. This way you move from easiest to hardest.
ROOF
Spray the roof with the solution until it is fully dripping wet. Plan on having dripping solution everywhere. Have a helper carefully peel off the backing SLOWLY and CAREFULLY. You each grab two corners and slowly step away from each other. Especially without transfer tape you need to be careful to NOT stretch the vinyl. Then the helper should spray the back of the vinyl before you set it down sticky side down on the roof. Both roof and vinyl is now very wet, set it down and slide it into place. Do the same for the 2nd piece. If it starts to not slide so easy, just lift up the end and spray generously under the stripe. Place the vinyl 1/4" off the tape you put down. There will be some overhang on the front and back, that's ok.
TAKE A BREATH. You do not need to rush. At any time, spray more solution and move it around. I found myself rushing for NO reason. Just relax and take your time.[/b]
Use the raw plastic squeegee to push the solution out. Start from the center and go to the sides and either end (see photo). Do not just go lengthwise, go from the center out the short way too. Start with very little pressure until most of the liquid and bubbles are out, then do it again with more pressure. Keep the top of the stripes wet so that the squeegee slides over the surface easily. When both stripes are 95% down, use a soft cloth and dry the area of the roof, avoiding the front and rear edges, you do not need fabric strands under the material. It should lay mostly flat, with only tiny wrinkles at the rear edge.
Go to the FRONT edge, gently push the squeegee between the seal and the roof next to the stripes. Then carefully slide the squeegee (still between the seal and roof) over, and slide the ends of the stripe into the place between the seal and roof. As you move across, continue until the whole stripe is down. At the front edge, wrap a small cloth around your finger, and rub down the front edge in the seal at at the corner. This will push it down (finger pressure) and pull out what solution you can from the area with the towel.
Now move to the back of the roof and with your fingers, gently fold the ends in the pocket between the roof and rear glass. It will not lay down. Gently use the squeegee, wedged against the glass, to squeegee out the little tail in that rear pocket between the rear edge of the roof, and the rear glass (see picture). If it does not stay down, go do another area and come back, some of the solution just needs to dry out. Use the finger wrapped in a cloth trick back here too, it will help dry the solution and make it stick.
This is a good time to tell you that you will have to take breaks from the difficult parts that won't lay down. For example, the hood was done except for the wrinkles at the front edge. I went ahead and did the trunk, then came back to the hood, because most of the solution had dried, allowing it to stick down.
TIP: I found the most effective TRICK for getting the wrinkles out was wrapping the cloth around my finger(s) or the squeegee. It quickly layed the wrinkles flat because it sucked up rest of the solution in all problem areas.[/b]
Wipe the whole roof down carefully, squeegee-ing out any remaining bubbles. I used the squeegee with a cloth over it, so it slid over the surface easily. When the top of the stripes and the squeegee are dry, it will not slide easily, and may scratch it.
The roof took me about 30 minutes total.
HOOD
Remove the washer nozzles: Open the hood, reach under the hood liner, squeeze the clip on each side of the nozzle, and push up through the hole with the hose still attached. You may need to push FORWARD a bit to get the nozzle to pop out. Now with the nozzle out with hose attached, twist the hose to nozzle and pull them apart. Save the nozzles for reinstallation later.
As with the roof, wipe the hood and un-applied stripes down with a damn cloth. Spray the hood with solution. Peel off the backing like described above, spray the stripe, and apply it to the hood. FIRST align the washer nozzle holes in the vinyl with those on the hood. Then keep the stripe gap constant and straight at the tip of the hood. Squeegee from the center like shown on the roof. Do the whole thing, leaving the rear edge hanging. The front edge will wrap around the corner, but will have wrinkles. I did the whole trunk, then cam back to the hood edges.
Rear hood edge: wrap it around the rear edge gently with your fingers. Then wrap your fingers around a cloth and push it down, mopping up the excess solution. As soon as the rest of the solution squeezes out, it will stick. Be careful to do this evenly (from the center out) so there are no wrinkles.
Front hood edge. Wrap the edge all the way around the hood. Carefully dry the area, not touching the sticky side of the stripe. Using the squeegee wrapped in a cloth, work the wrinkles one at a time using firm pressure from top to bottom. Move to the next wrinkle, come back to the first, and so on. The more solution you mop up with the cloth, the better it will stick. Some people use a hair dryer, but I was afraid to damage the vinyl, so I did not. Eventually you will have it mostly stuck down, and you can wrap the cloth around the underside where the end of the vinyl is, and use your fingers to stick it down. Be careful and take your time. If a hard crease starts as you are pushing it down, stop immediately as you could deform the vinyl permenantly.
The hood took me about 45 minutes, not including coming back to the front edge to wrap it around.
TRUNK:
I would recommend removing the 3rd brake light from the trunk. I did not and it would have made this process much easier.
Clean, spray, peel, spay, set on (just like above). Use your tape and the 3rd brake light as your guides. Top of the trunk is easy. When you have the piece in place squeegee the top down. Then carefully squeegee the area to the side and below of the 3rd brake light down. You WILL have lots of wrinkles at the sides and corners of the brake light opening. This is ok, it will work, I promise. Here is what mine looked like at this stage. Mostly flat except around the brake light opening.
With the squeegee wrapped in a cloth, slowly try to work out the wrinkles and wrap the edges. The material is very stretchy, it will lay flat and go into the corners. After a short time of this, move to using your fingers wrapped in the cloth. Wrap the flat top and bottom edges first. As you wrap the edge with your finger, the solution will squeeze out, and into the cloth. Each time you do it, more solution comes out, and it sticks better. Keep working in the corners using your cloth covered finger. You may have to go away for 20-30 minutes and come back to have it sit flat.
Front edge of trunk: Wrap the material around just like at the rear of the hood. The solution needs to be dry before it will stick. Use your fingers.
Faux gas cap area:
My Mustang has a honeycomb panel here, so I did NOT need to do it. I have no tips other than those techniques described above.
The whole trunk took me about 40 minutes, not including coming back to do the brake light area.
REAR BUMPER:
Clean, spray, peel, spray, set on (like above). Use the tape as your guide side to side, and start to squeegee when in position. Use the license frame opening also as a guide up down. Make sure the overlap into the opening is even including top and bottom. Squeegee the top first, then sides and below the license frame. Do not do the most bottom area below the body crease yet, we'll get to that in a minute. There WILL be wrinkles around the frame. You deal with these exactly like you did with the 3rd brake light. Just take your time and do some waiting until the solution is mostly dry and it will go fine.
Below the license frame is a sharp crease in the body. Use the squeegee to hold the vinyl into the crack while laying the material down below it. This way you have to stretch no material into the crease later. Underneath the bumper you will have a few wrinkles you will have to remove using the cloth over squeegee technique.
The crease in the rear bumper is not perfectly straight and you will have some material bridging across. I had to wait until the next day until all the solution was gone to make it stick. I did use one finger covered with a dry cloth to get it most of the way (as you push across the crease, it pushes the solution out the end of the crease and into the cloth). Doing this over and over will get it down.
Rear bumper took me about 45 minutes. By this time I was getting the technique down pretty good.
FRONT BUMPER:
I have no license frame, and my kit came in 2 pieces, one for the top of the bumper, and another for the vertical part. I did the top first, but I think I was supposed to do it the other way around. The top bumper piece was the hardest part of the whole car. First clean, spray, peel, spray, and lay down the stripes as before. Line it up so the rear edge just BARELY goes under the front grill. If you were really motivated, you could remove the grill beforehand (which is a simple 5 minute job if you know how to do it). If the grill is in place. First get the stripe into place, squeegee the top parts to stick it mostly down. Then use a plastic trim stick, which is a plastic wedge tool you can buy at the auto parts store to gently make a gap between the grill and bumper to gently slide the material under. This was hard and required 2 fiber sticks on mine. Once under, I pushed the squeegee along the top rearward, so that the solution was squeezed out behind the grill. Then I gently pushed the squeegee in the tiny gap between the bumper and grill. Don't force this, but you can do it.
The front edge of the piece hanging down will have massive wrinkles. It looks impossible, but is not. Like the front of the hood, use the cloth covered squeegee to push down a little at a time. It took me 40 minutes plus, just for this spot. Take your time.
The lower front bumper pieces are quite easy and I had no wrinkles. The top edge overlapped the piece above, and the bottom edge tucked in-between the bumper and lower trim piece just like the grill above. These took me about 15 minutes
The chin piece was just like the rest. You will have wrinkles underneath that you have to push out with a cloth covered squeegee.
OTHER TIPS:
Go back over each area and look carefully for bubbles and gently re-squeegee the edges using the cloth covered squeegee. I found a bit of solution was left at the edges everywhere.
Do not forget to put the washer nozzles back on!
Go back about 15-30 minutes after you get wrinkles down, as they may pop back up. It is ok, just do them again.
The first sunny day after you are done, park it outside in the bright sun to help dry the leftover solution. Look for any areas which need to be pushed down like crevices and tight corners.
Do not wash your car even with plain water for at least a week.
Here are a few good outside pictures with the stripes on. I also did the rocker stripes at the same time as the roof, those were very easy using the same wet application method.
Last edited by pnut; 02-09-2009 at 10:20 AM.
 07-02-2008, 10:09 AM
#5
dude that looks great, nice write up, i did mine about 2 weeks ago too..took about 12 hours...probally i can do them in half the time now, however i think its a pain in the ***...
07-02-2008, 10:12 AM
#6
CSMG Moderator
Join Date: Jan 2008
Location: Fort Smith, Arkansas
Posts: 1,729
I tried to redo my stripes yesterday, and had a pain with them. How do I remove the stripe from the transfer tape? Whenever I go to remove it, it stretches the stripes, and makes them look awful.
Any tips on that?
Any tips on that?
07-02-2008, 10:16 AM
#7
2nd Gear Member
Thread Starter
Join Date: Apr 2008
Location: MI
Posts: 231
ORIGINAL: boochy
I tried to redo my stripes yesterday, and had a pain with them. How do I remove the stripe from the transfer tape? Whenever I go to remove it, it stretches the stripes, and makes them look awful.
Any tips on that?
I tried to redo my stripes yesterday, and had a pain with them. How do I remove the stripe from the transfer tape? Whenever I go to remove it, it stretches the stripes, and makes them look awful.
Any tips on that?
THEN after the stripes are dry, you spray the top of the transfer tape with water, soak them. Let it sit for 10-15 minutes to let the transfer tape get soft and goey. Then carefully come back and pull the tape off. Pull 180 degrees, back on itself. Carefull hold the vinyl in place as it will want to lift up. after you get it started, it should be easy. If it pulls the vinyl up, the paper is not wet enough, or the stripes are not dry enough to the surface.
07-02-2008, 10:43 AM
#8
5th Gear Member
Join Date: Jun 2006
Location: Sterling Heights, MI
Posts: 3,792
ORIGINAL: pnut
I decided to write down some thoughts after doing my stripe install. I certainly learned alot. Check it out.
I decided to write down some thoughts after doing my stripe install. I certainly learned alot. Check it out.
Where are you located in Michigan?
Have you seen the thread about the Port Huron Cruise. A bunch of metro Detroit area guys/gals are meeting up to cruise up to Port Huron. We have reserved parking at the Ford dealer up there. Take a look at the link below.
https://mustangforums.com/m_4679541/tm.htm
