

 11-04-2015, 12:17 PM
Last edit by: IB Advertising
See related guides and technical advice from our community experts:
Browse all: Powertrain Guides
- Ford Mustang Gt 1996 to 2004: Fuel System Diagnostic Guide
Guide to diagnose trouble and recommended solutions
Browse all: Powertrain Guides

GT500 fuel pumps DIY w/ Pictures!
12-14-2008, 12:53 PM
#1
5th Gear Member
Thread Starter
Join Date: Aug 2007
Location: Lakeland/Mulberry FL
Posts: 2,263
3 hours for install, not too hard with basic hand tools, nothing special needed. Ford has a pretty good write up on this but they dont cover the small details and a few tricks to make it go easy.
Good ideal to do this with a empty tank unless you like the smell of gas. I had less than a inch of fuel accross the bottom of the tank when my gauge was on empty.
You will notice the BAP in the trunk, I installed this prior to the new pumps and removed it when the new pumps went in, I should not need it at this point.
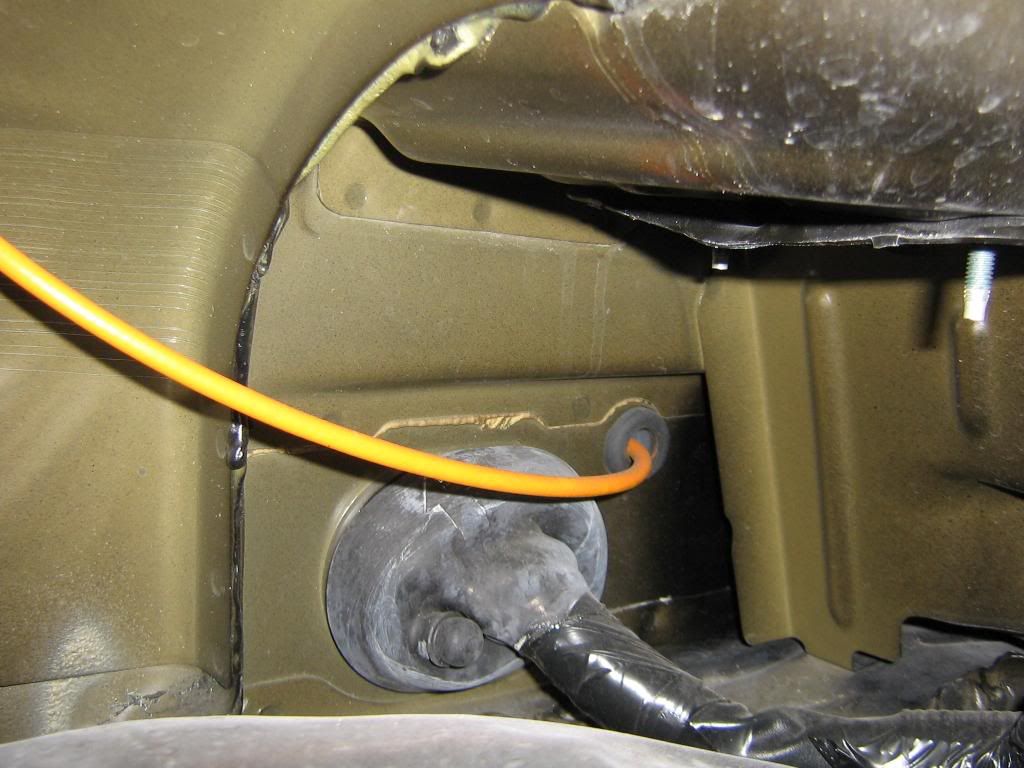
Our fuel tanks are made up of 2 sections because our driveshaft and exhaust running thru the tank, we are only dealing with the driver side pump and hat.
Start with jacking up the front passenger side of the car. If you have to use a ramp like i do,you want to make sure you do this first before pulling the fuel pump relay.
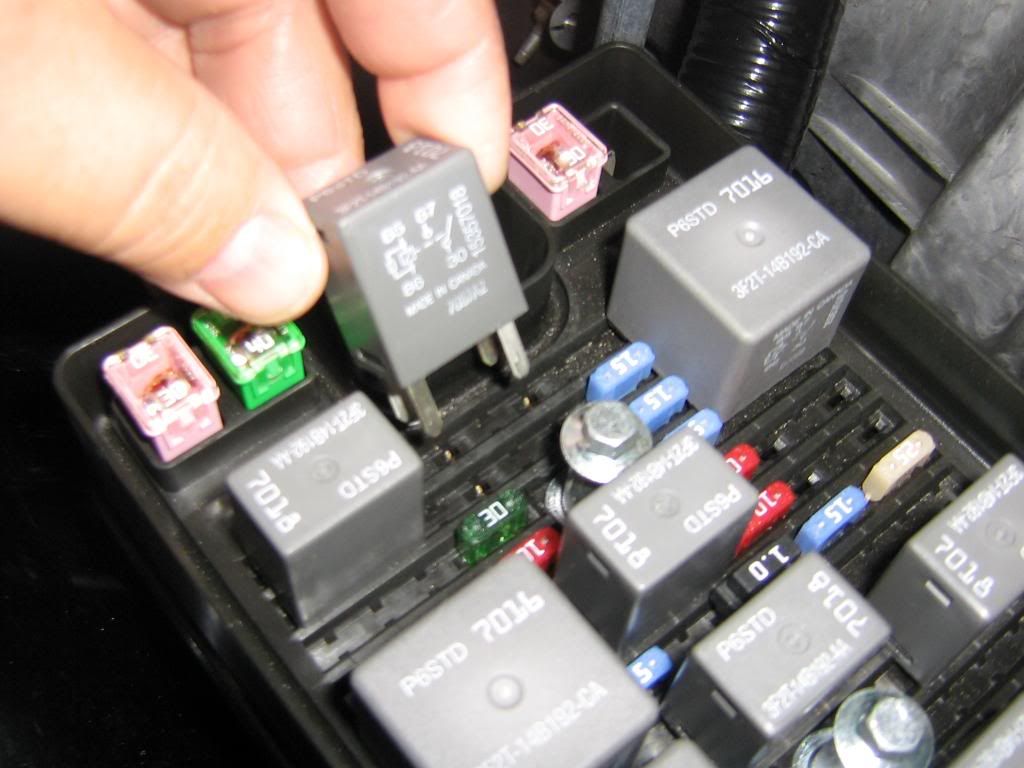
With the car jacked up, pull relay 21 under the hood, this should kill the fuel pump. Crank the engine over to make sure,the car should not start. If it does start, then it should die quickly and not restart.

Take out the rear seat by looking at the front bottom of the seat and just pushing in the plastic clips, it comes out very easy, There is one clip on each side.
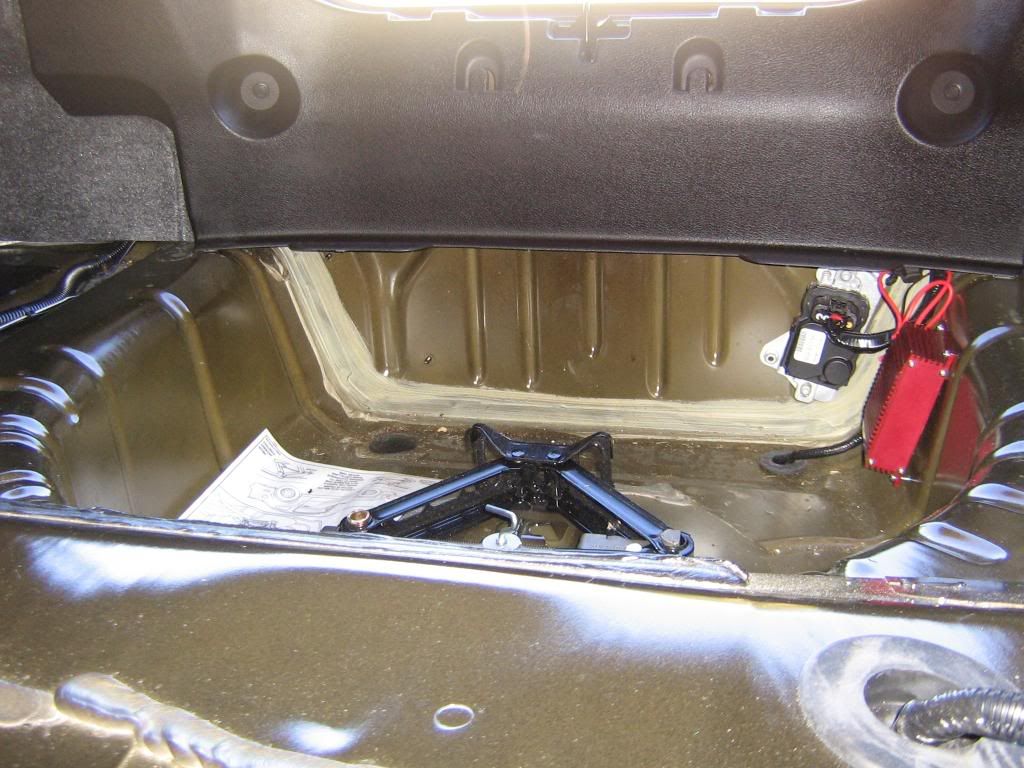
Strip down the rear, pull the panel out and the spare tire.
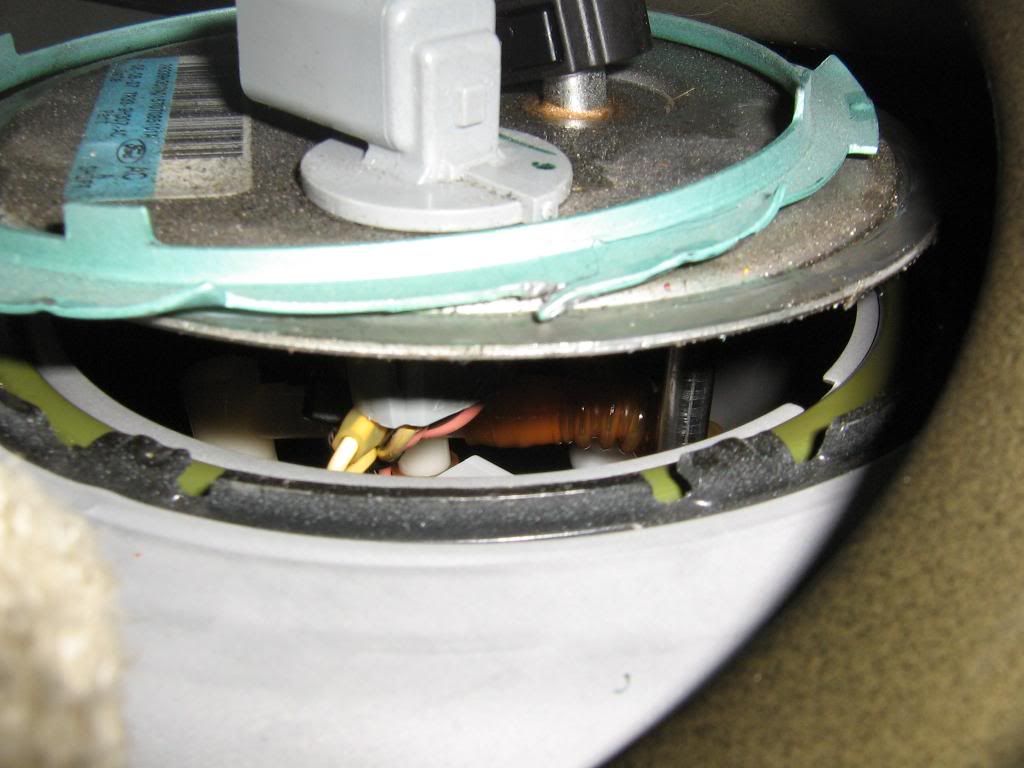
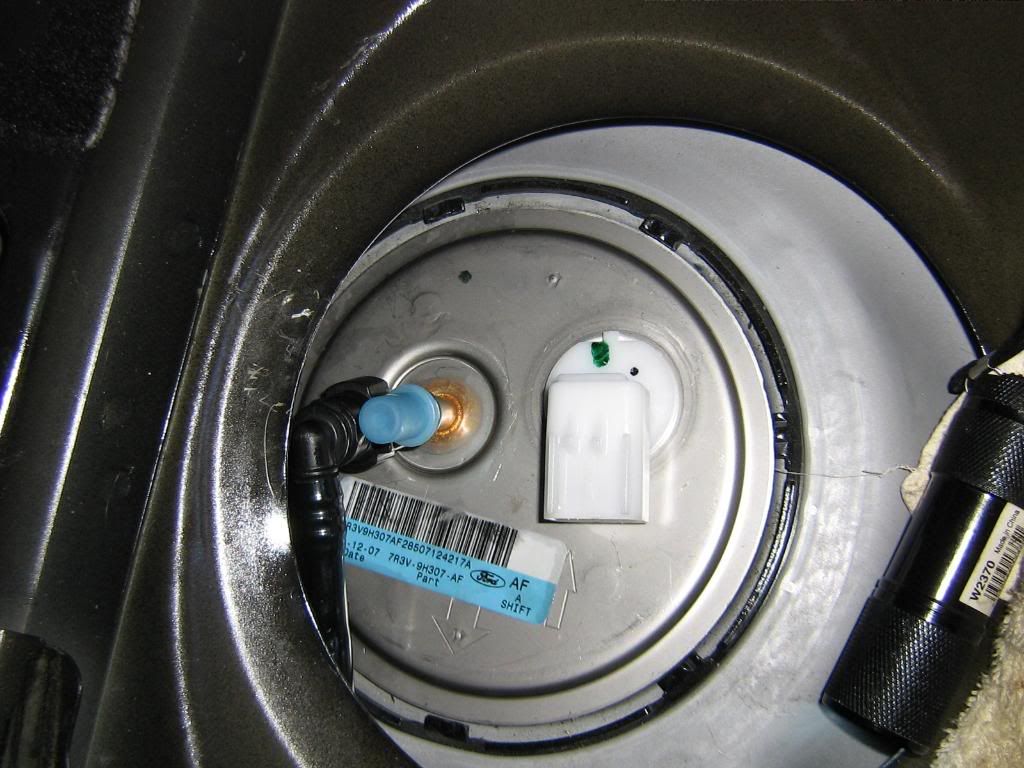
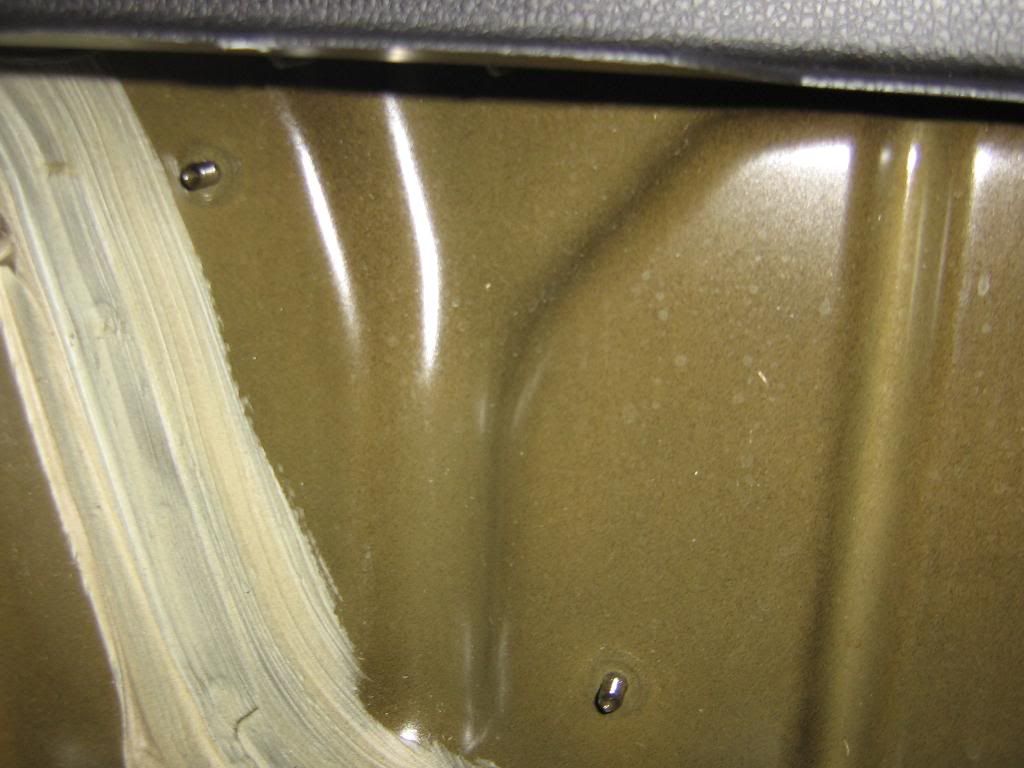
Heres what the fuel pump cover looks like soon as you pull the seat out, there is one on the driver and one on the passenger side, we are only dealing with the driver side pump. This cover just pulls off.
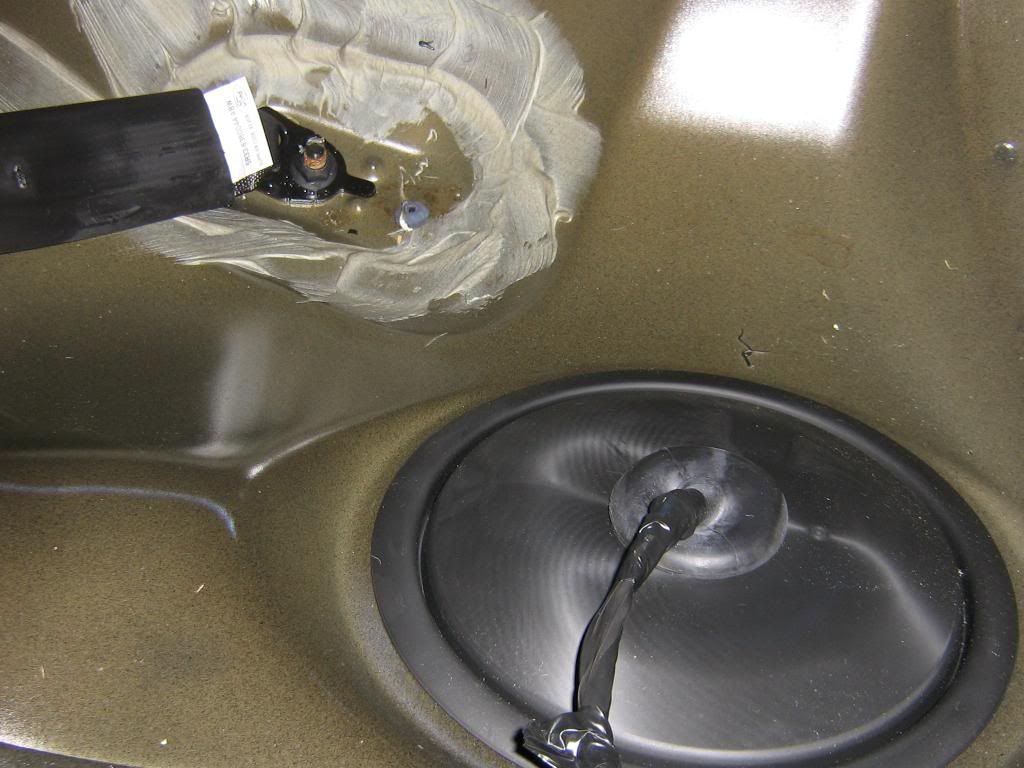
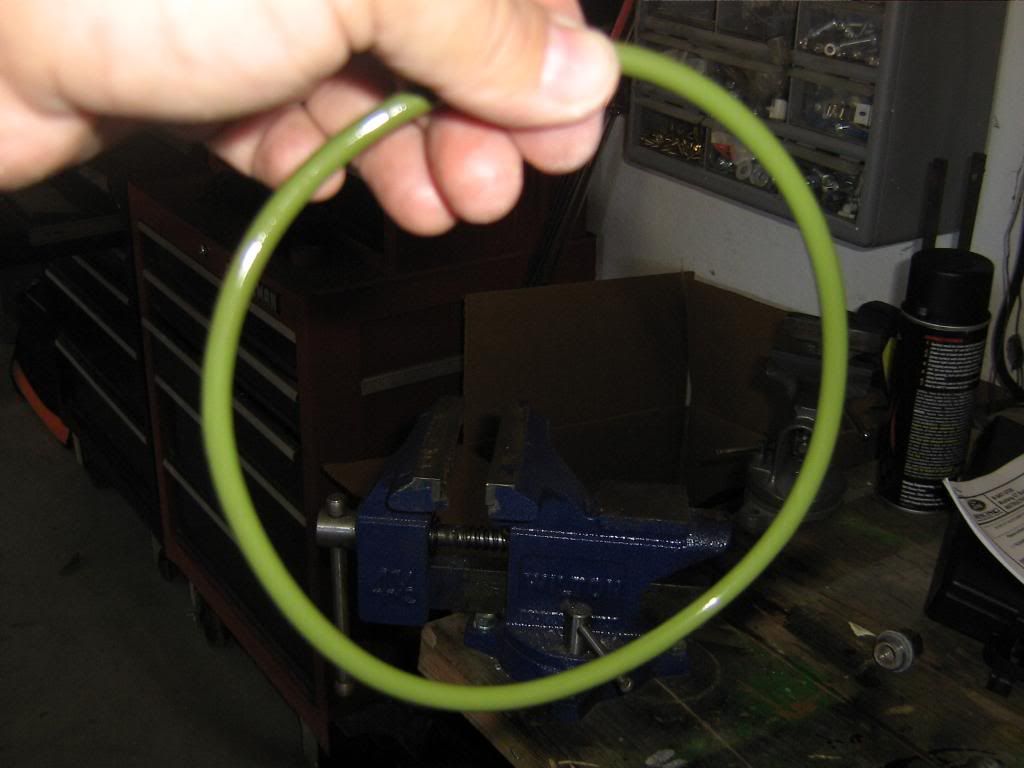
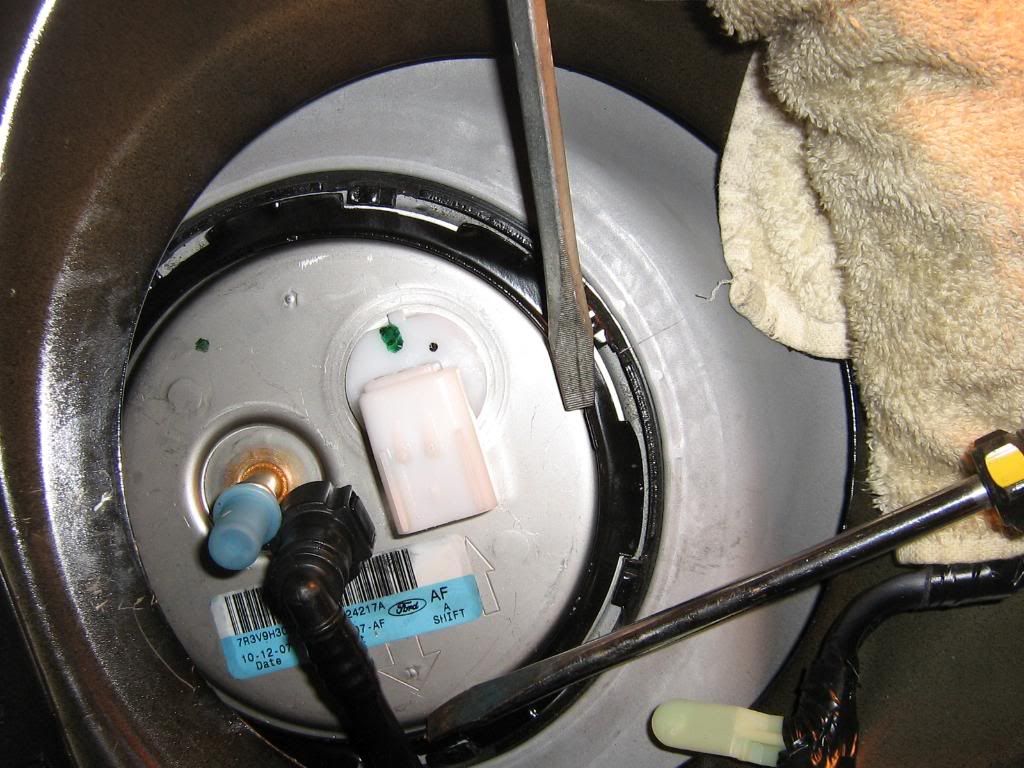
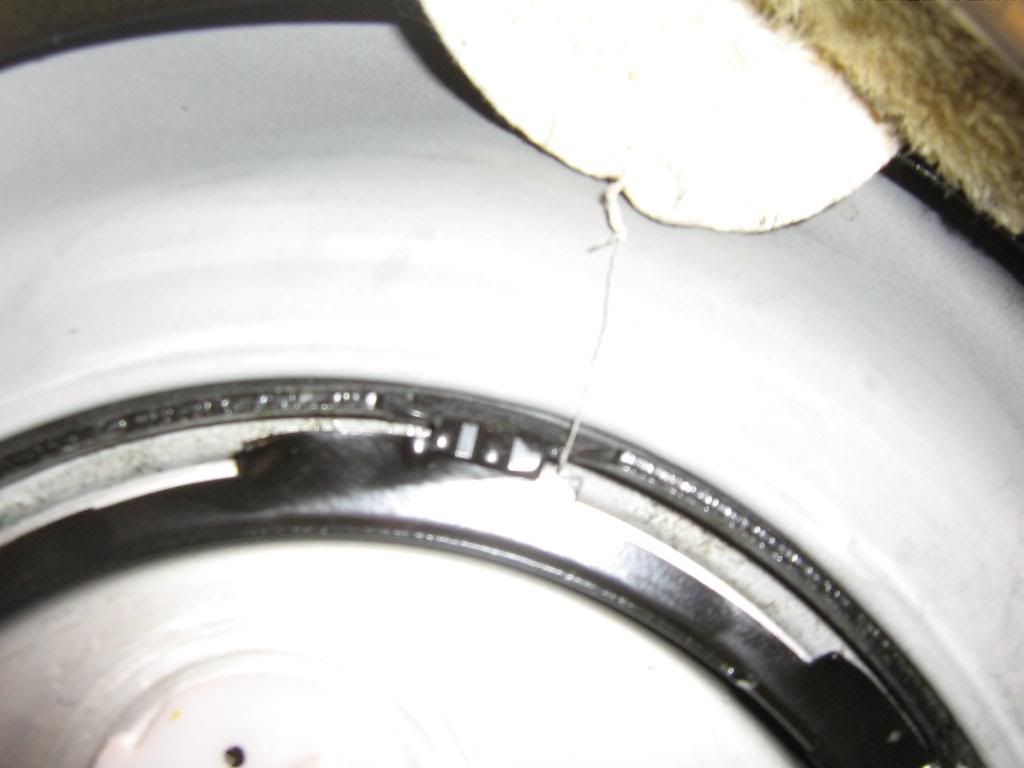
Remove the lock ring with a screwdriver and hammer, my picture shows the fuel line already disconnected but its better to wait on the fuel line until the lock ring is off. New pumps come with a new gasket and lock ring, so you can abuse the old lock ring as much as you wish when trying to remove it, it does come off with small little at a time so no need to whale on it real hard.

This picture shows how to release the fuel line by just pinching the sides together and it just pops off (* do not remove the fuel line until you actually have the lock ring removed first OR it will cause gas to splash up while you are beating the lock ring off * )
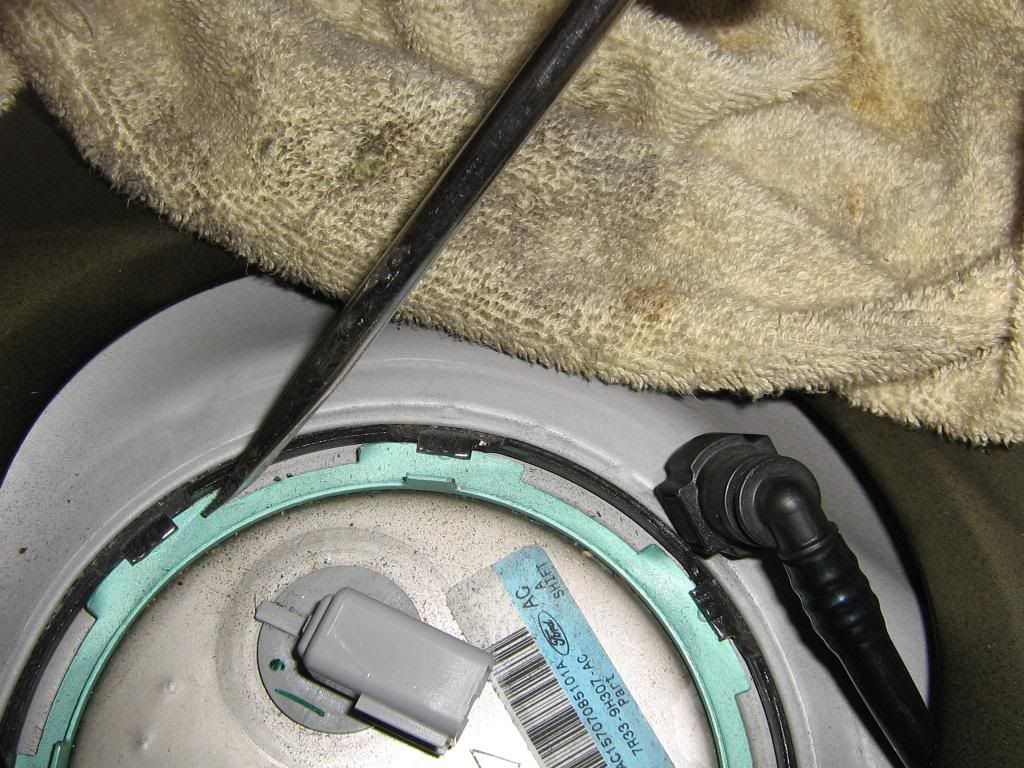
When the lock ring is removed the pump will pop up, the assembly is spring loaded so it may pop up about 1 inch.
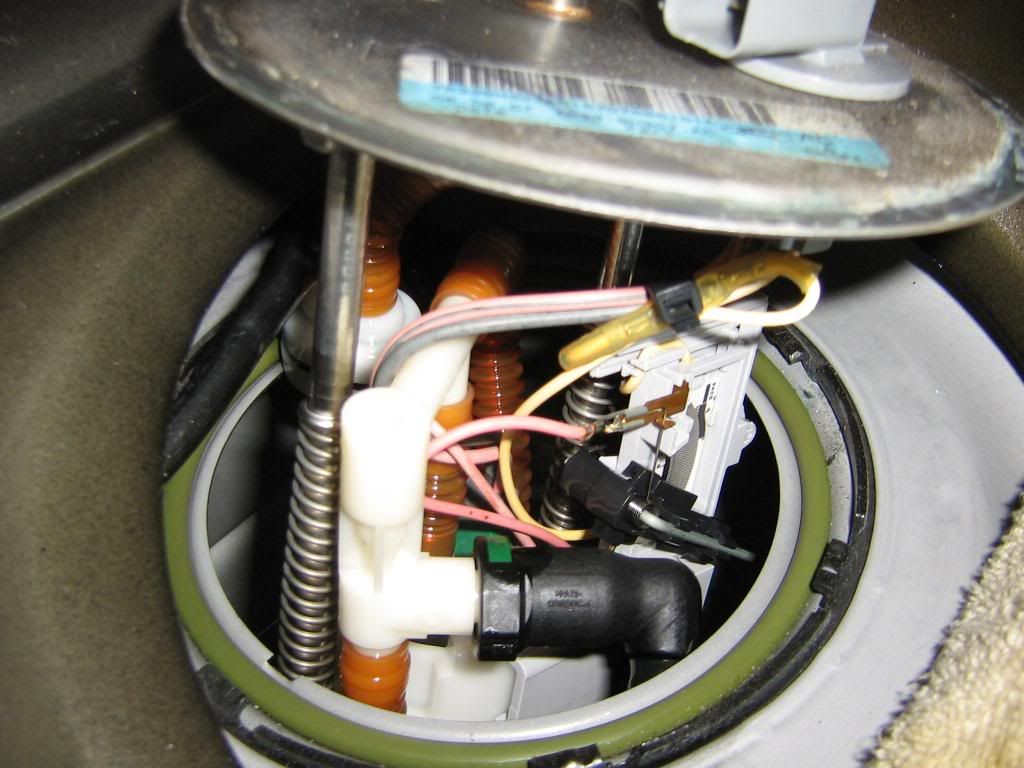
You will have to work it out, the hoses do get hung up so just work it side to side. Looking at this picture you can see the passenger side fuel line connected to the main fuel pump.
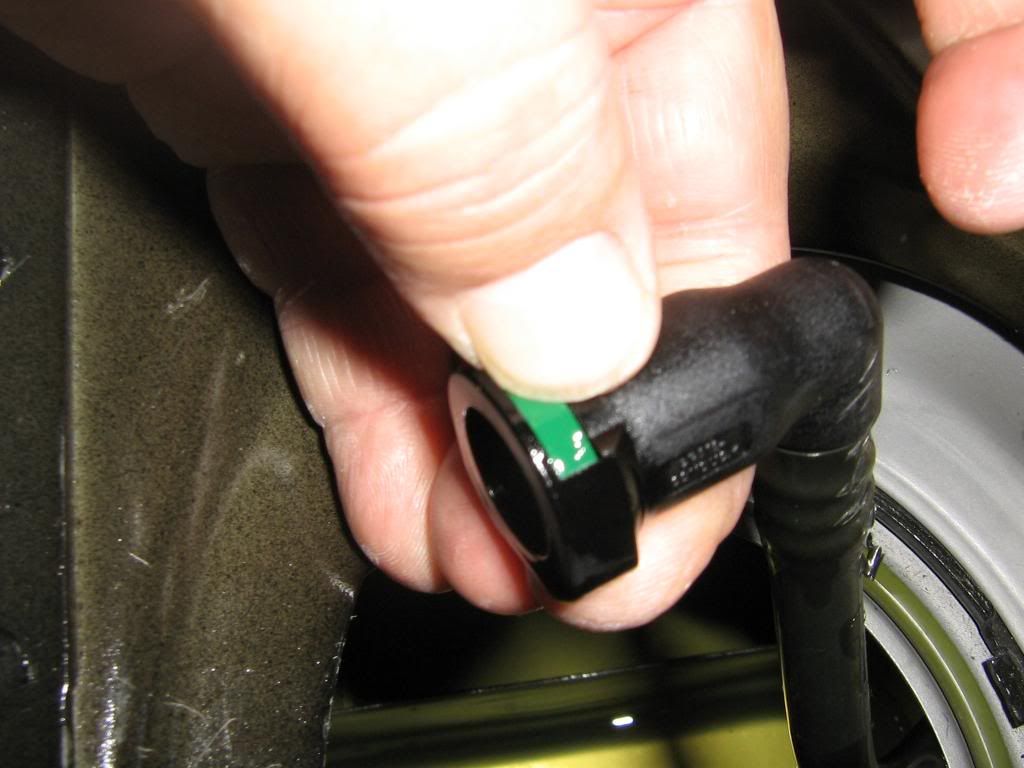
To remove this hose, just push down on the green tab and it will pop right off.
Pulled out.

Inside the tank you can see the passenger side line.
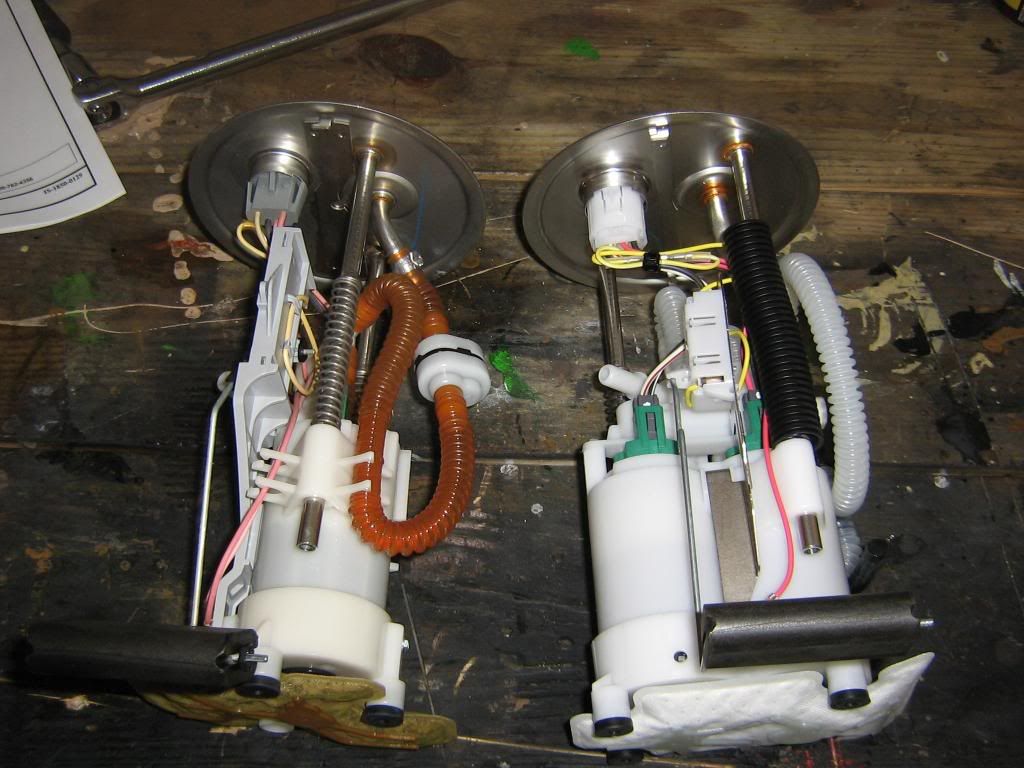
Side by side,old and new.
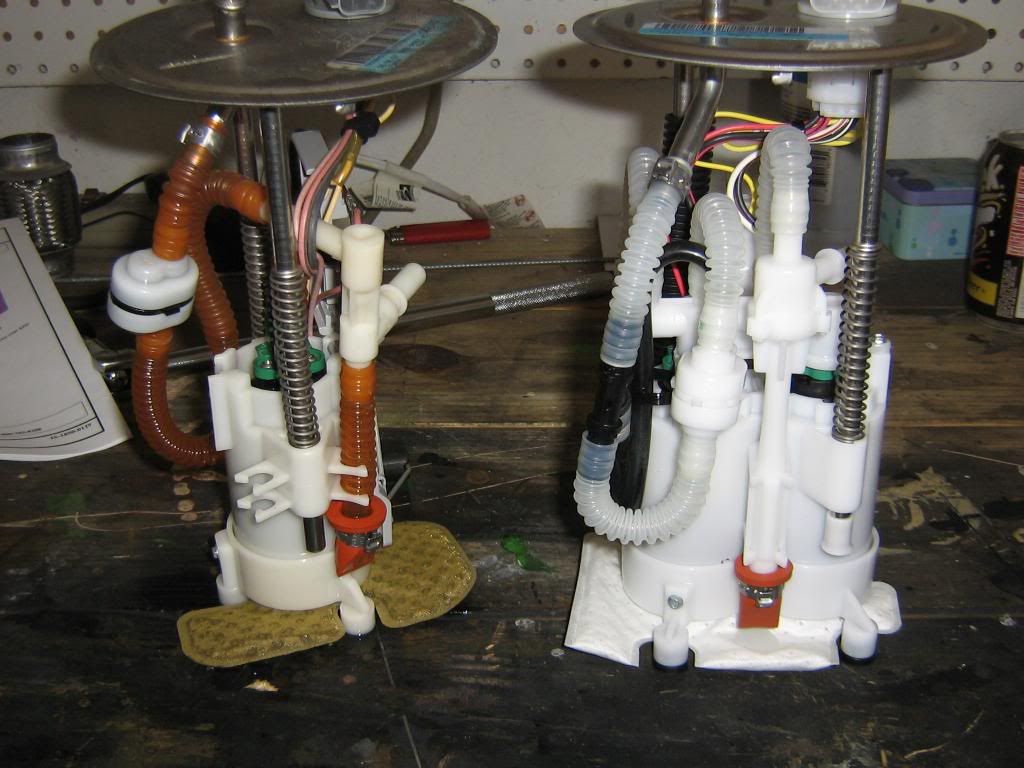
Side by side again.
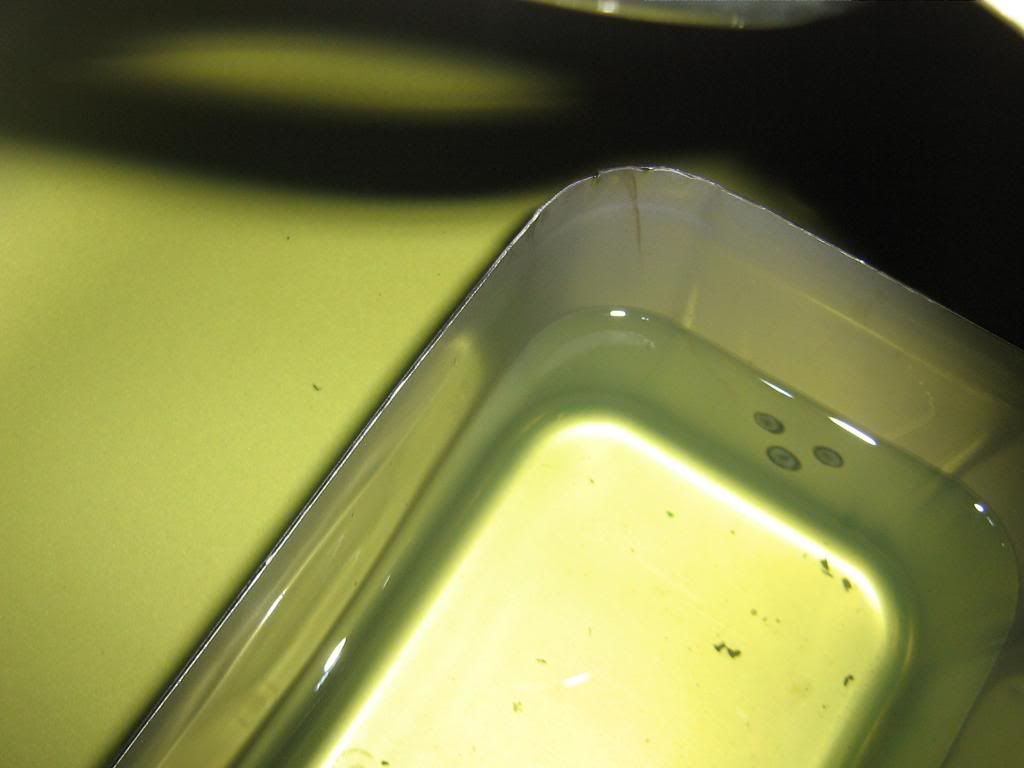
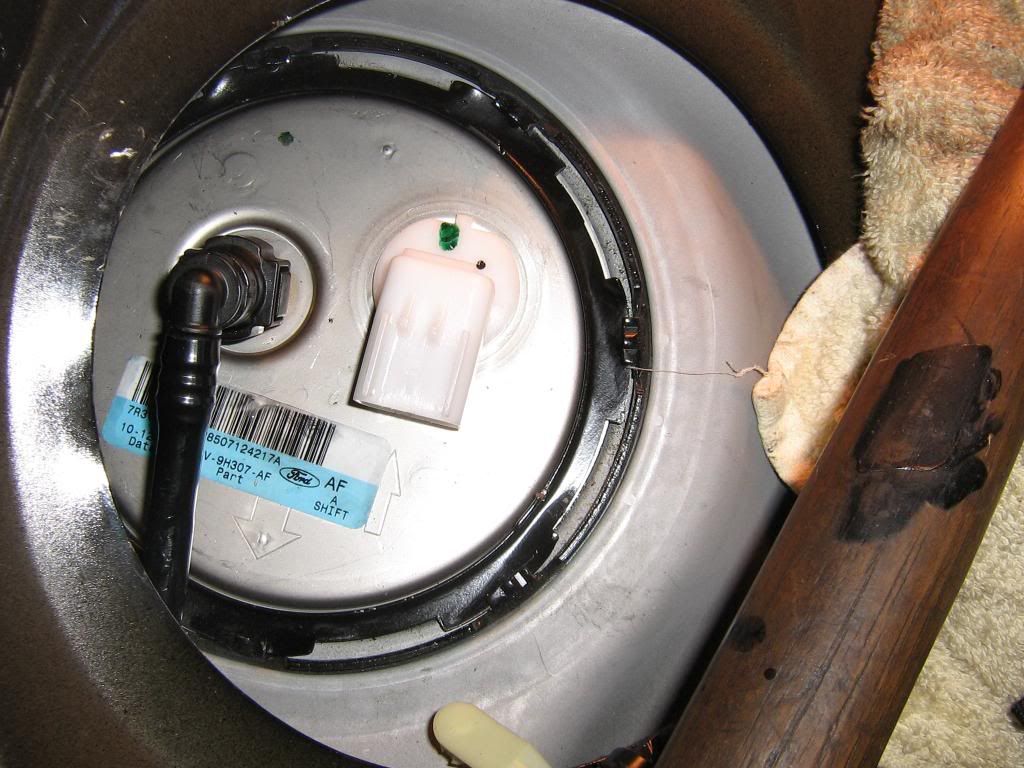
Looking inside the tank you can see a tray that the pump sits in, when you install the new pump you have to make sure the float is outside that tray and facing the passenger side.

Getting the new pump in is not easy, it takes alot of wiggeling and squeezing but it will go if you are pateint. Start with the pump on its side and the float going staight into the tank. You dont have to worry about the passnger side fuel line too much, it will be in the right spot when you get the pump in and you will be able to grab it. Once you get the float in, twist the whole pump towards the passenger side, making sure the float will clear the tray inside the tank. You will have to squeeze the hoses from side to side to get the pump down in the hole.

With the pump down in the hole, the passenger side hook up will be at about 2 "O" clock.

Just push the passenger side hose on until it clicks.
Good ideal to do this with a empty tank unless you like the smell of gas. I had less than a inch of fuel accross the bottom of the tank when my gauge was on empty.
You will notice the BAP in the trunk, I installed this prior to the new pumps and removed it when the new pumps went in, I should not need it at this point.
Our fuel tanks are made up of 2 sections because our driveshaft and exhaust running thru the tank, we are only dealing with the driver side pump and hat.
Start with jacking up the front passenger side of the car. If you have to use a ramp like i do,you want to make sure you do this first before pulling the fuel pump relay.
With the car jacked up, pull relay 21 under the hood, this should kill the fuel pump. Crank the engine over to make sure,the car should not start. If it does start, then it should die quickly and not restart.
Take out the rear seat by looking at the front bottom of the seat and just pushing in the plastic clips, it comes out very easy, There is one clip on each side.
Strip down the rear, pull the panel out and the spare tire.
Heres what the fuel pump cover looks like soon as you pull the seat out, there is one on the driver and one on the passenger side, we are only dealing with the driver side pump. This cover just pulls off.
Remove the lock ring with a screwdriver and hammer, my picture shows the fuel line already disconnected but its better to wait on the fuel line until the lock ring is off. New pumps come with a new gasket and lock ring, so you can abuse the old lock ring as much as you wish when trying to remove it, it does come off with small little at a time so no need to whale on it real hard.
This picture shows how to release the fuel line by just pinching the sides together and it just pops off (* do not remove the fuel line until you actually have the lock ring removed first OR it will cause gas to splash up while you are beating the lock ring off * )
When the lock ring is removed the pump will pop up, the assembly is spring loaded so it may pop up about 1 inch.
You will have to work it out, the hoses do get hung up so just work it side to side. Looking at this picture you can see the passenger side fuel line connected to the main fuel pump.
To remove this hose, just push down on the green tab and it will pop right off.
Pulled out.
Inside the tank you can see the passenger side line.
Side by side,old and new.
Side by side again.
Looking inside the tank you can see a tray that the pump sits in, when you install the new pump you have to make sure the float is outside that tray and facing the passenger side.
Getting the new pump in is not easy, it takes alot of wiggeling and squeezing but it will go if you are pateint. Start with the pump on its side and the float going staight into the tank. You dont have to worry about the passnger side fuel line too much, it will be in the right spot when you get the pump in and you will be able to grab it. Once you get the float in, twist the whole pump towards the passenger side, making sure the float will clear the tray inside the tank. You will have to squeeze the hoses from side to side to get the pump down in the hole.
With the pump down in the hole, the passenger side hook up will be at about 2 "O" clock.
Just push the passenger side hose on until it clicks.
Last edited by one eyed willy; 06-12-2013 at 09:44 AM.
 12-14-2008, 12:54 PM
#2
5th Gear Member
Thread Starter
Join Date: Aug 2007
Location: Lakeland/Mulberry FL
Posts: 2,263
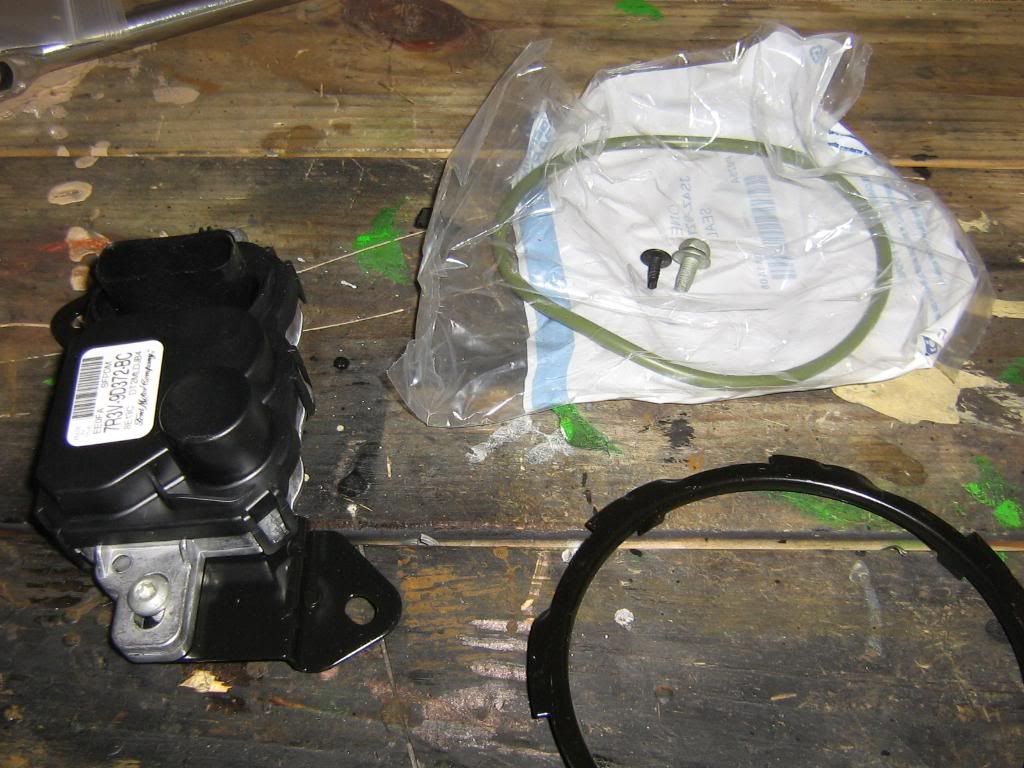
New kit comes with new o-ring and new lock ring.
Slap a little oil onto the new o-ring. Not alot or it will wiggle out of your hands.
This is one of the most crucial parts that I didnt see anywhere else online. Alot of people said that it was very hard to get the new pump in and a second person was needed to hold the new pump down, but its actually alot easier than that. By looking at this picture you can see a little notch in the tank, that notch lines up with the new pump, so if you press the new pump in, get the notchs lined up on both sides and give it a slight twist the pump will hold its self in and you dont need a second person to hold it down. it wont twist much at all ,just enough to catch.
Heres a picture of the pump holding it self in with no lock ring, its only hoding it self down by those 2 notchs.
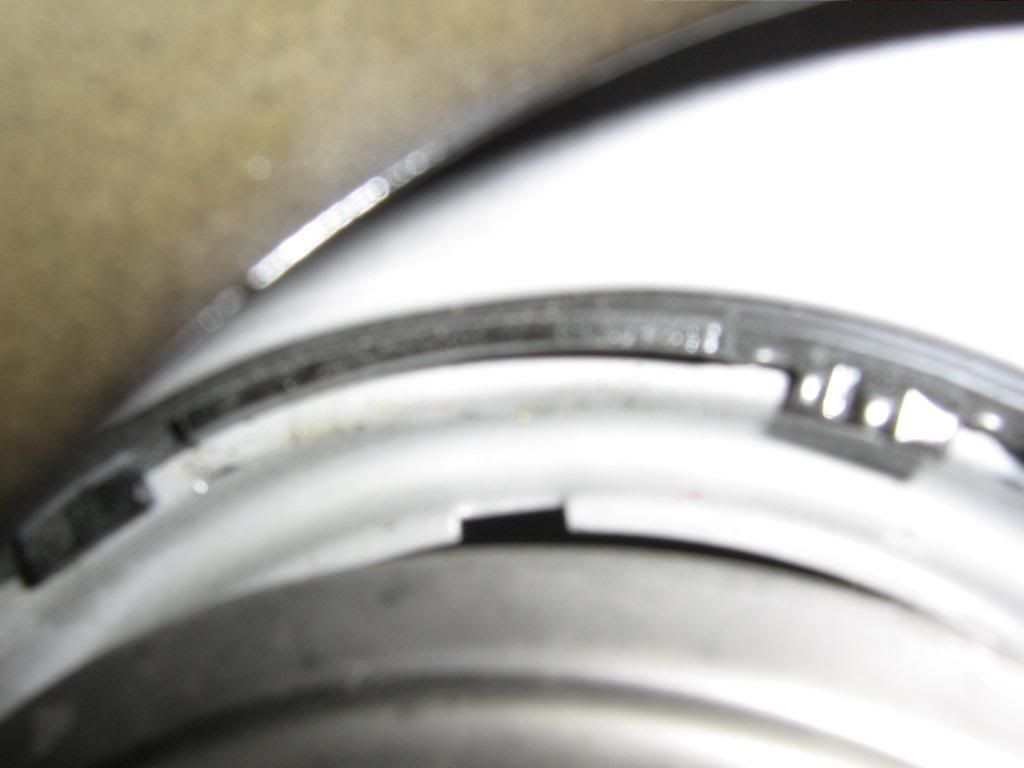
Lock ring going in. Heres another trick/tip. alot of people also said how hard it was to get the lock ring lined up all at the same time becuase its about 10 different teeth that have to all line up at the same time. Easy way to accomplish this is to use equal pressure all around the ring at the same time by using 2 different screwdrivers to get the ring started, one screwdriver on each side of the lock ring, it actually slides right in with little pressure for the first 1/4 inch, after that you have to start tapping it with a hammer.
Heres the best close up i could get of the teeth on the lock ring, there is a small dimple on the lock ring, and also a small indention on the tank, that dimple goes in to the indention to really lock it in.

It takes a little pounding to get it all the way in.
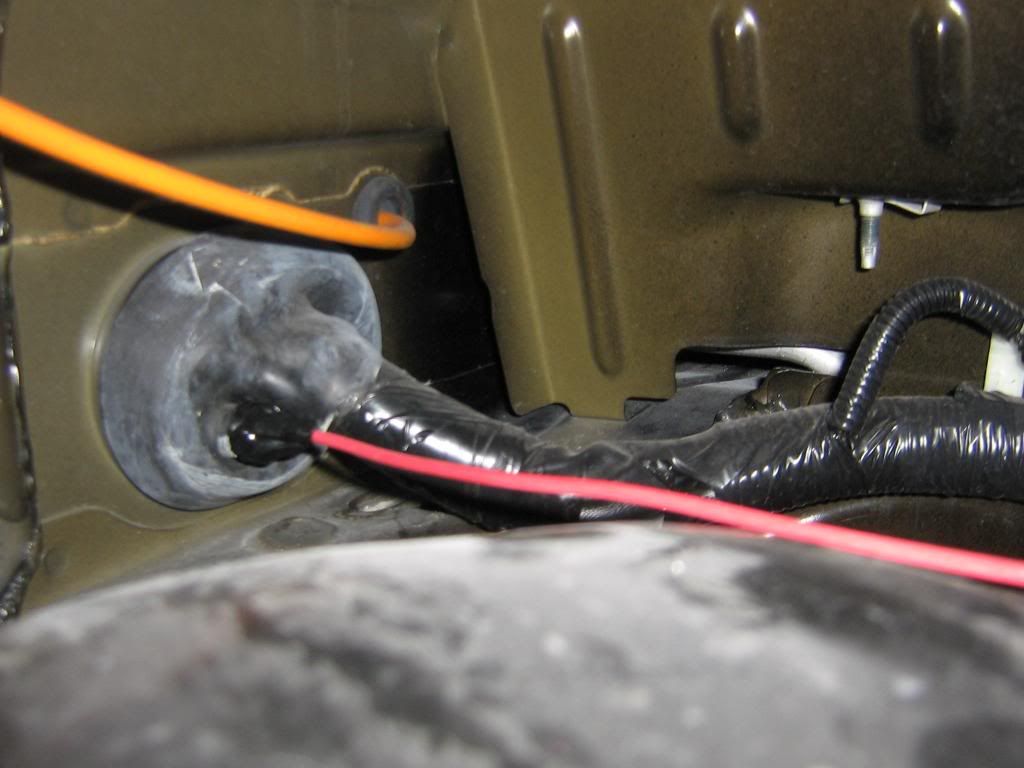
Just push the fuel line on until it clicks.
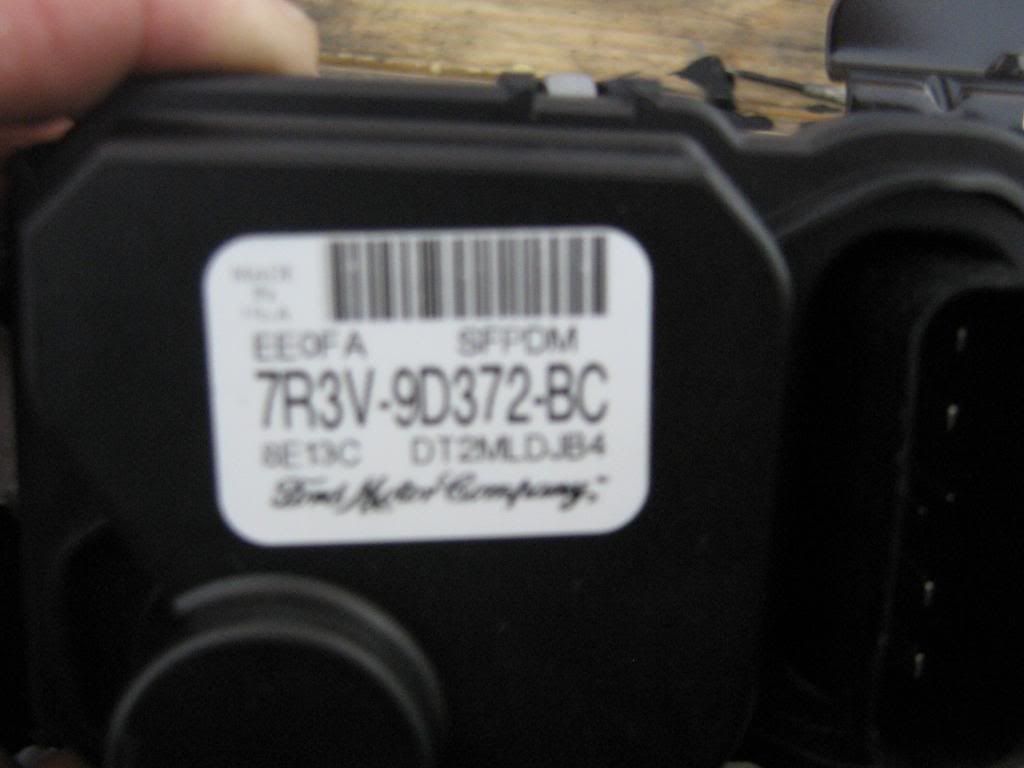
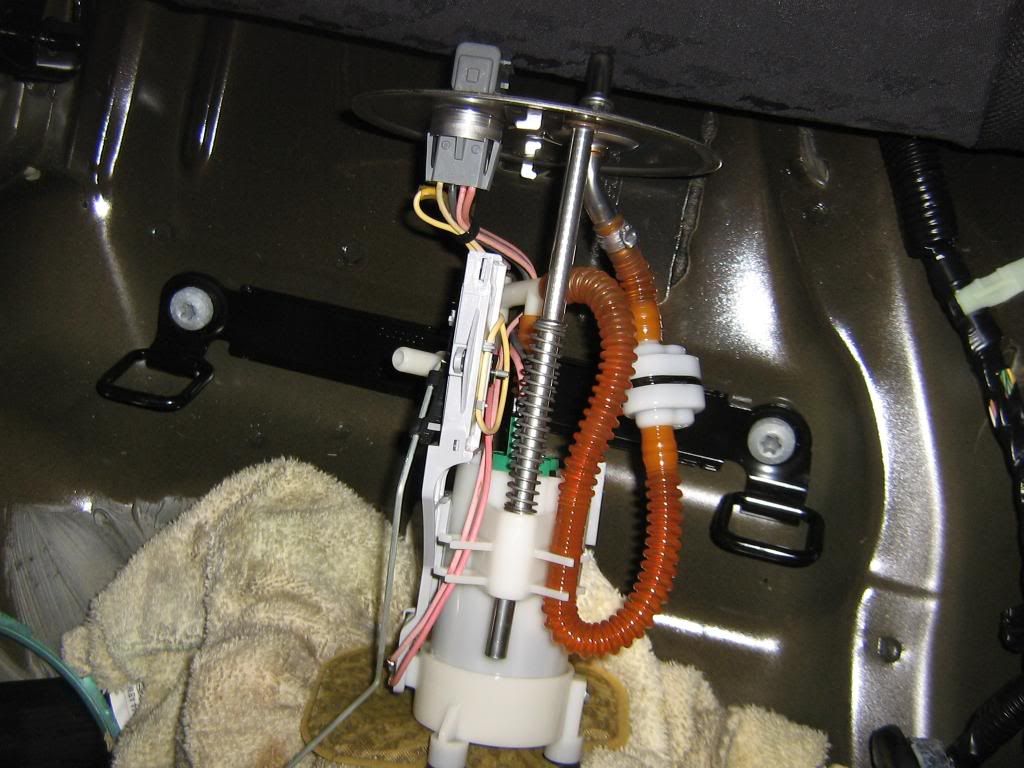
Heres a close up of the new fuel pump driver.
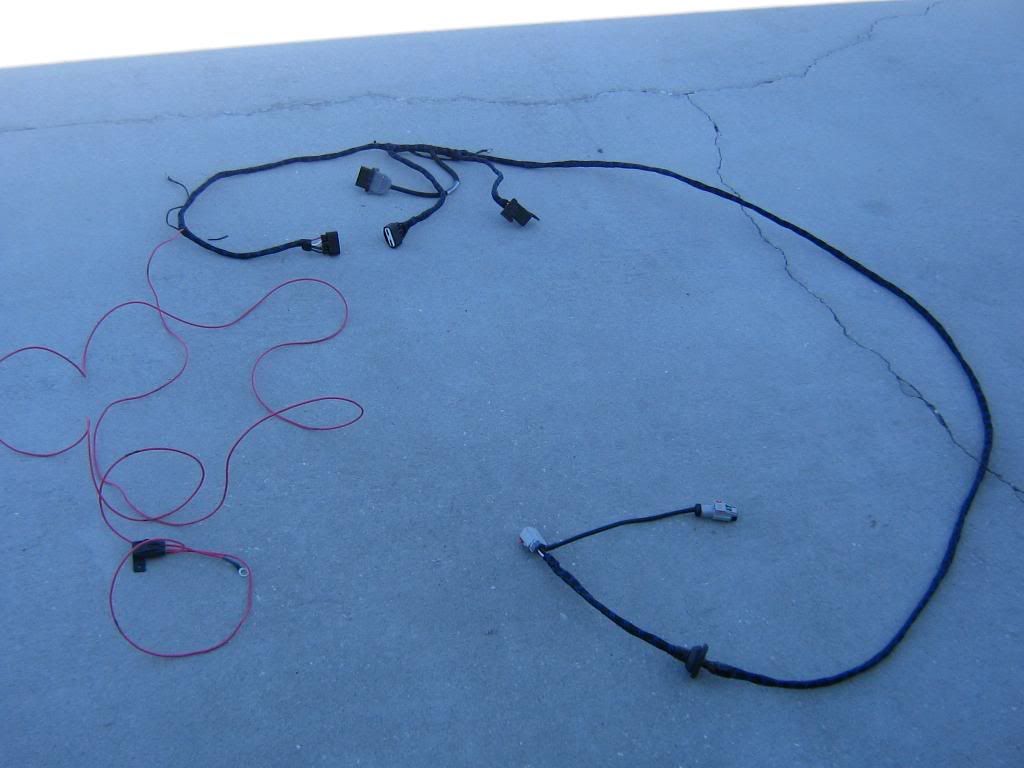
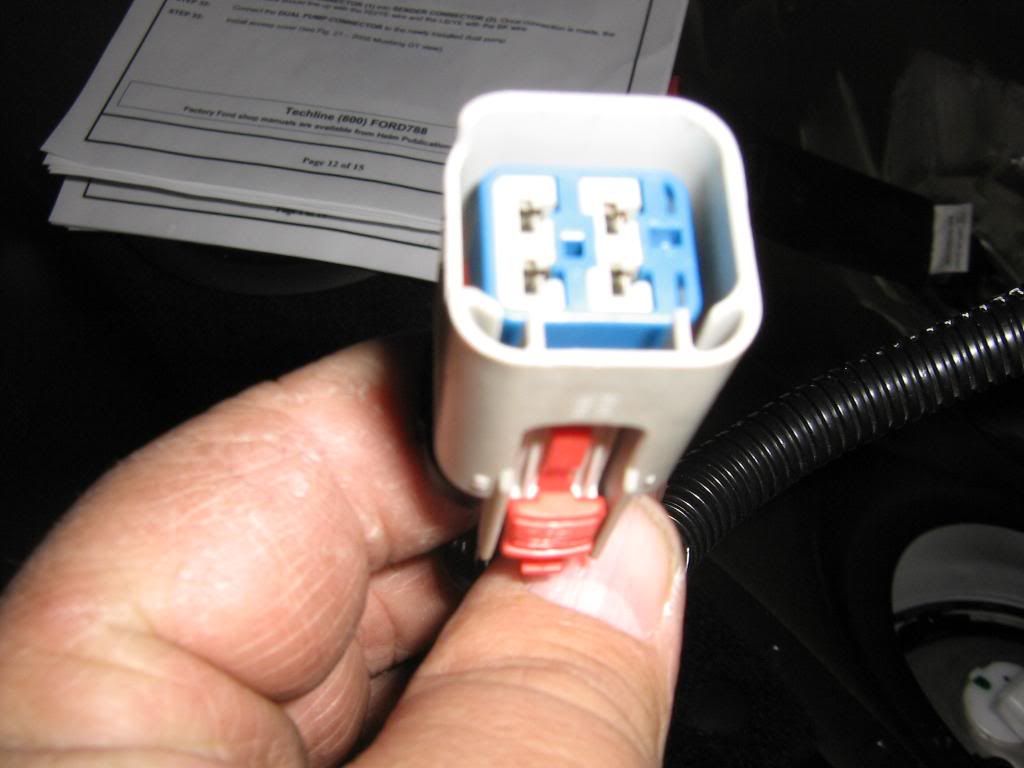
New harness layed out on driveway, there are 5 plugs on this harness and the hot wire that has to be run up to the fuse box. Its really easy to figure out what plug goes where.
Mounting location on the passenger side trunk for the new fuel pump driver. As you can see there are already 2 studs awaiting the new driver.
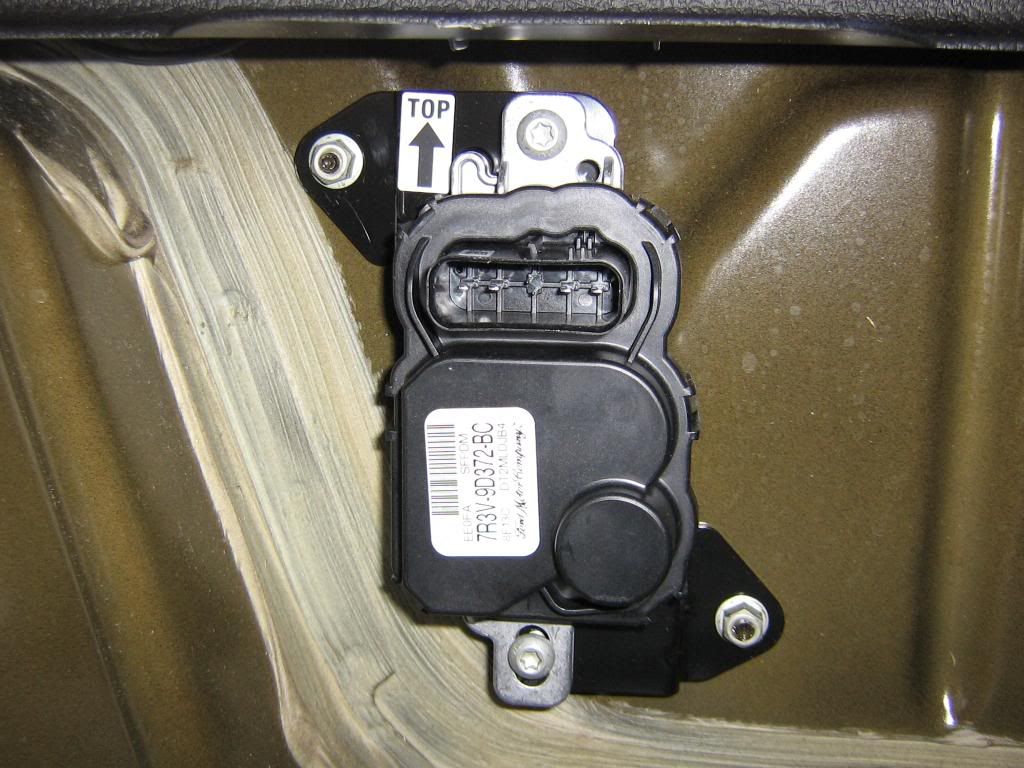
New driver mounted, the kit did not come with the 2 nuts i needed to mount this driver, I was lucky enough to have some laying around.

Wiring all in, looks rough but it all gets covered up. You can see the red power wire on the passenger side, this has to be routed to the passenger side kick panel, we will get to that in a moment.
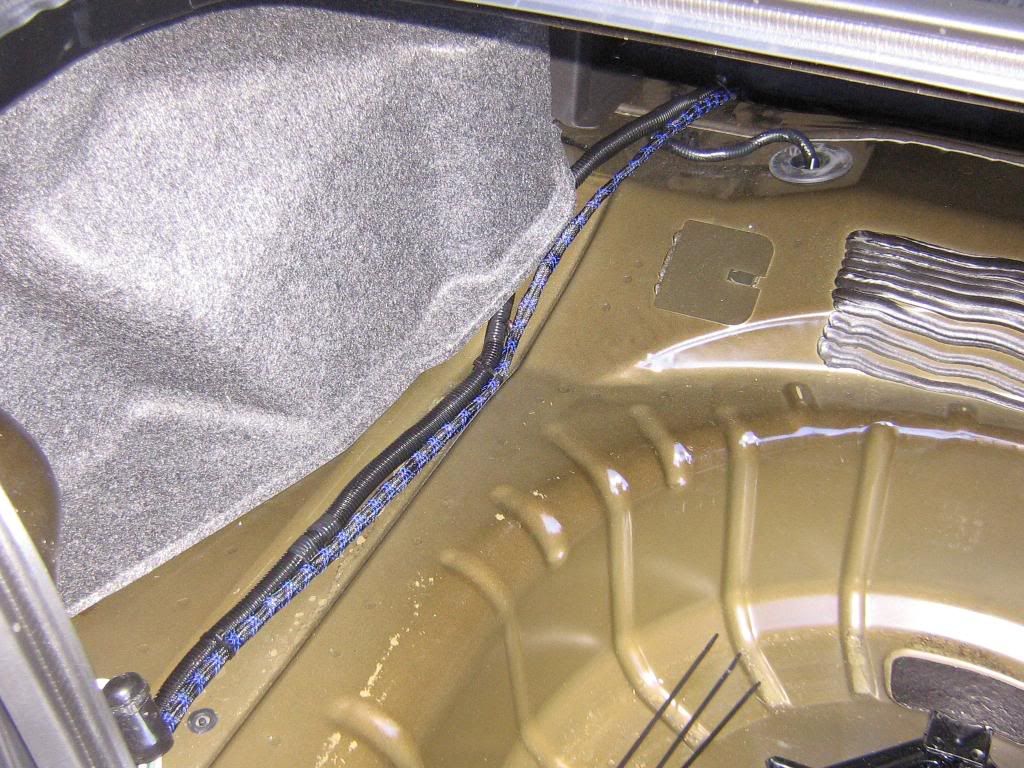
Harness going up to the Fuel pump.
Last edited by one eyed willy; 02-10-2009 at 07:37 PM.
12-14-2008, 12:54 PM
#3
5th Gear Member
Thread Starter
Join Date: Aug 2007
Location: Lakeland/Mulberry FL
Posts: 2,263
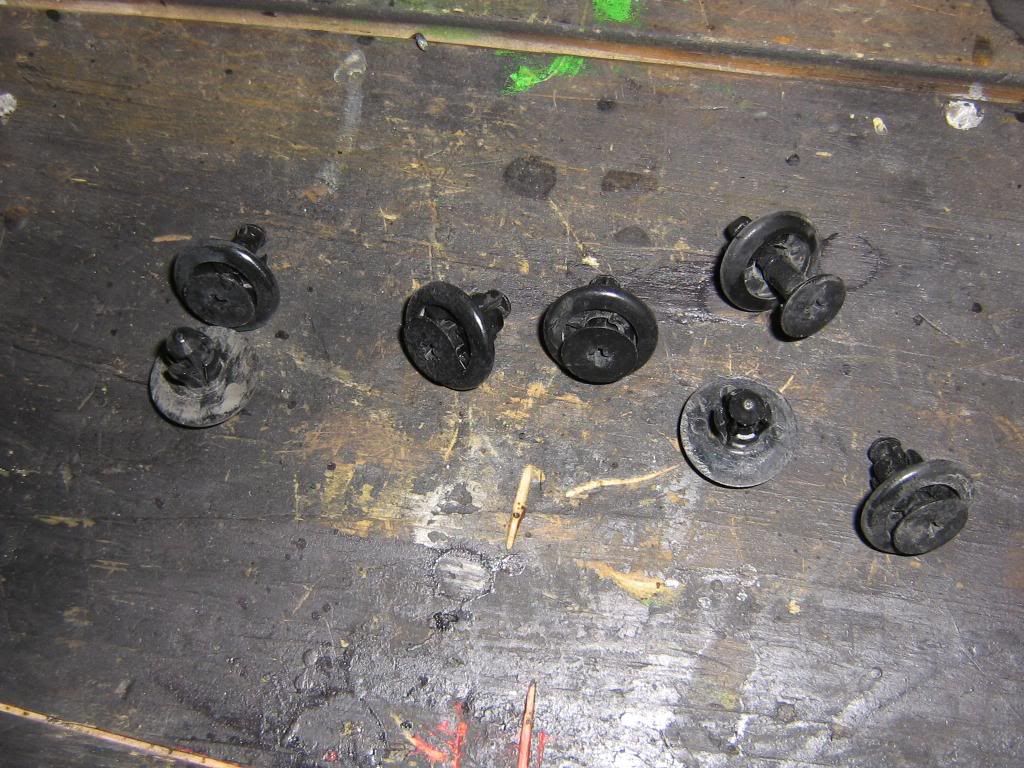
Pulled the tire off and pulled off 6 push clips to get the inner fender plastics pulled down.
Here you can see what is exposed with the inner fenders pulled down.
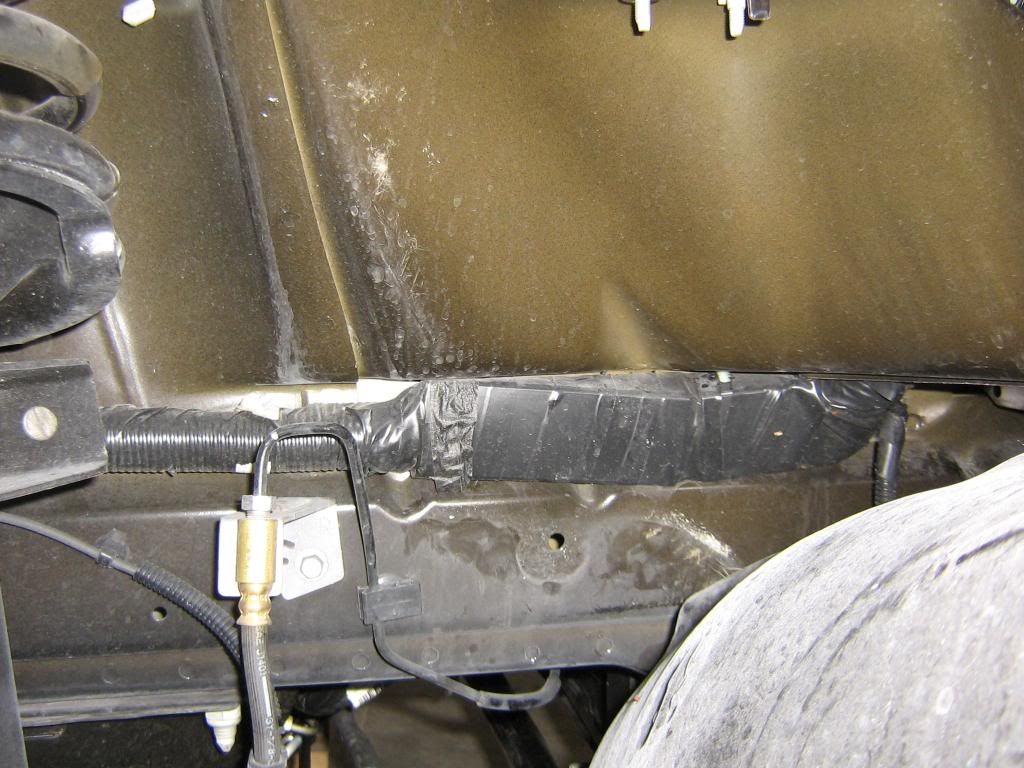
Inner fender exposed.
Here is the power wire coming thru the firewall. the power wire already has a fuse holder attached to it and its way to big to get thru the grommet so i just cut the fuse holder off and soldered it back on once the wire was thru the grommet.

All zip tied and taped up.
Fuse holder with 30amp fuse
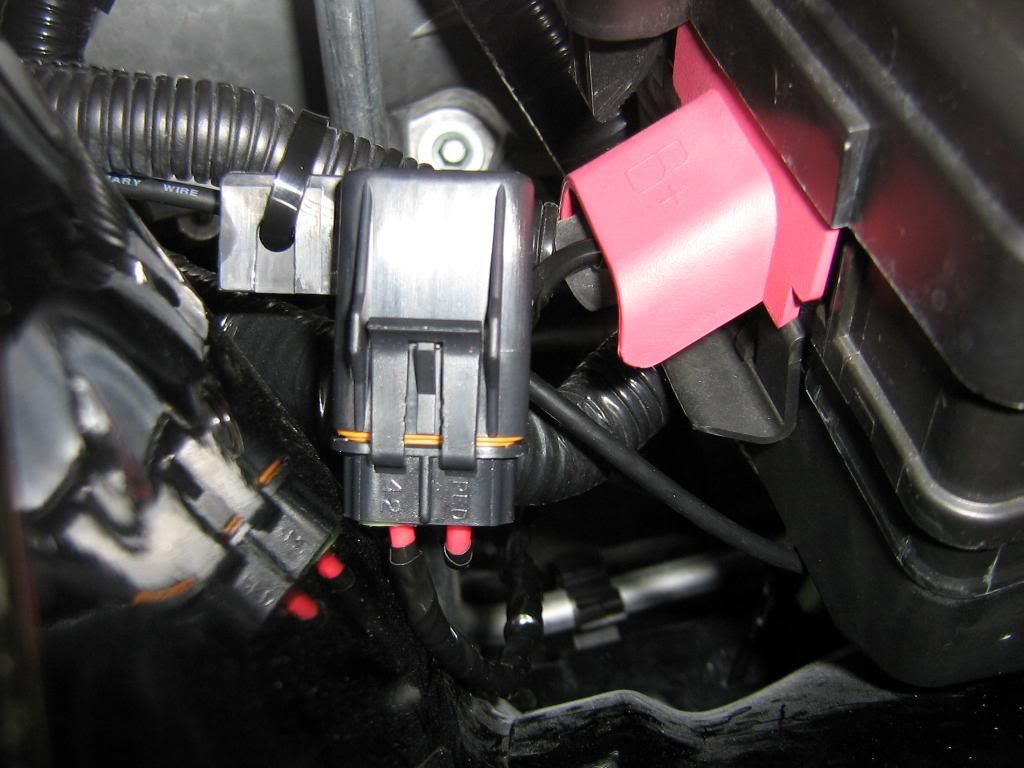
There is a small hole just blow the fuse box that you can bring your power wire up thru. Zip tie it to the factory harness and connect it to the power side of the fuse box.
Only thing left is to hook up the new harness to the new pump. unfortunatly its not that simple, you have to pull the fuel gauge sender wires (light blue-yellow stripe and light green violet stripe) out of the old harness and slide them into the new harness. You will need a small tipped screwdriver to do this. The blue piece of plastic has to come out first.
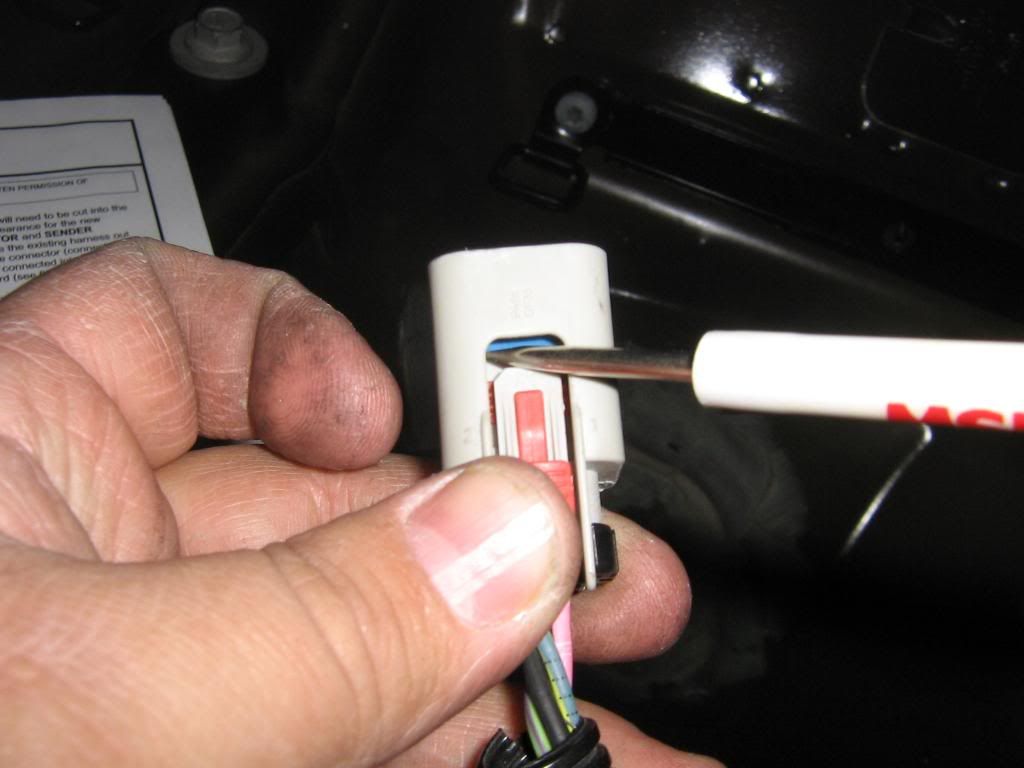
You can use the small screwdriver to push the blue piece out from one of the small openings on the side.

With the blue plastic out of the way, use the tip of the screwdriver to pry the plastic clip that holds the wire connector in place. Remove the black plastic clip from the back of the plug and blue rubber piece, the light blue-yellow stripe and light green violet stripe wire should come right out.

Should look like this.
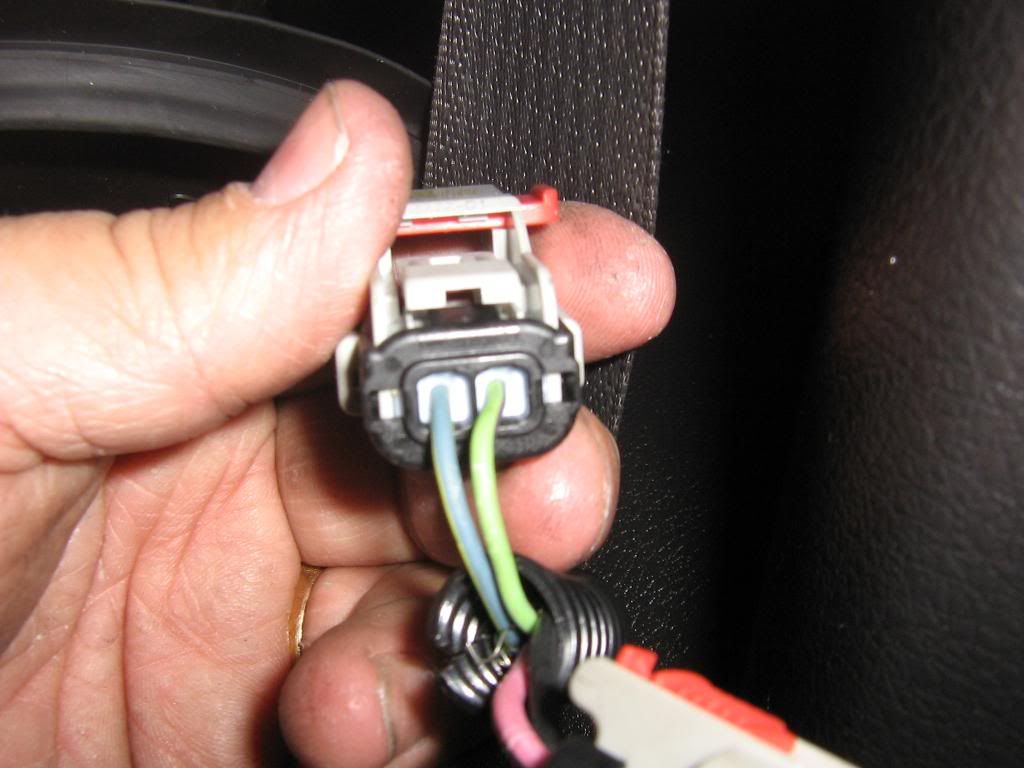
Now put the 2 wires into the new harness in the reverse order. Should look like this.
(*note:some have had to reverse these 2 wires to get a proper reading, maybe becuase of the different years? mine is a 2007)

And this.
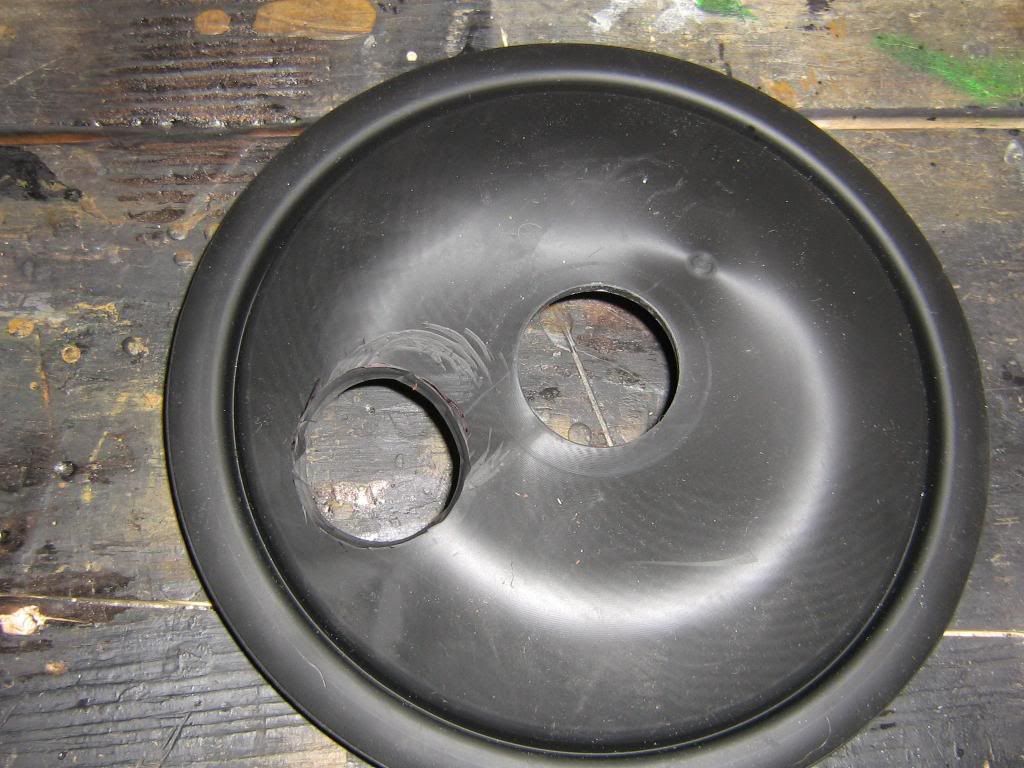
Next you have to cut out a new spot for the new harness on the fuel pump cover,i used a razor blade. 1-1/2 inch hole, about 1 inch from the existing hole.

Pull your wires thru.

Reinstall the cover.
Thats it, reinstall your fuel pump relay and crank it up, check your fuel gauge to make sure the wires are OK and you get a reading.
Last edited by one eyed willy; 06-12-2013 at 09:46 AM.

