
The Undead Saleen - Rebuild Started
 04-25-2010, 08:34 PM
#1
5th Gear Member
Thread Starter
Join Date: Oct 2009
Location: Oregon
Posts: 2,645
Part 1 - Disassembly
Hey there. First off, thanks for everyones support in the saga that is the 2006 Saleen Mustang. For those of you unaware, the motor blew at 6800 miles, about 1900 miles after I bought it. It was about 20 days outside of warranty. The dealership, though fighting it at first, has decided to step up and has cut me a check so I can fix it my way.
In any case, I wanted to document the rebuild process, starting with the disassembly. I am still undecided as to how I want to rebuild it, but I figure the first step is determining what went wrong to begin with.
I'll try and be detailed, but be patient with me, and feel free to provide hints/tips/warnings, etc.
Lastly, the pictures are being taken with my phone, so if the quality is too low, let me know and I'll bring them back to normal size.
Thank you all and I hope you enjoy the progress, however slow it may be.
Just for sympathy sake, this is how we got it home after the motor blew. Thankfully I was only a few miles away from my dad's house.

Step 1 - Hood removal: I decided to remove the hood to make all the work easier. I stored it in my dads spare bedroom, where he currently has a bunch of new parts in boxes waiting to go into his 335i.
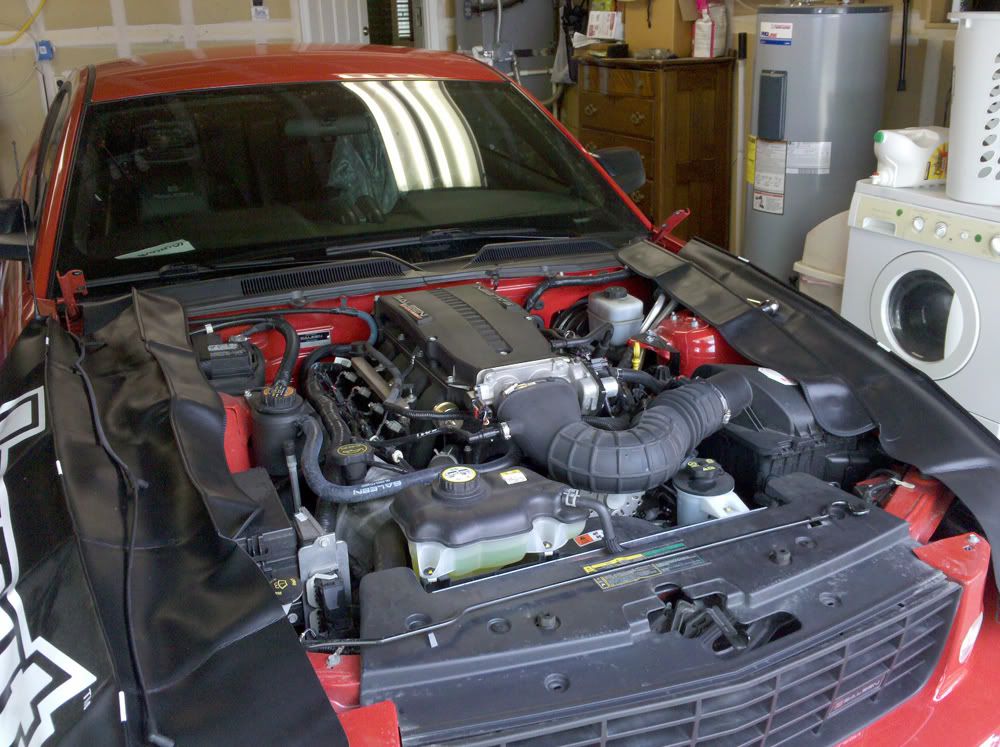
Step 2 - Removing some of the ducting. I can see some oil in the intake. I'll probably add an oil separator at some point in the build.
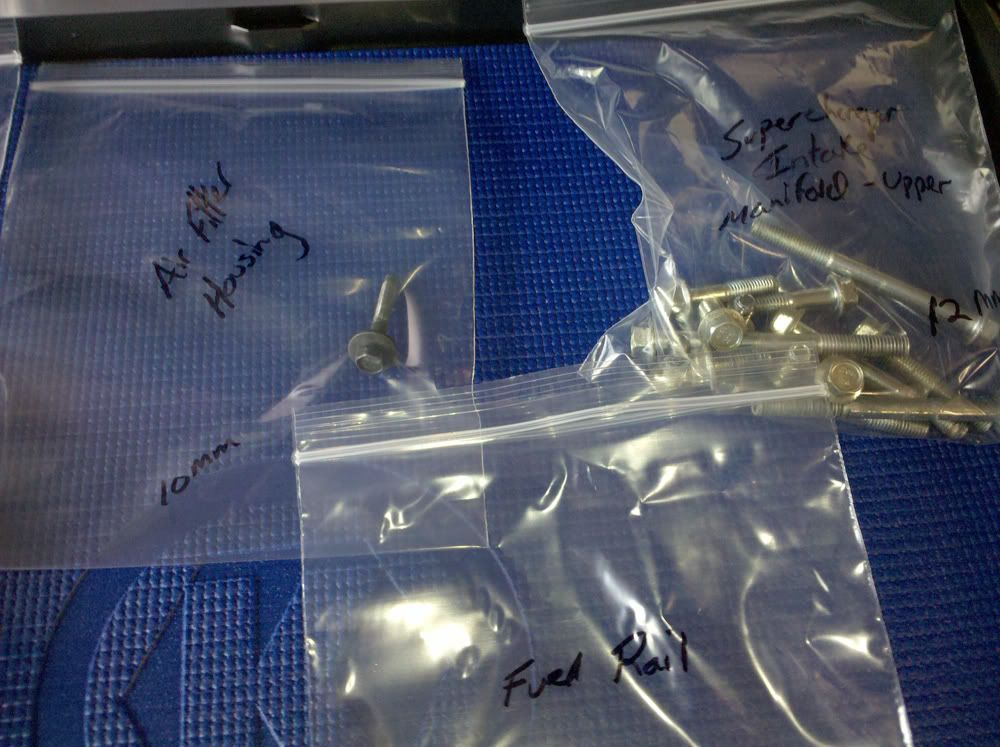
Step 3 - Develop a means of organizing bolts/parts. This is mine!
More to come next weekend, when the motor comes out!
Update: Motor is now out. Please excuse me if I skipped some steps in the process of removal .
.
Step 4 - Jack it up! Once everything was disconnected from the top end (minus the motor mounts) we jacked it up and went to work on the transmission.
[IMG] [/IMG]
Step 5 - Use the buddy system. I invited over some of my friends for beer, and my gf volunteered to make tacos and enchiladas and we went to work. My friend Michael (on the left) and I are seen disconnecting the exhaust manifolds, starter, ac pump, power steering pump, and transmission bolts. FYI, the exhaust manifold bolts on the drivers side can be a pain, but a flexisocket + 8" of extensions make it easy.
[IMG]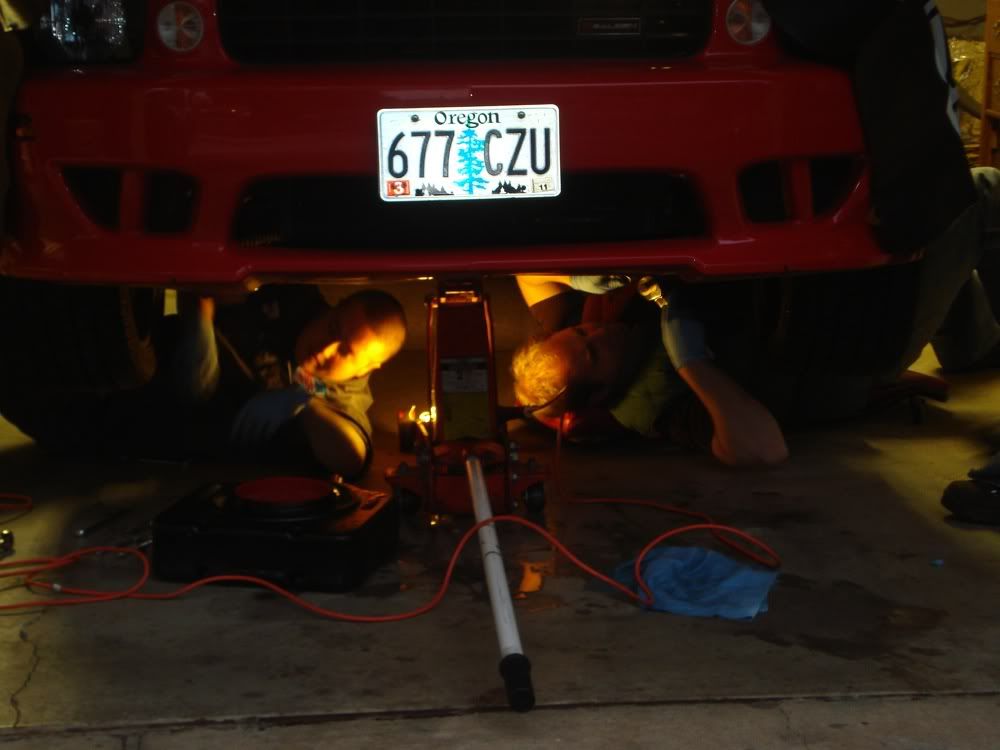 [/IMG]
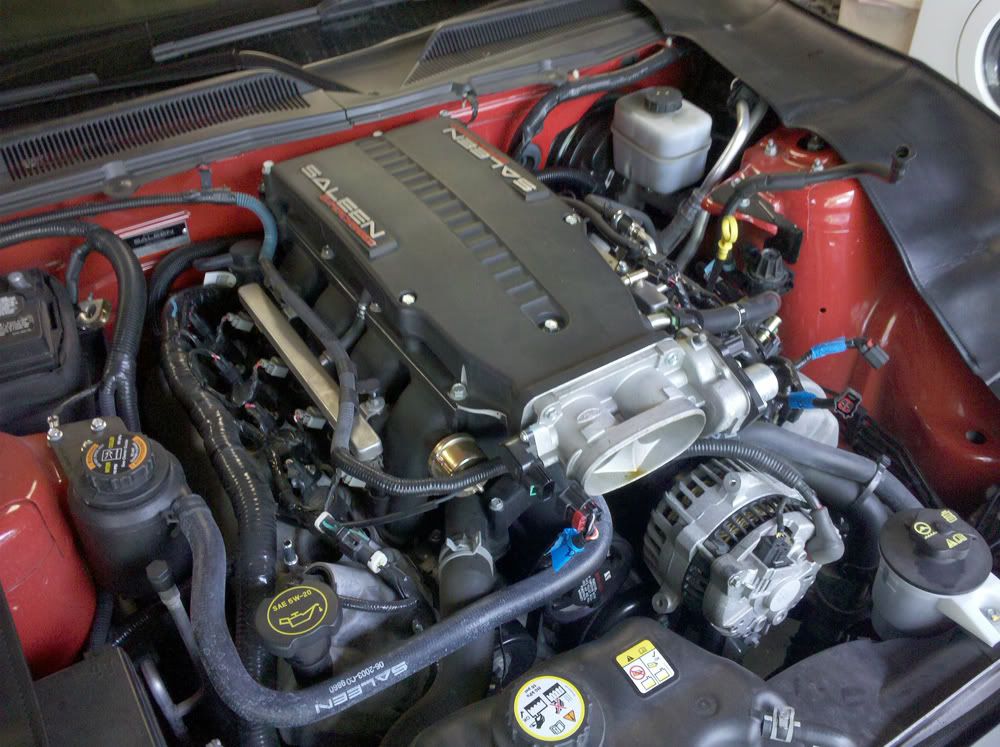
Step 6 - Intake it off baby! We decided to remove the intake/supercharger to make access to the top transmission bolts easier. It might not have been needed, but certainly made it a lot easier.
[IMG]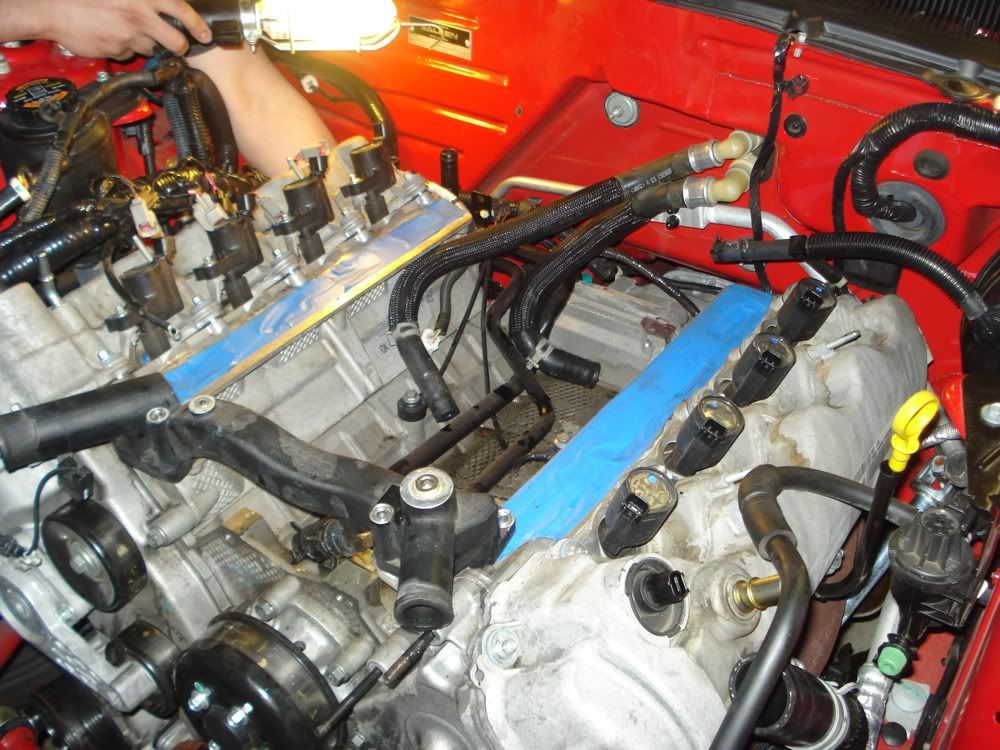 [/IMG]
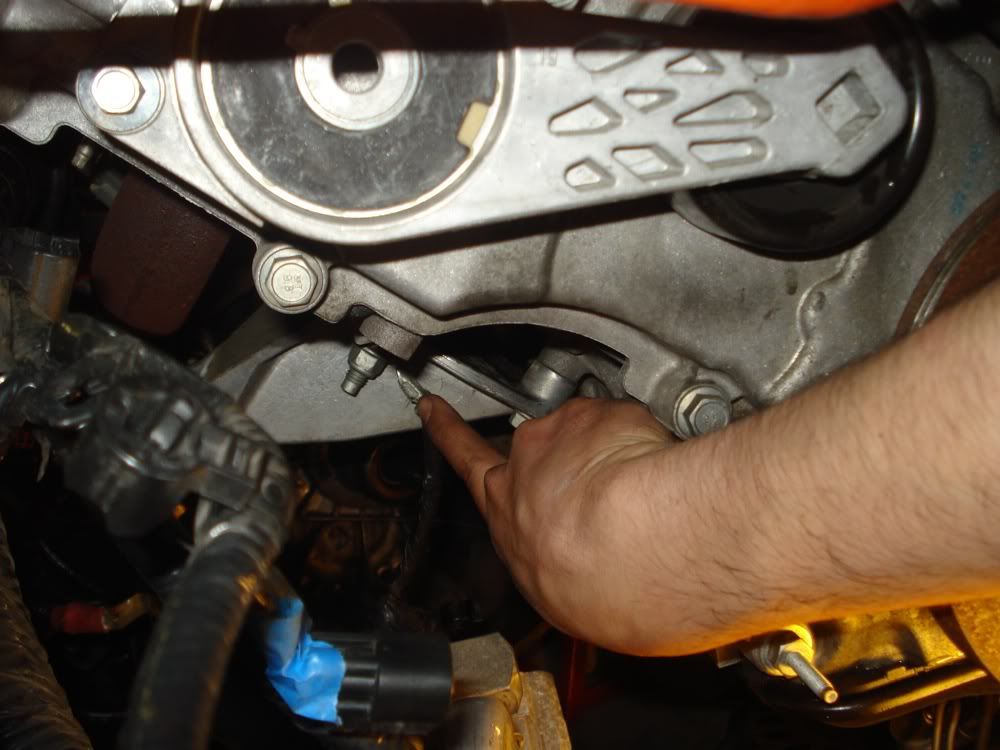
Step 7 - Beware of straps. Sometimes hidden ground straps can cause some issues. There is one such strap on the passenger side of the block. Be sure and remember to connect it to this stud on installation.
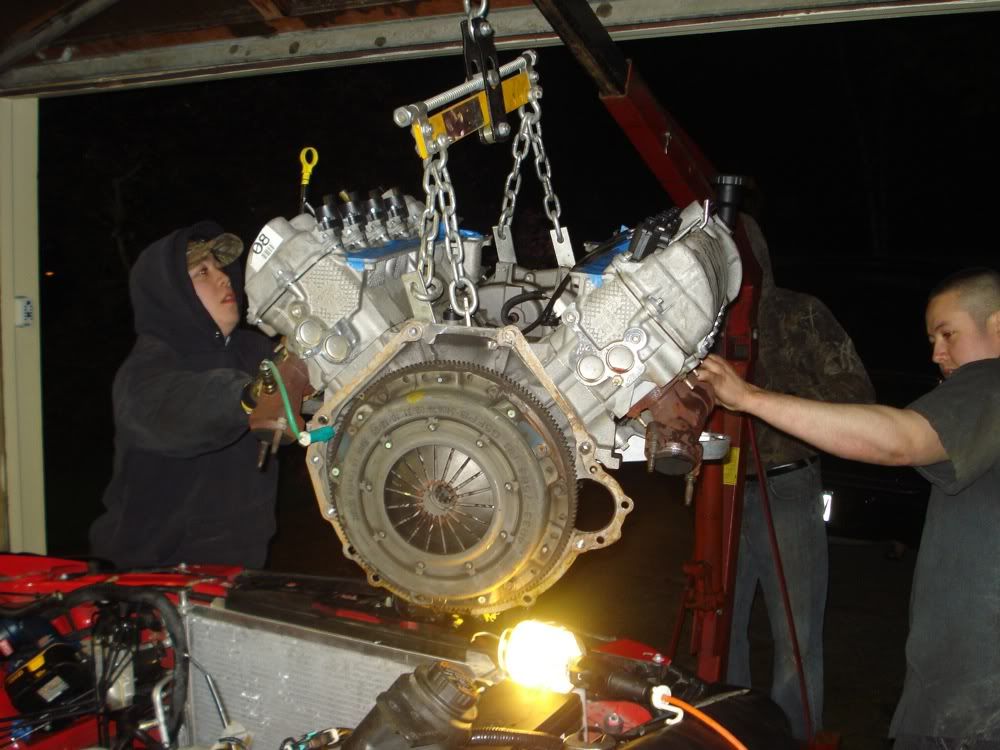
Step 8 - Its out. Time to assess the damage! Special thanks to Jonathan (left), Kevin who is manning the crane, and Michael (right) for allow me to sit on my *** for a good portion of the night. BTW ladies they're single and ready to mingle so PM me for digits.
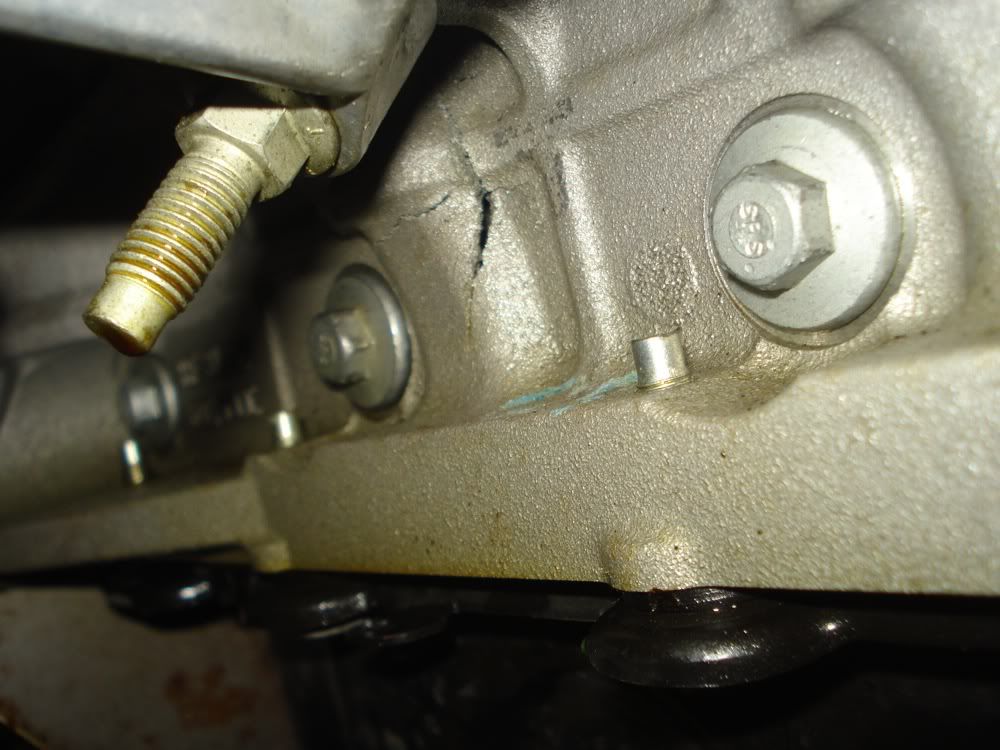
Step 9 - Hammer time, break it down now! Here are some pictures of what we saw upon pulling it. We knew it couldn't be good . . .
Passenger side:
Driver side:
Step 10 - The money shot! Oil pan time.
Step 11 - Its all about timing. Remember to keep all the timing components you take off separate so they go back on their respective sides. Since I am not reusing this block or internals, there wasn't really a point to aligning the timing marks with the shortblock for easy reinstallation.
After the timing stuff and valve covers are off, the heads come off pretty easily. Just need a solid 1/2" drive ratchet, and a tube to put over it for leverage. Or just a pry bar that will fit a socket. Or you could not be a puss like me I suppose.
Step 12 - Knowing when enough is enough. The block has had it. Here are some photos of the internal damage. Also, as you can see on the piston, there are two indentations of the intake valves. The valves themselves look fine and straight (though I'll be getting both heads checked and hot-tanked. This was the cylinder from where the tapping noise was coming from. I wonder if the rod stretched from over-revving and that tapping was the piston just barely tapping the valves.
**WARNING, what you are about to see may be disturbing. Viewer discretion is advised.


Well folks that is all I have for now. I'll be pulling the crank and stripping the block next weekend. I'll be starting to order parts tomorrow so hopefully within a few weeks I can put her back together. Will keep ya posted.
Hey there. First off, thanks for everyones support in the saga that is the 2006 Saleen Mustang. For those of you unaware, the motor blew at 6800 miles, about 1900 miles after I bought it. It was about 20 days outside of warranty. The dealership, though fighting it at first, has decided to step up and has cut me a check so I can fix it my way.
In any case, I wanted to document the rebuild process, starting with the disassembly. I am still undecided as to how I want to rebuild it, but I figure the first step is determining what went wrong to begin with.
I'll try and be detailed, but be patient with me, and feel free to provide hints/tips/warnings, etc.
Lastly, the pictures are being taken with my phone, so if the quality is too low, let me know and I'll bring them back to normal size.
Thank you all and I hope you enjoy the progress, however slow it may be.
Just for sympathy sake, this is how we got it home after the motor blew. Thankfully I was only a few miles away from my dad's house.
Step 1 - Hood removal: I decided to remove the hood to make all the work easier. I stored it in my dads spare bedroom, where he currently has a bunch of new parts in boxes waiting to go into his 335i.
Step 2 - Removing some of the ducting. I can see some oil in the intake. I'll probably add an oil separator at some point in the build.
Step 3 - Develop a means of organizing bolts/parts. This is mine!
More to come next weekend, when the motor comes out!
Update: Motor is now out. Please excuse me if I skipped some steps in the process of removal
.Step 4 - Jack it up! Once everything was disconnected from the top end (minus the motor mounts) we jacked it up and went to work on the transmission.
[IMG]
[/IMG]Step 5 - Use the buddy system. I invited over some of my friends for beer, and my gf volunteered to make tacos and enchiladas and we went to work. My friend Michael (on the left) and I are seen disconnecting the exhaust manifolds, starter, ac pump, power steering pump, and transmission bolts. FYI, the exhaust manifold bolts on the drivers side can be a pain, but a flexisocket + 8" of extensions make it easy.
[IMG]
[/IMG]Step 6 - Intake it off baby! We decided to remove the intake/supercharger to make access to the top transmission bolts easier. It might not have been needed, but certainly made it a lot easier.
[IMG]
[/IMG]Step 7 - Beware of straps. Sometimes hidden ground straps can cause some issues. There is one such strap on the passenger side of the block. Be sure and remember to connect it to this stud on installation.
Step 8 - Its out. Time to assess the damage! Special thanks to Jonathan (left), Kevin who is manning the crane, and Michael (right) for allow me to sit on my *** for a good portion of the night. BTW ladies they're single and ready to mingle so PM me for digits.
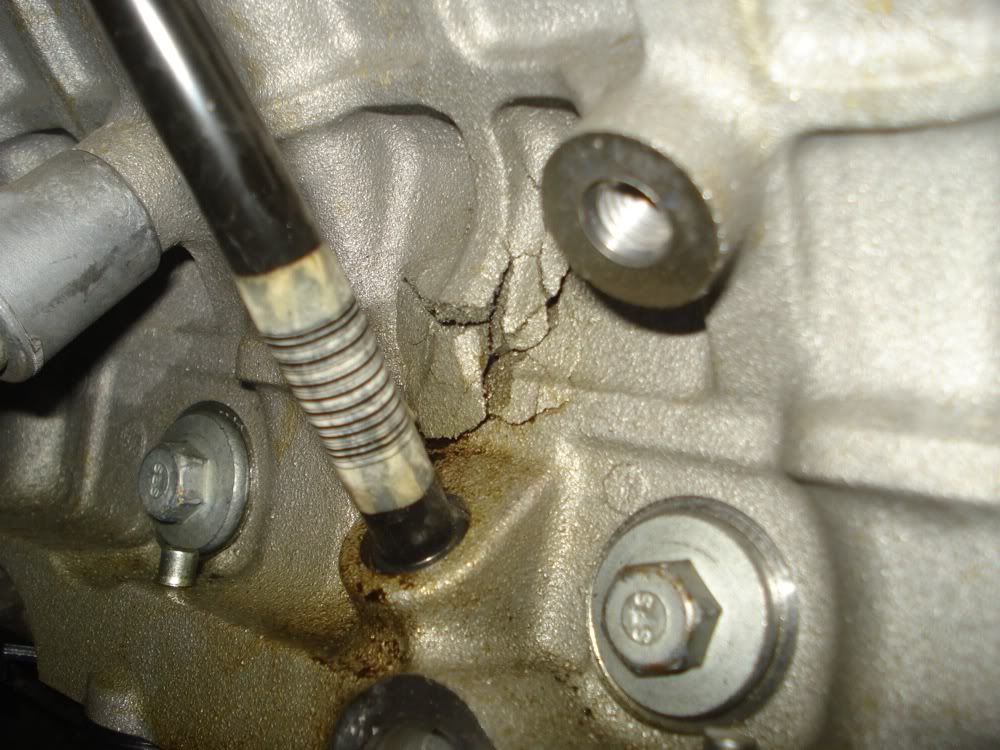
Step 9 - Hammer time, break it down now! Here are some pictures of what we saw upon pulling it. We knew it couldn't be good . . .
Passenger side:
Driver side:
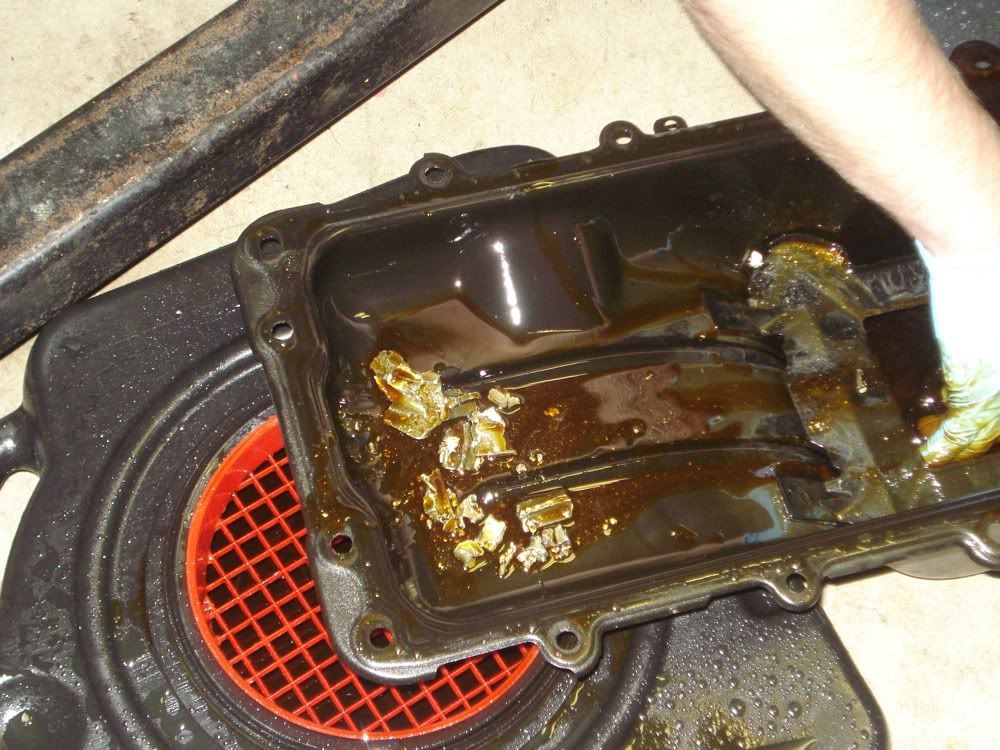
Step 10 - The money shot! Oil pan time.
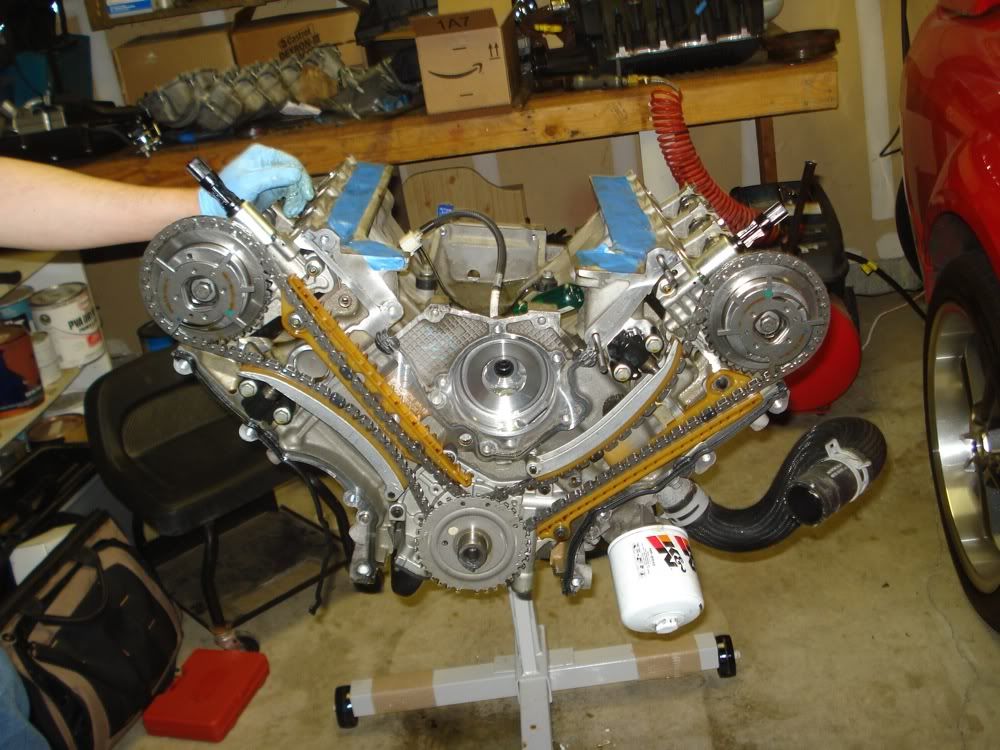
Step 11 - Its all about timing. Remember to keep all the timing components you take off separate so they go back on their respective sides. Since I am not reusing this block or internals, there wasn't really a point to aligning the timing marks with the shortblock for easy reinstallation.
After the timing stuff and valve covers are off, the heads come off pretty easily. Just need a solid 1/2" drive ratchet, and a tube to put over it for leverage. Or just a pry bar that will fit a socket. Or you could not be a puss like me I suppose.
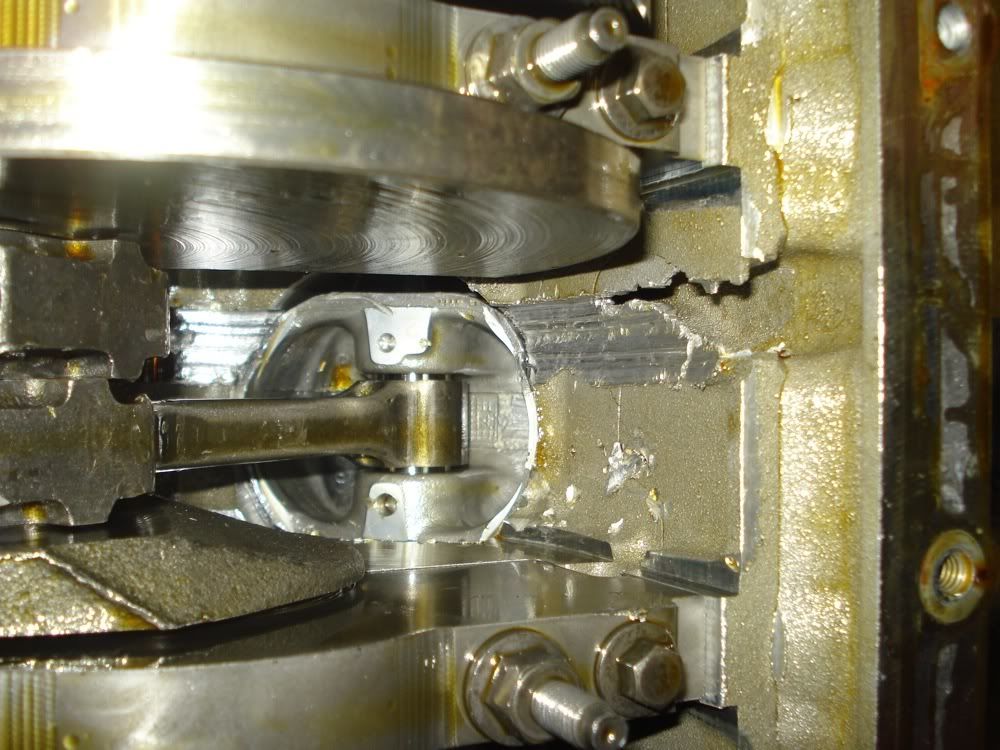
Step 12 - Knowing when enough is enough. The block has had it. Here are some photos of the internal damage. Also, as you can see on the piston, there are two indentations of the intake valves. The valves themselves look fine and straight (though I'll be getting both heads checked and hot-tanked. This was the cylinder from where the tapping noise was coming from. I wonder if the rod stretched from over-revving and that tapping was the piston just barely tapping the valves.
**WARNING, what you are about to see may be disturbing. Viewer discretion is advised.
Well folks that is all I have for now. I'll be pulling the crank and stripping the block next weekend. I'll be starting to order parts tomorrow so hopefully within a few weeks I can put her back together
. Will keep ya posted.
Last edited by siggyfreud; 05-02-2010 at 11:02 PM.


