
28x12x15 rear tires. Yes, they fit. Here's how...
 01-18-2011, 01:02 PM
#1
5th Gear Member
Thread Starter
Join Date: Jul 2006
Location: New Orleans
Posts: 4,491
I recently decided that my 275/60/15 Mickey Thompson ET Streets were just too soft to drive on long trips to and from the track (or much of anywhere else on the street for that matter). So I decided to invest in a pair of rims for street use. I wanted a tire that looked as good as my ET Streets and filled the rear wheel wells even better. Mickey Thompson makes a 28x12x15 Sportsman s/r, and I decided on that because not only would it look good on its own, but it also matches my front skinnies. After searching the internet for days looking for someone running this size tire on the rear of an S197, I came across a guy who was running them on a '08 Bullitt. He advised me that theey would fit, but would require some fabrication of the bump stop brackets in the rear wheel wells. During my install, I was pleasantly surprised to find that I did not have to modify the bump stop brackets after all, but clearance is TIGHT. I decided to detail my installation in pictures.
Here are the new 28x12" tires (mounted on 15x10" Race Star wheels with a 7.5" back space) on the left waiting to be put in place of the ET Streets that are on the car in this picture.
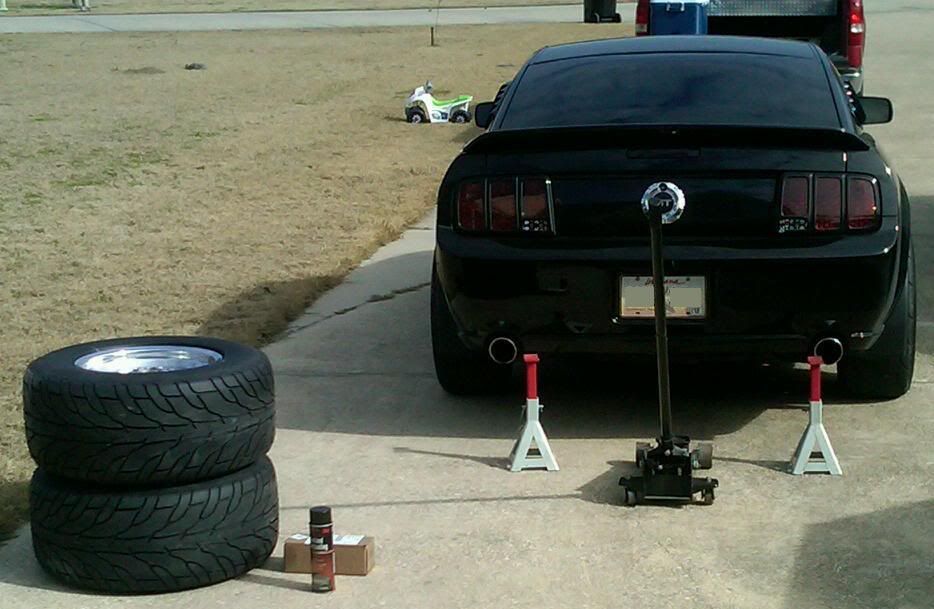
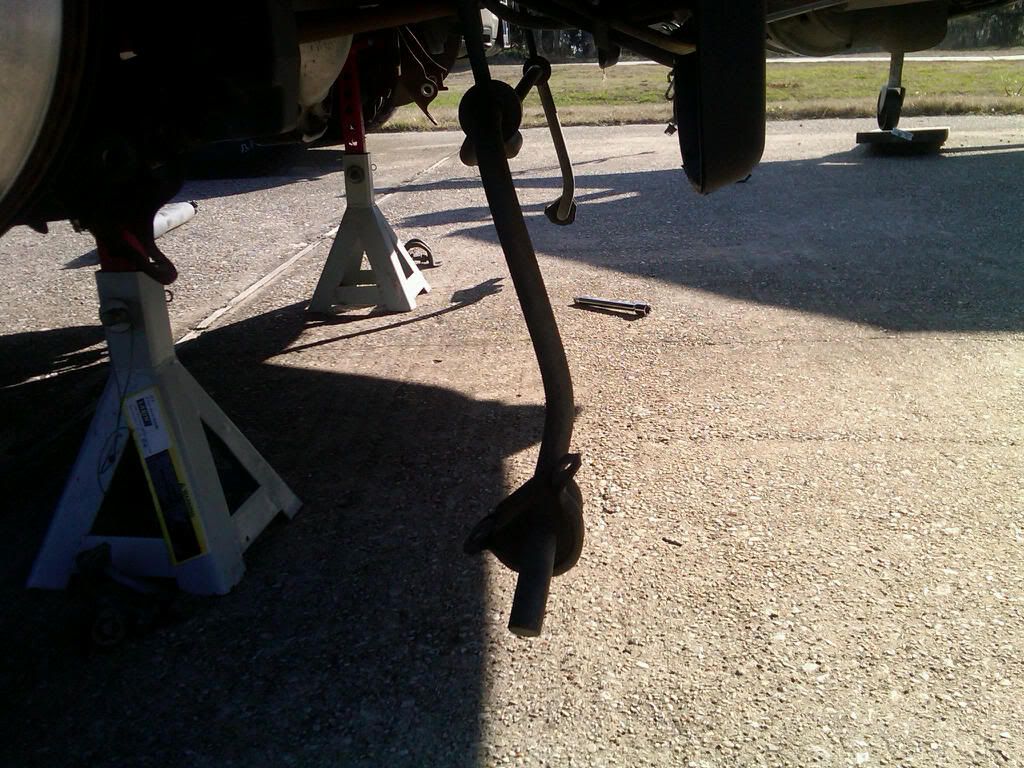
Fist thing I did was to get the car in the air on jackstands as high as possible.
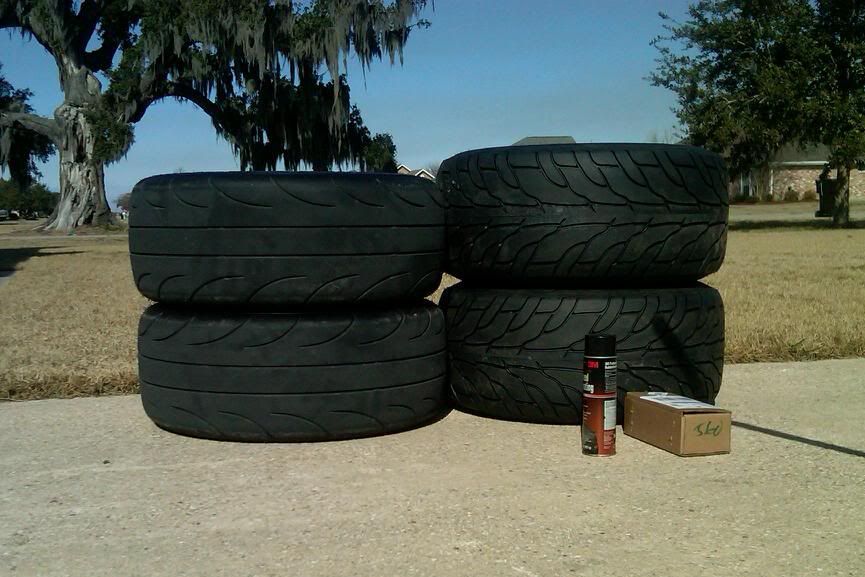
I removed the 275/60 ET Streets (on Race Star 15x8" wheels with 5.5" back space) and placed them next to the 28x12"s for comparison. Quite a difference.
Next, I began installing BMR swaybar relocation brackets. The first thing that needs to be done is removal of the bolt that holds the rear strut to the axle on each side.
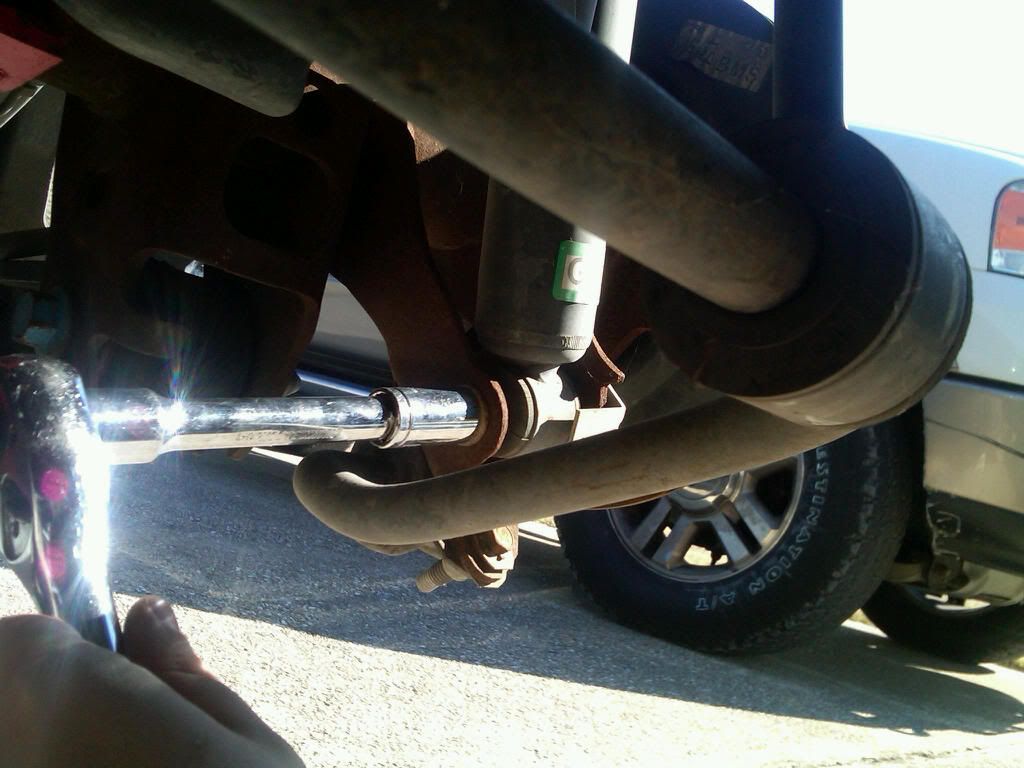
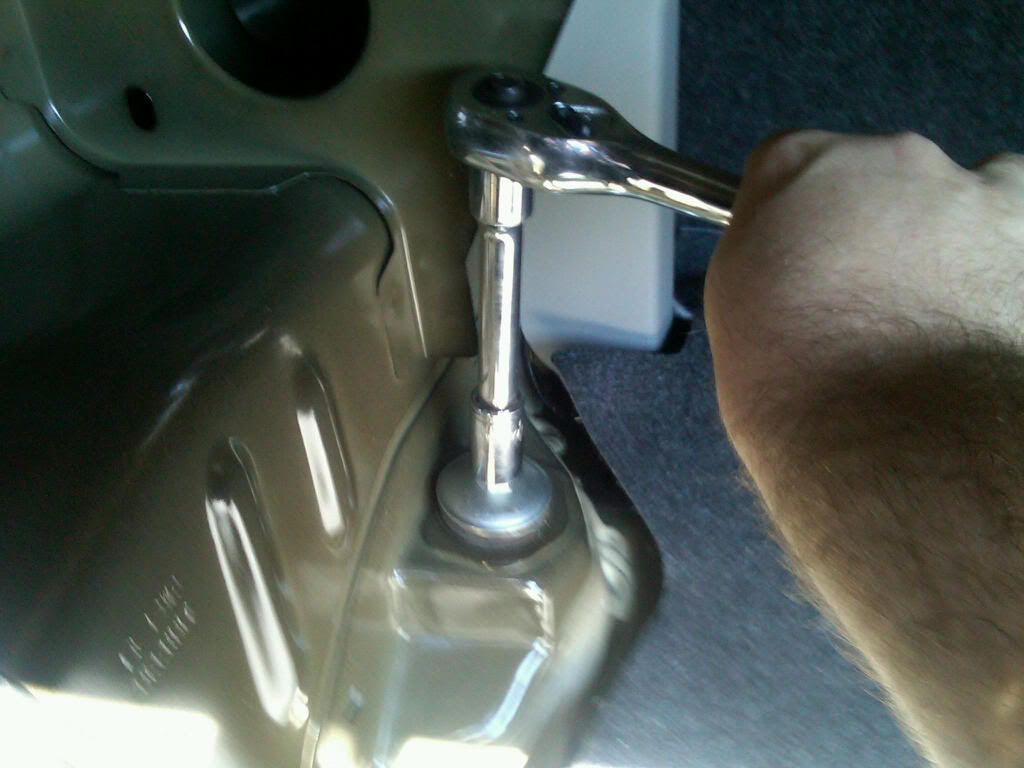
After that, peel back the trunk carpet and remove the top nut from the strut assembly on each side. (Even though I'm holding a ratchet in this pic, I had to use an impact wrench to keep the strut assembly from spinning in place while I removed the nut).
Here's where the directions from BMR start to get a little sketchy. It's easier if you do it my way, TRUST ME. Remove the two 15mm bolts from the underside of the factory swaybar bracket on each side of the car and allow the swaybar to drop down.
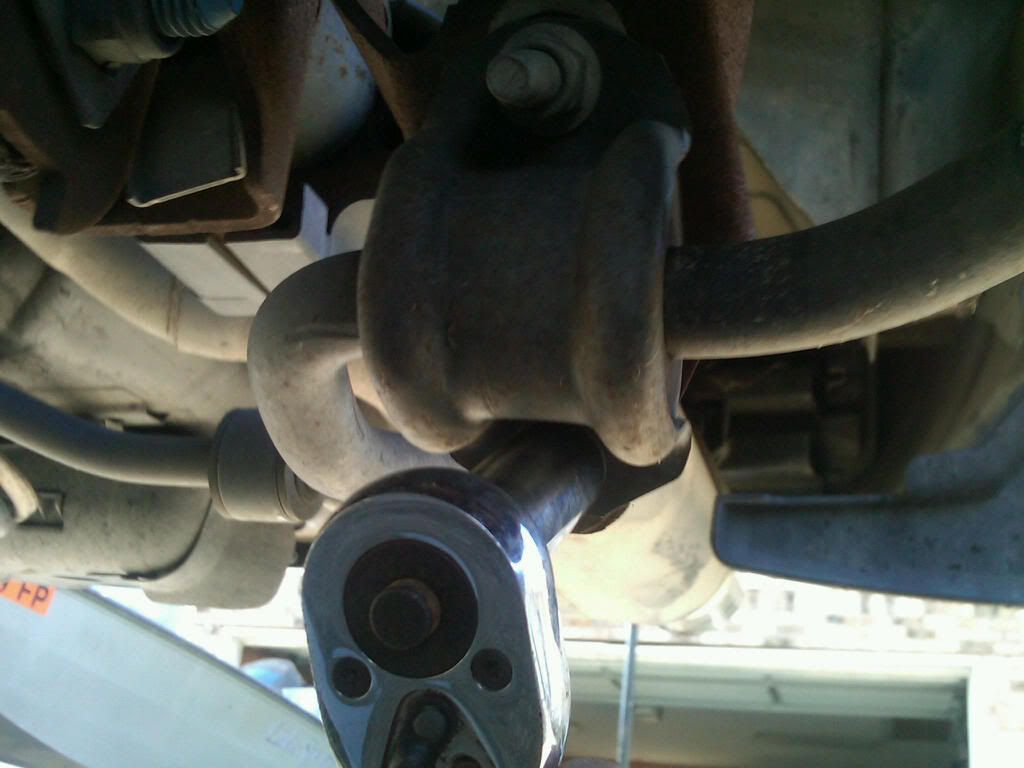
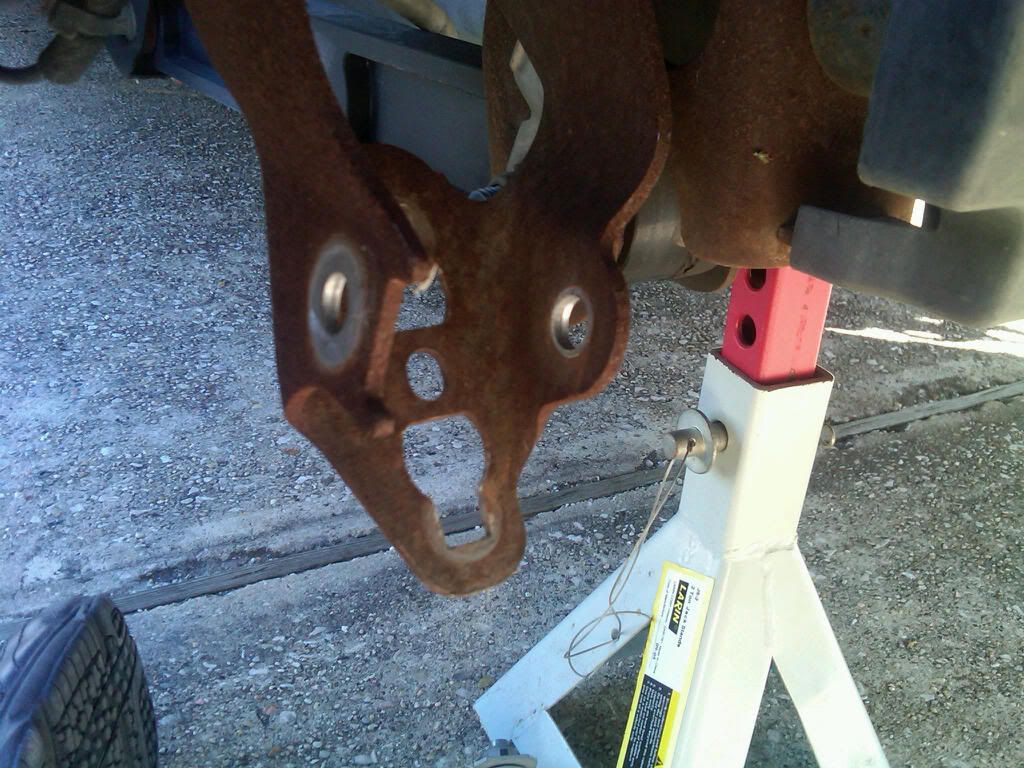
Now use a 13mm socket to twist the bolts and retaining clips on top of the factory swaybar brackets until you hear or feel the retaining clips break or "give" (they will not be reused). Carefully maneuver the retaining clips and bolts out of the bracket.
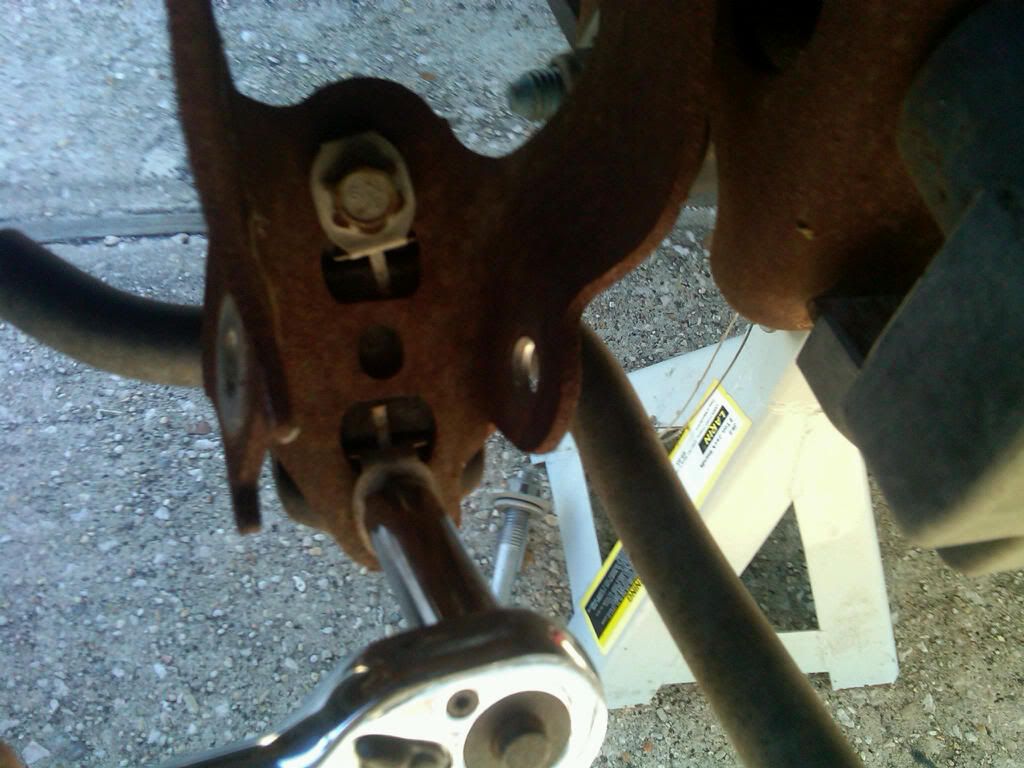
This is what the factory bracket should look like at this point:
Here are the new 28x12" tires (mounted on 15x10" Race Star wheels with a 7.5" back space) on the left waiting to be put in place of the ET Streets that are on the car in this picture.
Fist thing I did was to get the car in the air on jackstands as high as possible.
I removed the 275/60 ET Streets (on Race Star 15x8" wheels with 5.5" back space) and placed them next to the 28x12"s for comparison. Quite a difference.
Next, I began installing BMR swaybar relocation brackets. The first thing that needs to be done is removal of the bolt that holds the rear strut to the axle on each side.
After that, peel back the trunk carpet and remove the top nut from the strut assembly on each side. (Even though I'm holding a ratchet in this pic, I had to use an impact wrench to keep the strut assembly from spinning in place while I removed the nut).
Here's where the directions from BMR start to get a little sketchy. It's easier if you do it my way, TRUST ME. Remove the two 15mm bolts from the underside of the factory swaybar bracket on each side of the car and allow the swaybar to drop down.
Now use a 13mm socket to twist the bolts and retaining clips on top of the factory swaybar brackets until you hear or feel the retaining clips break or "give" (they will not be reused). Carefully maneuver the retaining clips and bolts out of the bracket.
This is what the factory bracket should look like at this point:
Last edited by Diabolical!; 01-19-2011 at 08:25 AM.
 01-18-2011, 01:28 PM
#2
5th Gear Member
Thread Starter
Join Date: Jul 2006
Location: New Orleans
Posts: 4,491
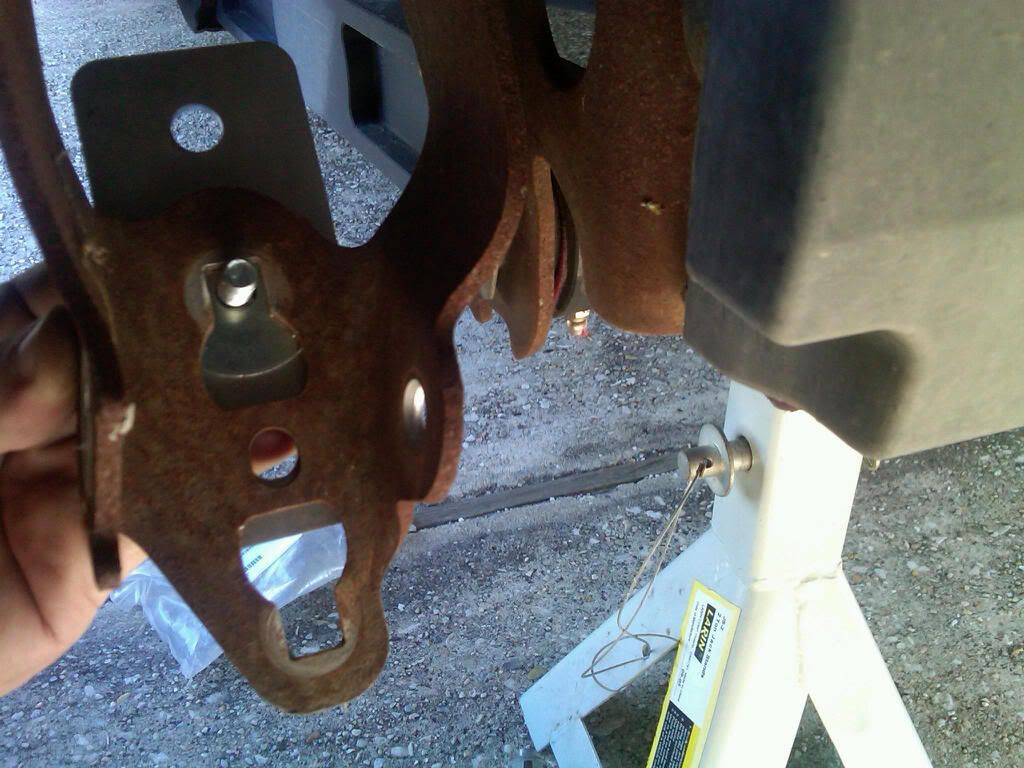
Next, hold the new BMR swaybar brackets in place as shown to see how much material will need to be removed from the factory bracket. All of the material that extends below the BMR bracket in this pic will need to be removed:
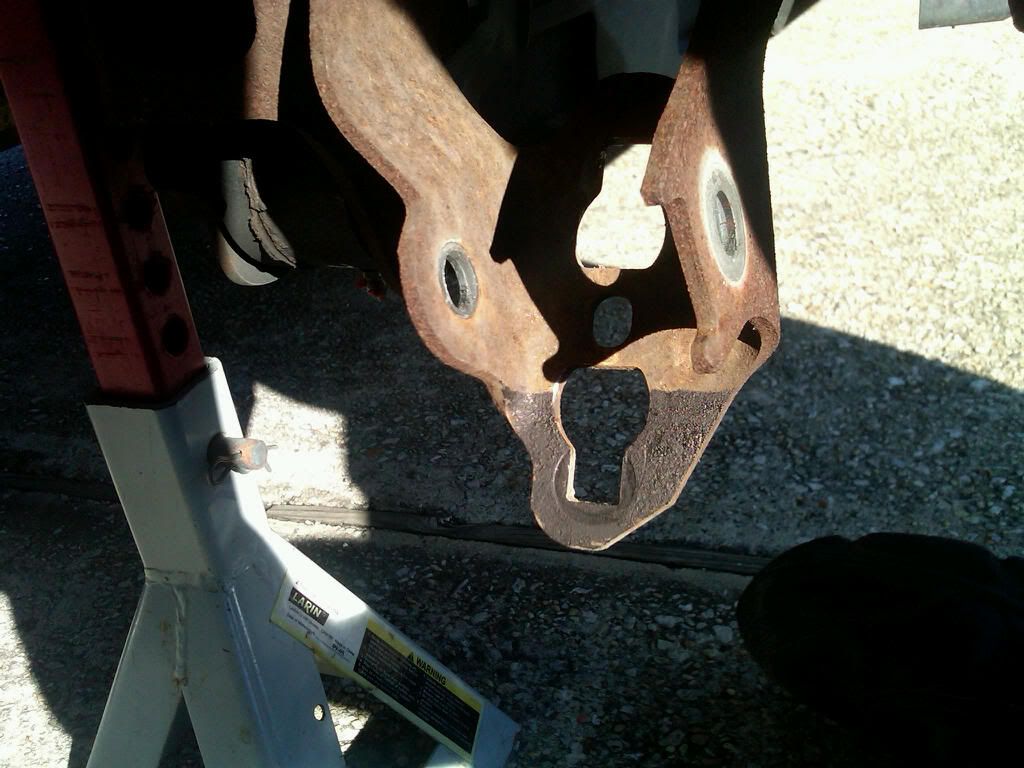
I used a black marker to color in all of the material that would need to be removed and removed it with an angle grinder.
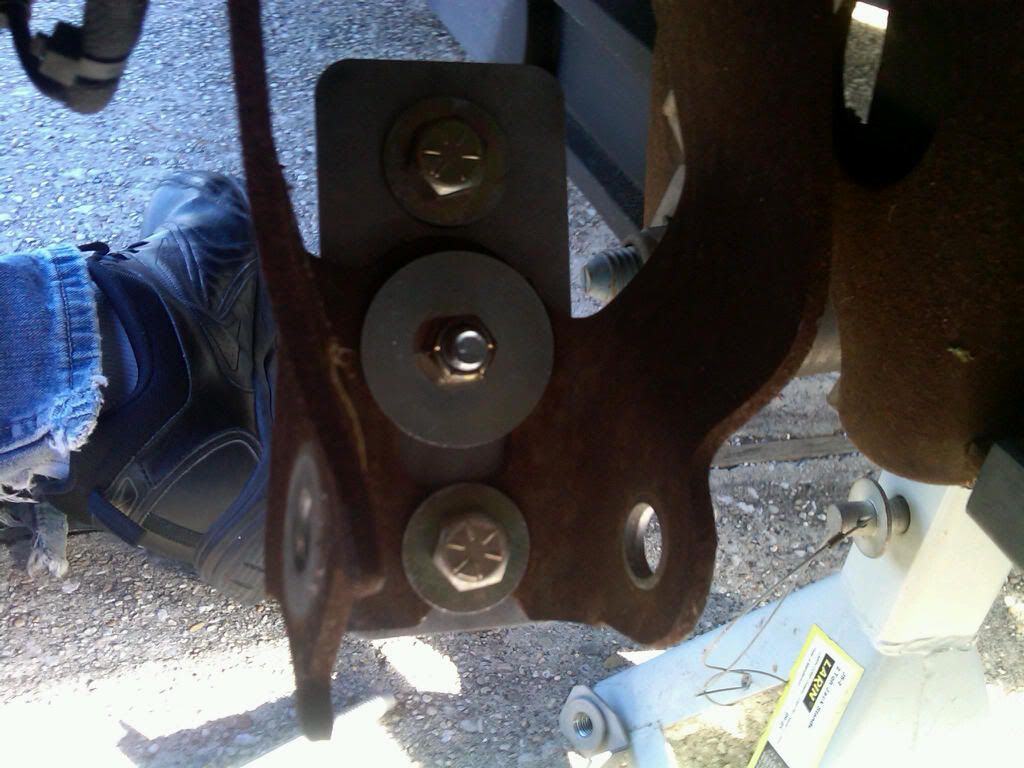
Now attach the center bolt and washer of the new bracket and tighten. Drop the other two bolts and washers into place, but DO NOT attach the swaybar at this point. If you do, the swaybar will block the holes needed to reinstall the strut, and you will have to uninstall the swaybar again in order to install the struts (ask me how I know, lol. Thanks BMR).
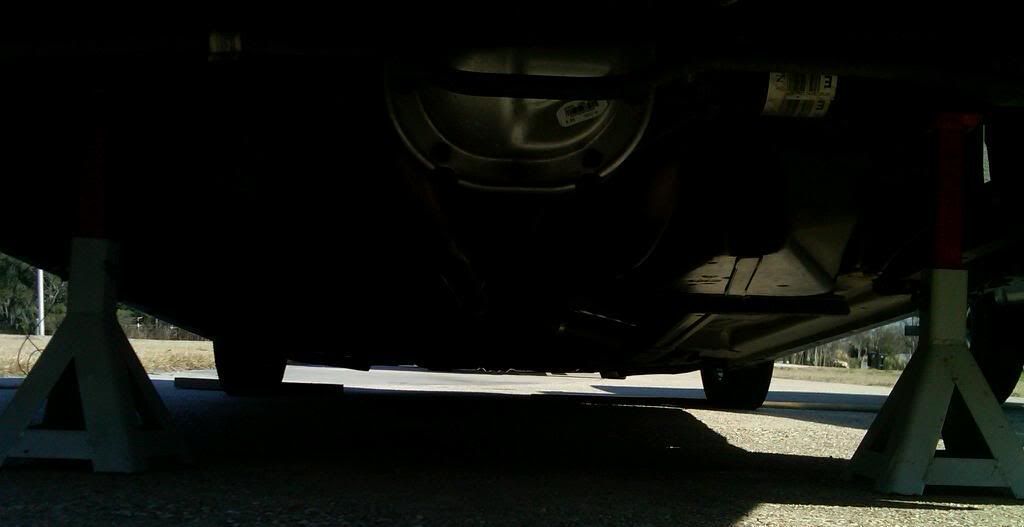
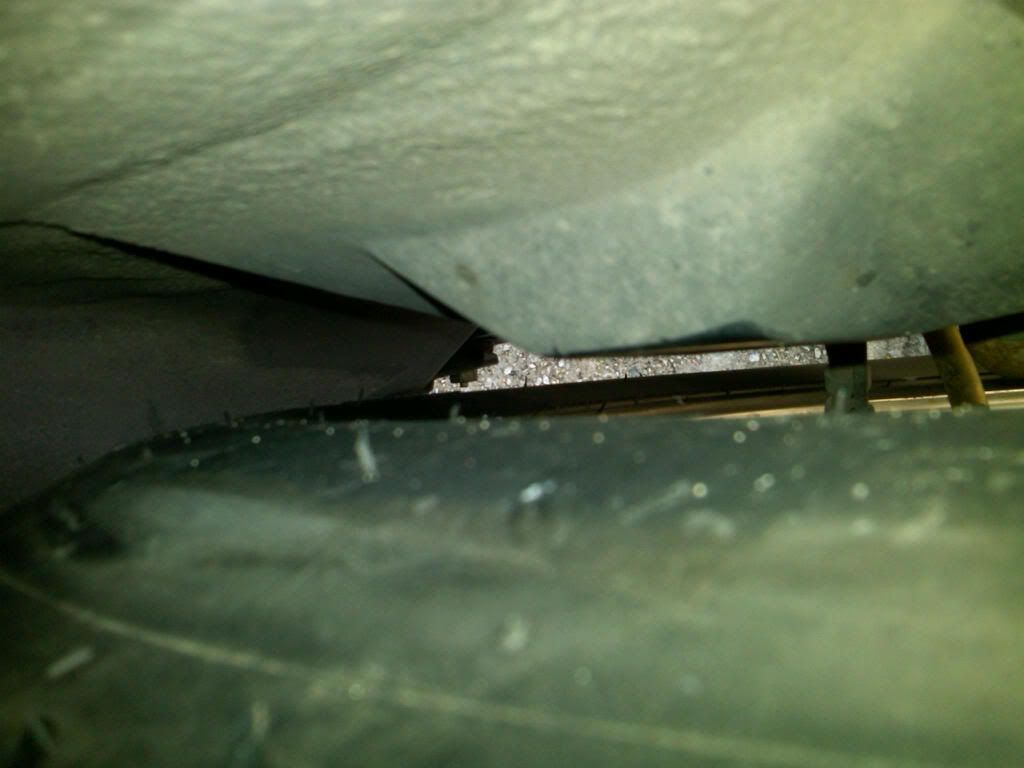
I reinstalled the strut at this point and checked for fitment issues by mounting the wheels and tires before going any further. This picture shows the clearance between the new tire and the bump stop bracket. It is very tight, but they will not rub on a stock height car. I flexed the axle up and down on both sides to make sure, and the tires actually move up and over the bump stop brackets when going over bumpy surfaces.
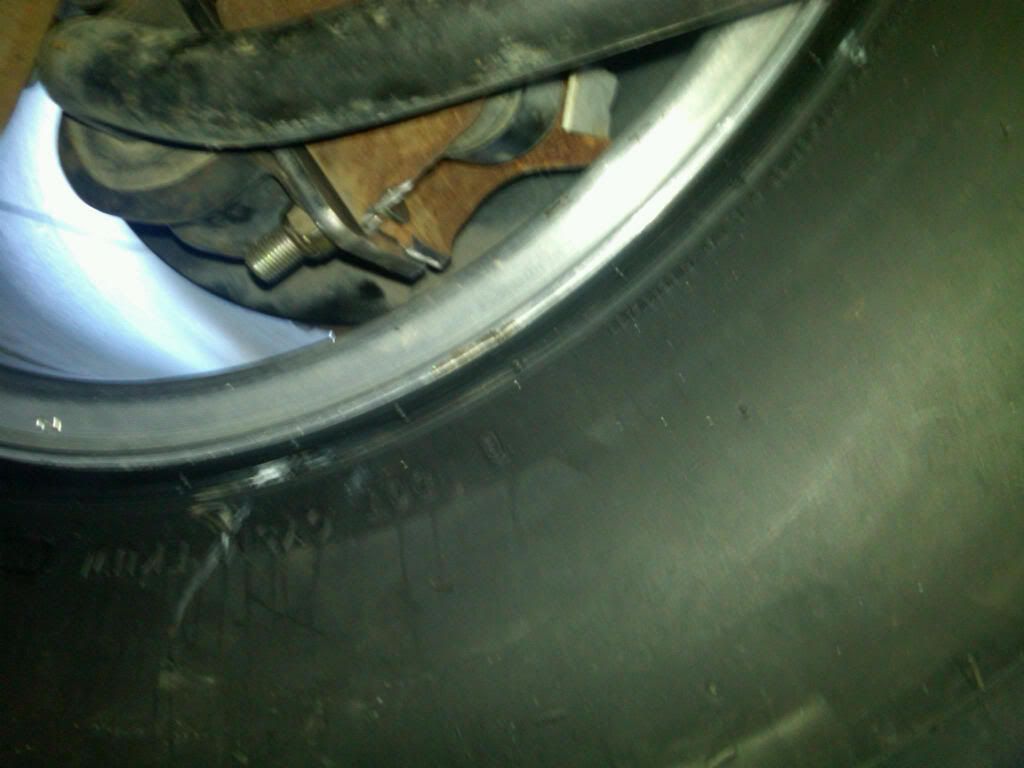
Here is the clearance between the tire and the strut. Again, it's tight, but they clear (you can also see another angle of the clearance between the bump stop bracket and the tire in the background of this pic).

I then removed the tire and reinstalled the swaybar. Remember, the strut must already be in place when you reinstall the sway bar (even though it isn't in this picture). You will have to use a box end wrench below the strut to install the lower bolt on each swaybar bracket and you will have to use a swivel socket to access the upper bolt behind the strut.
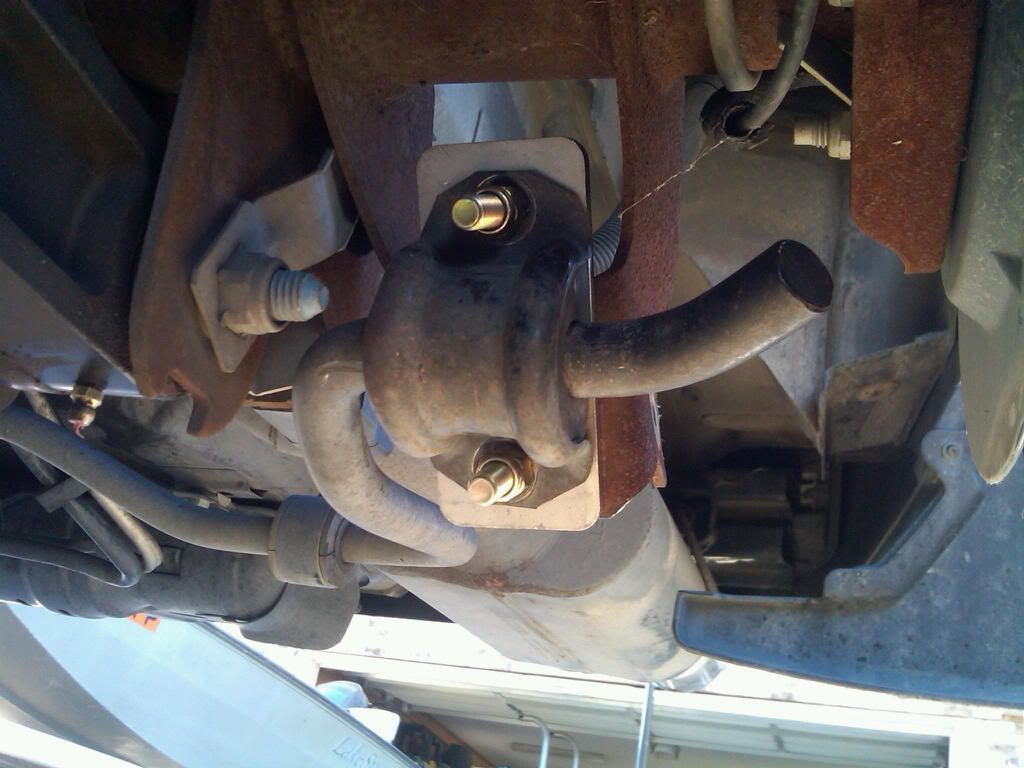
Finally, I put the wheels on and torqued them to spec. Here is a picture of how close the clearance is for the new BMR swaybar brackets. Note the location of the swaybar in relation to the opening for the lower strut mounting bolts. It is impossible to install the struts with the swaybar in place.
Here's one more shot of the clearance between the bump stop brackets and the 28x12 tires. It is VERY TIGHT. If your car is lowered, I can almost guarantee that you will need an adjustable panhard bar to center the rear axle so that these tires do not rub (my car is stock height).
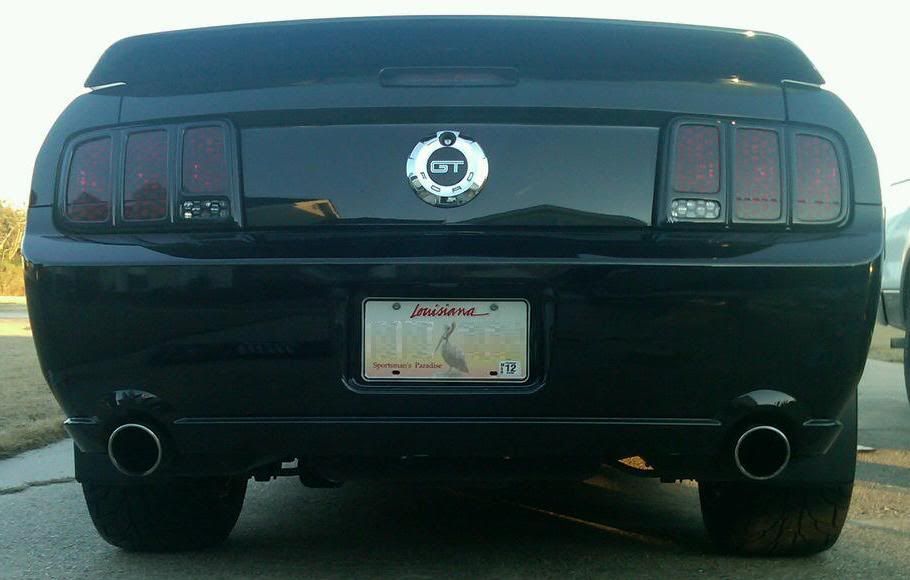
Finally. 28x12"s installed and on the ground (and a nice shot of my new GT500 spoiler). Daylight was fading at this point, but I promise some better pics from more angles soon.
I used a black marker to color in all of the material that would need to be removed and removed it with an angle grinder.
Now attach the center bolt and washer of the new bracket and tighten. Drop the other two bolts and washers into place, but DO NOT attach the swaybar at this point. If you do, the swaybar will block the holes needed to reinstall the strut, and you will have to uninstall the swaybar again in order to install the struts (ask me how I know, lol. Thanks BMR).
I reinstalled the strut at this point and checked for fitment issues by mounting the wheels and tires before going any further. This picture shows the clearance between the new tire and the bump stop bracket. It is very tight, but they will not rub on a stock height car. I flexed the axle up and down on both sides to make sure, and the tires actually move up and over the bump stop brackets when going over bumpy surfaces.
Here is the clearance between the tire and the strut. Again, it's tight, but they clear (you can also see another angle of the clearance between the bump stop bracket and the tire in the background of this pic).
I then removed the tire and reinstalled the swaybar. Remember, the strut must already be in place when you reinstall the sway bar (even though it isn't in this picture). You will have to use a box end wrench below the strut to install the lower bolt on each swaybar bracket and you will have to use a swivel socket to access the upper bolt behind the strut.
Finally, I put the wheels on and torqued them to spec. Here is a picture of how close the clearance is for the new BMR swaybar brackets. Note the location of the swaybar in relation to the opening for the lower strut mounting bolts. It is impossible to install the struts with the swaybar in place.
Here's one more shot of the clearance between the bump stop brackets and the 28x12 tires. It is VERY TIGHT. If your car is lowered, I can almost guarantee that you will need an adjustable panhard bar to center the rear axle so that these tires do not rub (my car is stock height).
Finally. 28x12"s installed and on the ground (and a nice shot of my new GT500 spoiler). Daylight was fading at this point, but I promise some better pics from more angles soon.


