
DIY: 1 piece driveshaft install
 02-16-2007, 11:55 PM
#1
6th Gear Member
Thread Starter

Join Date: Sep 2006
Location: Gainesville, FL
Posts: 11,278
Well i broke down and bought a 1 piece steel driveshaft from dennysdriveshaft.com for $540 .
.
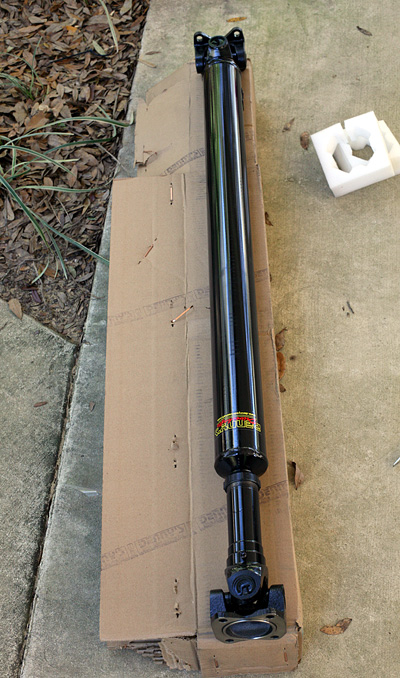
The driveshaft is supposed to weigh 23lbs, but I got 25 using myself and my bathroom scale. The stock driveshaft
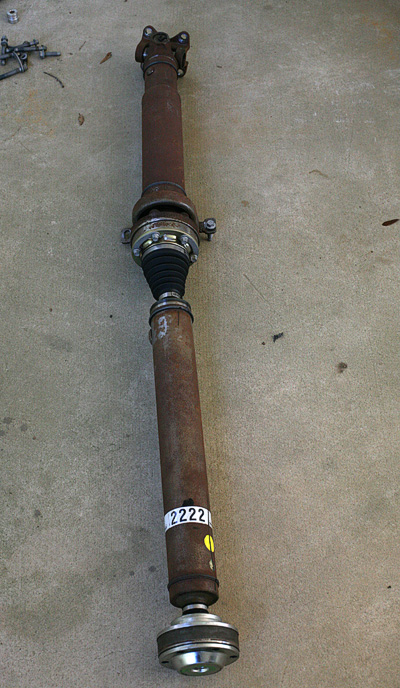
weighed in at 41lbs using the same method. It's supposed to weigh anywhere from 41 (obviously) to 46 from what i've read.
The first step in removing the stock shaft is to put the car in nuetral( i'm guessing so you don't stress the tranny)and obviously jacking up the car, blah, blah, blah
, i'm going to skip the common sense stuff. So the real first step is removing the rear of the driveshaft from the pinion. This was arelatively easy step, actually the easiest. The hardest part for me was having to get out from under the car to jack the back up off my ramps so I could rotate the driveshaft in order to get to the rest of the 6 bolts. That was one long sentence!
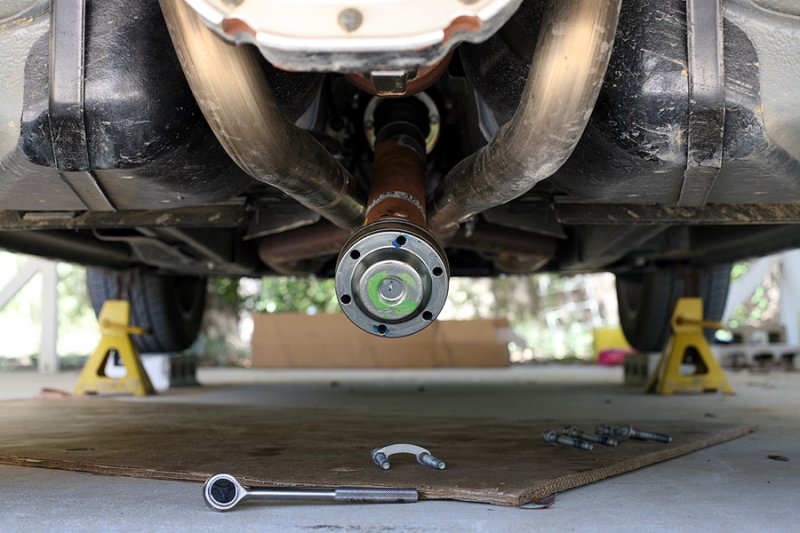
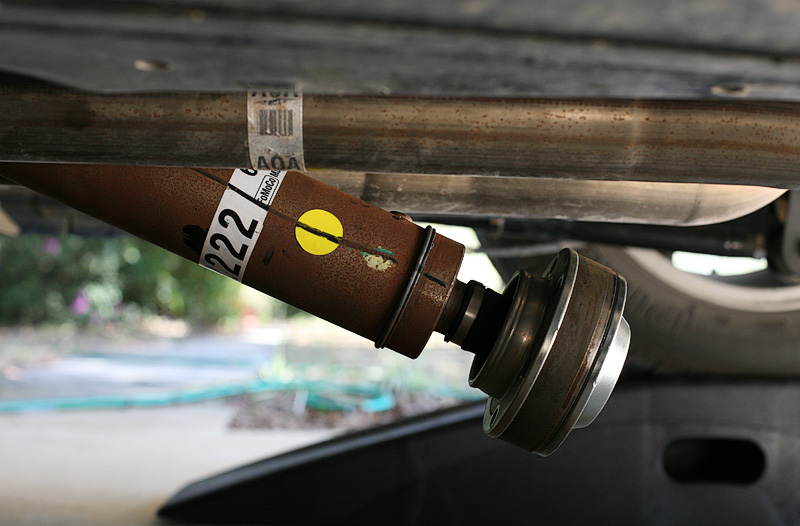
The bolts that hold the cv joint to the pinion are 10mm and ford put an ample amount of locktite on them. They weren't all that tight as far as torqued, but they were tight almost all the way out of the hole. Here's a tip that the service manual instructions fail to mention. Leave two bolts in the rear, finger tight. This is to keep the driveshaft from moving when removing the transmission mounting bolts.
Next you can remove the 4 12 point (12mm) bolts that hold the driveshaft to the transmission.
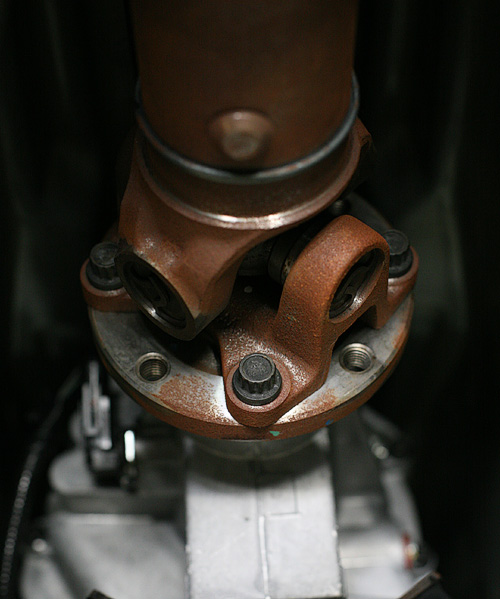
At first I thought I didn't have this type ofsocket. I don't know what I was thinking. Your going to need a breaker bar of some kind to put on your ratchet. i used the closed end of a 1 1/8 inch wrench, worked like a charm. Be sure to mark the tranny flange and U joint flange incase you ever want/need to put the stocker back in, you want to put it in the same holes. Once you remove all the bolts you'll need to pry the flange off the tranny. Don't just pry at any spot. In my picture above you want to put your pry tool in the U shaped spot to the right of the bottom bolt. If you think you can use your tire iron as a pry bar you are sadly mistaken. I ended up using a large flat blade screw driver and it came off easier than I expected.
Now is the time to find something to lay between the exhaust pipes to support the driveshaft. Actually you should allready have done that. I used a couple of pieces of wood. you can go back now and remove the two bolts you left in therear mount Now you need to remove the carrier bearing bracket bolts.

The bolts are 13mm I think, but my old 1/2 socket fit like a glove.You'll need some extensions on your socket to get at these bolts, they are a pain! Be sure to pop off the aluminum spacers between the body and carrier bracket.

One of mine came off by itself, but the other was stuck there. I used a screw driver to pop it off. You don't want them falling off down the road.
You'll need to slide the driveshaft out the back. It would help to have another person, but I did it by self. Now to put the Denny's driveshaft in.
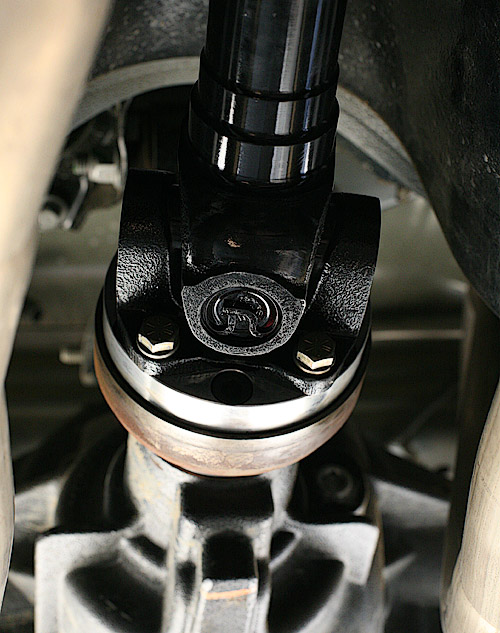
First you need to install the aluminum adapter to the pinion flange using the 6 allen head bolts (hex bolts) supplied. I had to go to discount autoto buy a 5/16th inch,3/8 inch drive hex bit socket. It cost $5. Use loctite on these bolts!

Once again I had to crawl out from under the car to release the E-brake in order to turn the pinion flange, to access all the bolts. The E-brake worked fine to hold the rear end because Ford specs are 41 ft lbs for these bolts. Be sure you have the car high enough or a short enough torque wrench. There is very little room to torque these bolts due to the exhaust. My torque wrench is longer than i'd like.
Now is the time to put the dennys shaft into place. I recommend finding something to lay across the H pipe that is tall enough to put the driveshaft up to the height of the tranny flange. I used a foam kayak pad and it worked freakin perfectly! I impressed myself there.
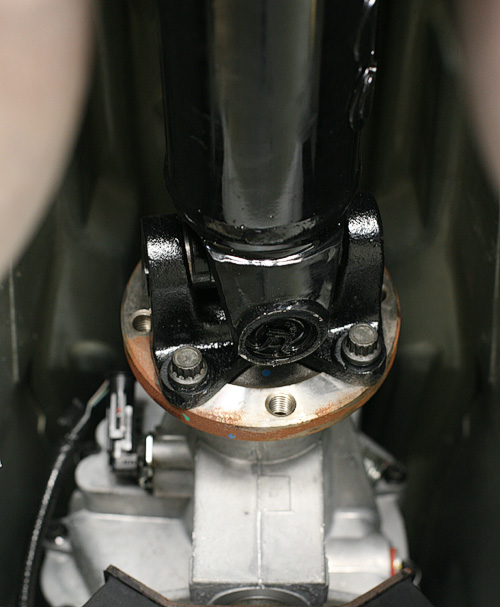
You need to attach the rear first using the 4, 14mm bolts and lock washers supplied. I went ahead and used locktite here to, but it's probably redundent. Denny didn't say anything about how tight to torque these so i did 41 ft. lbs like the ford specs. Again you'll need to rotate the driveshaft to get to all the bolts. big pain in the ***!
With the rear attached slide the front up to the transmission mount and install the original 12 point 12mm bolts you removed. Use loctite on these bolts! Ford specs say 76 ft lbs. Be sure the rear tires are resting on something or your driveshaft will spin when torqueing these.
you need to grease the slip joint on this driveshaft after the install. I used valvoline full synthetic wheel bearing and CV joint grease. Still waiting to hear back from Denny to wether or not that's the right stuff. I'm not going to go into setting the pinion angle in this post. i shortened my control arms to lessen the negative angle at the pinion. I didn't get a chance to do a good test drive, just a quick 1 mile trip to my parents house and back to make sure it was driveable. This would have only taken me 2 hours if I knew the bolts sizes and had the correct tools. it ended up taking me 4 1/2 hours not including raising the car, but I did include my trip to the parts store. Hopefully this can save some of you some time. I'm sure i've left something out here or there and i'll update this post as necessary.
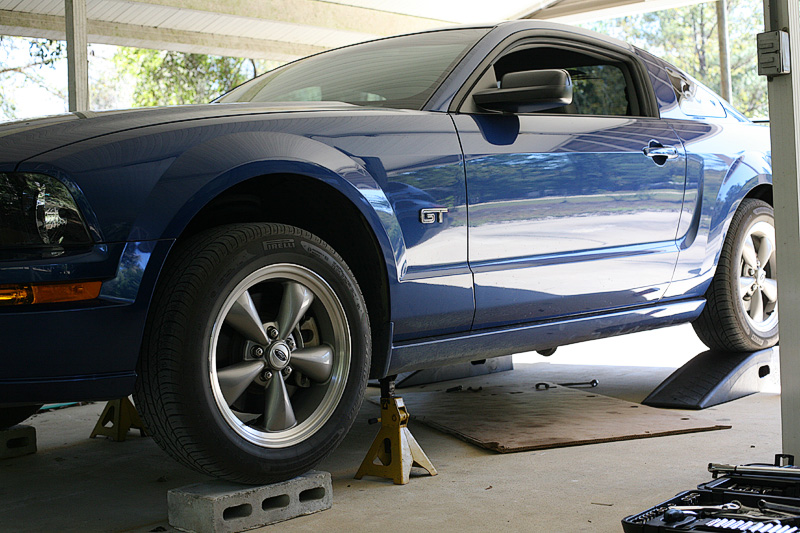
This is what I call a raked look!

.The driveshaft is supposed to weigh 23lbs, but I got 25 using myself and my bathroom scale. The stock driveshaft
weighed in at 41lbs using the same method. It's supposed to weigh anywhere from 41 (obviously) to 46 from what i've read.
The first step in removing the stock shaft is to put the car in nuetral( i'm guessing so you don't stress the tranny)and obviously jacking up the car, blah, blah, blah
, i'm going to skip the common sense stuff. So the real first step is removing the rear of the driveshaft from the pinion. This was arelatively easy step, actually the easiest. The hardest part for me was having to get out from under the car to jack the back up off my ramps so I could rotate the driveshaft in order to get to the rest of the 6 bolts. That was one long sentence!
The bolts that hold the cv joint to the pinion are 10mm and ford put an ample amount of locktite on them. They weren't all that tight as far as torqued, but they were tight almost all the way out of the hole. Here's a tip that the service manual instructions fail to mention. Leave two bolts in the rear, finger tight. This is to keep the driveshaft from moving when removing the transmission mounting bolts.
Next you can remove the 4 12 point (12mm) bolts that hold the driveshaft to the transmission.
At first I thought I didn't have this type ofsocket. I don't know what I was thinking. Your going to need a breaker bar of some kind to put on your ratchet. i used the closed end of a 1 1/8 inch wrench, worked like a charm. Be sure to mark the tranny flange and U joint flange incase you ever want/need to put the stocker back in, you want to put it in the same holes. Once you remove all the bolts you'll need to pry the flange off the tranny. Don't just pry at any spot. In my picture above you want to put your pry tool in the U shaped spot to the right of the bottom bolt. If you think you can use your tire iron as a pry bar you are sadly mistaken. I ended up using a large flat blade screw driver and it came off easier than I expected.
Now is the time to find something to lay between the exhaust pipes to support the driveshaft. Actually you should allready have done that.
I used a couple of pieces of wood. you can go back now and remove the two bolts you left in therear mount Now you need to remove the carrier bearing bracket bolts. The bolts are 13mm I think, but my old 1/2 socket fit like a glove.You'll need some extensions on your socket to get at these bolts, they are a pain! Be sure to pop off the aluminum spacers between the body and carrier bracket.
One of mine came off by itself, but the other was stuck there. I used a screw driver to pop it off. You don't want them falling off down the road.
You'll need to slide the driveshaft out the back. It would help to have another person, but I did it by self. Now to put the Denny's driveshaft in.
First you need to install the aluminum adapter to the pinion flange using the 6 allen head bolts (hex bolts) supplied. I had to go to discount autoto buy a 5/16th inch,3/8 inch drive hex bit socket. It cost $5. Use loctite on these bolts!
Once again I had to crawl out from under the car to release the E-brake in order to turn the pinion flange, to access all the bolts. The E-brake worked fine to hold the rear end because Ford specs are 41 ft lbs for these bolts. Be sure you have the car high enough or a short enough torque wrench. There is very little room to torque these bolts due to the exhaust. My torque wrench is longer than i'd like.
Now is the time to put the dennys shaft into place. I recommend finding something to lay across the H pipe that is tall enough to put the driveshaft up to the height of the tranny flange. I used a foam kayak pad and it worked freakin perfectly! I impressed myself there.
You need to attach the rear first using the 4, 14mm bolts and lock washers supplied. I went ahead and used locktite here to, but it's probably redundent. Denny didn't say anything about how tight to torque these so i did 41 ft. lbs like the ford specs. Again you'll need to rotate the driveshaft to get to all the bolts. big pain in the ***!
With the rear attached slide the front up to the transmission mount and install the original 12 point 12mm bolts you removed. Use loctite on these bolts! Ford specs say 76 ft lbs. Be sure the rear tires are resting on something or your driveshaft will spin when torqueing these.
you need to grease the slip joint on this driveshaft after the install. I used valvoline full synthetic wheel bearing and CV joint grease. Still waiting to hear back from Denny to wether or not that's the right stuff. I'm not going to go into setting the pinion angle in this post. i shortened my control arms to lessen the negative angle at the pinion. I didn't get a chance to do a good test drive, just a quick 1 mile trip to my parents house and back to make sure it was driveable. This would have only taken me 2 hours if I knew the bolts sizes and had the correct tools. it ended up taking me 4 1/2 hours not including raising the car, but I did include my trip to the parts store.
Hopefully this can save some of you some time. I'm sure i've left something out here or there and i'll update this post as necessary.This is what I call a raked look!
Last edited by moosestang; 01-24-2013 at 04:31 PM.

 02-17-2007, 12:08 AM
#3
6th Gear Member
Thread Starter
Join Date: Sep 2006
Location: Gainesville, FL
Posts: 11,278
ORIGINAL: James Cole
Great post! thanx very much, but we would also like to know how does the car feel now...
Great post! thanx very much, but we would also like to know how does the car feel now...

 02-17-2007, 07:08 AM
#6
6th Gear Member
Thread Starter
Join Date: Sep 2006
Location: Gainesville, FL
Posts: 11,278
ORIGINAL: likemike99
great write up. I am awaiting my dennys ds. I had tried to loosen the front bolts putting in my shifter and wasnt sure it could be done by hand. good to know it can.
great write up. I am awaiting my dennys ds. I had tried to loosen the front bolts putting in my shifter and wasnt sure it could be done by hand. good to know it can.
02-17-2007, 01:12 PM
#9
3rd Gear Member
Join Date: Mar 2006
Location: Connecticut
Posts: 758
Congrats on the install !.. and thanks for write up!...Mine is on order so I am curious to know how the car drives now?..Looking forward to your full road test...
[IMG]local://upfiles/31319/978D41D57C92427BB64F2D75CEBFEB0A.jpg[/IMG]
[IMG]local://upfiles/31319/978D41D57C92427BB64F2D75CEBFEB0A.jpg[/IMG]
02-17-2007, 01:44 PM
#10
4th Gear Member
Join Date: Jan 2007
Location:
Posts: 1,999
What is the advantage of switching to a one piece and why did Ford bother with a more complex, more $$$ 2 piece.
On trucks, after a certain length a1 piece will start to whip at high rpms.
On trucks, after a certain length a1 piece will start to whip at high rpms.