Retrofitting headlights questions
 04-11-2014, 08:36 PM
#1
Thread Starter

Join Date: Aug 2011
Location: Michigan
Posts: 21
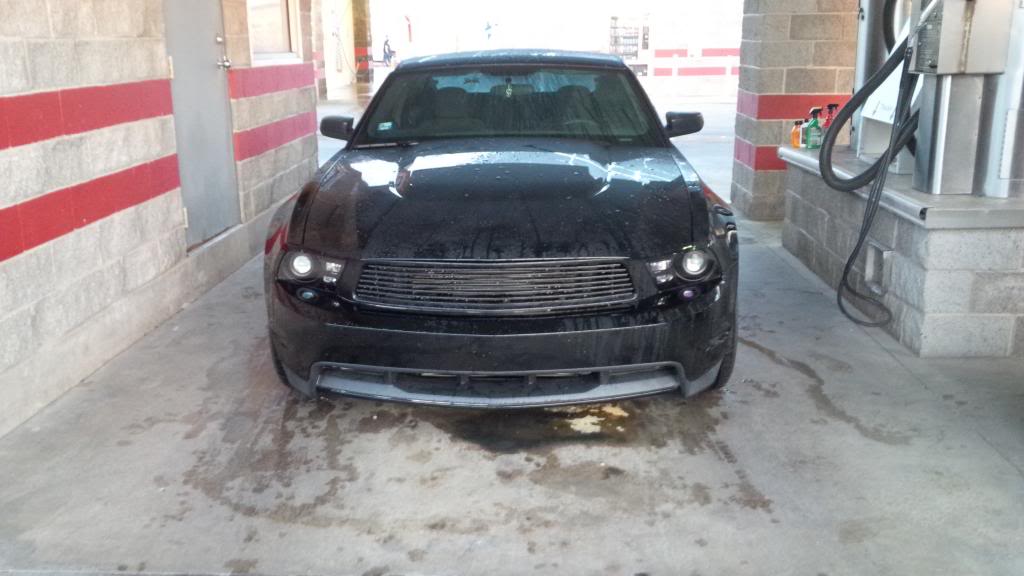
Okay so I've searched far and wide and only found a handful of people that have actually retrofitted headlights for the S197. So my reason for posting this thread is to get some pointers on what to do.
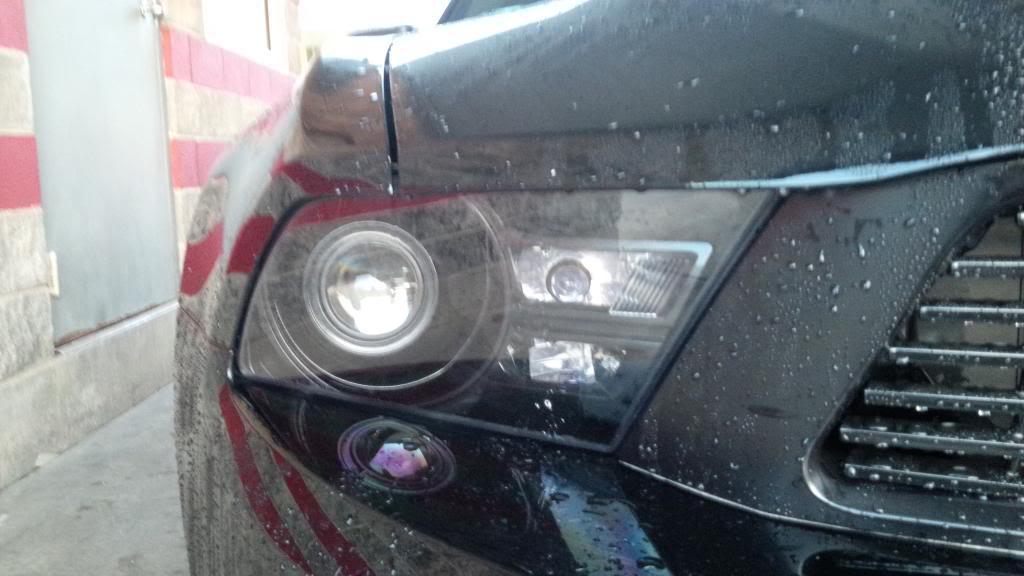
I've read that the OEM headlights are incredibly hard to bake open so I will probably opt for these headlights (http://www.ebay.com/itm/10-11-12-FORD-MUSTANG-2DR-BASE-GT-CRYSTAL-HEADLIGHTS-BLACK-HOUSING-CLEAR-LENS/291122304722?_trksid=p2047675.c100011.m1850&_trkparms=aid%3D222008%26algo%3DSIC.MOTORS%26ao%3D1%26asc%3D22042%26meid%3D6140940143672074416%26pid%3D100011%26prg%3D9536%26rk%3D1%26rkt%3D10%26sd%3D301136300570) and bake them open.
The next question is what kind of projectors/shroud combo should i get?
Once all that is out of the way is how do i do all the wiring?
This project will probably happen after this semester and if I do decide to do I will definitely post a guide up.
 04-12-2014, 07:49 AM
#2

StockD/HID Retrofit Lights did my '10 a couple years back. I went with Morimoto everything (projectors, ballasts, shrouds, etc...) The Retrofit Source sells kits and has a lot of information on the process of retrofitting. If I were you I'd read up on exactly what you need to do first before you drop any cash on materials.
Projectors come in a few "flavors" depending on what kind of output you're looking for. Mini H1 are on the smaller side but performed well enough for me. I went with 5000k Morimoto bulbs since that's sort of the middle ground between output and color. 4300k is stock and offers the best output, but is more on the yellow side of the spectrum. 5000k whitened it up. The FX-R projectors are pretty popular as they offer great output with a crisp beam & cutoff. Not sure on the size restrictions of Stang headlights.
Speaking of headlights, if OEMs are a pain to get open and a set of eBay ones possibly aren't, that could be a cause for concern on the eBay ones. You don't want the lights to leak or fog. Sure you'll need sealant anyway, but if the lights are junk to begin with they may leak elsewhere.
A retrofit job can be a little complicated so I wouldn't skimp on materials and do your homework. Buying quality means they'll last if you do it right. My completed set ran me about $500 or so if I recall. That's shipping stockers, materials, labor.
Check out HID Retrofit Lights if you decide to have them done by StockD. I highly recommend his work. http://www.hidretrofitlights.com http://www.theretrofitsource.com
Last edited by BKamp613; 04-12-2014 at 08:10 AM.
04-12-2014, 01:01 PM
#3
Thread Starter
Join Date: Aug 2011
Location: Michigan
Posts: 21
Okay thanks for the input! hmmm StockD is a little bit pricey, but i guess if you want it done right its worth it. This is more like a little project, I would like to see if I could do it myself.
But I will probably get a kit from theretrofitsource.com and I'm guessing the Bi-xenon HID adapter is just plug and play. Keeping it pretty straight forward.
But I will probably get a kit from theretrofitsource.com and I'm guessing the Bi-xenon HID adapter is just plug and play. Keeping it pretty straight forward.
05-05-2014, 01:20 AM
#4
2nd Gear Member
Join Date: Dec 2009
Location: Oklahoma
Posts: 152
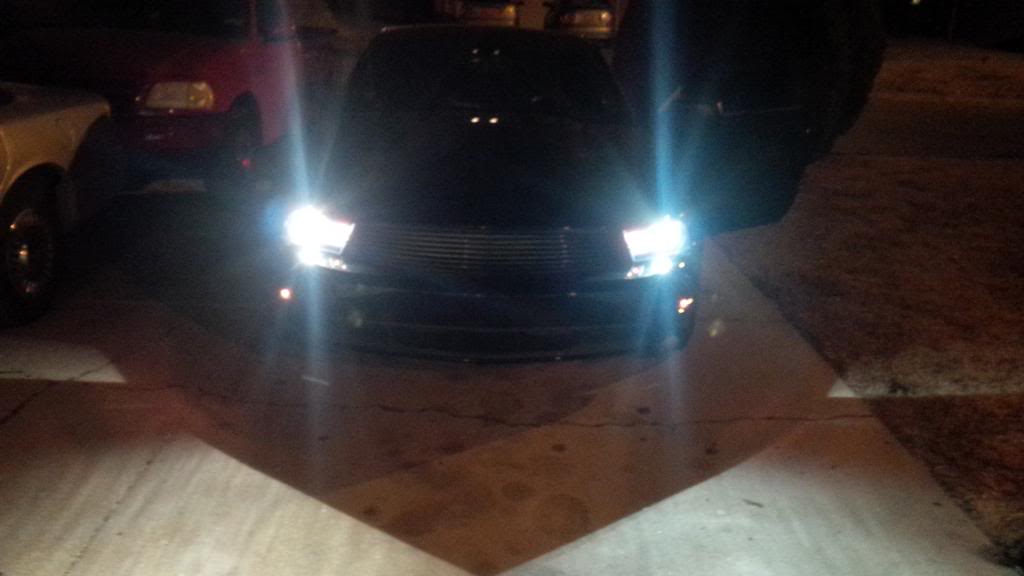
I did my retrofit for a tad over $300. I bought a mini d2s complete kit from the retrofit source. Came with projectors, bulbs, ballasts ,shrouds, and relay.
Opening the stock housings isn't that hard. I baked and used a heat gun. The easiest way is to start prying at the pointed corner. Wedge it and work around and it will pop open. The hardest part was pulling off all the old adhesive.
Once the housing is open I popped off the headlight bowl from the nipples. I used rotary tool, step drill and, orbital sander to sand the bulb support flat and make sure the hole was large enough to fit the projector. Then I painted everything. I used aluminum tape around the projector to stop light leak.
Once everything was dry I installed the projector into the halogen bowl. Because the back of the bowl isn't flat I had to shim the between the nut and bowl to keep the projector straight to the bowl. If the projector is cocked to one side it will throw off the horizontal aiming, and you can't adjust horizontally with the stock aiming. I rotational adjustment is a tad tricky. I got it the best I could by keeping the top of the projector parallel to the flat part of the bowl, but I still had to adjust it one the car.
Once I got the projector tightened down, I installed the shrouds and popped it back on the aiming nipples. Then you just reassemble all the interior parts of the headlight. I removed the amber lenses and painted everything black.
Then you need to get your lens as clean as possible. I used 3m window weld to reassemble the lens to the housing with some clamps.
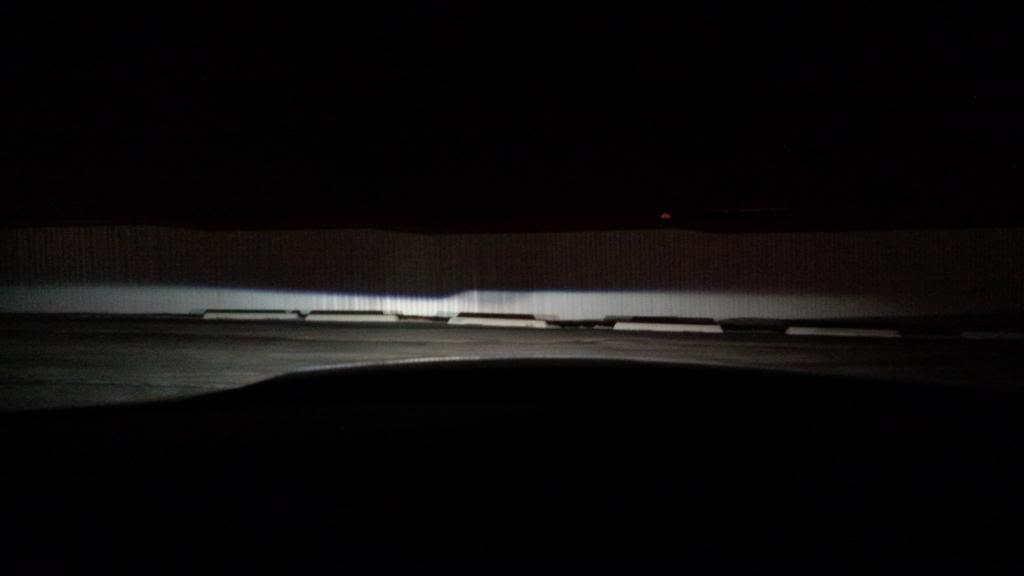
Then it's just putting them back on the car. Now for the rotational adjustment. Because of the way the ballast plug connects to the bulb, it tends to rotate the projector. I had the projector really tight but the rubber washer allows some play. It's unavoidable, but it's actually helpful because it allows you to make sure the beam is parallel to the ground.
I was fortunate that I managed to shim my projector perfectly so the horizontal aiming was spot on. If you had to you could use something to shim the projector left or right while it is on the car. Once I got the rotation right. I took it out and aimed the headlight vertically. Because the projector is mounted in the halogen bowl, the factor adjustment screw will adjust the projector vertically just as it did the halogen.
That's about it. I did have a small gap between back of the projector and the stock housing. I started to fill it but I left it open. The only time my housing fogs is when I bay wash the car, but it clears out within two mins of turning on the headlights. The morimoto kit is 1st class.

Opening the stock housings isn't that hard. I baked and used a heat gun. The easiest way is to start prying at the pointed corner. Wedge it and work around and it will pop open. The hardest part was pulling off all the old adhesive.
Once the housing is open I popped off the headlight bowl from the nipples. I used rotary tool, step drill and, orbital sander to sand the bulb support flat and make sure the hole was large enough to fit the projector. Then I painted everything. I used aluminum tape around the projector to stop light leak.
Once everything was dry I installed the projector into the halogen bowl. Because the back of the bowl isn't flat I had to shim the between the nut and bowl to keep the projector straight to the bowl. If the projector is cocked to one side it will throw off the horizontal aiming, and you can't adjust horizontally with the stock aiming. I rotational adjustment is a tad tricky. I got it the best I could by keeping the top of the projector parallel to the flat part of the bowl, but I still had to adjust it one the car.
Once I got the projector tightened down, I installed the shrouds and popped it back on the aiming nipples. Then you just reassemble all the interior parts of the headlight. I removed the amber lenses and painted everything black.
Then you need to get your lens as clean as possible. I used 3m window weld to reassemble the lens to the housing with some clamps.
Then it's just putting them back on the car. Now for the rotational adjustment. Because of the way the ballast plug connects to the bulb, it tends to rotate the projector. I had the projector really tight but the rubber washer allows some play. It's unavoidable, but it's actually helpful because it allows you to make sure the beam is parallel to the ground.
I was fortunate that I managed to shim my projector perfectly so the horizontal aiming was spot on. If you had to you could use something to shim the projector left or right while it is on the car. Once I got the rotation right. I took it out and aimed the headlight vertically. Because the projector is mounted in the halogen bowl, the factor adjustment screw will adjust the projector vertically just as it did the halogen.
That's about it. I did have a small gap between back of the projector and the stock housing. I started to fill it but I left it open. The only time my housing fogs is when I bay wash the car, but it clears out within two mins of turning on the headlights. The morimoto kit is 1st class.


Thread
Thread Starter
Forum
Replies
Last Post
treesloth
New Member Area
4
09-28-2015 07:03 AM