HOW TO BUILD YOUR OWN ENGINE 56K beware
 04-20-2007, 02:48 AM
#1
6th Gear Member
Thread Starter
Join Date: May 2006
Location: Ohio
Posts: 6,448
I promised you guys that I would post a how to on assembeling your own engine from the short block up.
Sorry about some of the pics my camera sucks.
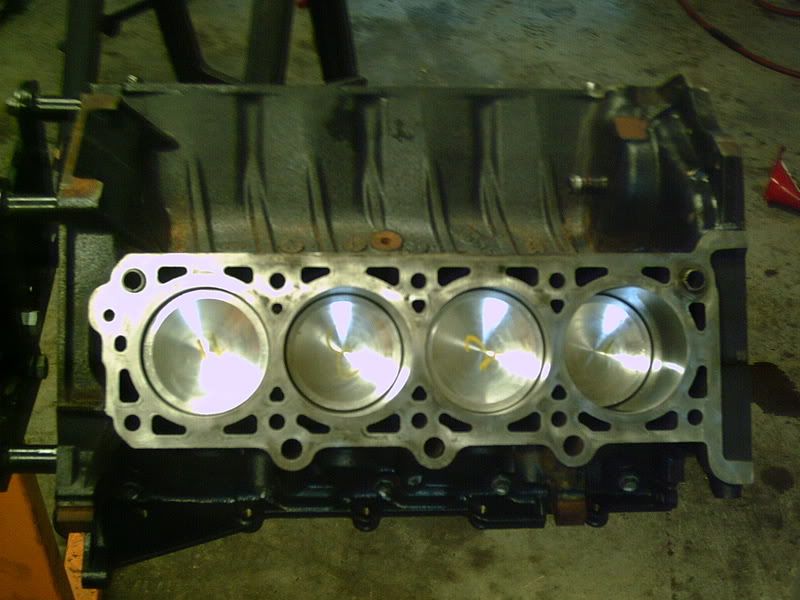
First you start with your shortblock. It should be already clean.
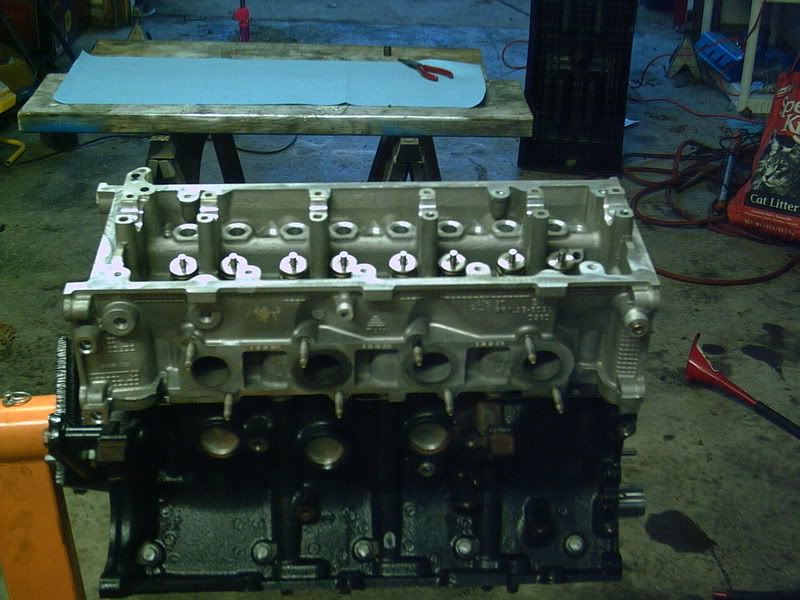
Next you install the head gaskets

Then place the heads on the block being carefull not to scratch the mating surface
Oil the head bolts using 30w oil and allow them to drip the excess off
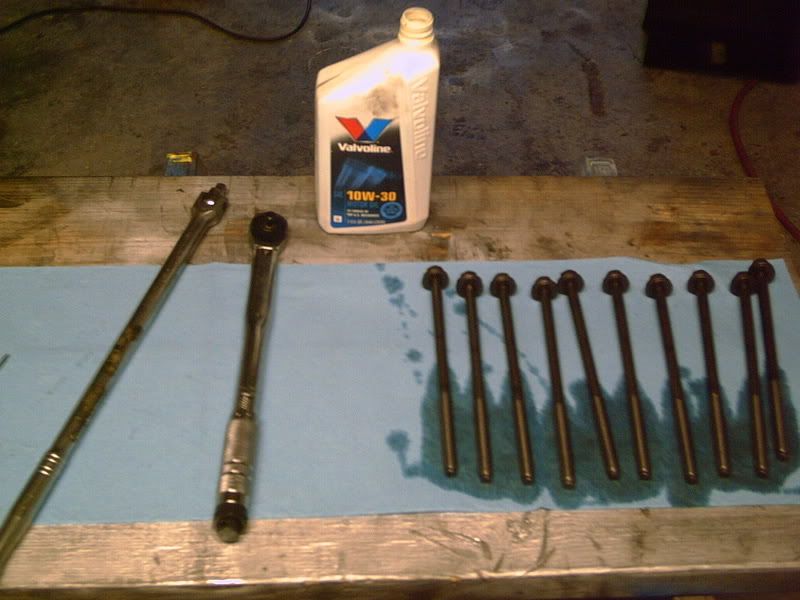
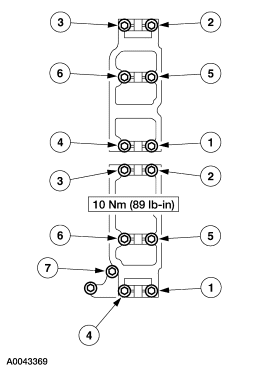
Torque down the heads
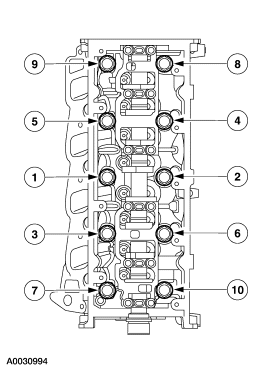
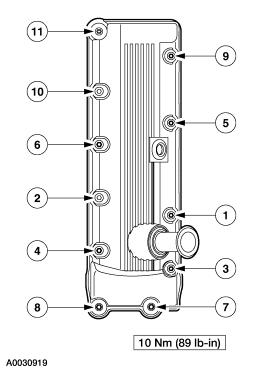
Tighten the bolts in six stages in the sequence shown.
Stage 1: Tighten to 40 Nm (30 lb-ft).
Stage 2: Tighten an additional 90 degrees.
Stage 3: Loosen the bolts a minimum of one full turn.
Stage 4: Tighten to 40 Nm (30 lb-ft).
Stage 5: Tighten an additional 90 degrees.
Stage 6: Tighten an additional 90 degrees.
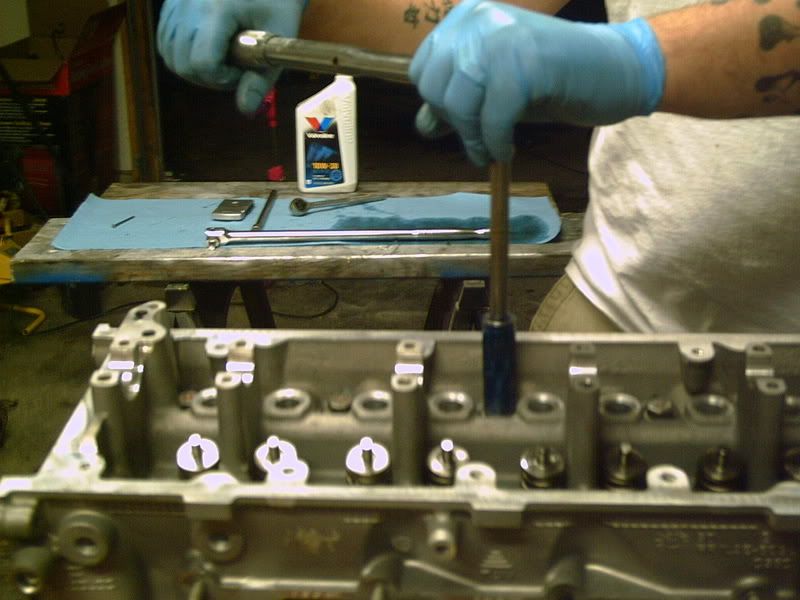
Be sure to number your bolts so you dont lose track
install the oil pump
install the pick up tube mount and pickup tube
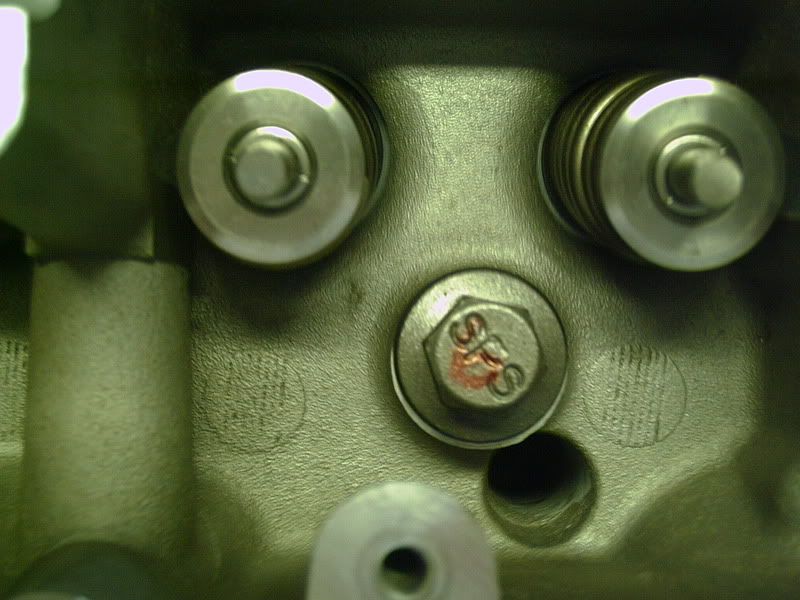
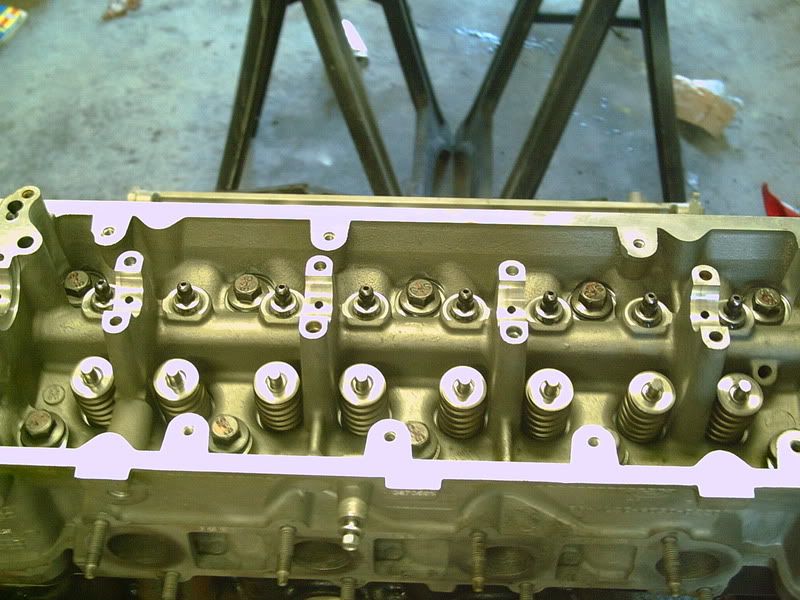
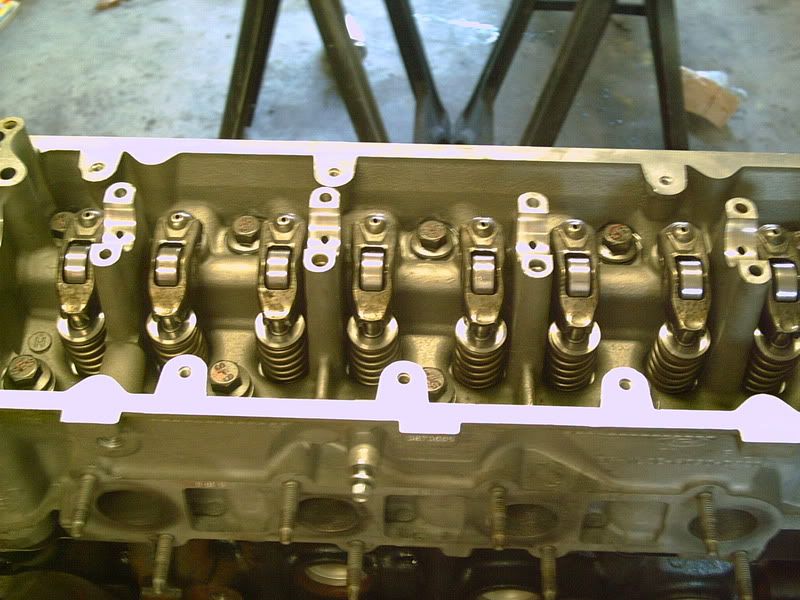
install lash adjusters and cam followers
Turn the crank so that the key is at 12 oclock
Place the camshaft in the head
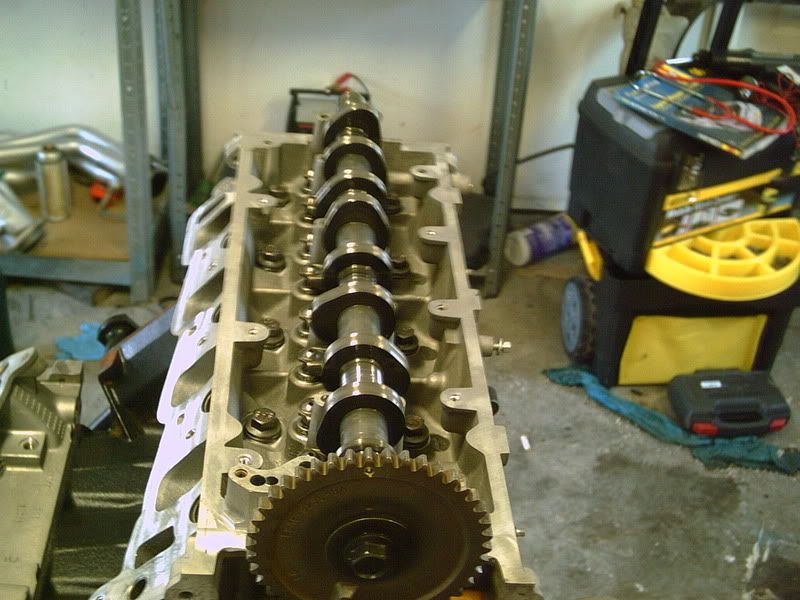
torque down the cam caps

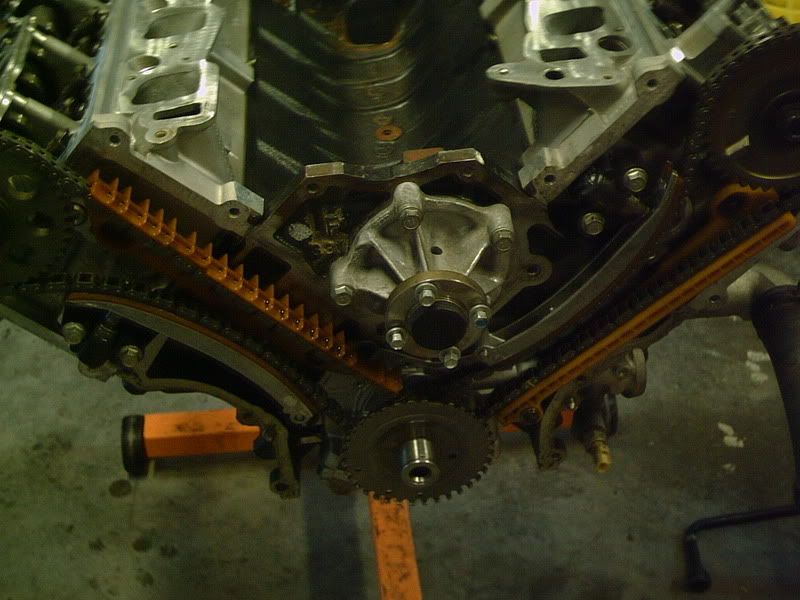
install the timing chain guides and crank gear
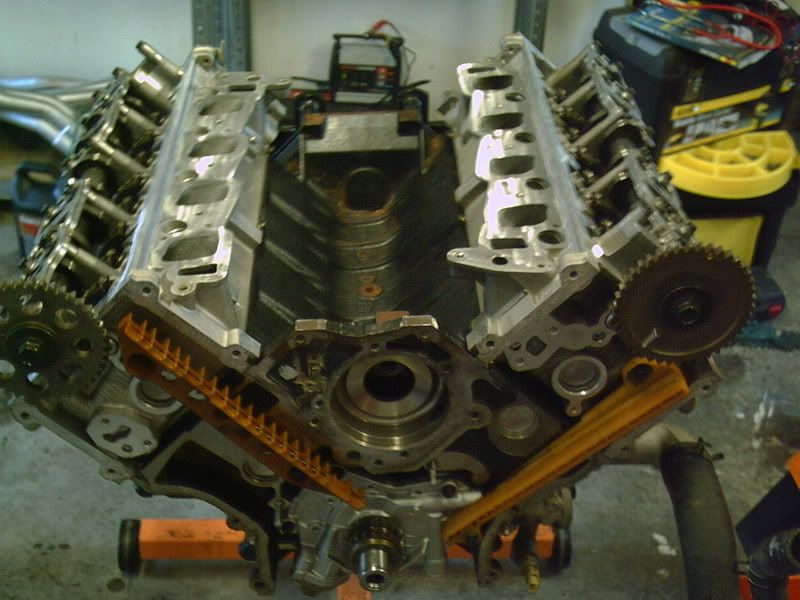
install timing chain driverside first (back gear on the crank) making sure to line up the timing marks. If you did not mark your chains before you took them off then just fold it in half and mark the links on either end. Do not move the crank to get the marks lined up only move the cam.
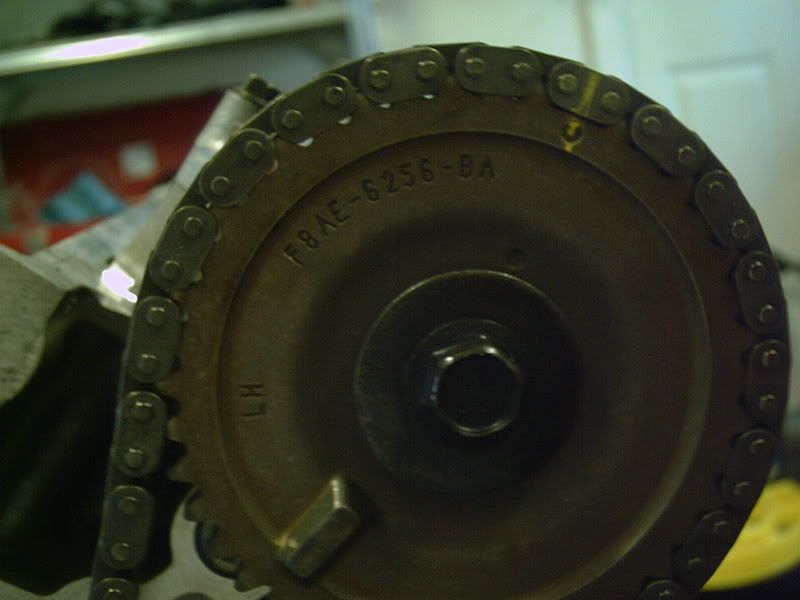
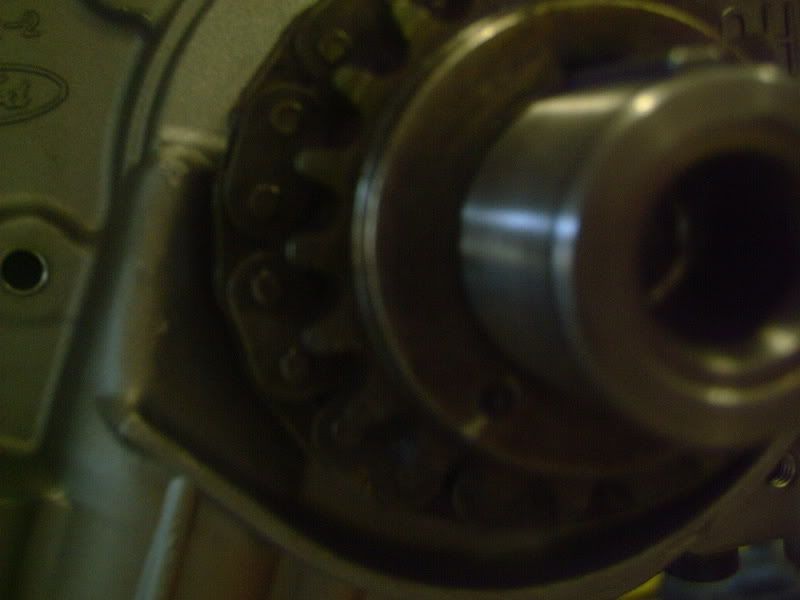
once chains are on install the other guides and the tensioners. You can just press the tensioner closed and force it into place while you slide the bolts in.
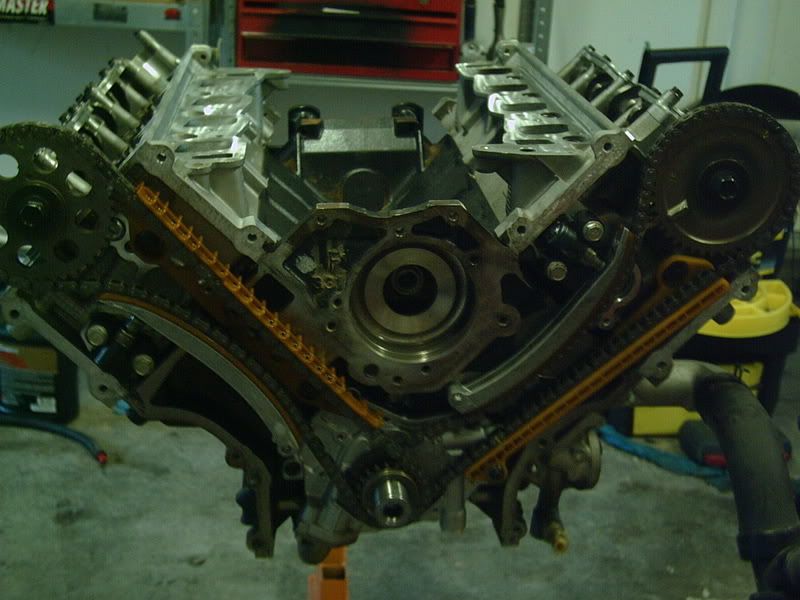
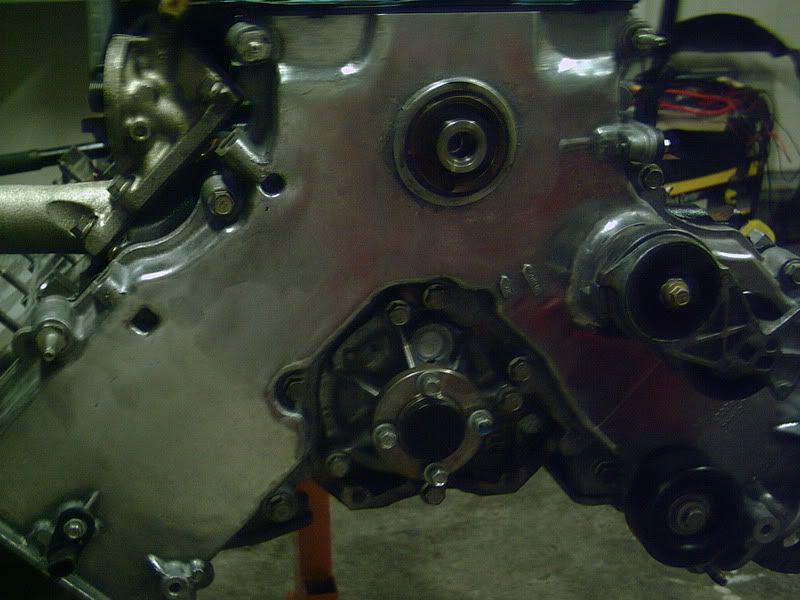
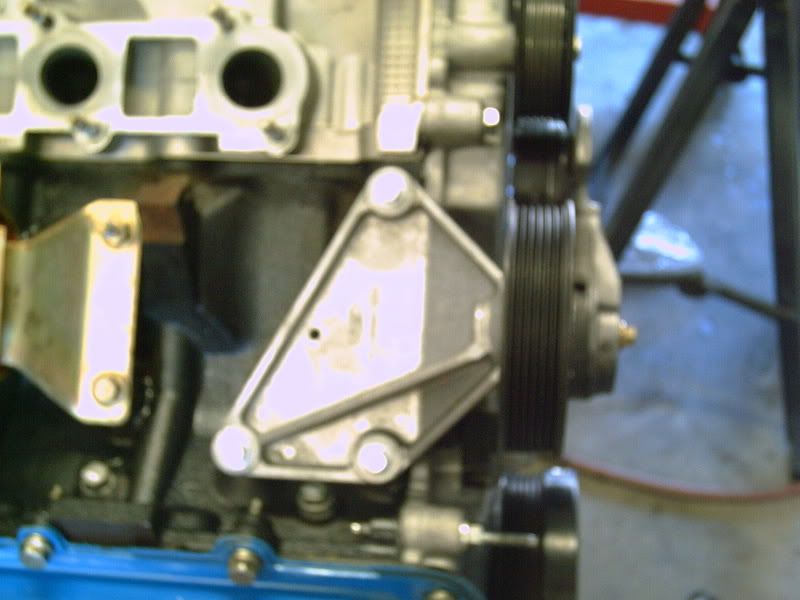
install timing wheel and water pump (use a new gasket on the pump)
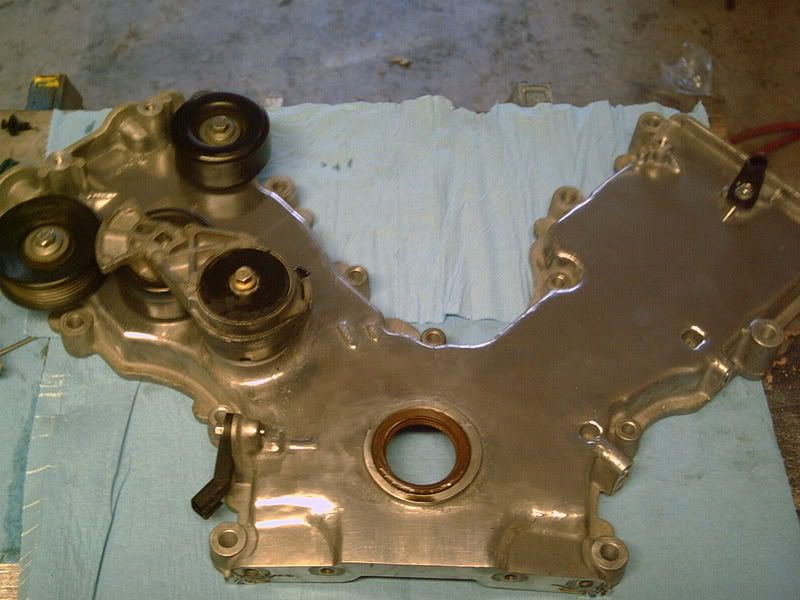
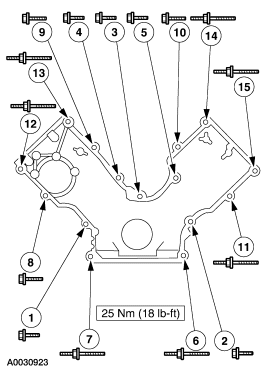
assemble timing cover ( you dont have to polish the cover I was just bored one day )
)
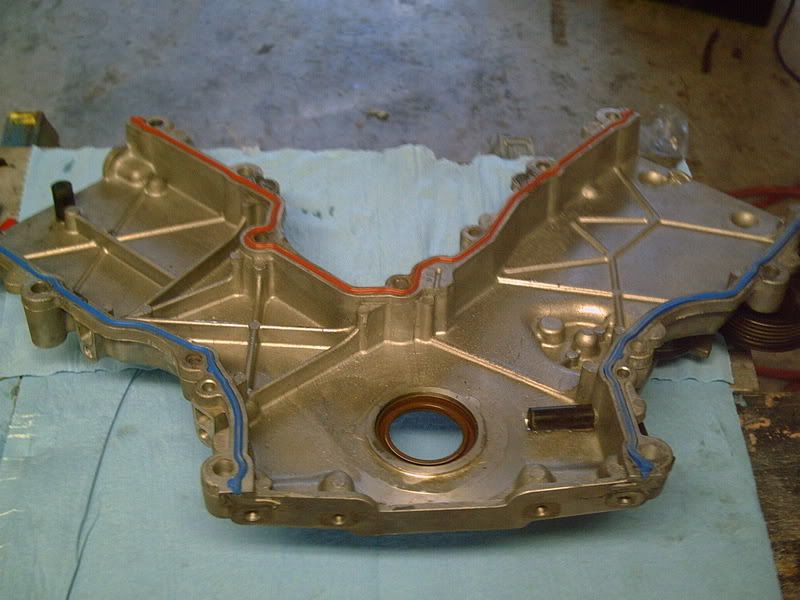
install new gaskets, put some silicone on the cover at the point where the heads meet the block and just above where the oil pan will meet the cover
install cover
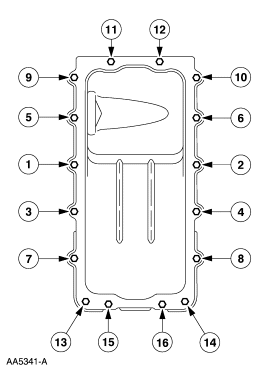
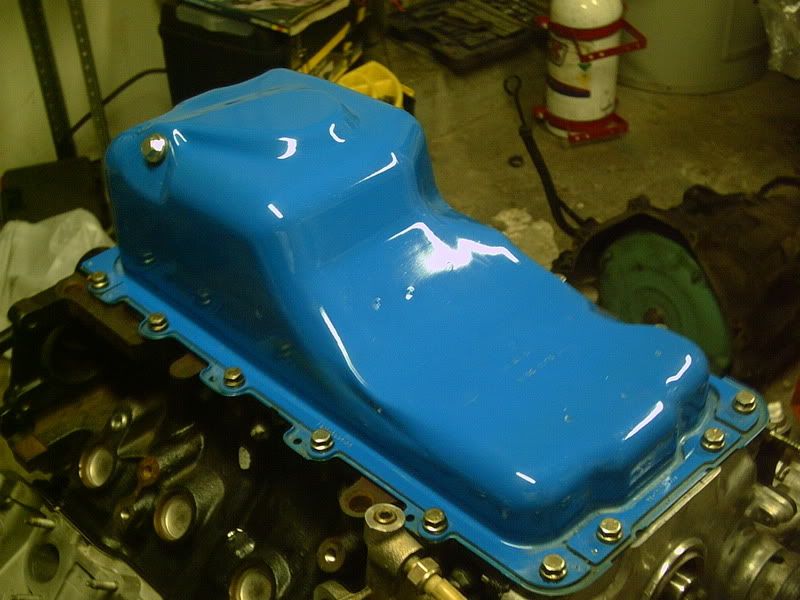
install oilpan with gasket. put some silicone on both side where the timing cover and block meet.
install valve covers
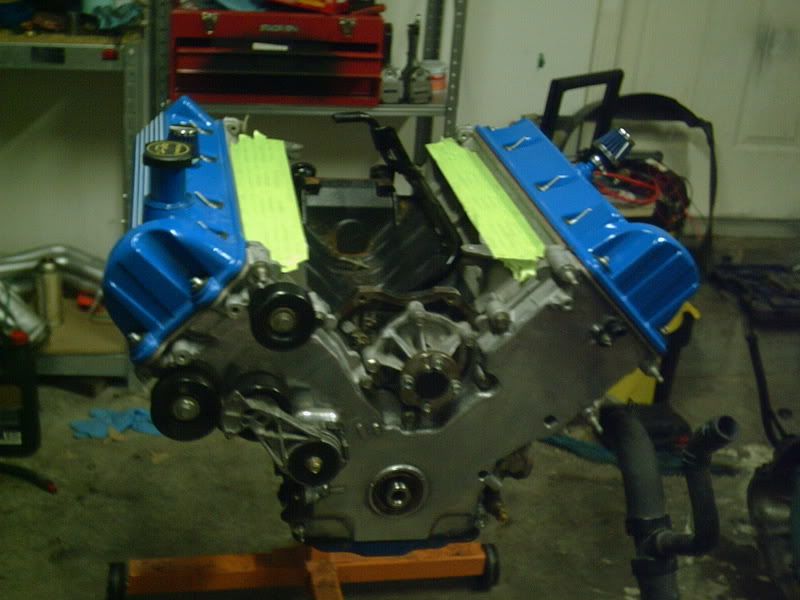
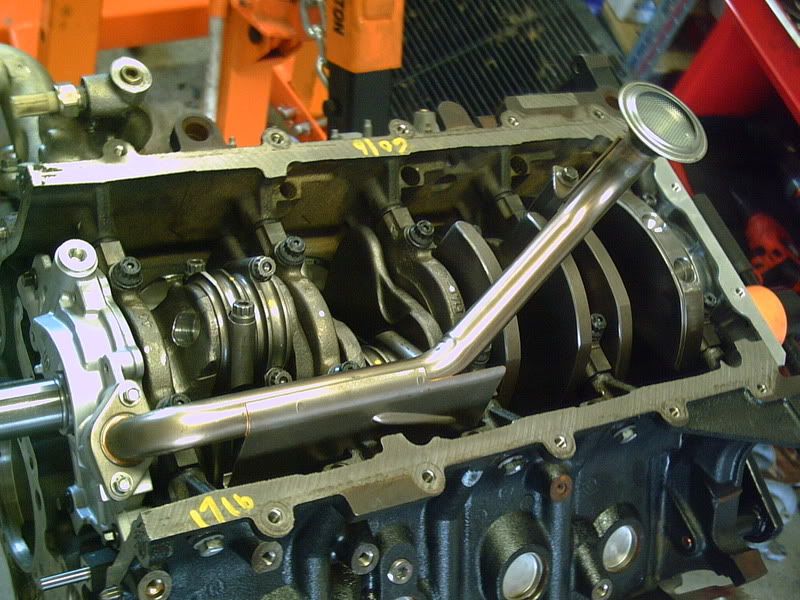
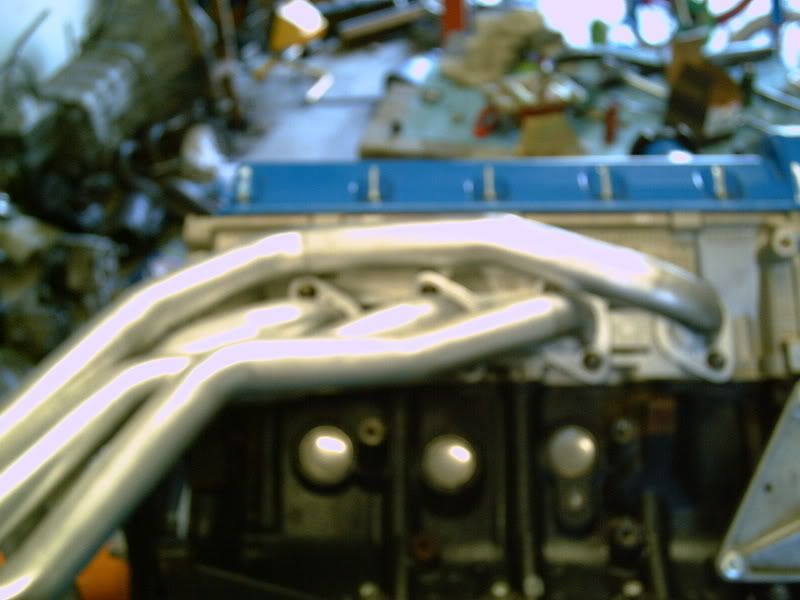
install headers or manifolds if you want to. I did the passenger side header because I have no A/C and it will fit. The driverside I did after I droped the engine in the car because the steering shaft has to go thru it.
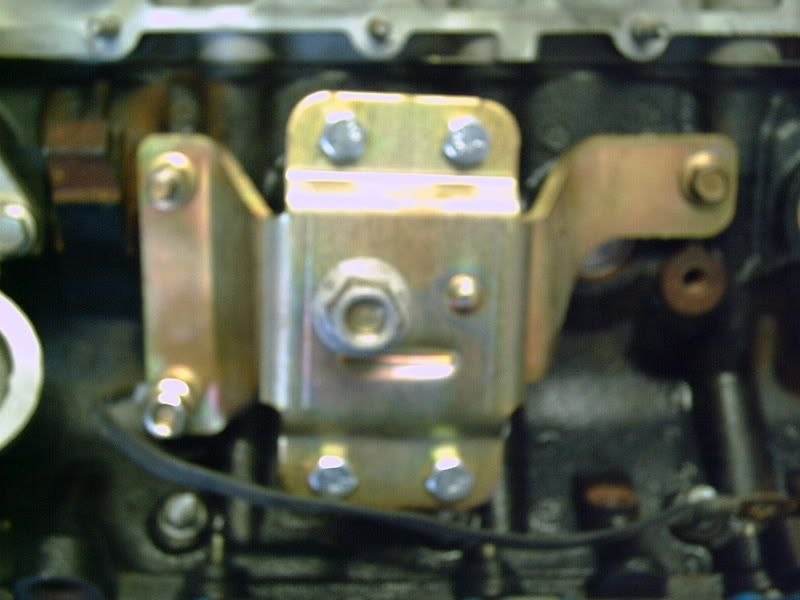
install motor mounts, oil filter housing, and A/C or A/C delete in my case
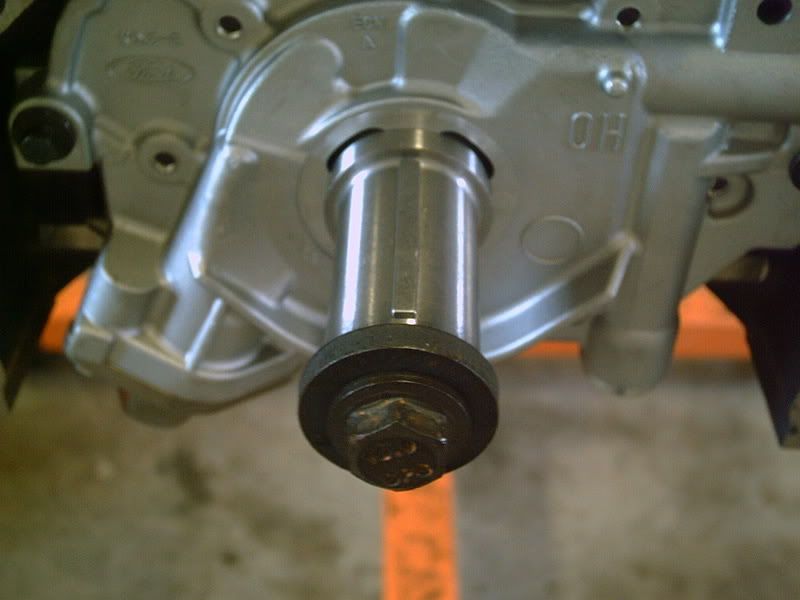
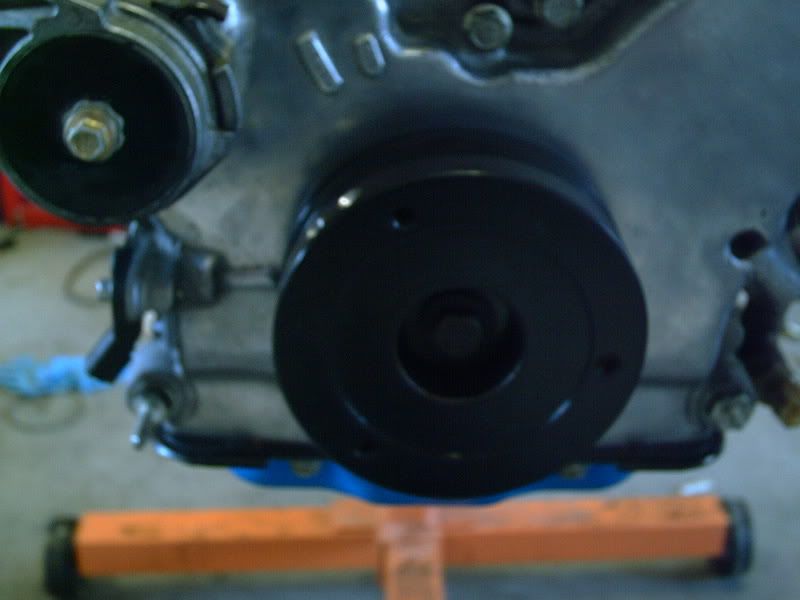
install dampner and torque to 60ft lbs I used a strap wrench to hold the pully still
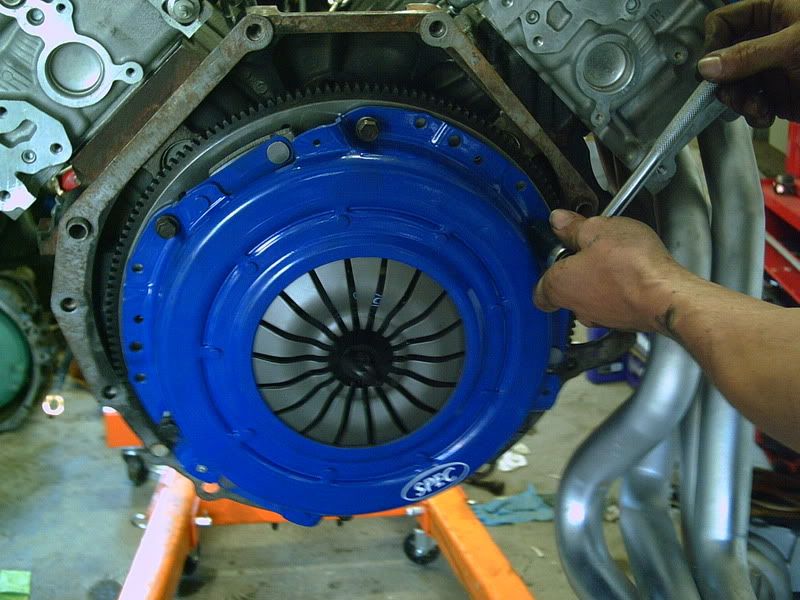
install flywheel and torque bolts to 60 ft lbs. Tighten them in a crisscross pattern like putting on a wheel.
I dont have a pic of it sorry forgot because we got excited when the UPS guy showed up with my clutch and we knew we would have time to drop it in the car.
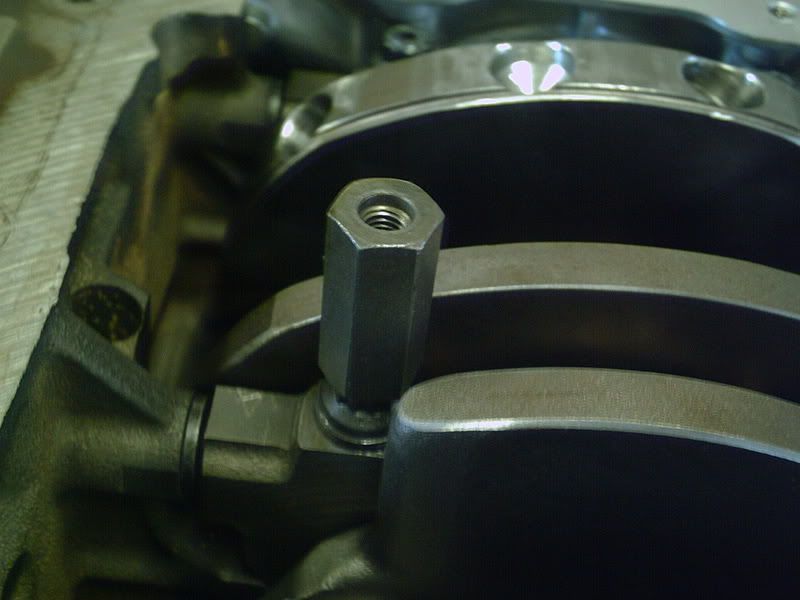
install pilot bearing, clutch and pressure plate. Make sure you use an alignment tool.
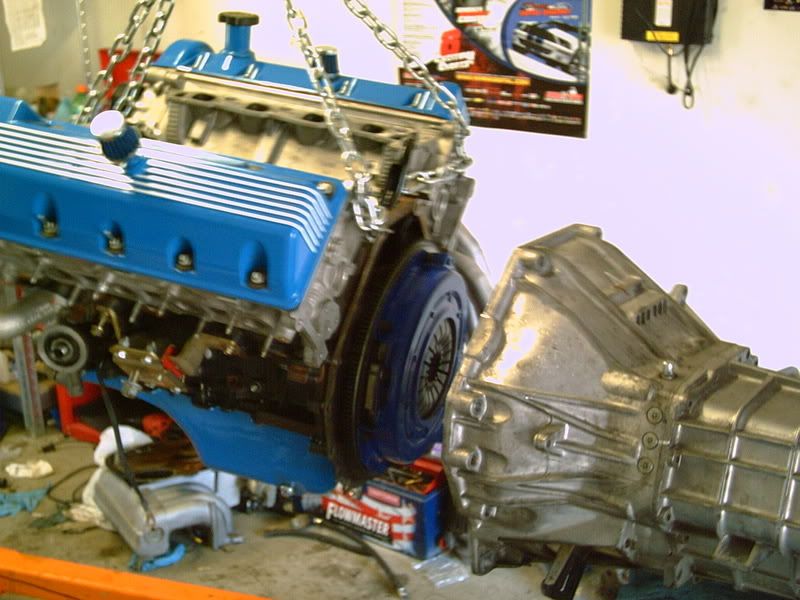
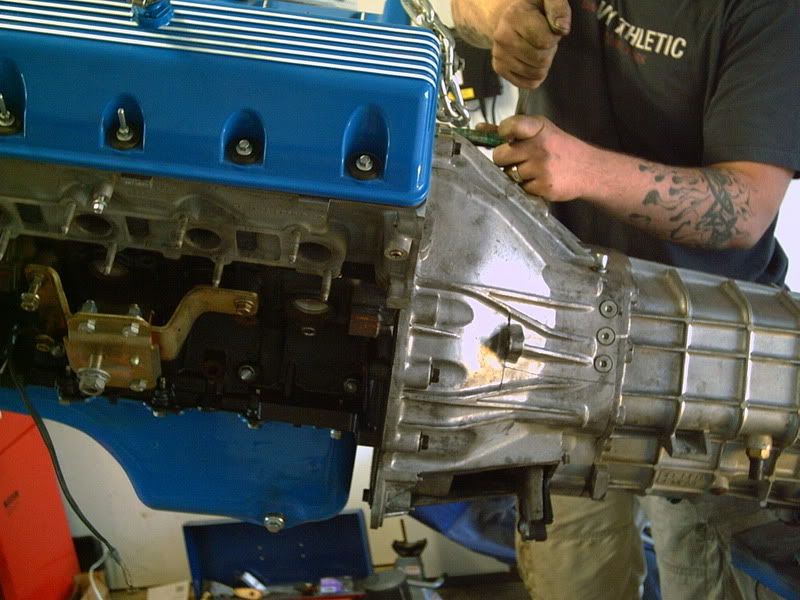
Line up tranny with the engine and push them together. The header made it a bit harder but we still got it on. Turn the crank and watch through the fork hole and make sure the shaft is turning then just tighten up the bolts.
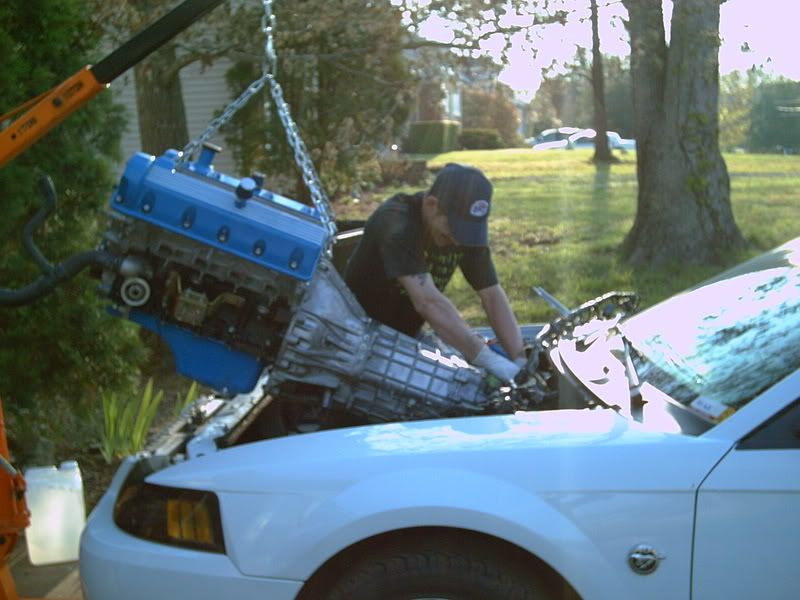
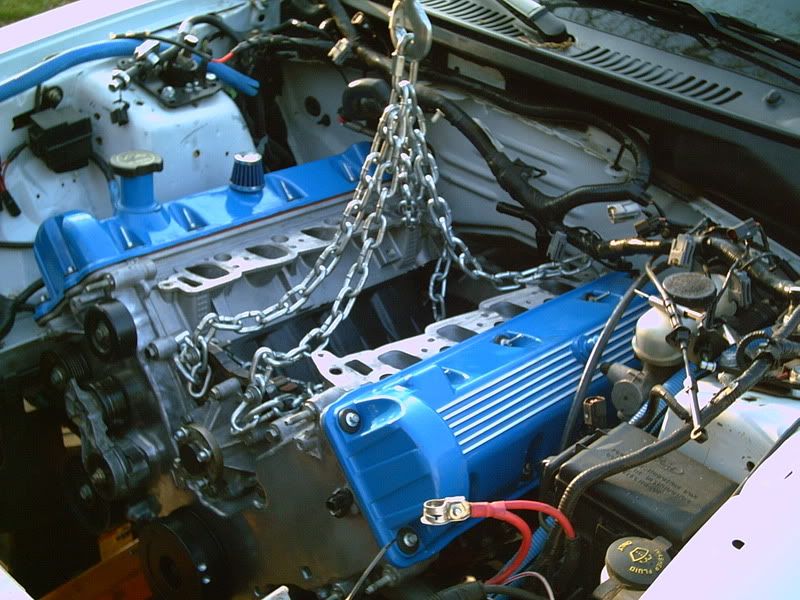
Now you are ready to install the engine into the car. Once its in the car you can install the intake and all other accesories.
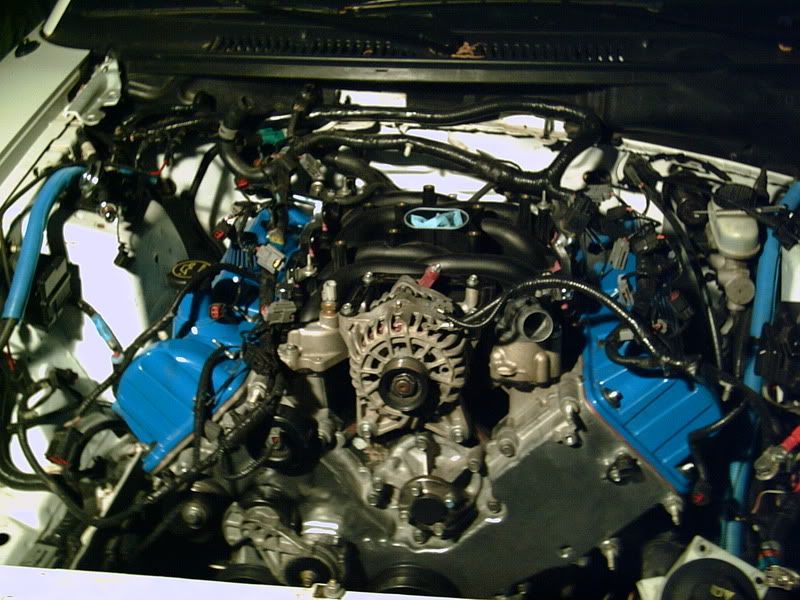
Im am not going to go thru and take pictures of plugging everything back in Id rather shot myself. Everything on the wiring harness reaches what it is supposed to and nothing else really. Take your time and think about what your doing.
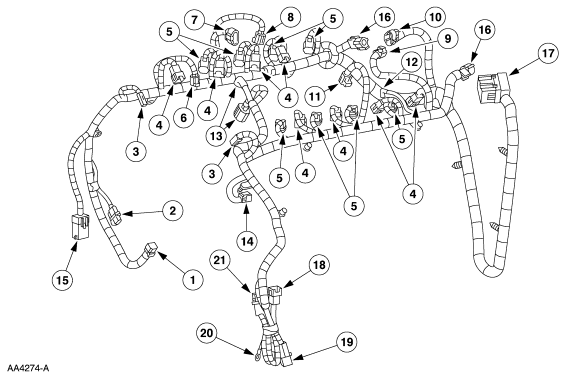
Item
Part Number
Description
1
—
To crankshaft position sensor
2
—
To A/C compressor
3
—
To radio ignition interference capacitor (2)
4
—
To fuel injectors (8)
5
—
To ignition coils (8)
6
—
To engine coolant temperature sensor
7
—
To throttle position sensor
8
—
To idle air control valve
9
—
To EGR vacuum regulator
10
—
To differential pressure feedback EGR
11
—
To fuel pressure regulator
12
—
Fuel injection ground
13
—
To generator
14
—
To camshaft position sensor
15
—
To body
16
—
To heated oxygen sensor (2)
17
—
Engine bulkhead connector
18
—
To low coolant sensor
19
—
To body
20
—
To power distribution box
21
—
To body
Hope this helps out. Now you can see how easy it is to build your own engine. Took my 2 days of working after work to get to this point and by sat I will be driving it again. I know I didnt go into to much detail but when you are doing it yourself it is selfexplainatory. Good luck and feel free to ask any questions.
Sorry about some of the pics my camera sucks.
First you start with your shortblock. It should be already clean.
Next you install the head gaskets
Then place the heads on the block being carefull not to scratch the mating surface
Oil the head bolts using 30w oil and allow them to drip the excess off
Torque down the heads
Tighten the bolts in six stages in the sequence shown.
Stage 1: Tighten to 40 Nm (30 lb-ft).
Stage 2: Tighten an additional 90 degrees.
Stage 3: Loosen the bolts a minimum of one full turn.
Stage 4: Tighten to 40 Nm (30 lb-ft).
Stage 5: Tighten an additional 90 degrees.
Stage 6: Tighten an additional 90 degrees.
Be sure to number your bolts so you dont lose track
install the oil pump
install the pick up tube mount and pickup tube
install lash adjusters and cam followers
Turn the crank so that the key is at 12 oclock
Place the camshaft in the head
torque down the cam caps
install the timing chain guides and crank gear
install timing chain driverside first (back gear on the crank) making sure to line up the timing marks. If you did not mark your chains before you took them off then just fold it in half and mark the links on either end. Do not move the crank to get the marks lined up only move the cam.
once chains are on install the other guides and the tensioners. You can just press the tensioner closed and force it into place while you slide the bolts in.
install timing wheel and water pump (use a new gasket on the pump)
assemble timing cover ( you dont have to polish the cover I was just bored one day
)install new gaskets, put some silicone on the cover at the point where the heads meet the block and just above where the oil pan will meet the cover
install cover
install oilpan with gasket. put some silicone on both side where the timing cover and block meet.
install valve covers
install headers or manifolds if you want to. I did the passenger side header because I have no A/C and it will fit. The driverside I did after I droped the engine in the car because the steering shaft has to go thru it.
install motor mounts, oil filter housing, and A/C or A/C delete in my case
install dampner and torque to 60ft lbs I used a strap wrench to hold the pully still
install flywheel and torque bolts to 60 ft lbs. Tighten them in a crisscross pattern like putting on a wheel.
I dont have a pic of it sorry forgot because we got excited when the UPS guy showed up with my clutch and we knew we would have time to drop it in the car.
install pilot bearing, clutch and pressure plate. Make sure you use an alignment tool.
Line up tranny with the engine and push them together. The header made it a bit harder but we still got it on. Turn the crank and watch through the fork hole and make sure the shaft is turning then just tighten up the bolts.
Now you are ready to install the engine into the car. Once its in the car you can install the intake and all other accesories.
Im am not going to go thru and take pictures of plugging everything back in Id rather shot myself. Everything on the wiring harness reaches what it is supposed to and nothing else really. Take your time and think about what your doing.
Item
Part Number
Description
1
—
To crankshaft position sensor
2
—
To A/C compressor
3
—
To radio ignition interference capacitor (2)
4
—
To fuel injectors (8)
5
—
To ignition coils (8)
6
—
To engine coolant temperature sensor
7
—
To throttle position sensor
8
—
To idle air control valve
9
—
To EGR vacuum regulator
10
—
To differential pressure feedback EGR
11
—
To fuel pressure regulator
12
—
Fuel injection ground
13
—
To generator
14
—
To camshaft position sensor
15
—
To body
16
—
To heated oxygen sensor (2)
17
—
Engine bulkhead connector
18
—
To low coolant sensor
19
—
To body
20
—
To power distribution box
21
—
To body
Hope this helps out. Now you can see how easy it is to build your own engine. Took my 2 days of working after work to get to this point and by sat I will be driving it again. I know I didnt go into to much detail but when you are doing it yourself it is selfexplainatory. Good luck and feel free to ask any questions.


 04-20-2007, 03:00 AM
#6
5th Gear Member

Join Date: Mar 2005
Location: Nashville/Knoxville, Tennessee
Posts: 4,687
ORIGINAL: bjh061487
you make it seem SO easy... wish it was that easy
you make it seem SO easy... wish it was that easy
04-20-2007, 03:03 AM
#8
6th Gear Member
Thread Starter
Join Date: May 2006
Location: Ohio
Posts: 6,448
ORIGINAL: jpmustanggt
Holy crap man! You must be a mechanic?
Holy crap man! You must be a mechanic?
but this can be done aslong as you know how to turn a wrench and put a puzzle together.
04-20-2007, 03:05 AM
#9
5th Gear Member
Join Date: Mar 2005
Location: Nashville/Knoxville, Tennessee
Posts: 4,687
you might want to add that to clean all mating surfaces with acetone and such into your article.. also maybe about spraying the head gaskets with that rtf stuff in the blue spray can... to make it easy for some people also there are 2 bronze links on each chain, and each of those goes on the timing marks...
its a great article though... btw, what did you torque those motor mount bolts to? the 4 that are on the mount itself and also the block to mount bolts?
its a great article though... btw, what did you torque those motor mount bolts to? the 4 that are on the mount itself and also the block to mount bolts?
