How To: Install clutch Flywheel + T56 swap in 96-98 chasis
 08-21-2013, 02:19 PM
#1
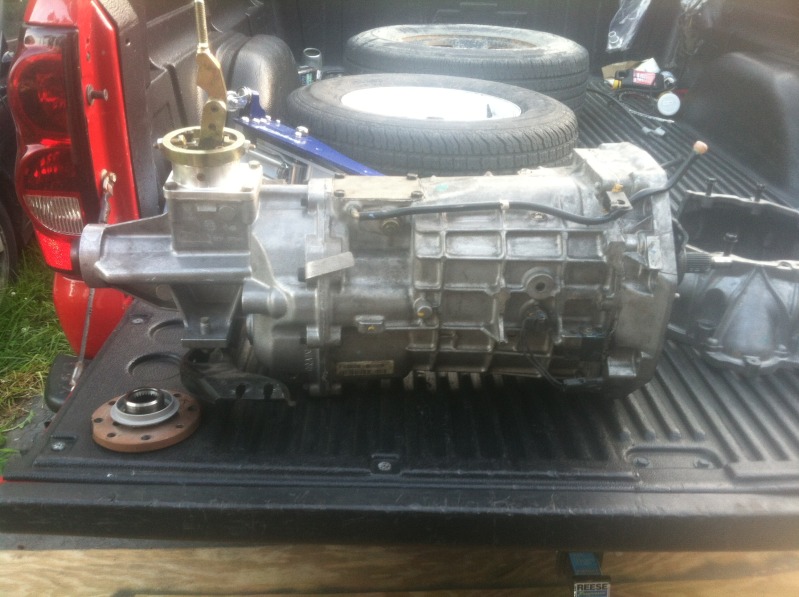
Well I'm just waiting on a few parts (TOB, pilot bearing, Friction ring) and I will be starting my t56 swap in a 97 GT chasis. What I have so far is built t56 with liberty 26 spline input shaft, spec 2 piece flywheel, aluminum driveshaft setup for SRA, spec stage 5 clutch. I also picked up an AJE cross member for the swap which I am currently unsure if I will need it as more of these swaps have been done in sn95 cobras where the trans crossmember needs to be moved up 1 inch to work BUT with the gt it had a different tailshaft on the t45 so I might not even need to mess with a cross member but time will tell. I will take a lot of pics as I go along, few modifications that need to be done is a speedcal to correct the different speedo gear setups, and a wirring setup for the reverse lockout solenoid. Back up light connection should be a direct swap. The t45 and all associated parts are out of the car already and I should be beginning this week. It seems there is little info online regarding this swap in a 96-98 2v chasis and even the cobra swaps are pretty vague. Anywho COMING SOON>
EDIT
Update 8/28/
Well didn't nearly get as much accomplished today as I wanted but got a late start and had to make some hardware runs. Anyway here we go, I will also copy this update to the original post.
These steps are starting with the trans and flywheel/clutch assembly already out of the car, if u need instructions on removal well its basically the reverse of the installation.
Starting out with the install of a fresh pilot bearing, always safe bet to go with the Ford racing unit. Tap it into the back of the crankshaft with a bearing/race driver as shown.
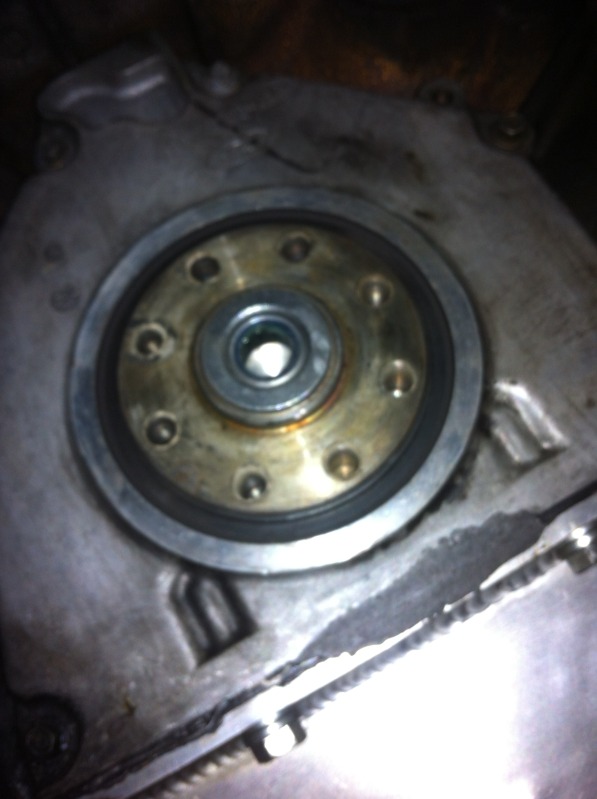
Now you can line up the transmission mid plate back over the two dowel pins on the back of the engine.
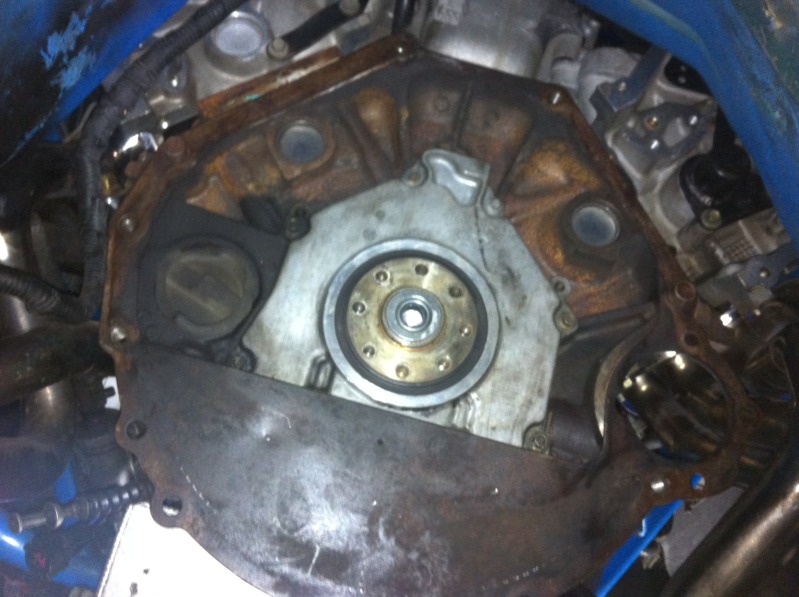
Next continue to install your flywheel. I have a spec billet unit with removable friction material, if you do not you must have your existing flywheel resurface. The friction material bolts that attach it to the flywheel are torque to 7-8 f-lbs for anyone installing a new ring. Next torque down the 6 or 8 flywheel bolts (depending if u have a 6 or 8 bolt crank) in a star pattern at 59-66 f-lbs, I always go at the top of the range so went 66. Also apply blue loc-tite to the flywhee bolts.
IMG]http://i82.photobucket.com/albums/j249/uberstang1/work/null_zps2c8ccf34.jpg[/IMG]
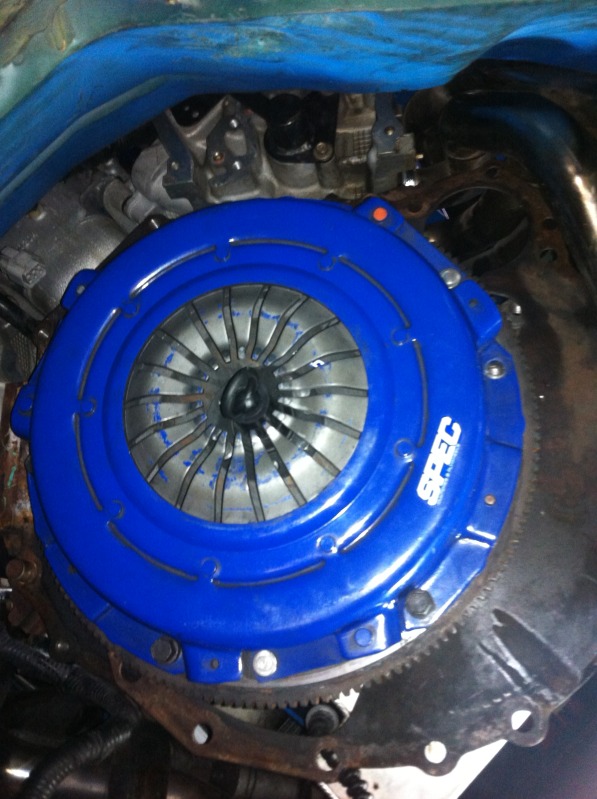
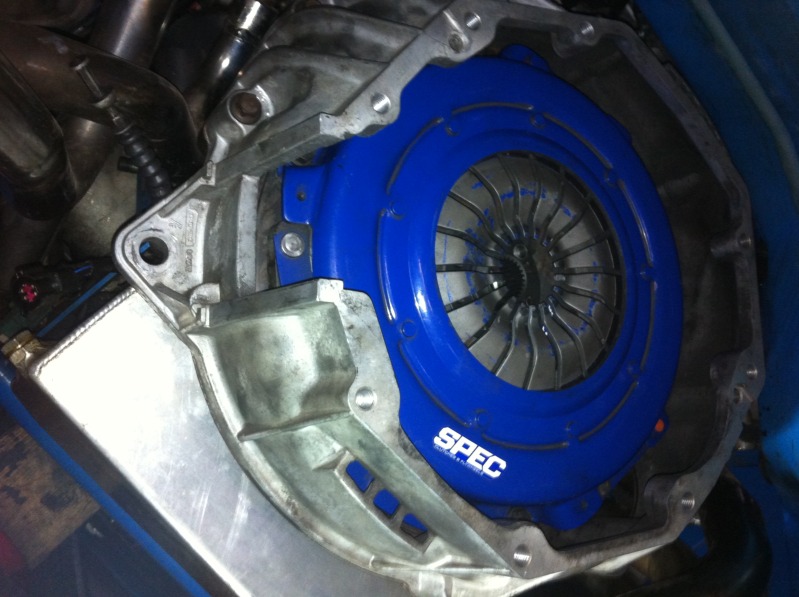
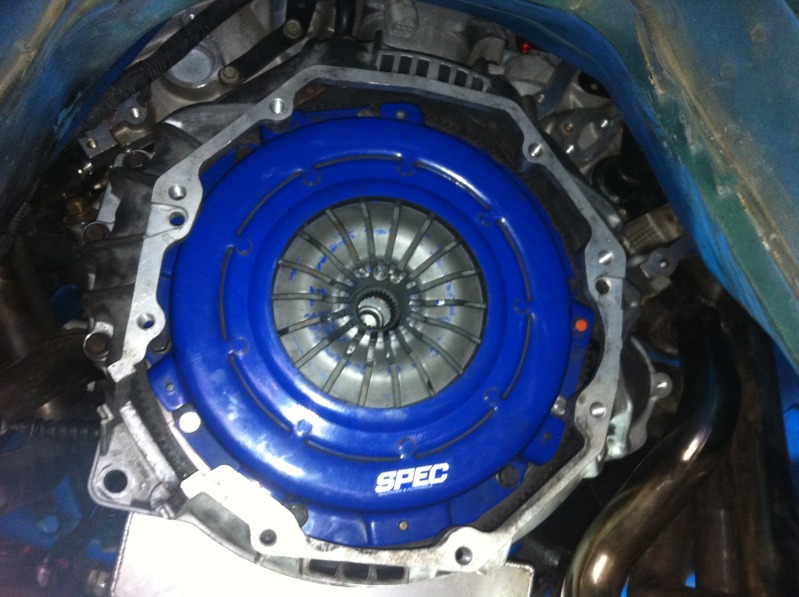
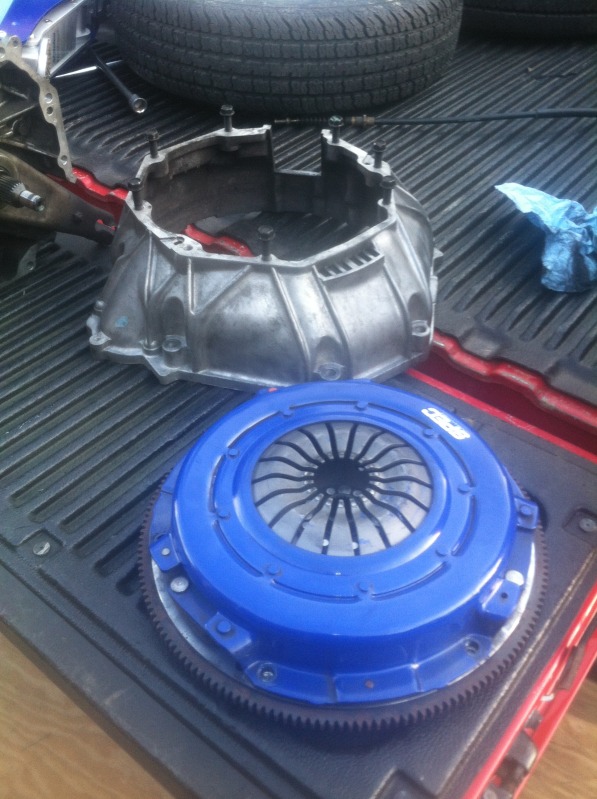
Next using the proper clutch alignment tool, slide the tool through the female splines on the clutch disk then stick the end of the tool into the pilot bearing on the crank shaft. Then line up the pressure plate over the dowel pins on the flywheel and torque down the 6 bolts to 24 f-lbs along with blue loc-tite in a start pattern while insuring the clutch disk and alignment tool don't shift. You can see the tool still installed in the pics, once the clutch is torqued to spec simply pull the tool out.
Next we can install the bellhousing to the engine, unlike the t-45 and 2650 the t56 using a removable belhlousing that doesn't also act like a front cover to the transmission making it a hell of a lot easier to install. The 7 bellhousing bolts get torqued down to 40 f-lbs. Using an extension and a 13mm swivel socket is the easiest. 2 of the 7 bolts are slightly longer than the rest, these two bolts go in the holes that also have the dowels in them. You can also bolt down the midplate to the front of the bellhousing with the two 17mm headed bolts as well.
More to come this week.
Update 8/29/13
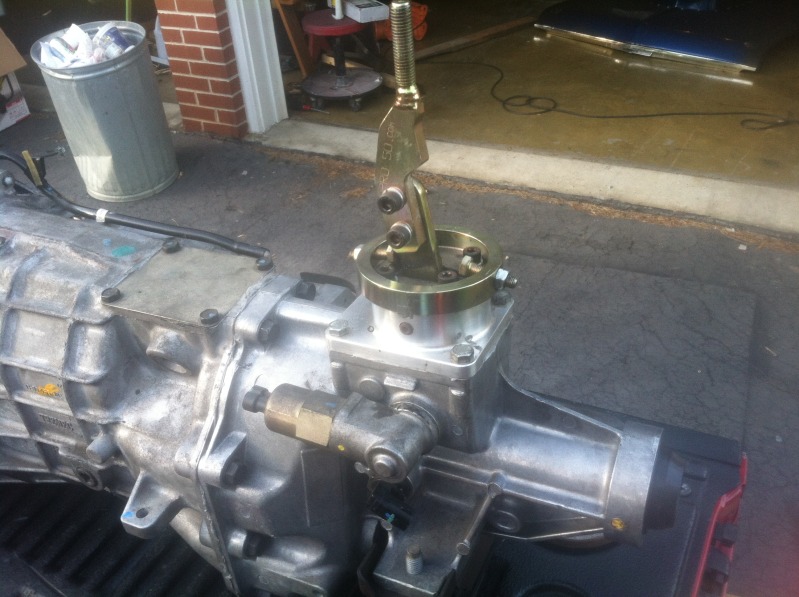
Well today I got the trans in and bolted down.
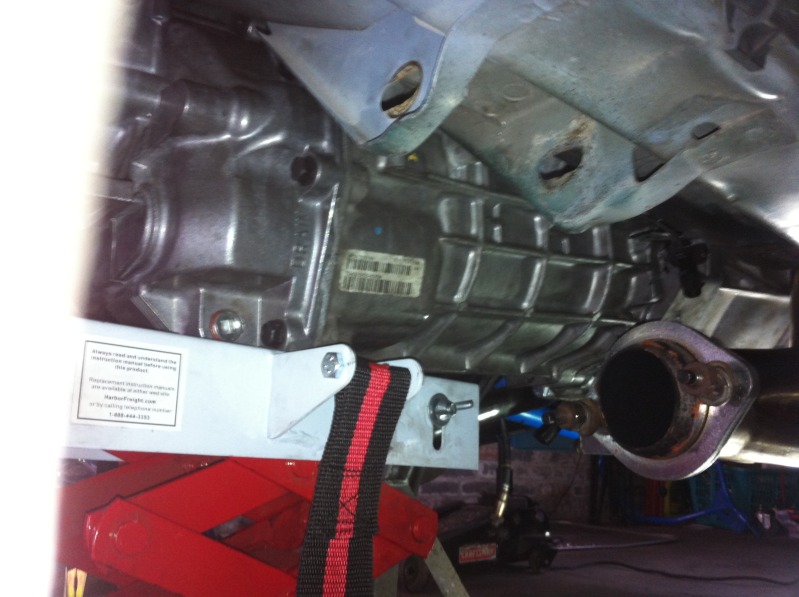
I did this solo and on jack stands so I used a small trolley transmission jack which makes it 10x easer lining it up to slide into the pilot bearing. Place a small block of wood on a jack and jack up on the crank pulley of the engine so the engine tips back slightly to allow for installation of the transmission. Then with the transmission jack angled correctly wiggle the transmission onto the bellhousing insuring that the input shaft is lined up into the clutch assembly correctly.

Also you can leave the shifter installed for this step as long as u remove the shifter handle.
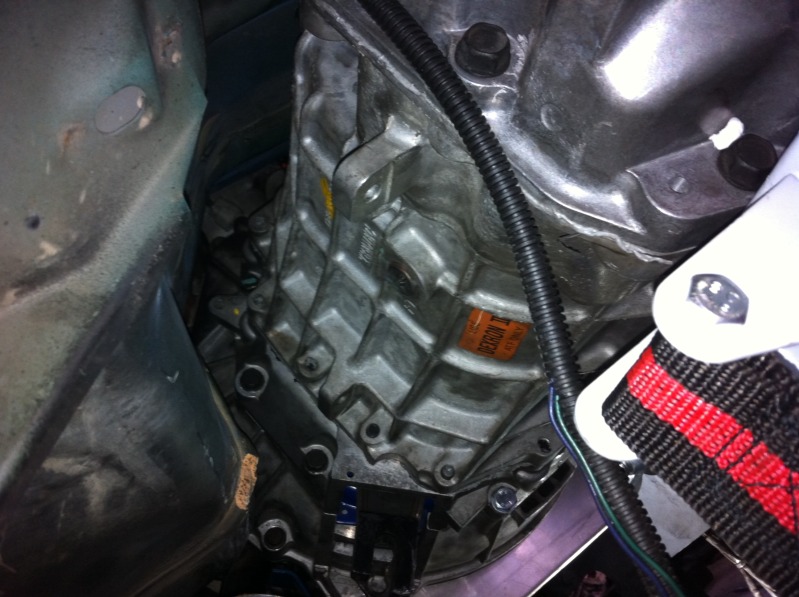
Once the transmission is mated to the bellhousing and lined up properly you can begin to install the 8 transmission to bellhousing bolts, this are 15mm headed bolts and are to be torque down to 34 f-lbs. The use of a 15mm swivel socket or a 15mm along with a universal swivel will be required for some of the upper bolts. The very top bolt on the passenger side that also attaches the bracket for the breather to the trans is the hardest one to get as access is very limited, for this bolt I used some masking tape to hold to bolt in the socket and guide it up to the hole with a long extension.
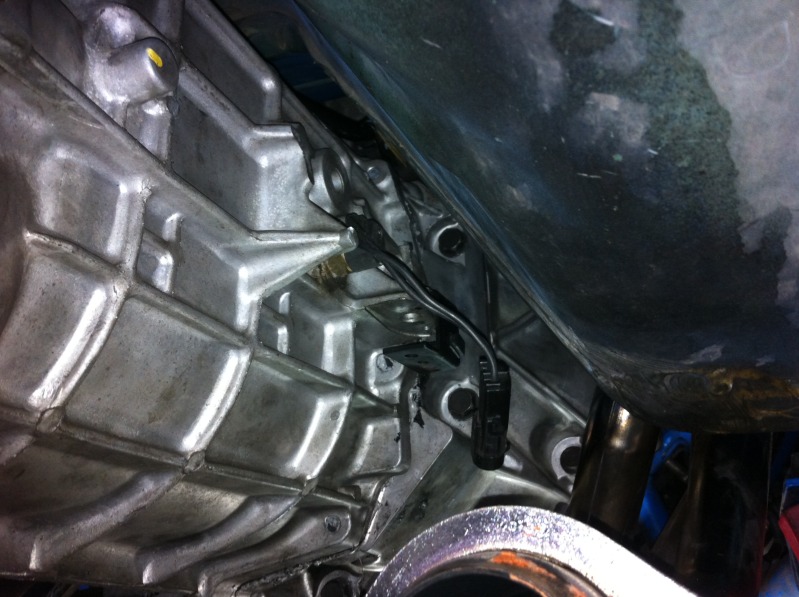
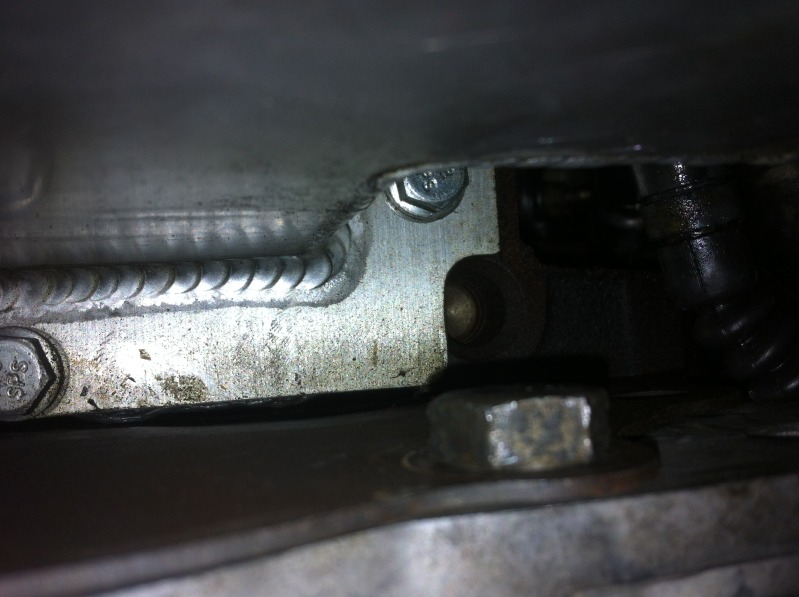
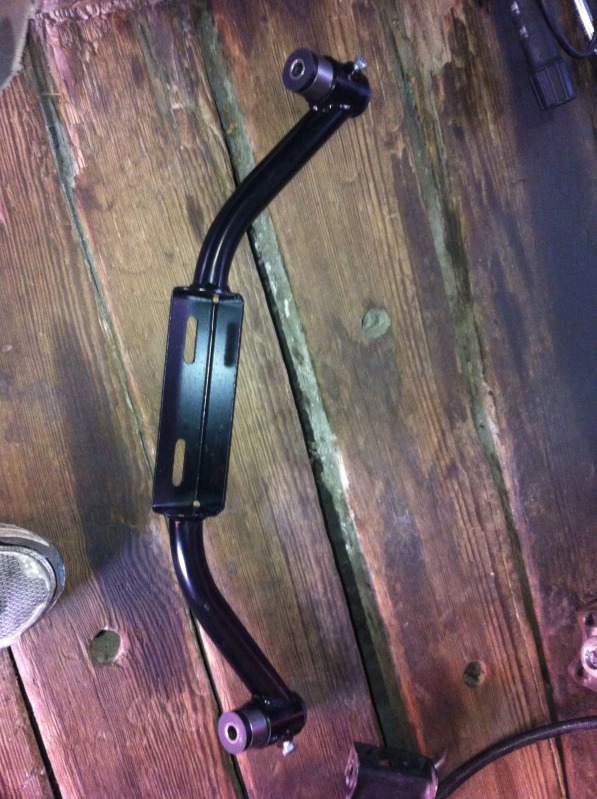
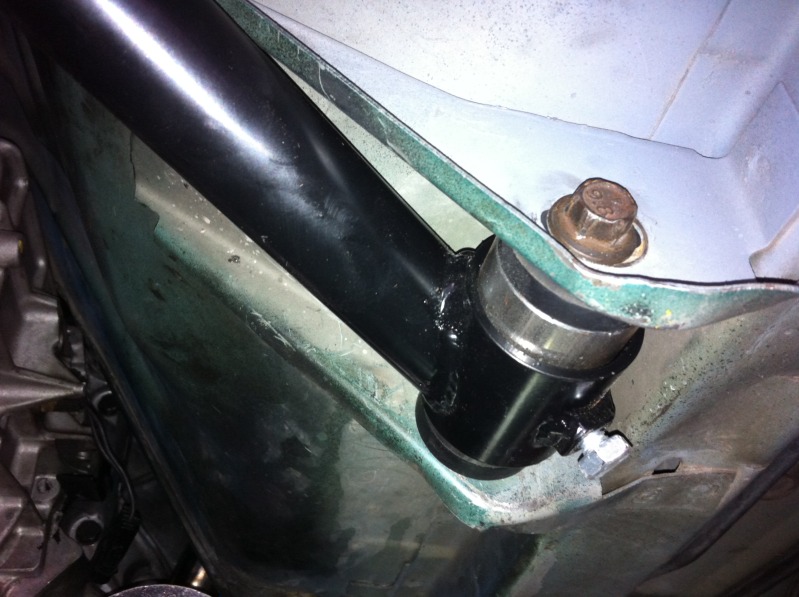
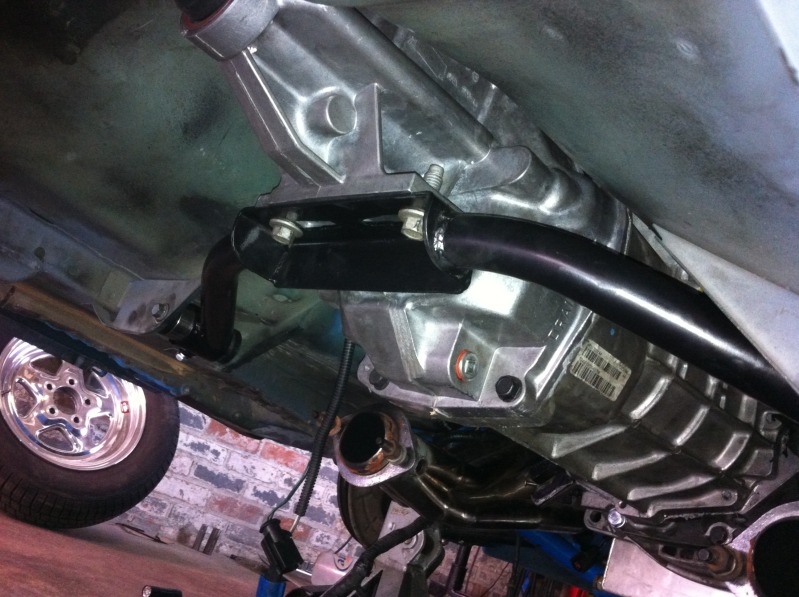
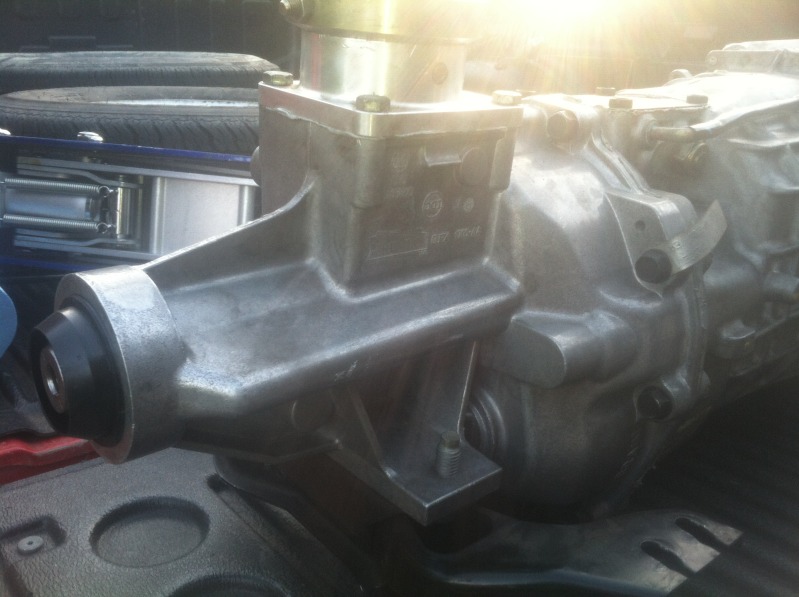
Once the transmission is mounted next step is installing the cross member, instead of cutting and re-welding the tabs to move the stock crossmember mount up an each I opted for a bolt in AJE cross member specifically designed for c4 and t56 installations in the 96-96 body. This mount deletes any form of traditional transmission mount and mounts directly to the tail of the transmission. There are adjustable poly stuffed collars at the end of the crossmember where it attaches to the chasis. Loosen the lock bolts and bolt the crossmember to the chasis then adjust it so the holes on the tailshaft line up with the slots in the crossmember. Then you can tighten down the crossmember to transmission bolts, then torque down the cross member to chasis bolts along with the stop bolts for the adjustment on the crossmember.
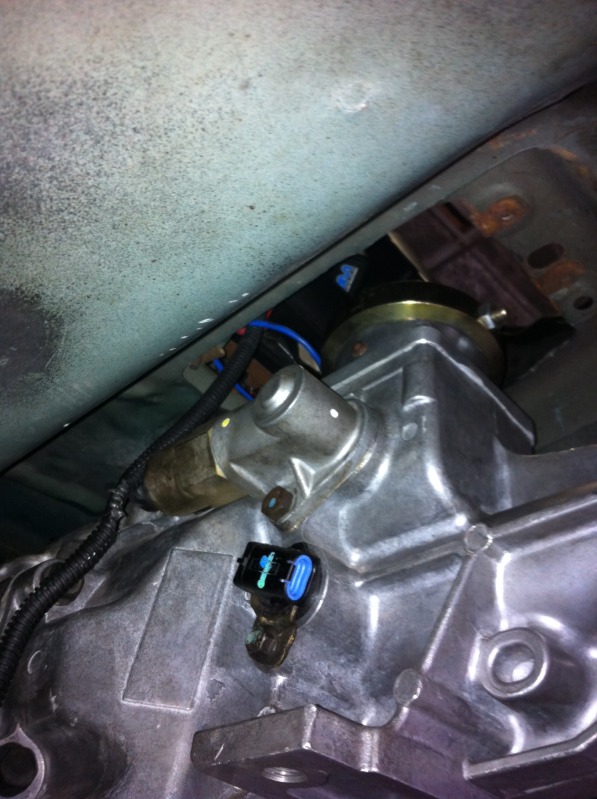
That wraps it up for this garage trip, all that's left is to install the driveshaft, x pipe, bolt down the passenger long tube, and fabricate some wirring for the reverse lockout/ reverse lights. The wirring for the speed sensor plugs in but you WILL need an extended range version of the dallas mustang speedcal to compensate going from the vss gear driven speed sensor to the OSS style on the T56. I already previous installed a speedcal so I won't get indepth with that but the instructions that come with it are cut and dry and its a very east install.
9/1/13
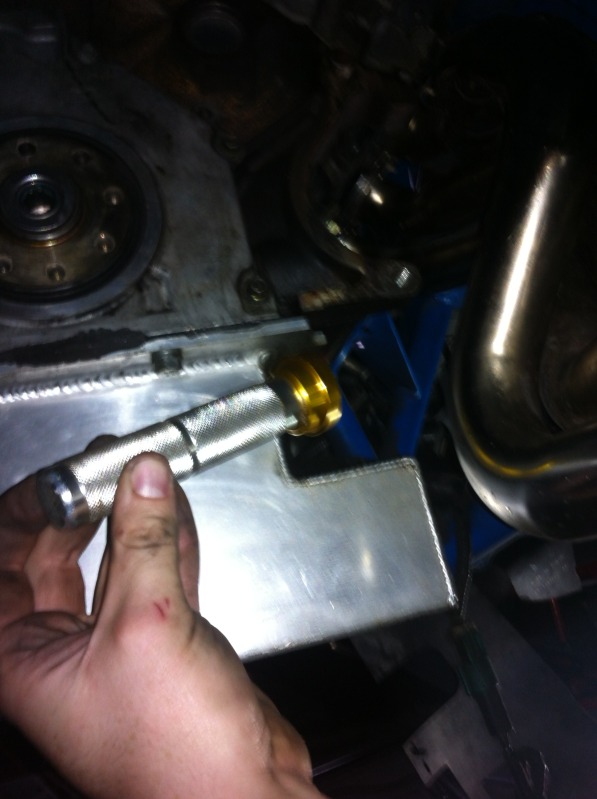
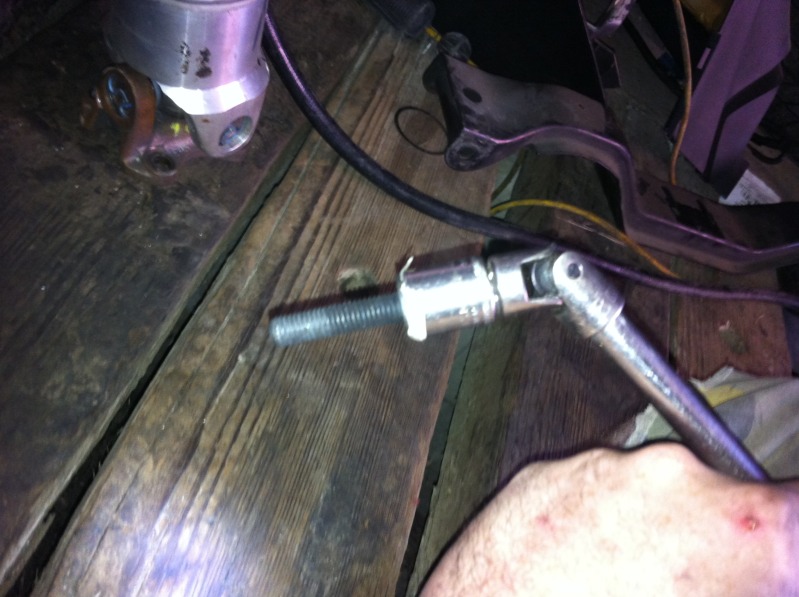
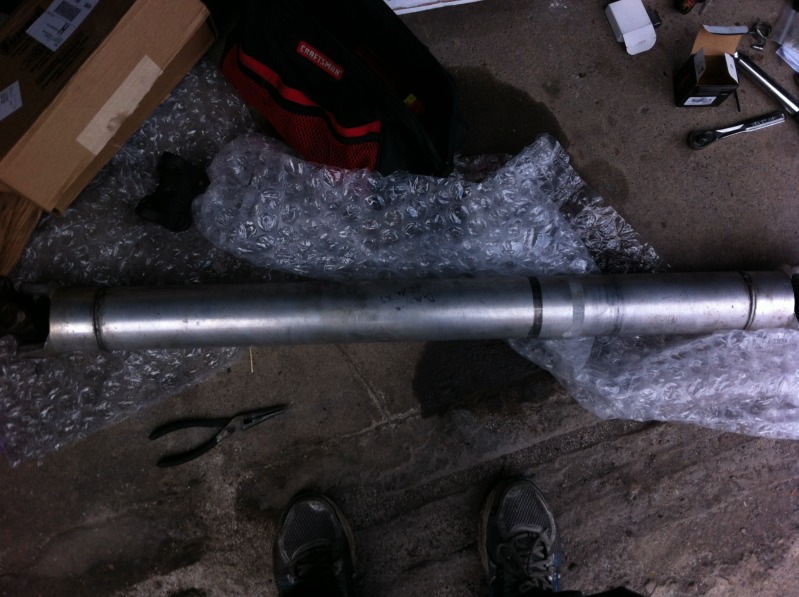
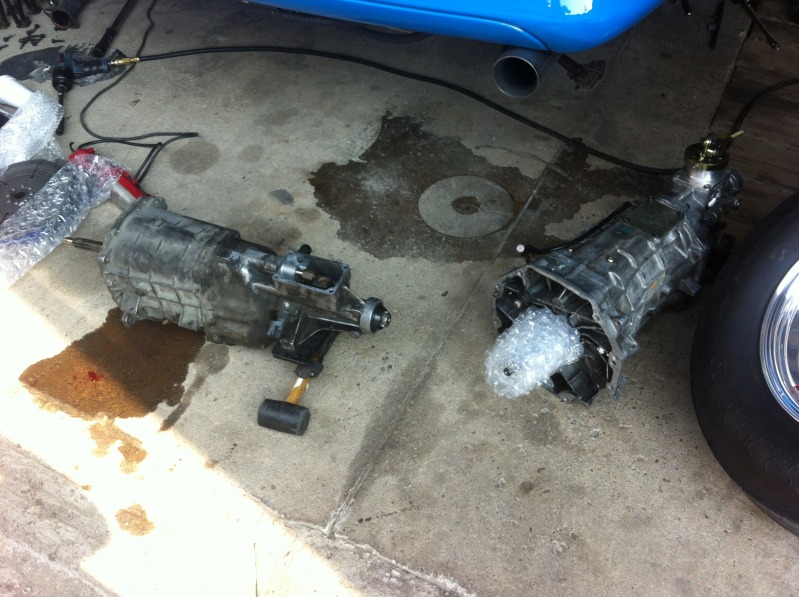
Next is the driveshaft, I will be using an aluminum 03-04 driveshaft for my swap. You have a few options to tackle this. Have your existing driveshaft shortened, have a custom driveshaft made, or use a 03-04 cobra driveshaft along with using a terminator pinion flange or using your SRA pinion flange with a hybrid u-joint part number moog-448. I will be going with the hybrid u joint setup. Here is a pic of the driveshaft.
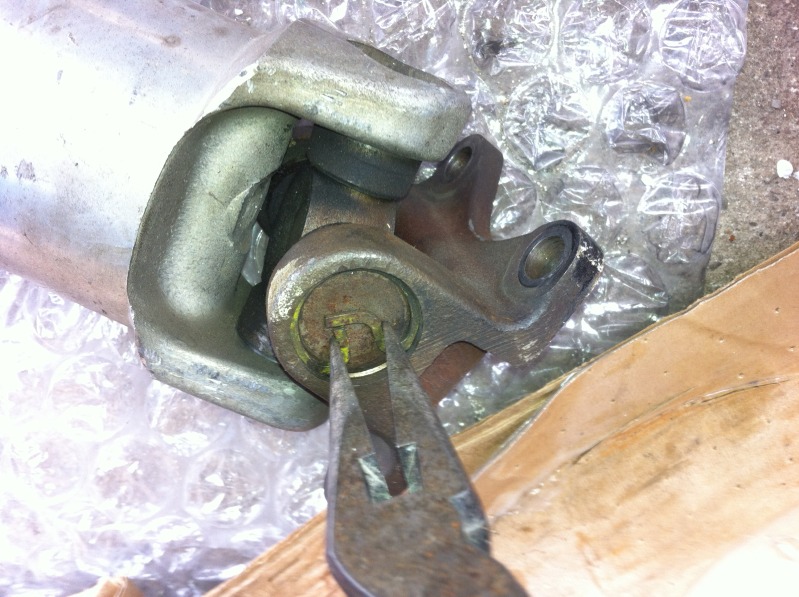
Removing the U joint is a peice of cake, just remove the 4 lock clips with a pair of pliers, then remove the caps and the flange will fall right out.
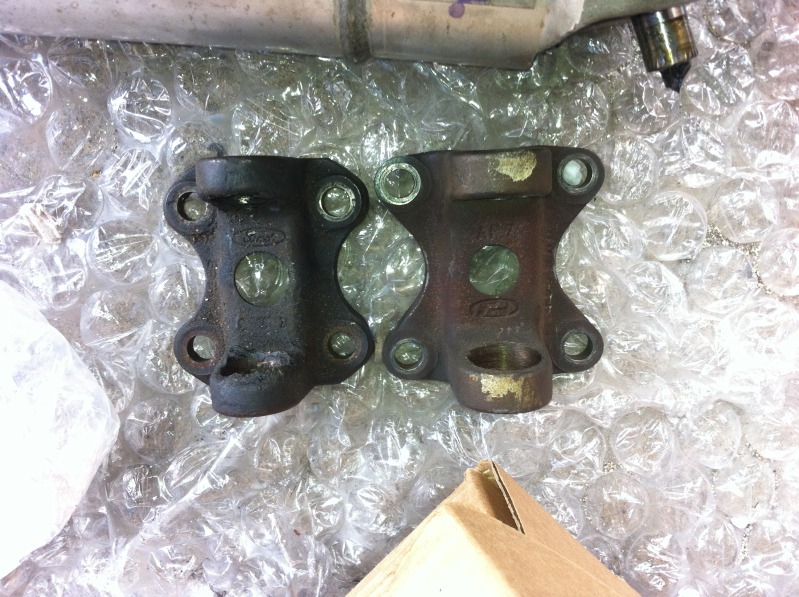
Here is a comparision of the different driveshaft ends, the IRS one is on the right and the SRA on the left.
The 03-04 cobra flange using a little larger U joint but the MOOG-448 hybrid u joint has the correct size ends on two sides then the other two sides will be the correct size for the end of the SRA driveshaft, simply install this u-joing with the SRA end onto the terminator driveshaft and you are good do go, slide the driveshaft into the transmission and bolt it down to the pinion flange with some blue loc-tite and 90 f-lbs of torque. Fill the trans with just under 4 quarts of penzoil synchromesh, reinstall your started and exhaust and that pretty much concludes the swap, the wires are a direct plug in, the speed sensor is OSS style which means you need an extended range speedcal to get the speedo working properly, the reverse light plug just needs to be crimped a hair smaller and it plugs right in. I decided not to wire a switch for the reverse lockout solenoid, I was reading you need two hands to get it into reverse but after installing it its easily done one handed doesn't take much force at all, if for some reason u feel its to hard hit the damn gym.
EDIT
Update 8/28/
Well didn't nearly get as much accomplished today as I wanted but got a late start and had to make some hardware runs. Anyway here we go, I will also copy this update to the original post.
These steps are starting with the trans and flywheel/clutch assembly already out of the car, if u need instructions on removal well its basically the reverse of the installation.
Starting out with the install of a fresh pilot bearing, always safe bet to go with the Ford racing unit. Tap it into the back of the crankshaft with a bearing/race driver as shown.
Now you can line up the transmission mid plate back over the two dowel pins on the back of the engine.
Next continue to install your flywheel. I have a spec billet unit with removable friction material, if you do not you must have your existing flywheel resurface. The friction material bolts that attach it to the flywheel are torque to 7-8 f-lbs for anyone installing a new ring. Next torque down the 6 or 8 flywheel bolts (depending if u have a 6 or 8 bolt crank) in a star pattern at 59-66 f-lbs, I always go at the top of the range so went 66. Also apply blue loc-tite to the flywhee bolts.
IMG]http://i82.photobucket.com/albums/j249/uberstang1/work/null_zps2c8ccf34.jpg[/IMG]
Next using the proper clutch alignment tool, slide the tool through the female splines on the clutch disk then stick the end of the tool into the pilot bearing on the crank shaft. Then line up the pressure plate over the dowel pins on the flywheel and torque down the 6 bolts to 24 f-lbs along with blue loc-tite in a start pattern while insuring the clutch disk and alignment tool don't shift. You can see the tool still installed in the pics, once the clutch is torqued to spec simply pull the tool out.
Next we can install the bellhousing to the engine, unlike the t-45 and 2650 the t56 using a removable belhlousing that doesn't also act like a front cover to the transmission making it a hell of a lot easier to install. The 7 bellhousing bolts get torqued down to 40 f-lbs. Using an extension and a 13mm swivel socket is the easiest. 2 of the 7 bolts are slightly longer than the rest, these two bolts go in the holes that also have the dowels in them. You can also bolt down the midplate to the front of the bellhousing with the two 17mm headed bolts as well.
More to come this week.
Update 8/29/13
Well today I got the trans in and bolted down.
I did this solo and on jack stands so I used a small trolley transmission jack which makes it 10x easer lining it up to slide into the pilot bearing. Place a small block of wood on a jack and jack up on the crank pulley of the engine so the engine tips back slightly to allow for installation of the transmission. Then with the transmission jack angled correctly wiggle the transmission onto the bellhousing insuring that the input shaft is lined up into the clutch assembly correctly.
Also you can leave the shifter installed for this step as long as u remove the shifter handle.
Once the transmission is mated to the bellhousing and lined up properly you can begin to install the 8 transmission to bellhousing bolts, this are 15mm headed bolts and are to be torque down to 34 f-lbs. The use of a 15mm swivel socket or a 15mm along with a universal swivel will be required for some of the upper bolts. The very top bolt on the passenger side that also attaches the bracket for the breather to the trans is the hardest one to get as access is very limited, for this bolt I used some masking tape to hold to bolt in the socket and guide it up to the hole with a long extension.
Once the transmission is mounted next step is installing the cross member, instead of cutting and re-welding the tabs to move the stock crossmember mount up an each I opted for a bolt in AJE cross member specifically designed for c4 and t56 installations in the 96-96 body. This mount deletes any form of traditional transmission mount and mounts directly to the tail of the transmission. There are adjustable poly stuffed collars at the end of the crossmember where it attaches to the chasis. Loosen the lock bolts and bolt the crossmember to the chasis then adjust it so the holes on the tailshaft line up with the slots in the crossmember. Then you can tighten down the crossmember to transmission bolts, then torque down the cross member to chasis bolts along with the stop bolts for the adjustment on the crossmember.
That wraps it up for this garage trip, all that's left is to install the driveshaft, x pipe, bolt down the passenger long tube, and fabricate some wirring for the reverse lockout/ reverse lights. The wirring for the speed sensor plugs in but you WILL need an extended range version of the dallas mustang speedcal to compensate going from the vss gear driven speed sensor to the OSS style on the T56. I already previous installed a speedcal so I won't get indepth with that but the instructions that come with it are cut and dry and its a very east install.
9/1/13
Next is the driveshaft, I will be using an aluminum 03-04 driveshaft for my swap. You have a few options to tackle this. Have your existing driveshaft shortened, have a custom driveshaft made, or use a 03-04 cobra driveshaft along with using a terminator pinion flange or using your SRA pinion flange with a hybrid u-joint part number moog-448. I will be going with the hybrid u joint setup. Here is a pic of the driveshaft.
Removing the U joint is a peice of cake, just remove the 4 lock clips with a pair of pliers, then remove the caps and the flange will fall right out.
Here is a comparision of the different driveshaft ends, the IRS one is on the right and the SRA on the left.
The 03-04 cobra flange using a little larger U joint but the MOOG-448 hybrid u joint has the correct size ends on two sides then the other two sides will be the correct size for the end of the SRA driveshaft, simply install this u-joing with the SRA end onto the terminator driveshaft and you are good do go, slide the driveshaft into the transmission and bolt it down to the pinion flange with some blue loc-tite and 90 f-lbs of torque. Fill the trans with just under 4 quarts of penzoil synchromesh, reinstall your started and exhaust and that pretty much concludes the swap, the wires are a direct plug in, the speed sensor is OSS style which means you need an extended range speedcal to get the speedo working properly, the reverse light plug just needs to be crimped a hair smaller and it plugs right in. I decided not to wire a switch for the reverse lockout solenoid, I was reading you need two hands to get it into reverse but after installing it its easily done one handed doesn't take much force at all, if for some reason u feel its to hard hit the damn gym.
Last edited by uberstang1; 09-03-2013 at 06:14 AM.
 08-21-2013, 04:14 PM
#2
6th Gear Member
Join Date: Feb 2007
Location: South FL
Posts: 8,540
You will love the T56. It's the best trans I've had. Mine has a 'custom' cross member since there wasn't an aftermarket one made back when it was installed.
Make sure you not that it's the DM Speed Cal II that needs to be used to convert the signal for the earlier speedo and analog odometer. The regular Speed Cal won't do the trick.
Make sure you not that it's the DM Speed Cal II that needs to be used to convert the signal for the earlier speedo and analog odometer. The regular Speed Cal won't do the trick.
08-21-2013, 04:34 PM
#3
I'm pretty sure my speedcal is the extended range but not 100% sure I will find out. Your car was a 2v so I'm assuming the stock crossmember didn't match up even with the offset trans mount?
 08-22-2013, 05:08 PM
#7
6th Gear Member
Join Date: Feb 2007
Location: South FL
Posts: 8,540
Correct. Mine is fabbed up out of a 2"x2" that is bolted across under the tail end of it to keep it in place.
08-23-2013, 04:02 PM
#8
good info, I def should be good with the AJE cross member then, still waiting on a few parts. Ordered wrong tailshaft seal because I ordered for an 03 cobra instead of a viper spec trans.