Tim99GT's build thread (56K DEATH)
 06-29-2010, 09:22 PM
#111
4th Gear Member

Join Date: Apr 2009
Location: oregon
Posts: 1,501
just a word of warning on that oil pan....one if you have to chop k member, its a pain when you get the motor almost all the way in....lol i was hoping id be one of those lucky cases.....and i wasnt. 2 i dont know how low the front of your car is, but mines 2.1 drop in the front, and i already mashed the pan because it hangs a little over an inch below the k member and that tranny support looking peice. So just keep that in mind, i knew it was low and i dont even remember hitting it, small speed bump and i thought it was my exhaust because that rubs all the time, i just removed like half a quart of storage....lol, im hoping the plug comes out.
Also, i wasnt impressed with mine. I weld for a living, pressure welding at that, and mine came with a very clear and very large pin hole that i am now going to have to seal up because it is seeping oil. other than that hurry up and get this thing back together.
Also, i wasnt impressed with mine. I weld for a living, pressure welding at that, and mine came with a very clear and very large pin hole that i am now going to have to seal up because it is seeping oil. other than that hurry up and get this thing back together.
 08-27-2012, 10:32 AM
#112
4th Gear Member
Thread Starter
Join Date: Dec 2007
Location: Lafayette, LA
Posts: 1,700
Ok... so ive finally got back to working on the car lol. I know, i know.. its been forever...
It was basically put on hold when i bought a new house and was promoted at work which means my free time went to ****. Things are starting to move along now though. For a while i guess i kind of lost that urge to finish it or even mess with it but im back in the game now.
So a little update. Ryan and i finished the heads and timing and then i decided i wasn't going to run the MMR oil pump( Ive read 3 threads on the various forums in the past 6 months about failures), so we tore the timing chains off again and replaced the MMR pump with a good ole ford racing pump. We've replaced the chains and re-timed it. Ive purchased a lot of new parts such as a set of PA racing A-arms to complete the front suspension, mitshimoto(Spelling?) radiator, 8 rib pulley kit, belt, brackets that i needed, etc.
As of now the motor is complete(internally speaking). I was wanting to have the entire motor buttoned up yesterday but the paint for the front timing cover wasn't going to be dried in time to install it.
A few pics for ****s and giggles and your enjoyment:
Primed timing cover:
Yes, i know the seal was covered in paint. Its the old seal and will be replaced so its no big deal
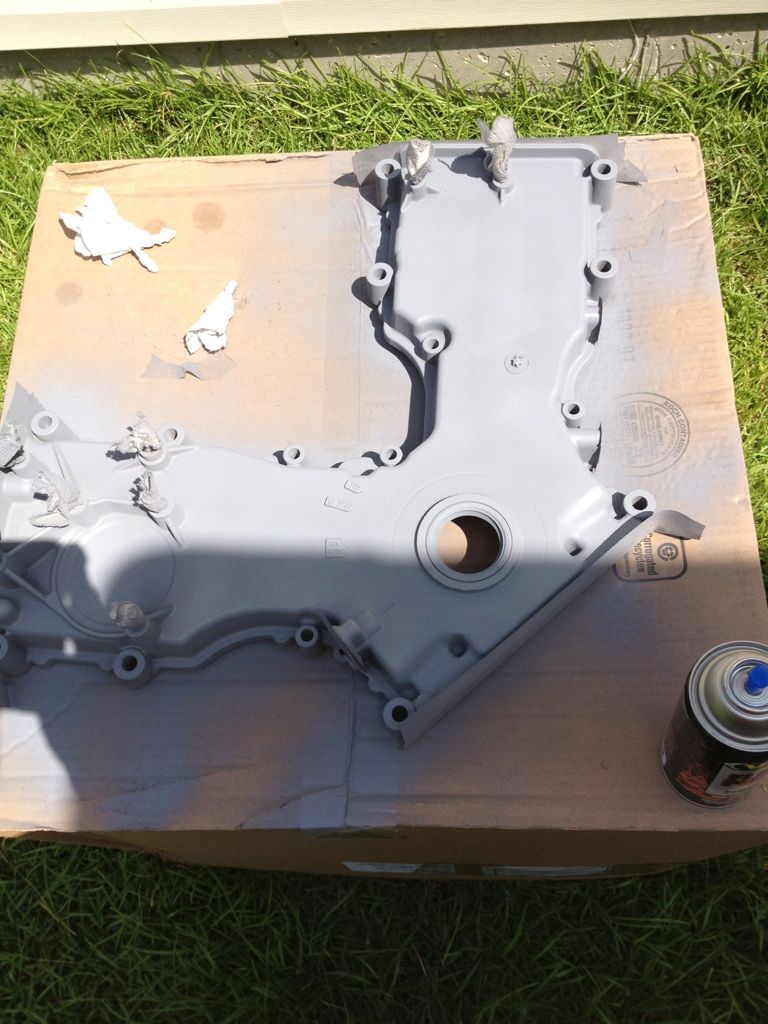
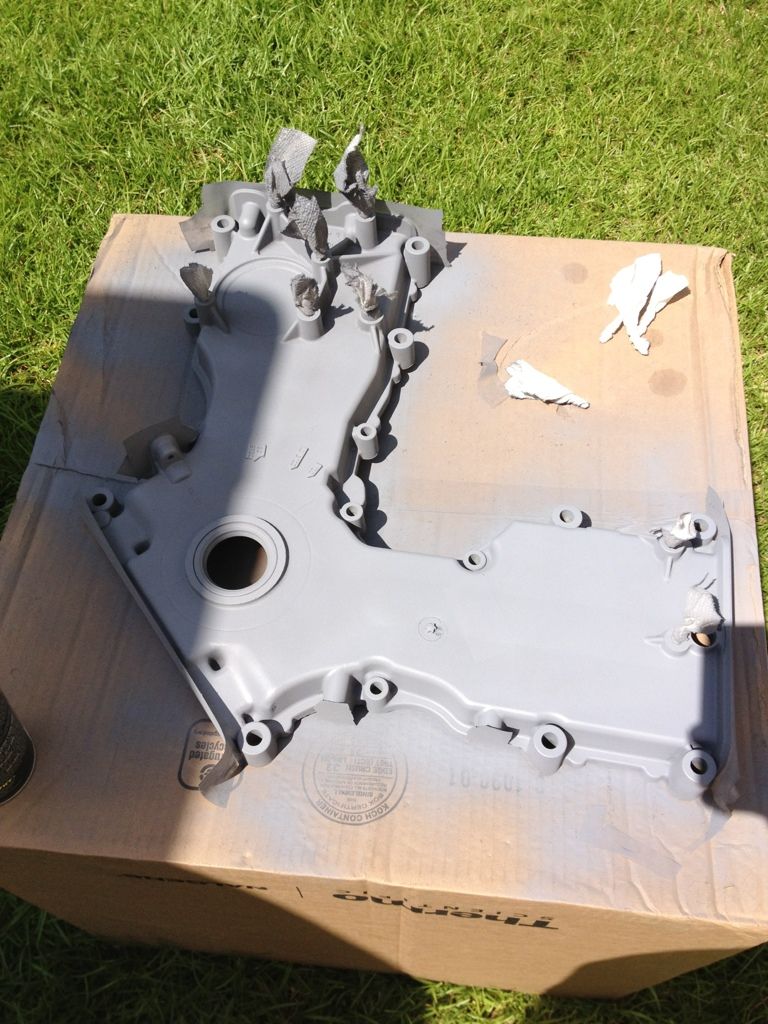
I didnt snap a pic of the finished cover but i will. We painted it with a high temp wrinkle black paint.
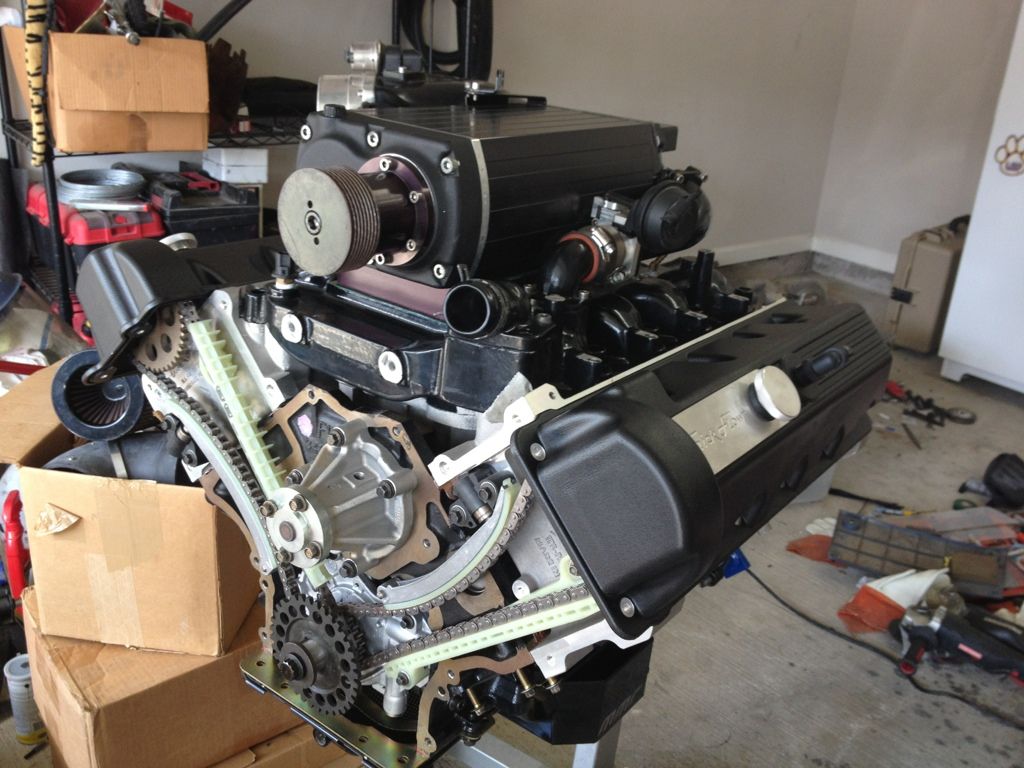
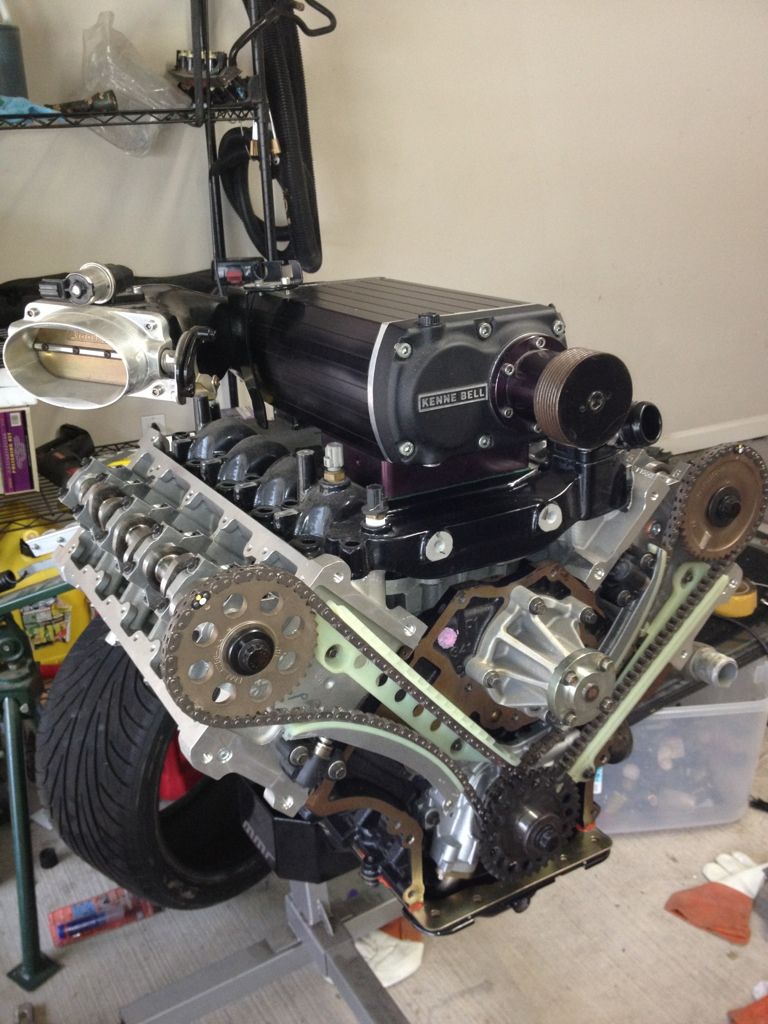
Engine as it is on the stand now:
(The valve covers and blower are just sitting on top. They're not actually bolted in place)
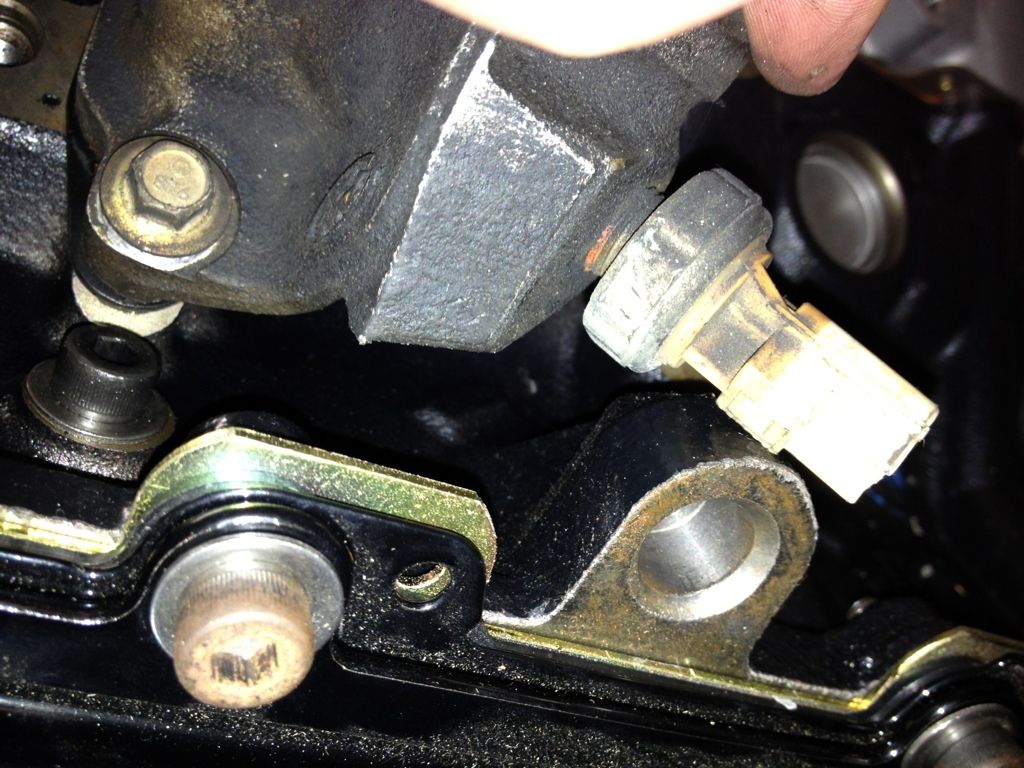
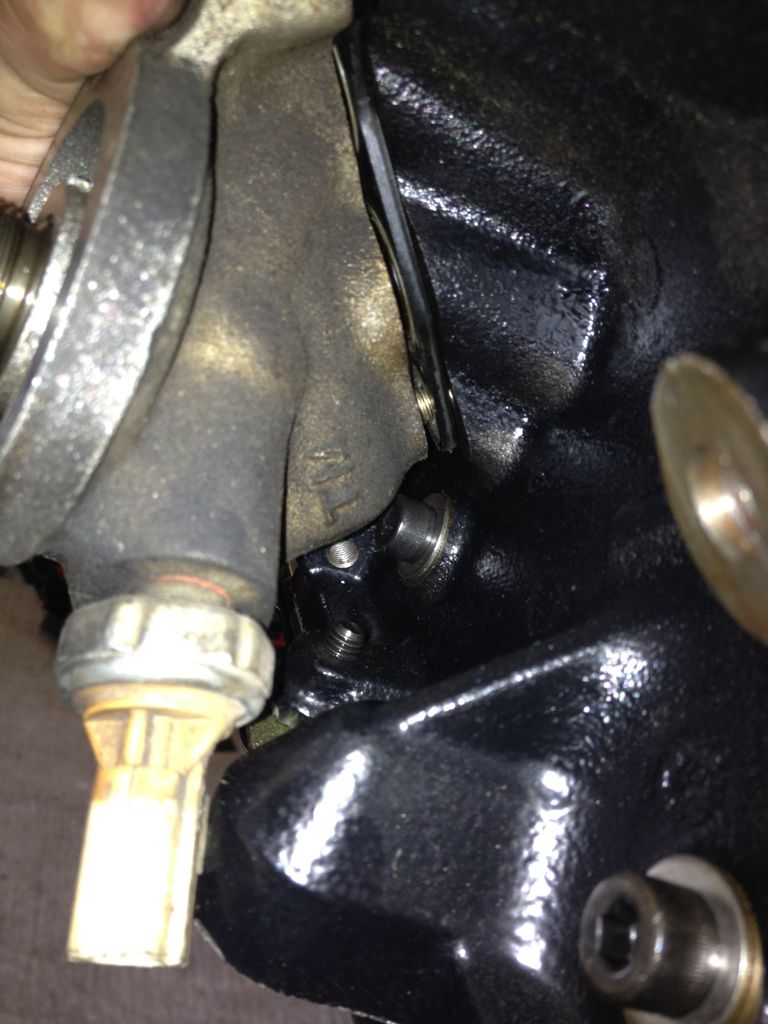
A few issues we've run into: Oil filter adapter fitment issue
(Not sure on whether we are going to notch the block or use a 45* fitting to allow the sensor to clear)
Also, does anyone know what these are for? (Not the mounting holes for the motor mounts but the larger hole to the right below the plug)
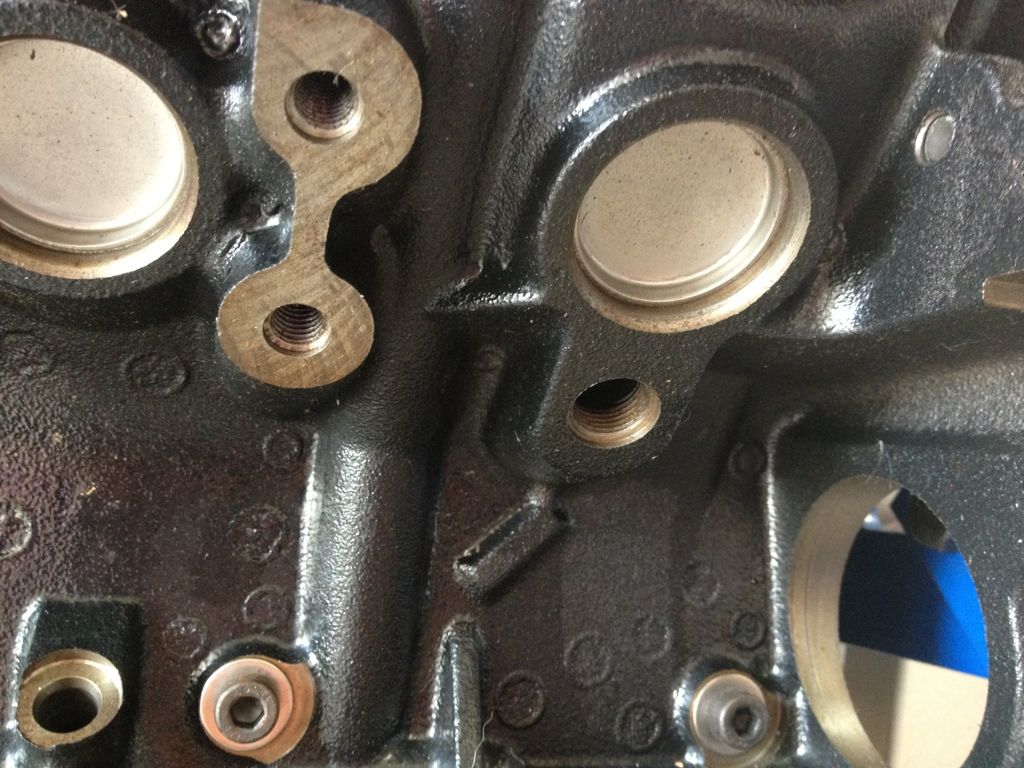
I haven't looked at the old block to reference but i don't remember these holes being there. They may be and i just don't remember.
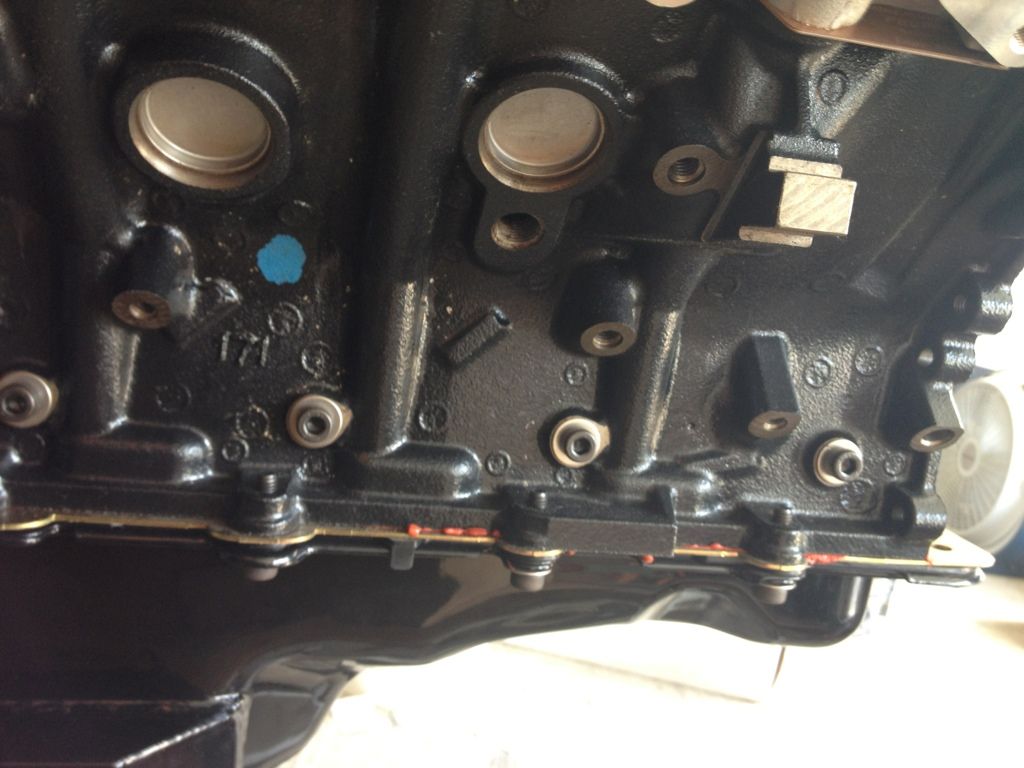
Same size hole on the opposite side of the block:
It was basically put on hold when i bought a new house and was promoted at work which means my free time went to ****. Things are starting to move along now though. For a while i guess i kind of lost that urge to finish it or even mess with it but im back in the game now.
So a little update. Ryan and i finished the heads and timing and then i decided i wasn't going to run the MMR oil pump( Ive read 3 threads on the various forums in the past 6 months about failures), so we tore the timing chains off again and replaced the MMR pump with a good ole ford racing pump. We've replaced the chains and re-timed it. Ive purchased a lot of new parts such as a set of PA racing A-arms to complete the front suspension, mitshimoto(Spelling?) radiator, 8 rib pulley kit, belt, brackets that i needed, etc.
As of now the motor is complete(internally speaking). I was wanting to have the entire motor buttoned up yesterday but the paint for the front timing cover wasn't going to be dried in time to install it.
A few pics for ****s and giggles and your enjoyment:
Primed timing cover:
Yes, i know the seal was covered in paint. Its the old seal and will be replaced so its no big deal
I didnt snap a pic of the finished cover but i will. We painted it with a high temp wrinkle black paint.
Engine as it is on the stand now:
(The valve covers and blower are just sitting on top. They're not actually bolted in place)
A few issues we've run into: Oil filter adapter fitment issue
(Not sure on whether we are going to notch the block or use a 45* fitting to allow the sensor to clear)
Also, does anyone know what these are for? (Not the mounting holes for the motor mounts but the larger hole to the right below the plug)
I haven't looked at the old block to reference but i don't remember these holes being there. They may be and i just don't remember.
Same size hole on the opposite side of the block:
08-28-2012, 01:40 PM
#114
Its about freakin time! I was anxiously awaiting numbers and such, as you were one of the first people to buy these heads, but you kinda dropped off the face of the planet! I hope all goes well with everything man! Make sure them bearings are all lubed up in the bottom end before you fire it for the first time. Sitting that long, I hope they are not dry!
09-02-2012, 12:51 PM
#115
2nd Gear Member
Join Date: Sep 2008
Location: Connecticut
Posts: 312
OP, I'm pulling my stock block right now all by my lonesome...couple of questions for you, is it easier to pull with the tranny or without? And I'm having a hard time finding somewhere to put the chain for the hoist...what did you hook into? Any other advice I would much appreciate because I'm freaking out about doing this on my own but I don't know any MFer's up here in the North since I just moved! :/