My Mustang's evolution (Lots of pics)
 12-07-2013, 12:13 PM
#91
1st Gear Member
Thread Starter

Join Date: Jun 2012
Location: KY
Posts: 112
Early August I got the exhaust installed:
LM2 exhaust and BBK O/R X are on! First impressions are I love the exhaust. The car is actually just as quiet until 2000rpms or so. If anything, it is quieter and doesn't seem as deep as it was with the cats and glasspacks. You can hear the cams 10x better though. When I started it up to drive it off the lift, several of the mechanics that were working on other projects walked over and watched me leave. Not to mention the garage echo'd the car's exhaust note and made it 10x louder lol. No crackling or popping nonsense with this setup so far (the car is an auto which helps I am sure.)
The fitment of the SLP exhaust was top notch, too. Everything went right into place as I assembled it. I literally had the exhaust on in less than 45 minutes once the old setup was off.
The best part? I am noticing a significant increase in midrange and upper RPM power. I will explain why later. Here is a pic of me lining up the exhaust tips: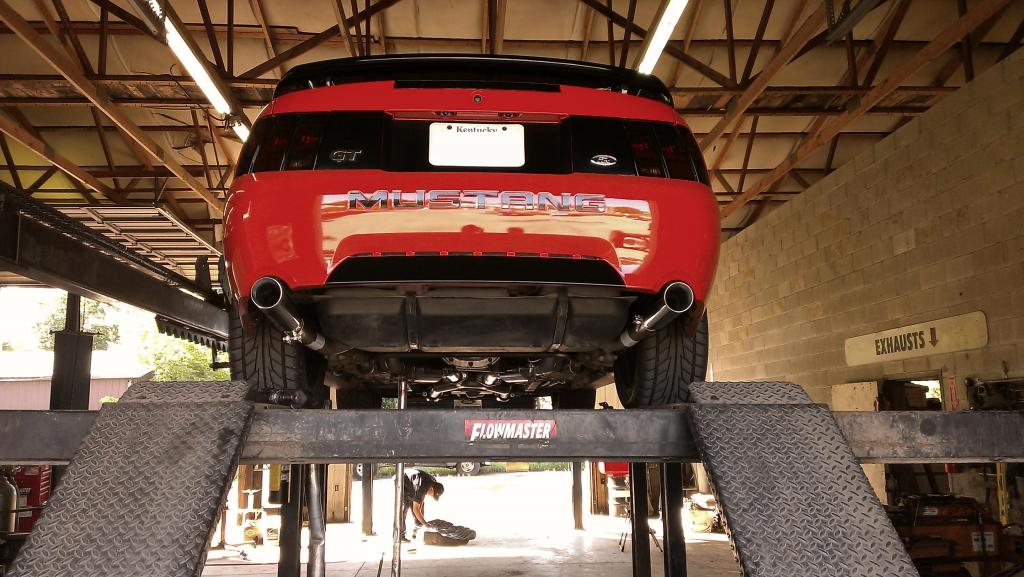
Unfortunately, I do not have any sound clips just yet. Yesterday was an anniversary, so shortly after I got the exhaust on I had to go spend time shopping and eating at over-priced restaurants. I will try to get the sound clip as soon as I can though, don't worry.
Now, NEVER, EVER get a custom exhaust made from a shop without a mandrel bender. If you have to, get dumps or something idiot proof. I have a lot of faith in the shop that built my exhaust, and they had done well on my other vehicles in the past (Silverado with dumps), and have been honest with me when I needed their advice. However, I did not realize how much more of a challenge a Mustang's exhaust would be to custom make.
Here is what I am talking about. What you are about to see may disturb you.
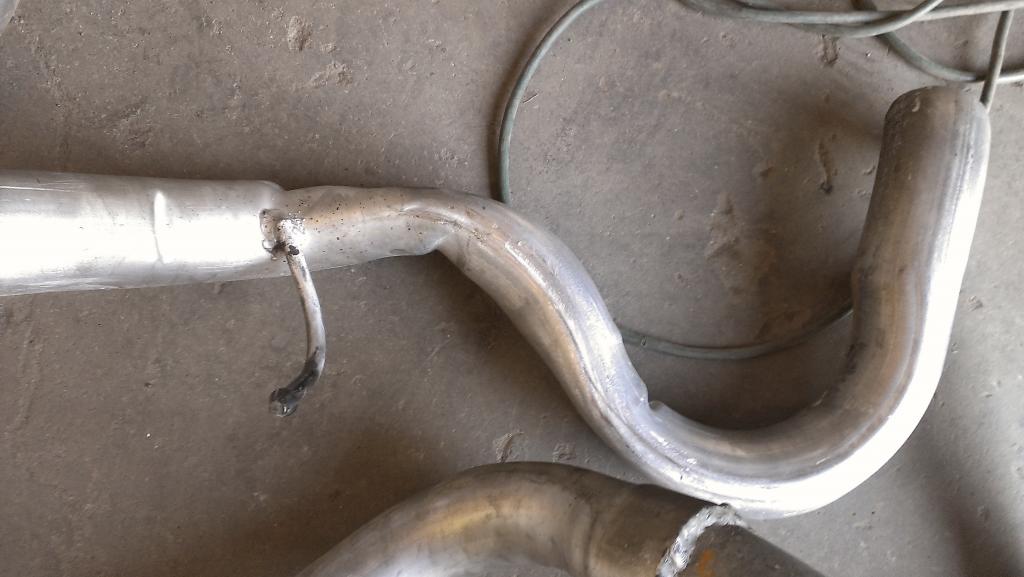
This is one of my axle over pipes that was custom made. The far left of the picture shows true 2.5" diameter piping. The middle is crushed down to maybe 1-1.5". I could tell from crawling under the car that the exhaust was more restrictive than I would have wanted, but I had no idea it was like this.
When I had this exhaust built, I also added my longtube headers. As some of you know, I did not really feel any gains when I added those puppies. It is my belief that this "custom" exhaust turned out to be even more restrictive than stock, and that all the gains I would have gotten from longtubes were totally counter-acted by the crappy pipe bends. As I said earlier, the car feels quite a bit snappier in the upper RPM range now. I am very pleased, and I believe it is now breathing like the beast that it is.
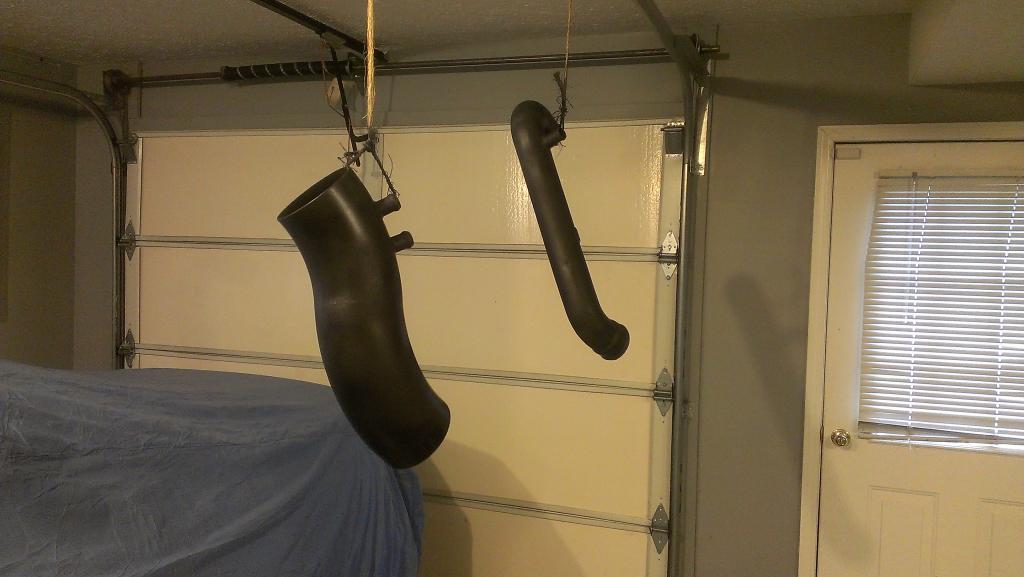
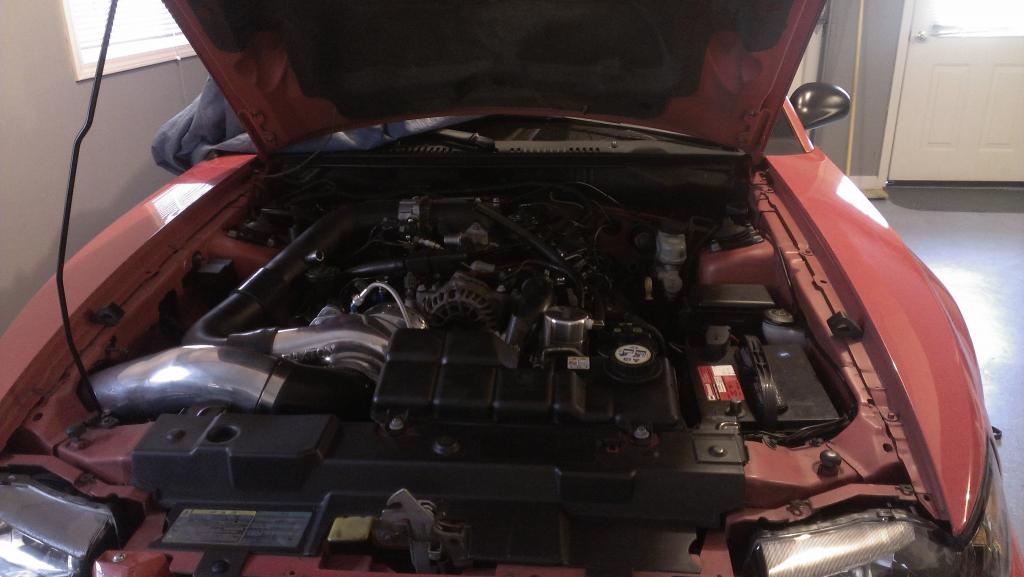
As another update, I painted my supercharger intake and discharge tubes. Engine enamel gave a nice textured finish that is not too flashy. Just the look I was going for.
I also ordered my Lightning threaded IAT sensor and pigtail. Here are the part numbers, just for reference. I had a hard time finding them online, so maybe this will help someone.
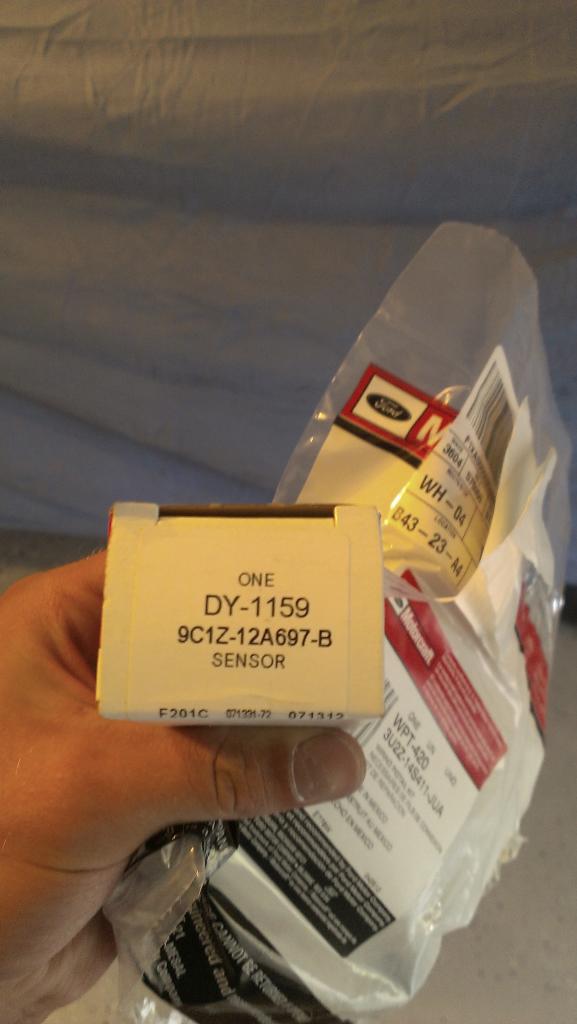
9c1z-12a687-b is the Lightning threaded IAT. From what I read, it is 3/8th-18npt threads. It is also worth noting that the piece has been redesigned and is now plastic instead of brass.
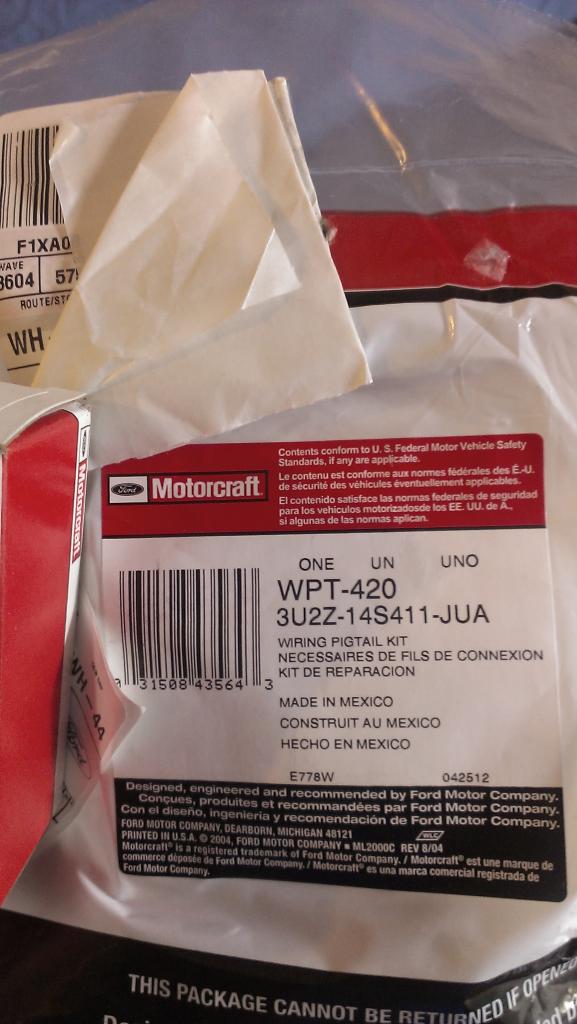
3u2z-14s411-jua is the wiring pigtail. This one is off of a 2003 F150, and was the part I was having a hard time finding. All the part numbers for the Lightning pigtail were no longer valid for some reason.
Now, onto the supercharger bracket. As you remember, it was supposed to ship the 2nd of August. I called on the 2nd, and was told the tracking information had not shown up yet and to call back Monday. So I called back Monday, the 5th, and was told the bracket was actually discontinued and Paxton was trying to piece me together a kit special order and did not know the estimated ship date. Keep in mind I ordered this SOB the second week of JULY. I was very alarmed about this, and spent several hours on the phone with Paxton, figuring out each individual piece I needed. Then, while I was on the phone, an email came through to the Paxton rep that said they were going to make a fresh batch of the discontinued pieces, and the kit would ship on the 8th. So all of yesterday was wasted in a panic for pretty much no reason.
I also ordered my DivisionX pump, submersible fuel line, clamps, and Cobra injectors. All of them should be here by the end of this week, which means I will be dropping the tank very soon.
Btw, the 3/8th-18 npt tap is a pain to find. I have checked 5 or 6 auto parts and hardware stores. They would all have 3/8th-16 or -24 taps, but nothing I needed. I am going to the machine shop on Wednesday to try to find one. Hopefully it will work out then. I did manage to find a plumb bob, which I will attempt to use to punch the hole in the pan. Totally has me scared, haha.
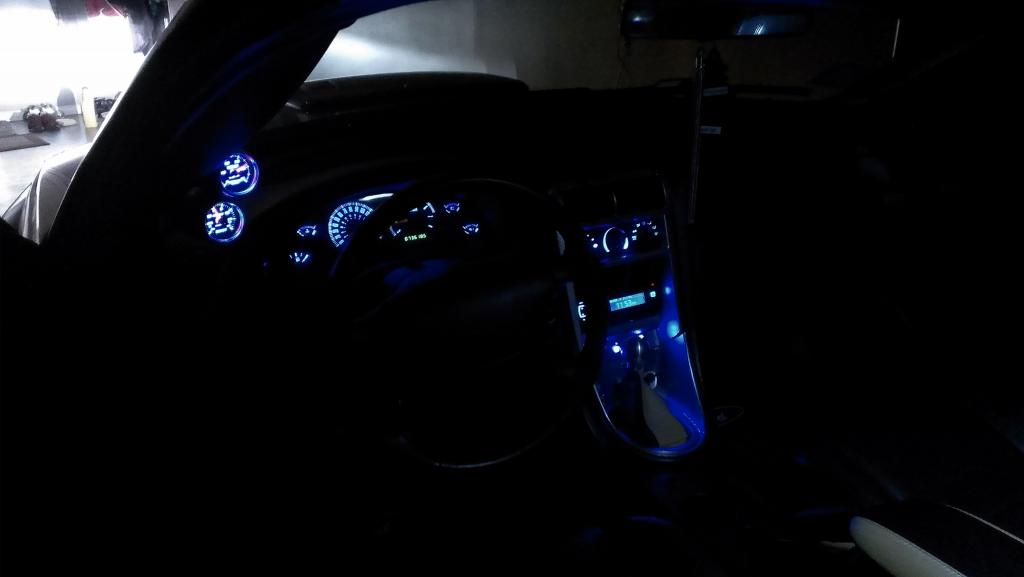
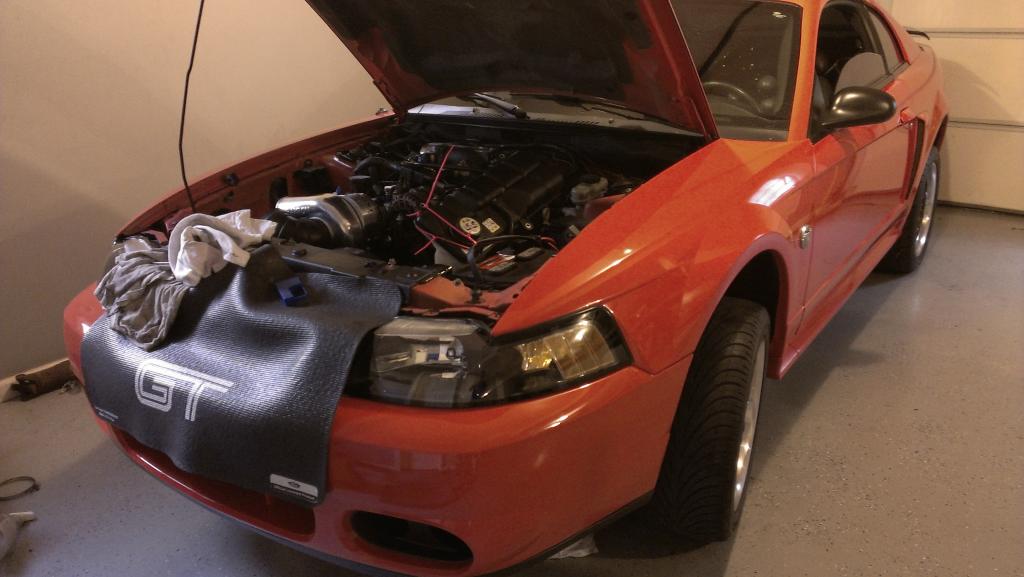
That's all for now, folks! Took some shots of the car to make myself feel better after the Paxton incident.

Exhaust clip of the LM2:
Took me 3 more days of searching and I finally found a 3/8th-18 NPT tap lol. Machine shop had it laying in the back. If you are planning on tapping the oil pan for a turbo or suprecharger, I strongly suggest you find the punch and tap before you get into things. Nothing like losing hours of progress trying to find a tool!
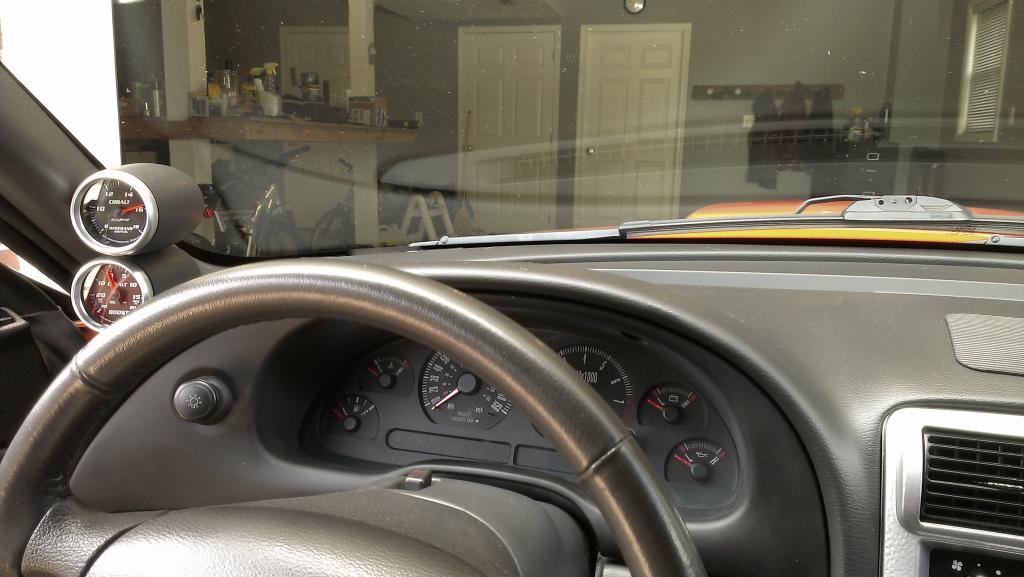
At this point, I was working 6 days a week and didn't have a lot of time to work on the car. I purchased an Autometer Cobalt wideband and boost gauge from AM, and installed them. I took a lot of pictures and did a write up on how to install the gauges for AM, and I am very pleased to say they published it. If you find yourself installing a boost or wideband gauge on a 99-04, I suggest you check out the guide on their website!
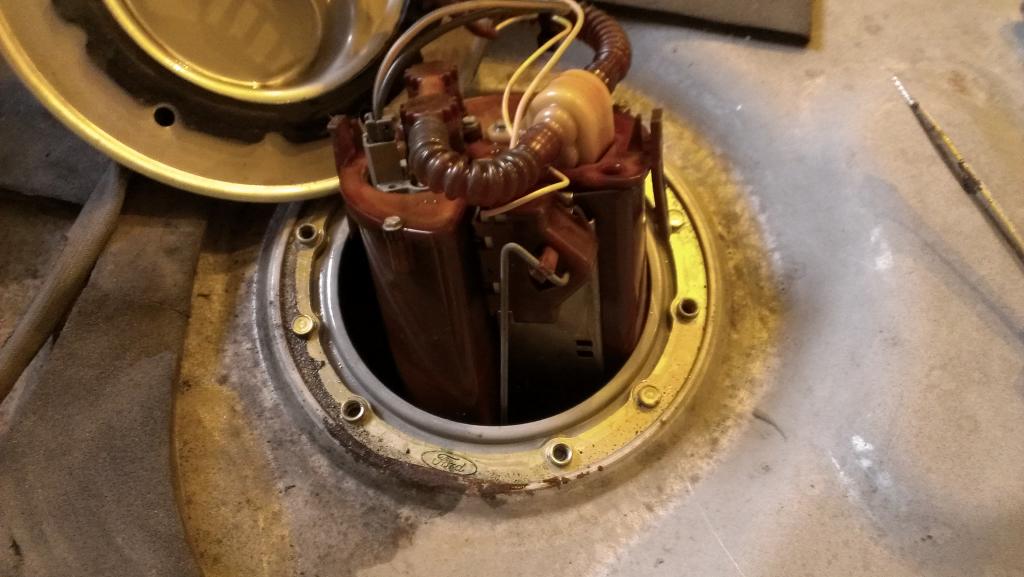
Now, last night I dropped the tank and changed my fuel pump. It really wasn't that bad to be honest. You all had me scared! : Now, if that fuel hose is kinked inside the tank, it'll be a different story. My tank was somewhat dirty, but not really bad for a 9 year old car. Inside the tank didn't have much dirt at all. I believe it has been dropped before. Looking inside, the float assembly and electronics appeared to all be new.
Anyway, here are a couple things I noticed, if anyone is using this thread as a reference:
*Run the car until the dang gas light comes on before doing this. The tank is heavy enough being empty.
*Put the back of the car on jack stands. I didn't do this, and it made life hard. I ended up having to put the tank on my chest, and shimmy under the car and bench press it up into place because I did not have room for a jack, lol.
*The fuel line, at the filter, uses a 5/16th quick disconnect. I could not, for the life of me, get it off. I tried using a slightly larger 3/8th quick disconnect and it popped right off.
On to the pics!
Tank is out!
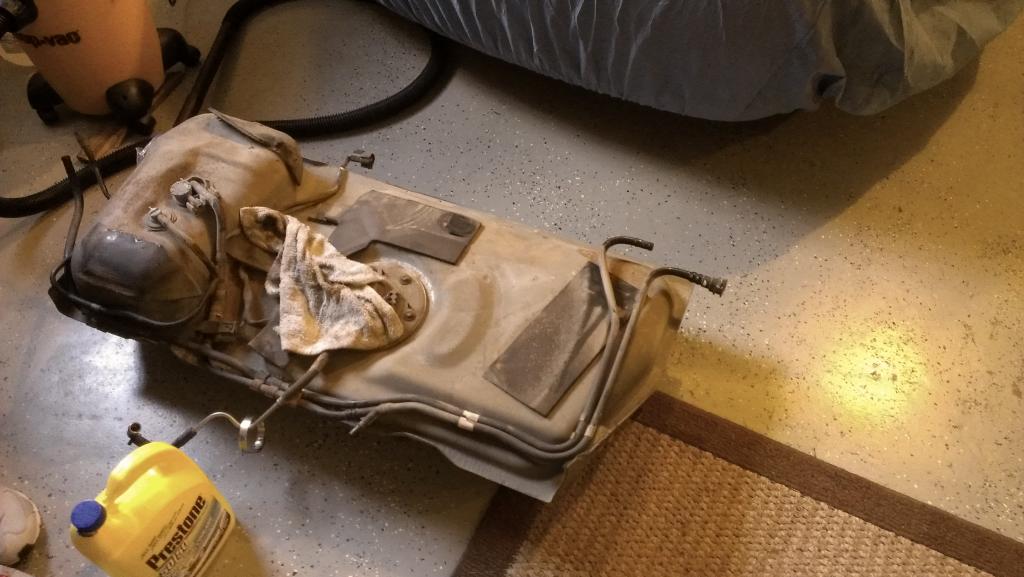
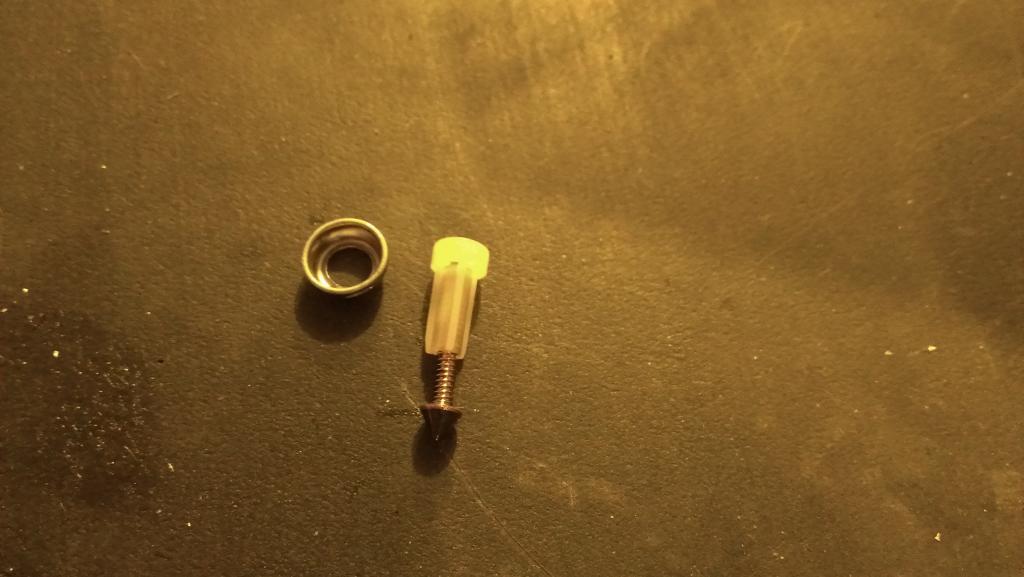
If you are dropping the tank in these cars, just go ahead and plan on fishing this out of the tank, lol. There is also a small screen that goes inside of it.

Hat is off
What I am installing; Stryker 340 pump, Dayco 80160 hose, 5/16th fuel line clamps.

The pump. Looks slightly different than some of the Strykers I have seen on the forums. It is identical to the one srt10ram put in his Bullitt Build, though. It might be a re-badge I figured.

Removed the check valve on the pump:
(poorly) modified basket.
Drilled some holes in the basket for more fuel. Also removed the check valve in the bottom. Somewhat by accident. :facepalm:
Pumps side-by-side:
Ready to go back in the tank. Check out that PPRV delete. :rockon
I will be changing the spark plugs and injectors today. And possibly tapping the oil pan if I feel adventurous enough.
Oh, by the way, THE BRACKET SHIPPED! It took almost a month, but it will be here on Thursday. I hope to have this car assembled by the coming Monday.
Stay tuned!
LM2 exhaust and BBK O/R X are on! First impressions are I love the exhaust. The car is actually just as quiet until 2000rpms or so. If anything, it is quieter and doesn't seem as deep as it was with the cats and glasspacks. You can hear the cams 10x better though. When I started it up to drive it off the lift, several of the mechanics that were working on other projects walked over and watched me leave. Not to mention the garage echo'd the car's exhaust note and made it 10x louder lol. No crackling or popping nonsense with this setup so far (the car is an auto which helps I am sure.)
The fitment of the SLP exhaust was top notch, too. Everything went right into place as I assembled it. I literally had the exhaust on in less than 45 minutes once the old setup was off.
The best part? I am noticing a significant increase in midrange and upper RPM power. I will explain why later. Here is a pic of me lining up the exhaust tips:

Unfortunately, I do not have any sound clips just yet. Yesterday was an anniversary, so shortly after I got the exhaust on I had to go spend time shopping and eating at over-priced restaurants. I will try to get the sound clip as soon as I can though, don't worry.
Now, NEVER, EVER get a custom exhaust made from a shop without a mandrel bender. If you have to, get dumps or something idiot proof. I have a lot of faith in the shop that built my exhaust, and they had done well on my other vehicles in the past (Silverado with dumps), and have been honest with me when I needed their advice. However, I did not realize how much more of a challenge a Mustang's exhaust would be to custom make.
Here is what I am talking about. What you are about to see may disturb you.

This is one of my axle over pipes that was custom made. The far left of the picture shows true 2.5" diameter piping. The middle is crushed down to maybe 1-1.5". I could tell from crawling under the car that the exhaust was more restrictive than I would have wanted, but I had no idea it was like this.
When I had this exhaust built, I also added my longtube headers. As some of you know, I did not really feel any gains when I added those puppies. It is my belief that this "custom" exhaust turned out to be even more restrictive than stock, and that all the gains I would have gotten from longtubes were totally counter-acted by the crappy pipe bends. As I said earlier, the car feels quite a bit snappier in the upper RPM range now. I am very pleased, and I believe it is now breathing like the beast that it is.
As another update, I painted my supercharger intake and discharge tubes. Engine enamel gave a nice textured finish that is not too flashy. Just the look I was going for.

I also ordered my Lightning threaded IAT sensor and pigtail. Here are the part numbers, just for reference. I had a hard time finding them online, so maybe this will help someone.

9c1z-12a687-b is the Lightning threaded IAT. From what I read, it is 3/8th-18npt threads. It is also worth noting that the piece has been redesigned and is now plastic instead of brass.

3u2z-14s411-jua is the wiring pigtail. This one is off of a 2003 F150, and was the part I was having a hard time finding. All the part numbers for the Lightning pigtail were no longer valid for some reason.
Now, onto the supercharger bracket. As you remember, it was supposed to ship the 2nd of August. I called on the 2nd, and was told the tracking information had not shown up yet and to call back Monday. So I called back Monday, the 5th, and was told the bracket was actually discontinued and Paxton was trying to piece me together a kit special order and did not know the estimated ship date. Keep in mind I ordered this SOB the second week of JULY. I was very alarmed about this, and spent several hours on the phone with Paxton, figuring out each individual piece I needed. Then, while I was on the phone, an email came through to the Paxton rep that said they were going to make a fresh batch of the discontinued pieces, and the kit would ship on the 8th. So all of yesterday was wasted in a panic for pretty much no reason.
I also ordered my DivisionX pump, submersible fuel line, clamps, and Cobra injectors. All of them should be here by the end of this week, which means I will be dropping the tank very soon.
Btw, the 3/8th-18 npt tap is a pain to find. I have checked 5 or 6 auto parts and hardware stores. They would all have 3/8th-16 or -24 taps, but nothing I needed. I am going to the machine shop on Wednesday to try to find one. Hopefully it will work out then. I did manage to find a plumb bob, which I will attempt to use to punch the hole in the pan. Totally has me scared, haha.
That's all for now, folks! Took some shots of the car to make myself feel better after the Paxton incident.


Exhaust clip of the LM2:
Took me 3 more days of searching and I finally found a 3/8th-18 NPT tap lol. Machine shop had it laying in the back. If you are planning on tapping the oil pan for a turbo or suprecharger, I strongly suggest you find the punch and tap before you get into things. Nothing like losing hours of progress trying to find a tool!
At this point, I was working 6 days a week and didn't have a lot of time to work on the car. I purchased an Autometer Cobalt wideband and boost gauge from AM, and installed them. I took a lot of pictures and did a write up on how to install the gauges for AM, and I am very pleased to say they published it.
If you find yourself installing a boost or wideband gauge on a 99-04, I suggest you check out the guide on their website!

Now, last night I dropped the tank and changed my fuel pump. It really wasn't that bad to be honest. You all had me scared! : Now, if that fuel hose is kinked inside the tank, it'll be a different story. My tank was somewhat dirty, but not really bad for a 9 year old car. Inside the tank didn't have much dirt at all. I believe it has been dropped before. Looking inside, the float assembly and electronics appeared to all be new.
Anyway, here are a couple things I noticed, if anyone is using this thread as a reference:
*Run the car until the dang gas light comes on before doing this. The tank is heavy enough being empty.
*Put the back of the car on jack stands. I didn't do this, and it made life hard. I ended up having to put the tank on my chest, and shimmy under the car and bench press it up into place because I did not have room for a jack, lol.
*The fuel line, at the filter, uses a 5/16th quick disconnect. I could not, for the life of me, get it off. I tried using a slightly larger 3/8th quick disconnect and it popped right off.
On to the pics!
Tank is out!

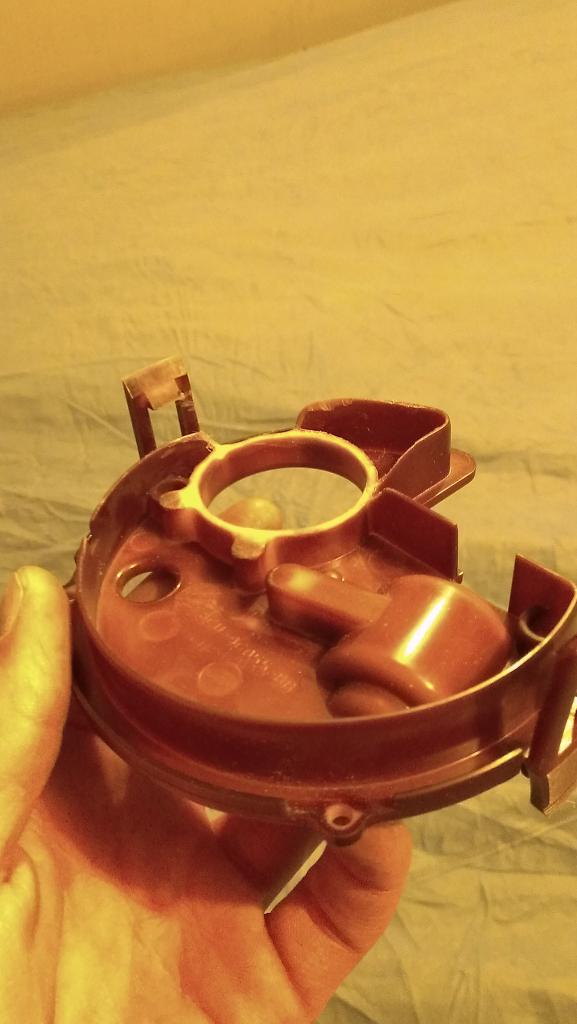
If you are dropping the tank in these cars, just go ahead and plan on fishing this out of the tank, lol. There is also a small screen that goes inside of it.

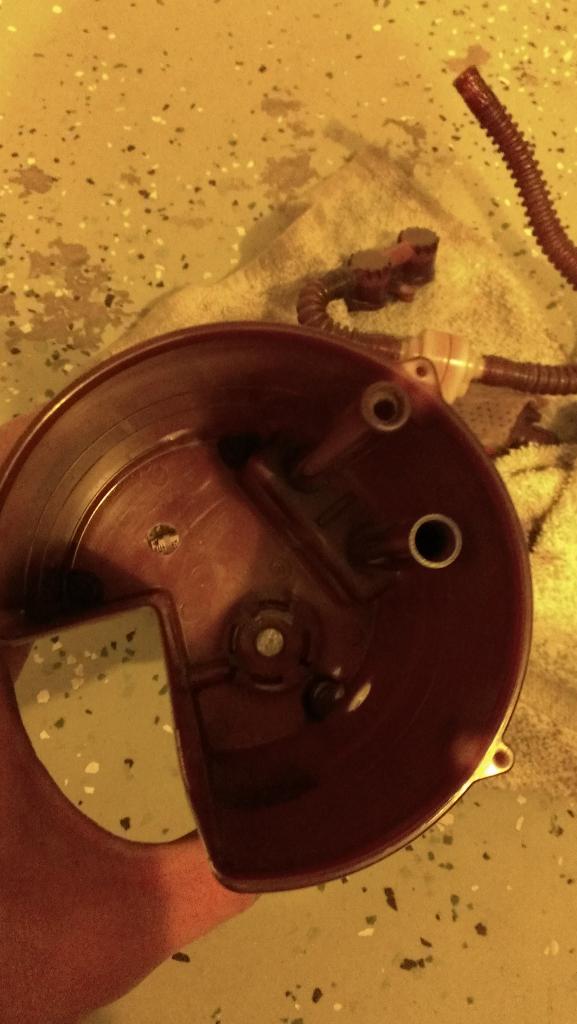
Hat is off

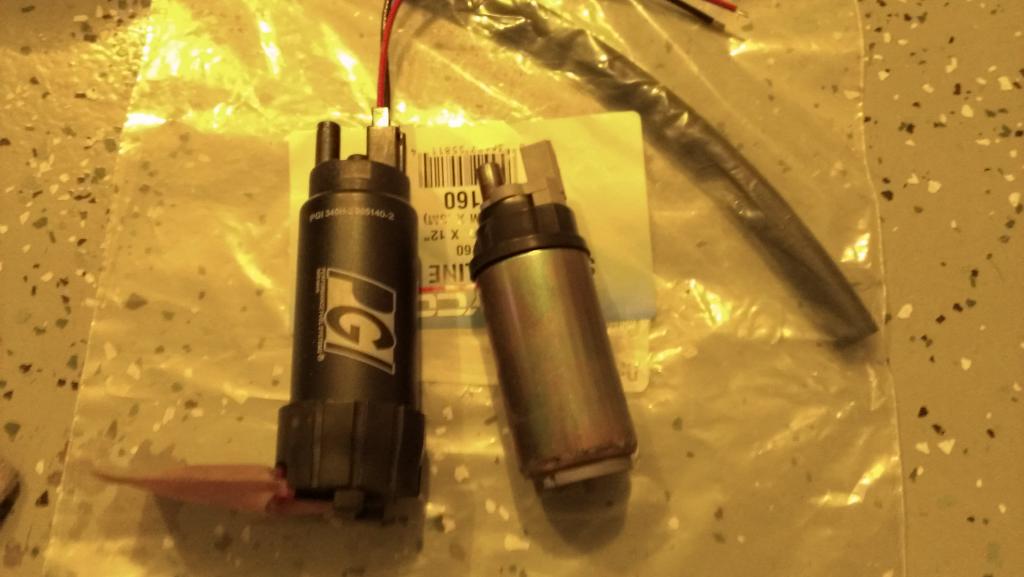
What I am installing; Stryker 340 pump, Dayco 80160 hose, 5/16th fuel line clamps.

The pump. Looks slightly different than some of the Strykers I have seen on the forums. It is identical to the one srt10ram put in his Bullitt Build, though. It might be a re-badge I figured.

Removed the check valve on the pump:

(poorly) modified basket.

Drilled some holes in the basket for more fuel. Also removed the check valve in the bottom. Somewhat by accident. :facepalm:

Pumps side-by-side:

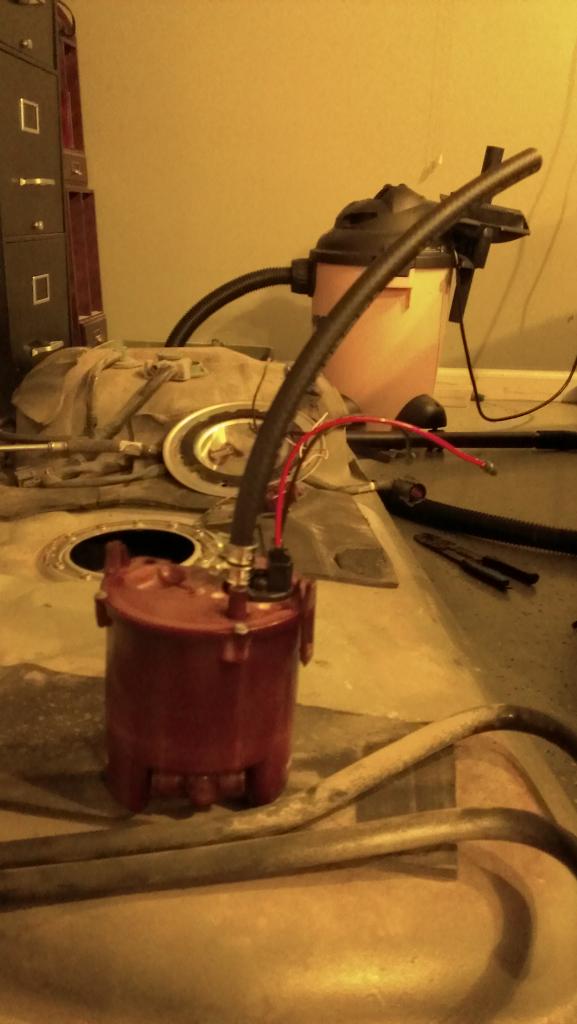
Ready to go back in the tank. Check out that PPRV delete. :rockon

I will be changing the spark plugs and injectors today. And possibly tapping the oil pan if I feel adventurous enough.
Oh, by the way, THE BRACKET SHIPPED! It took almost a month, but it will be here on Thursday.
I hope to have this car assembled by the coming Monday. Stay tuned!
 12-07-2013, 12:26 PM
#92
1st Gear Member
Thread Starter
Join Date: Jun 2012
Location: KY
Posts: 112
Fuel pump duty cycle seems to be good at idle, part throttle, and WOT. Gas gauge also works.
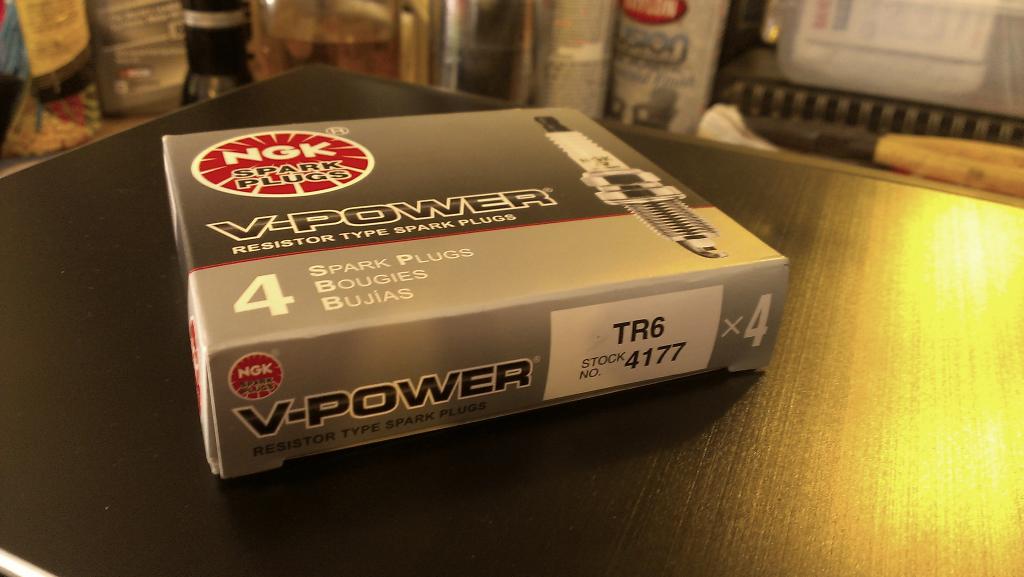
New injectors are in, and new plugs are in and gapped to .032". The car no longer runs haha. I got it to start and sputter into the garage, and the air fuel ratio was around 10:1.
Not wanting to lose my momentum, so I am doing the oil pan now.
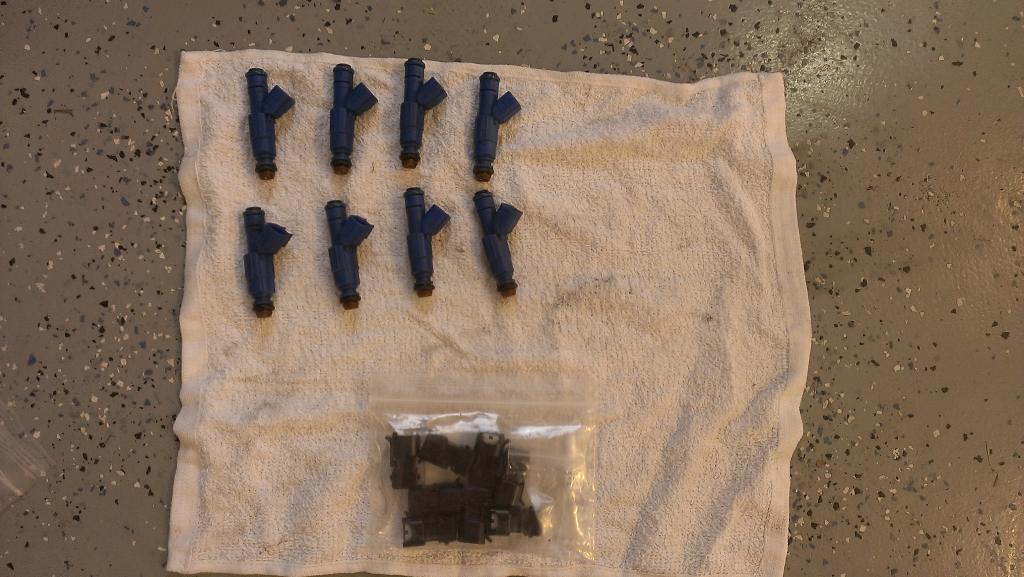
Cobra injectors and adapters:
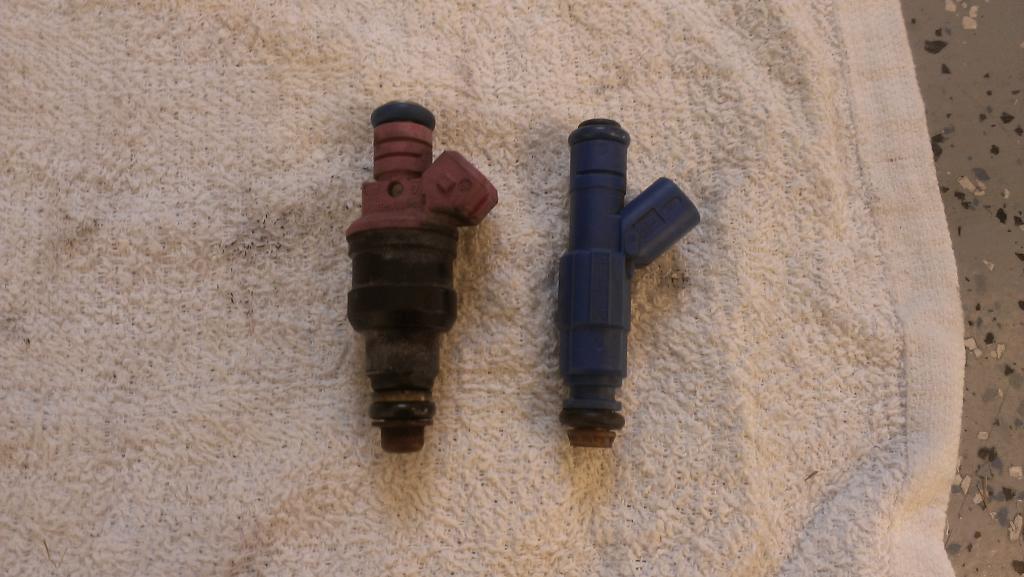
Stock vs. Cobra:
Tr6 plugs:
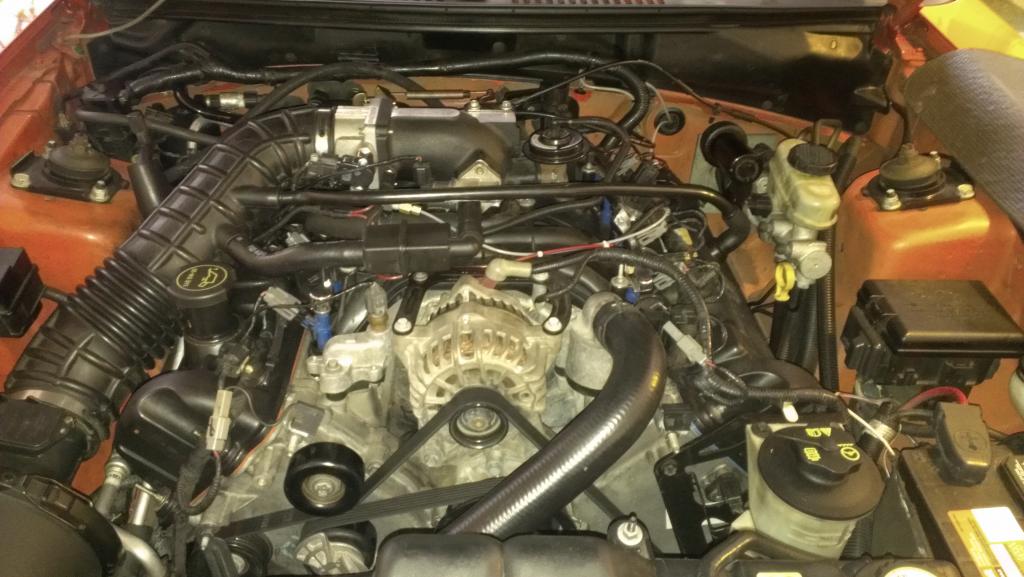
You can kind of see the blue injectors, haha.
Got the oil pan tapped that night,
Once again it was not that bad. Punching it was kind of a pain, but I managed OK after a few minutes. I completely caked my tap in grease and started tapping. It caught a massive amount of shavings. I then poked around with a magnet and got a few more, then flushed the pan out 3 times. I am hoping that got out all of the shavings.
Here is the finished product:
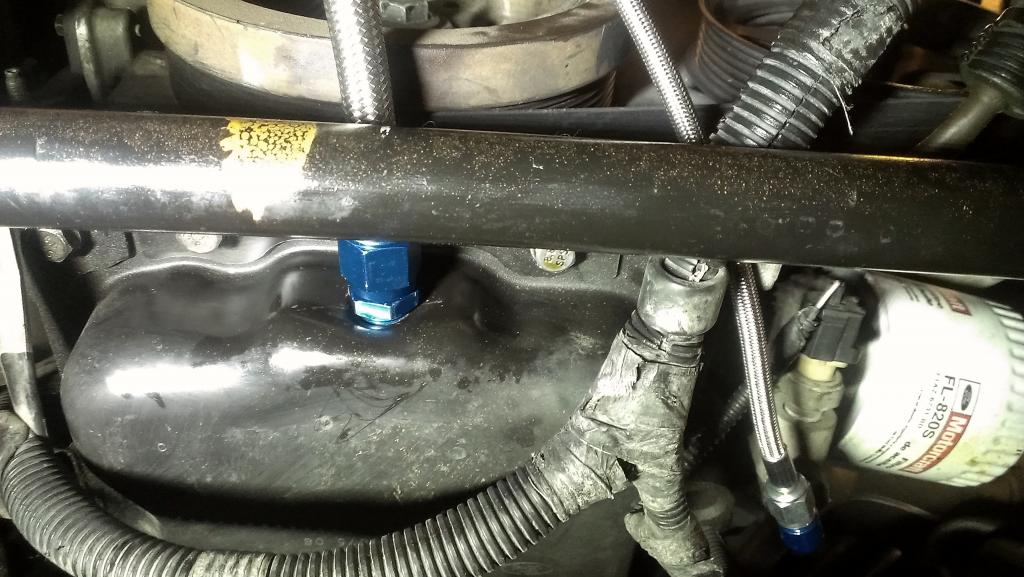
Now, I also installed my Vortech oil feed upgrade, and it seems way too short. Is there any specific way to route the feed line I need to know about? I am hoping it becomes more apparent when the super charger is on.
The bracket comes tomorrow. I hope to have the supercharger mounted tomorrow night, and be making calls about getting it on the rollers this weekend. :thumb:
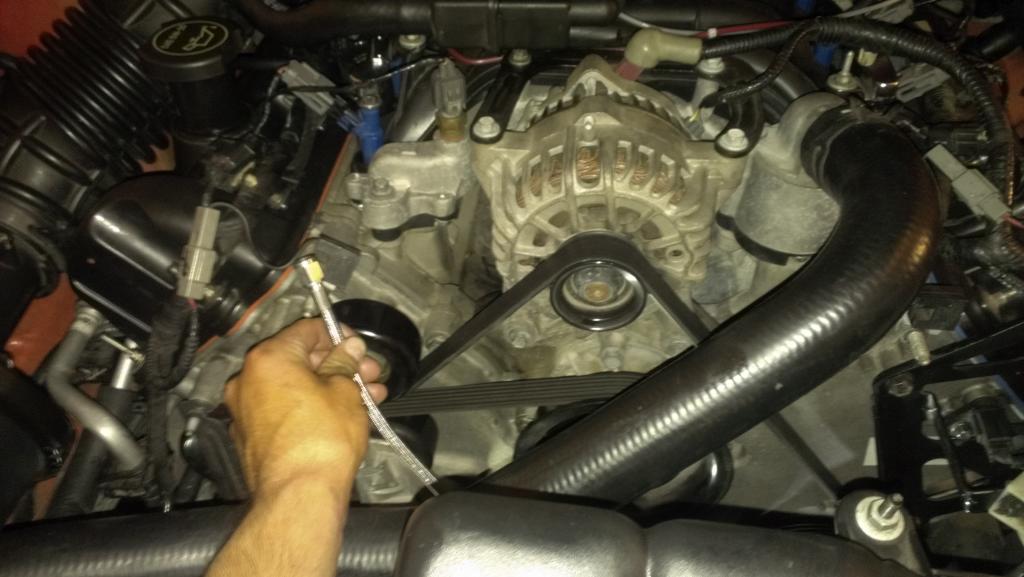
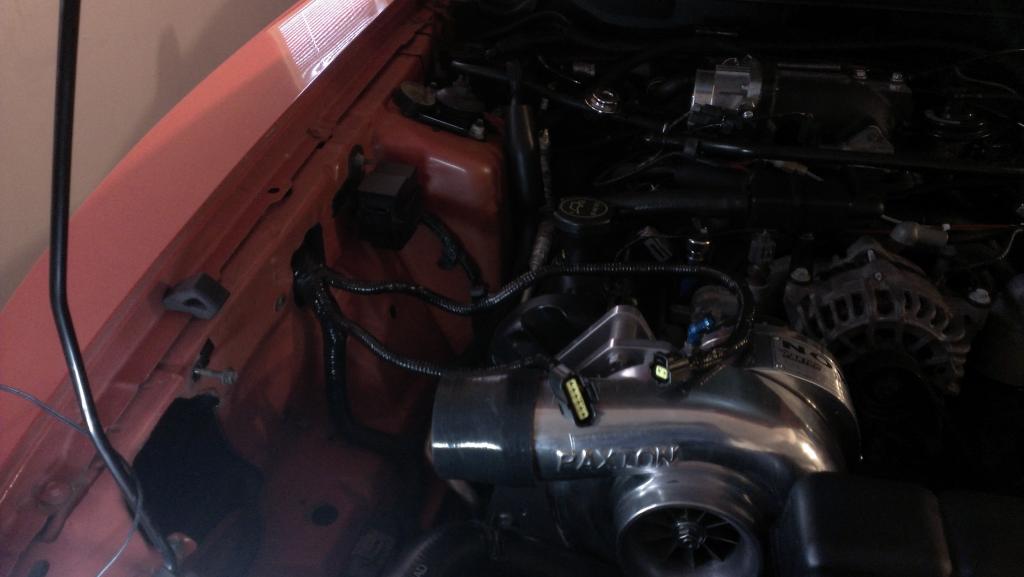
Well, I got the bracket mounted today. Progress went much much slower than I hoped, seeing as my original goal was to have the blower mounted tonight. I got hung up a couple things, like the fan resistor. I haven't read anything about it in any of the build threads I frequent, so I was totally freaked out when I saw it in the instructions. And apparently the kit originally came with a relocation bracket for the resistor that I cannot find online. Anyone have any info on this?
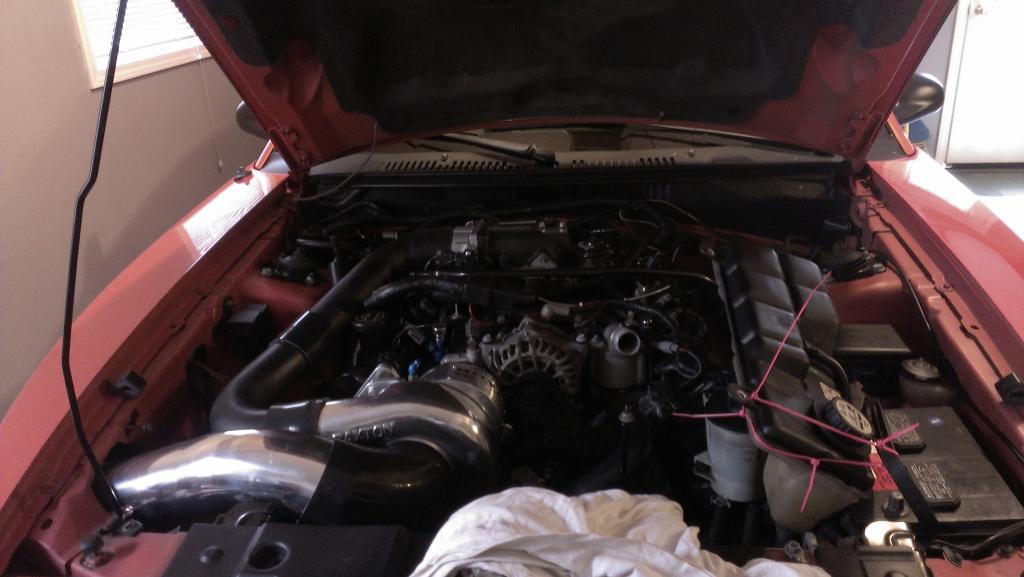
Here is a picture of my progress. I will hopefully wrap it up tomorrow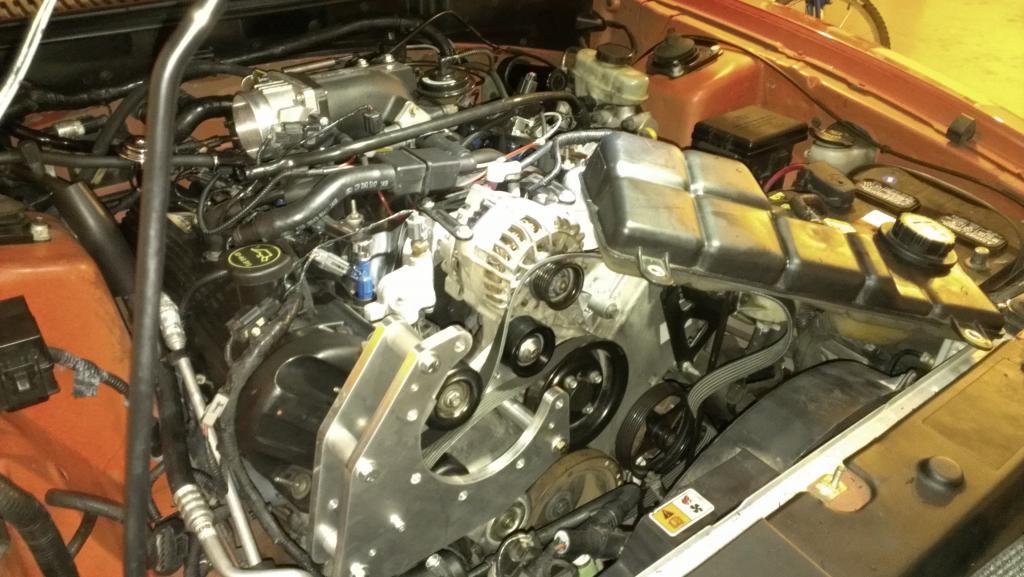
Little did I know that I was in for a mess...
I'm convinced I totally jinx myself whenever I open my mouth about 'estimated completion dates.'
I have hit several hard walls with the install. I will touch on them briefly.
* The oil feed WAS too short. Paxton blowers use the top port on the blower for the oil nozzle. I needed an oil feed at least 12" longer. I ordered a new one from Paxton for a small fortune. If anyone wants a brand new Vortech oil feed line, hit me up.
* The 90* boot going from my blower to the intake tube hit my fan shroud, and my Vortech discharge tube was a tad too short. I trimmed my fan shroud even more (Paxton says you have to trim it a small amount for the install), and now I "believe" I have clearance. The discharge tube has been modified to fit as well.
* I have no idea what kind of intake setup came with my kit, but it does not even pretend like it wants to fit. So, I can either pay $250 for a new OEM unit, or spend $100 and make a power pipe and gain some PSI while I am at it. Tough call. The only thing I am worried about is getting the fittings for the bypass valve and the PCV and IAC tubes on the power pipe.
*Now, the big one. My supercharger pulley did not align with my other accessory pullies. There was 1/4" difference between the two. See pic:
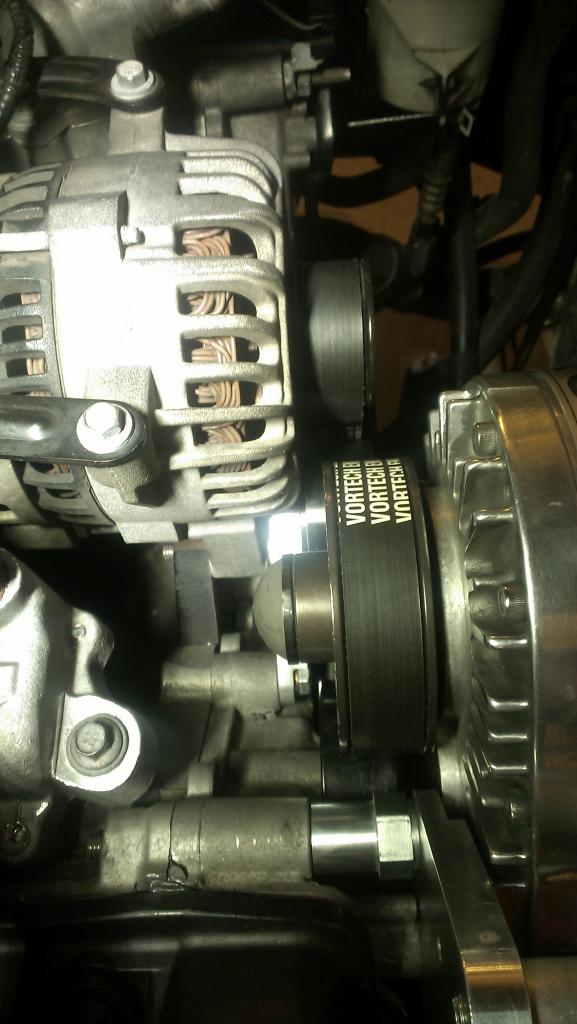
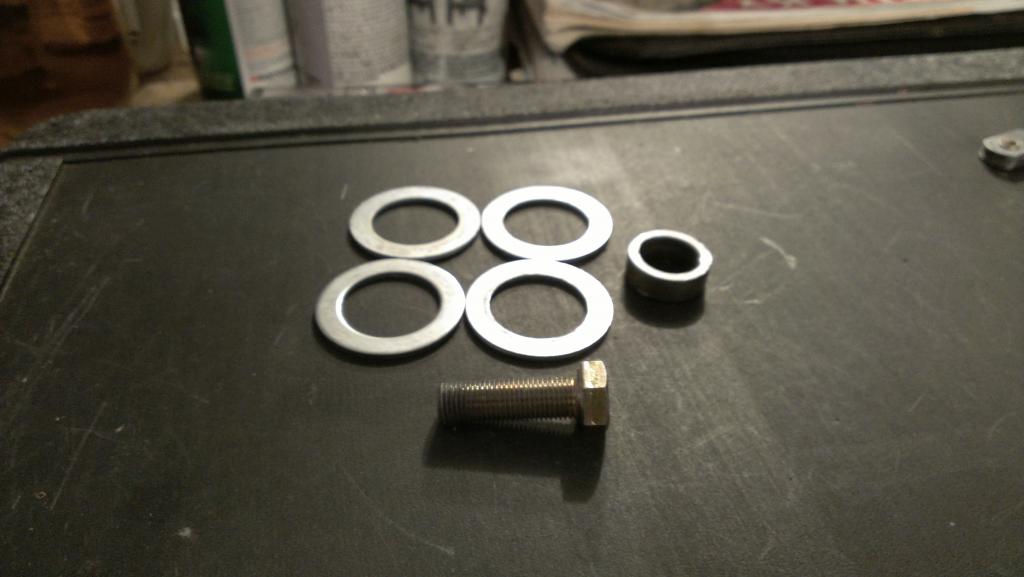
I took off the pulley on the blower, and put 3 small washers in. It gave me the space that I needed. The only thing that worries me, is there is now 1/4" gap between the end of the pulley, and the shaft going into the blower. It is recessed, somewhat. I went ahead and re-installed the blower, but now that I have got to thinking, I believe I am going to try to find a slightly longer bolt, and find a spacer to go on the end of the shaft. Does that sound like a good idea to you all?
And finally, I need the radiator hose piece included with the kit. If anyone has the dimensions or specs of this piece I would really appreciate the info. Otherwise, I will pay the $30 from Vortech I guess.
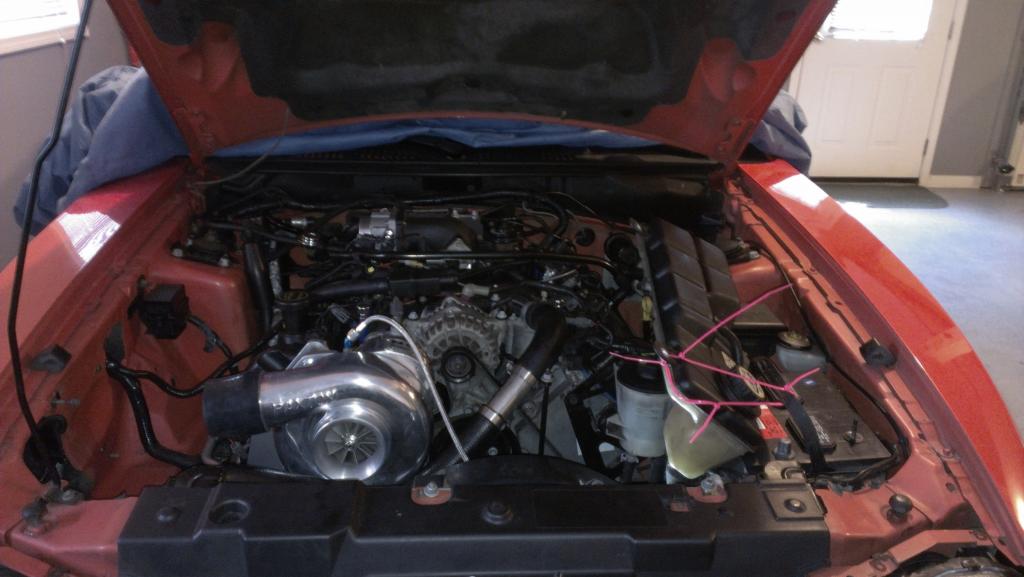
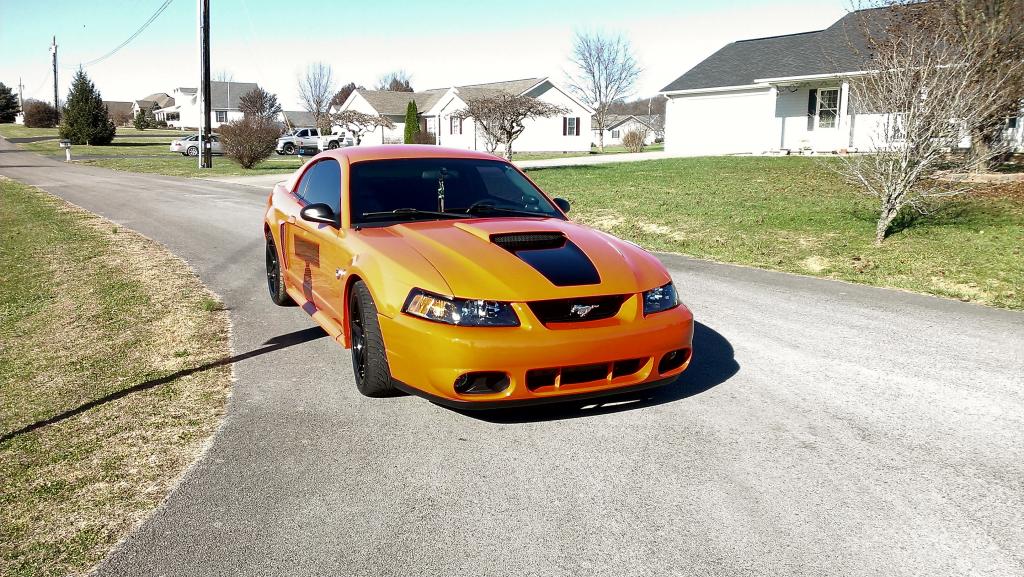
Here is what the car looks like now.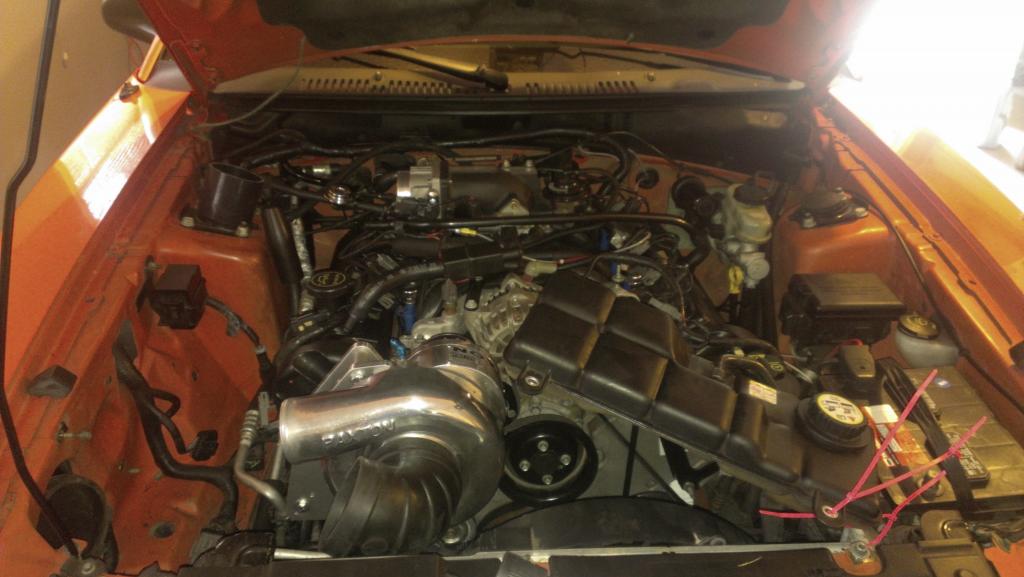
To get this thing rolling, here is what I lack:
*Order parts for new intake assembly.
(Figure out how to mount bypass valve)
*Install new oil feed, when it arrives.
*Do something to get some peace of mind with the blower shims.
*Figure out the radiator hose snafu.
Man, I thought changing the fuel pump would be the hard part of this install. I was dead wrong. :facepalm:
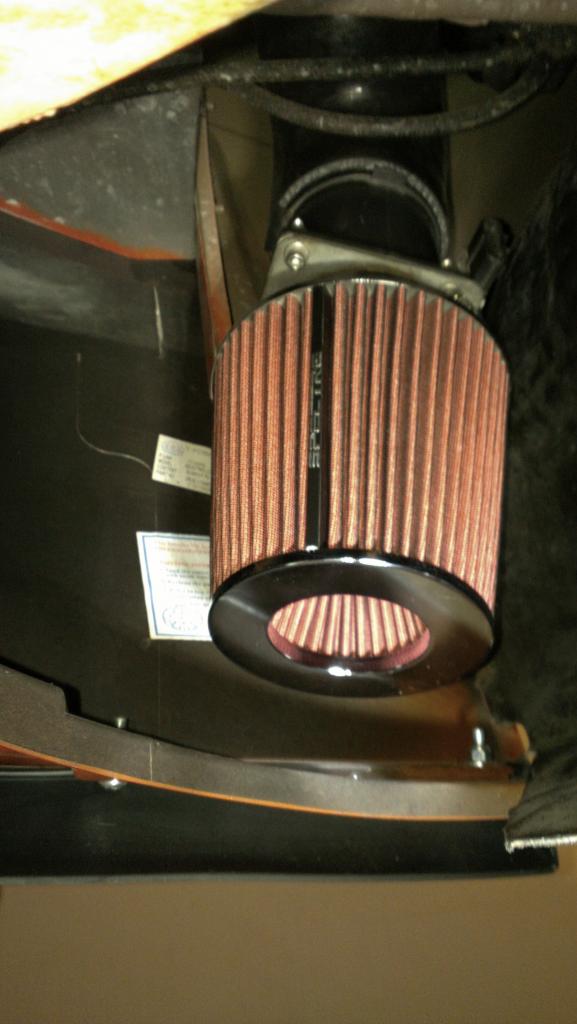
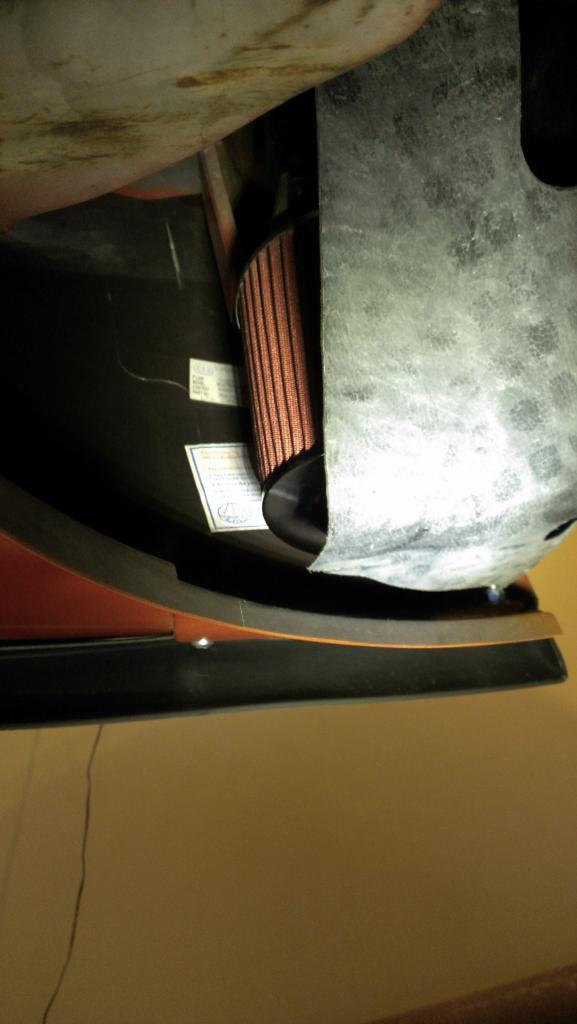
In other news, I got my Spectre filter, and my MAF housing in my fender well installed. I am very happy with it! The filter is a little bit shorter than the K&N one my kit came with, but it is much fatter, and has a inverted cone on the end, so it has more surface area to suck air from. The best part is that it lets me keep my fender liner in tact, so I don't have to worry about sucking up water as much.
I also ordered the pieces to make my Power pipe, and modify my Vortech discharge to work a few minutes ago. I found some aluminum nuts online at Fastenal, and I have one local to me. My plan is to buy the hose barbs I need to match the IAC, PCV, and BPV, then find the nuts to fit the bases and have them welded on.
I got the blower spaced correctly, and I feel pretty good about it. I used a grade 8 bolt, 4 large stainless washers, and a small bushing the same diameter as the shaft of the blower that I had machined to the same thickness of the washers. This keeps the bolt on the end pressing against the pulley shaft, instead of just collapsing the washer underneath it. Make sense? I then added a few drops of lock tight, and gave the bolt a good zap with an electric impact. If anyone knows the correct torque spec for the pulley bolt, please let me know.
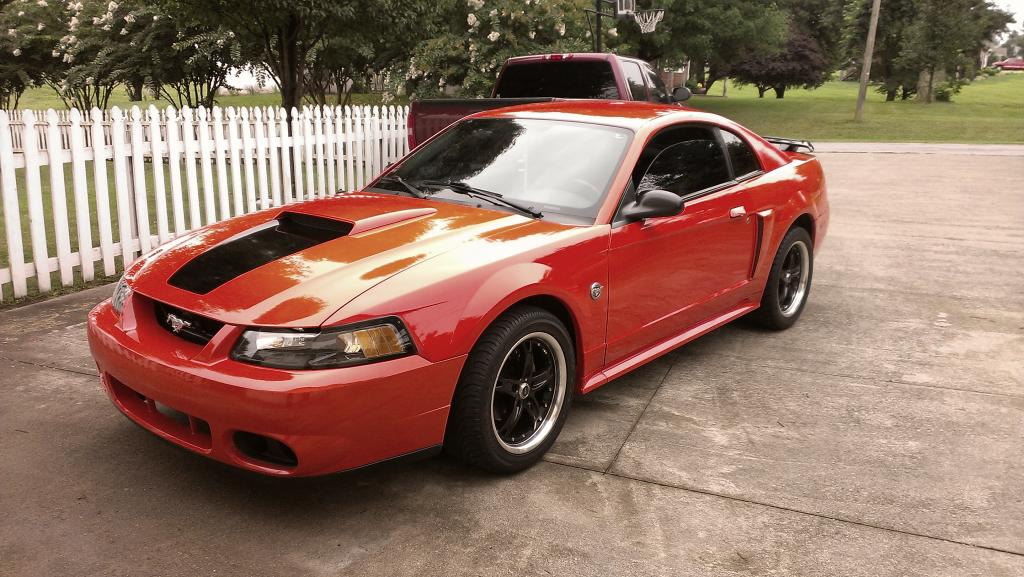
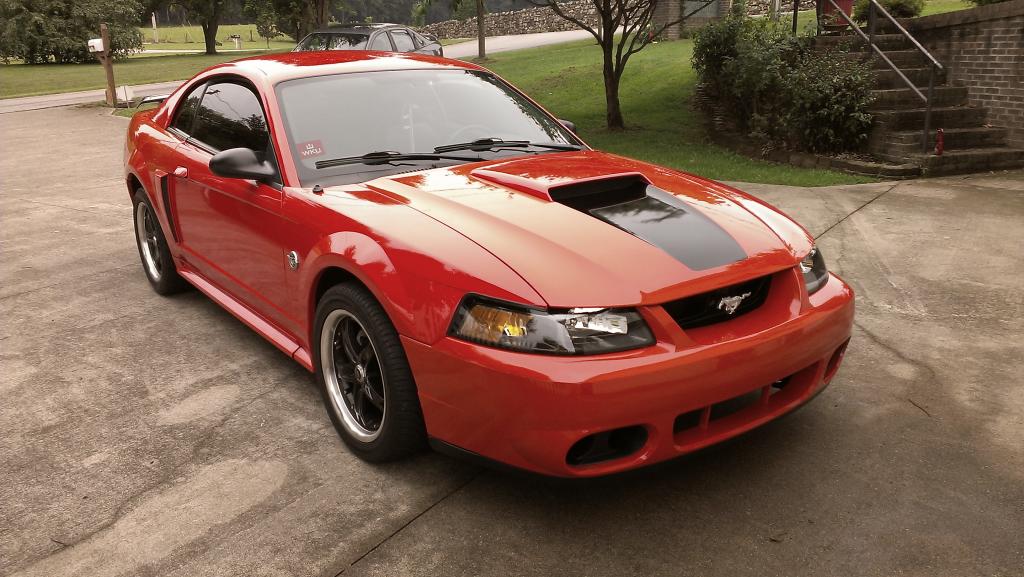
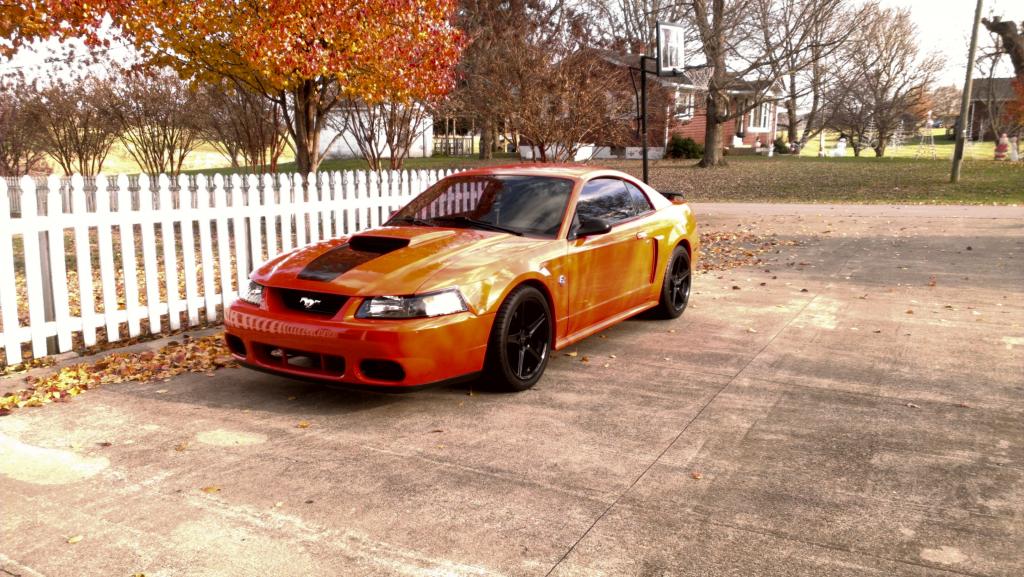
Here is the car in its natural habitat for the majority of 2013.
I got my power pipe assembled and my discharge tube modified. I'll start by saying that if you are torn between adding a powerpipe to a draw-through setup, or cutting off your own leg, I would suggest cutting off the leg. It is easier, less painful, and you will actually lose less blood.
All jokes aside though, it sucked. I cannot mount my maf on the bumper brackets like I originally planned. I am going to have to fab something up. Dropped the pipes off at the machine shop to have fittings welded on for the BPV and IAC and got raped. $40, and they won't be done until tomorrow. That is what you get when you go to the only person capable of welding aluminum in town though, :facepalm:
Beginning to look like a complete kit!
Only had to do a small amount of hacking and slashing of the fender.
Another thing worth noting is that the Novi 1000 has a 4" intake, instead of the ~3.5" intake the Vortech units have. With this powerpipe, it is sucking from a true 4" tube all the way to the filter. No restrictions. It'll be interesting to see if this will net me any boost.
New injectors are in, and new plugs are in and gapped to .032". The car no longer runs haha. I got it to start and sputter into the garage, and the air fuel ratio was around 10:1.
Not wanting to lose my momentum, so I am doing the oil pan now.
Cobra injectors and adapters:

Stock vs. Cobra:

Tr6 plugs:

You can kind of see the blue injectors, haha.

Got the oil pan tapped that night,
Once again it was not that bad. Punching it was kind of a pain, but I managed OK after a few minutes. I completely caked my tap in grease and started tapping. It caught a massive amount of shavings. I then poked around with a magnet and got a few more, then flushed the pan out 3 times. I am hoping that got out all of the shavings.
Here is the finished product:

Now, I also installed my Vortech oil feed upgrade, and it seems way too short. Is there any specific way to route the feed line I need to know about? I am hoping it becomes more apparent when the super charger is on.

The bracket comes tomorrow. I hope to have the supercharger mounted tomorrow night, and be making calls about getting it on the rollers this weekend. :thumb:
Well, I got the bracket mounted today. Progress went much much slower than I hoped, seeing as my original goal was to have the blower mounted tonight. I got hung up a couple things, like the fan resistor. I haven't read anything about it in any of the build threads I frequent, so I was totally freaked out when I saw it in the instructions. And apparently the kit originally came with a relocation bracket for the resistor that I cannot find online. Anyone have any info on this?
Here is a picture of my progress. I will hopefully wrap it up tomorrow

Little did I know that I was in for a mess...
I'm convinced I totally jinx myself whenever I open my mouth about 'estimated completion dates.'
I have hit several hard walls with the install. I will touch on them briefly.
* The oil feed WAS too short. Paxton blowers use the top port on the blower for the oil nozzle. I needed an oil feed at least 12" longer. I ordered a new one from Paxton for a small fortune. If anyone wants a brand new Vortech oil feed line, hit me up.
* The 90* boot going from my blower to the intake tube hit my fan shroud, and my Vortech discharge tube was a tad too short. I trimmed my fan shroud even more (Paxton says you have to trim it a small amount for the install), and now I "believe" I have clearance. The discharge tube has been modified to fit as well.
* I have no idea what kind of intake setup came with my kit, but it does not even pretend like it wants to fit. So, I can either pay $250 for a new OEM unit, or spend $100 and make a power pipe and gain some PSI while I am at it. Tough call. The only thing I am worried about is getting the fittings for the bypass valve and the PCV and IAC tubes on the power pipe.
*Now, the big one. My supercharger pulley did not align with my other accessory pullies. There was 1/4" difference between the two. See pic:

I took off the pulley on the blower, and put 3 small washers in. It gave me the space that I needed. The only thing that worries me, is there is now 1/4" gap between the end of the pulley, and the shaft going into the blower. It is recessed, somewhat. I went ahead and re-installed the blower, but now that I have got to thinking, I believe I am going to try to find a slightly longer bolt, and find a spacer to go on the end of the shaft. Does that sound like a good idea to you all?
And finally, I need the radiator hose piece included with the kit. If anyone has the dimensions or specs of this piece I would really appreciate the info. Otherwise, I will pay the $30 from Vortech I guess.
Here is what the car looks like now.

To get this thing rolling, here is what I lack:
*Order parts for new intake assembly.
(Figure out how to mount bypass valve)
*Install new oil feed, when it arrives.
*Do something to get some peace of mind with the blower shims.
*Figure out the radiator hose snafu.
Man, I thought changing the fuel pump would be the hard part of this install. I was dead wrong. :facepalm:
In other news, I got my Spectre filter, and my MAF housing in my fender well installed. I am very happy with it! The filter is a little bit shorter than the K&N one my kit came with, but it is much fatter, and has a inverted cone on the end, so it has more surface area to suck air from. The best part is that it lets me keep my fender liner in tact, so I don't have to worry about sucking up water as much.


I also ordered the pieces to make my Power pipe, and modify my Vortech discharge to work a few minutes ago. I found some aluminum nuts online at Fastenal, and I have one local to me. My plan is to buy the hose barbs I need to match the IAC, PCV, and BPV, then find the nuts to fit the bases and have them welded on.
I got the blower spaced correctly, and I feel pretty good about it. I used a grade 8 bolt, 4 large stainless washers, and a small bushing the same diameter as the shaft of the blower that I had machined to the same thickness of the washers. This keeps the bolt on the end pressing against the pulley shaft, instead of just collapsing the washer underneath it. Make sense? I then added a few drops of lock tight, and gave the bolt a good zap with an electric impact. If anyone knows the correct torque spec for the pulley bolt, please let me know.

Here is the car in its natural habitat for the majority of 2013.

I got my power pipe assembled and my discharge tube modified. I'll start by saying that if you are torn between adding a powerpipe to a draw-through setup, or cutting off your own leg, I would suggest cutting off the leg. It is easier, less painful, and you will actually lose less blood.
All jokes aside though, it sucked. I cannot mount my maf on the bumper brackets like I originally planned. I am going to have to fab something up. Dropped the pipes off at the machine shop to have fittings welded on for the BPV and IAC and got raped. $40, and they won't be done until tomorrow. That is what you get when you go to the only person capable of welding aluminum in town though, :facepalm:
Beginning to look like a complete kit!

Only had to do a small amount of hacking and slashing of the fender.

Another thing worth noting is that the Novi 1000 has a 4" intake, instead of the ~3.5" intake the Vortech units have. With this powerpipe, it is sucking from a true 4" tube all the way to the filter. No restrictions. It'll be interesting to see if this will net me any boost.
12-07-2013, 12:29 PM
#93
1st Gear Member
Thread Starter
Join Date: Jun 2012
Location: KY
Posts: 112
Progress for today:
Got the powerpipe and discharge tube back from the machine shop. Turns out the welding was $50, but like I said there was no where else to go. Here is my new, improved powerpipe with a 2" segment of $50 pipe welded to it. :screwy:
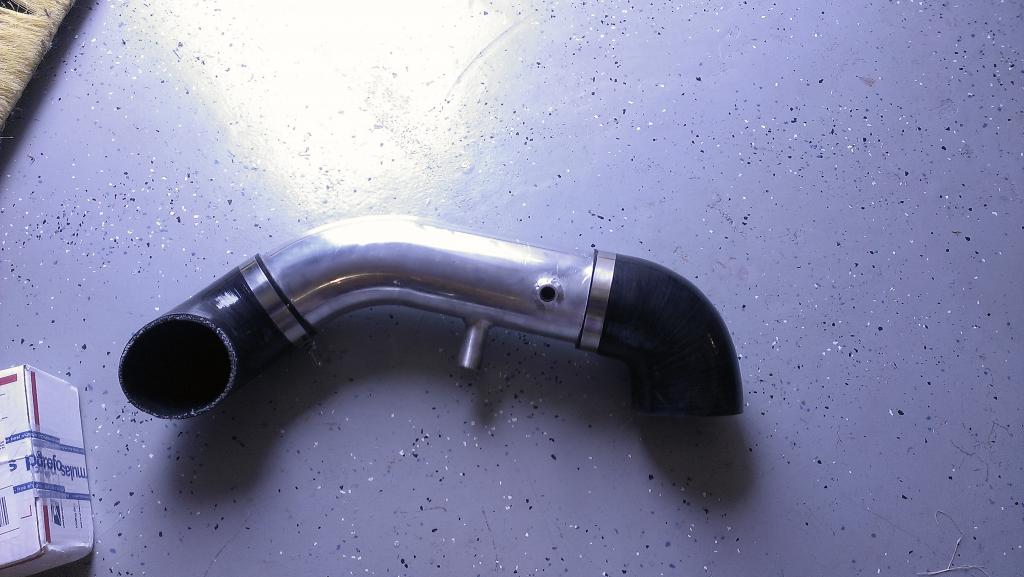
Also scratched up the pipe quite a bit re-installing it. Any tips on polishing aluminum? If not, I might opt to paint it black like the discharge tube.
Got the MAF and IAT wired in.
Also fabbed up a mounting location for the MAF in the fender well that I am happy with, and soldered my firewire cable into my wideband for use in datalogging.
At this point, I am in the home stretch (I am almost afraid to say that at this point.) All I lack is the oil feed line, and the Vortech radiator hose. Those should both be here on Monday. Sadly, it will be this coming weekend before I can work on the car again. I should be able to finish the mechanical side of things, though. All that will be left at that point is a tune. Because of financial and time issues, I will be tuning the car through Trick Tuners again. I plan to later put it on rollers to see what it is making though.
At this point, it was late August, and things really started coming together.
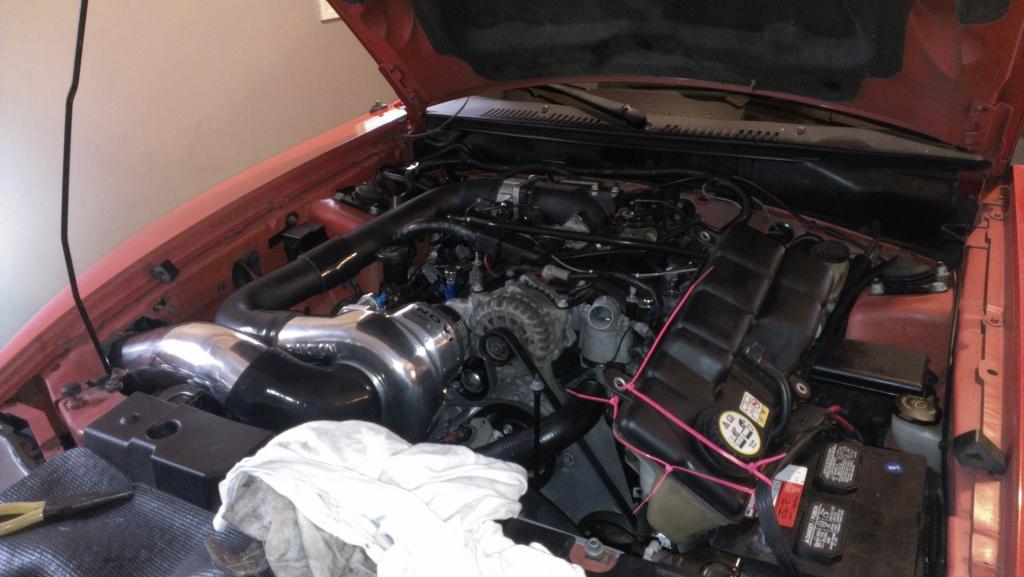
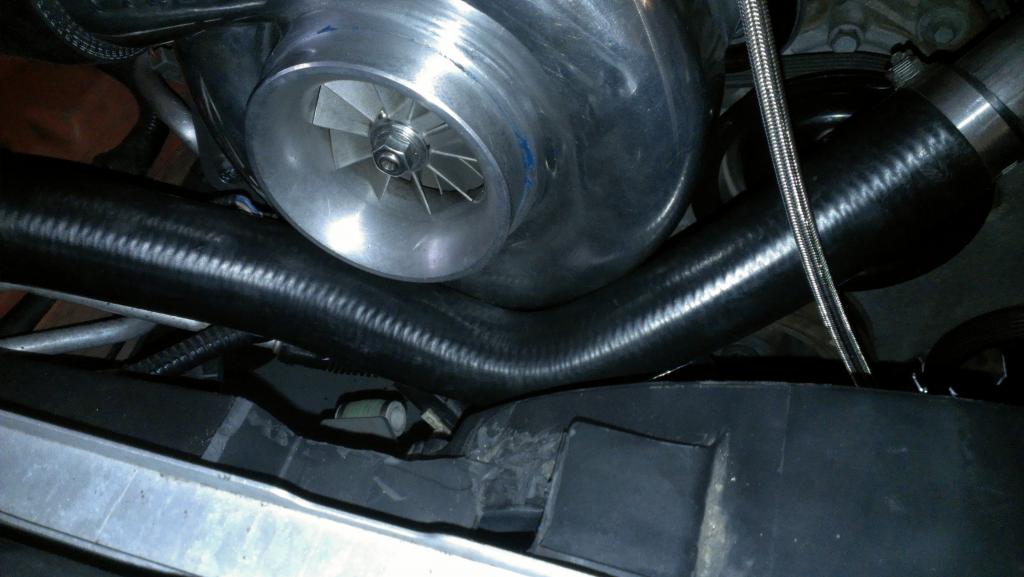
got the radiator tube, oil feed, and catch can installed. Here is what the engine bay looked like:
Rad hose very lightly touches the SC. You guys think this will cause me any issues?
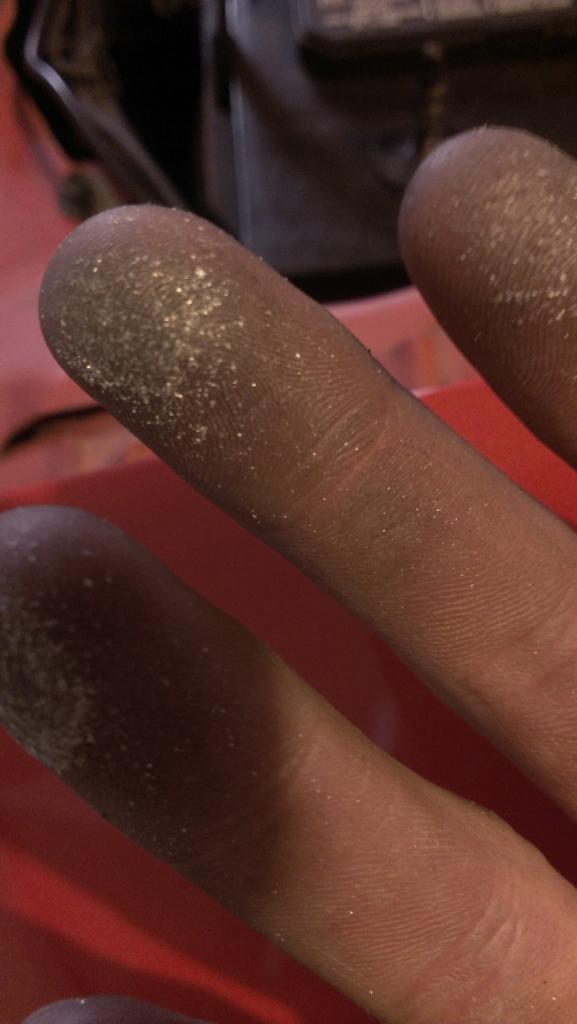
Got it all put together again for the final time, minus T-bolts on the discharge tube. Then paranoia kicked in, and I started worrying about if I had cleaned my intake tube. Pulled back the silicon joint and checked it out, and this is what I found:
FFFFFFFFFFFFFFFFFFFFFFFFUUUUUUUUUUUUUUUUUUUUUUUUUU UU!!!!!!!
So I took it apart, again, and fought with the stupid pipe for an hour. Seriously. The combination of using a draw through and having a tightly fitting Paxton makes this power pipe a NIGHTMARE. But it is clean and on right now. Thank God I didn't start it before cleaning it.
Anyway, I ordered my tune from Joe last week, and he got me a base tune way faster than I anticipated. At this point, the only thing holding me back is myself. I need a few vacuum hoses and T fittings. Hopefully I will raid Lowes at the end of the week. First start should be within a few hours of then!
Got the powerpipe and discharge tube back from the machine shop. Turns out the welding was $50, but like I said there was no where else to go. Here is my new, improved powerpipe with a 2" segment of $50 pipe welded to it. :screwy:

Also scratched up the pipe quite a bit re-installing it. Any tips on polishing aluminum? If not, I might opt to paint it black like the discharge tube.
Got the MAF and IAT wired in.

Also fabbed up a mounting location for the MAF in the fender well that I am happy with, and soldered my firewire cable into my wideband for use in datalogging.
At this point, I am in the home stretch (I am almost afraid to say that at this point.) All I lack is the oil feed line, and the Vortech radiator hose. Those should both be here on Monday. Sadly, it will be this coming weekend before I can work on the car again. I should be able to finish the mechanical side of things, though. All that will be left at that point is a tune. Because of financial and time issues, I will be tuning the car through Trick Tuners again. I plan to later put it on rollers to see what it is making though.
At this point, it was late August, and things really started coming together.
got the radiator tube, oil feed, and catch can installed. Here is what the engine bay looked like:

Rad hose very lightly touches the SC. You guys think this will cause me any issues?

Got it all put together again for the final time, minus T-bolts on the discharge tube. Then paranoia kicked in, and I started worrying about if I had cleaned my intake tube. Pulled back the silicon joint and checked it out, and this is what I found:

FFFFFFFFFFFFFFFFFFFFFFFFUUUUUUUUUUUUUUUUUUUUUUUUUU UU!!!!!!!
So I took it apart, again, and fought with the stupid pipe for an hour. Seriously. The combination of using a draw through and having a tightly fitting Paxton makes this power pipe a NIGHTMARE. But it is clean and on right now. Thank God I didn't start it before cleaning it.

Anyway, I ordered my tune from Joe last week, and he got me a base tune way faster than I anticipated. At this point, the only thing holding me back is myself. I need a few vacuum hoses and T fittings. Hopefully I will raid Lowes at the end of the week. First start should be within a few hours of then!
12-07-2013, 12:31 PM
#94
1st Gear Member
Thread Starter
Join Date: Jun 2012
Location: KY
Posts: 112
Then, on September 7th, my car roared to life for the first time.
... is what I would have said if it had actually started lol. An error in the base tune resulted in the video you are about to see.
Pretty much, the car fired right up, but idled very rough, then dies. When I go to start it again, it cranks and cranks but will not fire. If I hold the gas pedal all the way in to disable the injectors, it will fire up. You can smell gas very strong, and the car is throwing codes p2196 and p2198.
I brought this to Joe's attention, and he immediately got back to me with a corrected tune.
Let's try that video again, shall we?
Last edited by flyboy1294; 12-07-2013 at 12:35 PM.
12-07-2013, 12:36 PM
#95
1st Gear Member
Thread Starter
Join Date: Jun 2012
Location: KY
Posts: 112
I am putting this in a post by its self so it stands out, hopefully.
I was getting a huge discrepancy between my A/F gauge and the numbers showing up in wideband. My A/F at idle according to the gauge was 13-14, but livelink was showing 16-17. Obviously this concerned me, so I started checking my ground. Eventually, I ran a ground directly from the gauge to the chassis, and a separate ground from the firewire to the chassis, and I was still getting the huge gap.
At this point, I turned to the formula I was using to convert the wideband voltage into a a/f ratio. I was using the standard (v*2.5)+10 formula that was all over the internet. I looked in depth into the formula, and found it was based on the standard y=mx+b linear formula. It is:
(Volts*(High AF ratio-Low AF ratio)/4)+10
My air fuel gauge reads from 8-18, so I figured 18-8=10/4=2.5v. I kept getting values in Livelink way over 18 though, so I was still suspicious. After reading the owner's manual for my gauge, I found that the gauge put out between 0-4v. 0v actually equaled 10AFR, while 4v=18V. In short, although my gauge read 8AFR, it would output 10AFR at the lowest.
With that said, the correct formula was (2*V)+10. When logging your gauge, I strongly suggest you read the owner's manual and find your gauge's output range, then plug it into the formula above. With the formula corrected, my readings are spot on.
12-07-2013, 12:52 PM
#96
1st Gear Member
Thread Starter
Join Date: Jun 2012
Location: KY
Posts: 112
At this point, Joe and I were working on the datalogging process. Nothing really exciting happened, aside from a few small issues that we had to iron out.
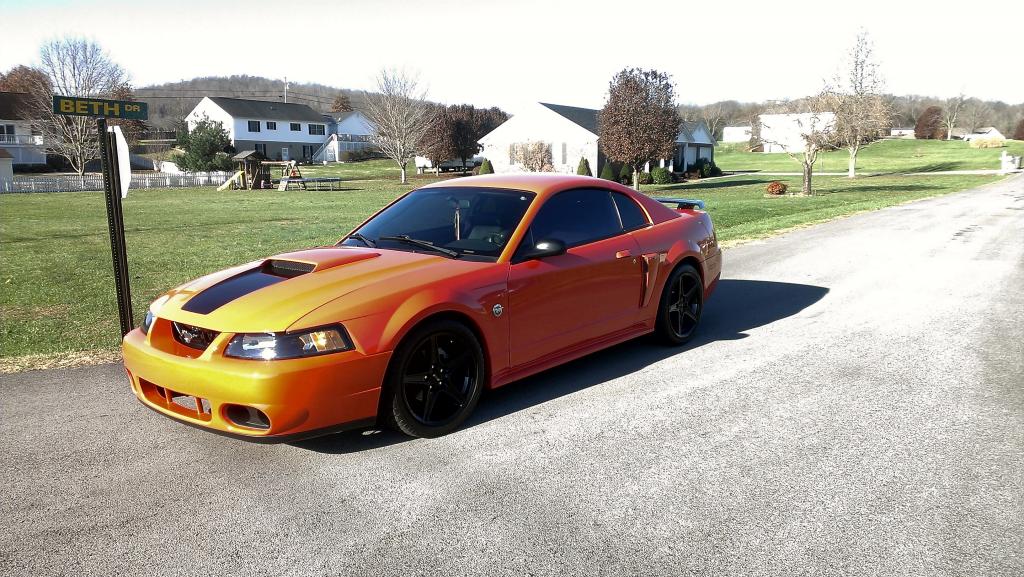
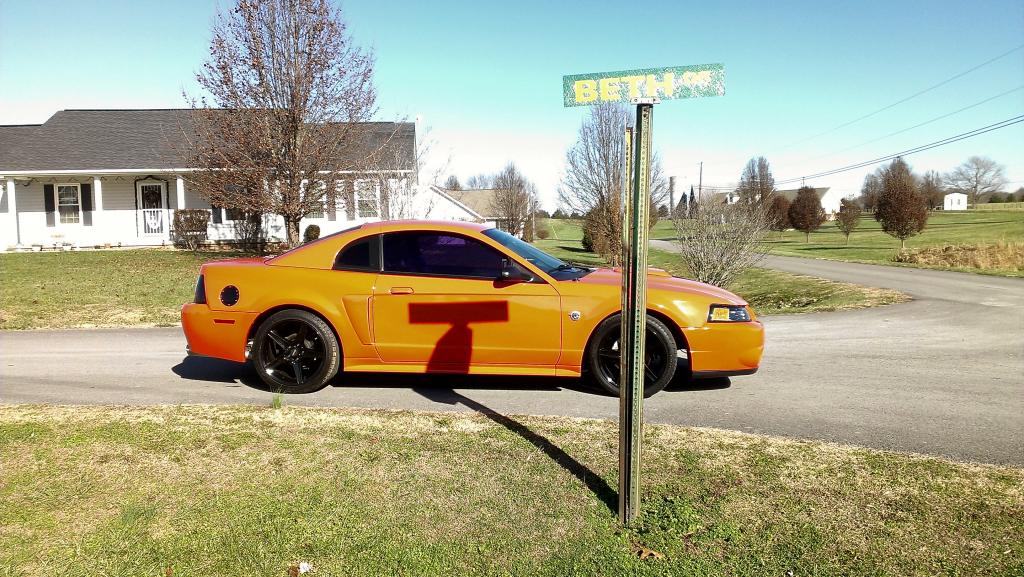
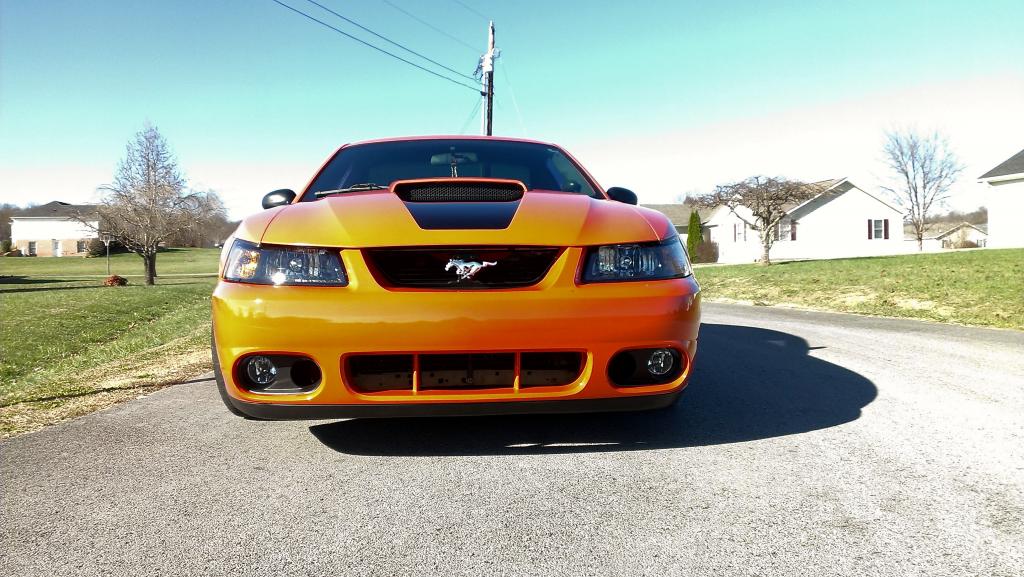
During that same time period, I was approached by a gentleman that had some 18x9/18x10 staggered black Saleens that was willing to trade. I jumped on the deal. Here are the results.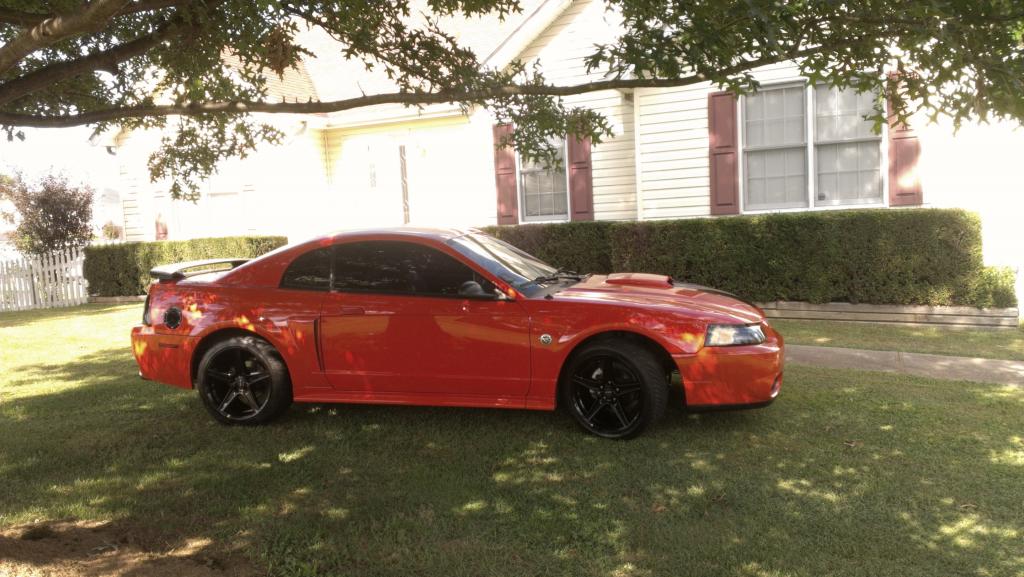 [/URL]
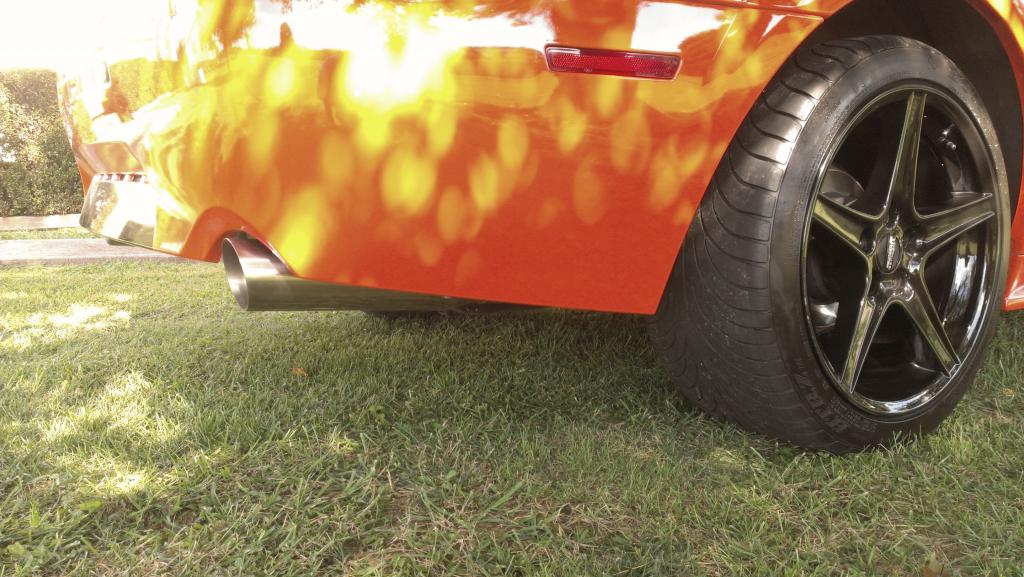
MAN it needs to be lowered. Don't worry guys, that will be my next mod.
Later that week, I went to a local historical battleground and took some more pictures.

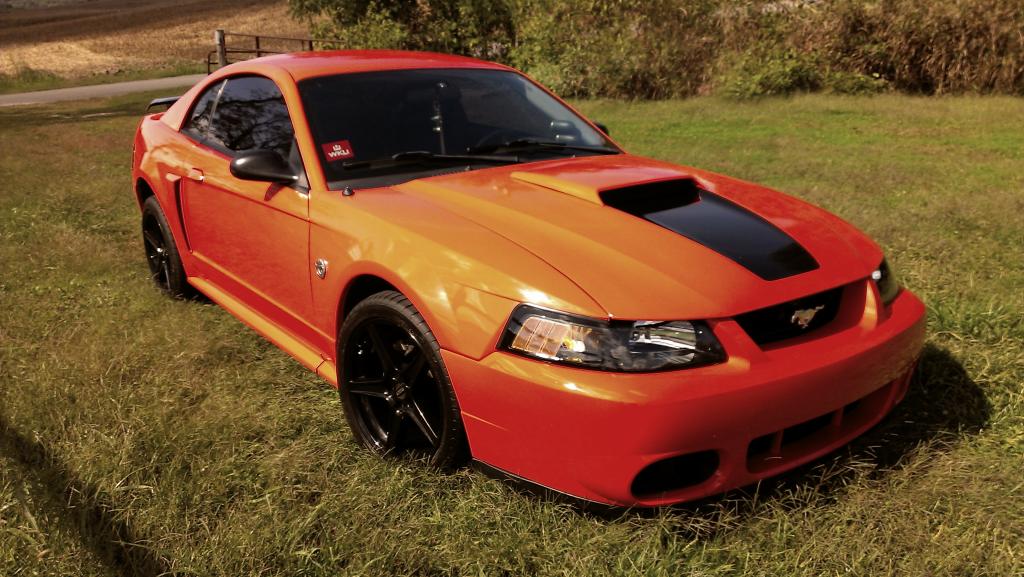
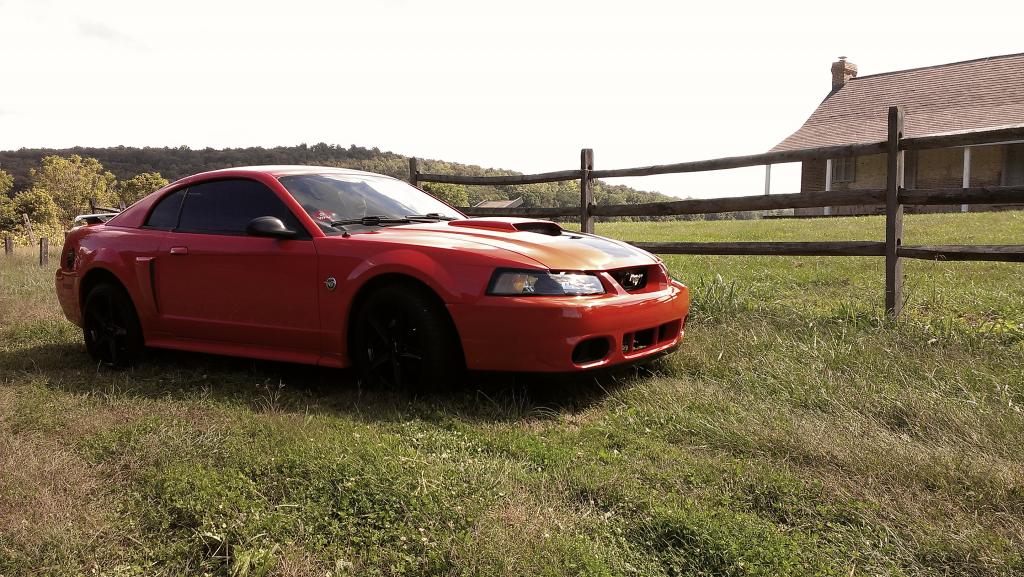
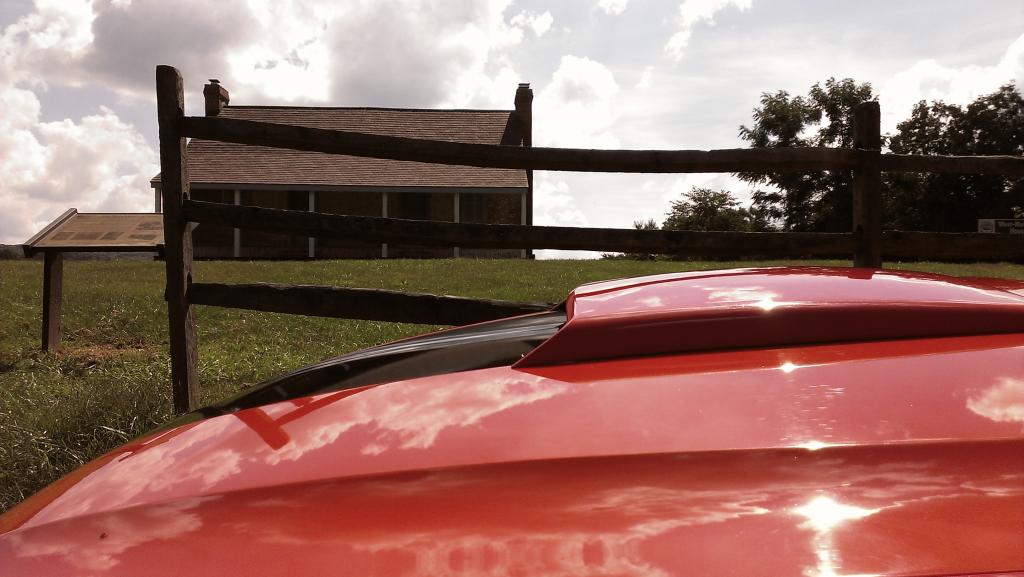
The second picture shows best what the car really looks like. For some reason, sunlight overwhelms my camera phone. I really am digging the black wheels. I think they are here to stay for the time being.
Now, we kept having a problem with the car wanting to buck and surge at low rpm, high speeds. Joe looked at the datalogs and figured out it was MAF backwash. This is a common problem with draw through setups like mine since the bypass valve is having to force all of that air back into the intake when the throttle is closed.
To remedy this, I used Solidworks to come up with a 45* baffle to weld inside the power pipe to direct the air towards the supercharger. It is attached to this post for reference.
It did not work how I wanted, however. The problem persisted. Also, my local machine shop RAPED me on welding this thing. That power pipe now has $156 of welding done to it, ladies and gents.
During that same time period, I was approached by a gentleman that had some 18x9/18x10 staggered black Saleens that was willing to trade. I jumped on the deal. Here are the results.
[/URL]

MAN it needs to be lowered. Don't worry guys, that will be my next mod.
Later that week, I went to a local historical battleground and took some more pictures.


The second picture shows best what the car really looks like. For some reason, sunlight overwhelms my camera phone. I really am digging the black wheels. I think they are here to stay for the time being.
Now, we kept having a problem with the car wanting to buck and surge at low rpm, high speeds. Joe looked at the datalogs and figured out it was MAF backwash. This is a common problem with draw through setups like mine since the bypass valve is having to force all of that air back into the intake when the throttle is closed.
To remedy this, I used Solidworks to come up with a 45* baffle to weld inside the power pipe to direct the air towards the supercharger. It is attached to this post for reference.
It did not work how I wanted, however. The problem persisted. Also, my local machine shop RAPED me on welding this thing. That power pipe now has $156 of welding done to it, ladies and gents.
12-07-2013, 12:55 PM
#97
1st Gear Member
Thread Starter
Join Date: Jun 2012
Location: KY
Posts: 112
Good news though! It doesn't look like I will be doing an unplanned blow through swap just yet. Woke up in the middle of the night earlier this week, and really went through the schematics (somewhat better than what I posted up earlier) that I made on Solidworks for the by pass bung that I had welded.
No way in heck that thing was getting backwash to the MAF! I have the bung as far away as I can get from the MAF: probably 14" or so. Not only that, but the tubing inside the power pipe was bent 180* away from the MAF, and even had a 45* fillet on the end to encourage the air flow to have a straight shot into the blower. The entire fitting extends another inch towards the blower once inside the power pipe. If anything, I would get compressor surge from the 90* bend restricting flow, but that was not what was happening.
To add to this, I was only getting the bucking at 40+ mph when the car was deep in vacuum. Below that speed and it ran relatively smooth, and at WOT it also ran great!
I narrowed it down to 4 or 5 things that could be causing this:
*Bad wiring on the MAF. I had to extend the wiring maybe 6". Soldered and shrink wrapped it all, but accidents happen.
*Dirty or bad MAF. Either one is possible since the MAF was used when I got it.
*By-pass valve was insufficient or broken. Not sure on this one, just grasping at straws.
*A COP was bad. Car bucked like it did a few hundred miles ago when I had a COP just barely on its way out. The MAF counts and AFR went crazy when it started the rodeo, though. I was leaning away from this one.
*The MAF was getting interference from another source other than the BPV.
The more I scrutinized the MAF counts I had logged, and the more I thought about it, the more I decided it was either the 2nd or last option. Something was funky with the MAF itself, and it was not my BPV.
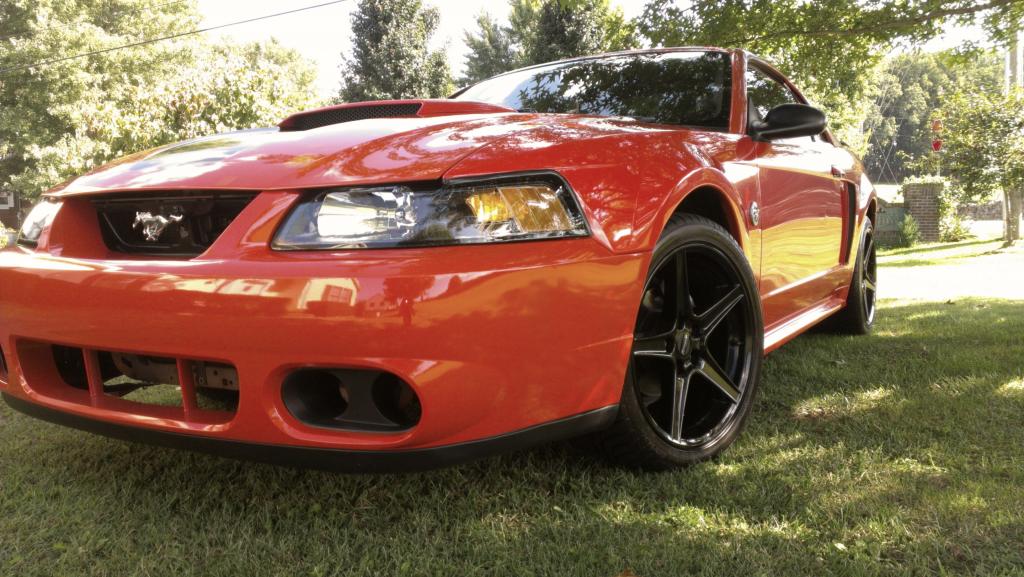
When I got home this afternoon, I looked it all over. Sure enough, the damn Cobra bumper foglight bezels make a straight shot to my airfilter. I could even see rather large bugs that had been smashed against the filter. That thing was seeing a lot of wind. Like, 100mph+ of wind in some instances lately. :naughty:
I was pretty sure that was my problem. To test it, I taped off the inside of the foglight bezels with some Gorilla tape.
Aaaaaaannnnnnndd sure enough! Car was a dream to drive! No hiccups at all; the AFR modulates perfectly between 14-16 as it should while cruising. No more wild swings! Also checked my MAF counts and they were much better.
I 'might' be feelings a very very very small amount of roughness at lower speeds. It could be in my imagination, though. I am going to clean the MAF just to be thorough. Over all, I think the car runs very smoothly for a supercharged and cammed car. I would be content even if I could not improve the drivability anymore than it already is.
TL;DR?
If you are running a draw through setup, beware of air directly hitting the air filter. It'll cause your MAF to attempt to commit suicide.
With every triumph comes a defeat, though. The car is still being hard to start. I am priming the **** out of it, and I am still having issues. Read up on hard starts with the PPRV delete, and I read many guys just feather the gas pedal some while cranking it hot. Janky, but it works.
I tried this, and got the car to fire up amazingly 4 or 5 times today. Thought all my worries were behind me. Then, after a hot start, the CEL comes on. I got the codes P0190, P0132, and P0152 out of it. The last two are the stupid slow 02 response codes. I am wondering if my tuner realizes I am running LTs?
The P0190 has me concerned, though. There is a chance I popped my FRPS, but the code was thrown while I was babying on the car. No bouncing off of the rev limiter, or even seeing boost at the time. There could also be a chance that my fuel pump wiring is faulty (I used crimps in the tank. Didn't trust shrink wrap), or that I received a faulty pump. I have a hard time believing either case, though. My FPDC is still very low, and I have a nice 11:1 AFR across the RPMs when romping on it.
I have heard of a few instances from members on this board where the 190 code was thrown during hard starts for no apparent reason. I am hoping this is just the case. I read a post from cliffyk that said (from my interpretation), the hard start issues caused by the PPRV deletes can be tuned around by richening the desired AFR on start up when the ECTs were high, in order to compensate for the fuel boiling out of the rails. At the same time though, it seems like my car is rich on start up. Not sure on this one.
It's like a trying to solve a Rubix cube that keeps rearranging itself. :dunce:
Atleast it runs good now, once I get it running!
No way in heck that thing was getting backwash to the MAF! I have the bung as far away as I can get from the MAF: probably 14" or so. Not only that, but the tubing inside the power pipe was bent 180* away from the MAF, and even had a 45* fillet on the end to encourage the air flow to have a straight shot into the blower. The entire fitting extends another inch towards the blower once inside the power pipe. If anything, I would get compressor surge from the 90* bend restricting flow, but that was not what was happening.
To add to this, I was only getting the bucking at 40+ mph when the car was deep in vacuum. Below that speed and it ran relatively smooth, and at WOT it also ran great!
I narrowed it down to 4 or 5 things that could be causing this:
*Bad wiring on the MAF. I had to extend the wiring maybe 6". Soldered and shrink wrapped it all, but accidents happen.
*Dirty or bad MAF. Either one is possible since the MAF was used when I got it.
*By-pass valve was insufficient or broken. Not sure on this one, just grasping at straws.
*A COP was bad. Car bucked like it did a few hundred miles ago when I had a COP just barely on its way out. The MAF counts and AFR went crazy when it started the rodeo, though. I was leaning away from this one.
*The MAF was getting interference from another source other than the BPV.
The more I scrutinized the MAF counts I had logged, and the more I thought about it, the more I decided it was either the 2nd or last option. Something was funky with the MAF itself, and it was not my BPV.
When I got home this afternoon, I looked it all over. Sure enough, the damn Cobra bumper foglight bezels make a straight shot to my airfilter. I could even see rather large bugs that had been smashed against the filter. That thing was seeing a lot of wind. Like, 100mph+ of wind in some instances lately. :naughty:
I was pretty sure that was my problem. To test it, I taped off the inside of the foglight bezels with some Gorilla tape.
Aaaaaaannnnnnndd sure enough! Car was a dream to drive! No hiccups at all; the AFR modulates perfectly between 14-16 as it should while cruising. No more wild swings! Also checked my MAF counts and they were much better.
I 'might' be feelings a very very very small amount of roughness at lower speeds. It could be in my imagination, though. I am going to clean the MAF just to be thorough. Over all, I think the car runs very smoothly for a supercharged and cammed car. I would be content even if I could not improve the drivability anymore than it already is.
TL;DR?
If you are running a draw through setup, beware of air directly hitting the air filter. It'll cause your MAF to attempt to commit suicide.
With every triumph comes a defeat, though. The car is still being hard to start. I am priming the **** out of it, and I am still having issues. Read up on hard starts with the PPRV delete, and I read many guys just feather the gas pedal some while cranking it hot. Janky, but it works.
I tried this, and got the car to fire up amazingly 4 or 5 times today. Thought all my worries were behind me. Then, after a hot start, the CEL comes on. I got the codes P0190, P0132, and P0152 out of it. The last two are the stupid slow 02 response codes. I am wondering if my tuner realizes I am running LTs?
The P0190 has me concerned, though. There is a chance I popped my FRPS, but the code was thrown while I was babying on the car. No bouncing off of the rev limiter, or even seeing boost at the time. There could also be a chance that my fuel pump wiring is faulty (I used crimps in the tank. Didn't trust shrink wrap), or that I received a faulty pump. I have a hard time believing either case, though. My FPDC is still very low, and I have a nice 11:1 AFR across the RPMs when romping on it.
I have heard of a few instances from members on this board where the 190 code was thrown during hard starts for no apparent reason. I am hoping this is just the case. I read a post from cliffyk that said (from my interpretation), the hard start issues caused by the PPRV deletes can be tuned around by richening the desired AFR on start up when the ECTs were high, in order to compensate for the fuel boiling out of the rails. At the same time though, it seems like my car is rich on start up. Not sure on this one.
It's like a trying to solve a Rubix cube that keeps rearranging itself. :dunce:
Atleast it runs good now, once I get it running!
12-07-2013, 01:00 PM
#98
1st Gear Member
Thread Starter
Join Date: Jun 2012
Location: KY
Posts: 112
Here is a short video I made of a 50-100 pull. Looks like it'll do it in about 7 seconds. Comparing this to the new 5.0 videos on YouTube, it looks about even. Not bad for a little 2v.
Sadly, this car will be fastest during the 0-60 range I believe. Currently, with my 285 Sumis, anything below 30mph spins the tires so hard the car bounces off the rev limiter at 6250. Unless something goes wrong, I am saving for some 305 MT ET street II radials, and will be able to afford them in about 3 weeks. That will wake the car up more than any single mod, I think.
Also, watch this keeping in mind that the car is not finished tuning. Timing still has to be turned up some. :naughty:
Enjoy!
Now, Joe finally got the tuned finished a few days afterwords, and the car was running great. I decided to take it to a local dyno to see what she was making. I got in touch with James @ ShorTuning to let me rent out his dyno for awhile. Here is the resulting video:
Now, before I post any numbers, I want to mention that is a Dyno Dynamics dyno, which is affectionately known as "the heartbreaker" because of its exceptionally low numbers.
I spoke with Joe, and he agrees that the dyno was exceedingly greedy. If nothing else, this gives me a really good reference point for adding more boost and an intercooler later down the road, so I am staying positive! I'll probably re-dyno it at Speedy's when I have the cash, just to puff up my chest a little haha.
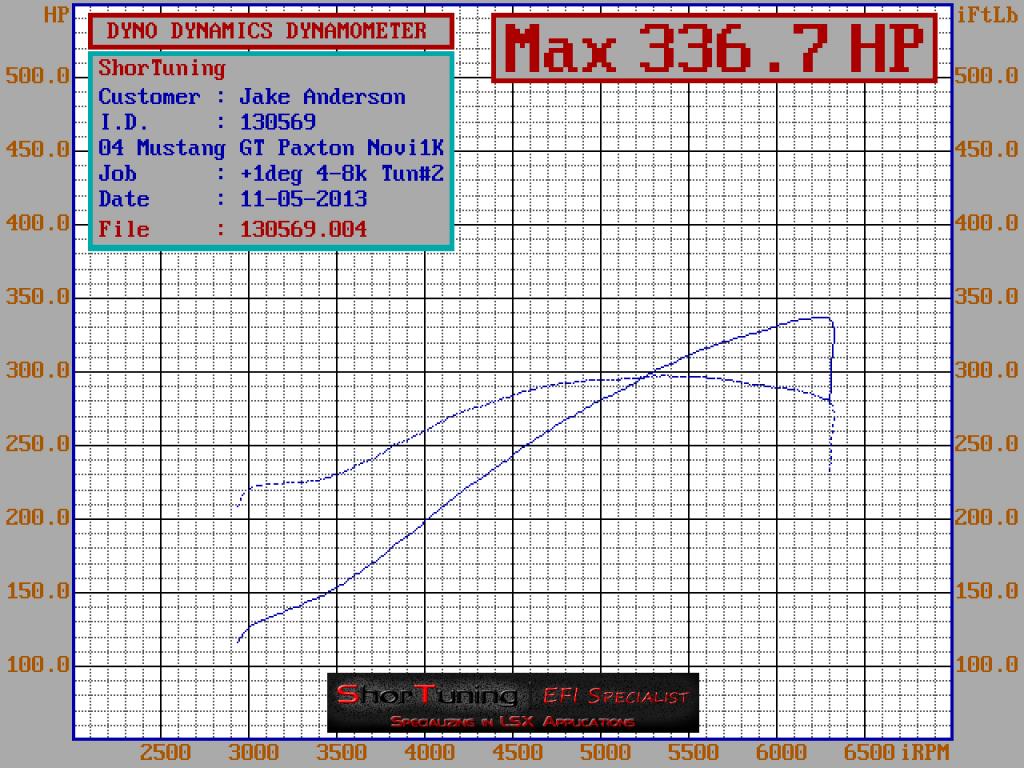
Also, the Corvette that was there before me made 343rwhp with a tune, cam, intake, longtubes and exhaust so it wasn't just my car that was getting low numbers.
12-07-2013, 01:04 PM
#99
1st Gear Member
Thread Starter
Join Date: Jun 2012
Location: KY
Posts: 112
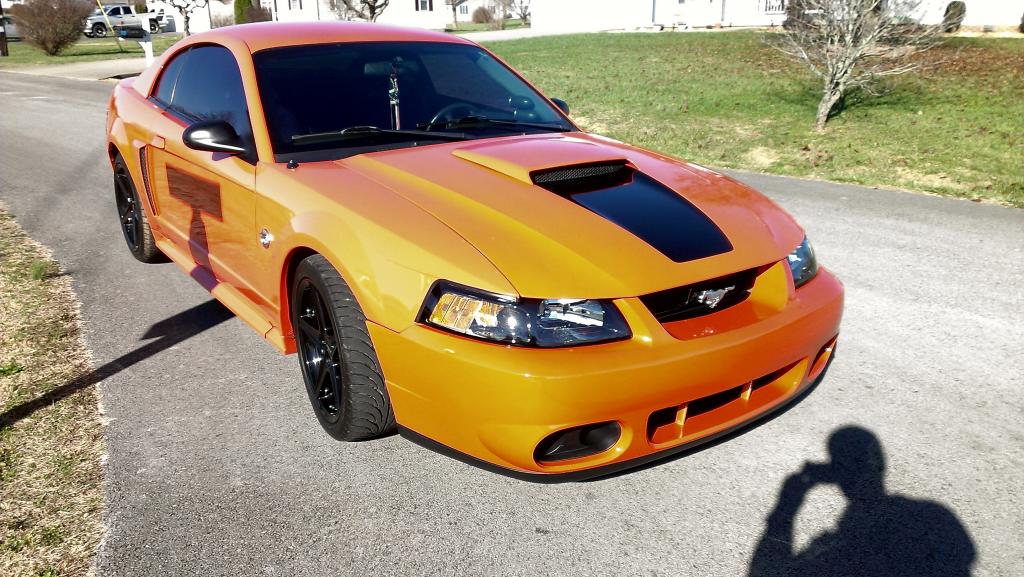
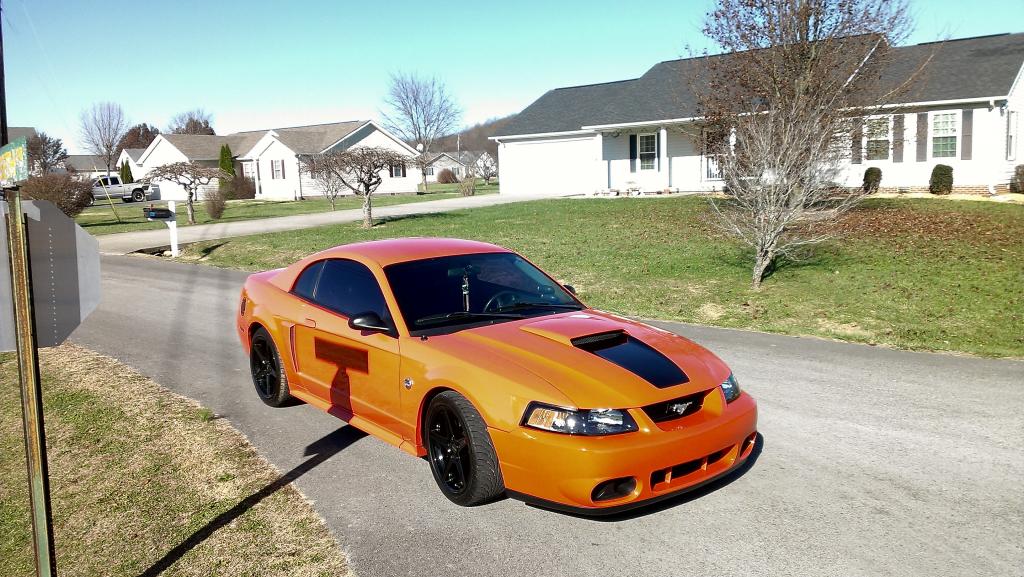
Now we are getting close to present time! Early November I decided the car needed to be lowered. I bought some MM caster camber plates and H&R lowering springs to take care of that.
BAM!
It still needs to settle, but man does it look more aggressive! I wound up leaving in all the iso. My longtubes are about 3" above the ground. I'm not pushing it any further than that.
Here are a couple more pictures I snapped. I was experimenting with taking the spoiler off.
My initial impressions of the lowering springs are very good. The car ride feels like stock, if anything, maybe a little smoother. The car feels much stickier in turns, like there is less body roll. The steering also feels tighter. I attribute that to the car needing to be aligned anyway, since I have not done it since last year.
Here are some pictures I snapped. Sorry for the poor quality of some of them. My phone is a potato.
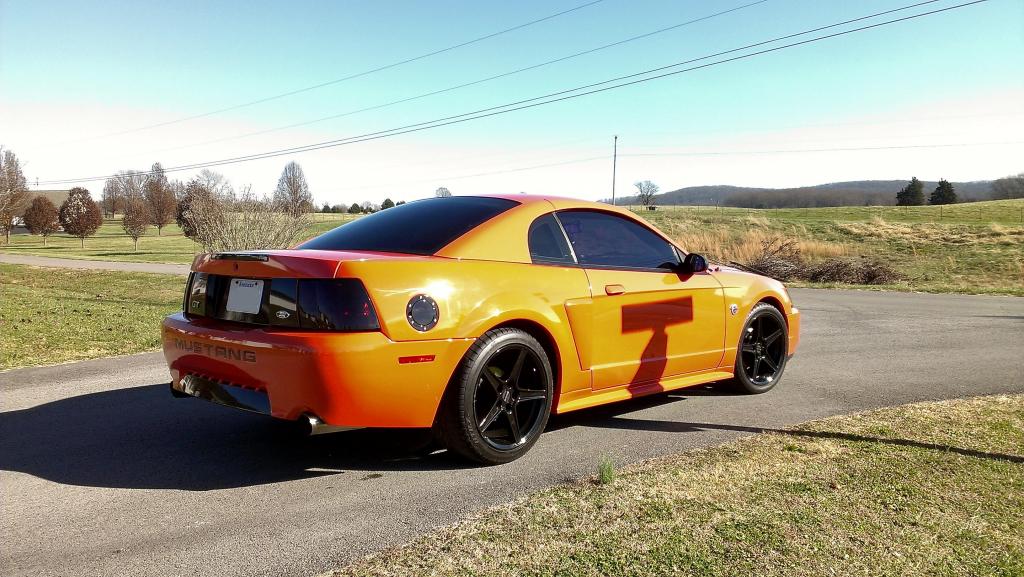
BAM!

It still needs to settle, but man does it look more aggressive! I wound up leaving in all the iso. My longtubes are about 3" above the ground. I'm not pushing it any further than that.
Here are a couple more pictures I snapped. I was experimenting with taking the spoiler off.
My initial impressions of the lowering springs are very good. The car ride feels like stock, if anything, maybe a little smoother. The car feels much stickier in turns, like there is less body roll. The steering also feels tighter. I attribute that to the car needing to be aligned anyway, since I have not done it since last year.
Here are some pictures I snapped. Sorry for the poor quality of some of them. My phone is a potato.


 12-07-2013, 01:06 PM
#100
1st Gear Member
Thread Starter
Join Date: Jun 2012
Location: KY
Posts: 112
And as of now, everyone is up to speed.
I don't know if I'll have many updates about the car for awhile. I've got plans for it over the winter, but money is the limitation. First and foremost, I want to get it intercooled. On my dyno pulls, I saw the IAT jump 48* in less than 8 seconds. Joe advised me that I only need to go WOT for 1/4 mile at a time, or else I risk detonation. Right now, during the 55-60* weather we are having, that isn't really an issue. This summer though, it will be a ticking time bomb.
The setup I am switching to is a Treadstone Tr25 intercooler on it, an HPX PMAS MAF, TiAl 50mm bov, and a 3" pulley. The smaller pulley should put me near 10psi, so I should get a little amount of power out of the car.
I'll update you guys with any more progress!