2.3 Tech Articles
 09-14-2006, 02:31 AM
#1
5th Gear Member
Thread Starter

Join Date: Jul 2003
Location: Bangladesh
Posts: 4,840
Removal of fuel line/AC line garter spring connectors
Exhaust manifold porting
Power window planetary gear rebuild
Distributor rebuild and PIP install
Remote mounted TFI
Turboing your NA 2.3
thanks evintho for all of our tech articles...
Exhaust manifold porting
Power window planetary gear rebuild
Distributor rebuild and PIP install
Remote mounted TFI
Turboing your NA 2.3
thanks evintho for all of our tech articles...
 03-11-2007, 11:10 PM
#2
4th Gear Member

Join Date: Feb 2007
Location: Springfield, TN
Posts: 1,695
Yeah some F150s have the heat sink for the "Remote mounted TFI".I bought a fender from a 92-96 f150(don't remember which) that was 4x4 and it has the heat sink in the fender. Still have the fender actually.
My 1992 Bronco has a heat sink, it of course is 4x4(at the moment). So if anybody actully reads this you can get a heat sink from a 4x4 F150 or bronco between the years 1992-1996.
My 1992 Bronco has a heat sink, it of course is 4x4(at the moment). So if anybody actully reads this you can get a heat sink from a 4x4 F150 or bronco between the years 1992-1996.
04-15-2007, 08:05 PM
#3
6th Gear Member
Join Date: Sep 2006
Location: Regina Beach, Sask
Posts: 9,991
How to make a CAI on a 1987-1990 Mustang 2.3l (by sleeper_inc)
How to install a ranger roller cam (by sleeper_inc)
2.3 Performace Mods (by sleeper_inc)
Gutting a 87-90 Air Silencer (by sleeper_inc)
Gutting a 91-93 Air Silencer (by an_ngl)
Making an AFPR out of a CFI FPR
Bad gas mileage? (by sleeper_inc)
Replacing the A4LD Vacuum Modulator (by sleeper_inc)
Repinning your harness (by sleeper_inc)
Fuse Box Diagram (1987-1990 Mustang) (by sleeper_inc)
Folvo/Volvo Cylinder Head Swap (info gathered by sleeper_inc)
Link 1 | Link 2
T3 turbo rebuild (by sleeper_inc)
IHI turbo rebuild (by sleeper_inc)
Manual transmission swap (by sleeper_inc)
How to do a compression test (by sleeper_inc)
Last edited by sleeper_inc; 03-06-2009 at 08:32 PM.
04-27-2007, 11:58 PM
#4
5th Gear Member

Join Date: Apr 2007
Location: Camas, Washington
Posts: 4,881
ORIGINAL: sleeper_inc
http://www.cardomain.com/ride/2543132/5
How to make a CAI on a 1987-1990 Mustang 2.3l
http://www.cardomain.com/ride/2543132/5
How to make a CAI on a 1987-1990 Mustang 2.3l


 07-09-2007, 04:02 PM
#6
6th Gear Member
Join Date: Sep 2006
Location: Regina Beach, Sask
Posts: 9,991
[align=center]Turboing a 1987-1990 2.3 N/A
[/align]
Ok, many of you have been asking how to turbo a 2.3 N/A without swapping engines. Well I'll tell you how to, but keep in mind that I have not attempted this 'yet' (meaning I will in the future)
So, first you have 2 ways to go.
1) Forged Pistons
2) Cast Pistons
1) You replace your current pistons with forged pistons so you can run more boost and feel safer.
Now, you decide if you want to run your stock computer or a turbo computer.
Turbo Computer
Computer (duh!)
Injectors to go with the computer (#30 or #35)
Vam to go with the computer (small - 2.5" large - 3")
Repin your harness
Stock Computer
Injectors (High impediance (sp?) #24 (max 15 PSI) # what ever, the higher the better)
Valve on your BAP sensor (controls the amount of boost that enters)
Once you have decided on what you want to do, time to get to work and make it run!
Basics for doing all of this
- Remove the engine from the car
- Take the engine apart (head, oil pan, etc)
- Take the pistons out (unbolting the main caps and slowly pushing from below)
- Look for any damage to your cylinder head, cylinder walls, crank shaft, etc
- Install new pistons
- Make oil return (tap a hole in the oil pan above the oil)
- Make an oil supply (tap off the oil line by the pressure sensor/sender)
- Put the engine together
- Put the engine back in the engine bay of the car
- Reconnect everything
- Put all the turbo stuff on
- Repin your harness (only if doing the turbo computer)
- Install the bleeding valve on your BAP sensor (only if using stock computer)
- Install your injectors
- Test fire the engine listening for 'ping'
- Make sure your not running lean and every thing is connected before you put any load or boost on the engine
- Start off with very little timing 2* with spout out and knock sensor connected
- get 91 or higher octane gas
- disconnect the knock sensor and play with your timming untill you hear 'pining' then back it off 2* - 4*
All done. Now be careful with the boost on the stock computer. If your running a turbo computer than its just like a 2.3 turbo engine
2) Same as with the forged pistons, only you want to be running a little rich as not to hurt your cast pistons. They will only take 15 PSI MAX and they wont take it for to long before they start to go down hill
It is recomanded that you don't run to long on the cast pistons as they will melt or explode if you lose your tune or run lean, even for only a second
If there is and questions or information that I've missed, please feel free to PM or e-mail me or just leave a message in here
07-29-2007, 03:11 AM
#7
5th Gear Member
Join Date: Apr 2007
Location: Camas, Washington
Posts: 4,881
A good easy cheap way to gain about 8hp with a 2.3L mustang/ranger/pinto/merkur/or anything that is a 2.3L engine
glasspack with no cat
Its a freeflow exhaust that doesnt restrict air from going out the exhaust and it also takes off alot of back pressure.
glasspack with no cat
Its a freeflow exhaust that doesnt restrict air from going out the exhaust and it also takes off alot of back pressure.
 09-23-2007, 04:23 PM
#9
6th Gear Member
Join Date: Sep 2006
Location: Regina Beach, Sask
Posts: 9,991
All info is below the pictures
What you need
14 (or 12) gauge wire (about 12 feet of it)
A toggle switch
Electrical tape
Wire cutters
Drill with drill bit
What you do
Cut the 12ft. wire in half.
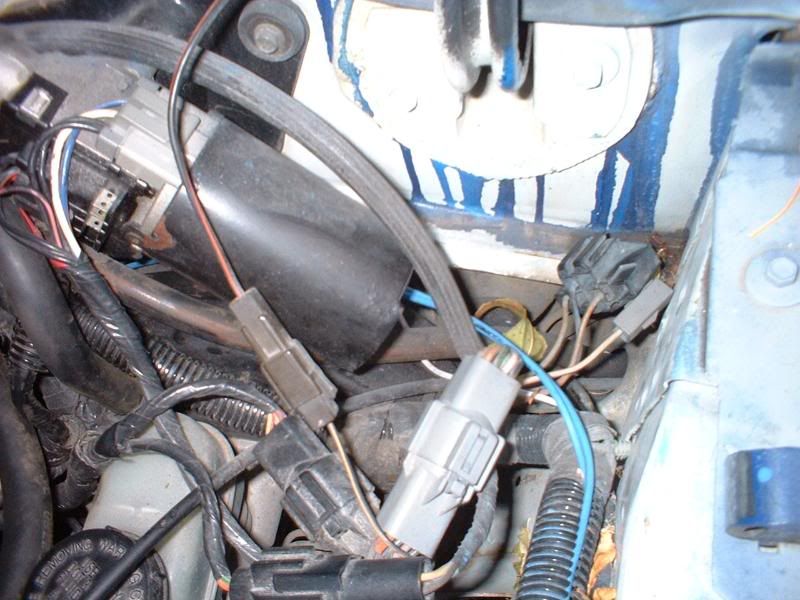
Then there is a rubber plug right beside the MAP sensor.
(Auto Tansmision People)
Take it out and cut a slit in it so you can feed the wires through
(Manual Transmission People)

Feed the wire through the hole where your speedometer cable is
Then you can now feed both the wires through the hole in the rubber plug and grab the 2 wires and pull them where you want to mount the switch.

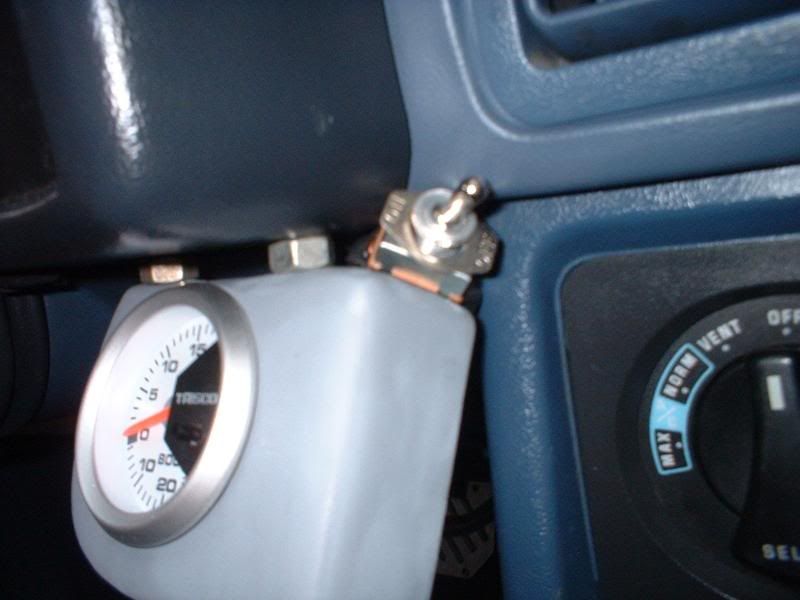
Take the drill and drill the proper sized hole for the switch and plug the 2 wires into the switch.

Now use zip ties to hid the wire so it looks cleaner and you also don't rip them out.

Now go into the engine bay and route the wires so they are protected and not able to be seen.
Now dissconnect your negative battery terminal.
Cut the fan connecter making sure to leave enough wire for yourself to connect the wiring. (also check to make sure the fan is pulling and not pushing air by plugging wither end into the battery)
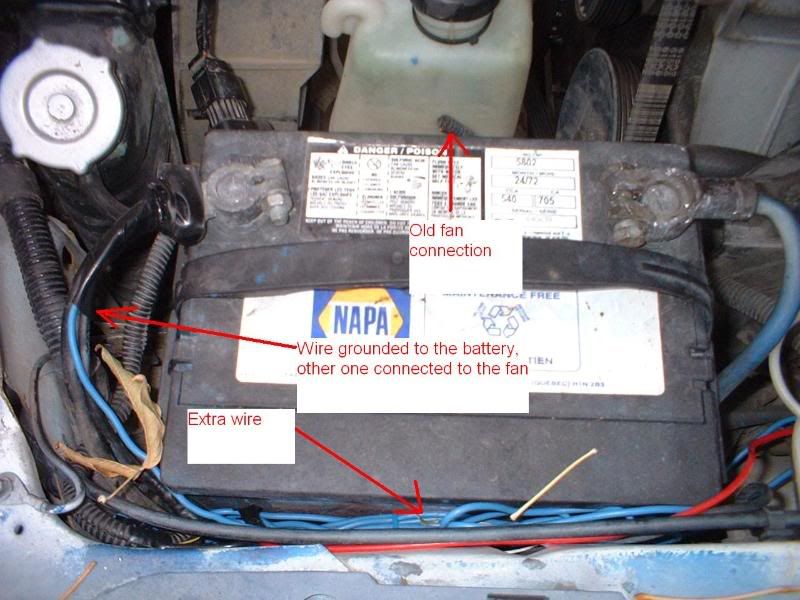
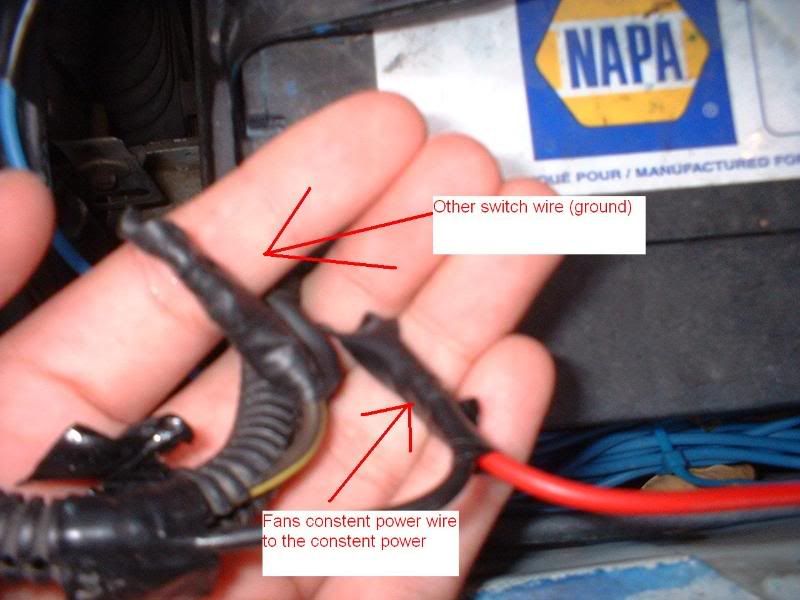
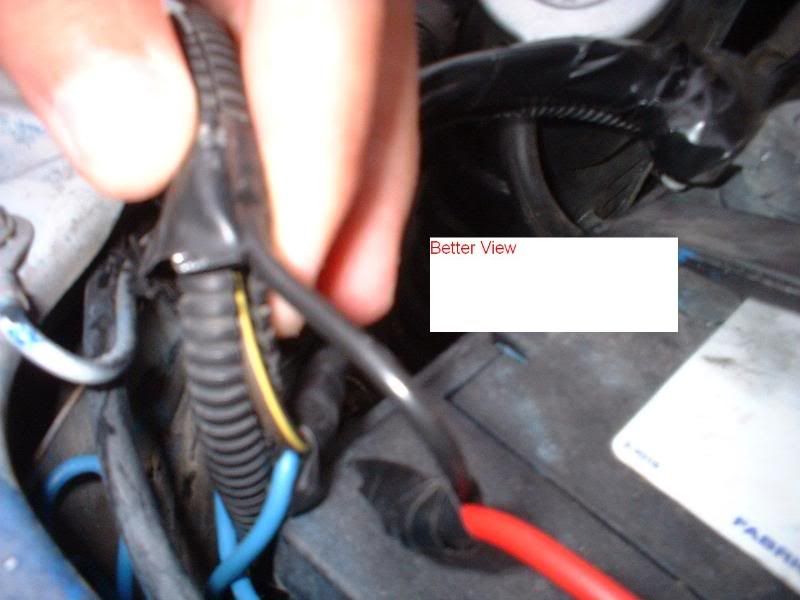
Now connect one line of the wire to the negative side of the battery, and the other wire to the fan.

Now connect the other side of the fan wiring to the continuse power of the starter solenoid.
Make sure all your connections are good then put tape on them (stops you from getting a nice shock)
Re-connect the battery, flip the switch and see if its pulling right. If not then you have to switch the wiring over so it will run the right way.
What you need
14 (or 12) gauge wire (about 12 feet of it)
A toggle switch
Electrical tape
Wire cutters
Drill with drill bit
What you do
Cut the 12ft. wire in half.
Then there is a rubber plug right beside the MAP sensor.
(Auto Tansmision People)
Take it out and cut a slit in it so you can feed the wires through
(Manual Transmission People)
Feed the wire through the hole where your speedometer cable is
Then you can now feed both the wires through the hole in the rubber plug and grab the 2 wires and pull them where you want to mount the switch.
Take the drill and drill the proper sized hole for the switch and plug the 2 wires into the switch.
Now use zip ties to hid the wire so it looks cleaner and you also don't rip them out.
Now go into the engine bay and route the wires so they are protected and not able to be seen.
Now dissconnect your negative battery terminal.
Cut the fan connecter making sure to leave enough wire for yourself to connect the wiring. (also check to make sure the fan is pulling and not pushing air by plugging wither end into the battery)
Now connect one line of the wire to the negative side of the battery, and the other wire to the fan.
Now connect the other side of the fan wiring to the continuse power of the starter solenoid.
Make sure all your connections are good then put tape on them (stops you from getting a nice shock)
Re-connect the battery, flip the switch and see if its pulling right. If not then you have to switch the wiring over so it will run the right way.