Fox To SN Rear Seat Conversion
 08-10-2011, 10:26 PM
#1
M.A.D. Motorsports
Thread Starter
Join Date: Jul 2006
Location: Indiana
Posts: 8,014
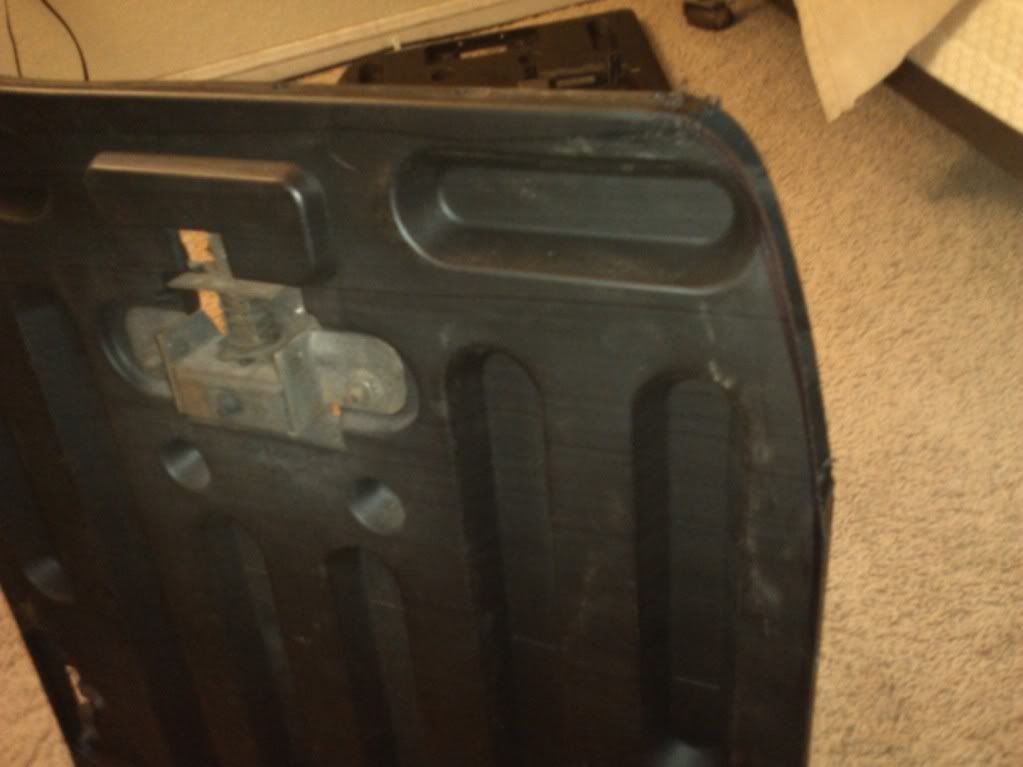
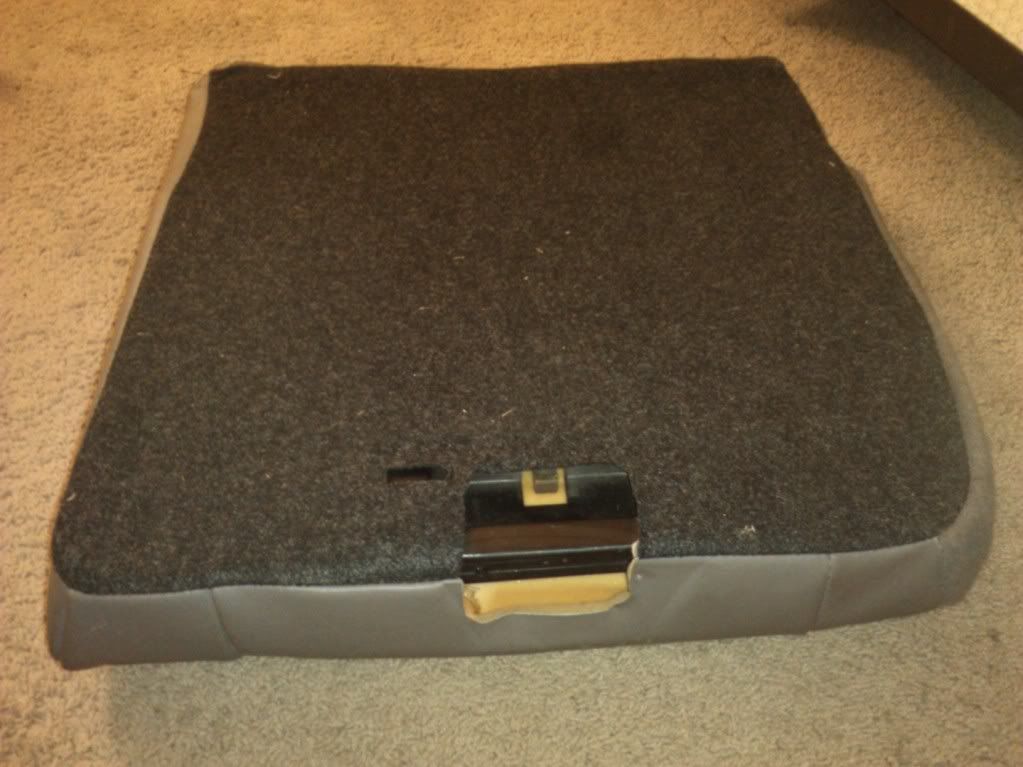
One of the upgrades I am done with my 93 is the SN rear seat conversion to go with my front seats. I have seen a few people write about it but I haven't seen a step by step write up so I figured I would go ahead and do it. It is a rather simple process. The bottom section requires either you to cut out and weld in the front part of the floor to make the piece where it pops into the floor or make your own. Some have used wood, square pipe, etc..... I am just going to use some sheet metal. Just use your imagination.
The top section requires the use of the stock fox split seats. I am going to do what I can to have it step by step even though alot of it is self explanatory....
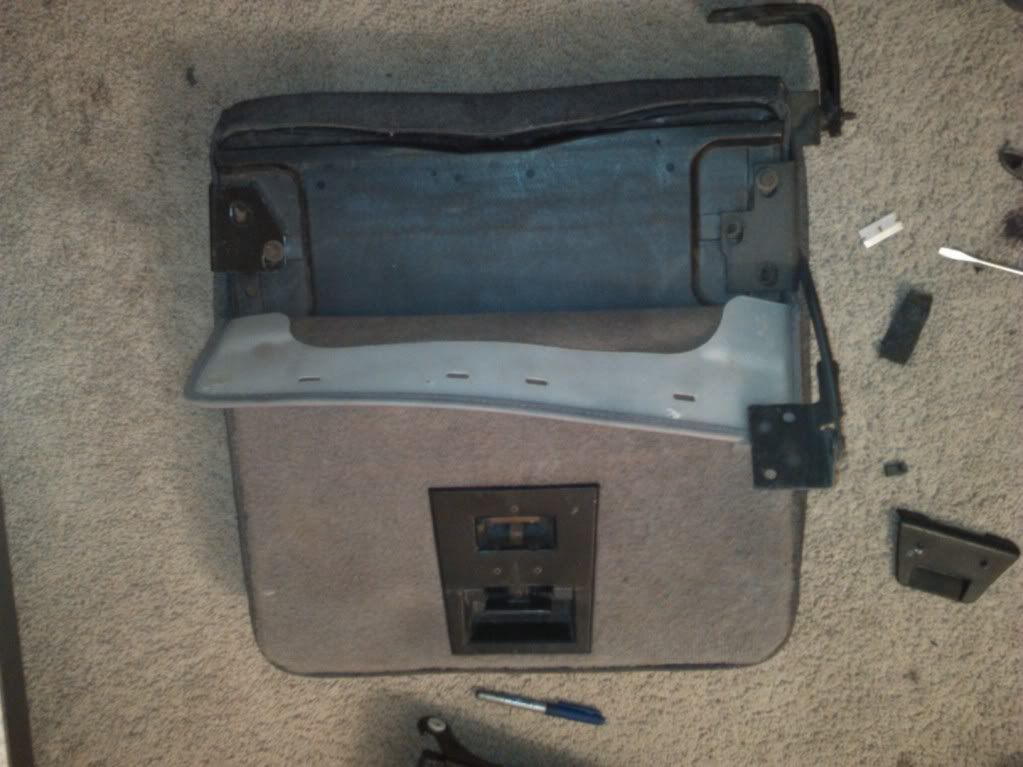
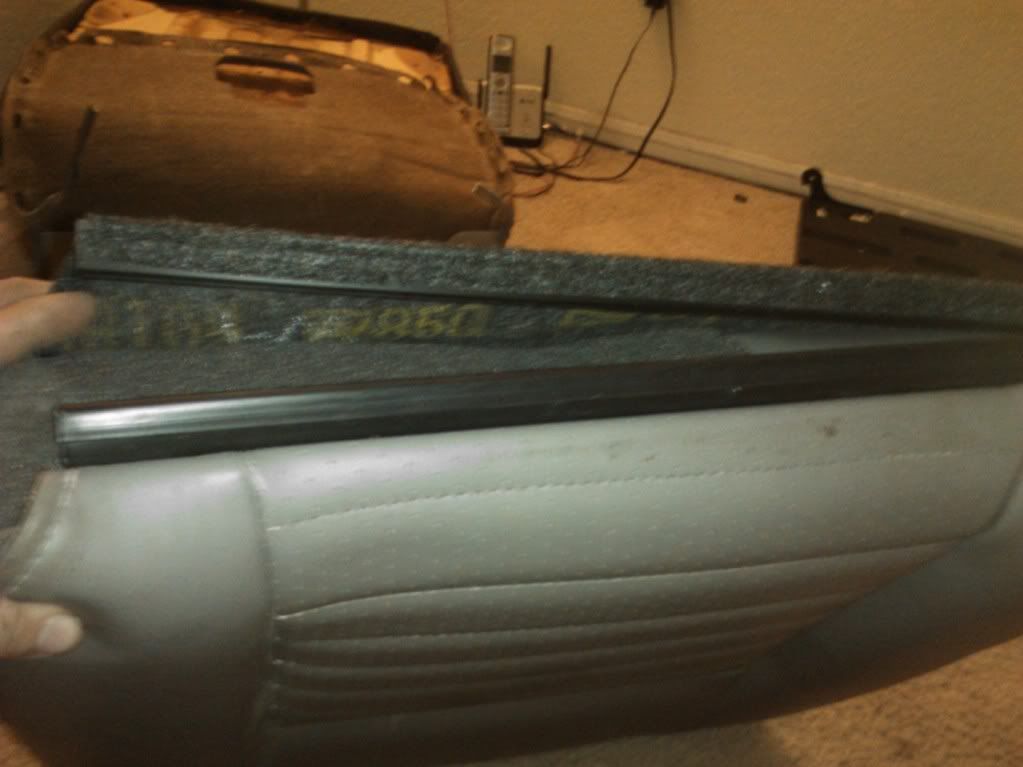
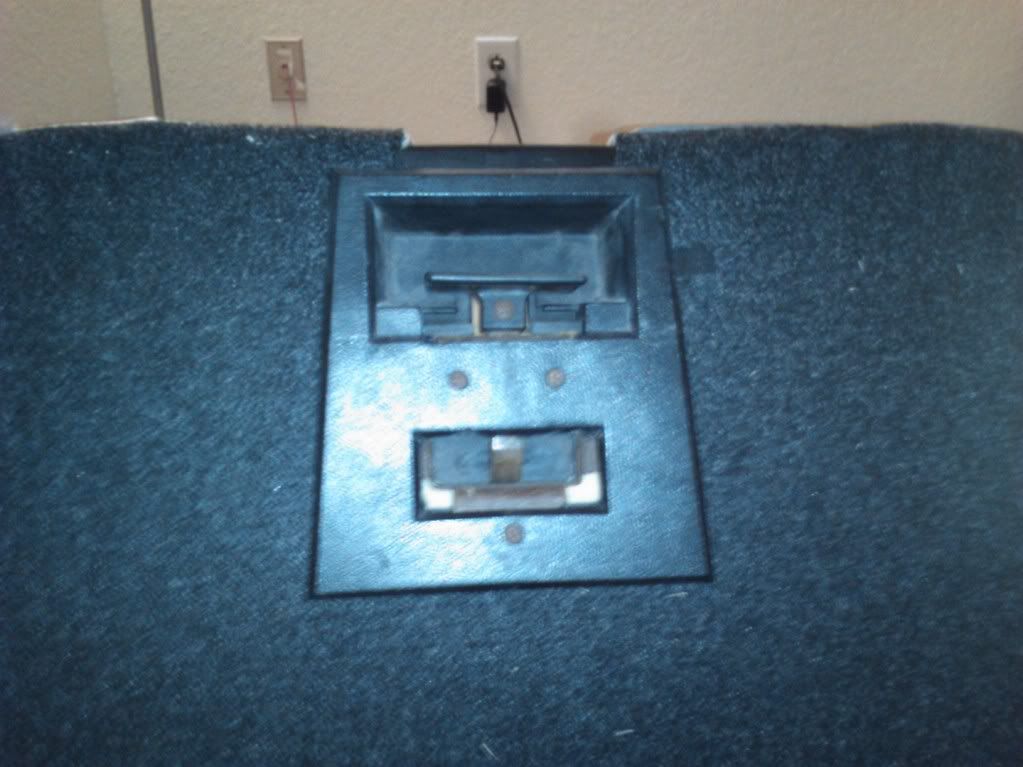
The back of a stock fox seat...
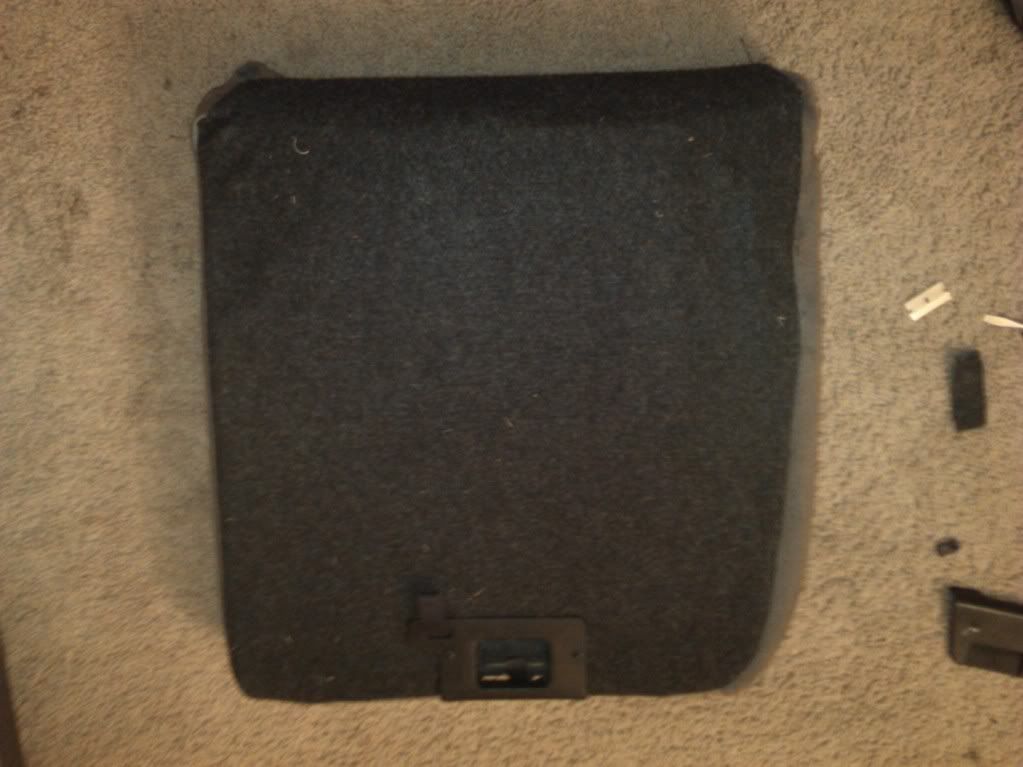
The back of a stock SN seat...
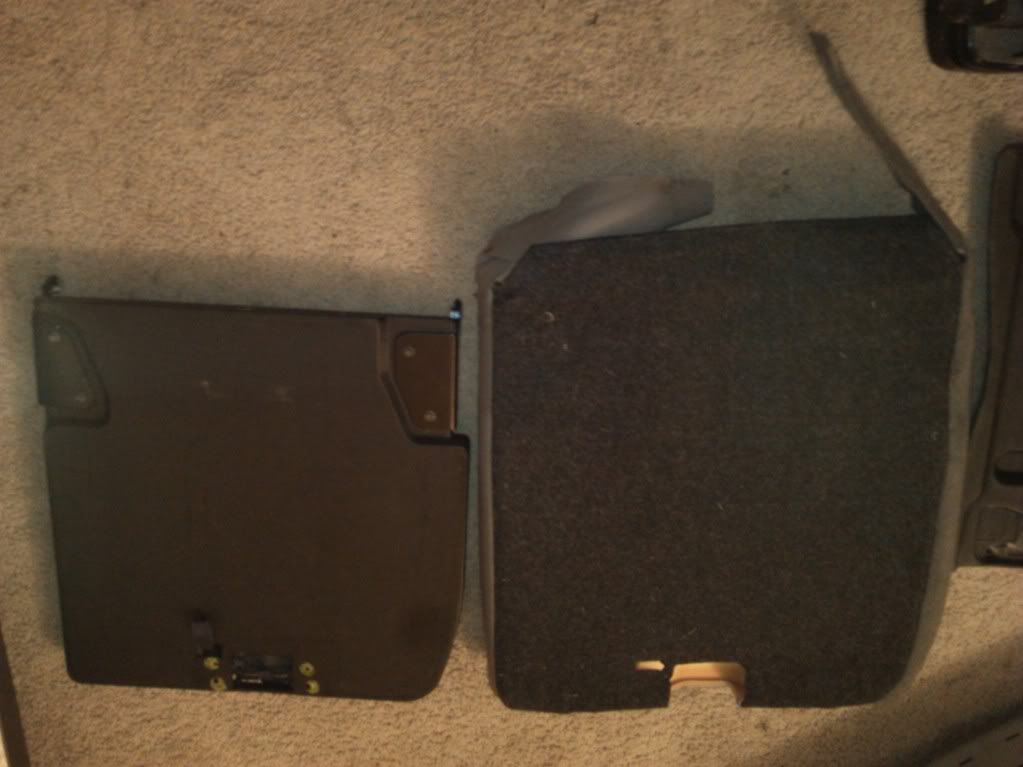
First, taking apart the fox seat.....
Remove the plastic bezel off the back....
Remove the 2 hinges.....

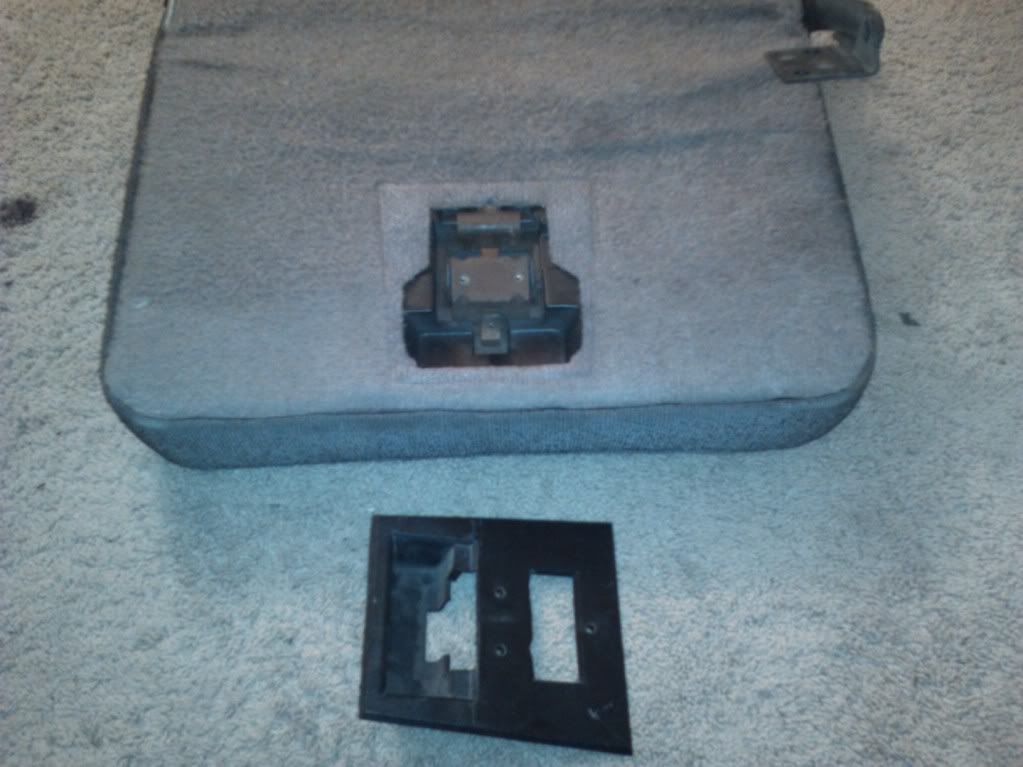
Go around the edges and pop out the xmas tree push pins to separate the upholstery from the backing....
Once that is done, just pull the 2 apart....
Then just pull the carpeting off the back of the plastic backing...
You have now successfully taken apart the fox seat!
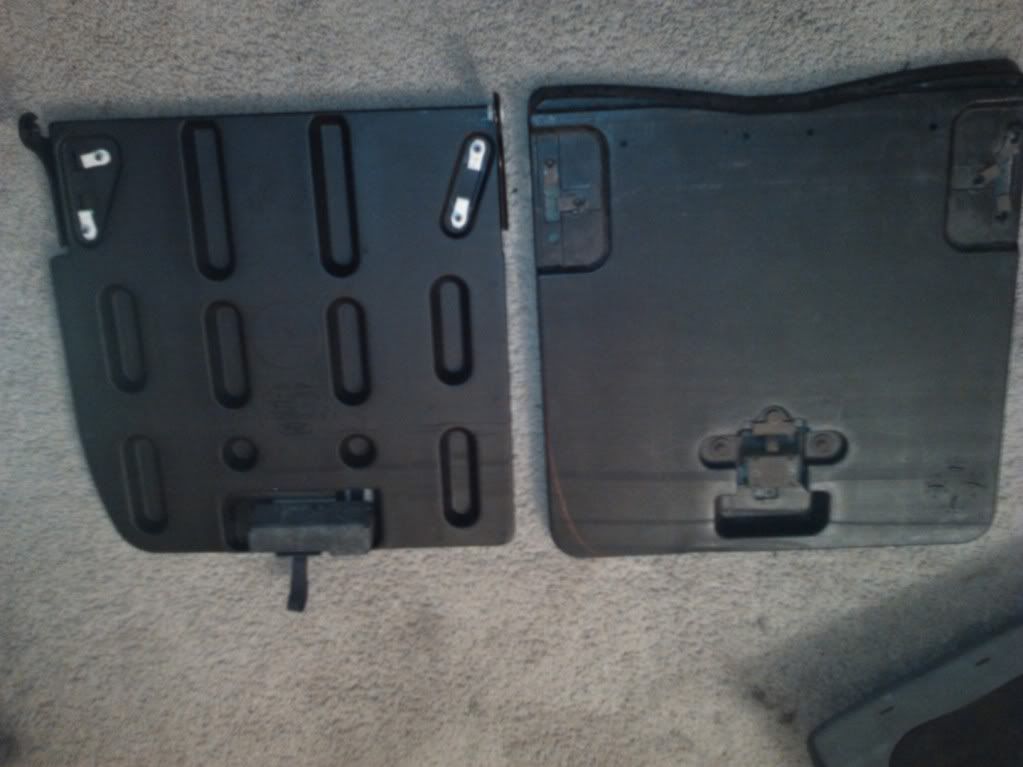
NOW the SN seat..
Remove the plastic bezel on the back...
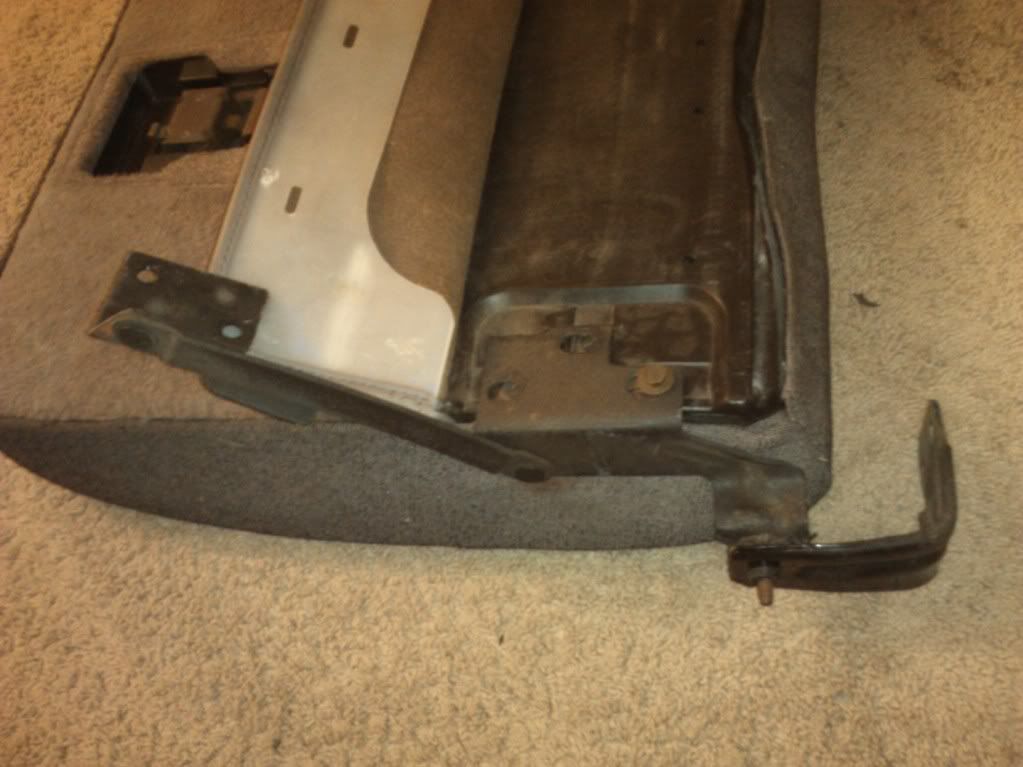
Then use a flat tip screw driver to pop the 2 plastic pieces apart at the bottom of the seat cover. The front section has a groove that the back section pops into with 2 small edges like a V shape. I took the screw driver and started at one end and got under one edge and just slid it down until it unlocked itself....
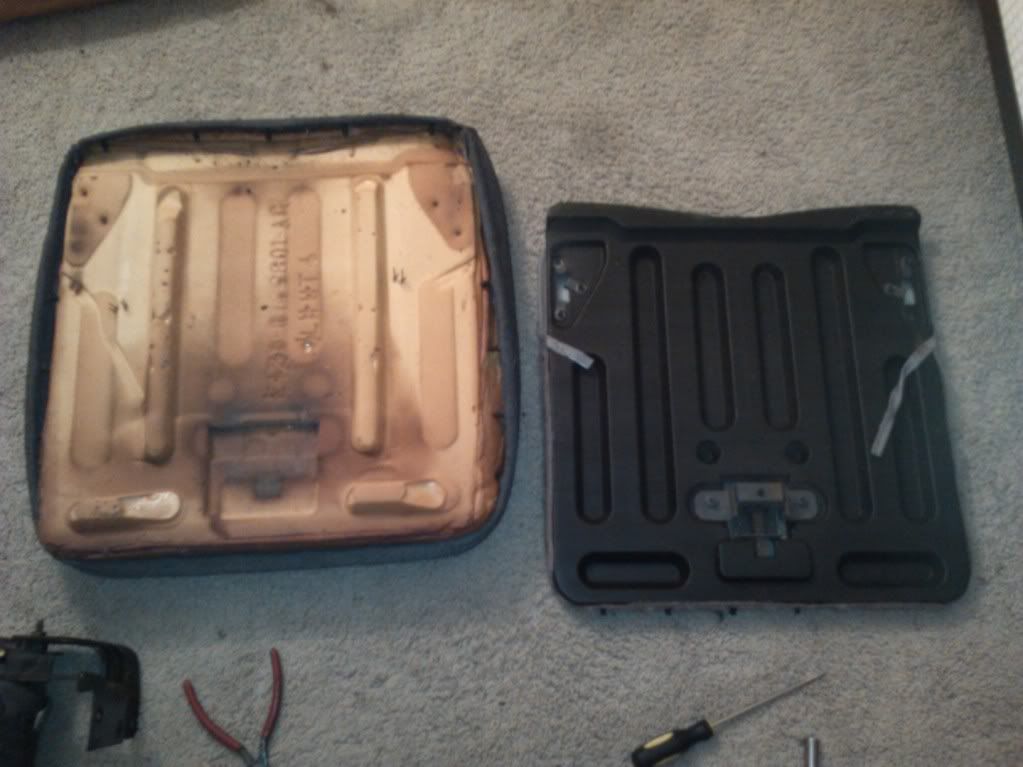
Then just carefully pull out the plastic backing. The metal pieces that bolt to the backing are inside the SN seats so be careful with those first.
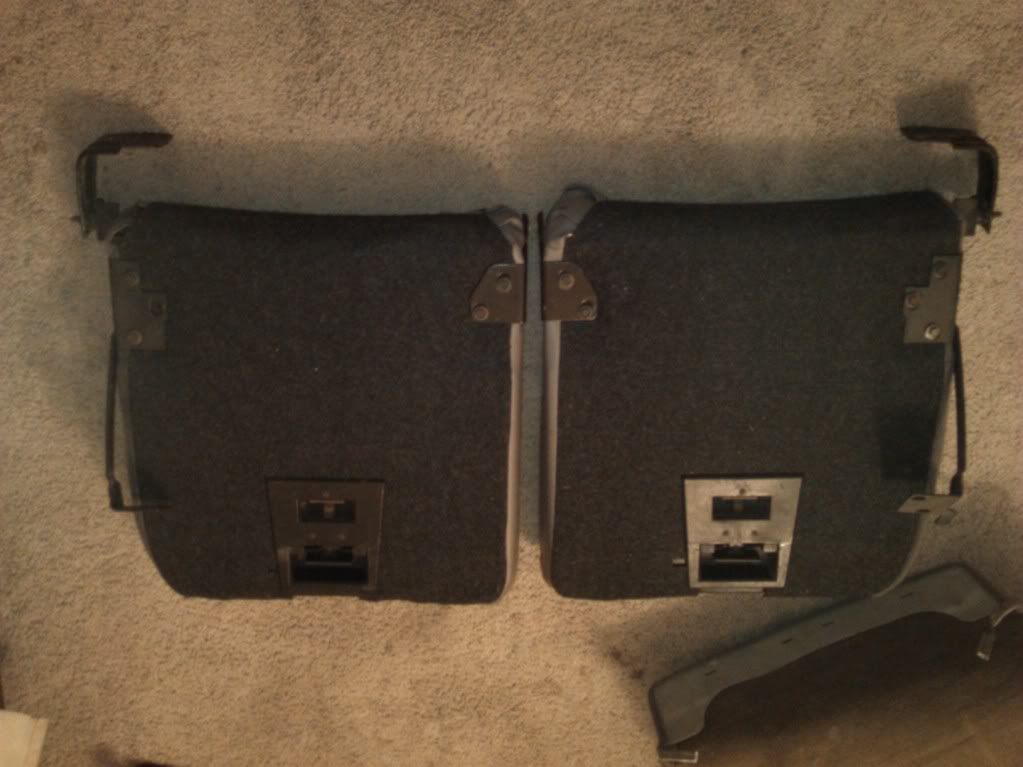
Now that you have both seats taken apart you can compare the 2 backings. You will use the fox backing and the SN seat and cushion. You will notice that the SN's outer corner is rounded and the fox's is not.
Take the SN's and lay it on the fox and trace out the edge that needs to be trimmed... be sure to trace the right corner so you don't screw it up.
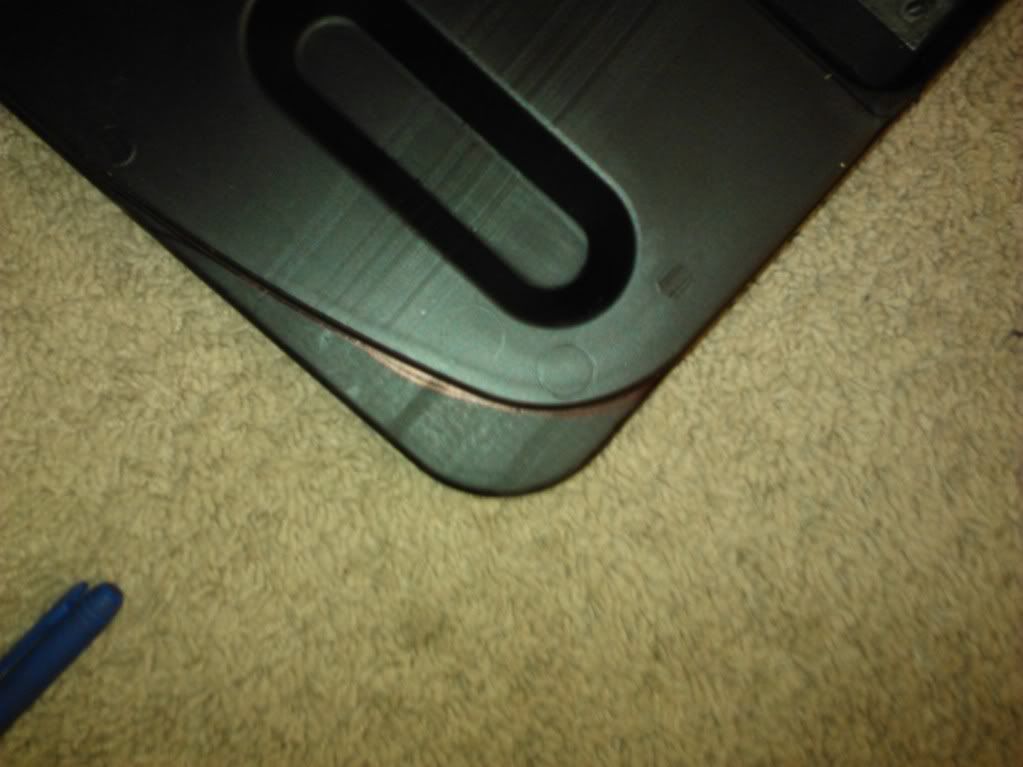
I used a jigsaw to cut mine out. It was quick and easy
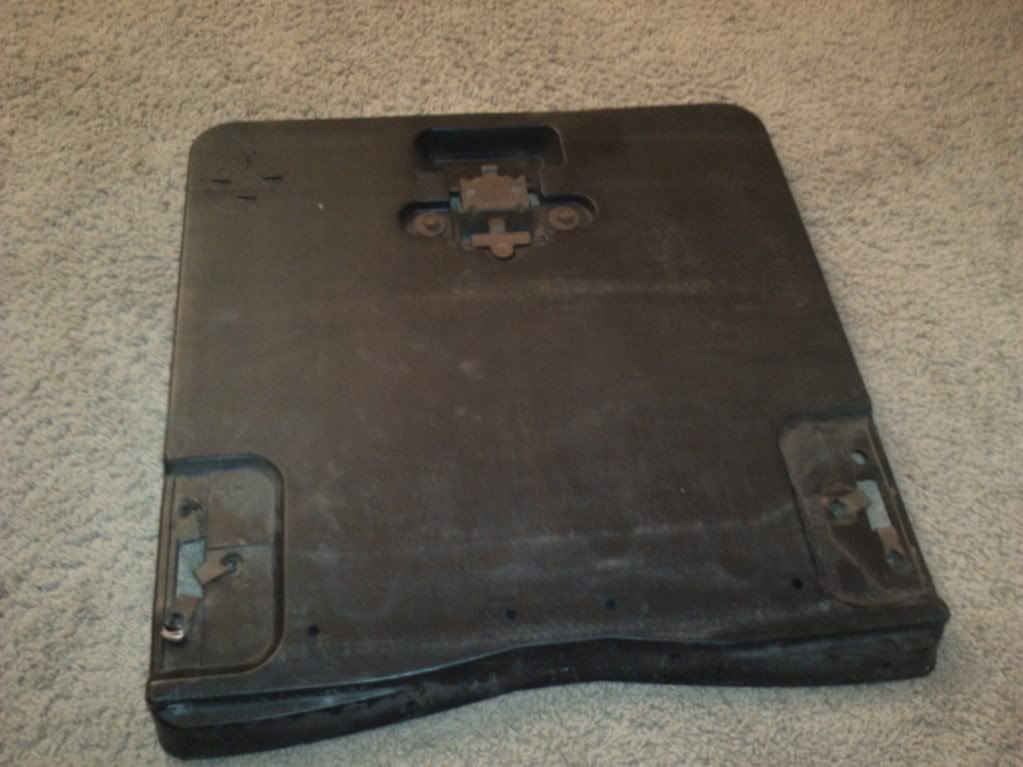
Once you have trimmed the fox backing it is time to reassemble.
Just slide the fox back into the SN seat...
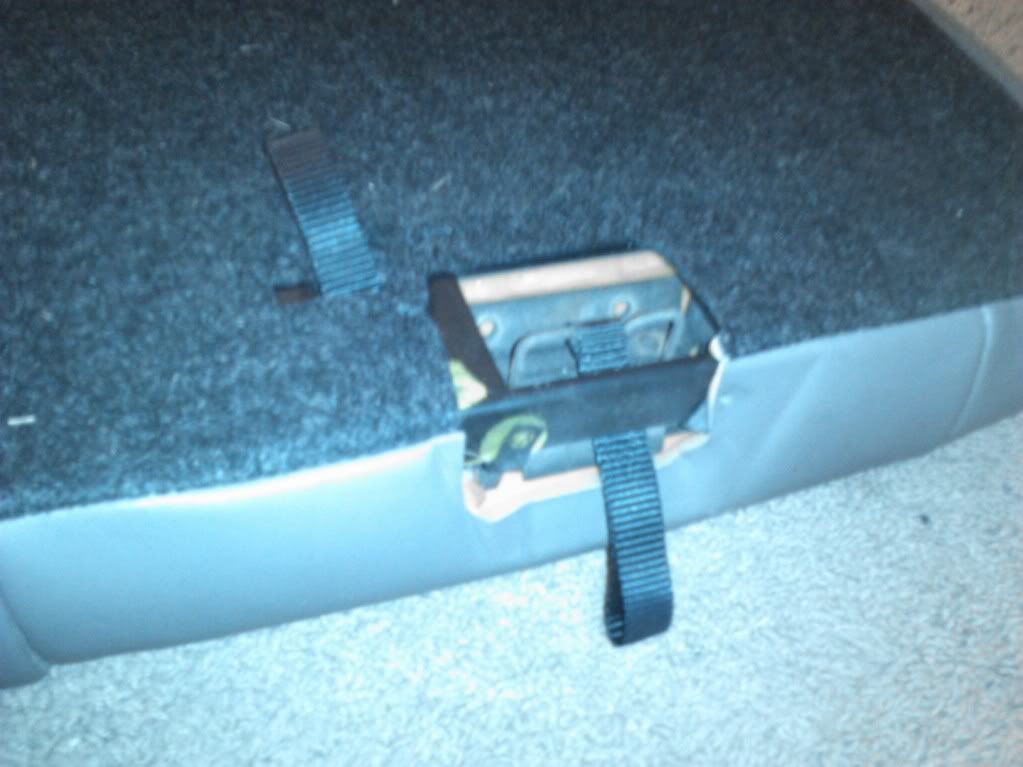
Trim off what little felt you have to on the SN back to expose the release handle and then screw the bezel into place. I just put the screws right thru the backing. I cut the latch section out after I screwed the bezel into place.
Then just locate the holes for the hinges to be bolted on. I took a razor blade and made a couple small slits in the backing for the holes. I then went ahead and popped the bottom plastic pieces back together before I bolted on the hinges so the backing would be tight. Once you get it all together you now have converted a fox back seat into a SN seat
Now you just need to bolt it back into the car and probably make some slight adjustments and you will be good to go!
INSTALL PICS TO SOON FOLLOW.....
I have yet to make the bracing for the bottom section but I will come back and add that to this so be patient!!!
The top section requires the use of the stock fox split seats. I am going to do what I can to have it step by step even though alot of it is self explanatory....
The back of a stock fox seat...
The back of a stock SN seat...
First, taking apart the fox seat.....
Remove the plastic bezel off the back....
Remove the 2 hinges.....
Go around the edges and pop out the xmas tree push pins to separate the upholstery from the backing....
Once that is done, just pull the 2 apart....
Then just pull the carpeting off the back of the plastic backing...
You have now successfully taken apart the fox seat!
NOW the SN seat..
Remove the plastic bezel on the back...
Then use a flat tip screw driver to pop the 2 plastic pieces apart at the bottom of the seat cover. The front section has a groove that the back section pops into with 2 small edges like a V shape. I took the screw driver and started at one end and got under one edge and just slid it down until it unlocked itself....
Then just carefully pull out the plastic backing. The metal pieces that bolt to the backing are inside the SN seats so be careful with those first.
Now that you have both seats taken apart you can compare the 2 backings. You will use the fox backing and the SN seat and cushion. You will notice that the SN's outer corner is rounded and the fox's is not.
Take the SN's and lay it on the fox and trace out the edge that needs to be trimmed... be sure to trace the right corner so you don't screw it up.
I used a jigsaw to cut mine out. It was quick and easy
Once you have trimmed the fox backing it is time to reassemble.
Just slide the fox back into the SN seat...
Trim off what little felt you have to on the SN back to expose the release handle and then screw the bezel into place. I just put the screws right thru the backing. I cut the latch section out after I screwed the bezel into place.
Then just locate the holes for the hinges to be bolted on. I took a razor blade and made a couple small slits in the backing for the holes. I then went ahead and popped the bottom plastic pieces back together before I bolted on the hinges so the backing would be tight. Once you get it all together you now have converted a fox back seat into a SN seat
Now you just need to bolt it back into the car and probably make some slight adjustments and you will be good to go!
INSTALL PICS TO SOON FOLLOW.....
I have yet to make the bracing for the bottom section but I will come back and add that to this so be patient!!!

 09-04-2011, 09:59 AM
#6
M.A.D. Motorsports
Thread Starter
Join Date: Jul 2006
Location: Indiana
Posts: 8,014
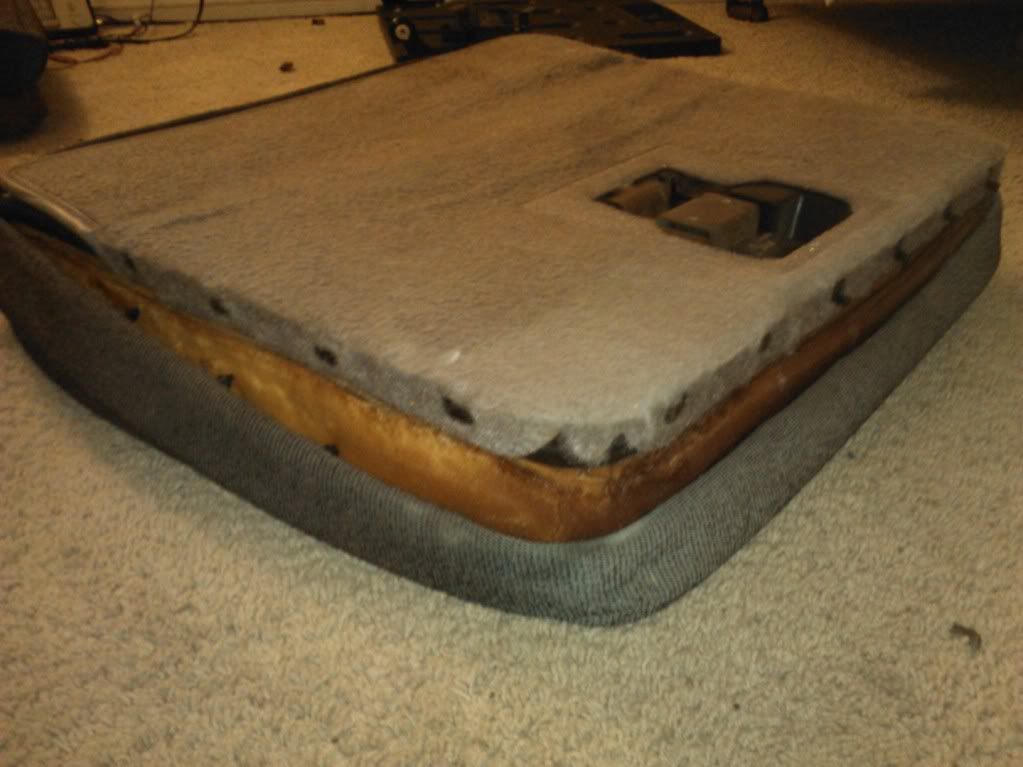
I still have to finish my bottom section to make it look complete and I probably won't in this car. I am going to end up transferring it over to my 83 eventually since its gonna be my comfy DD car  ....
....
Here is mine.... Remember once the bottom section is finished it will be tucked in a little more. You have to shave some of the foam off the bottom and make the front supports so it doesn't look as sloppy.... Please ignore the dirtyness of it lol
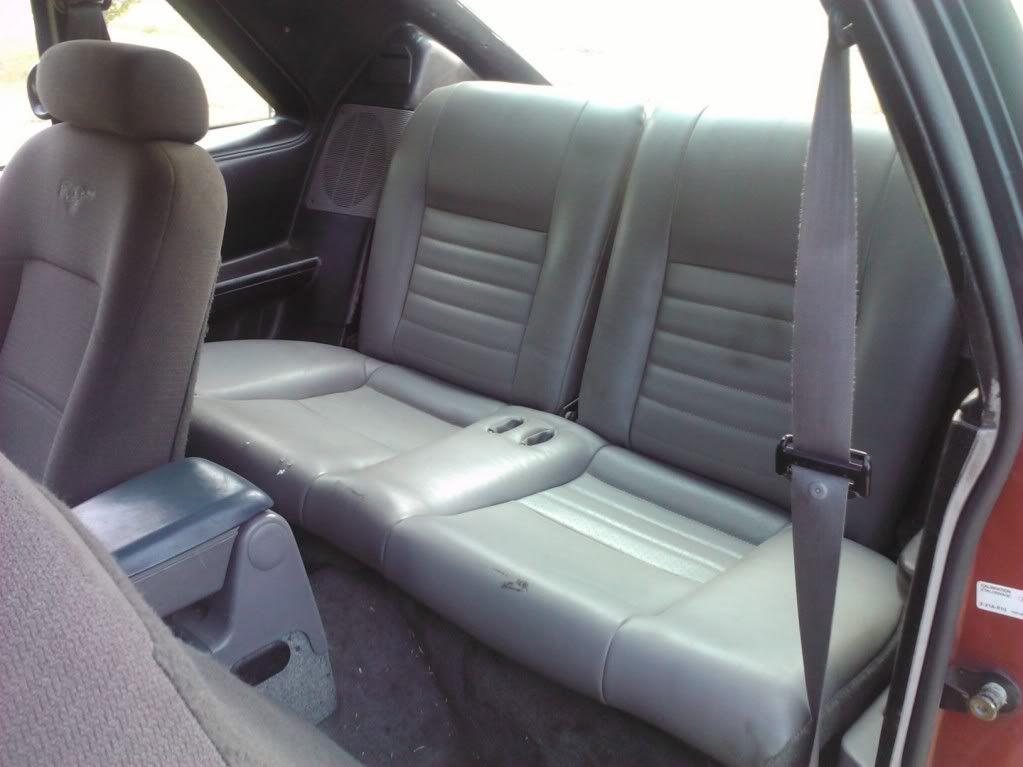
BUT here is another pic I have found.. with a slightly different touch..

....Here is mine.... Remember once the bottom section is finished it will be tucked in a little more. You have to shave some of the foam off the bottom and make the front supports so it doesn't look as sloppy.... Please ignore the dirtyness of it lol
BUT here is another pic I have found.. with a slightly different touch..
03-22-2013, 11:21 AM
#8
M.A.D. Motorsports
Thread Starter
Join Date: Jul 2006
Location: Indiana
Posts: 8,014
It can be done the same way....there are also upholstry upgrades you can do to the notch seats to make them look newer
http://www.stangnet.com/mustang-foru...-space.846974/
http://www.stangnet.com/mustang-foru...-space.846974/
