Door Panel Leather Sagging - **FIX**
 08-09-2009, 08:19 PM
#1
5th Gear Member
Thread Starter
Join Date: May 2006
Location: Winter Haven, Florida
Posts: 2,214
Okay guys, ive been posting all over these forums about the deal with my door panel leather coming off and from the feedback ive received, there are a lot more out there that are or were in my position and im sure there will be more in my position in the future as this is a continuing issue...
today, i took the challenge to fix it myself and i say "challenge" because im not very mechanically inclined...throughout the process, i took pics to help make this process a bit easier for the next guy to go down this road...
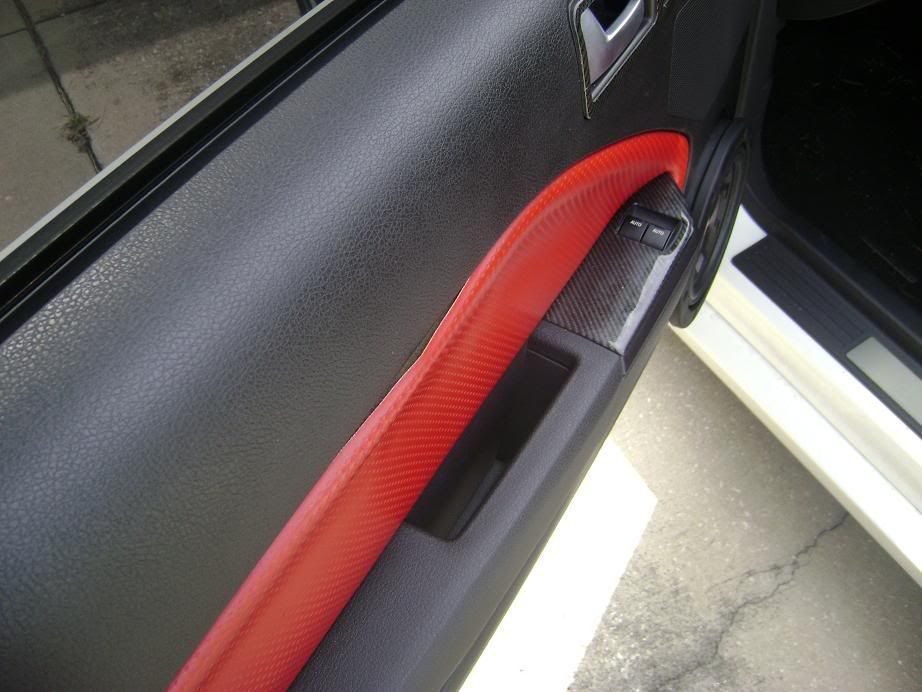
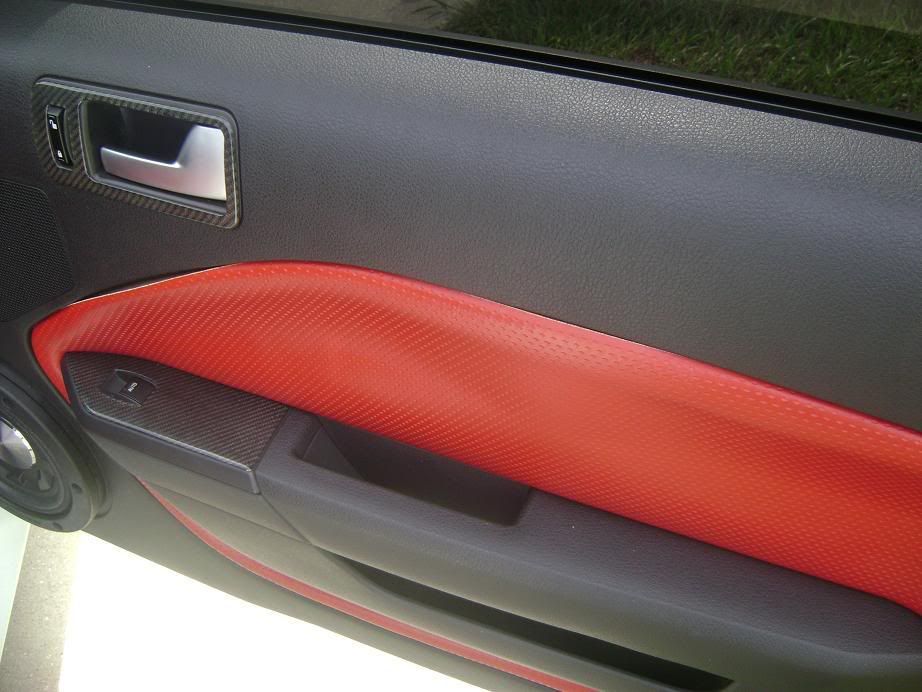
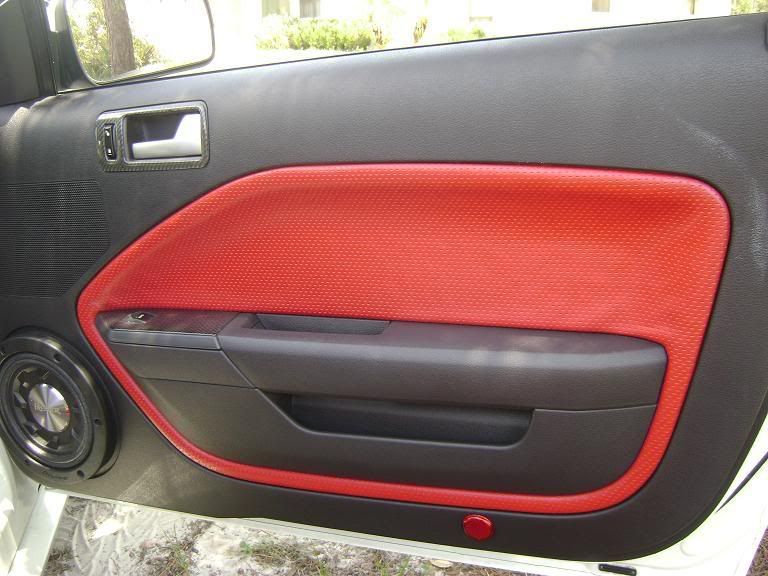
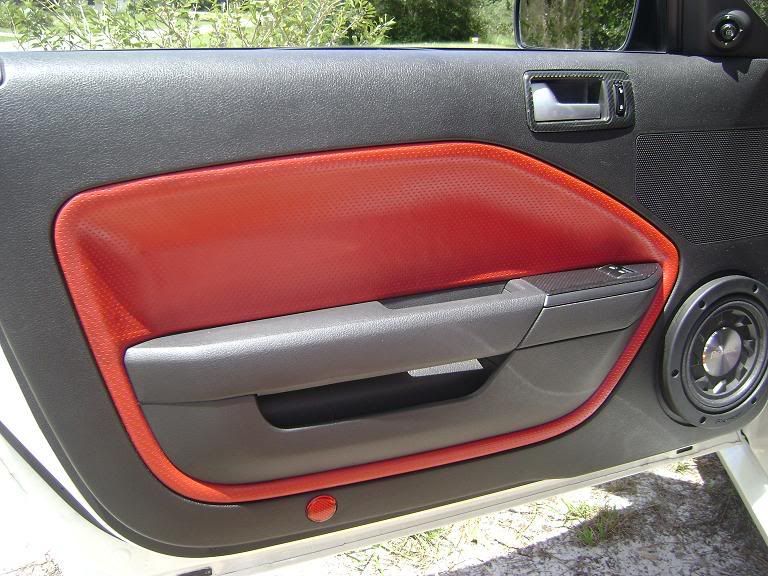
here were the panels before i started...
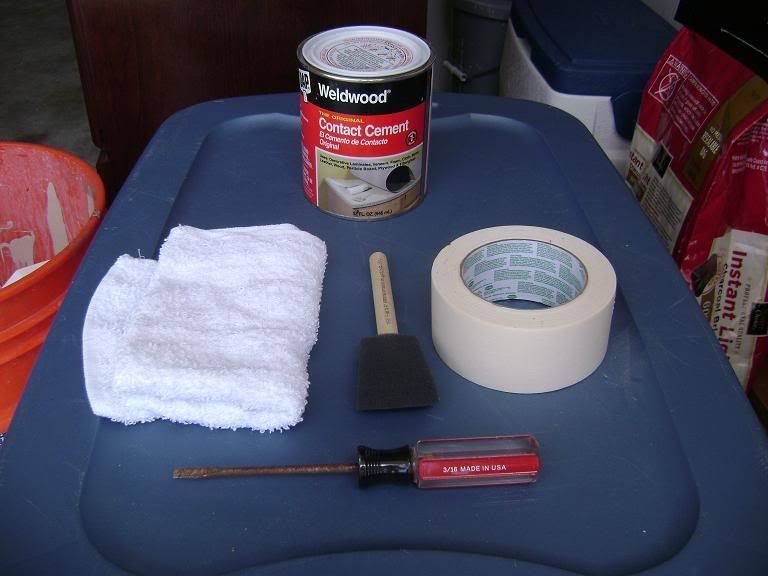
I went to Wal-Mart and bought a few supplies that i thought i would need. The supplies are as follows:
1 can of Contact Cement $5
1 wrag or tarry cloth
1 flathead screwdriver
1 pack of 3 Poly Brushes (from crafts section) $3
1 roll of masking tape $3
STEP 1:
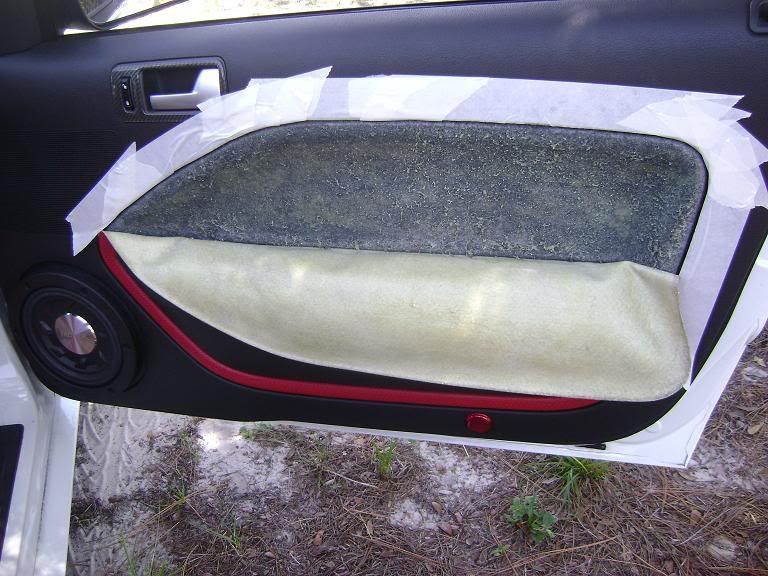
Go ahead and finish separating the leather from the door the rest of the way until you get down to the armrest.
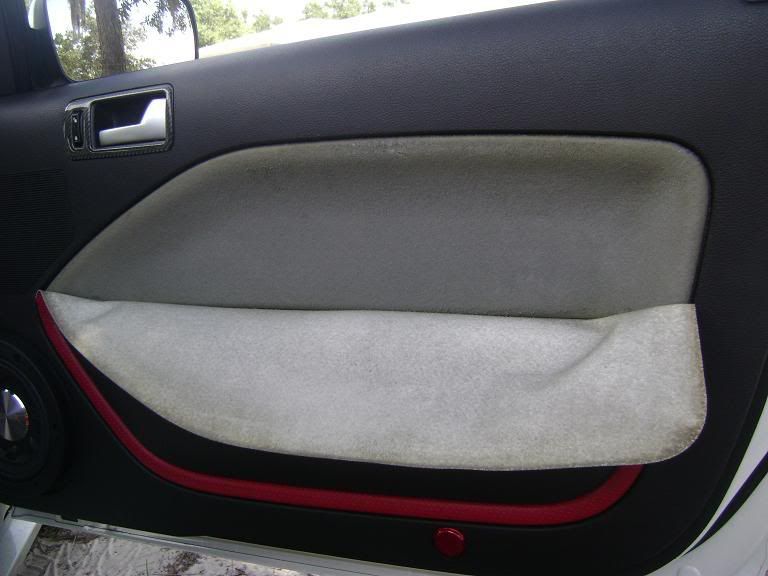
STEP 2:
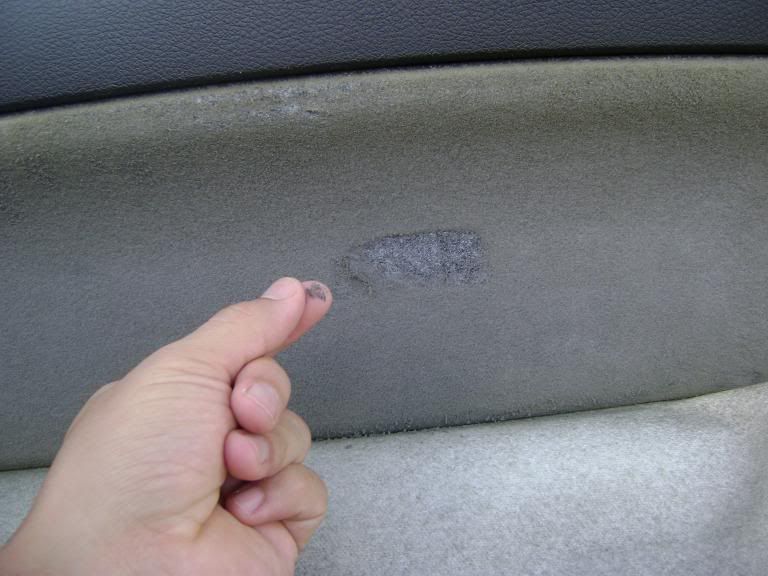
You will immediately notice the padding that rests behind the leather. Once upon a time, this leather was glued to the back of the leather, but it has since deteriorated from heat and expansion/contraction of the leather and eventually comes apart from the leather backing...You can take a finger and rub the padding and it will just roll under your fingertip and come right off like crumbs...The next step is to use your hand with some slight pressure and finish rolling off all of the desintigrated padding that is on the panel...Once you are done, there should be nothing but a carpet type of material left...
STEP 3:
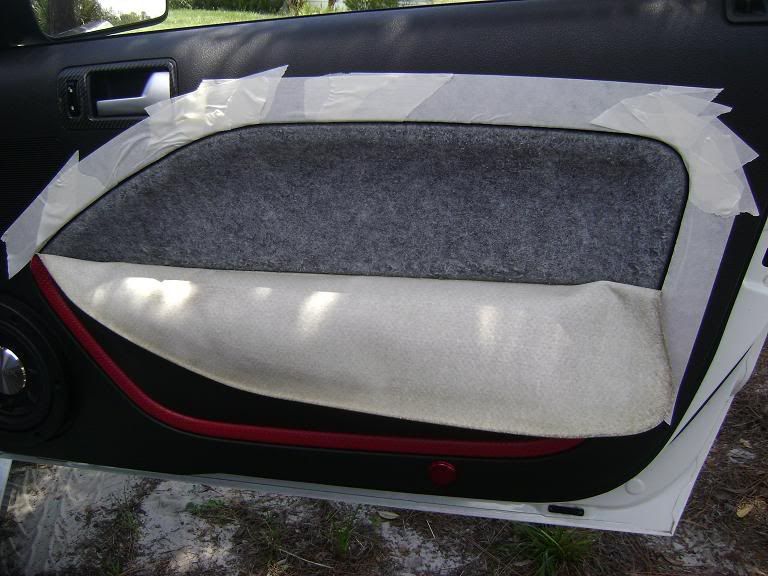
Apply the Contact Cement religiously to both the leather backing and the door panel area and let dry for 15 min. Apply one more light layer of Contact Cement to both areas and let dry for 15 min. I suggest 2 layers because the material will absorb some of the cement. I went ahead and taped off the door panel to protect it from the cement prior to application.


STEP 4:
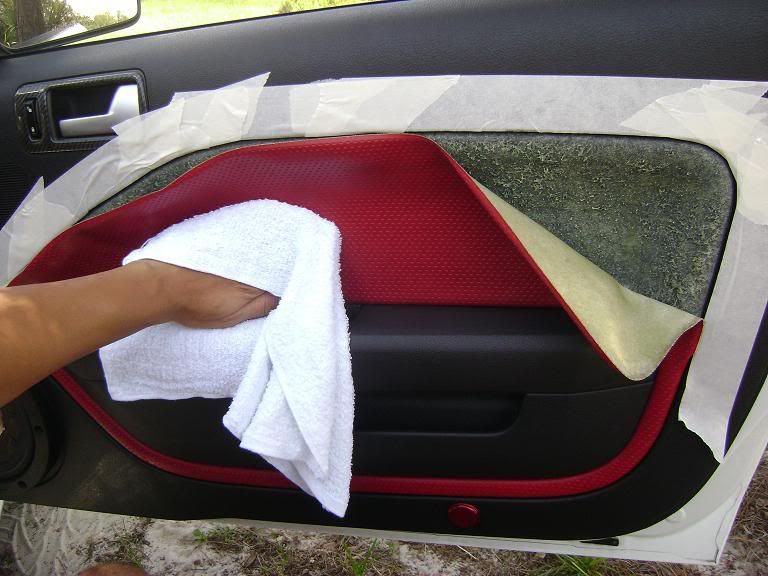
Once youve allowed plenty of time for the cement to dry, use a small towel or wrag in hand to start pressing the leather back onto the door panel beginning at the bottom in the middle and gradually working your way towards the top as well as to the sides. The edge of the leather is easy to put back in its original position because it retains its shape (curved edge) even after its removed from the panel. When pressing the leather back on, the leather edge just falls back into place.
Once all of this is completed, you have yourself a repaired door panel!
You just repeat the process for the other door and then your done!
All in all it took about 2 hours to complete but thats with taking my sweet'ole time and taking breaks from this Florida heat like every 15 minutes...Im very happy with how it came out and i hope this helps you guys...
-Mike
today, i took the challenge to fix it myself and i say "challenge" because im not very mechanically inclined...throughout the process, i took pics to help make this process a bit easier for the next guy to go down this road...
here were the panels before i started...
I went to Wal-Mart and bought a few supplies that i thought i would need. The supplies are as follows:
1 can of Contact Cement $5
1 wrag or tarry cloth
1 flathead screwdriver
1 pack of 3 Poly Brushes (from crafts section) $3
1 roll of masking tape $3
STEP 1:
Go ahead and finish separating the leather from the door the rest of the way until you get down to the armrest.
STEP 2:
You will immediately notice the padding that rests behind the leather. Once upon a time, this leather was glued to the back of the leather, but it has since deteriorated from heat and expansion/contraction of the leather and eventually comes apart from the leather backing...You can take a finger and rub the padding and it will just roll under your fingertip and come right off like crumbs...The next step is to use your hand with some slight pressure and finish rolling off all of the desintigrated padding that is on the panel...Once you are done, there should be nothing but a carpet type of material left...
STEP 3:
Apply the Contact Cement religiously to both the leather backing and the door panel area and let dry for 15 min. Apply one more light layer of Contact Cement to both areas and let dry for 15 min. I suggest 2 layers because the material will absorb some of the cement. I went ahead and taped off the door panel to protect it from the cement prior to application.
STEP 4:
Once youve allowed plenty of time for the cement to dry, use a small towel or wrag in hand to start pressing the leather back onto the door panel beginning at the bottom in the middle and gradually working your way towards the top as well as to the sides. The edge of the leather is easy to put back in its original position because it retains its shape (curved edge) even after its removed from the panel. When pressing the leather back on, the leather edge just falls back into place.
Once all of this is completed, you have yourself a repaired door panel!
You just repeat the process for the other door and then your done!
All in all it took about 2 hours to complete but thats with taking my sweet'ole time and taking breaks from this Florida heat like every 15 minutes...Im very happy with how it came out and i hope this helps you guys...
-Mike
Last edited by 0NF1R; 08-12-2009 at 09:28 PM.

 08-10-2009, 01:56 AM
#3
5th Gear Member

Join Date: Nov 2006
Location: Alabama
Posts: 2,935
Nice! I'll be sure to remember this when/if mine start to sag. One thing I've noticed in common with the people having this problem... they're all from either Florida or Texas... ugh the things heat can destroy.
08-10-2009, 03:14 AM
#4
4th Gear Member

Join Date: Oct 2008
Location: Henry County, Georgia
Posts: 1,636
That dap weldwood cement is some serious stuff! Alot of stand up jet ski riders (including myself) use it to attach our padding/grips and if applied right its a total PITA to get it off. Most things you glue on will break before the cement does. You shouldnt have to worry about the sagging problem again as long as the cement is dry before you press it down.
08-10-2009, 11:23 AM
#5
6th Gear Member
Excellent post. Although my Stang is currently garage kept, I'll file this away mentally if I ever need it. I'll also inform my son since his Saturn has the same issue.
 08-11-2009, 05:52 PM
#7
S197 Section Modder-ator
Join Date: Sep 2007
Location: Orlando FL
Posts: 13,373
08-11-2009, 07:58 PM
#8
5th Gear Member
Thread Starter
Join Date: May 2006
Location: Winter Haven, Florida
Posts: 2,214
(after applying the cement to both of the surfaces soon to be glued to one another)
#5 in the intructions states:
"Allow both surfaces to dry 15-20 minutes (dependent on temperature and humidity). Dry contact cement will feel tacky and appear glossy. If surfaces are not assembled within 2 hours, adhesive can be reactivated by applying an additional coat of Original Contact Cement."
you allow the surfaces to dry for 15-20 minutes then press them together

