How to swap in a manaul T5 transmission
 10-13-2008, 05:19 PM
#1
6th Gear Member
Thread Starter
Join Date: Sep 2006
Location: Regina Beach, Sask
Posts: 9,991
Ok guys, after my A4LD took a **** on me, I decided I'd go manual...
I bought my T5 from a tow yard for $250 with everything that I wanted off the car.
So here's the specs on the T5
Rebuilt less than 30,000kms ago (around 18,000 miles)
has 3.97 1st gear... other wise stock
I had the flywheel re-surfaced for $50 and trust me, you should all get it done by a shop and not by yourself... It turns out so much better.
Bought a stock replacement clutch kit for a 1988 Mustang 2.3 with an ungraded pressure plate (has 8 extra fingers compared to stock)
Also to give you some helpfull tips, a 2.3 N/A flywheel is made for a 8.5" clutch, SVO flywheel is made for a 8.75" clutch, Merkur flywheel is made for a 9" clutch and the Turbo coupes flywheel is made for 9.25" clutch. a flywheel made for a 8.5" clutch wont work with a 8.75" clutch, and a 9" wont work with a 9.25" clutch soTHEY DO NOT INTERCHANGE!
I'm running a 8.5" clutch and it's holding the power good, but if you're going to have loads of power than I would tell you to grab a TC flywheel and run a 9.25" clutch or a 5.0 clutch with some mods.
This swap will work with almost any fox body ford, you may have to change a few things but it should still follow the same principle.
Cost
Transmission $250
Fly wheel resurfacing $50
Clutch kit $200
Transmission fluid $15
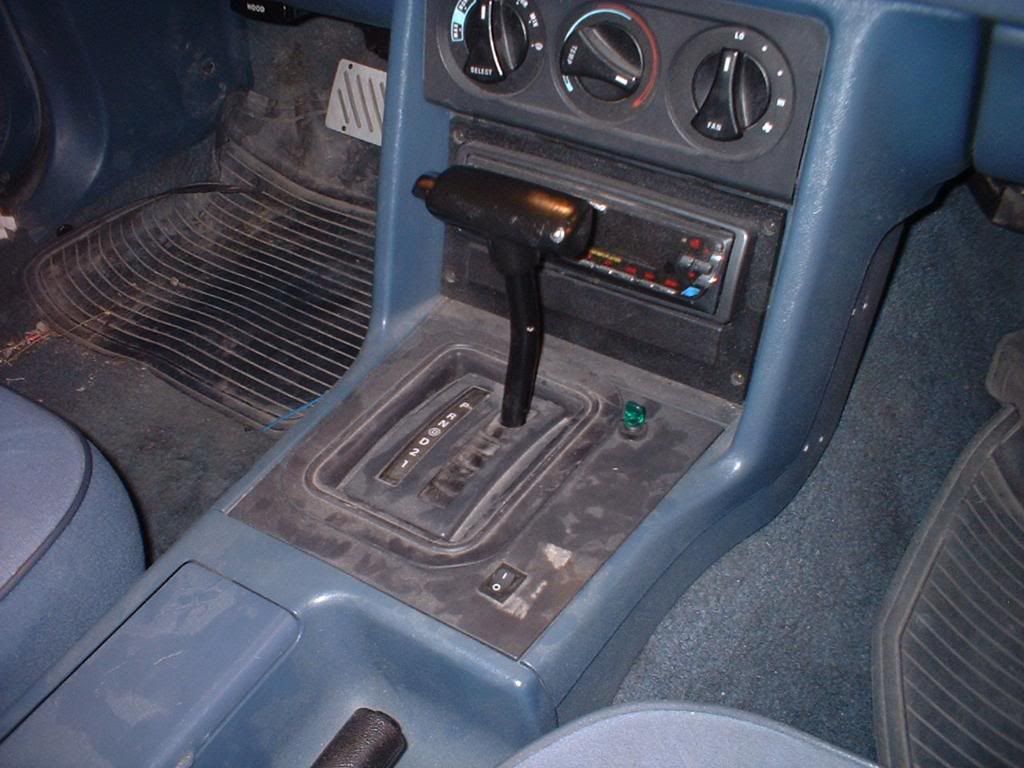
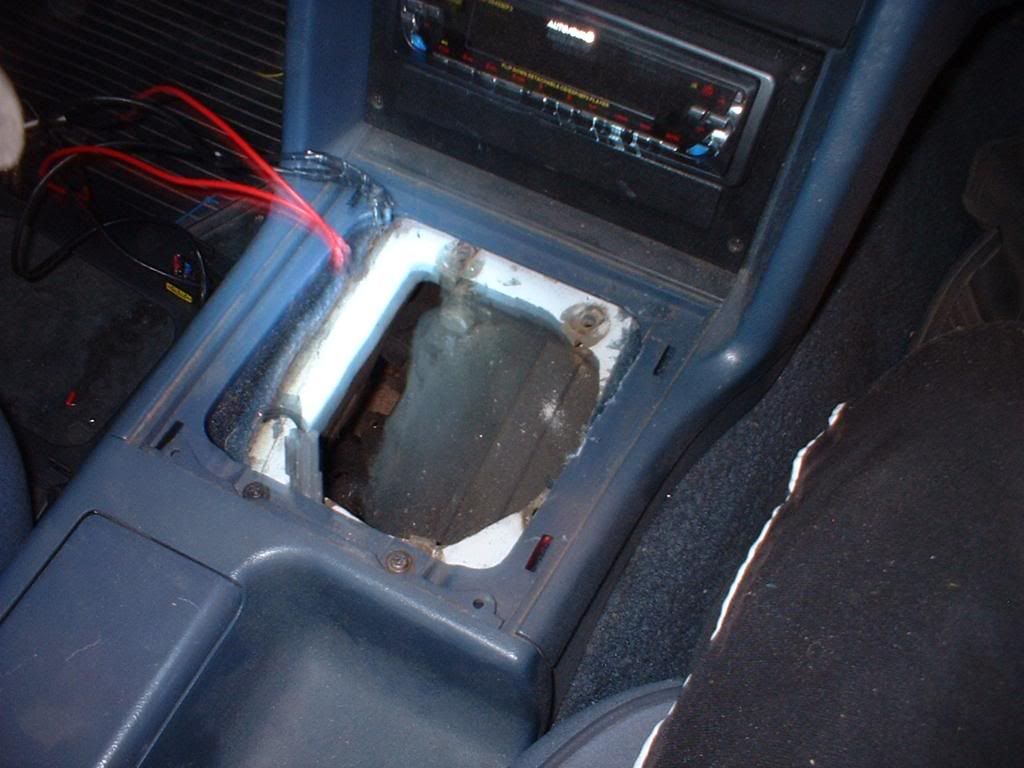
This is what your shifter should look like
Remove the robber outlining, this can be thrown away or used to throw at someone who's in your way
Remove the plastic covering around the shifter to get at the bolts
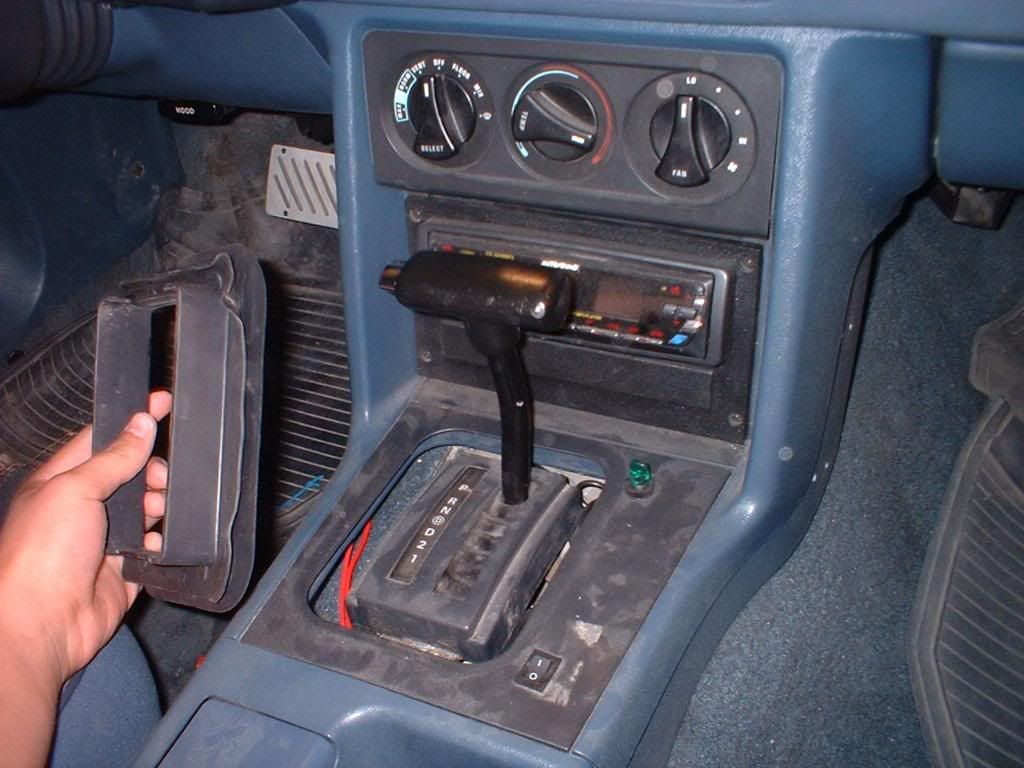
4 8mm bolts holding the gear indicator in place. I removed mine (see below) to get better access to the bolts
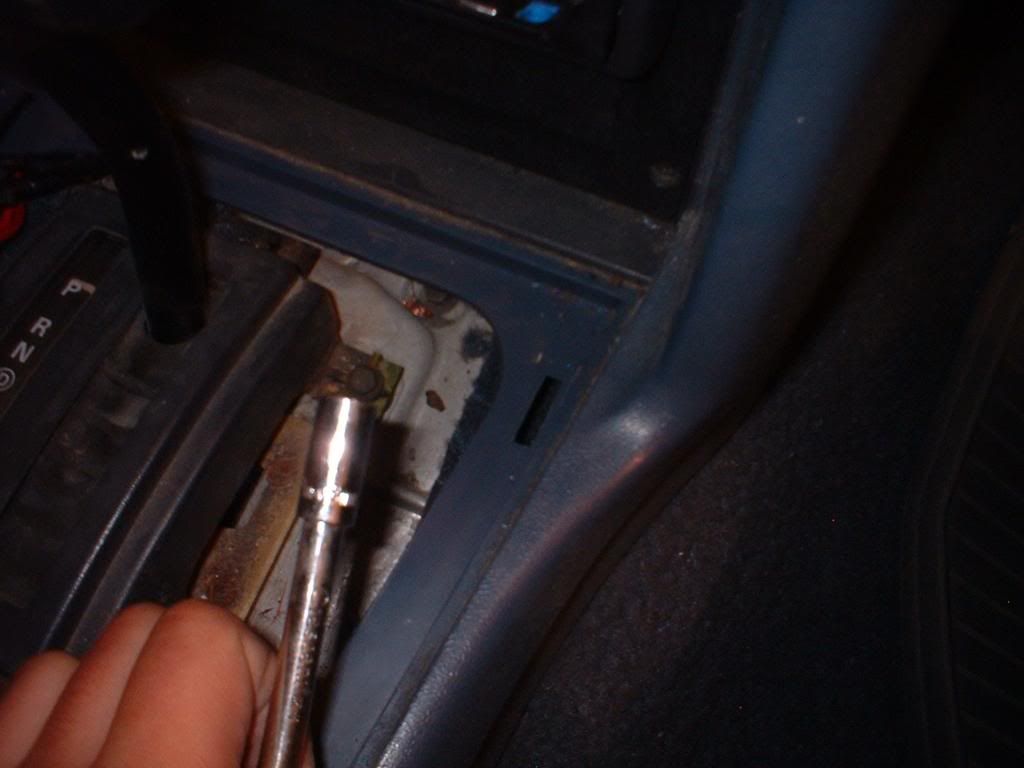
This is a connection for your light to show you your gear at night...
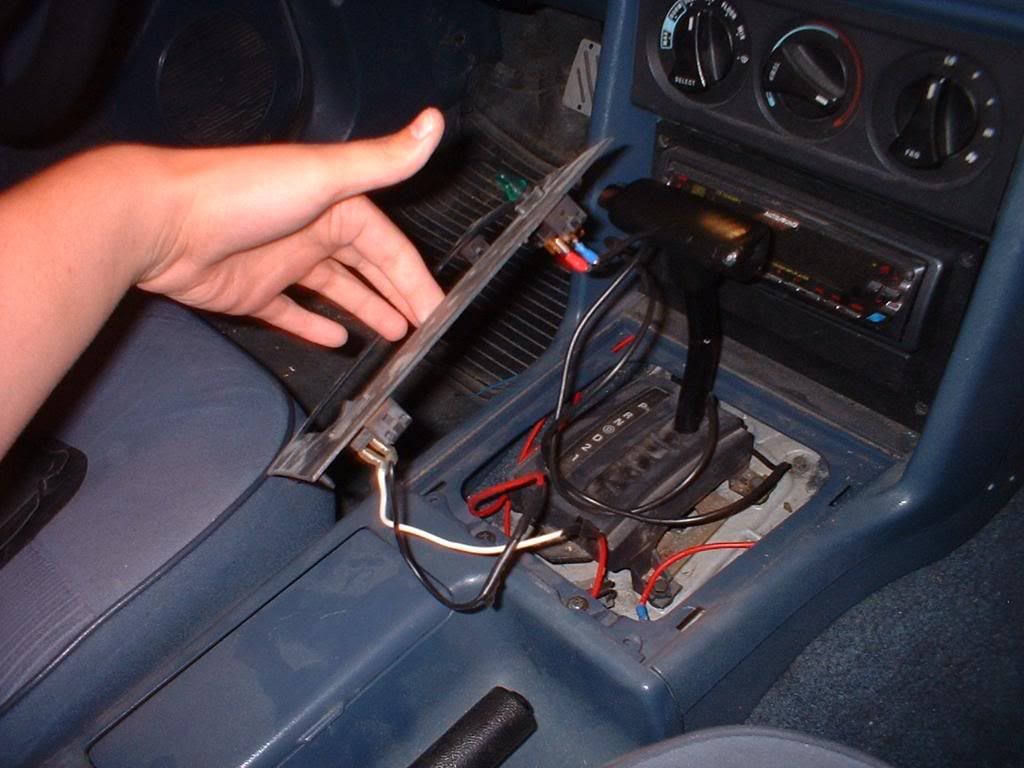
Also there are 2 bolts you'll have to remove here

And here
You'll have to use a 8mm wrench to get the bolts out from under the dash
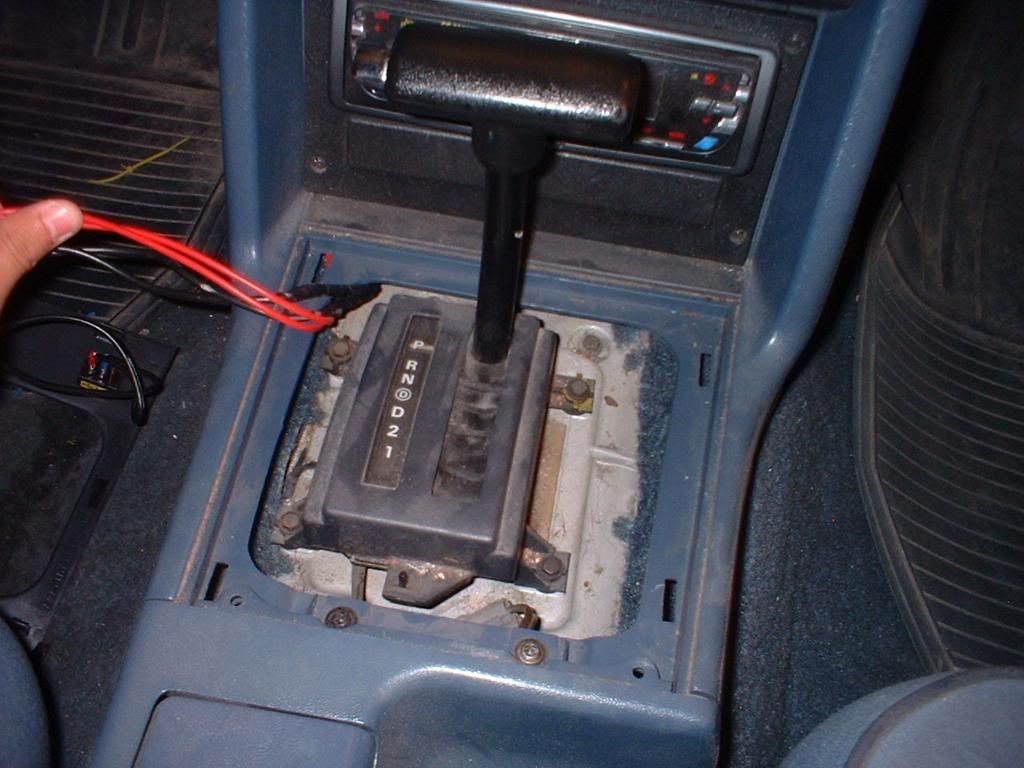
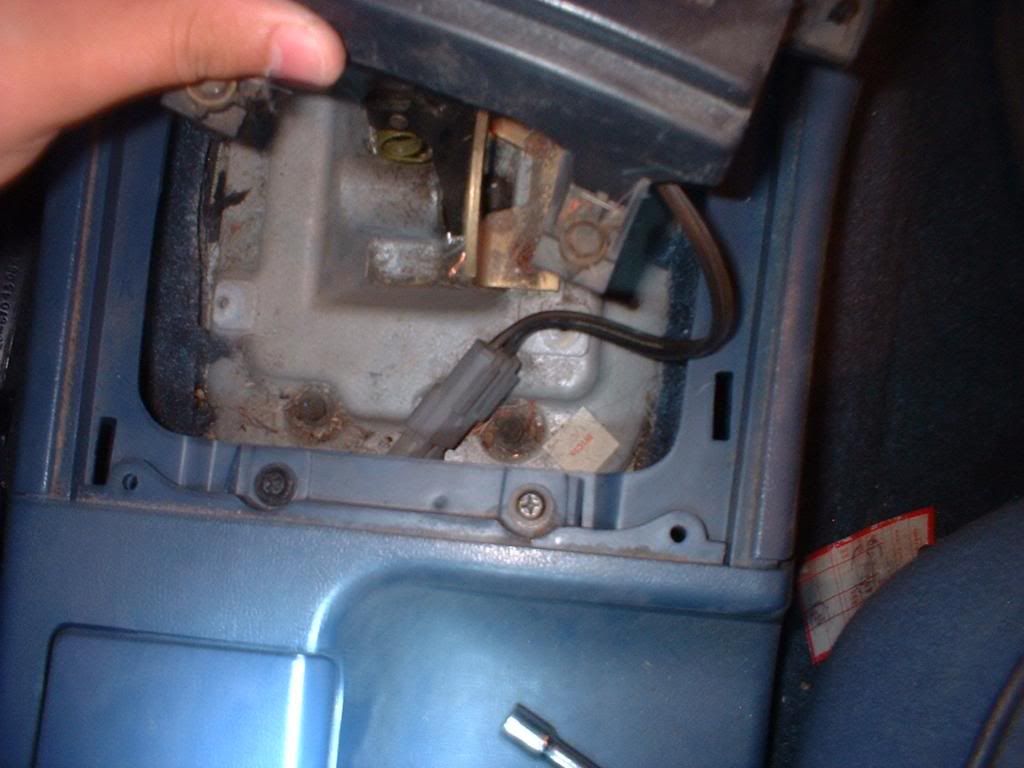
You'll then have to disconnect the shifter linkage with a 13mm wrench to remove the shifter
It'll take some time but you can get the whole shifter housing out without taking the consul out

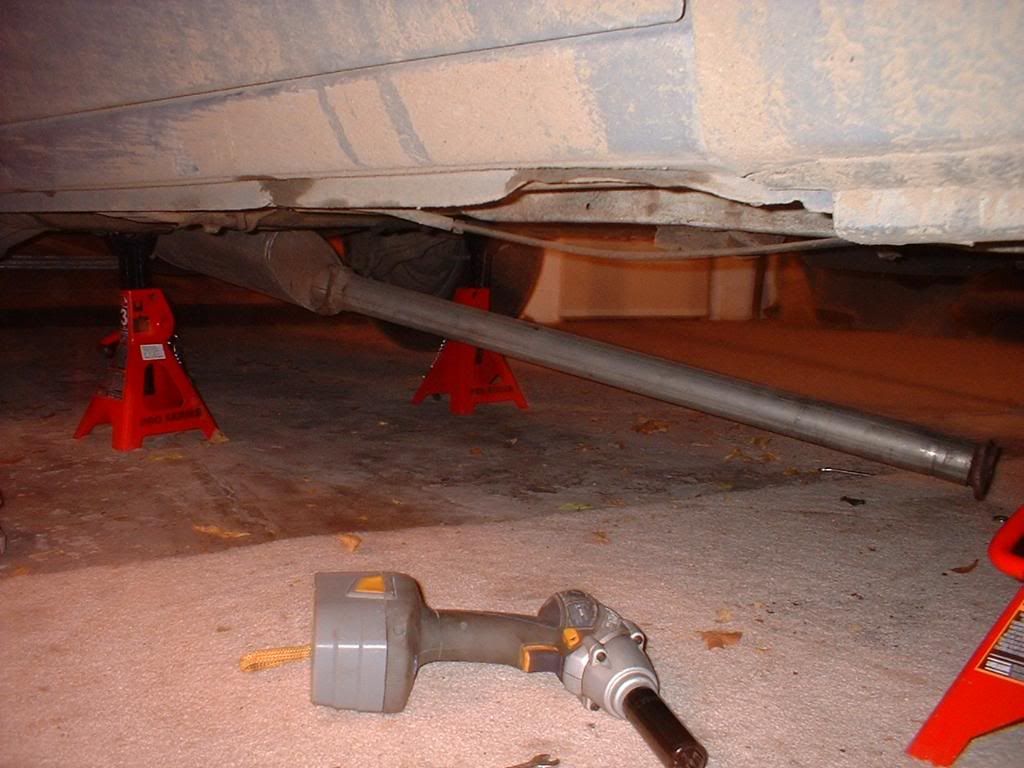
Next remove your exhaust, raise your car and support it properly
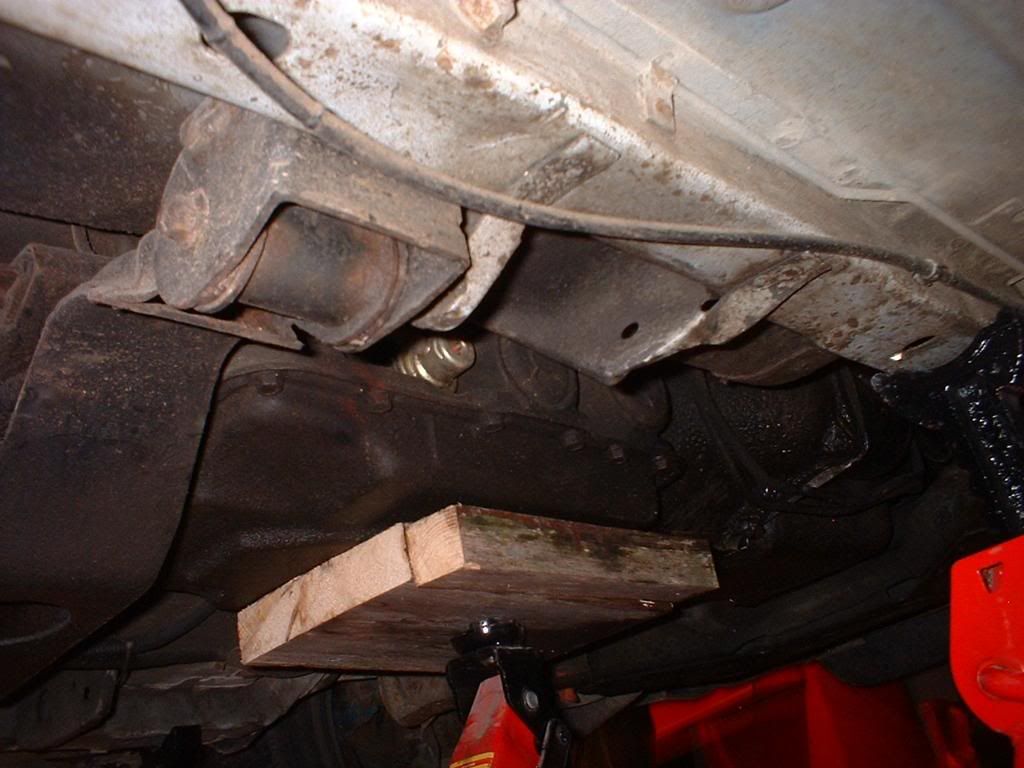
Use a block of wood between the transmission and the jack so you don't punch a hole in it causing transmission fluid to pour all over you
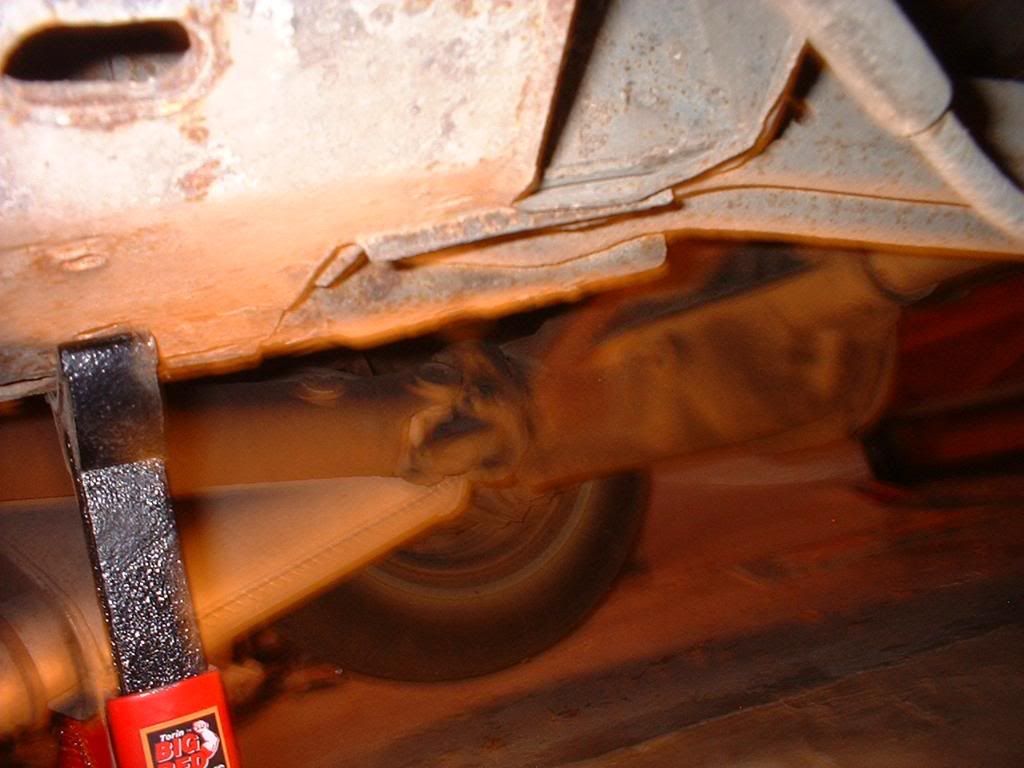
Next remove your driveshaft. If you don't not have a impact like I did, use a screw driver to keep the pinion from turning on you (id did this as well and yes it dose work
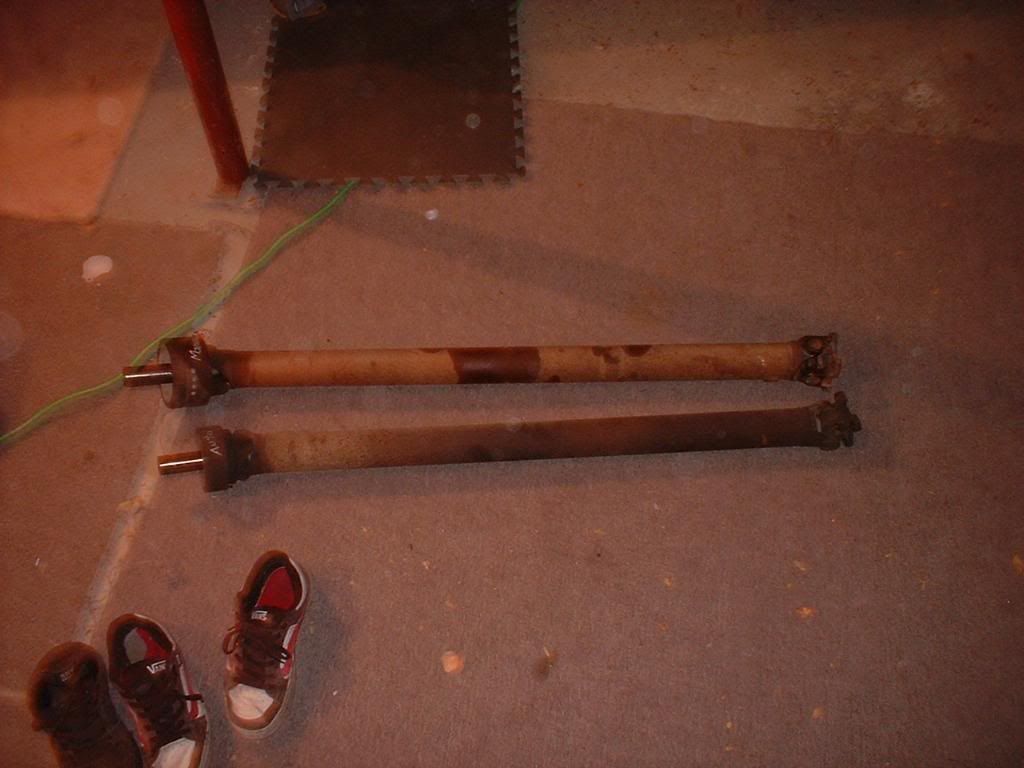
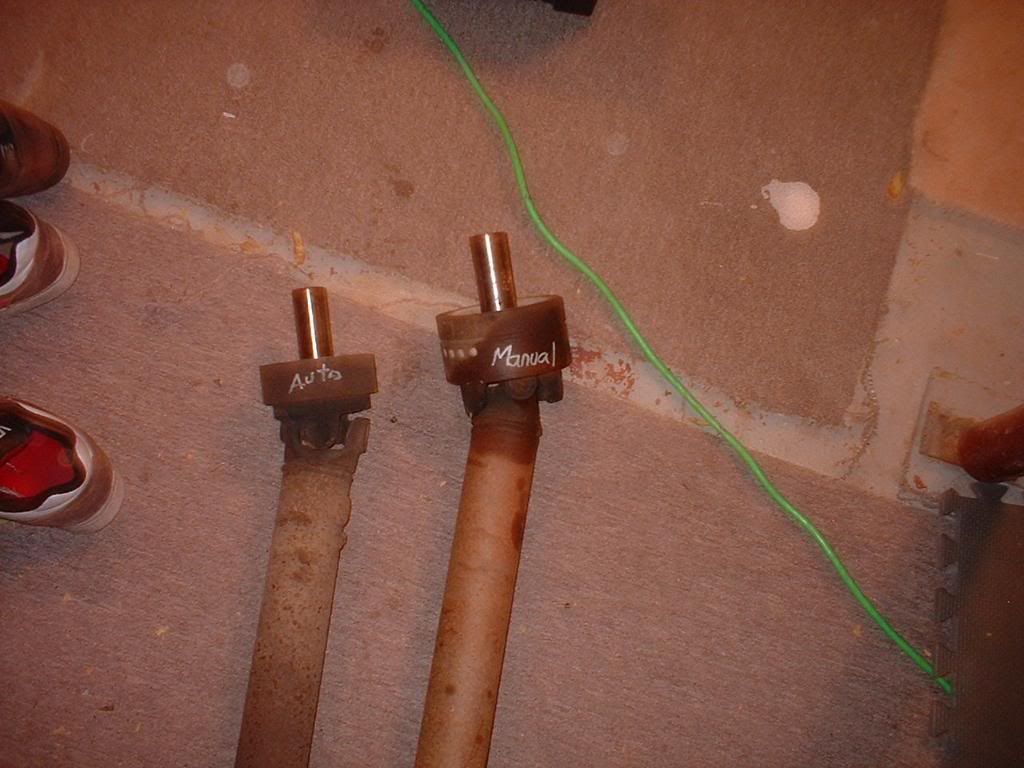
Auto and manual driveshaft comparison... Do you see why the auto one on the 2.3 wont work now??
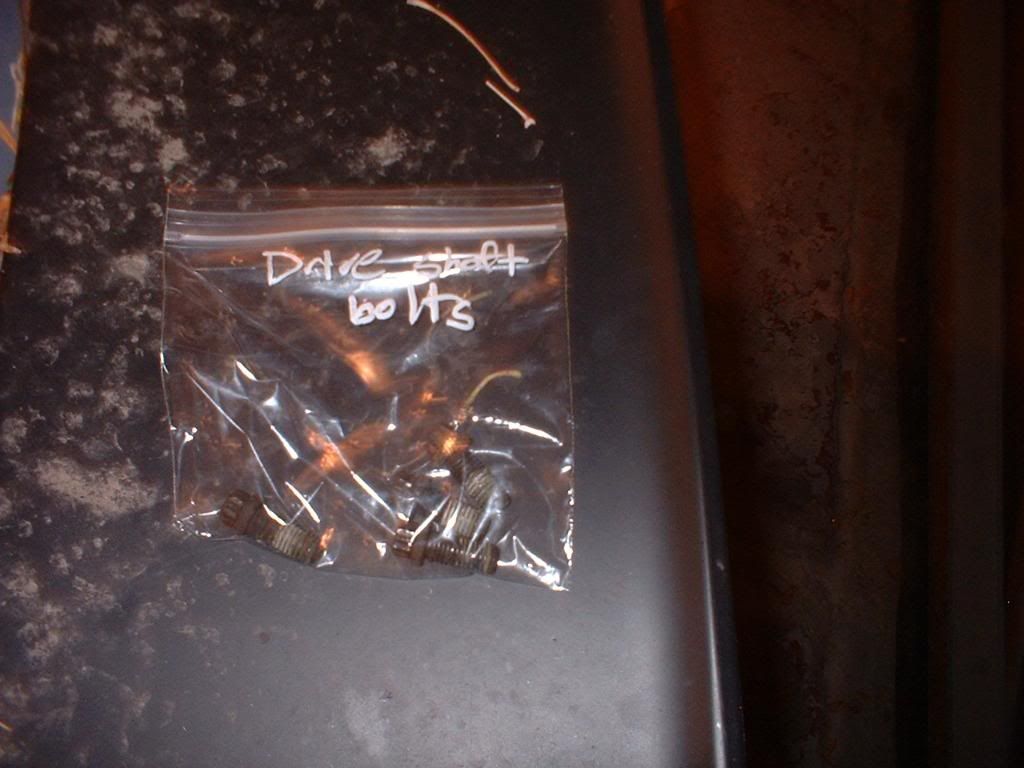
Make sure to bag and tag all your bolts or else you'll lose them (I stopped and lost 3 bolts... damnit!)
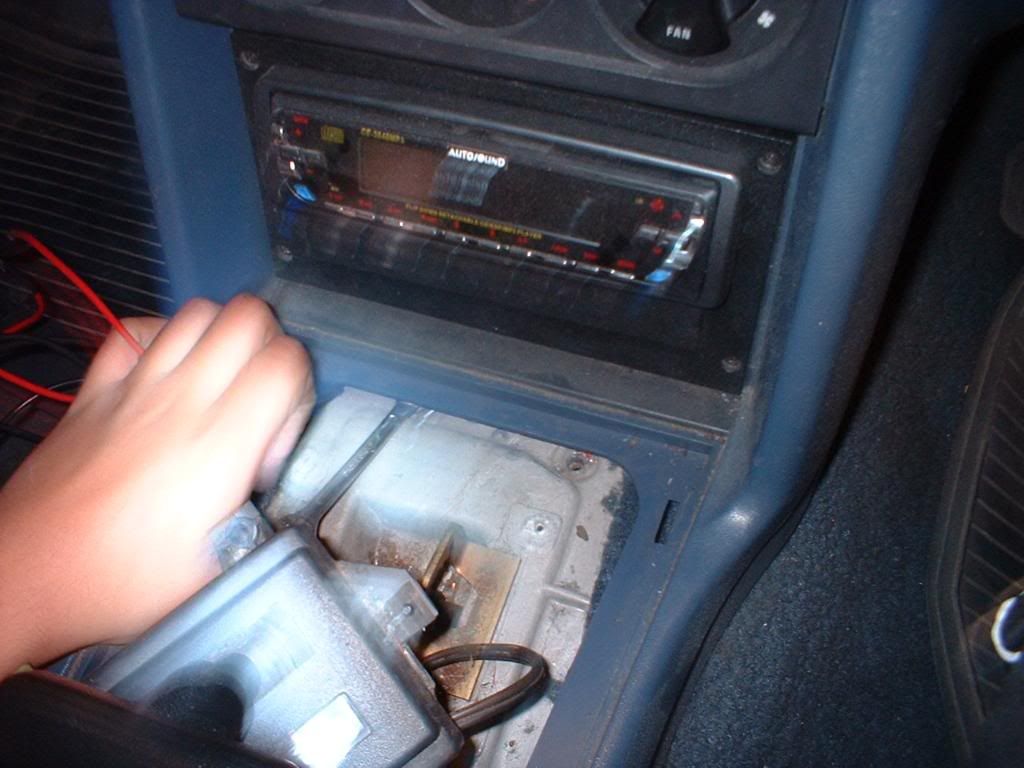
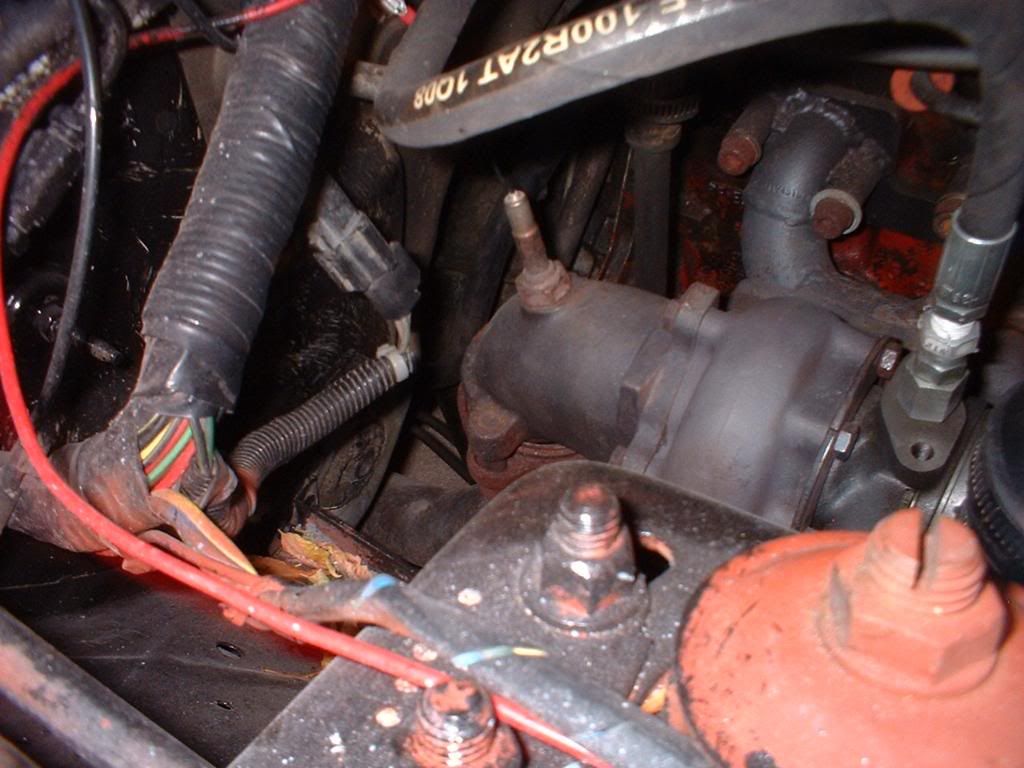
Next is the speedometer and VSS connection on the transmission
I bought my T5 from a tow yard for $250 with everything that I wanted off the car.
So here's the specs on the T5
Rebuilt less than 30,000kms ago (around 18,000 miles)
has 3.97 1st gear... other wise stock
I had the flywheel re-surfaced for $50 and trust me, you should all get it done by a shop and not by yourself... It turns out so much better.
Bought a stock replacement clutch kit for a 1988 Mustang 2.3 with an ungraded pressure plate (has 8 extra fingers compared to stock)
Also to give you some helpfull tips, a 2.3 N/A flywheel is made for a 8.5" clutch, SVO flywheel is made for a 8.75" clutch, Merkur flywheel is made for a 9" clutch and the Turbo coupes flywheel is made for 9.25" clutch. a flywheel made for a 8.5" clutch wont work with a 8.75" clutch, and a 9" wont work with a 9.25" clutch soTHEY DO NOT INTERCHANGE!
I'm running a 8.5" clutch and it's holding the power good, but if you're going to have loads of power than I would tell you to grab a TC flywheel and run a 9.25" clutch or a 5.0 clutch with some mods.
This swap will work with almost any fox body ford, you may have to change a few things but it should still follow the same principle.
Cost
Transmission $250
Fly wheel resurfacing $50
Clutch kit $200
Transmission fluid $15
This is what your shifter should look like
Remove the robber outlining, this can be thrown away or used to throw at someone who's in your way
Remove the plastic covering around the shifter to get at the bolts
4 8mm bolts holding the gear indicator in place. I removed mine (see below) to get better access to the bolts
This is a connection for your light to show you your gear at night...
Also there are 2 bolts you'll have to remove here
And here
You'll have to use a 8mm wrench to get the bolts out from under the dash
You'll then have to disconnect the shifter linkage with a 13mm wrench to remove the shifter
It'll take some time but you can get the whole shifter housing out without taking the consul out
Next remove your exhaust, raise your car and support it properly
Use a block of wood between the transmission and the jack so you don't punch a hole in it causing transmission fluid to pour all over you
Next remove your driveshaft. If you don't not have a impact like I did, use a screw driver to keep the pinion from turning on you (id did this as well and yes it dose work
Auto and manual driveshaft comparison... Do you see why the auto one on the 2.3 wont work now??
Make sure to bag and tag all your bolts or else you'll lose them (I stopped and lost 3 bolts... damnit!)
Next is the speedometer and VSS connection on the transmission
Last edited by sleeper_inc; 10-13-2008 at 06:40 PM.
 10-13-2008, 05:36 PM
#2
6th Gear Member
Thread Starter
Join Date: Sep 2006
Location: Regina Beach, Sask
Posts: 9,991
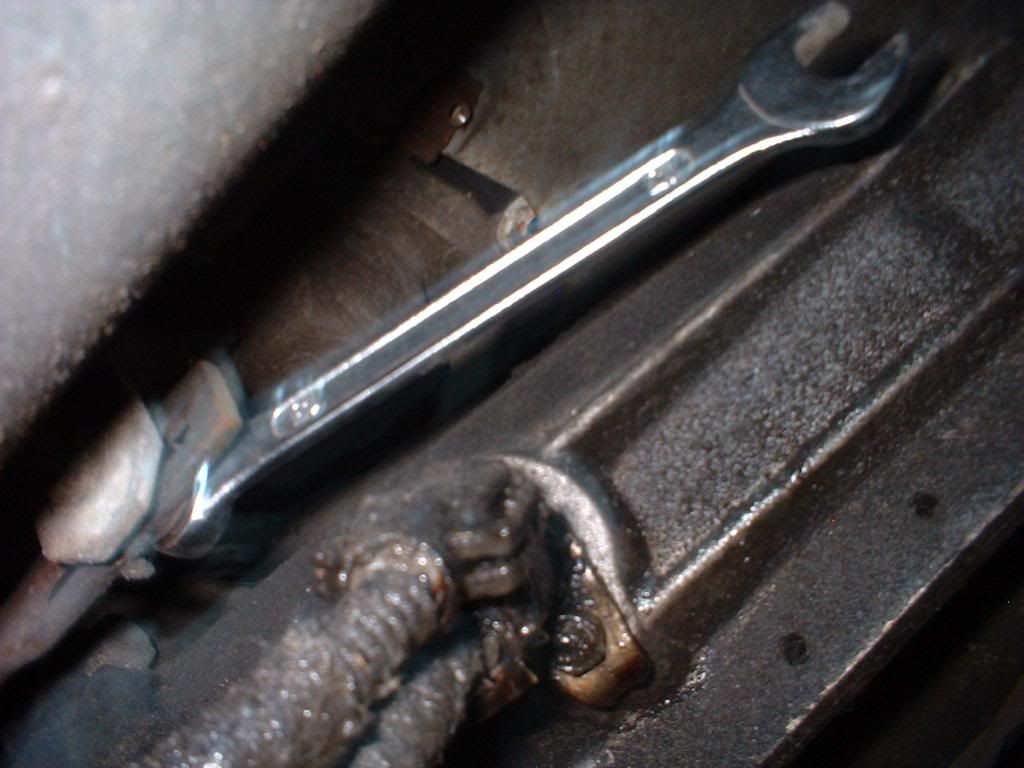
Remove the VSS/speedometer gear with a 10mm wrench
It's out!!
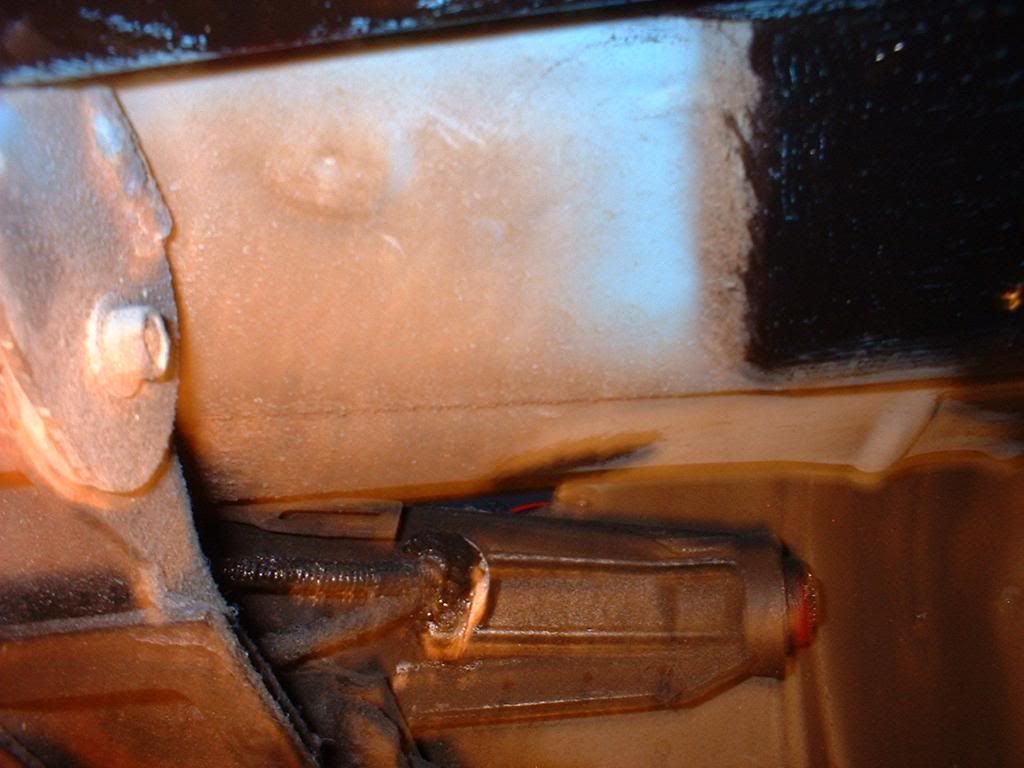
This is the CCL switch on the A4LD's. Driverside just behind the bellhousing
This is the only 17mm bolt that has to be removed, the rest that hold the transmission to the engine are 13mm
3 bots holding the starter
Disconnected the battery, and the transmission fluid lines (make sure to have a drain pan underneath (13mm or 12mm)
Cut transmission lines
Auto crossmember held in by the mounts on the frame, and the mounts are held on by one bolt and nut each
Starter removed, and you can see the converter bolts which are 15mm. Use a wrench and a long pole to keep the engine from turning over when you remove the converter bolts
Remove the kick down cable
Remove the crossmember, WHILE THE TRANSMISSION IS SUPPORTED by the jack and pull the transmission out. This transmission is full of FAILURE!
With the auto out, remove the flex plate remembering to have the engine locked down with a wrench and a pole. Use a breaker bar or a torque qrench to remove the bolts (15mm)
Now you can see if the seal is leaking, mine was (as you can see) so I replaced with the pictures below
Use a flat head and a hammer to get into the seal and pry it out
seal coming out
Old seal on the left and new on the right
seals out
Lube the new seal with motor oil so it wont tare on first fire up and installs easier
10-13-2008, 05:54 PM
#3
6th Gear Member
Thread Starter
Join Date: Sep 2006
Location: Regina Beach, Sask
Posts: 9,991
Oil seal ready to be pushed in
Using a hammer to drive the seal into place
Use thread locker on the fly wheel bolts to stop them from backing out on you... This thing weighs 20lbs after getting it resurfaced
Manual bolt on to, auto on the bottom... You see why you need to grab them before you do the swap?
Dirty fly wheel installed
Torquing the fly wheel down to 85ft lbs (I don't want this bitch to get lose!)
There is a o-ring seal you want pointing towards the transmission
Time to clean the fly wheel with acetone to get all the grease and oil off the fly wheel so the clutch wont slip
ooooooo clean fly wheel
Use a long socket and a hammer to knock the pilot bearing into position
See the alignment tool? USE IT!
Not so hard? was it
This is what you use the alignment tool for... It saves you alot of time and headache
Pressure plate installed with the bolts torqued to 40ft lbs
Lube the splines on the clutch with the supplied lube
New throw out bearing installed
Last edited by sleeper_inc; 10-13-2008 at 06:08 PM.
10-13-2008, 06:18 PM
#4
6th Gear Member
Thread Starter
Join Date: Sep 2006
Location: Regina Beach, Sask
Posts: 9,991
Shifter in it's place
Modded auto crossmember
Added 2 holes and spacers, works perfect
Modded return line, works fine
Remove all the covering to get to the bracing
Remove this so you can drop the steering column and remove the pedals easier
Remove the connections on the column to make removal easier
Remove the bolts on the column supports to remove the hood release and drop the column down
Removing the seat makes this swap a TON easier
All the connections removed and steering column ready to be removed
Remove this bolt and pull the steering column if you want it removed, I kept mine in because my bolt was seized on
These two bolts (and the ones below) hold the brake booster in place, they must be removed (15mm)
Remove
10-13-2008, 06:29 PM
#5
6th Gear Member
Thread Starter
Join Date: Sep 2006
Location: Regina Beach, Sask
Posts: 9,991
Remove
Use a long extension to get at the bolts
Bolts removed, ready for the booster to be pulled forward
Use the crow bar to forced the brake booster forward to pull the studs forward
Remove the BSS(?) and the brake light switch, they should slide right off after the lock pin is removed
More bolts on top (ohhh goody)
This big bolt is a PITA to remove
Pedals ready to be removed
Auto Vs. Manual pedals
The white outlines need to be cut out to make it fit easier
Remove the vacuum tree
Where the speedometer cable goes through the fire wall is where the clutch cable goes through.
10-13-2008, 06:36 PM
#6
6th Gear Member
Thread Starter
Join Date: Sep 2006
Location: Regina Beach, Sask
Posts: 9,991
Left - speedometer cable through the fire wall
right - clutch cable almost installed, just need to put a bolt in that hole
These cables are in the auto cars right at the back of the fire wall near the wiring harness. These are the clutch safty switch
They go here
The rest is reverse. The only thing that you would need to do differently is the mounting location of the speedometer cable and the clutch cable.
If you use the auto crossmember then you'll have to drill 2 new holes and use spacers since its going to have to be used in the manual location because it has to be moved back. The manual mounts are wider than the auto mounts, hence the spacers.
10-13-2008, 07:47 PM
#7
5th Gear Member

Join Date: Oct 2006
Location: Kentucky
Posts: 2,171
Awesome Sleeper. Didn't know differant in TC setup. If know it could have got one of these setup this weekend. I didn't need it so didn't both. Cluch pedals bellhousing everything there. Learn something everyday.
10-13-2008, 09:36 PM
#9
6th Gear Member
Thread Starter
Join Date: Sep 2006
Location: Regina Beach, Sask
Posts: 9,991
Your welcome guys, I had issues finding a good how to so I got as many pictures as I thought it would need 
Also the mustang has no grip in 1st at all... It's a whole new animal now
Also the mustang has no grip in 1st at all... It's a whole new animal now

