2011 Mustang Stereo Build
 08-18-2013, 10:31 AM
#21
1st Gear Member
Thread Starter

Join Date: Jun 2013
Location: WA
Posts: 62
Door Panel Removal
First remove the mirror trim piece
They must have really thought the door was going to fall off. It took me looking at the service manual to figure out the hidden screw underneath the window switch. I recommend removing the door lock surround it makes installing the door panel easier. Once all the screws are removed the door lifts right off.
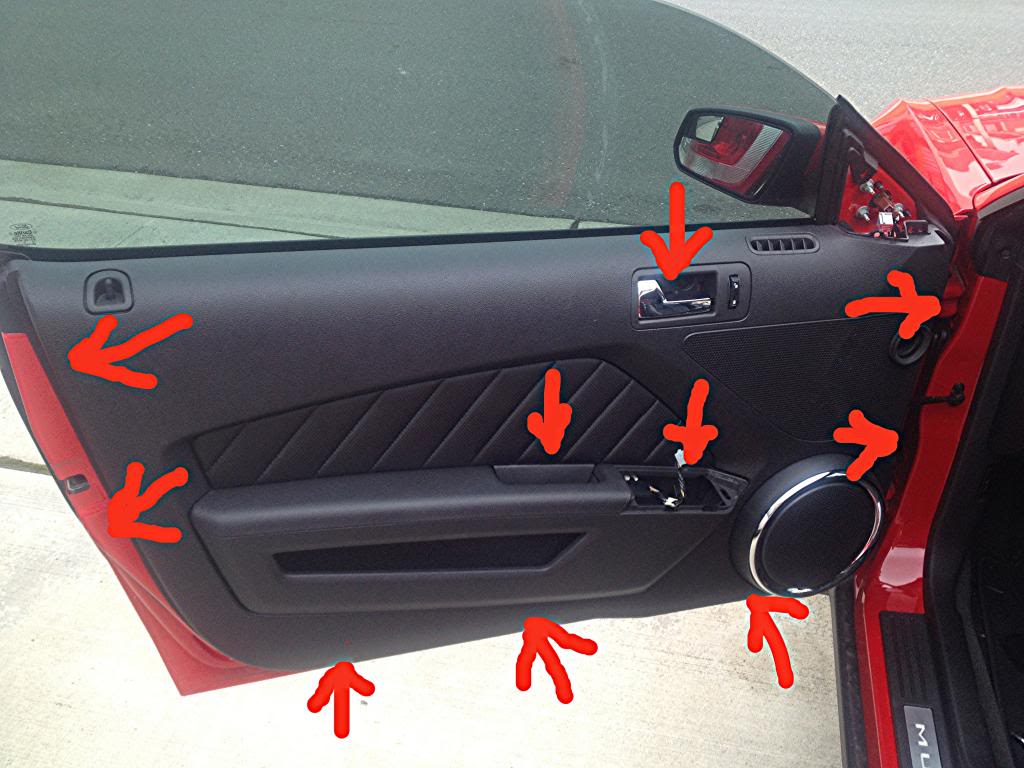
Next pop off the "sub" surround.
The door "sub" is held in by 8 screws and a bolt. The bolt eliminates the possibility of removing the sub without removing the whole panel.

First remove the mirror trim piece

They must have really thought the door was going to fall off. It took me looking at the service manual to figure out the hidden screw underneath the window switch. I recommend removing the door lock surround it makes installing the door panel easier. Once all the screws are removed the door lifts right off.

Next pop off the "sub" surround.

The door "sub" is held in by 8 screws and a bolt. The bolt eliminates the possibility of removing the sub without removing the whole panel.

Last edited by mmarker; 08-20-2013 at 08:37 PM.
 08-18-2013, 10:46 AM
#22
1st Gear Member
Thread Starter
Join Date: Jun 2013
Location: WA
Posts: 62
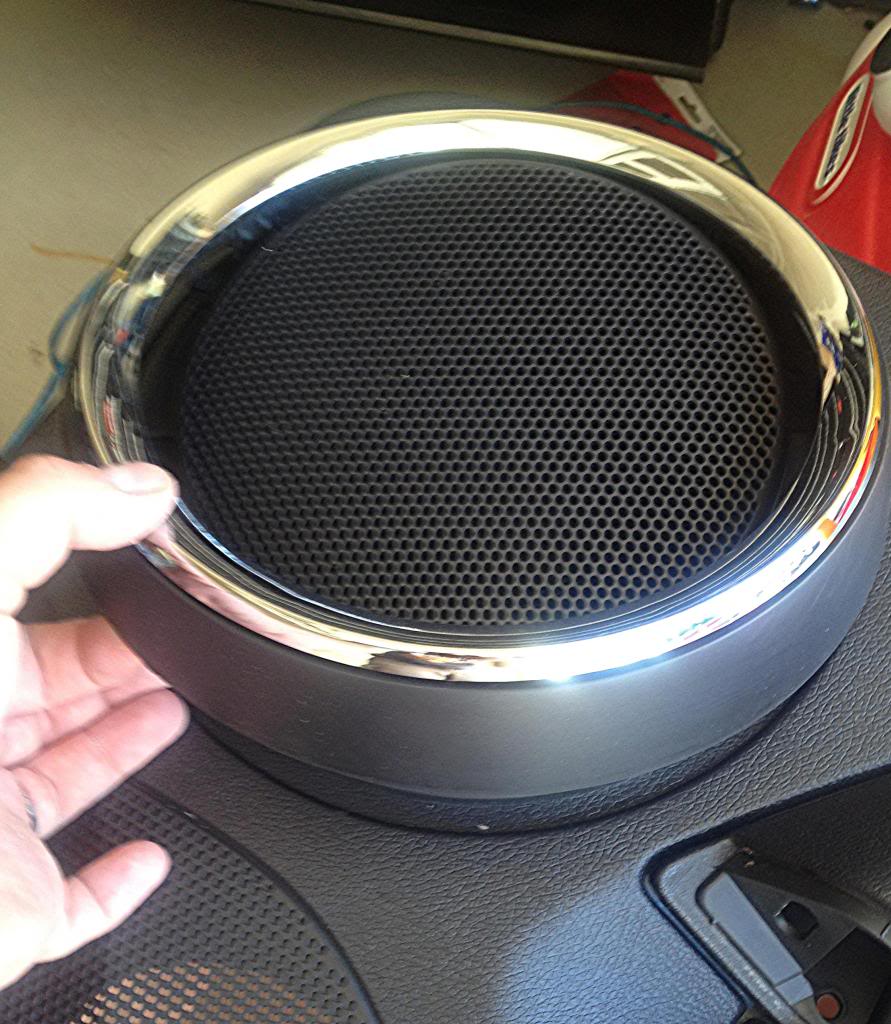
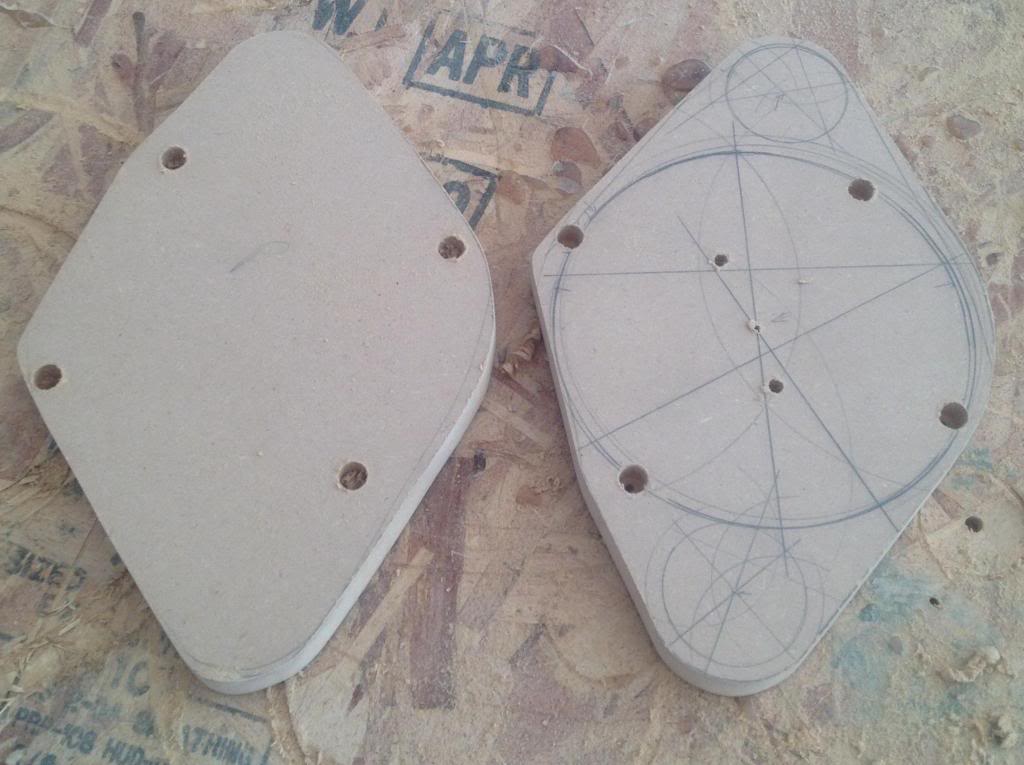
6"x8" Adapter
These adapters can be made any number of ways depending on what speakers you want to install. I installed a 6.5" and two tweeters. I will be moving one of the tweeters up to the interior mirror trim after I order the trim piece. I had to offset the 6.5" low because of the defroster tube that runs right along the speaker adapter.
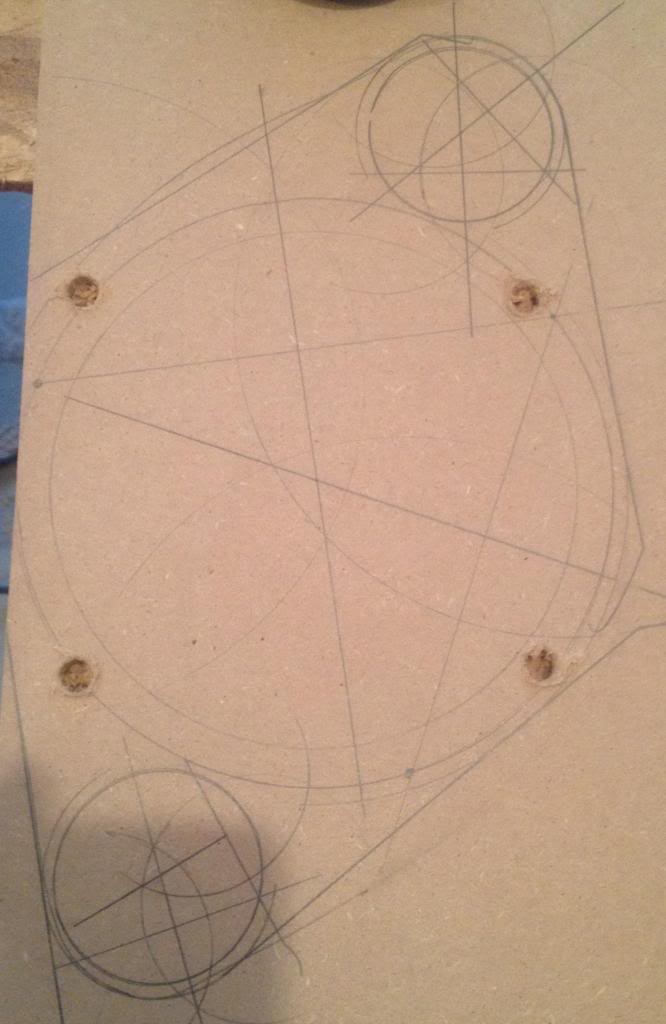
First I cutout the general shape. I used a jigsaw and a sander to smooth out the shape. I laid out the shape by transferring the stock adapter onto the wood and then traced the speaker shape over the stock adapter shape. This allowed me to draw the target shape of the speaker adapter. It is slightly larger then the stock adapter. It has to be made as tight as possible because there is not much room in these door panels. I recommend drilling out the stock-aftermarket adapter mounting holes prior to cutting out the speaker hole because it will be really difficult later. Here is a link to show how to find the center of a circle http://www.ehow.com/how_4824107_center-of-circle.html Remember the driver and passenger sides are mirrored images of one another.
These adapters can be made any number of ways depending on what speakers you want to install. I installed a 6.5" and two tweeters. I will be moving one of the tweeters up to the interior mirror trim after I order the trim piece. I had to offset the 6.5" low because of the defroster tube that runs right along the speaker adapter.
First I cutout the general shape. I used a jigsaw and a sander to smooth out the shape. I laid out the shape by transferring the stock adapter onto the wood and then traced the speaker shape over the stock adapter shape. This allowed me to draw the target shape of the speaker adapter. It is slightly larger then the stock adapter. It has to be made as tight as possible because there is not much room in these door panels. I recommend drilling out the stock-aftermarket adapter mounting holes prior to cutting out the speaker hole because it will be really difficult later. Here is a link to show how to find the center of a circle http://www.ehow.com/how_4824107_center-of-circle.html Remember the driver and passenger sides are mirrored images of one another.


Last edited by mmarker; 08-18-2013 at 10:50 AM.


 08-18-2013, 10:50 PM
#28
1st Gear Member
Thread Starter
Join Date: Jun 2013
Location: WA
Posts: 62
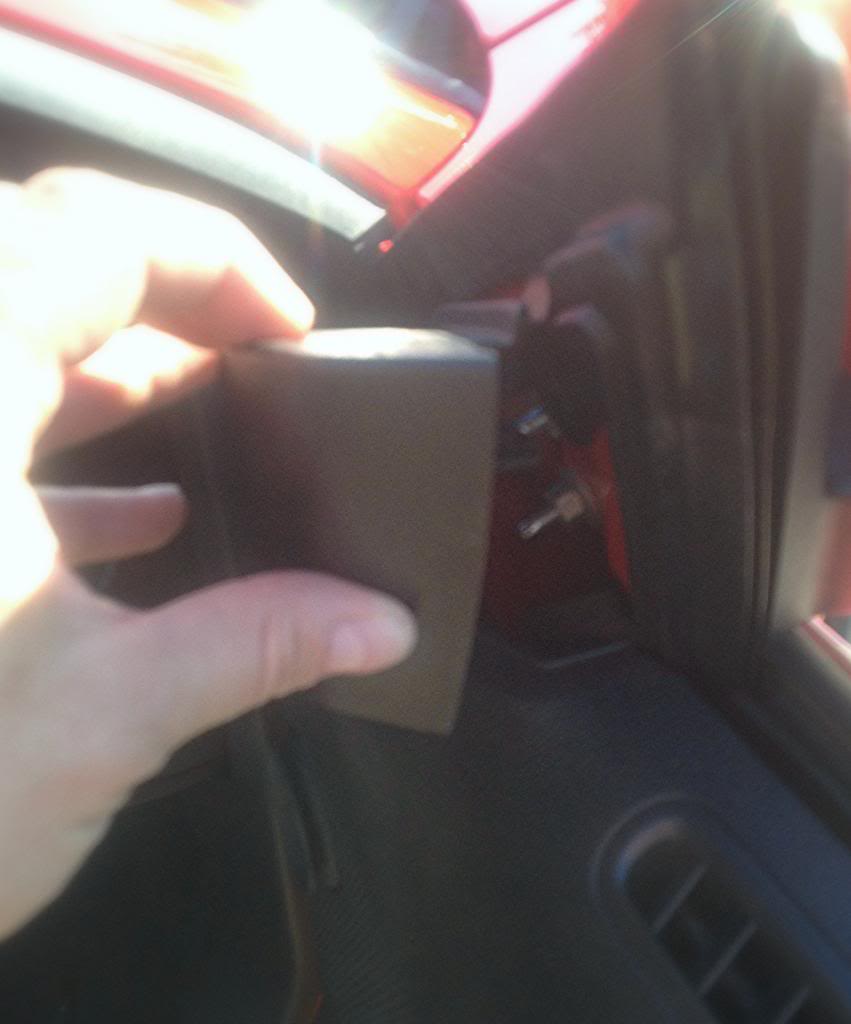
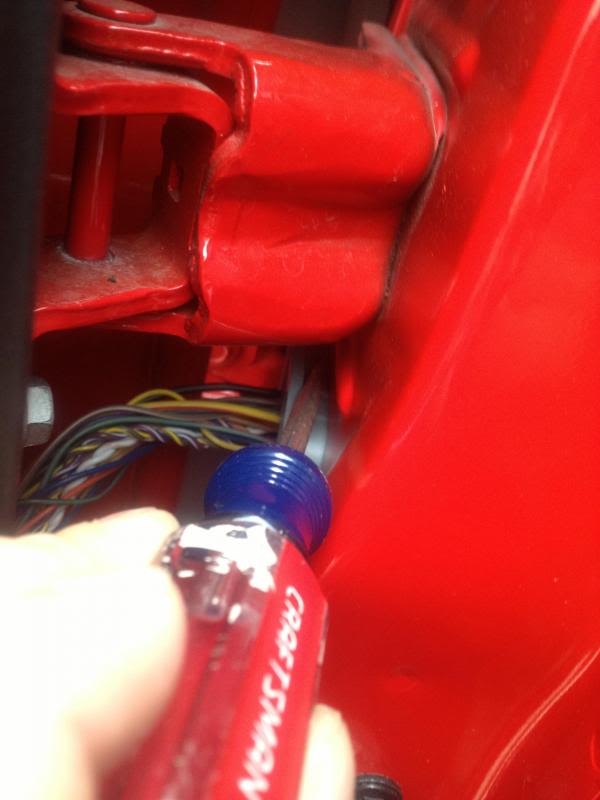
Running Wires Through The Door
This was the biggest PITA of the whole build. I shredded my knuckles running the wires through the driver side. In order to get the wires through the driver side door you must remove the lower Shaker amp that are located on the drivers side kick panels.
First pull the rubber conduit off the plastic plug
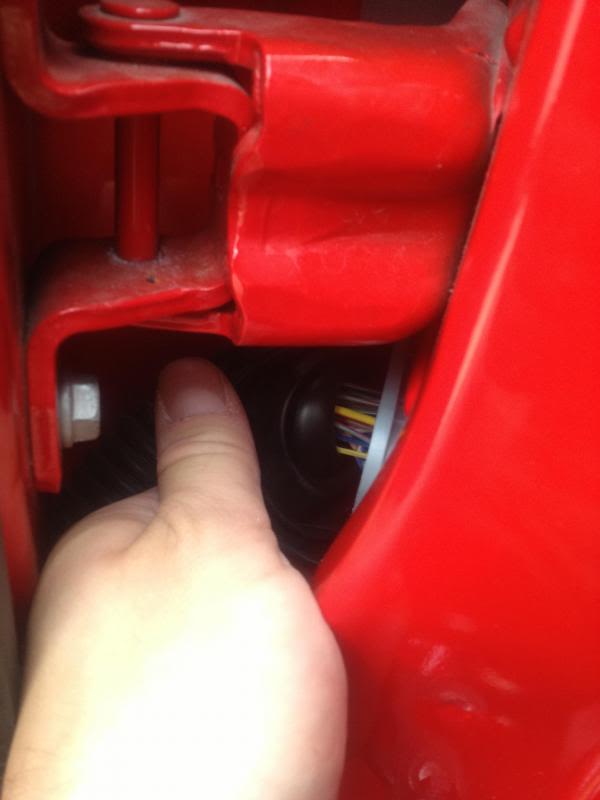
Next push the conduit into the door to keep it out of the way
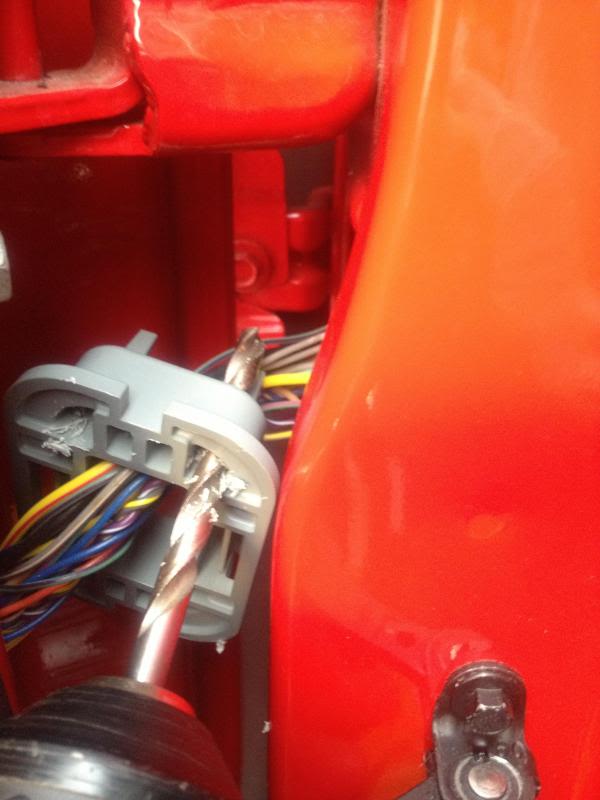
Next pop the plastic out of the frame. There is a clip in the center that you need to push down with a screw driver.
Next separate the plastic "grommet" from the "molex" adapter

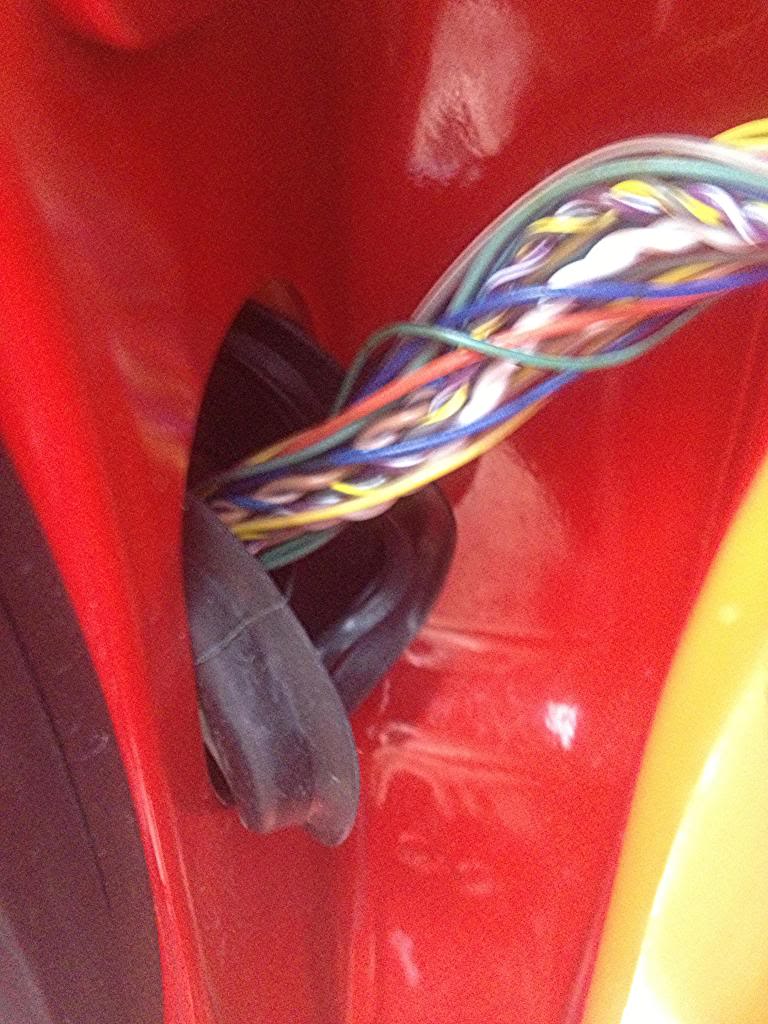
Next I drilled two holes in the recesses to run the speaker wires through
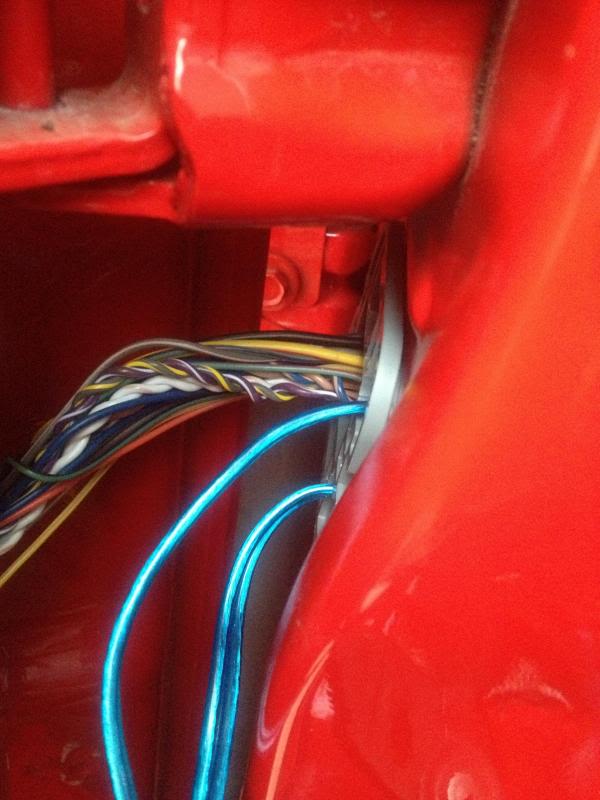
I taped a couple of zip ties together to fish the wires through it was more pliable then my fishing tape
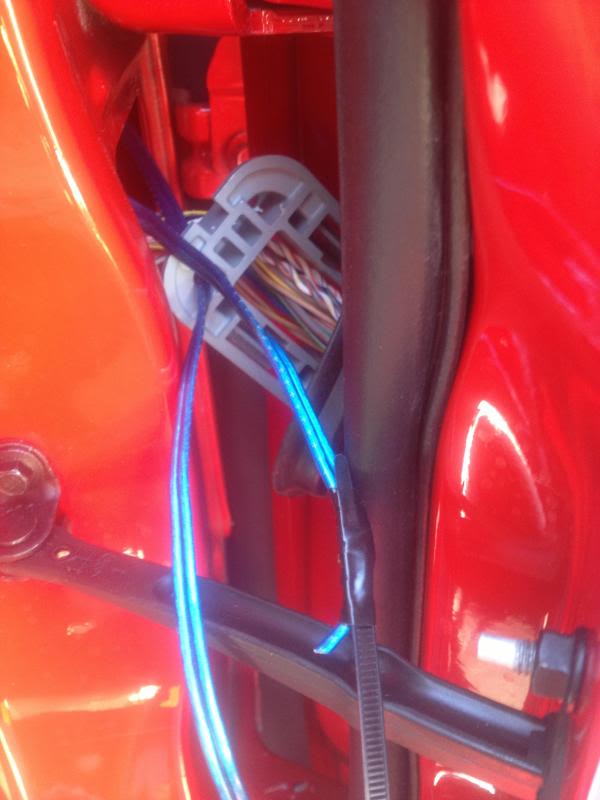
Once the wires are pulled through snap the connector back in place as you slide it back into the frame. Then pull the rubber conduit back over the wire.
This was the biggest PITA of the whole build. I shredded my knuckles running the wires through the driver side. In order to get the wires through the driver side door you must remove the lower Shaker amp that are located on the drivers side kick panels.
First pull the rubber conduit off the plastic plug

Next push the conduit into the door to keep it out of the way

Next pop the plastic out of the frame. There is a clip in the center that you need to push down with a screw driver.

Next separate the plastic "grommet" from the "molex" adapter

Next I drilled two holes in the recesses to run the speaker wires through

I taped a couple of zip ties together to fish the wires through it was more pliable then my fishing tape

Once the wires are pulled through snap the connector back in place as you slide it back into the frame. Then pull the rubber conduit back over the wire.

Last edited by mmarker; 08-20-2013 at 08:22 PM.
08-19-2013, 07:41 AM
#29
Join Date: Mar 2013
Location: Florida
Posts: 41
I guess you didn't look at my build log. I didn't remove the shaker amp, drill out the plug, or hurt my knuckles and it was done in less than 20 minutes for both sides.
Also, does the door panel block one if those tweeters on your plates? There's not much of an opening in the grill itself, or are you drilling out additional holes?
Box came out nicely, and your plates are well built. Keep up the good work.
Also, does the door panel block one if those tweeters on your plates? There's not much of an opening in the grill itself, or are you drilling out additional holes?
Box came out nicely, and your plates are well built. Keep up the good work.
08-20-2013, 06:01 PM
#30

Join Date: Aug 2013
Location: Charlotte, North Carolina
Posts: 10