2011 Mustang Stereo Build
 08-20-2013, 07:26 PM
#31
1st Gear Member
Thread Starter

Join Date: Jun 2013
Location: WA
Posts: 62
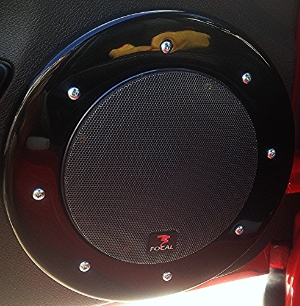
Also, does the door panel block one if those tweeters on your plates? There's not much of an opening in the grill itself, or are you drilling out additional holes?
Last edited by mmarker; 08-20-2013 at 08:18 PM.


 08-21-2013, 07:35 AM
#33
Join Date: Mar 2013
Location: Florida
Posts: 41
It's weird how that hole isn't round, right? I noticed that too during my test fit.
Also, on the speaker wire, I didn't snap the plug back into the boot connector( I guess I'll call it that). I pushed the plug back down into the body panel. The wires don't rub on the body because the part that holds the boot is still on the metal.
Keep up the good work! It's coming together nicely. I'm almost recovered enough from my knee surgery to get get out there and work on mine.
08-22-2013, 11:31 AM
#34
1st Gear Member
Thread Starter
Join Date: Jun 2013
Location: WA
Posts: 62
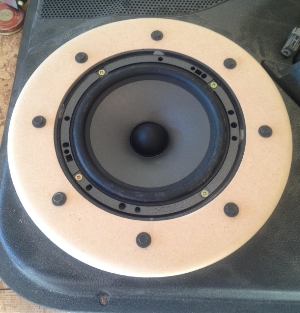
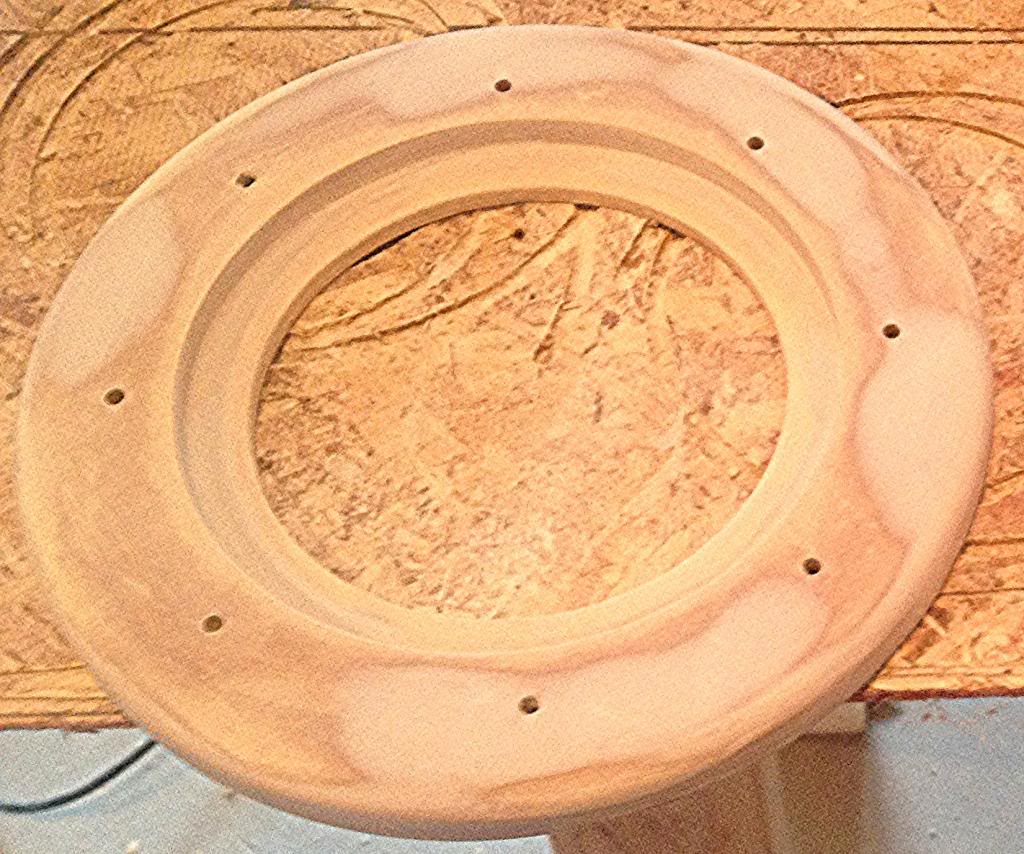
Speaker Rings
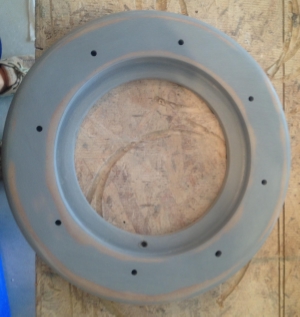
1. For these I used 3/4" MDF. First I cut out the outer diameter using my router. I also used my router and circle Jig to give it a nice rounded edge. Then I flipped the circle over and using my router and circle jig I cutout a recess to allow the door panels speaker "lip" to fit inside so the wood would fit flush against the door panel. Next i flipped the wood over and cutout the recess for the speaker so it would sit flush with the wood. Finally, I cut out the mounting hole for the speaker. (Sorry, I forgot to take pictures of this process)
2. I put a layer of bondo around the edge of the speaker ring. This seals the end grain and prevents it from sticking out when you primer the ring.
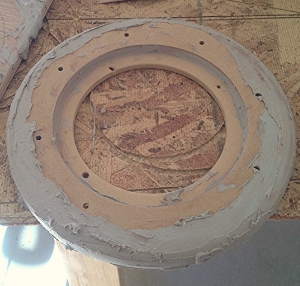
3. I sanded the wood/bondo layer down with 100/220/400 grit sandpapers.
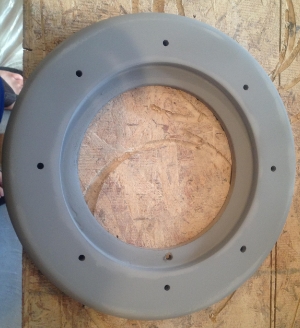
4. I applied 3 coats of Rust-oleum filler primer. It is a high buildup formula which helps fill any minor imperfections.
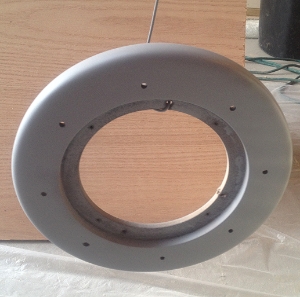
5. I sanded down the primer using 220/400/600 grit sandpapers. Then applied 3 more coats of the primer.
6. I applied a thin coat of Rust-Oleum Arcylic Enamel Black Semi-Gloss. The black made it easier to see all the imperfections in the wood. I sanded this down using 400/600/1000 grit sandpapers. If there was any flaws in the wood. I sanded the general area down till all the black was gone to ensure all the "hills/valleys" were gone.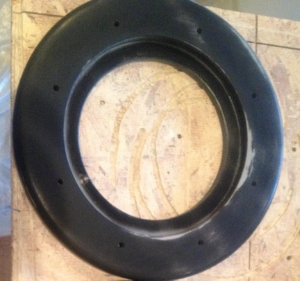
7. I applied several lite coats of the black. I sanded this down with 1000 grit.
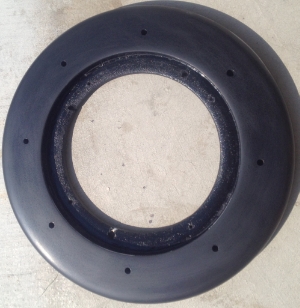
8. I applied several more lite coats of the black. Then wet sanded this with 1000/1500 grit. You want to sand this down with the 1500 grit until there is no glossy areas left that will ensure you do not get the "orange peel" effect.
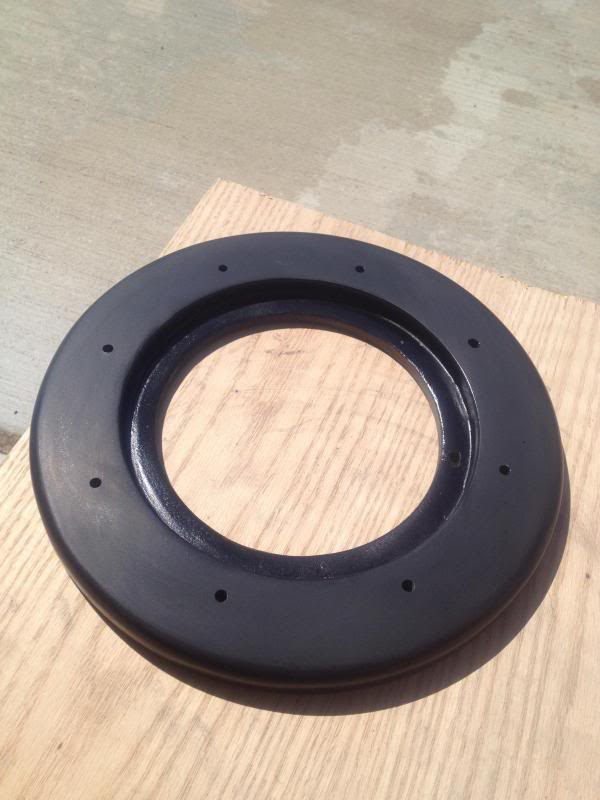
9. I next applied several coats of Rust-Oleum clear. And wet sanded it down with the 1500 grit. Same here you do not want any glossy areas left. I then used Maguiers Ultimate Rubbing Compound and Scratch X to get all the light scratches from the 1500 grit. I then buffed it out with three light coats of Maguiers Professional Wax. The picture here is not very good I will be taking better pictures once my car gets out of the body shop. It was hit in the parking lot the other day. I used #10 Stainless Steel Machine Screws to mount the rings. If people are interested in these rings, I may start building and selling them.
1. For these I used 3/4" MDF. First I cut out the outer diameter using my router. I also used my router and circle Jig to give it a nice rounded edge. Then I flipped the circle over and using my router and circle jig I cutout a recess to allow the door panels speaker "lip" to fit inside so the wood would fit flush against the door panel. Next i flipped the wood over and cutout the recess for the speaker so it would sit flush with the wood. Finally, I cut out the mounting hole for the speaker. (Sorry, I forgot to take pictures of this process)

2. I put a layer of bondo around the edge of the speaker ring. This seals the end grain and prevents it from sticking out when you primer the ring.

3. I sanded the wood/bondo layer down with 100/220/400 grit sandpapers.

4. I applied 3 coats of Rust-oleum filler primer. It is a high buildup formula which helps fill any minor imperfections.

5. I sanded down the primer using 220/400/600 grit sandpapers. Then applied 3 more coats of the primer.


6. I applied a thin coat of Rust-Oleum Arcylic Enamel Black Semi-Gloss. The black made it easier to see all the imperfections in the wood. I sanded this down using 400/600/1000 grit sandpapers. If there was any flaws in the wood. I sanded the general area down till all the black was gone to ensure all the "hills/valleys" were gone.

7. I applied several lite coats of the black. I sanded this down with 1000 grit.

8. I applied several more lite coats of the black. Then wet sanded this with 1000/1500 grit. You want to sand this down with the 1500 grit until there is no glossy areas left that will ensure you do not get the "orange peel" effect.

9. I next applied several coats of Rust-Oleum clear. And wet sanded it down with the 1500 grit. Same here you do not want any glossy areas left. I then used Maguiers Ultimate Rubbing Compound and Scratch X to get all the light scratches from the 1500 grit. I then buffed it out with three light coats of Maguiers Professional Wax. The picture here is not very good I will be taking better pictures once my car gets out of the body shop. It was hit in the parking lot the other day. I used #10 Stainless Steel Machine Screws to mount the rings. If people are interested in these rings, I may start building and selling them.

Last edited by mmarker; 08-22-2013 at 11:34 AM.


Thread
Thread Starter
Forum
Replies
Last Post