Back with a "New" project, 1966 Coupe
 07-18-2015, 08:36 AM
#41
2nd Gear Member
Thread Starter
Join Date: Nov 2008
Location: Ca
Posts: 245
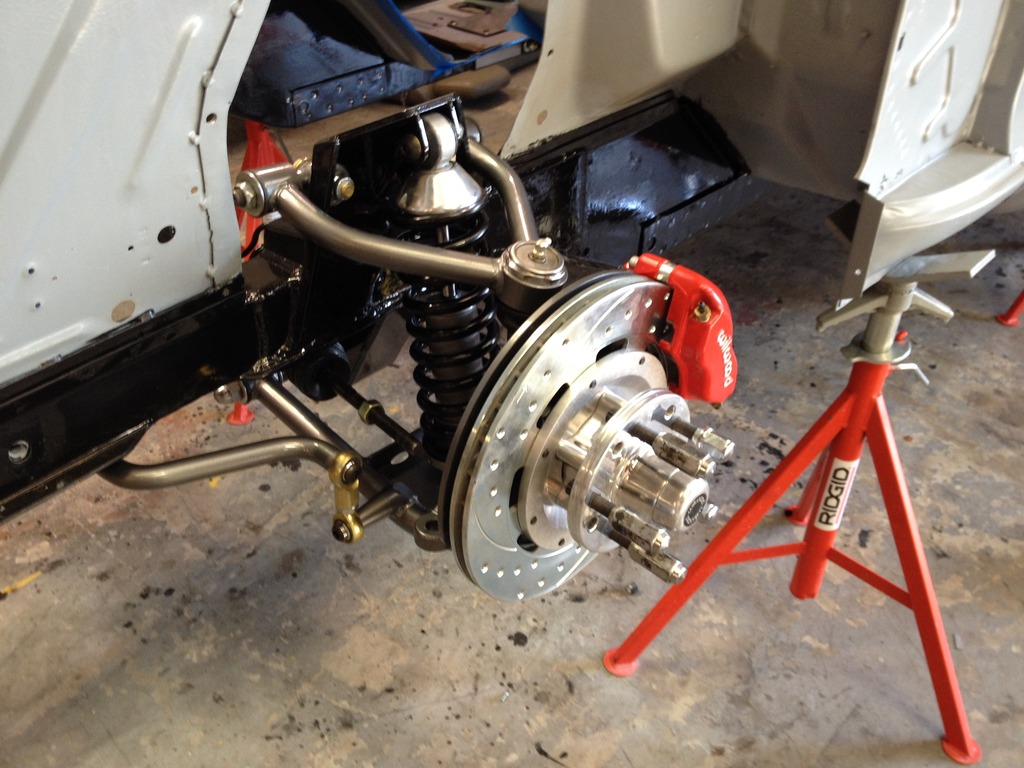
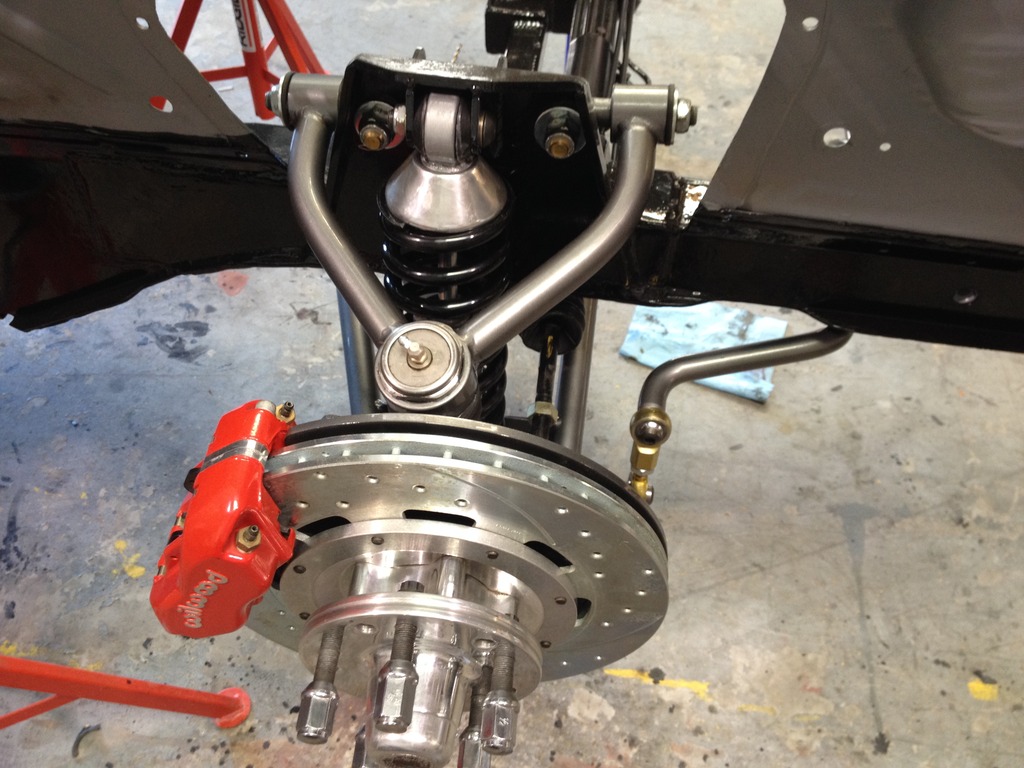
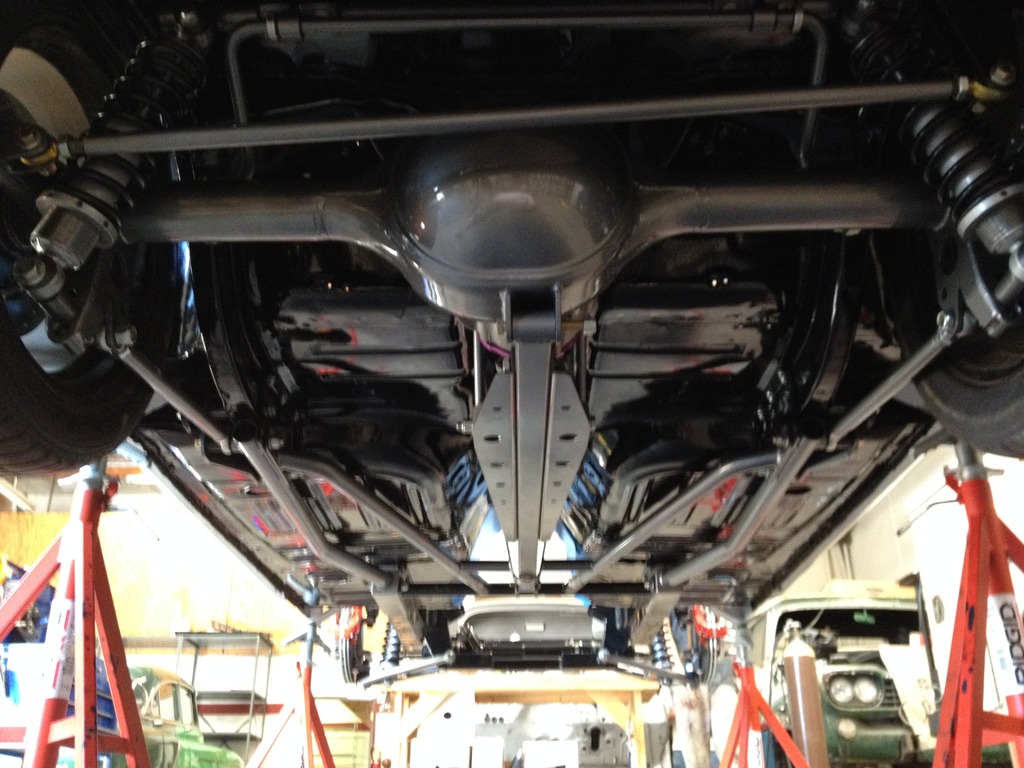
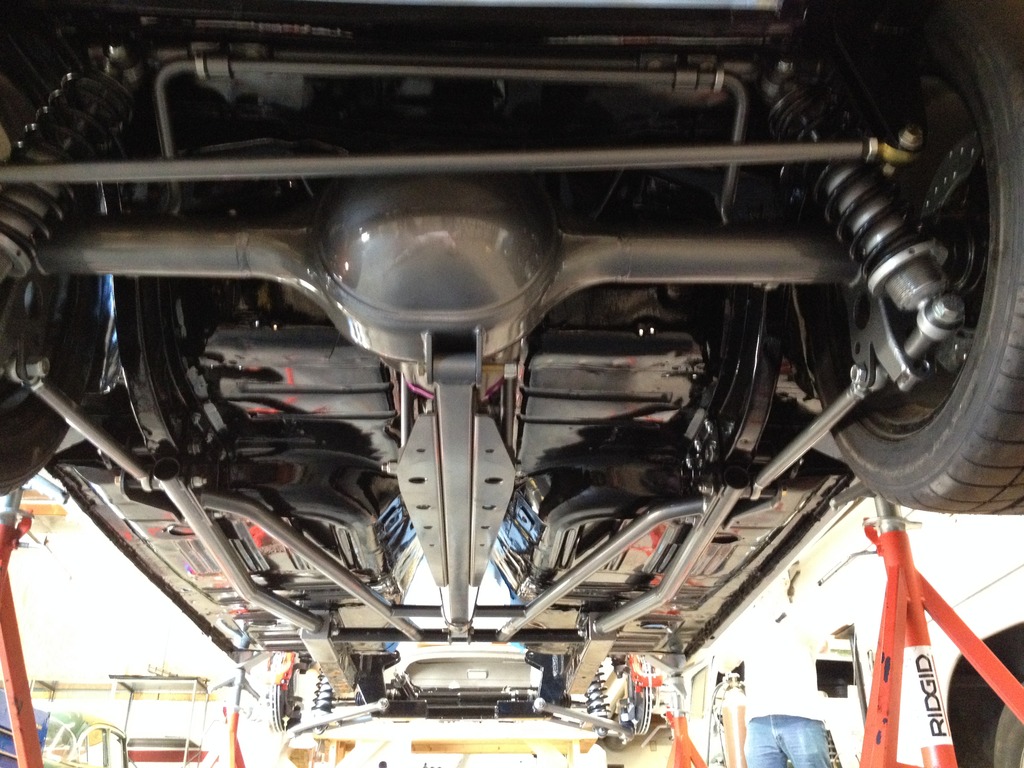
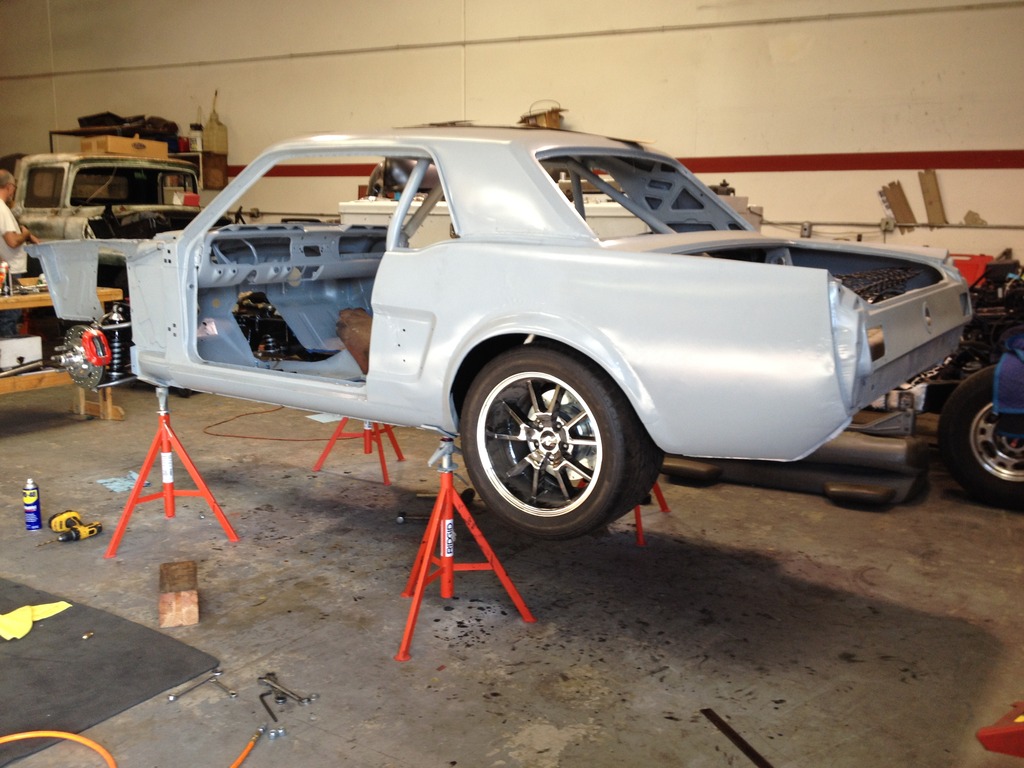
Tried to get all the suspension bolted on to see how much the tubs helped, also need to finish mocking up the trans mount which is the only piece left to be powder coated after the trans tab is welded on. Next will be the motor back in again and start the trans tunnel for the monster 6 speed, mock up the brake pedal with that monster wide Coyote (any tips welcome LOL) and also look into an electric brake booster and so on and so on....stay tuned for progress updates. Here are a few pics for your enjoyment
FRONT SUSP
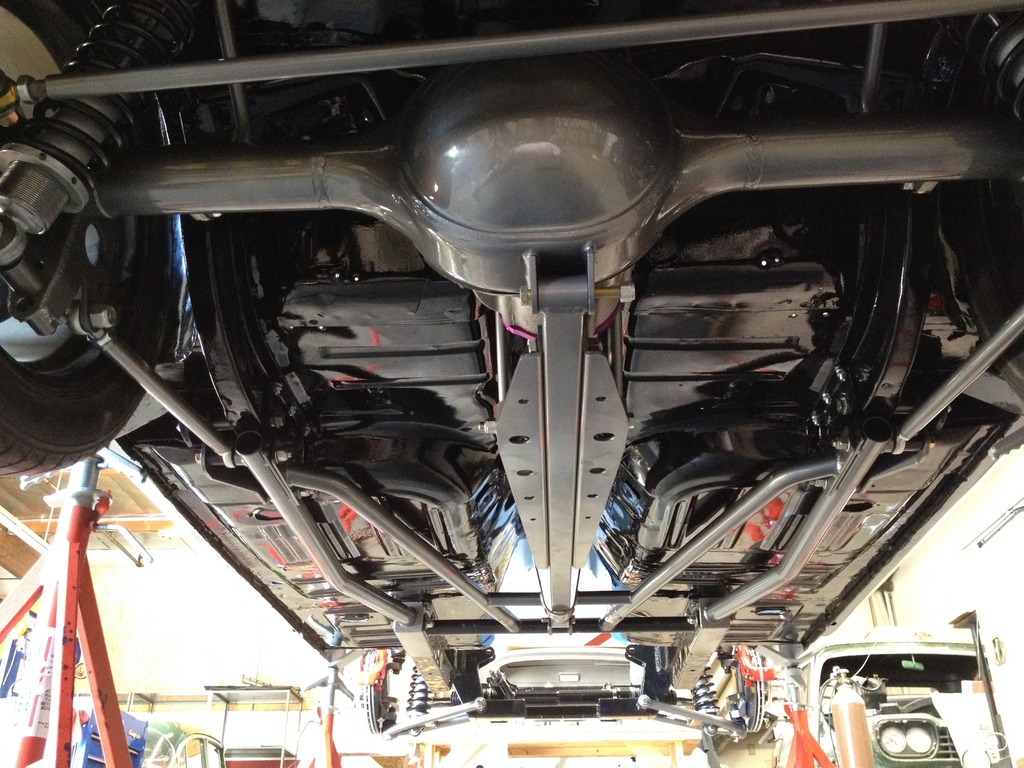
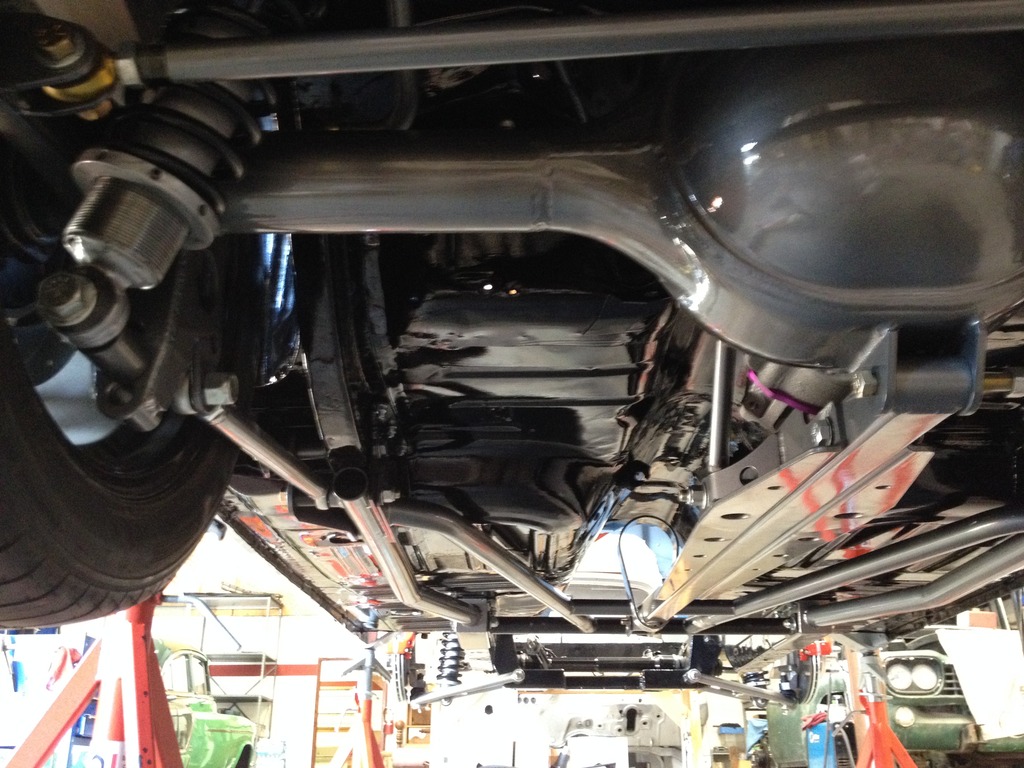
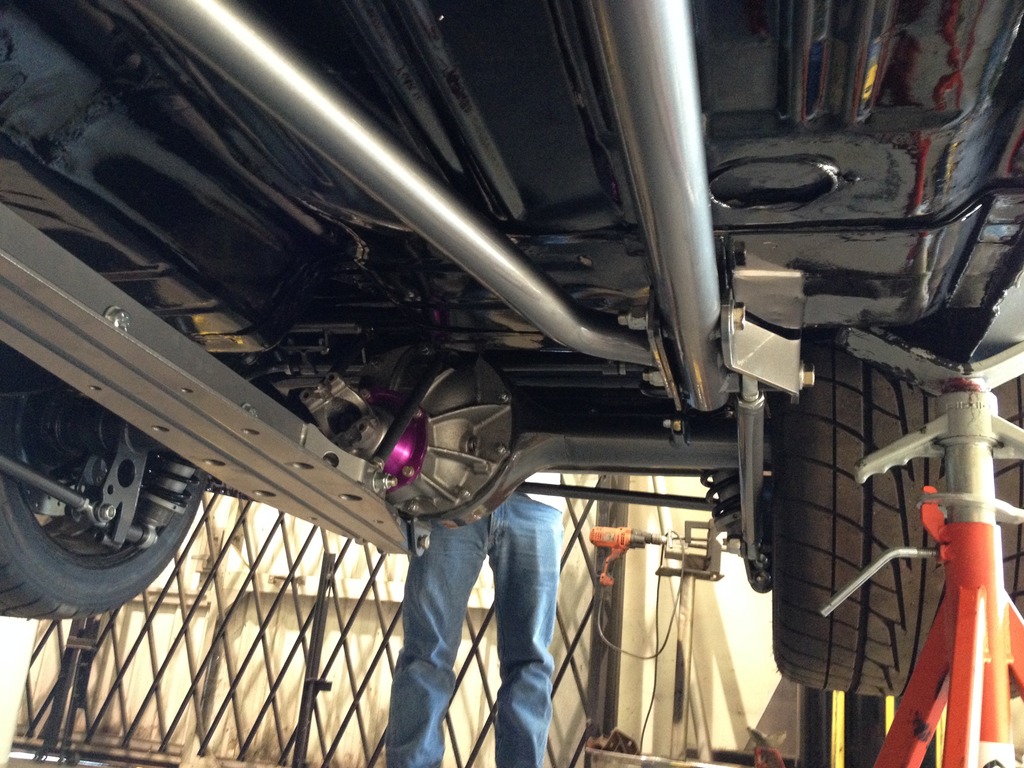
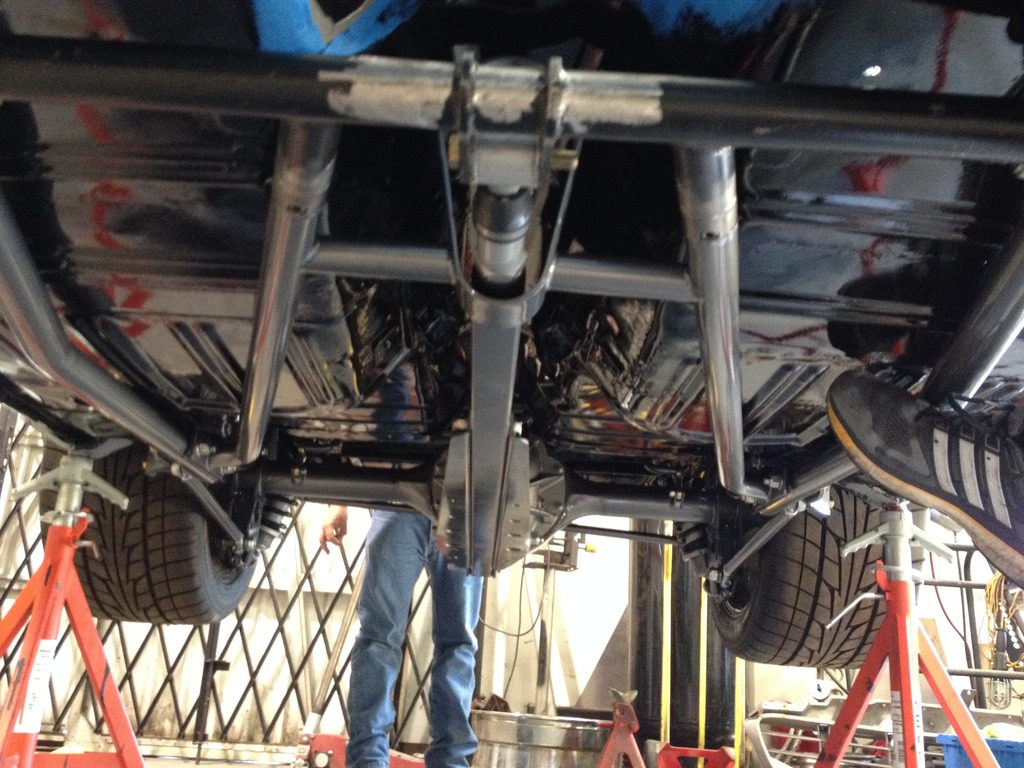
Rear torque arm
See you soon!!
FRONT SUSP


Rear torque arm


See you soon!!
 08-14-2015, 10:50 PM
#42
2nd Gear Member
Thread Starter
Join Date: Nov 2008
Location: Ca
Posts: 245
Well after the last post we have changed a few things, done and redone a few things, order a few parts, sent a few parts back LOL and so on and so on..............as it goes with a custom project. Yes there are a few other projects out there like this one we have take a few liberties and taken a little form other projects as we have made our own way on several projects, I say we as Mike from "Brand New Classics" has been with me on this thing from the beginning, he has stuck with me even as he moved a bigger shop and taken on several new MAJOR projects!!! anyways here are a few steps we have taken as we start to work on the top side of the car....................
AS you know if you are following the thread we are stuffing a six speed into the mustang, so the trans tunnel will be modified and we are wanting to use the factory console!! Also ordered a factory radiator condenser and fan set up for a 2014 5.0 coyote mustang. The condenser will not work for our application, so we ordered one from vintage air that will work nicely, also gonna use the Gen 4 system and already have the vintage air pulley system installed on the coyote in order to run non-electric steering and adds the air compressor (see pics)
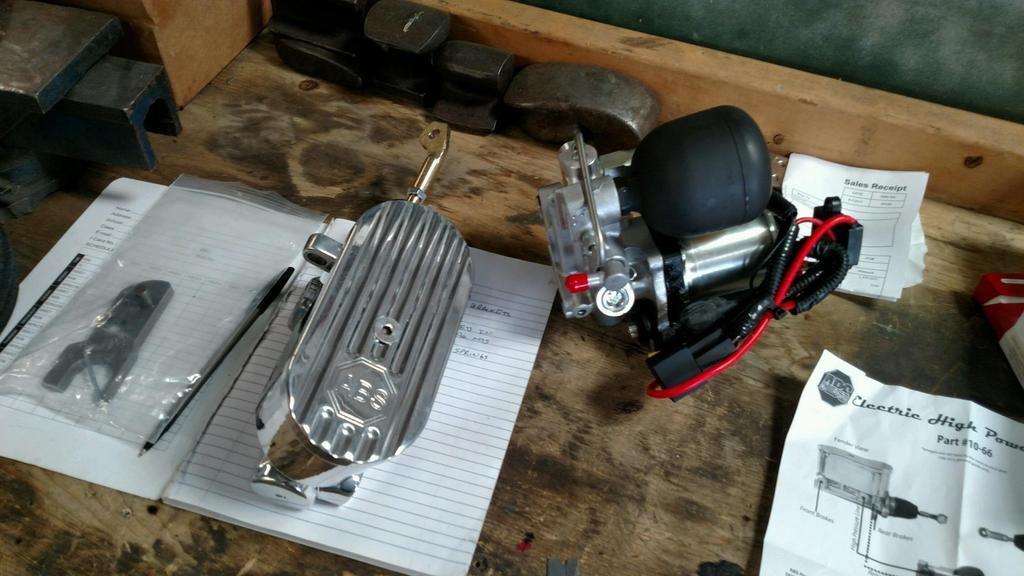
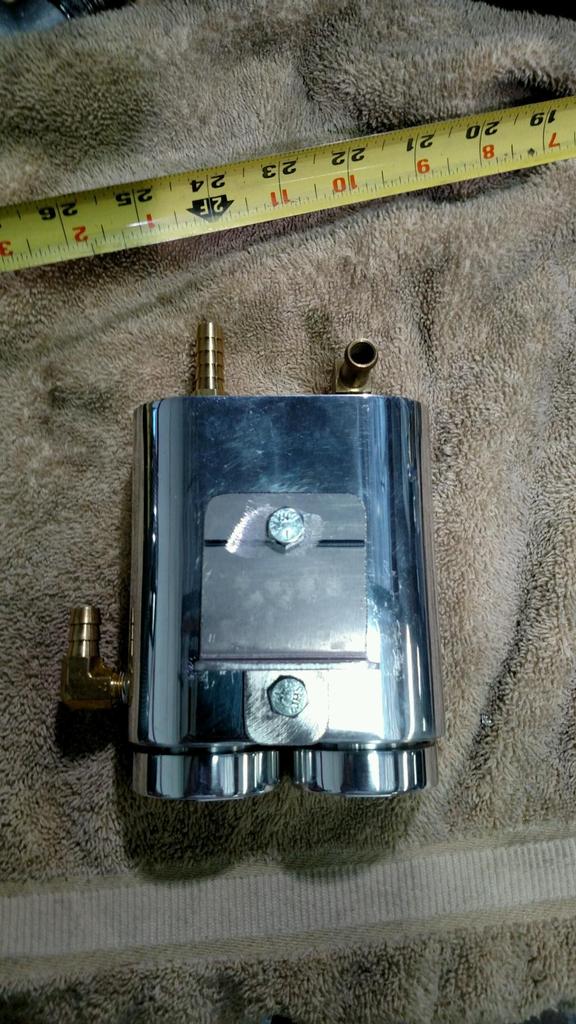
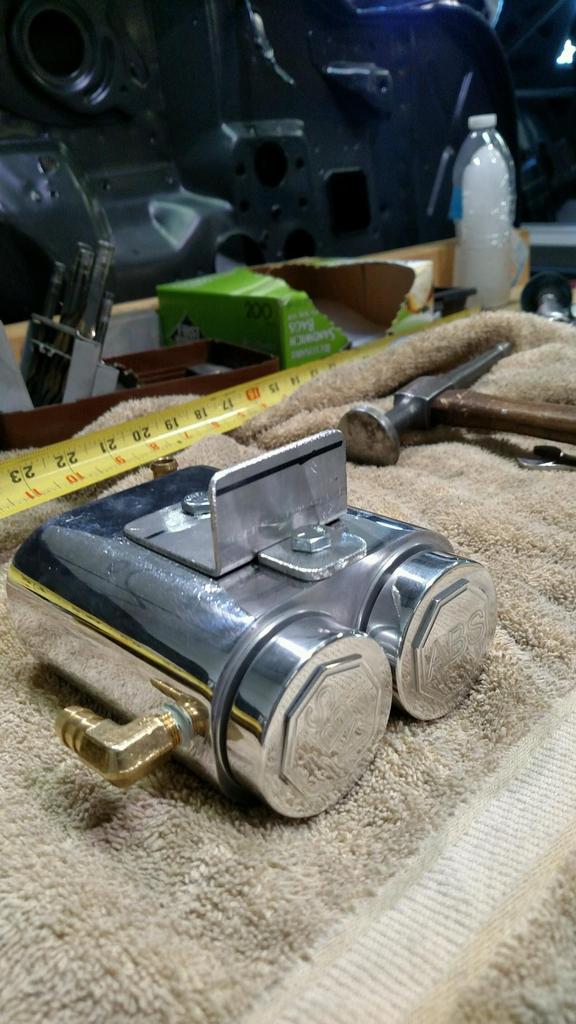
Also decided due to space constraints to go with the ABS electric power brakes set up, no need for a huge booster and we will also use a remote reservoir (see pics)
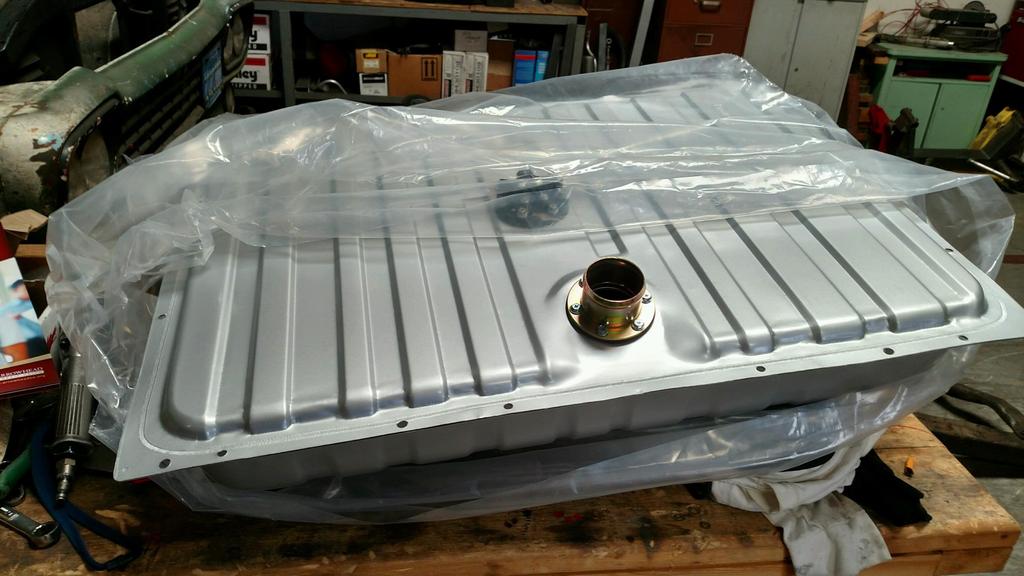
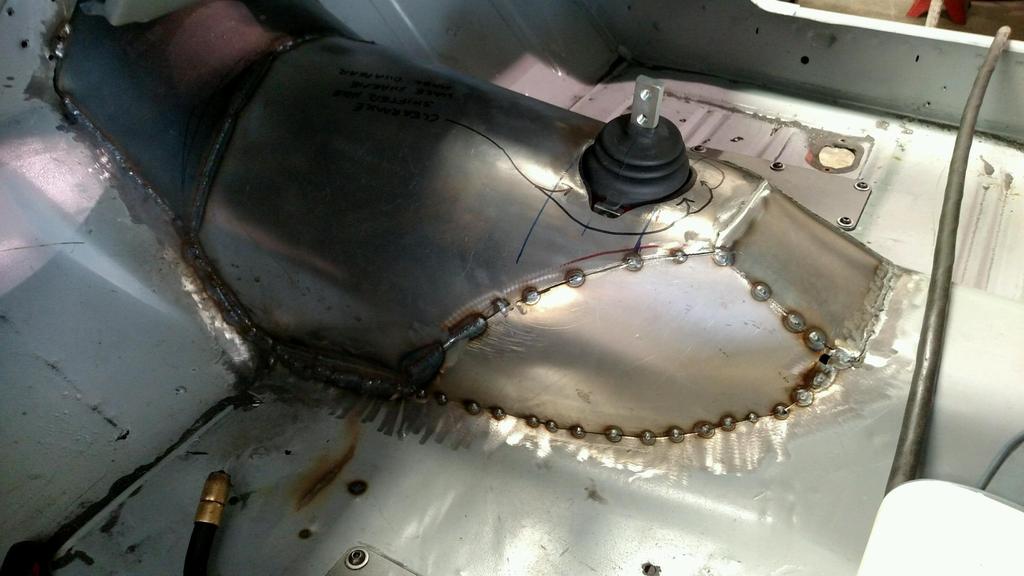
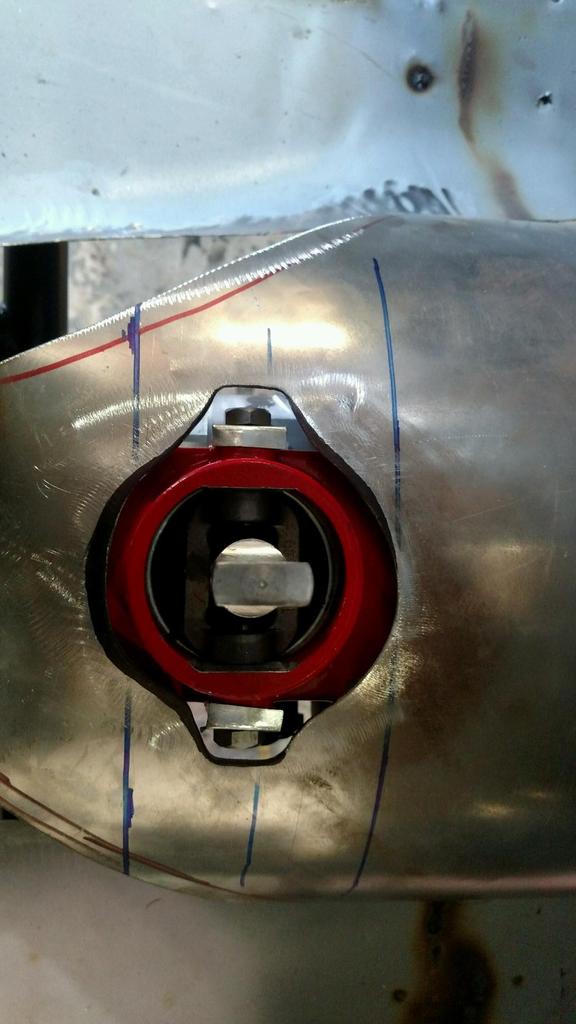
And for the fuel injection we decided to go with Aeromotive (factory style mustang tank) and all of their accessories ( they have an awesome tech support) And found an awesome web site that smokes summit for prices on Aeromotive stuff) sparktec motorsports
Gas tank with in tank fuel pump
this is the ABS power brake parts to be installed, we did change to a remote reservior
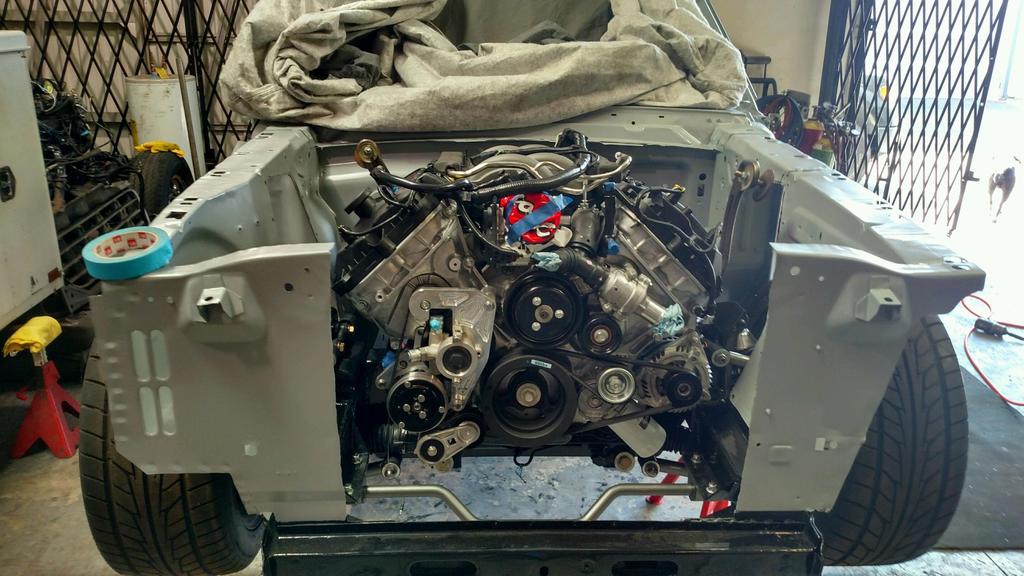
A look at the front drive parts installed on the Coyote, power steering pump and the AC compressor
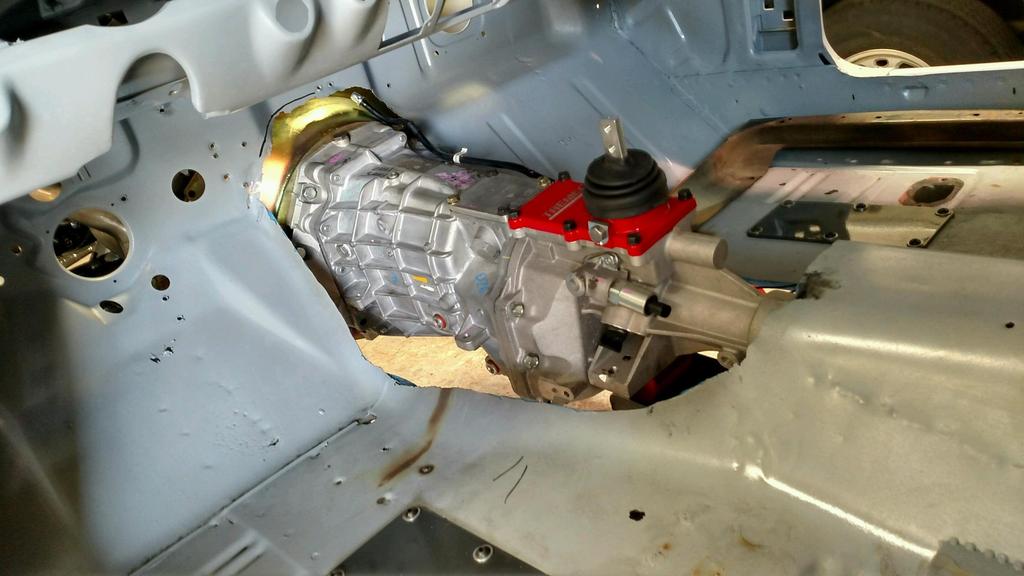
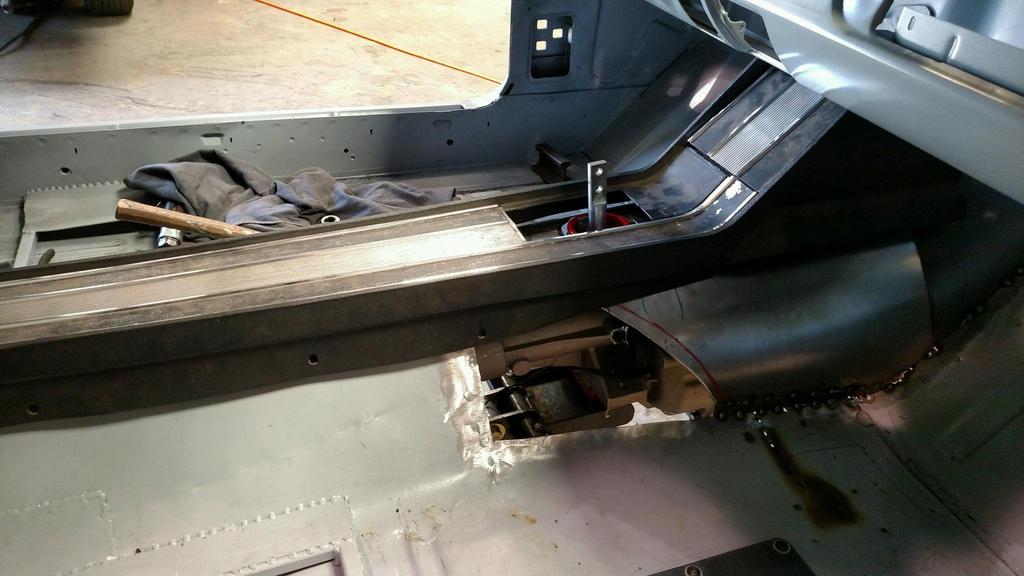
THe monster 6 speed pokin its head thru the "new" tunnel
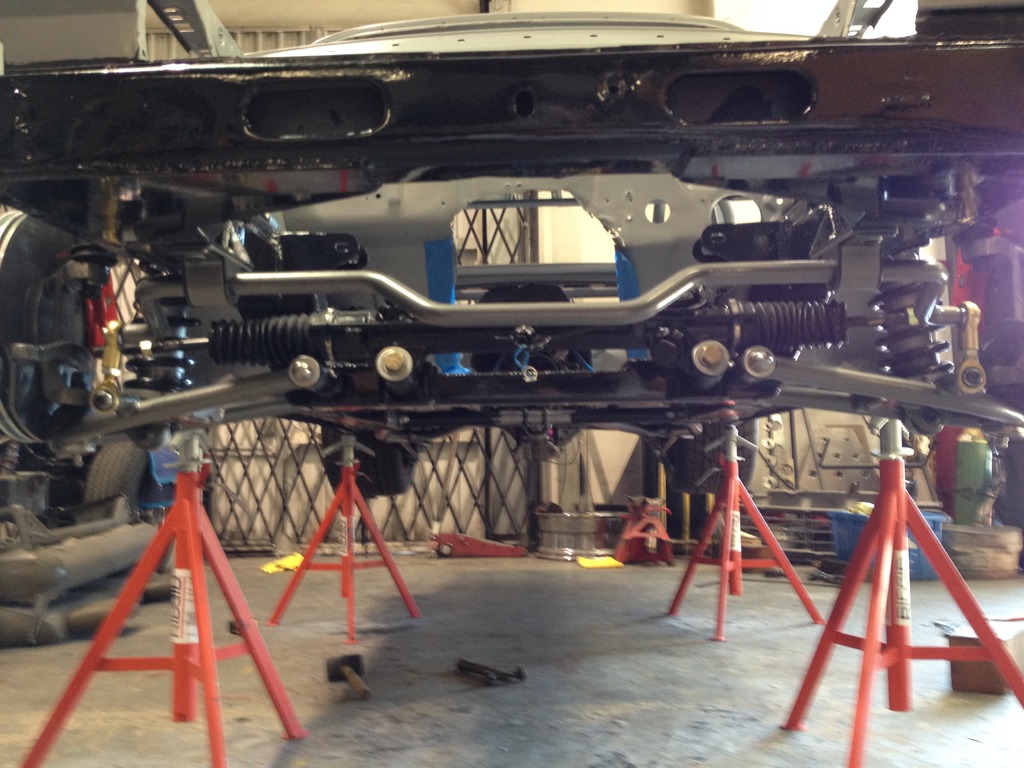
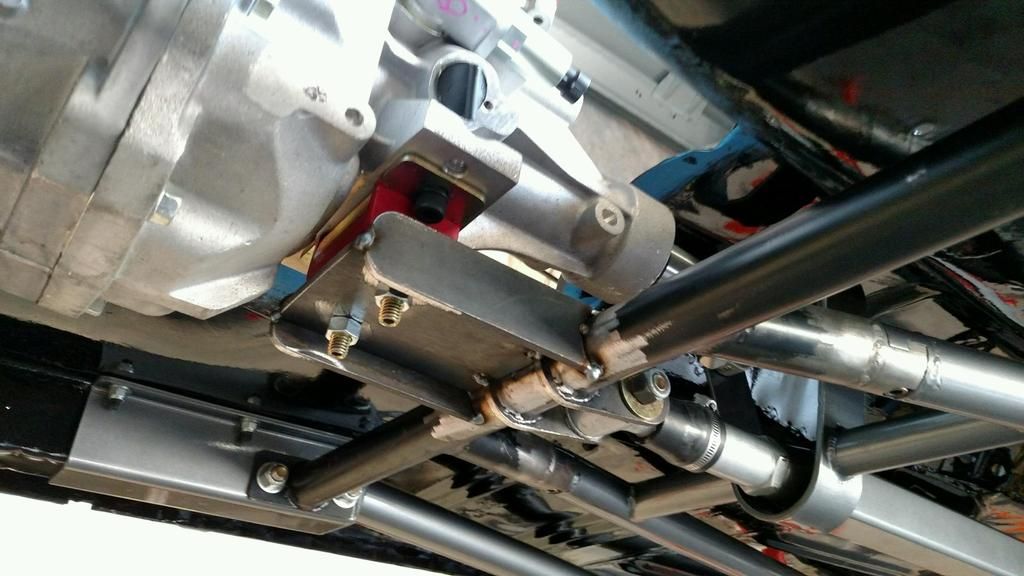
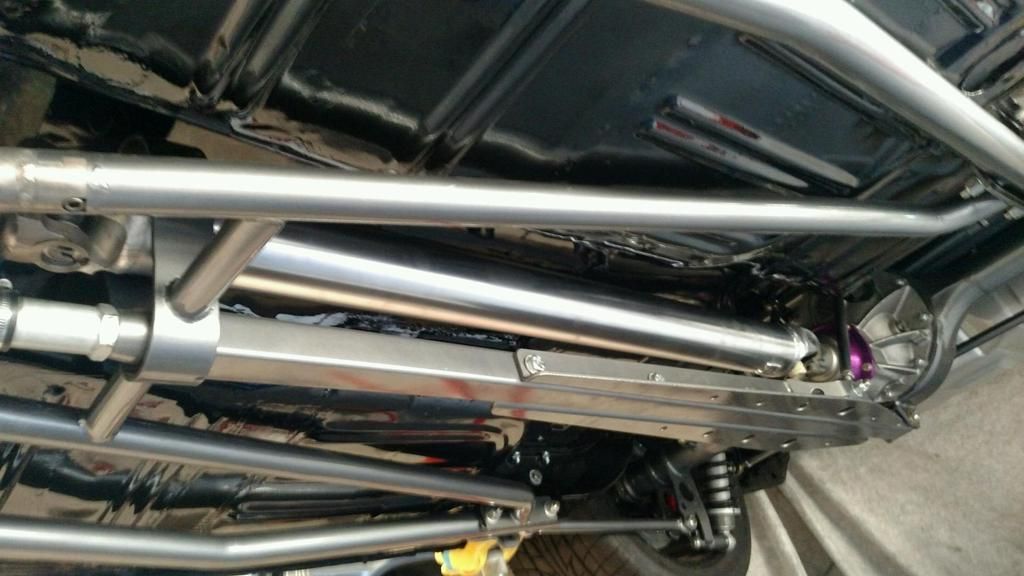
May be hard to see but the complete suspension is by TCI, mike thought it may be best to separate the front portion of the torque arm system and make it removable in order to drop the trans in case of emergency and not have to remove the bulk of the torque arms (ton of bolts)
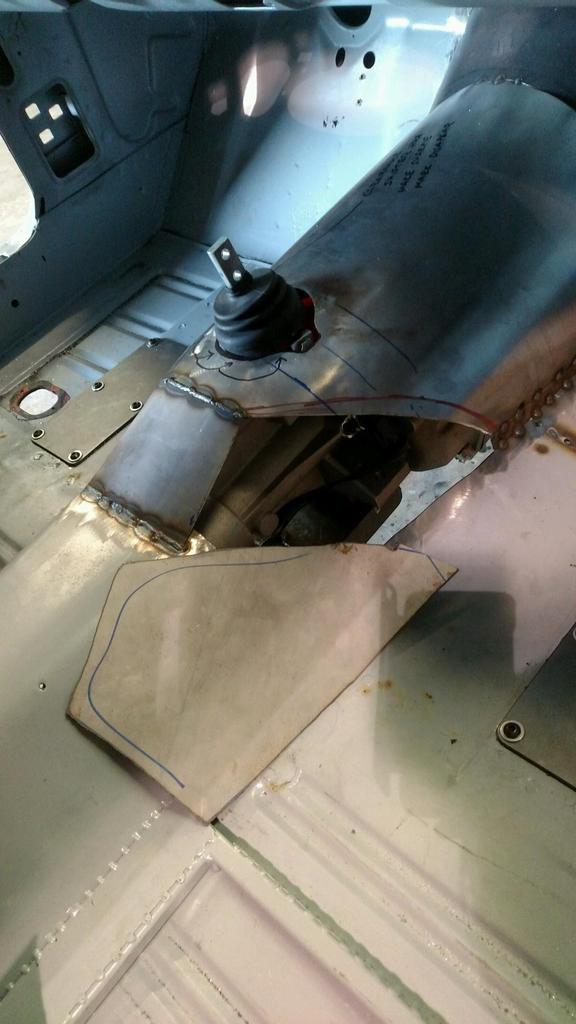
And the trans tunnel
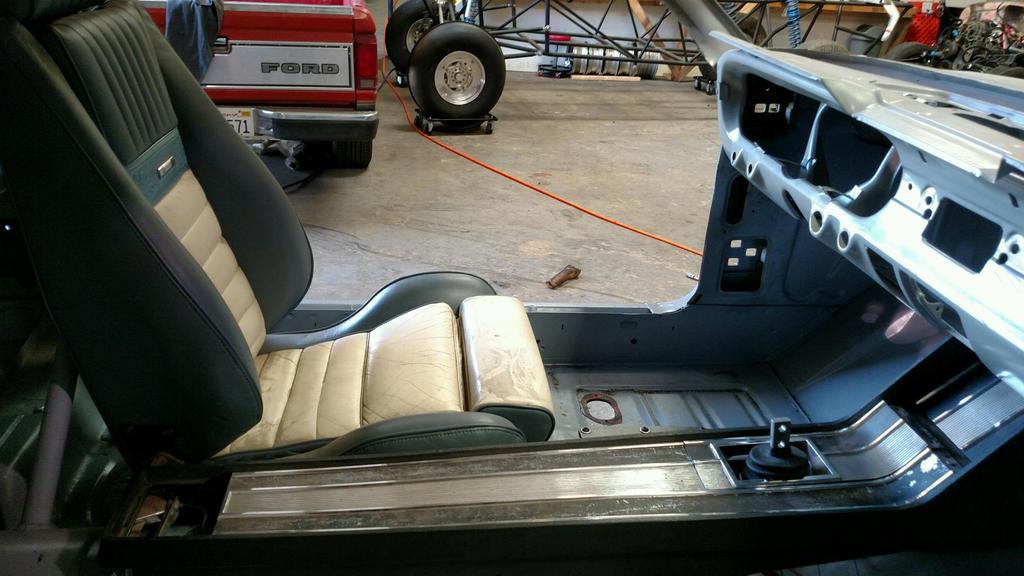
And earlier in the thread you can see we took out the seat pans and are running these style seats (Helmet fits better) and this stock console
Stock radiator and fan set up set in

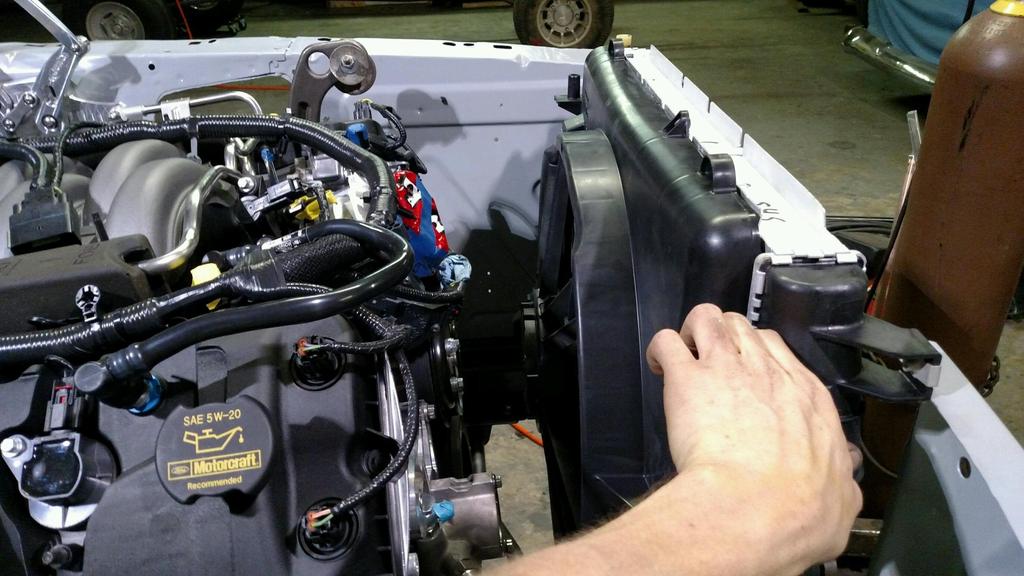
AS you know if you are following the thread we are stuffing a six speed into the mustang, so the trans tunnel will be modified and we are wanting to use the factory console!! Also ordered a factory radiator condenser and fan set up for a 2014 5.0 coyote mustang. The condenser will not work for our application, so we ordered one from vintage air that will work nicely, also gonna use the Gen 4 system and already have the vintage air pulley system installed on the coyote in order to run non-electric steering and adds the air compressor (see pics)
Also decided due to space constraints to go with the ABS electric power brakes set up, no need for a huge booster and we will also use a remote reservoir (see pics)
And for the fuel injection we decided to go with Aeromotive (factory style mustang tank) and all of their accessories ( they have an awesome tech support) And found an awesome web site that smokes summit for prices on Aeromotive stuff) sparktec motorsports
Gas tank with in tank fuel pump

this is the ABS power brake parts to be installed, we did change to a remote reservior

A look at the front drive parts installed on the Coyote, power steering pump and the AC compressor

THe monster 6 speed pokin its head thru the "new" tunnel

May be hard to see but the complete suspension is by TCI, mike thought it may be best to separate the front portion of the torque arm system and make it removable in order to drop the trans in case of emergency and not have to remove the bulk of the torque arms (ton of bolts)

And the trans tunnel


And earlier in the thread you can see we took out the seat pans and are running these style seats (Helmet fits better) and this stock console

Stock radiator and fan set up set in


 08-14-2015, 11:07 PM
#43
2nd Gear Member
Thread Starter
Join Date: Nov 2008
Location: Ca
Posts: 245
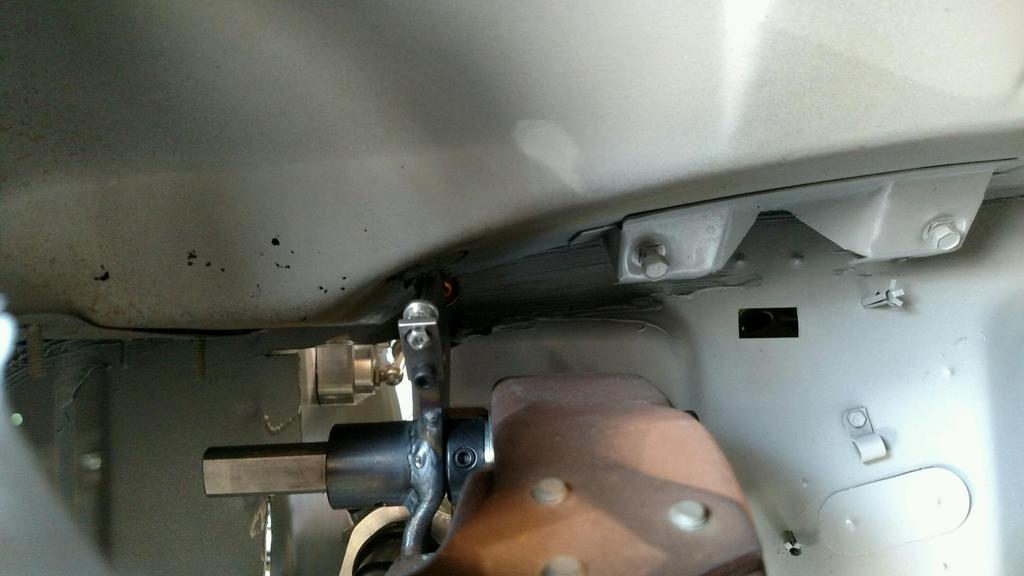
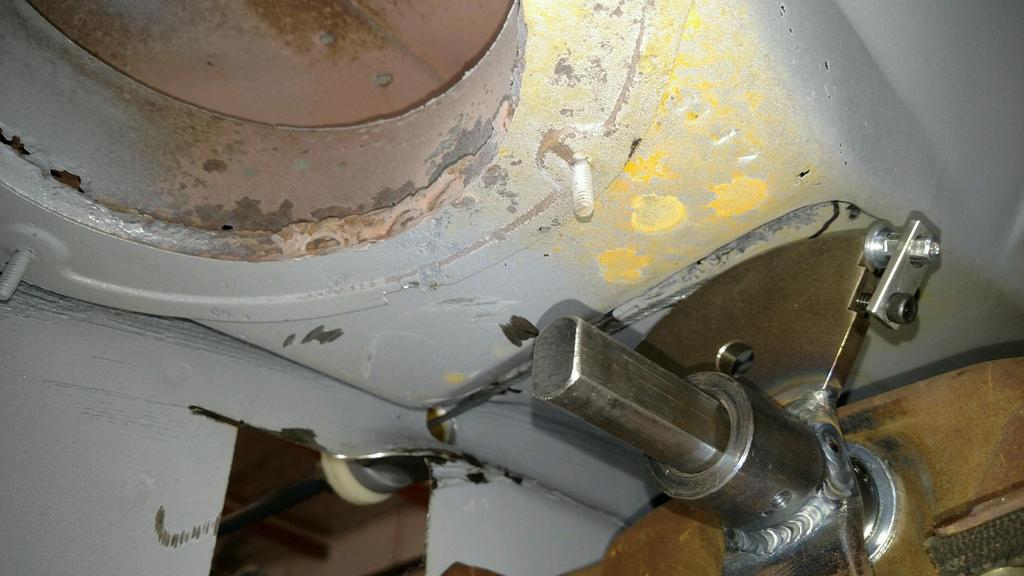
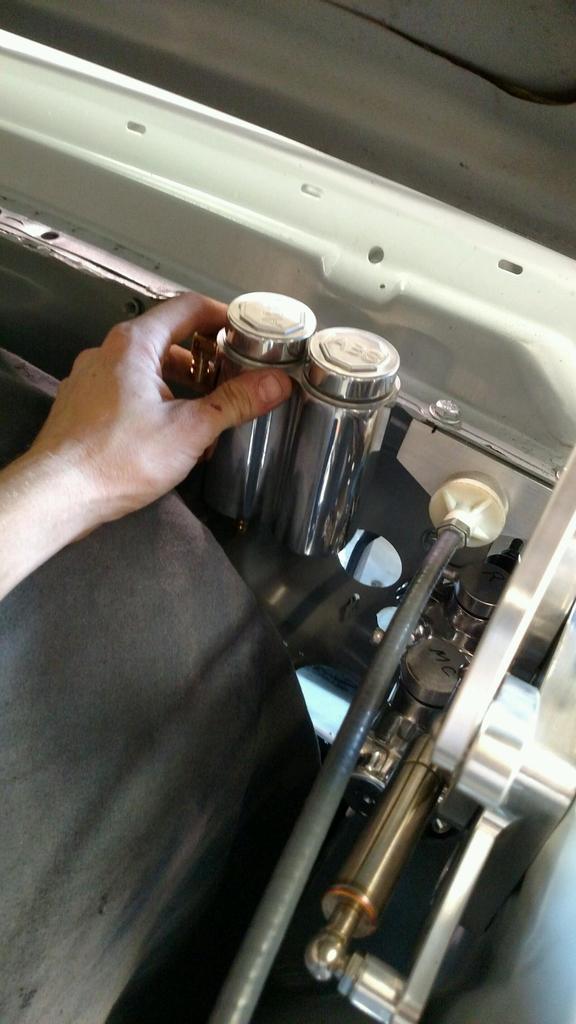
Just a few more words, the brake system in the classic mustang mated with a coyote is a common problem (wide *** motor LOL). Mike and I have researched different options, the first of which is to go with the Power brake system in order to delete the giant power booster, ABS power brakes makes a master that is supposed to fit right into the stock holes with a coyote. THats what we orderd and it didnt bolt right up, not sure if it is because we are running TCI motor mounts or what? Anyways we were forced to improvise. I will try to explain as best I understand that Mike the master fabricator did with the brake set up
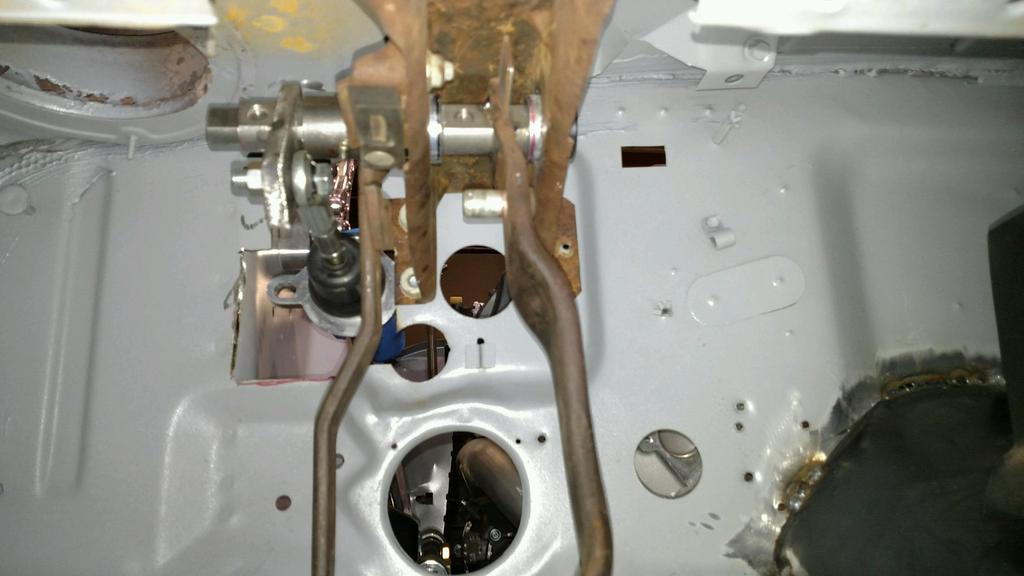
First thing Mike decided to do was move the mount point of the master over the width of the mounting points. If that makes sense we mounted the left side to the right side mount bolts
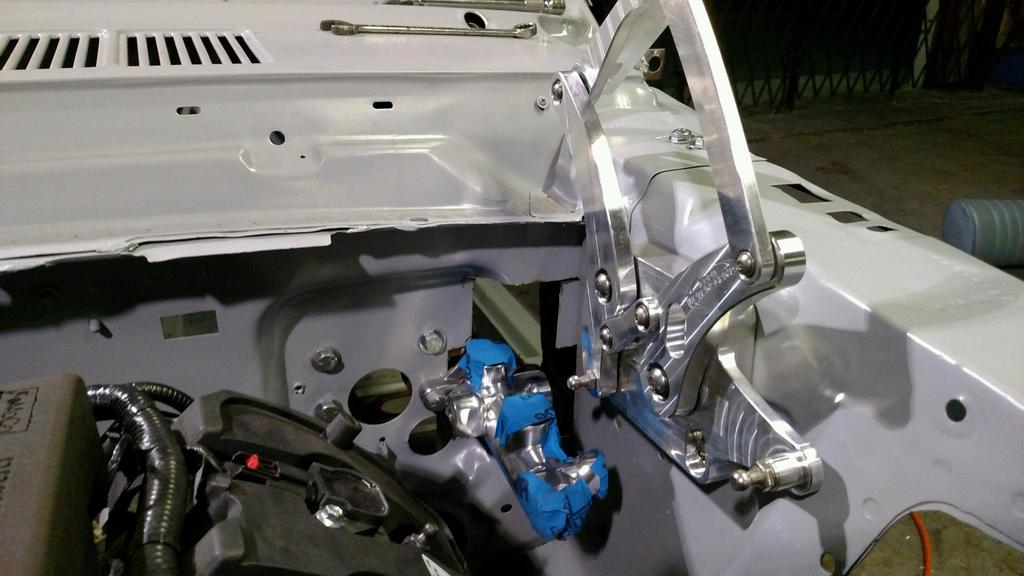
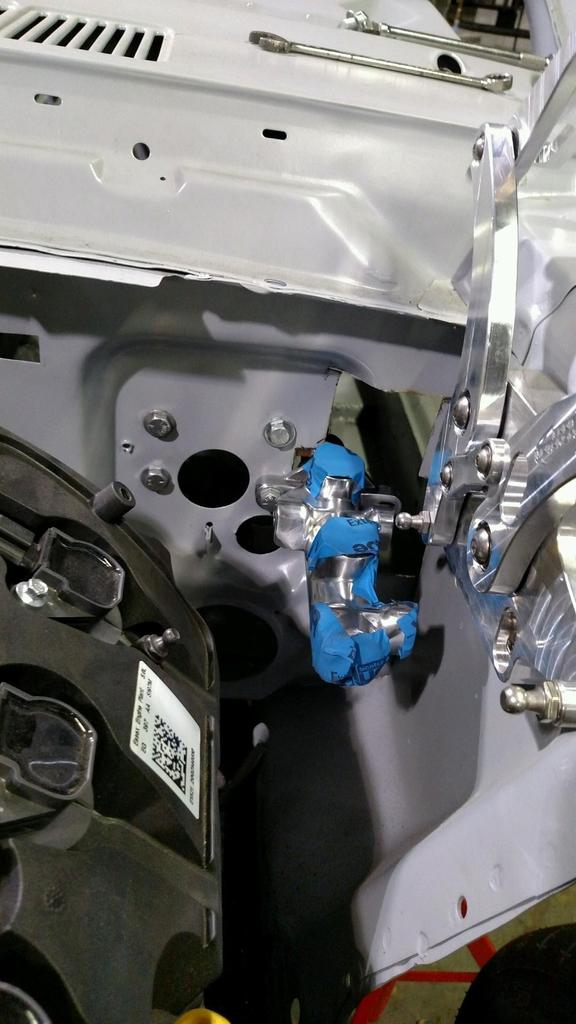
THe firewall will have to be repaired as we hacked it trying to get the reservoir to fit some how (before we decided to go remote)
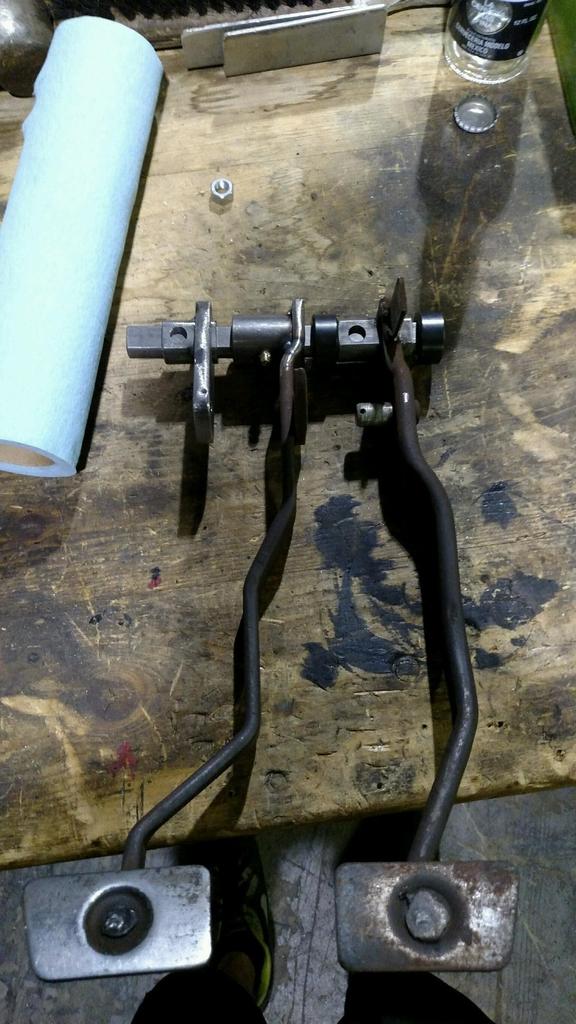
THe pedal assembly will still be mounted in the stock position but the clutch pedal actuator will basically be on the other side of the clutch, sorry I think I may be confusing myself LOL. What Mike did was reinvent the shaft that the pedals mount on. Using D rod and a set of bearing from Talan Mike achieved what we needed
I am sure I did no justice to teh new set up, if you are doing something similar or need a master fabricator PM me and I will hook you up with Mike at Brand New classics number
Have a great weekend
First thing Mike decided to do was move the mount point of the master over the width of the mounting points. If that makes sense we mounted the left side to the right side mount bolts


THe firewall will have to be repaired as we hacked it trying to get the reservoir to fit some how (before we decided to go remote)
THe pedal assembly will still be mounted in the stock position but the clutch pedal actuator will basically be on the other side of the clutch, sorry I think I may be confusing myself LOL. What Mike did was reinvent the shaft that the pedals mount on. Using D rod and a set of bearing from Talan Mike achieved what we needed


I am sure I did no justice to teh new set up, if you are doing something similar or need a master fabricator PM me and I will hook you up with Mike at Brand New classics number
Have a great weekend
08-20-2015, 10:03 PM
#44
2nd Gear Member
Thread Starter
Join Date: Nov 2008
Location: Ca
Posts: 245
A few more pics of the progress
Cable Clutch from D and D performance (welds to the stock pedal set up)
The remote master from ABS (Had to go remote due to giant coyote)
The drive shaft is also built and installed (aluminum)
Pics....
Cable clutch, sorry hyro fans
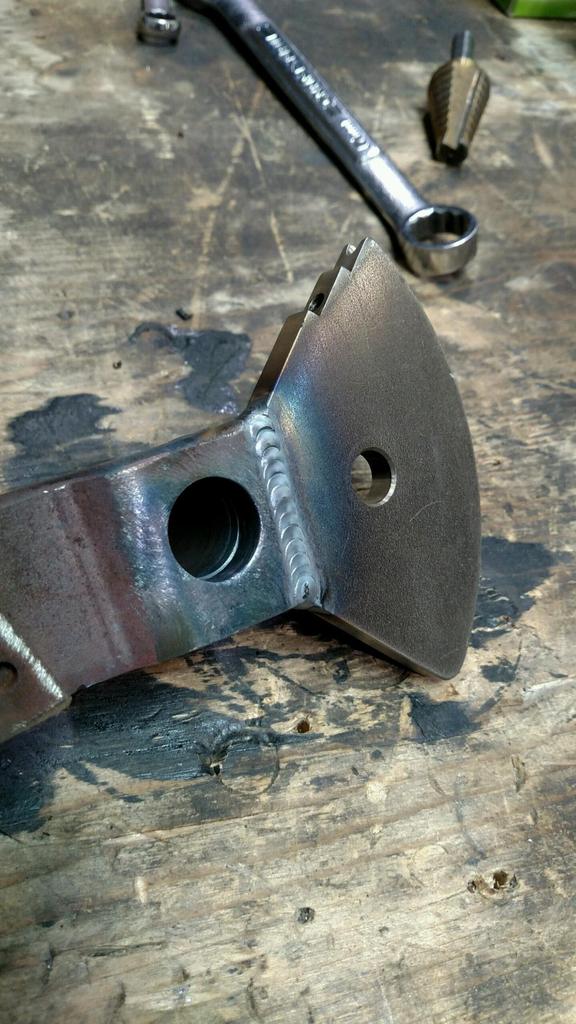
This is the piece that welds to the top of the stock pedal, second one we have used
Drive shaft, Aluminum 3.5 inch......very close to drive shaft loop, about 3/8 to 1/2 inch clearance

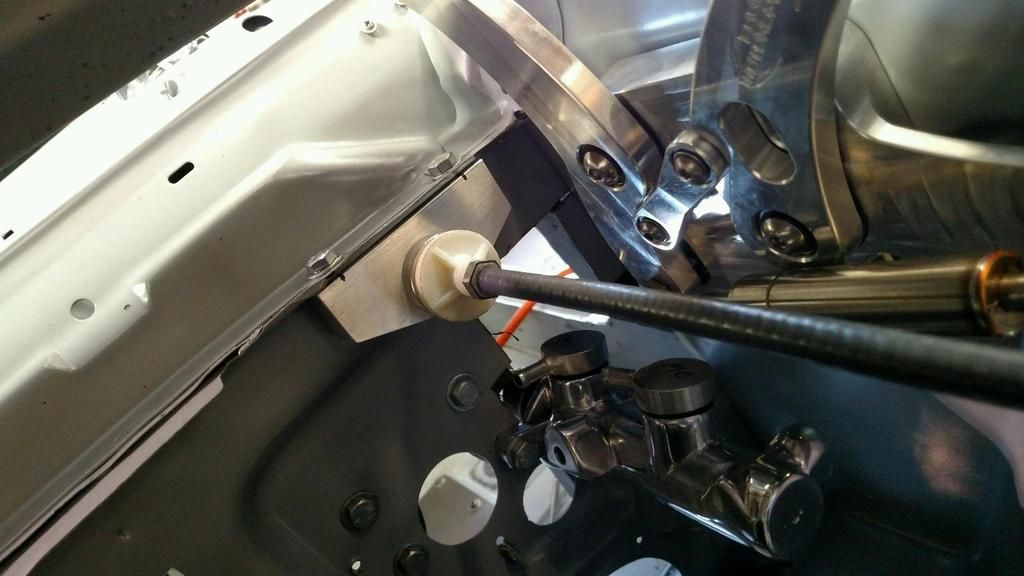
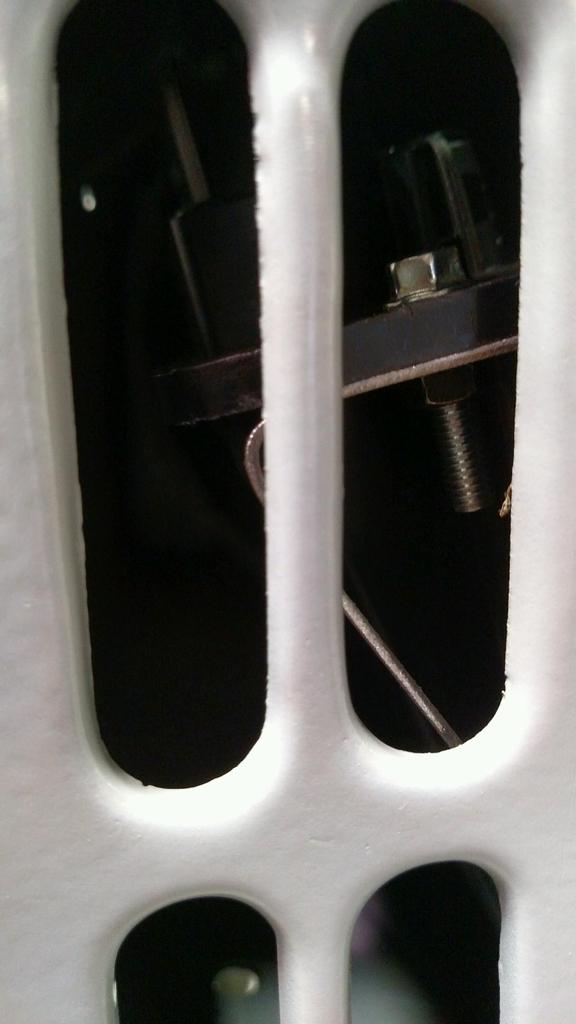
Master with a fabbed up tab to mount to firewall area
Mount point
Stay tuned hope to get more done tomorrow
Cable Clutch from D and D performance (welds to the stock pedal set up)
The remote master from ABS (Had to go remote due to giant coyote)
The drive shaft is also built and installed (aluminum)
Pics....
Cable clutch, sorry hyro fans

This is the piece that welds to the top of the stock pedal, second one we have used


Drive shaft, Aluminum 3.5 inch......very close to drive shaft loop, about 3/8 to 1/2 inch clearance


Master with a fabbed up tab to mount to firewall area


Mount point

Stay tuned hope to get more done tomorrow
08-31-2015, 10:36 PM
#45
2nd Gear Member
Thread Starter
Join Date: Nov 2008
Location: Ca
Posts: 245
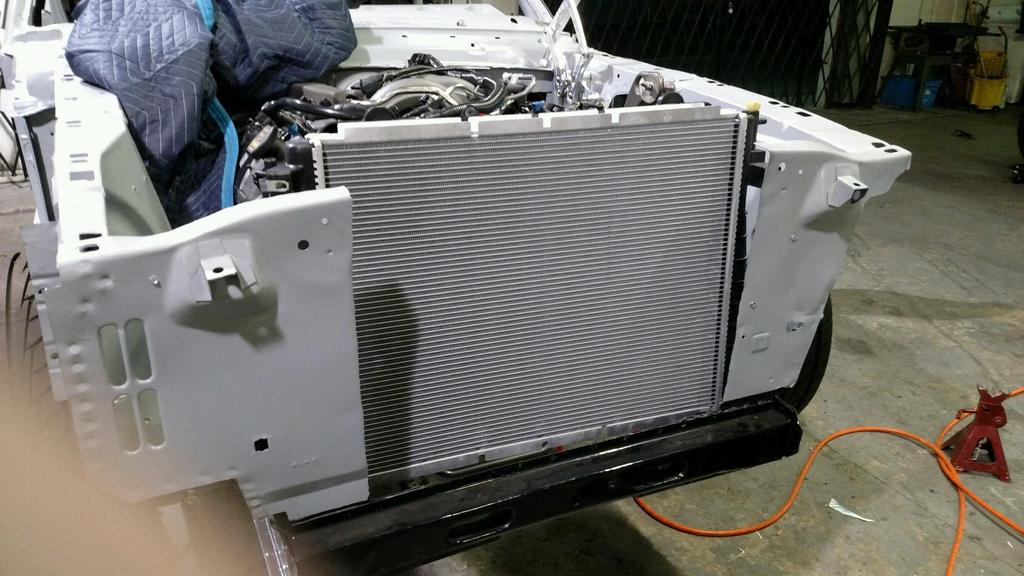
As the build progresses, we are trying to use some stock 2014 mustang parts, like the 2014 radiator and fan, the ECU (of course) and then a few aftermarket parts that are supposed to bolt right into the 66 stang with a coyote mod, LOL. with this build and like others I have participated in..........2 steps forward one step back, lol. Every time this happens I tell myself to remember this for the next one but there is always something new on a build like this, I cant wait for the next build (30 model a sedan on custom rails LOL), ANyways here are some progress pics, like I said sometimes 2 steps back, as in we strengthened up the front rails then had to cut a bit to make this stock set up work.
Stock (2014) radiator with factory donuts to sit in on the 66 frame, the condenser is from Vintage Air
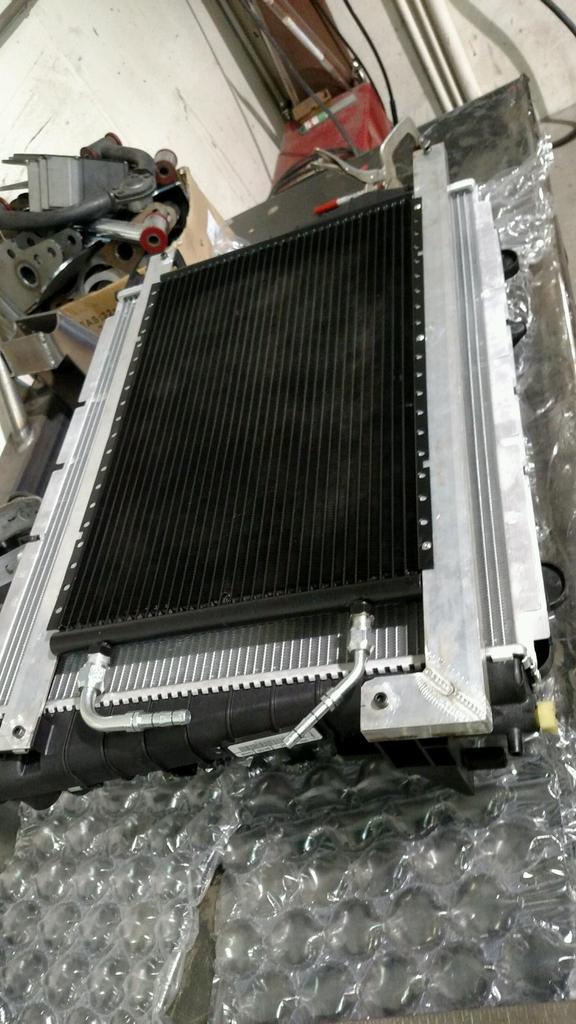
Custom brackets for the condenser
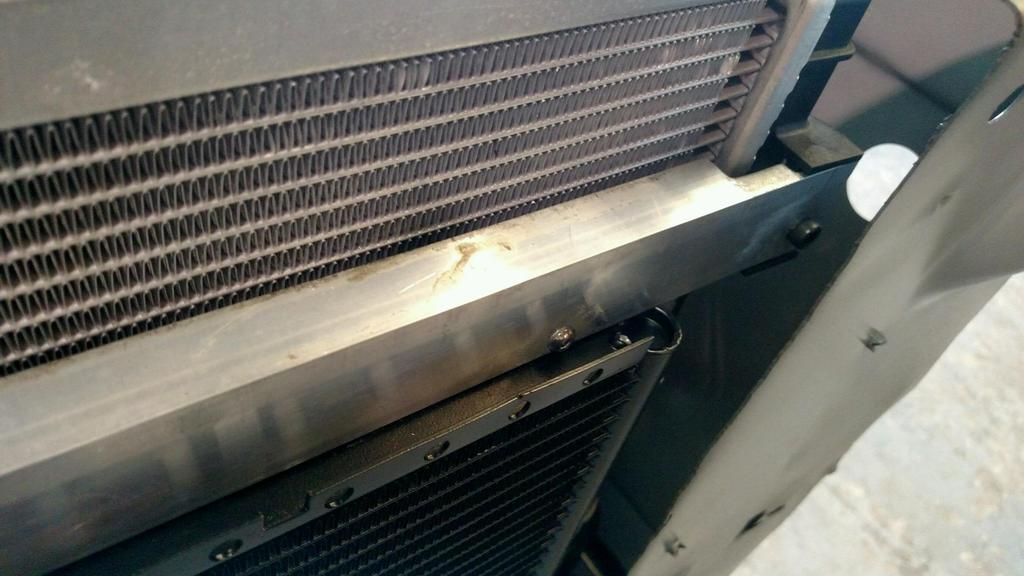
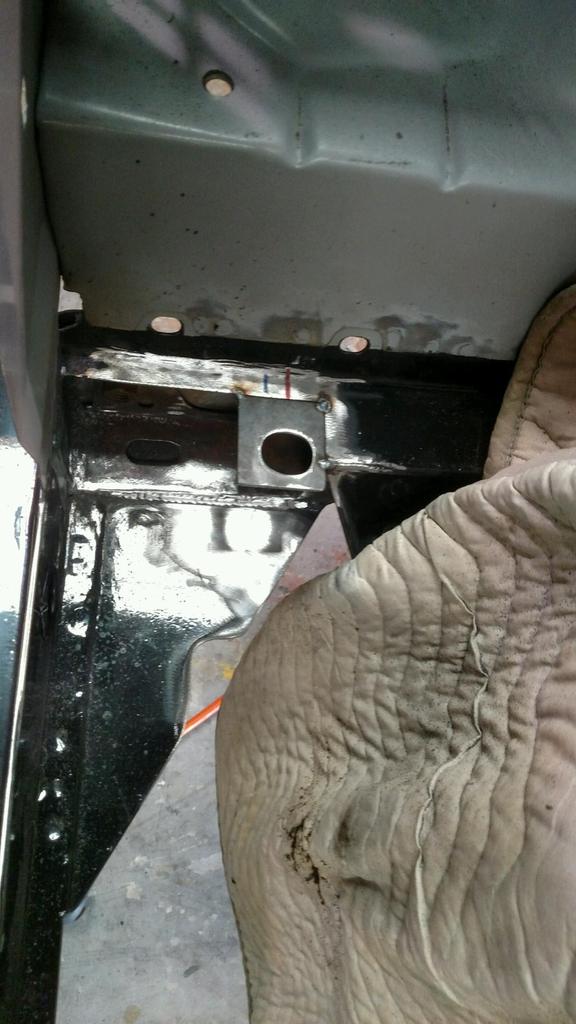
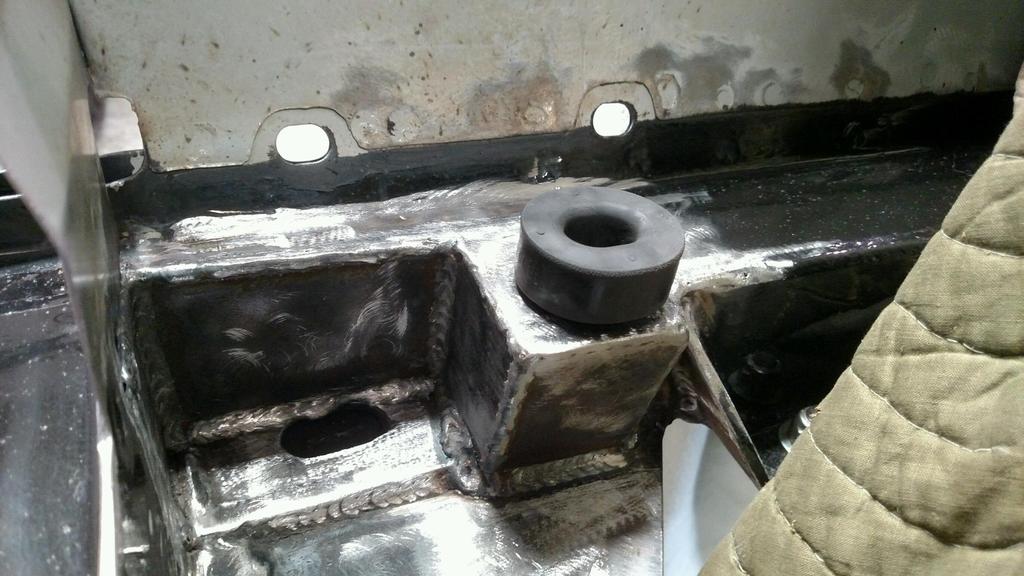
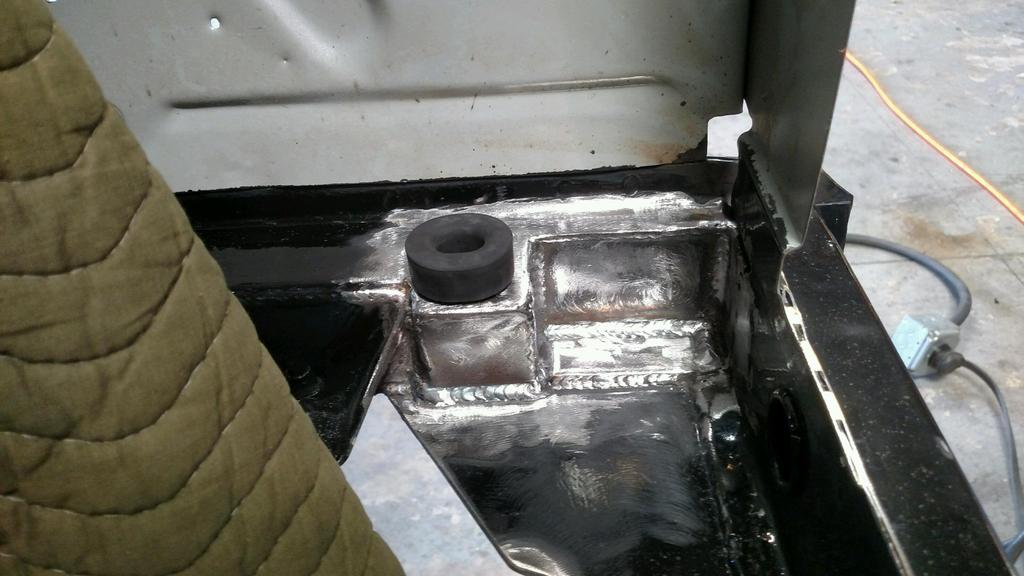
modded frame and donuts
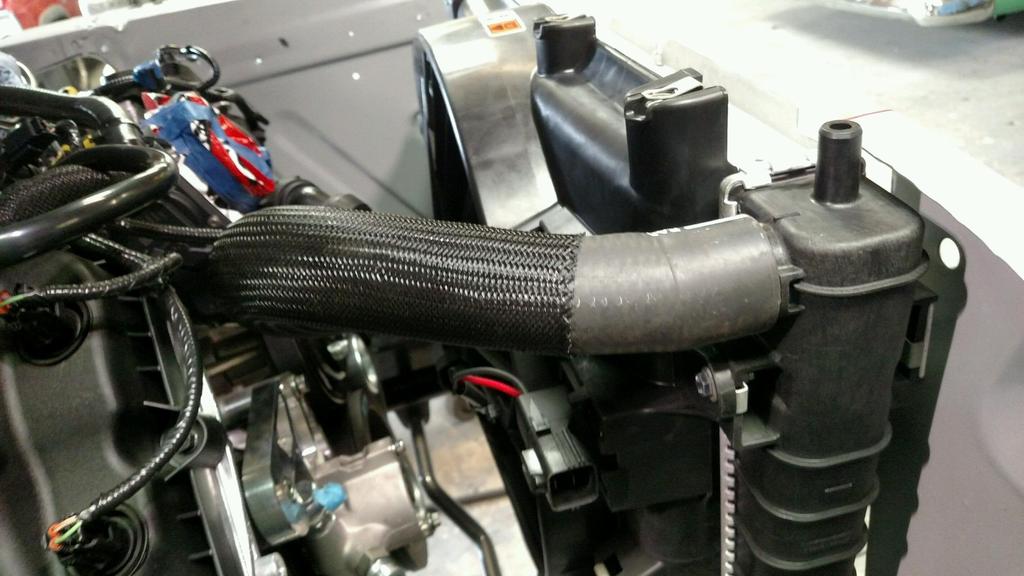
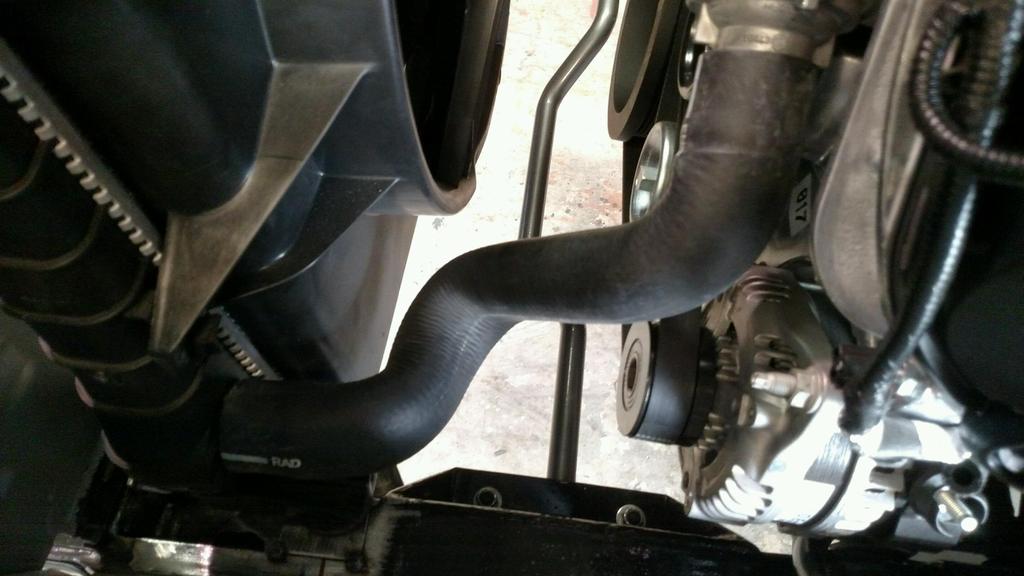
Factory hoses fit!!!
Got this idea from another build, gotta put the computer somewhere
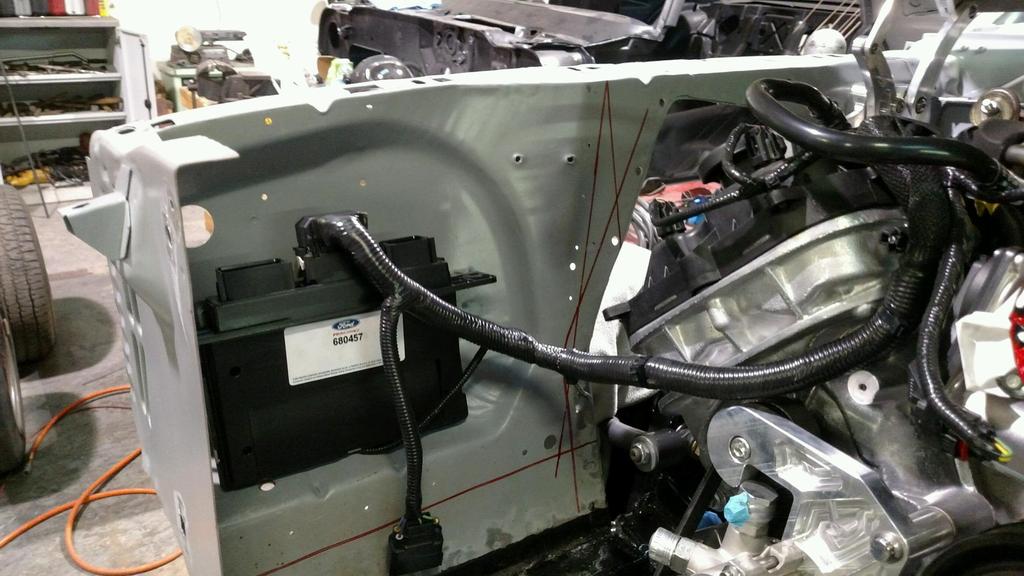
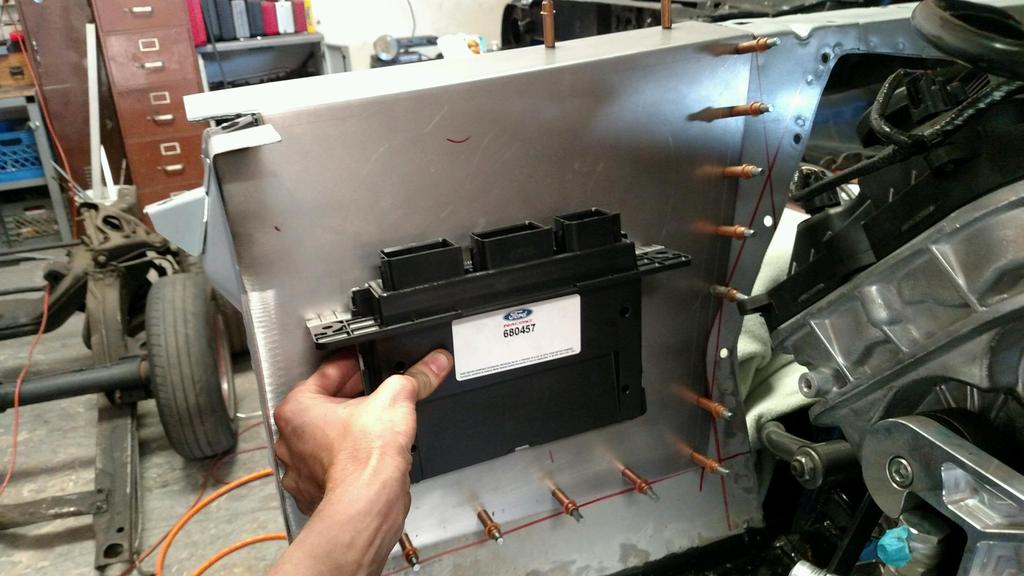
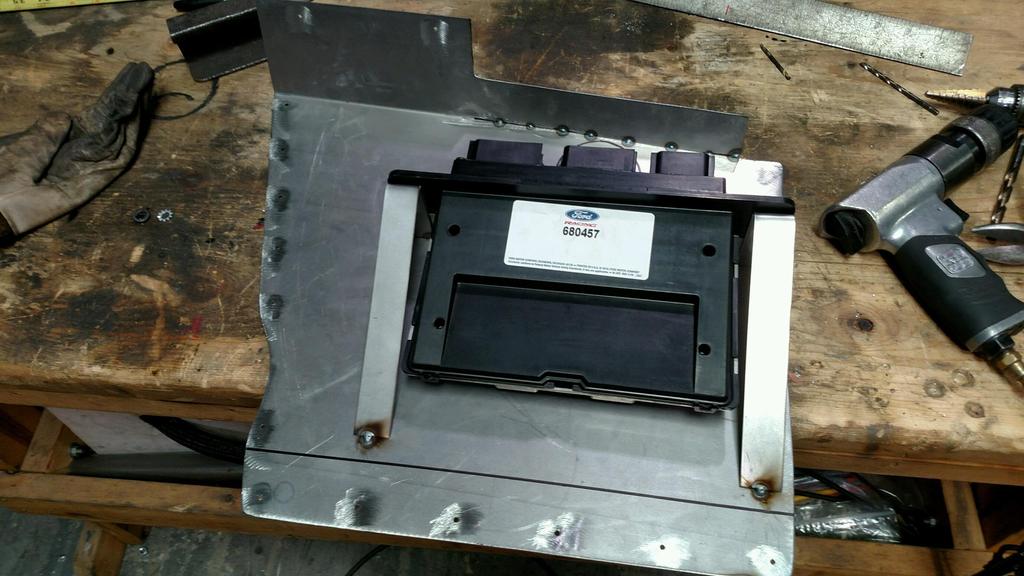
Factory holes in front core support for cooling of the computer??
Prob left something out, will update later in the week
Stock (2014) radiator with factory donuts to sit in on the 66 frame, the condenser is from Vintage Air

Custom brackets for the condenser

modded frame and donuts


Factory hoses fit!!!


Got this idea from another build, gotta put the computer somewhere


Factory holes in front core support for cooling of the computer??

Prob left something out, will update later in the week


 03-12-2017, 10:09 PM
#48
2nd Gear Member
Thread Starter
Join Date: Nov 2008
Location: Ca
Posts: 245
ok admittedly i have been absent and I could make excuses, I have been working on the mustang this entire with the help of Mike at Brand New Classic in Riverside Ca . Just been too hard to take pics and I used to get to go to the shop once or twice a week but work has cut my shop time back. I didnt even get to work on it for several months in a row LOL. Anyways my documenting has suffered as well but I am making an effort to resurrect this thread as friends and family have asked me to update the build progress so here goes, next few posts will be progress from last 18 months................yeah I know 18 months i should be done lol
Oak
Oak
03-13-2017, 10:12 PM
#50
2nd Gear Member
Thread Starter
Join Date: Nov 2008
Location: Ca
Posts: 245
This first reply will be a test to see how well I remember how photobucket works LOL, a lot of progress and trial and error bit with Mike at Brand new classics leading the way we have changed a few things, added a few things, scrapped a few things and here we are. My photobucket didnt load in order so I will just show some of our progress and changes as I
a few shots of the Raptor lining we did after the trans hump was modified to fit the Magnum six speed
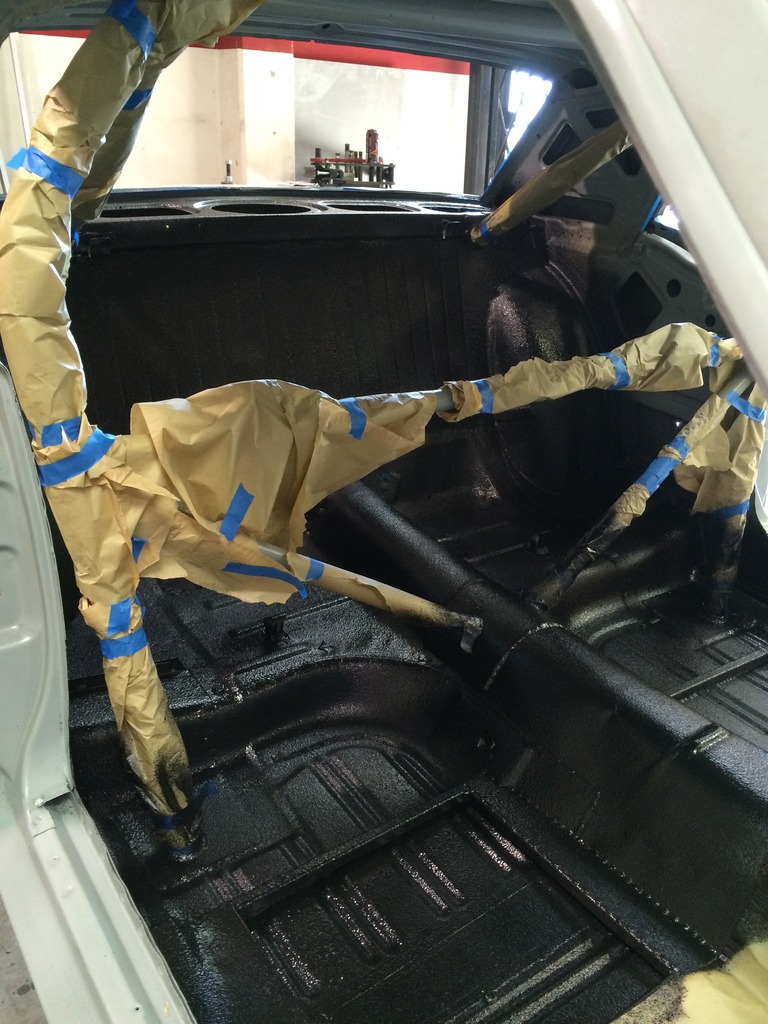
a few shots of the Raptor lining we did after the trans hump was modified to fit the Magnum six speed

Last edited by Oak; 03-13-2017 at 10:31 PM.