Boxing Lower Control Arms:
 03-05-2012, 09:32 PM
#1
1st Gear Member
Thread Starter

Join Date: Apr 2010
Location: Texas
Posts: 67
Boxing your lower control arms is a cheap and effective way to strengthen the arms for everyday driving or track use. I always box the lower control arms on every Mustang that comes through my shop when I rebuild the front suspension. Here are a few pics I took recently when I did a pair:
Here is the '67 lower control arm I started with, you can see the "nubs" on the lower part of the arm:

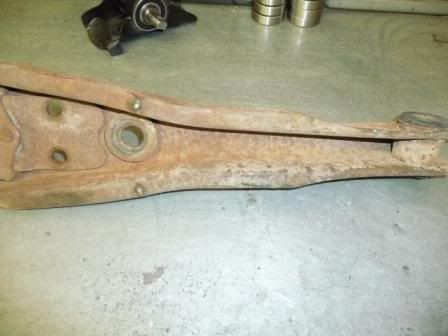
I already had a '70 arm that was sandblasted, so that was the one that I would be plating. The '70 arm does not have the nubs:

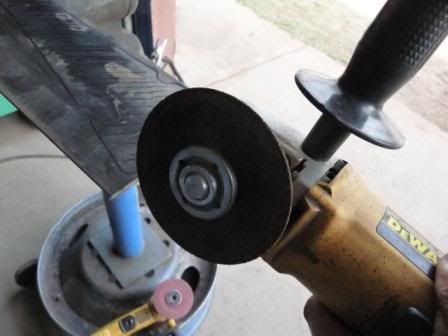
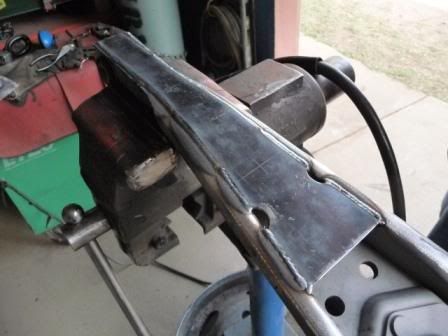
I made a cardboard pattern of the area I would be boxing, and cut it out of some 1/8" thick material. I could have used my plasma cutter, but I went with my default cutting tool, which is a 4 1/2" angle grinder with a cutting wheel:
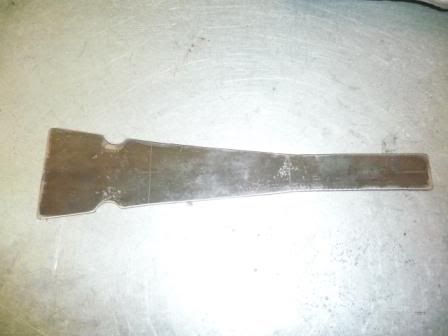
The piece I cut out has the notches for the nubs on the '67-'68 style control arms because I used that piece as a pattern to water jet several more boxing plates as I was doing more than one pair:
The piece required a small "dogleg" bend in it to conform to the shape of the bottom of the control arm. I used a vise and a hammer to make the bend:

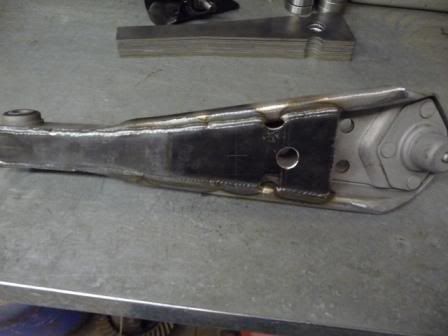
The boxing plate is clamped in place and tack welded. The length of the boxing plate allows the strut rods to be accessed:

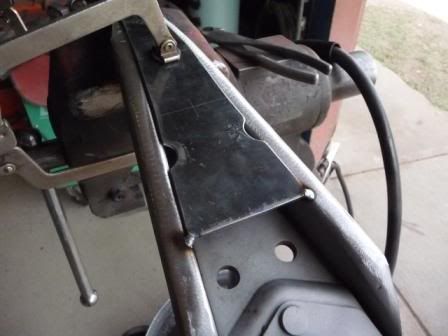
With the plate tacked in place, I start in the middle and skip around welding to prevent too much heat in one place. I also left the old bushing in place for now:
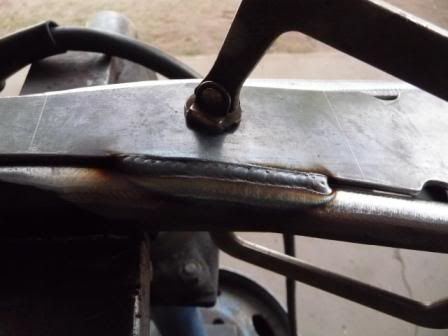

The last thing to do is to drill a 13/16" hole to allow access for the sway bar end link:
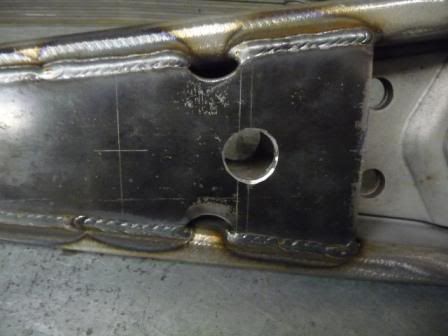
Here are how the notches fit the '67-'68 control arms:

Here is the '67 lower control arm I started with, you can see the "nubs" on the lower part of the arm:
I already had a '70 arm that was sandblasted, so that was the one that I would be plating. The '70 arm does not have the nubs:
I made a cardboard pattern of the area I would be boxing, and cut it out of some 1/8" thick material. I could have used my plasma cutter, but I went with my default cutting tool, which is a 4 1/2" angle grinder with a cutting wheel:
The piece I cut out has the notches for the nubs on the '67-'68 style control arms because I used that piece as a pattern to water jet several more boxing plates as I was doing more than one pair:
The piece required a small "dogleg" bend in it to conform to the shape of the bottom of the control arm. I used a vise and a hammer to make the bend:
The boxing plate is clamped in place and tack welded. The length of the boxing plate allows the strut rods to be accessed:
With the plate tacked in place, I start in the middle and skip around welding to prevent too much heat in one place. I also left the old bushing in place for now:
The last thing to do is to drill a 13/16" hole to allow access for the sway bar end link:
Here are how the notches fit the '67-'68 control arms:
 03-05-2012, 10:08 PM
#2
3rd Gear Member
Join Date: Jul 2009
Location: Smyrna, TN
Posts: 678
Nice work, I had a buddy do this to my new Moog LCA along with tack welding the bushing so it wouldn't slide. Wish I had the time and skills to add the roller bearings too, maybe on the next tear down.
Jon
Jon
03-06-2012, 12:16 AM
#4
1st Gear Member
Thread Starter
Join Date: Apr 2010
Location: Texas
Posts: 67
I can't say that it would improve handling all by itself, but it definately takes some flex out of the LCA's, which can't be bad. I have seen severe cases where the LCA actually was almost broken in half from years of abuse.

Thread
Thread Starter
Forum
Replies
Last Post
jwog666
Pipes, Boost & Juice
11
12-27-2021 08:09 PM