A 65 Coupe Restomod
 02-12-2013, 10:41 PM
#1
1st Gear Member
Thread Starter

Join Date: Feb 2013
Location: AL
Posts: 141
The forum where I have been posting my build is a smaller forum, and it is pretty slow, so now that I'm close to being finished, I've decided to put some stuff up in other places.
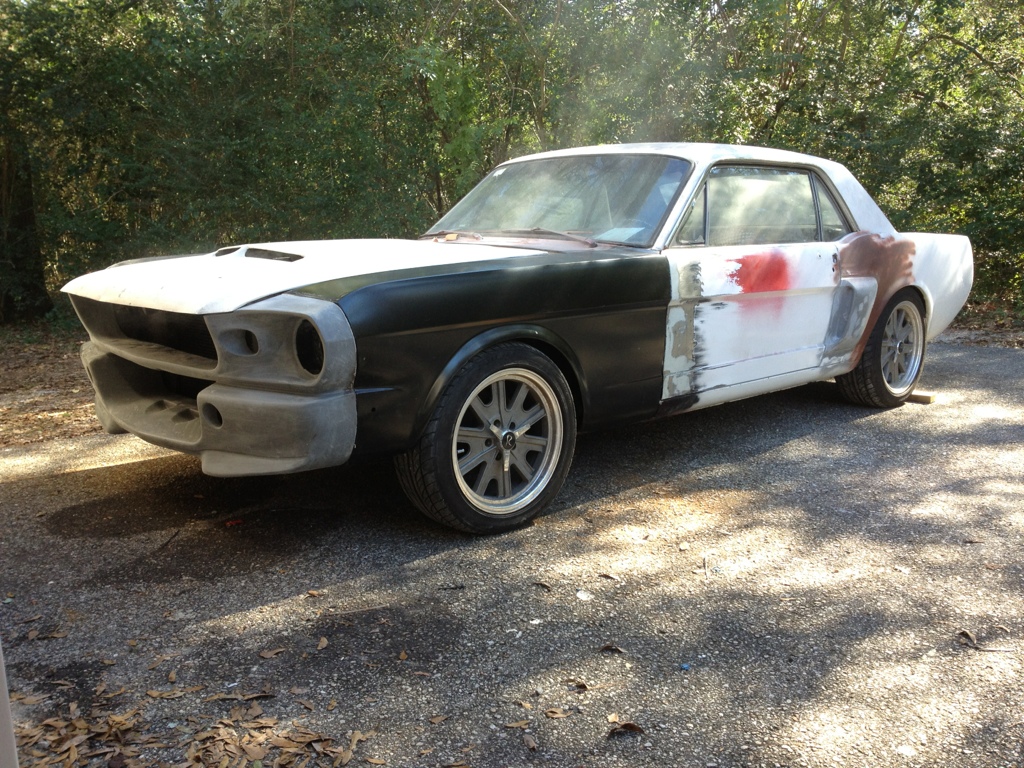
My goal has been to build a weekend car that I'm not afraid to drive. I don't want something so nice that it has to be trailered, but I don't want a beater either. I'm okay with a 5 foot paint job, as long as I can say one thing. "I did it myself." So far the only things I've paid someone else to do on my car are machine work the block, and align the tires. And I plan to keep it that way unless I just absolutely cannot find a suitable place to paint it on my time schedule.
To say the car (or at least motor) is snake bitten would be an understatement. The motor has been rebuilt twice and disassembled for cleaning 2 additional times due to filling it up with metal, and it has less than 50 miles on it. This car has sent me to the ER 3 times. Right now it is 2 years behind schedule (I know this is normal) and at about triple budget (mostly that is due to some really excessive scope creep).
Here are some cliff notes:
Motor:
1978 351w block
Stock Style Pistons (about 9.2:1)
AFR 185 Heads
1.6 roller rockers
Lunati Voodoo 262 Cam
Summit Stage 2 intake
Summit 750 carb
Stock Crank
Stock "football" rods
I don't know how many HP it is putting out, but it more than I can hook up with an open diff and 2.79 gears. I've got a 9" waiting to get trimmed down, with a stock ford posi and a set of 3.55 gears.
*Bought the car as a roller.
*Body work and base coat complete from the windshield back in wimbledon white
*I6 car with granada front discs and 8" rear with drums transplanted by PO
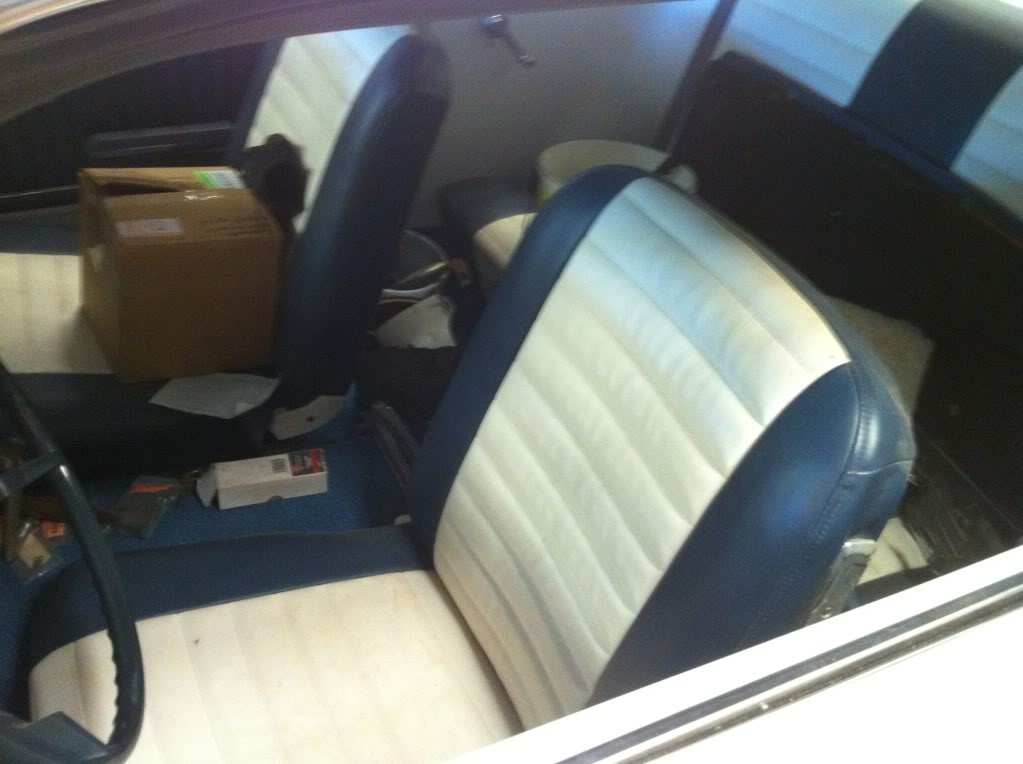
*Interior redone by PO in blue/white two tone
*I already had a 351w (disassembled) from when I tried to build a ferrari kit car as a freshman in college
*Toploader from Dad's 1969 Granada he totaled back in the 70's
*Had the block Fluxed/Dipped/Honed/Bored and the crank turned
*Rebuilt Toploader
*Put the motor back together, was missing tons of stuff, spent more than if I had bought a crate motor
*Motor knocks, think valve float, change springs, break spring compressor, spring uncompresses into forearm, first trip to ER.
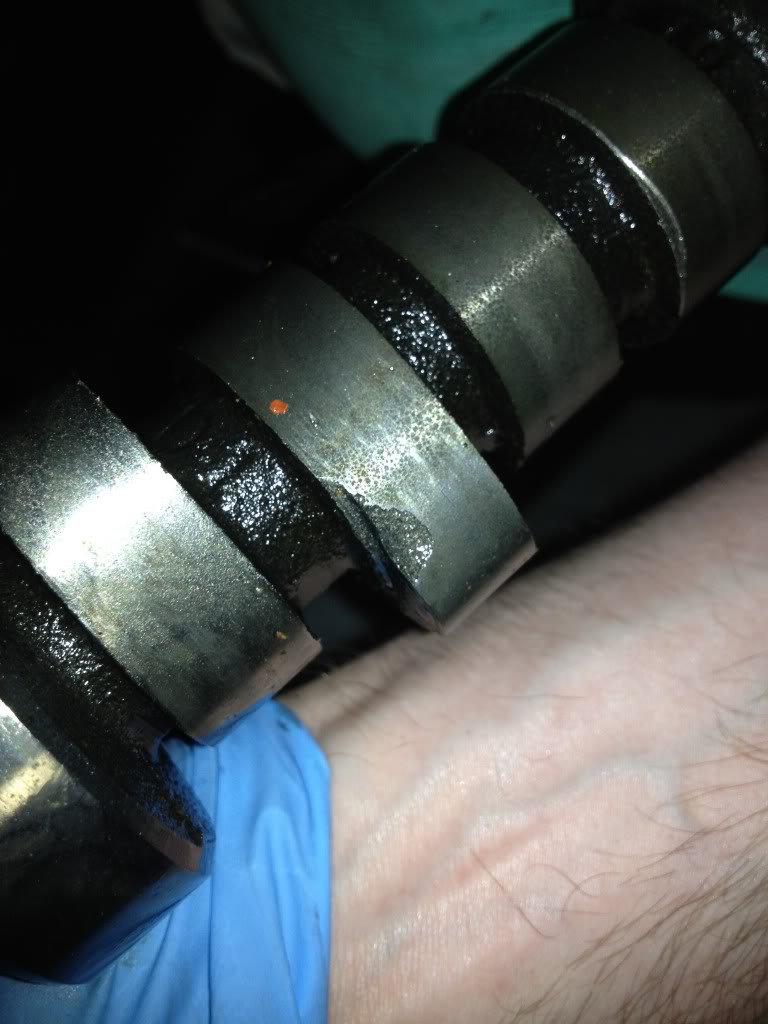
*It wasn't valve float, it was a bad spot on the crank, tore the crank up in less than 2 hours of run time, had to get new crank, rebuild again.
*All steering mechanisms where shot, installed manual R&P. Get metal flakes in eye (was wearing safety glasses but not a grinding shield), 2nd trip to ER (no biggie this time).
*Since the engine was out of the bay, take it back to metal and paint it white (See, this is how scope creep happens. You do one thing really nice, and now everything else gets kicked up a notch)
*Broke a carb in half (how the heck do you break a carb in half?)
*Chase over-heating issues for a year, realize brand new auto-zone water pump sucks. Upgrade to hi-flow, stay cool
*Spend a year trying to get fender to door gaps correct
*Decide to change cam. Cam break in fails, fills engine with metal, disassemble engine to clean again.
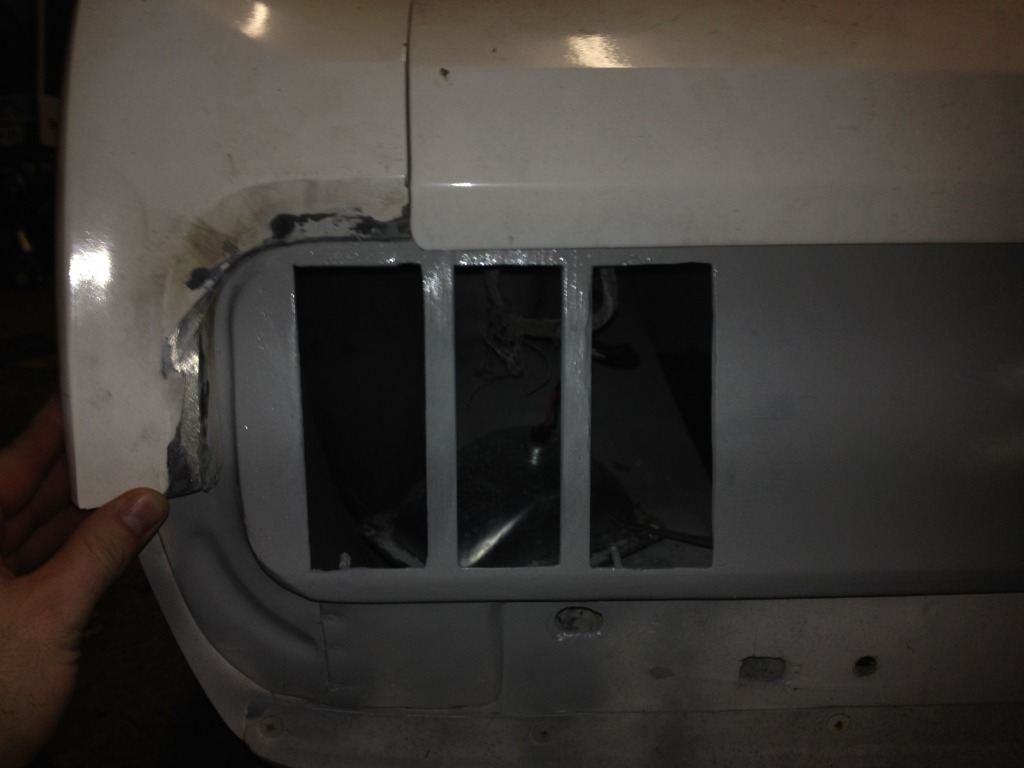
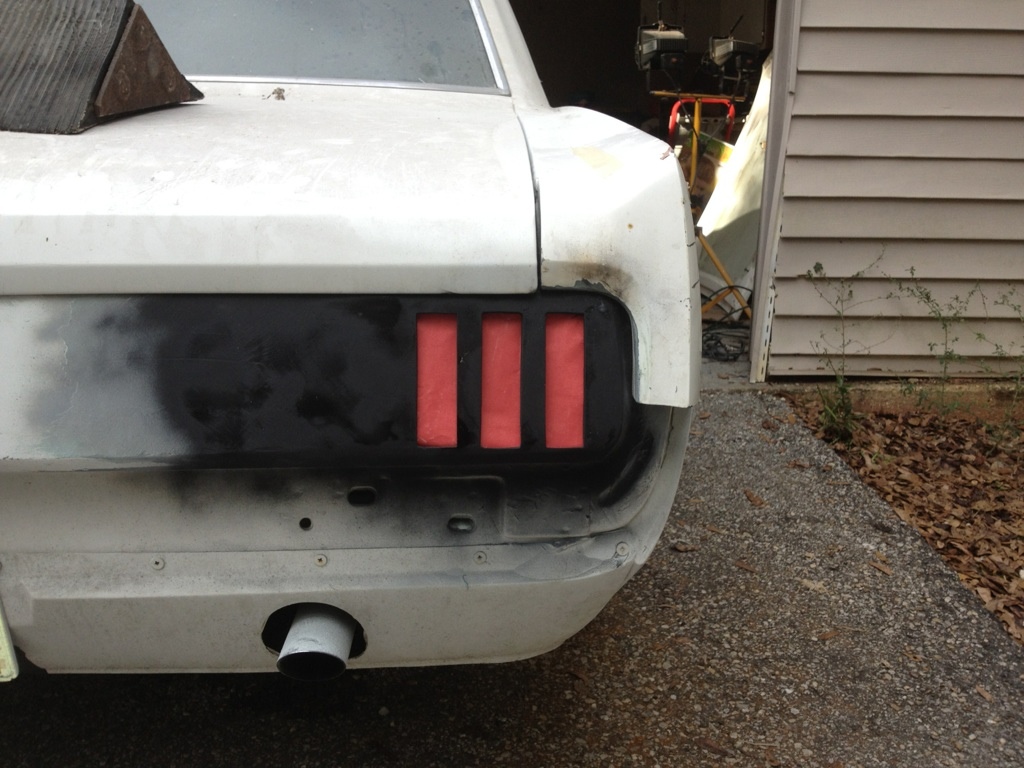
*Embark on journey to create custom tail flush lights, realize you have no body work experience, and no fabrication skills:
*Decide you never wanted a white car, you only were going to have one because you bought one.
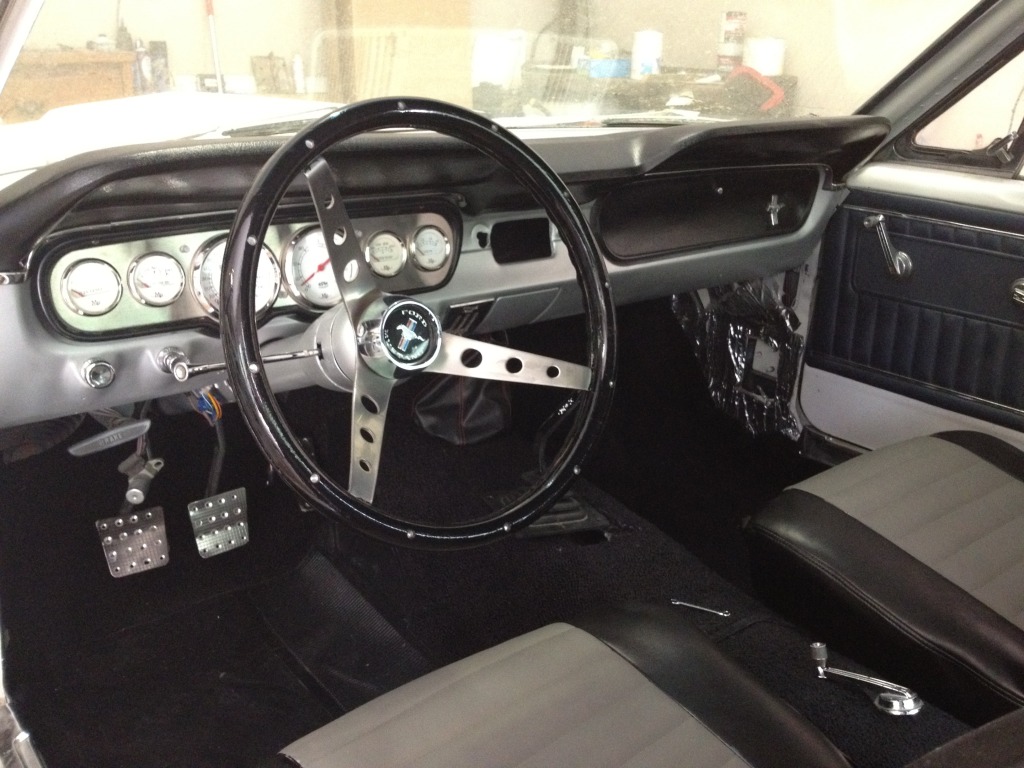
*Repaint interior for new color car
*Pull engine to repaint bay, drop flywheel on hand, break finger and get 5 stitches, third and most serious trip to ER due to car.
*Paint engine bay proposed color of car
*Finally get door to fender gaps set by bribing a friend who can weld into welding metal onto the doors to fill in the gaps.
My goal has been to build a weekend car that I'm not afraid to drive. I don't want something so nice that it has to be trailered, but I don't want a beater either. I'm okay with a 5 foot paint job, as long as I can say one thing. "I did it myself." So far the only things I've paid someone else to do on my car are machine work the block, and align the tires. And I plan to keep it that way unless I just absolutely cannot find a suitable place to paint it on my time schedule.
To say the car (or at least motor) is snake bitten would be an understatement. The motor has been rebuilt twice and disassembled for cleaning 2 additional times due to filling it up with metal, and it has less than 50 miles on it. This car has sent me to the ER 3 times. Right now it is 2 years behind schedule (I know this is normal) and at about triple budget (mostly that is due to some really excessive scope creep).
Here are some cliff notes:
Motor:
1978 351w block
Stock Style Pistons (about 9.2:1)
AFR 185 Heads
1.6 roller rockers
Lunati Voodoo 262 Cam
Summit Stage 2 intake
Summit 750 carb
Stock Crank
Stock "football" rods
I don't know how many HP it is putting out, but it more than I can hook up with an open diff and 2.79 gears. I've got a 9" waiting to get trimmed down, with a stock ford posi and a set of 3.55 gears.
*Bought the car as a roller.
*Body work and base coat complete from the windshield back in wimbledon white
*I6 car with granada front discs and 8" rear with drums transplanted by PO
*Interior redone by PO in blue/white two tone
*I already had a 351w (disassembled) from when I tried to build a ferrari kit car as a freshman in college
*Toploader from Dad's 1969 Granada he totaled back in the 70's
*Had the block Fluxed/Dipped/Honed/Bored and the crank turned
*Rebuilt Toploader
*Put the motor back together, was missing tons of stuff, spent more than if I had bought a crate motor
*Motor knocks, think valve float, change springs, break spring compressor, spring uncompresses into forearm, first trip to ER.
*It wasn't valve float, it was a bad spot on the crank, tore the crank up in less than 2 hours of run time, had to get new crank, rebuild again.
*All steering mechanisms where shot, installed manual R&P. Get metal flakes in eye (was wearing safety glasses but not a grinding shield), 2nd trip to ER (no biggie this time).
*Since the engine was out of the bay, take it back to metal and paint it white (See, this is how scope creep happens. You do one thing really nice, and now everything else gets kicked up a notch)
*Broke a carb in half (how the heck do you break a carb in half?)
*Chase over-heating issues for a year, realize brand new auto-zone water pump sucks. Upgrade to hi-flow, stay cool
*Spend a year trying to get fender to door gaps correct
*Decide to change cam. Cam break in fails, fills engine with metal, disassemble engine to clean again.
*Embark on journey to create custom tail flush lights, realize you have no body work experience, and no fabrication skills:
*Decide you never wanted a white car, you only were going to have one because you bought one.
*Repaint interior for new color car
*Pull engine to repaint bay, drop flywheel on hand, break finger and get 5 stitches, third and most serious trip to ER due to car.
*Paint engine bay proposed color of car
*Finally get door to fender gaps set by bribing a friend who can weld into welding metal onto the doors to fill in the gaps.
 02-12-2013, 10:42 PM
#2
1st Gear Member
Thread Starter
Join Date: Feb 2013
Location: AL
Posts: 141
One of the reason the build is so far behind schedule and so far over budget is that I didn't make a really good plan and lay everything out from the start. My original plan (that SWMBO bought into) was:
*Slap stock motor in
*Assemble fenders, hood, nose
*Paint front to match back, clear
*Drive on weekend
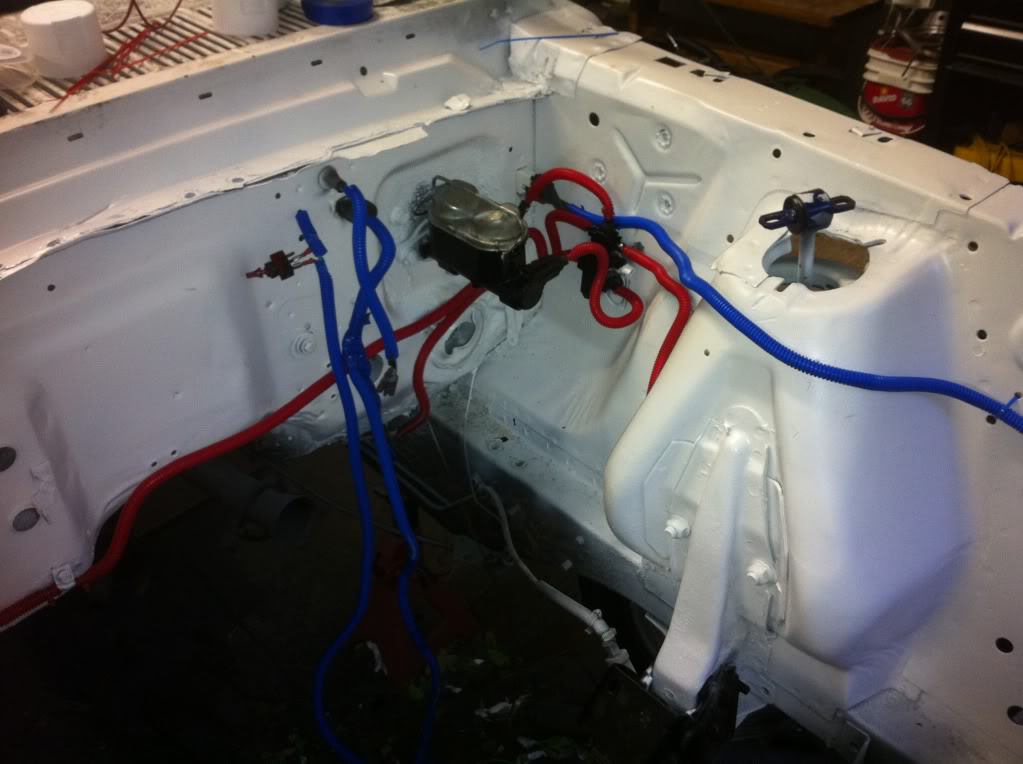
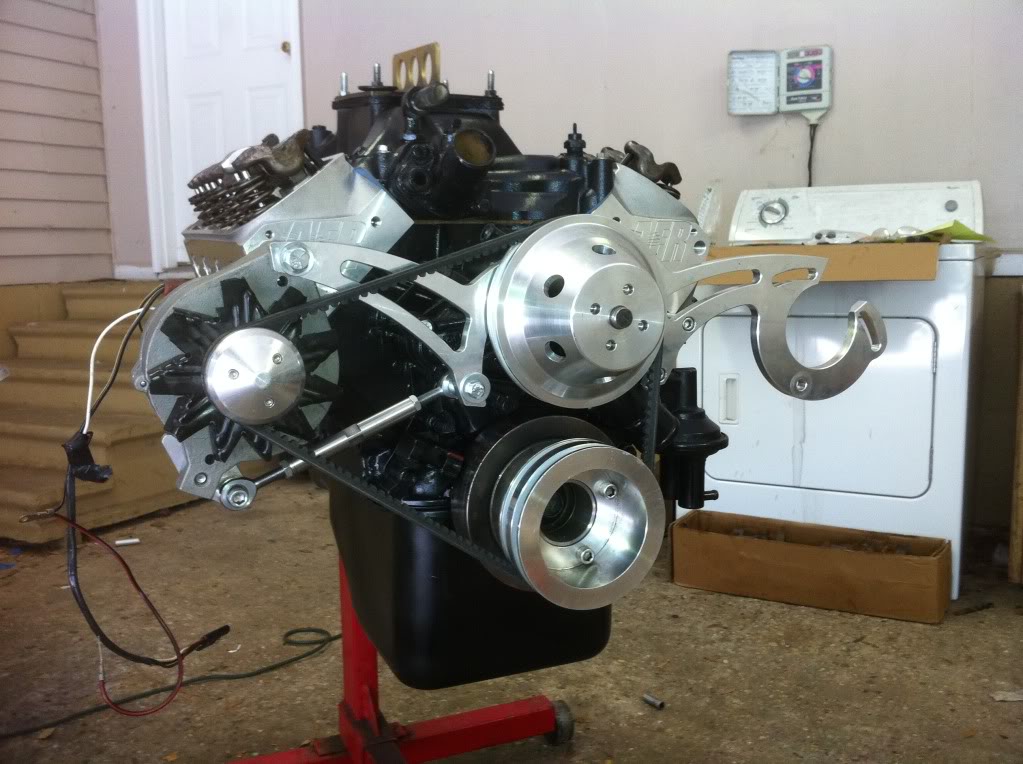
But things kept escalating, mainly due to sites like this one where I get lots of really bad ideas. It really started when the engine tore up, and I had to pull it back out. When that happened I painted the engine and the engine bay, and slapped on some AFR heads while it was out. I also decided since it was out I would solve my steering problems with the R&P. Suddenly I had a pretty nice (nothing like some of the fine stuff I see around here, but still really nice compared to what I had been seeing locally) engine bay, and other parts of the car started to look bad, so I would fix the next thing, then something else would look bad..... and on and on. I wish I had decided to do it ***** to the wall awesome up front, then I could have stripped it and done all the paint and body on a rotisserie, then put it back together. But since the original plan was to just slap it together and do a partial paint, I've been doing everything with the engine and interior in, and all suspension, which makes everything harder. My wife hates these sites, because the budget has ballooned as the car keeps getting nicer. Just an example, this is the progression of the engine bay:
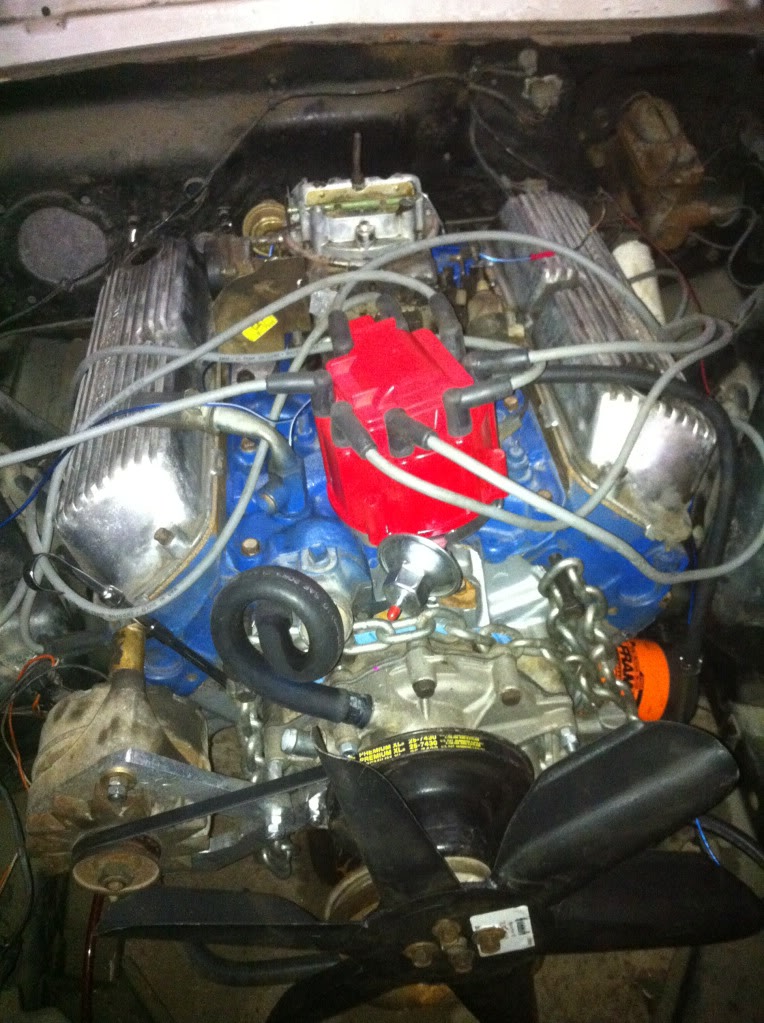
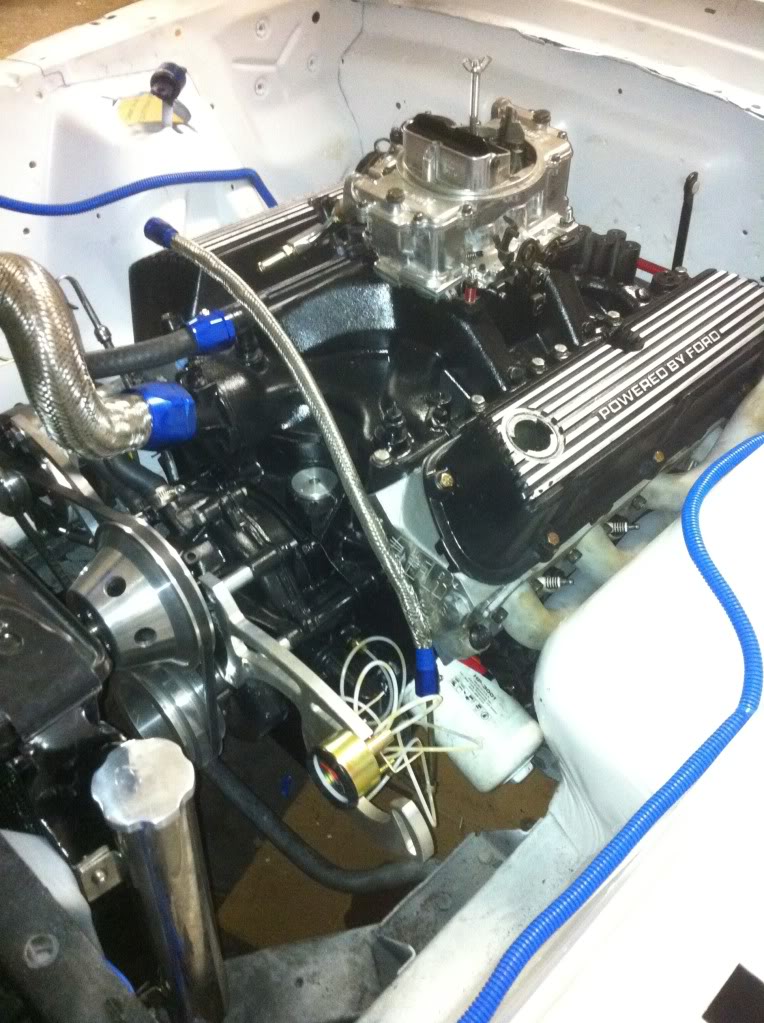
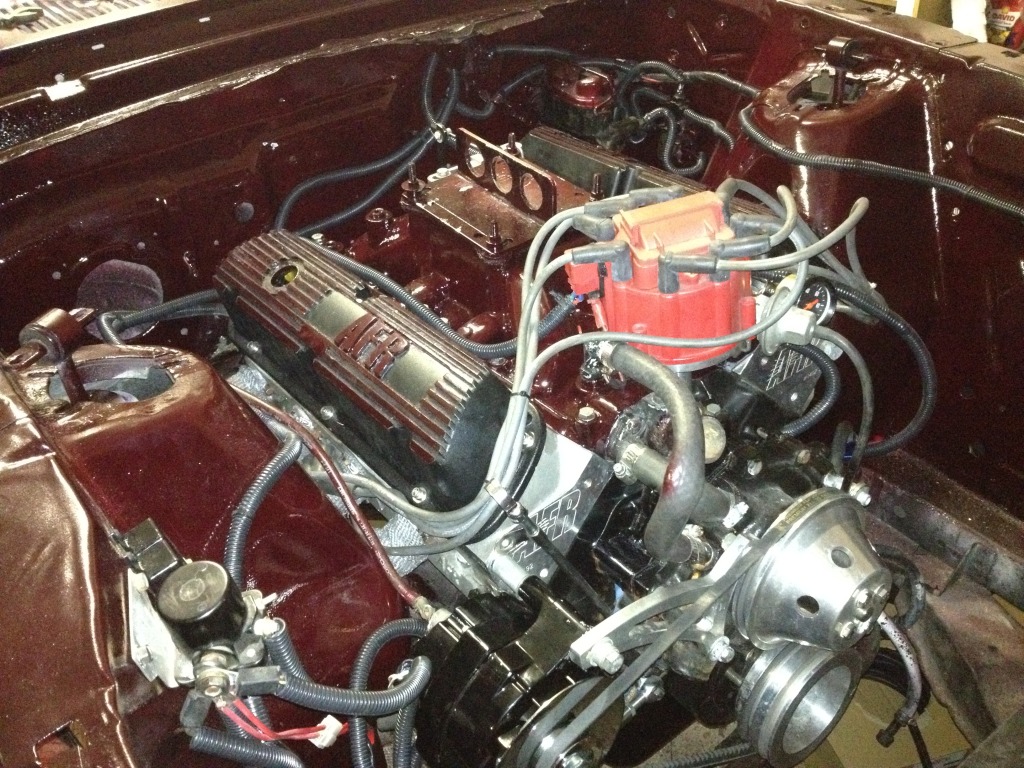
The engine is really dusty in that last shot, it really looks slick if I clean all the sanding dust off.
So here are some random shots as the car progressed:
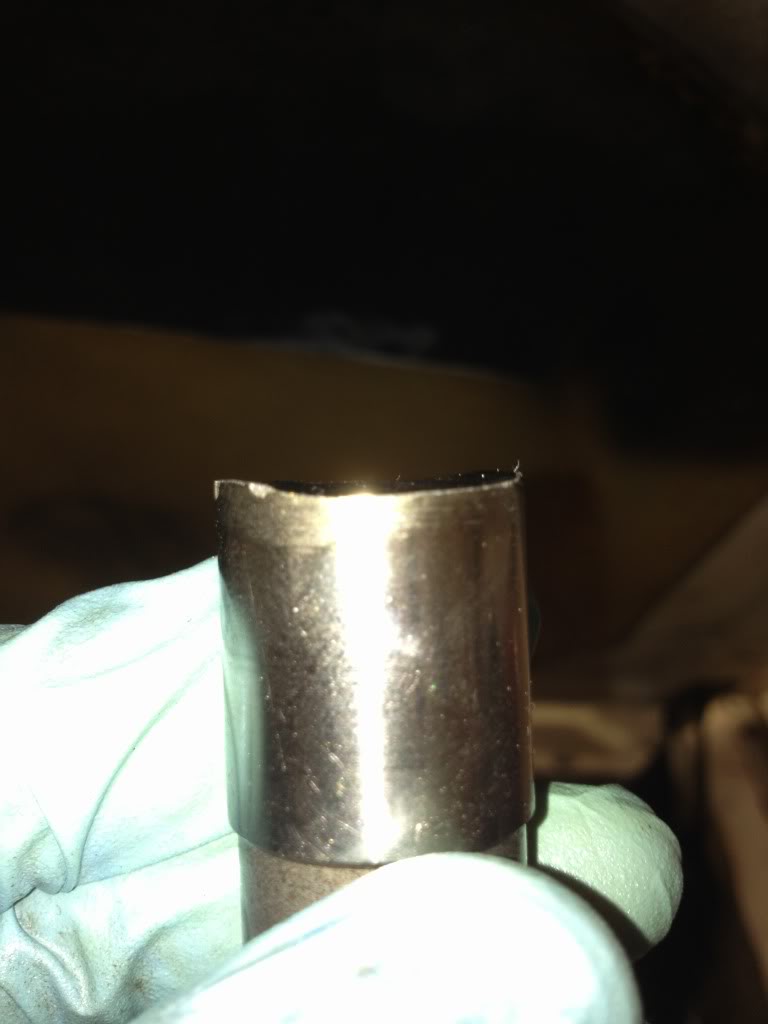
Just for fun, this is what a broken carb will do for you:

Some shots of the now abandoned tail light experiment.
*Slap stock motor in
*Assemble fenders, hood, nose
*Paint front to match back, clear
*Drive on weekend
But things kept escalating, mainly due to sites like this one where I get lots of really bad ideas. It really started when the engine tore up, and I had to pull it back out. When that happened I painted the engine and the engine bay, and slapped on some AFR heads while it was out. I also decided since it was out I would solve my steering problems with the R&P. Suddenly I had a pretty nice (nothing like some of the fine stuff I see around here, but still really nice compared to what I had been seeing locally) engine bay, and other parts of the car started to look bad, so I would fix the next thing, then something else would look bad..... and on and on. I wish I had decided to do it ***** to the wall awesome up front, then I could have stripped it and done all the paint and body on a rotisserie, then put it back together. But since the original plan was to just slap it together and do a partial paint, I've been doing everything with the engine and interior in, and all suspension, which makes everything harder. My wife hates these sites, because the budget has ballooned as the car keeps getting nicer. Just an example, this is the progression of the engine bay:
The engine is really dusty in that last shot, it really looks slick if I clean all the sanding dust off.
So here are some random shots as the car progressed:
Just for fun, this is what a broken carb will do for you:
Some shots of the now abandoned tail light experiment.
02-12-2013, 10:44 PM
#3
1st Gear Member
Thread Starter
Join Date: Feb 2013
Location: AL
Posts: 141
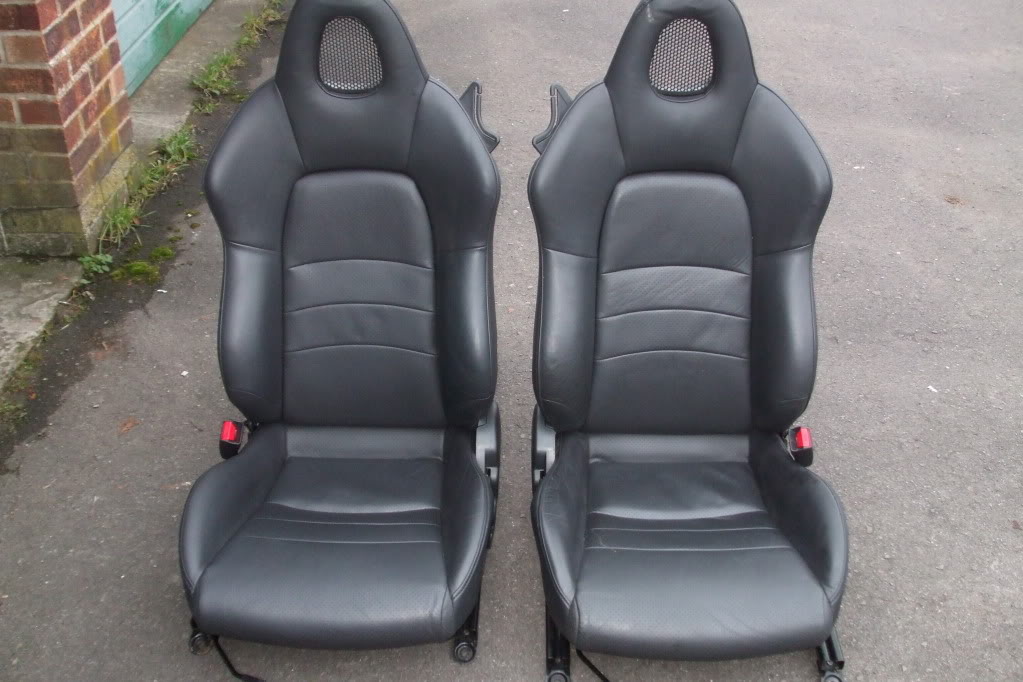
Recently I've decided to add some S2000 seats (not installed yet), which thanks to the shipping company punching nails holes in, will be getting recovered with two tone Black-grey with red stitching (on the shipping companies dime):
The most recent addition is a new fiberglass nose piece. When I bought my car I struggled with whether to get a 1965/66 or a 1967/68. I really don't like the back end of a 1967/68, but I've always preferred the longer nose on them. In the end, my preference for the 1965/66 rear, and the fact that I got a deal on a 1965, pushed me in that direction. However I never really gave up on trying to get a longer nose. I spent hours on the internet trying to figurewhat I would have to do to get a longer nose. I tried making several molds from styrofoam for a 1967 shelby style nose on a 1965 mustang (don't start... I told you I like custom stuff). I had pretty much given up and resolved myself to sticking with a basic 1965 front (plus and R-type apron I had already purchased), when Mustangs to Fear posted some pictures of a soon to be released body kit, which included a longer nose and hood. The longer hood was actually the key that I had missed when I was trying to make patterns for a custom nose. I kept trying to work the extra length into the nose, keeping the stock length hood. But by making the hood longer, the extended nose piece was much simpler.
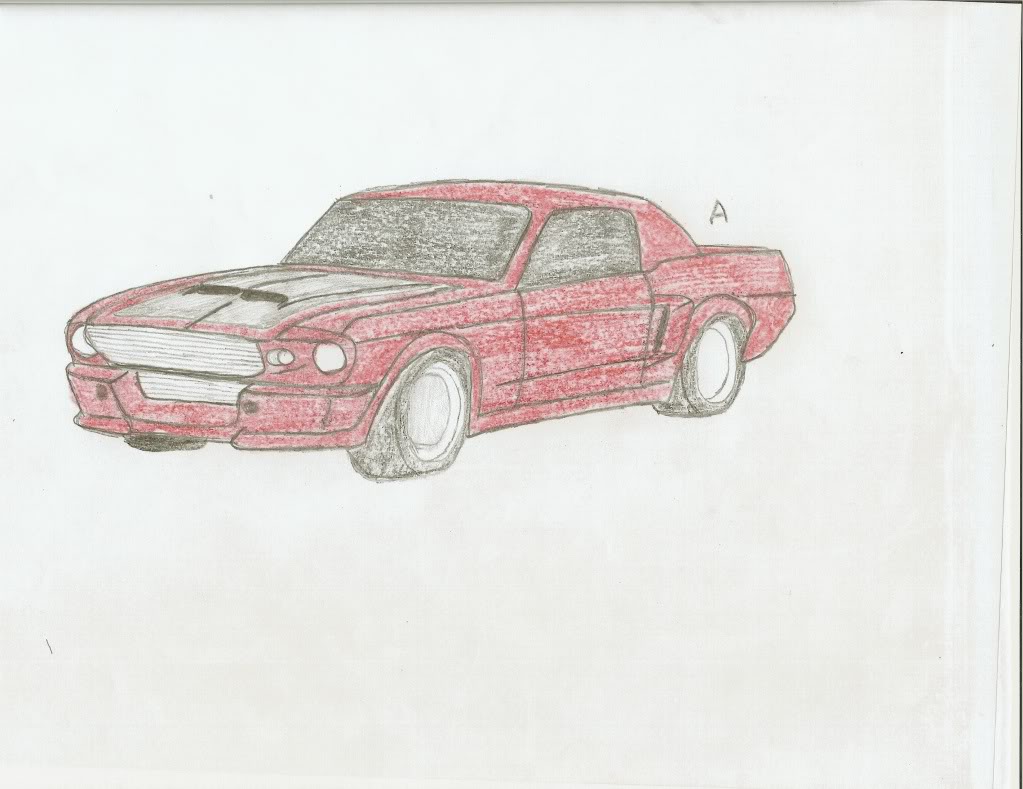
Now the MTF kit is an E-stlye nose, and I'm not the biggest fan of the Eleanor clones. I most definitely think it has been way overdone, but I do love certain aspects of it. After many nights of thinking about different things I would like to do (I tend to get insomnia for a few days at a time), I decided that I wanted a long nose bad enough that I could take an E-nose and try to tame it down to fit my taste. I didn't think it would be to hard to eliminate all of the extra fog lights, and I don't mind the driving lights that much, and I figured I could probably glass them over if I decided I really didn't like them, then I would just have a long nose 1967 style front end. I wound up making a couple of really crappy sketches and decided that I like the look of the long nose and the driving lights, with all the other lights deleted. I also wanted a unique paint scheme, no way was I going pepper grey with black stripes. Or even the inverse (DONT LAUGH AT MY ART SKILLZ):
The down side was that the kits were not ready for production yet. I kept plugging along on the car, trying to get it ready for paint everywhere except the nose and hood. The closer I got to thinking I was ready for a nose and hood, the more I bugged Rich at MTF about the schedule for the 1965/66 kits. Finally one day he made me an offer I couldn't refuse. He had a prototype nose that he had used for some plugs that he was willing to let me take a chance on. I still wouldn't have a hood, but getting the nose would allow me to go ahead and finish setting all of the body gaps and even start blocking everything but the hood. (In case you haven't tried it yet, the fenders to doors don't line up right unless the front end is attached, it flexes the fenders).
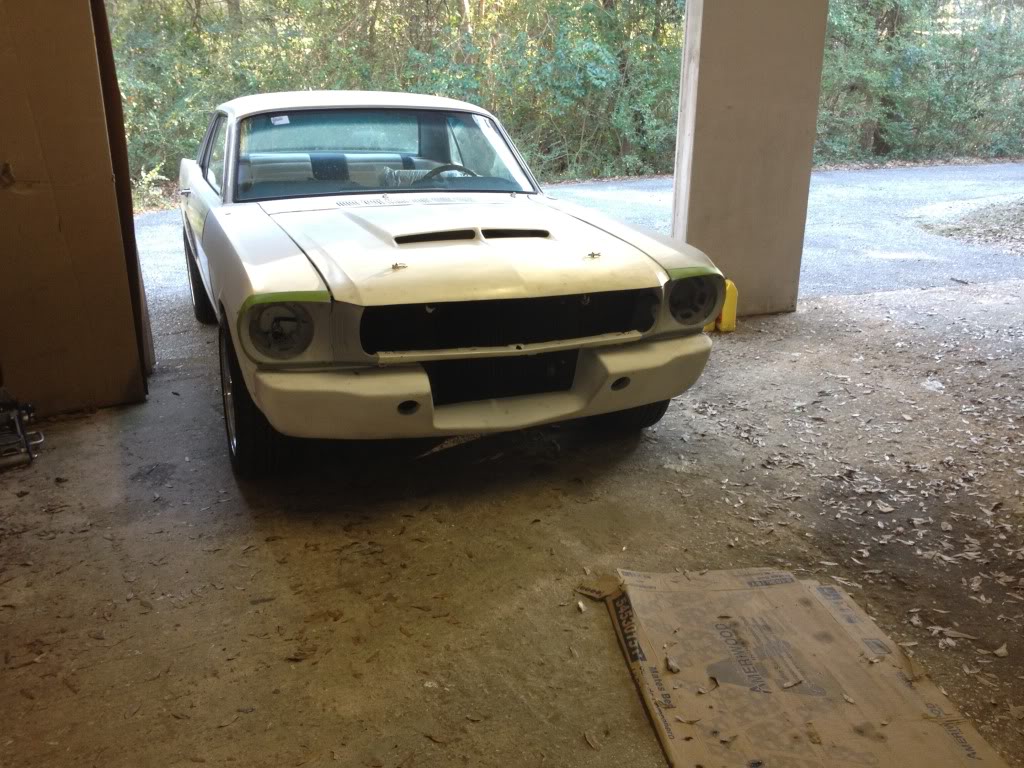
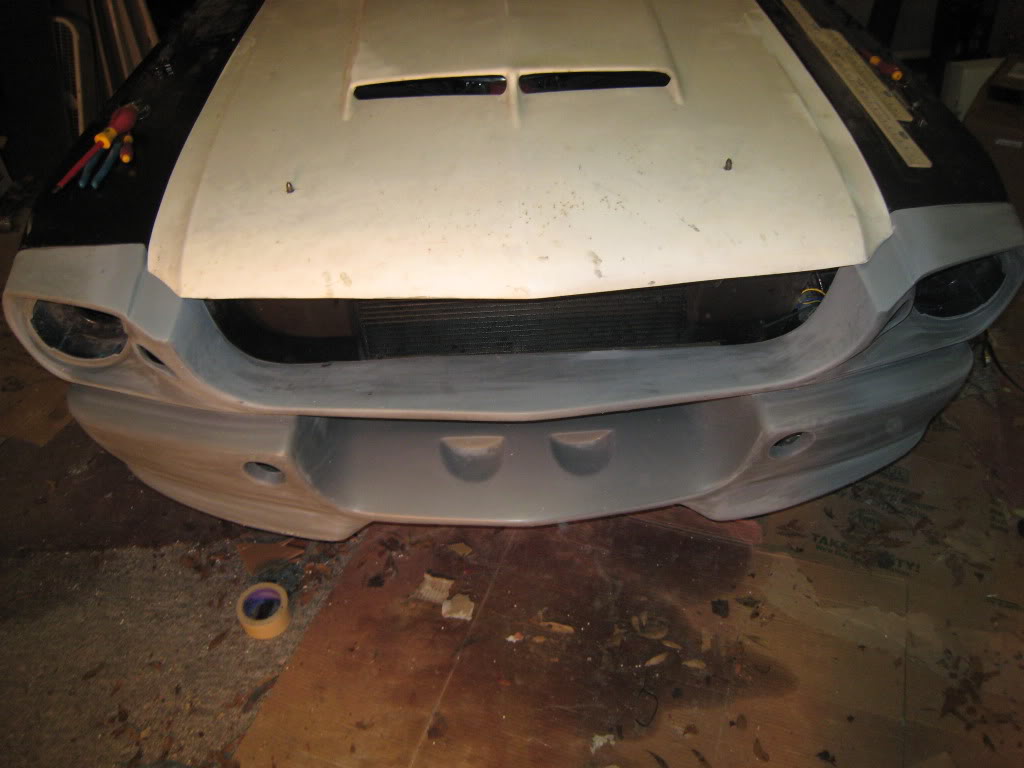
After spending a little time with the nose (it was a prototype, not quite up to MTF's usual standards, but still better than any other production fiberglass I had bought) I knew I had made the right decision in getting a long nose kit. Below are some pictures that show the nose along with the stock hood (So you can see how much longer it is, and I have since filled the divots for the lower fog lights):
This is the stock hood pulled forwards, to get a feel for how it will look when finished:
The most recent addition is a new fiberglass nose piece. When I bought my car I struggled with whether to get a 1965/66 or a 1967/68. I really don't like the back end of a 1967/68, but I've always preferred the longer nose on them. In the end, my preference for the 1965/66 rear, and the fact that I got a deal on a 1965, pushed me in that direction. However I never really gave up on trying to get a longer nose. I spent hours on the internet trying to figurewhat I would have to do to get a longer nose. I tried making several molds from styrofoam for a 1967 shelby style nose on a 1965 mustang (don't start... I told you I like custom stuff). I had pretty much given up and resolved myself to sticking with a basic 1965 front (plus and R-type apron I had already purchased), when Mustangs to Fear posted some pictures of a soon to be released body kit, which included a longer nose and hood. The longer hood was actually the key that I had missed when I was trying to make patterns for a custom nose. I kept trying to work the extra length into the nose, keeping the stock length hood. But by making the hood longer, the extended nose piece was much simpler.
Now the MTF kit is an E-stlye nose, and I'm not the biggest fan of the Eleanor clones. I most definitely think it has been way overdone, but I do love certain aspects of it. After many nights of thinking about different things I would like to do (I tend to get insomnia for a few days at a time), I decided that I wanted a long nose bad enough that I could take an E-nose and try to tame it down to fit my taste. I didn't think it would be to hard to eliminate all of the extra fog lights, and I don't mind the driving lights that much, and I figured I could probably glass them over if I decided I really didn't like them, then I would just have a long nose 1967 style front end. I wound up making a couple of really crappy sketches and decided that I like the look of the long nose and the driving lights, with all the other lights deleted. I also wanted a unique paint scheme, no way was I going pepper grey with black stripes. Or even the inverse (DONT LAUGH AT MY ART SKILLZ):
The down side was that the kits were not ready for production yet. I kept plugging along on the car, trying to get it ready for paint everywhere except the nose and hood. The closer I got to thinking I was ready for a nose and hood, the more I bugged Rich at MTF about the schedule for the 1965/66 kits. Finally one day he made me an offer I couldn't refuse. He had a prototype nose that he had used for some plugs that he was willing to let me take a chance on. I still wouldn't have a hood, but getting the nose would allow me to go ahead and finish setting all of the body gaps and even start blocking everything but the hood. (In case you haven't tried it yet, the fenders to doors don't line up right unless the front end is attached, it flexes the fenders).
After spending a little time with the nose (it was a prototype, not quite up to MTF's usual standards, but still better than any other production fiberglass I had bought) I knew I had made the right decision in getting a long nose kit. Below are some pictures that show the nose along with the stock hood (So you can see how much longer it is, and I have since filled the divots for the lower fog lights):
This is the stock hood pulled forwards, to get a feel for how it will look when finished:
02-12-2013, 10:45 PM
#4
1st Gear Member
Thread Starter
Join Date: Feb 2013
Location: AL
Posts: 141
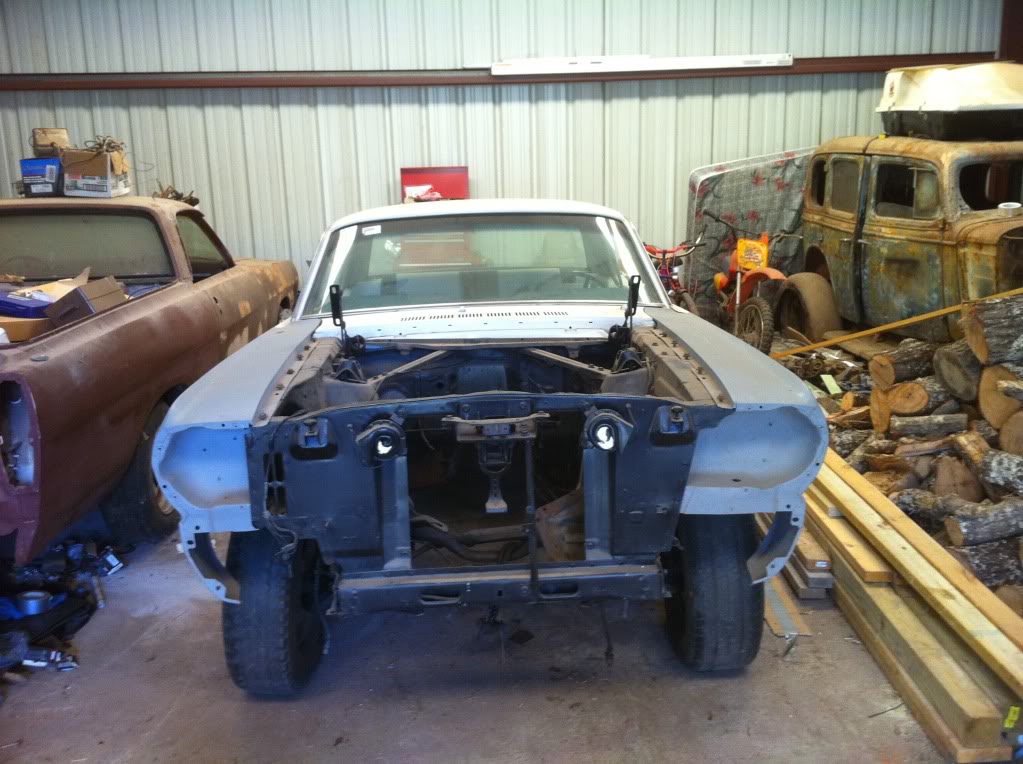
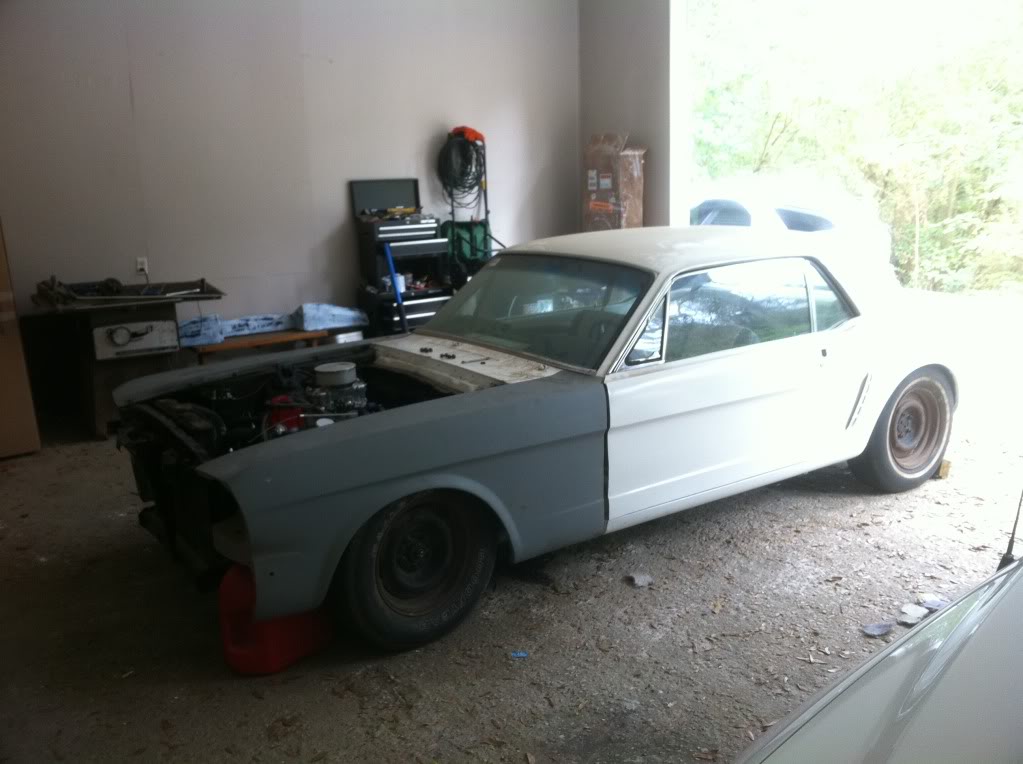
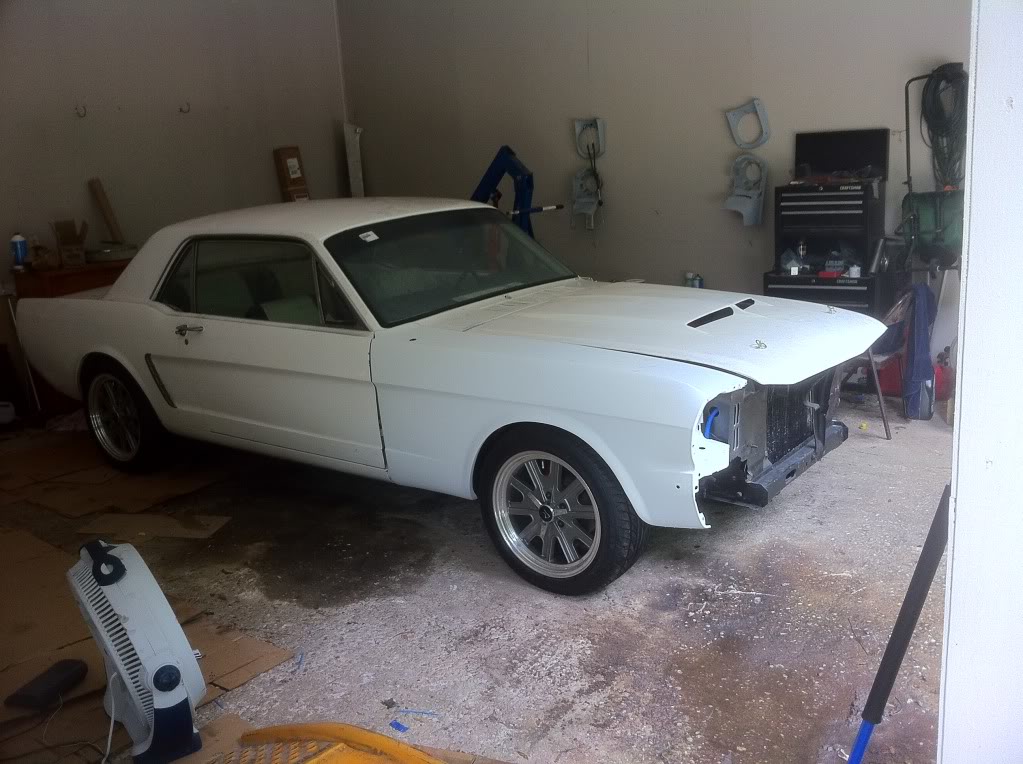
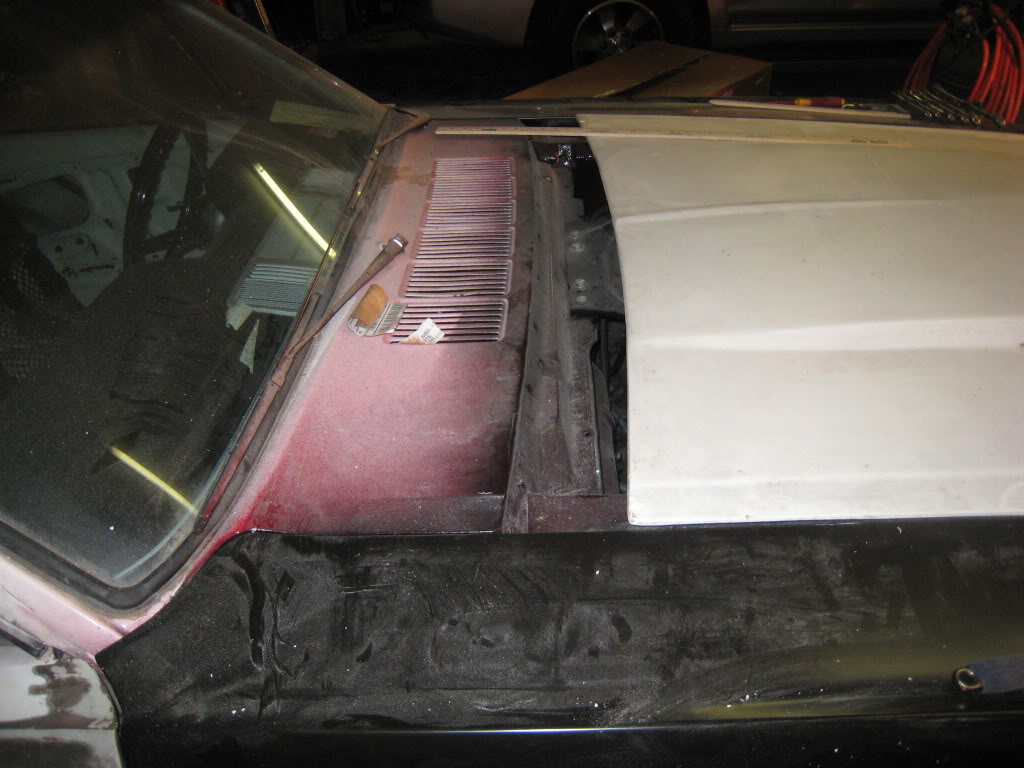
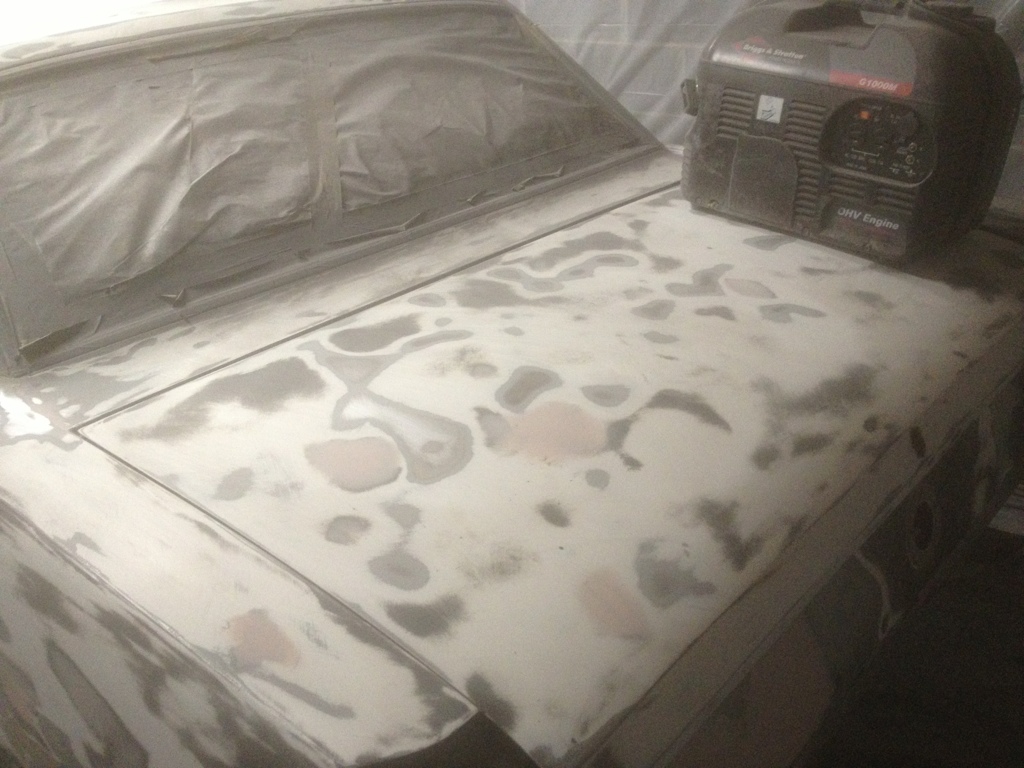
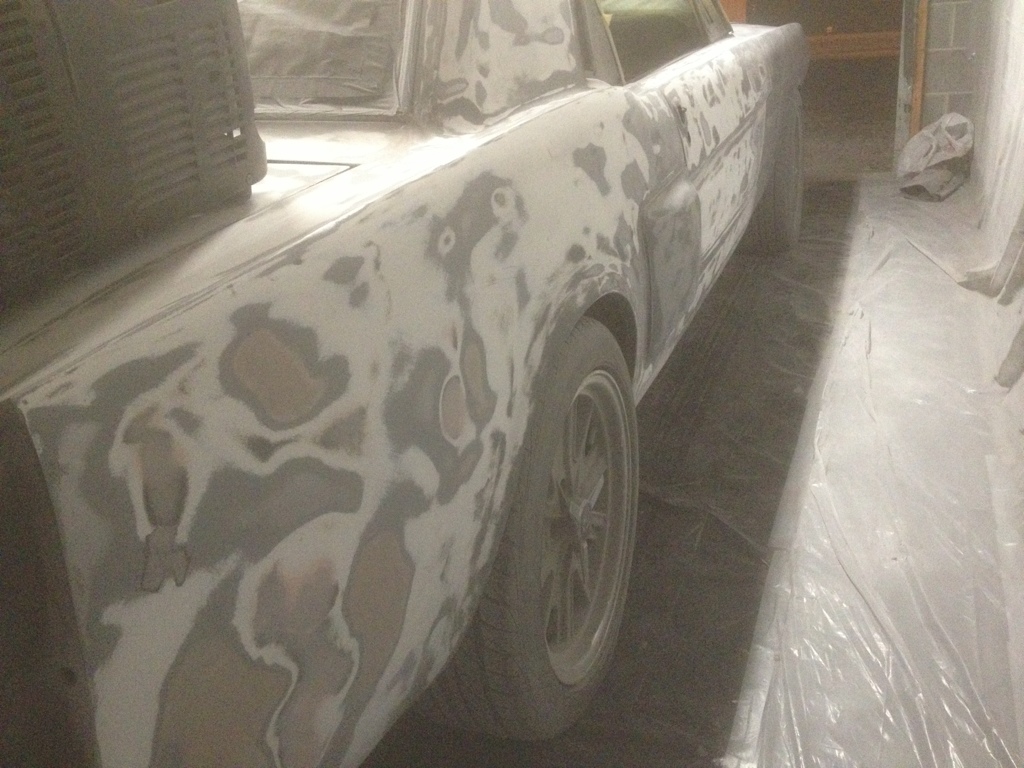
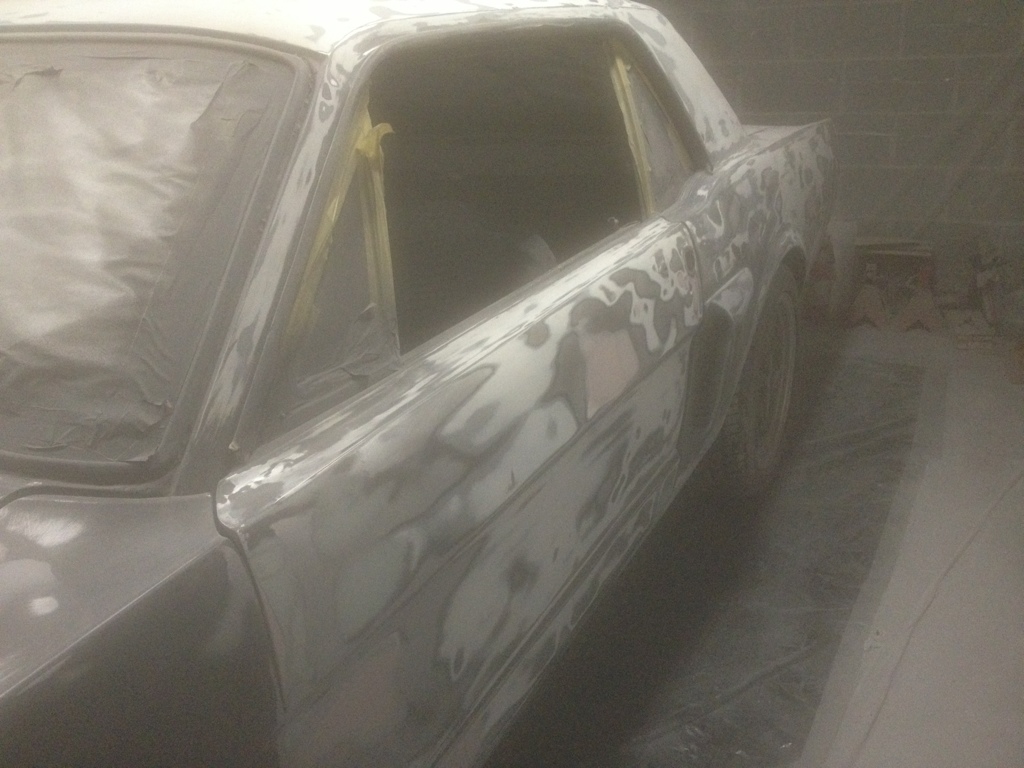
As of last week, I'm working out of town M-F, and flying home on the weekends. Since SWMBO is really really fed up with the car (2 years behind schedule) I knew working on it during my short weekends at home was gong to be a no no . So I found a storage unit that will let me work on the car inside during the evenings, and I've pulled the car up here:
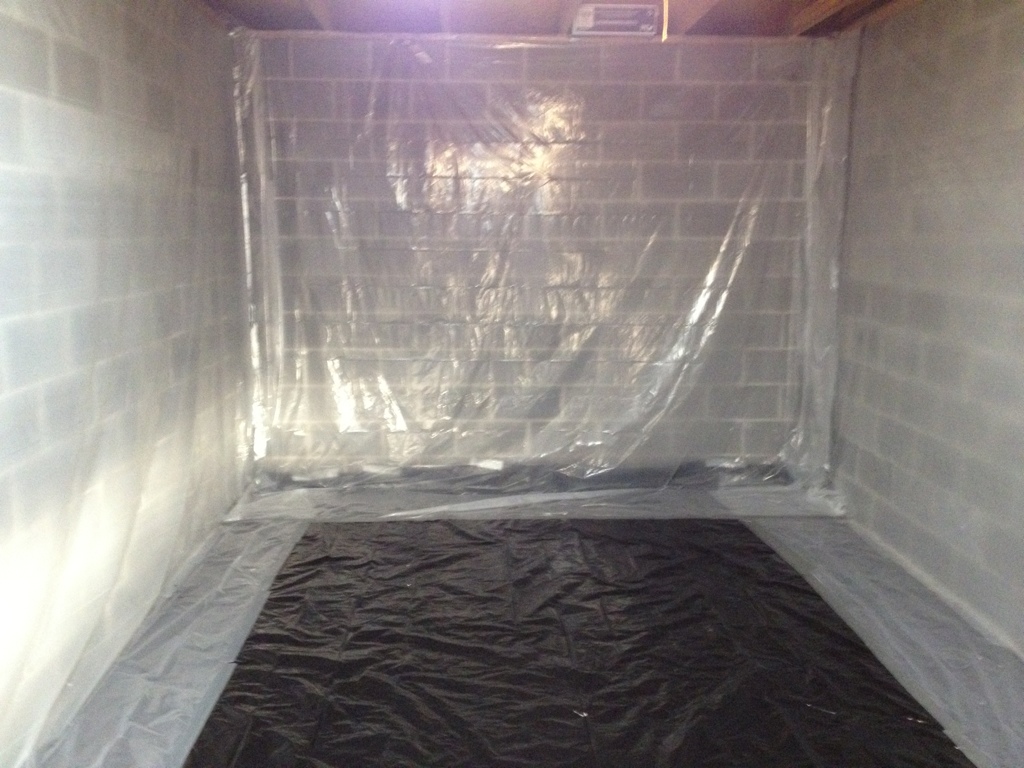
As the car sits in my storage unit, it is in epoxy primer, and I'm finishing the last of the body work. I hope to spray hi-build next week (if it will warm up enough) and start blocking. The goal is paint by mid-march.
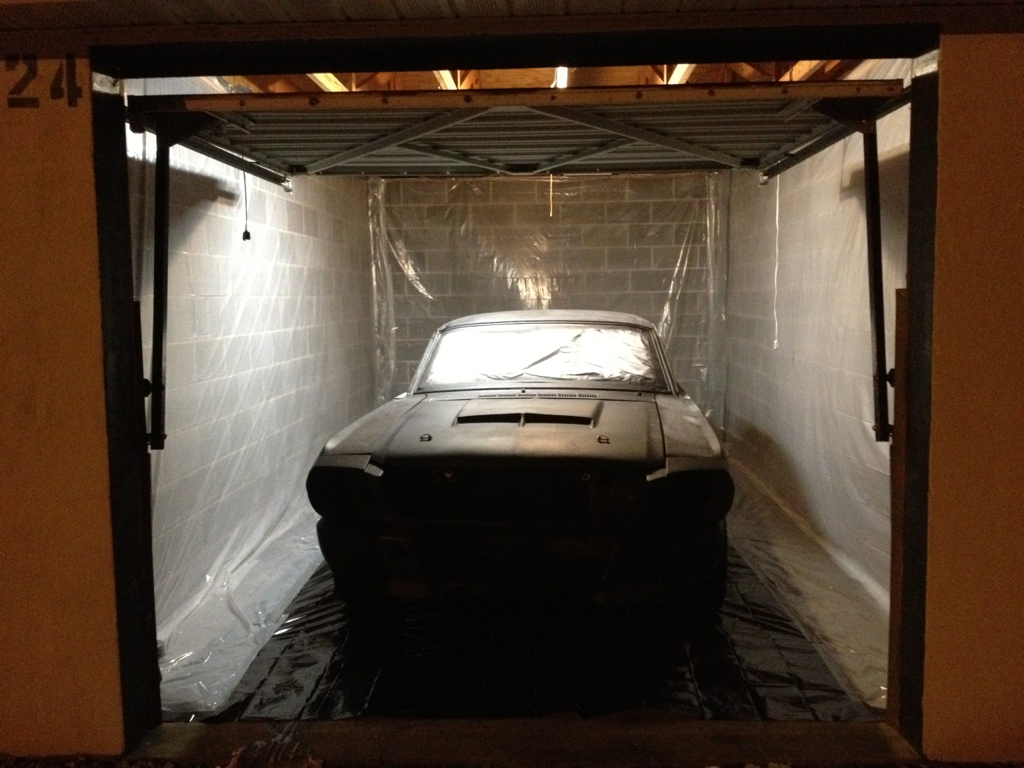
As the car sits in my storage unit, it is in epoxy primer, and I'm finishing the last of the body work. I hope to spray hi-build next week (if it will warm up enough) and start blocking. The goal is paint by mid-march.
02-13-2013, 01:33 PM
#5
3rd Gear Member
Join Date: Jul 2010
Location: Indianapolis
Posts: 710
Man, that car has certainly gone through a few iterations! Dont give up and never believe that you can build a car too nice to drive! I took J Leno's approach, get em as close to 100% as you can then drive em back down to 60%!
02-13-2013, 09:48 PM
#6
1st Gear Member
Thread Starter
Join Date: Feb 2013
Location: AL
Posts: 141
The problem being that if I drive it back down to 60%, it will be 20 years before I can build it back up again. SWMBO has been more overly patient as this build drug out and we have kids now. They will be out of the house before I can work on it again.
The paint job is the only thing that would scare me about driving the car. They are so expensive, and they are the easiest thing to muck up. Slinging a rod, breaking a control arm, smoking the electronics... I can fix these all myself for a reasonable cost. But screw up a 15K paint job... well that sucks. That is why I'm planning to paint myself. That way if I muck it up, I know how to fix it.
The paint job is the only thing that would scare me about driving the car. They are so expensive, and they are the easiest thing to muck up. Slinging a rod, breaking a control arm, smoking the electronics... I can fix these all myself for a reasonable cost. But screw up a 15K paint job... well that sucks. That is why I'm planning to paint myself. That way if I muck it up, I know how to fix it.
02-14-2013, 02:22 AM
#7
4th Gear Member
Join Date: Aug 2008
Location: Goodyear, AZ
Posts: 1,674
you have the right Idea about the paint. Especially since you have kids. I had my paint done, not a 15k dollar job but expensive for me. In the 5 years since, it has been ran into with bikes several times leaving handle bar scratches and once when I was washing it, my little dude decided to help me clean it with a scotch brite pad. he was on the other side and i didnt notice until i had a 12" x 12" well sanded area.
But hey it happens. at least i know it came from him and not a hole in a parking lot.
Keep it going...
But hey it happens. at least i know it came from him and not a hole in a parking lot.
Keep it going...
 02-14-2013, 11:55 AM
#9
1st Gear Member
Thread Starter
Join Date: Feb 2013
Location: AL
Posts: 141
02-14-2013, 11:10 PM
#10
1st Gear Member
Thread Starter
Join Date: Feb 2013
Location: AL
Posts: 141
I pushed myself too hard tonight. I could barely lift my arms to wash my face after I sanded for 4 hours with only 2 ten minute breaks. On the upside, I won't be working on the car for 4 days, so I've got plenty of time to rest.
And (drum roll please).......
I'm done sanding...
for now.
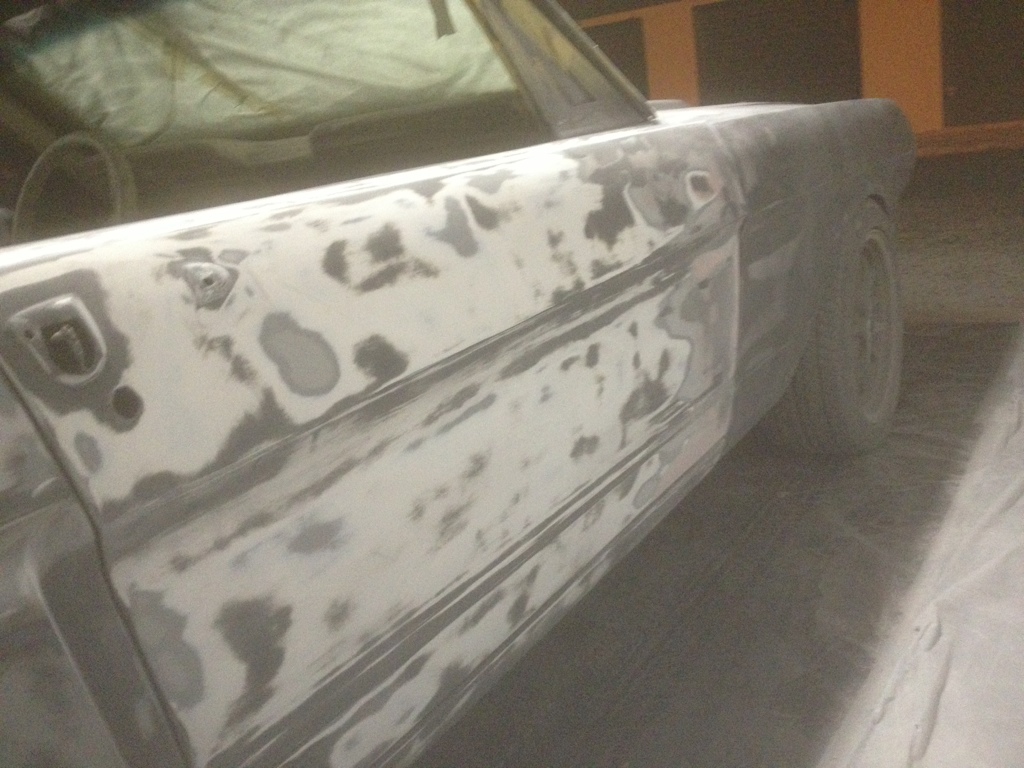
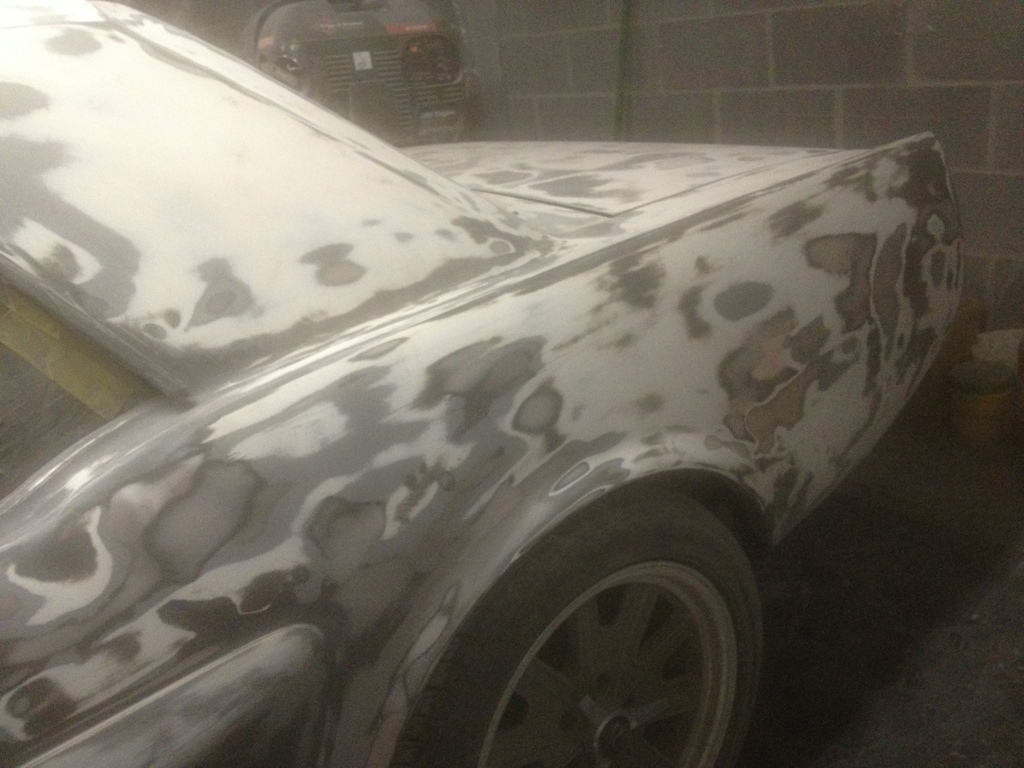
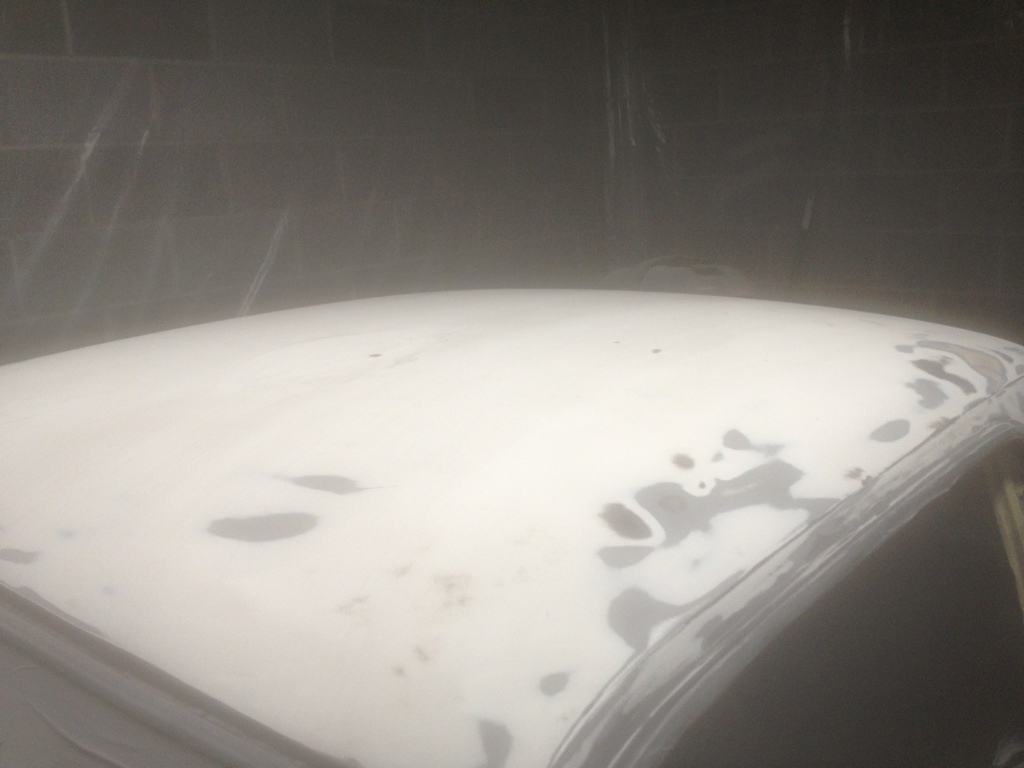
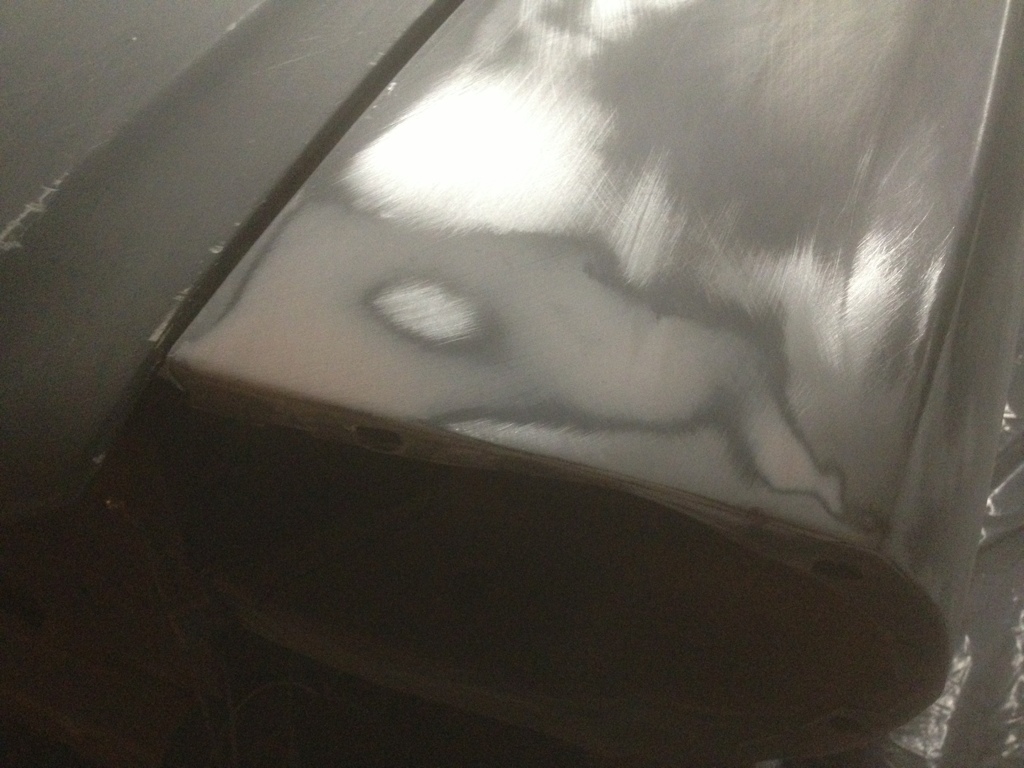
I finished blocking off the epoxy. I think it is straight, but I will find out next week. After I finished sanding tonight, I pulled the car outside and brushed the bulk of the dust off of it, and then swept the room 5 times. I got about as much dust gone as I am going to get out. Next week I will tape of the engine bay, tac the car and clean it with wax and grease remover. Then it is on to spraying hi-build.
I have to go by Harbor Freight and pickup the electric HVLP this weekend, and pray it doesn't trip the breaker in my storage unit. If all of that goes well, I'll be done laying hi-build next week, and will start (hopefully) my final blocking week after next.
And (drum roll please).......
I'm done sanding...
for now.
I finished blocking off the epoxy. I think it is straight, but I will find out next week. After I finished sanding tonight, I pulled the car outside and brushed the bulk of the dust off of it, and then swept the room 5 times. I got about as much dust gone as I am going to get out. Next week I will tape of the engine bay, tac the car and clean it with wax and grease remover. Then it is on to spraying hi-build.
I have to go by Harbor Freight and pickup the electric HVLP this weekend, and pray it doesn't trip the breaker in my storage unit. If all of that goes well, I'll be done laying hi-build next week, and will start (hopefully) my final blocking week after next.