My long tube header install thoughts & notes
 04-04-2013, 12:09 PM
#1
3rd Gear Member
Thread Starter
Join Date: Oct 2011
Location: WV
Posts: 750
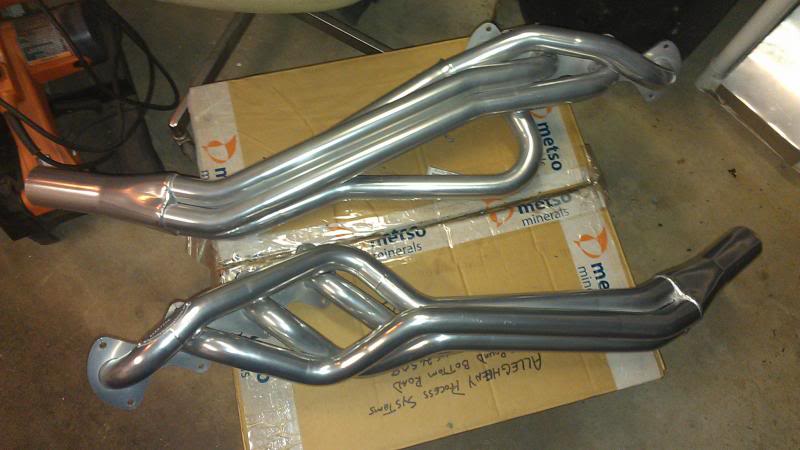
As some of you may be aware, I installed some JBA ceramic longtubes & JBA catted shorty H on my car and have been working on it (& other things) over the past few weeks.
I started this in the middle of March because I knew that I could take my time, and the weather was not gonna be nice enough for me to drive the car for awhile. At the same time the weather wouldn't be so cold that I'd freeze my fingers off in my unheated, detached garage.
So, I'll just start from the beginning here:
First off...I looked around online for some header install guides/chronicles written by others. I found this in my search:
http://www.moddedmustangs.com/forums...rochamber.html
Although it was written about installing Mac headers, and a lot of the picture links are now broken, the actual text part of the guide is VERY handy and I used it as the basis of my approach to this job. On my car, I used his method of removing the steering shaft (I locked the wheel beforehand, of course) which was easier than another guide I read that told you to unbolt the rack and slide it forward.
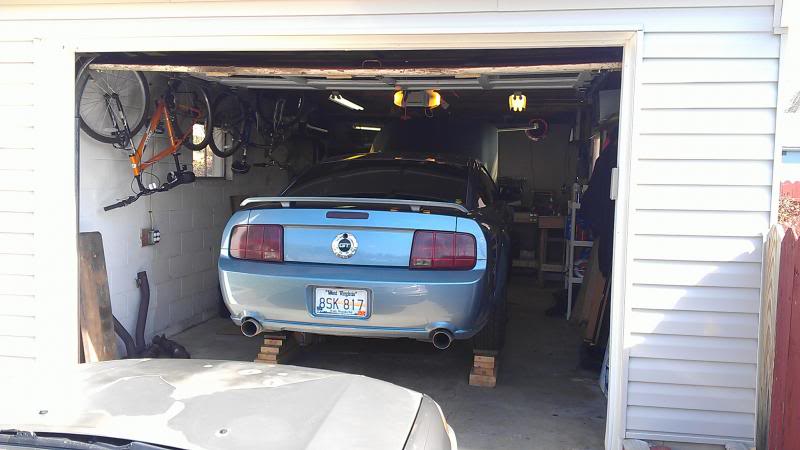
Let me just come right out and say that if you use this guide, this job is not at all difficult and in fact, raising the engine as he describes gives you pretty good access to almost everything. It is, however, rather time consuming. You can easily do this job on jackstands if you can get the car about 2 feet off the ground. This is my garage where I did my install, I'm glad this is an extra-wide one car garage because it gave me lots of room around the sides where you need it most. And before anyone comments on the wood, I didn't want to buy ramps but had lots of pieces of 2x6's laying around, so I screwed them together to make tire stands of sorts. The front IS on jackstands.
Before even starting this install, I slotted the two outermost bottom bolt holes on both headers with a cutoff wheel. This made installation about 10x easier since I could start those bolts with the gasket and set the header on them when bringing it in from under the car. SOOOO much easier to do, I highly recommend doing this step.
I also went to McMaster-Carr and bought some nice M8x30 flanged Class 10.9 bolts to use for this job because I didn't like the standard bolts with lock washers that were supplied. They cost about $20, and the ONLY place they didn't fit was the two top bolt holes in the back on the driver's side. For some reason they hit the tube and wouldn't go into the bolt hole
I sprayed everything with PB blaster about 24 hours before I started, after I had removed the motor mounts from the block. On the driver's side, all of the nuts came off easily, and once I removed the manifold I sprayed the studs with PB Blaster and again waited overnight. All but 3 turned out via the 5mm hex on their ends, those last 3 had to be double nutted and turned out with a wrench but weren't bad. The dipstick tube was quite honestly the most difficult and frustrating thing about this whole job- I probably spent a total of at least 2 hours trying to get the damn thing out. I finally had to work a screwdriver under the little "lip" where it goes into the block and pry to get it started out. Getting it back in wasn't much easier, either! Once that's done the header goes in easily and you have lots of room to get at the bolts, and the motor mount and steering shaft are easy to reinstall. Note, you will probably need to drop the engine down some (with the jack) to install the header, it was hitting the floorpan and wouldn't seat until I lowered the engine.
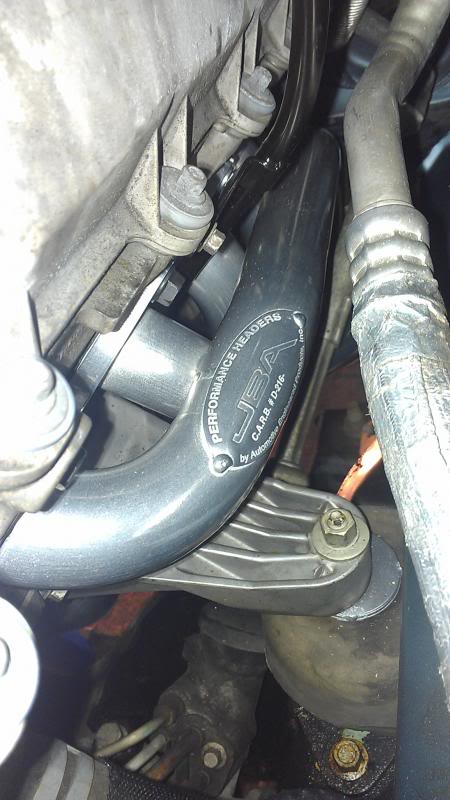
Driver's side was kind of the same story...I had two studs that turned out with the nuts when I took the manifold off, and again 3 studs that had to be double nutted to remove. Not bad at all. Access on the driver's side with the header in is a little more difficult. The top front couple bolts are hard to get at because of the fuse box, and the very front bottom bolt is right up against the AC compressor. Also, I had to really finagle around with the motor mount to get it back in with the header installed...you can only raise the motor so much once the header is installed due to floorpan clearance, and the stud is in the way, but I managed to get it in there.
When I set the driver's side header in, the top front bolt hole was off a minute amount but it was just enough the header bolt wouldn't start without crossthreading. Had to pull the header back out to enlarge the hole (I ended up just slotting it too and taking a little off that side).
With everything back in, I can definitely see that going over the bolts to tighten them will be just a tad difficult.
I kept the stock motor mounts and used 1/4" spacers on them, , and pulled the engine over towards the passenger side a bit before tightening down the motor mounts, just to make sure I had good steering shaft clearance.
Driver's side, with everything installed:
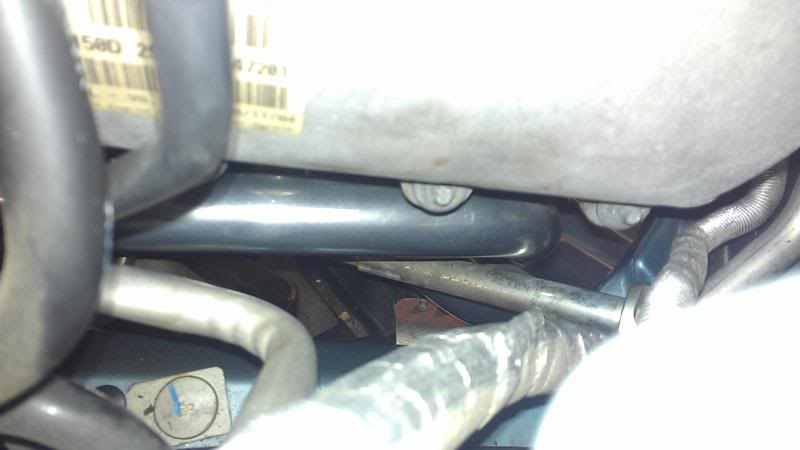
Shaft clearance looks good.
Passenger side:

As you can see, you can access the "blind" top starter bolt from the engine bay with these headers, which is a big help for starter reinstallation.
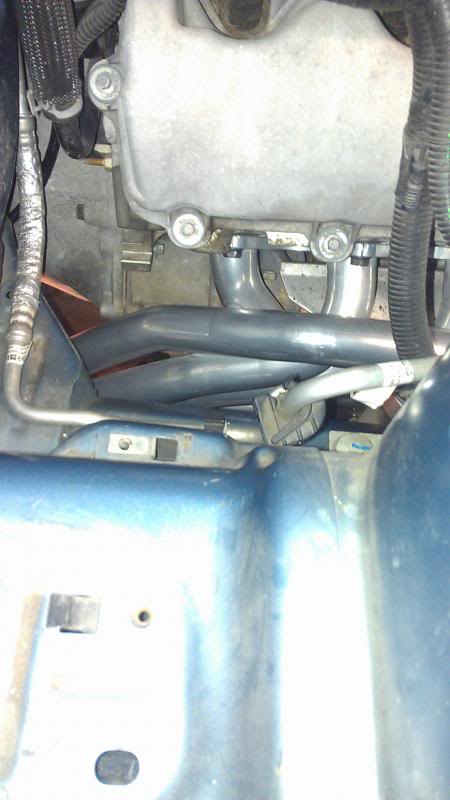
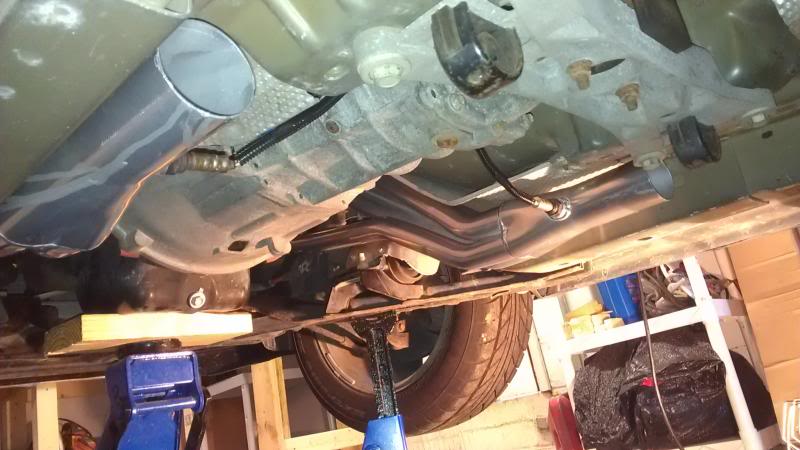
Underneath:
I extended all my O2 sensors with wire and solder. It was easy, these headers didn't come with extensions so it saved me $64 that extensions woulda cost me.
One sorta issue I did run into was that the driver's side header hangs down about 1/4" or so lower than the passenger side, which caused some H-pipe alignment issues, but it seems to be OK.
So that's that...it's now almost completely done, I'm finishing the rest of the exhaust now, but overall not bad. Any questions feel free to ask


 04-05-2013, 12:03 PM
#3
5th Gear Member
Join Date: Oct 2009
Location: Maui
Posts: 4,752
LT install is just a long process. The dip stick delay is a perfect example. Sometimes sh*t just doesn't go the easy route. Did you wear gloves or just lose a few pints of blood? Lol
Be sure to get us a video when your done.
Be sure to get us a video when your done.
04-05-2013, 02:57 PM
#4
3rd Gear Member
Thread Starter
Join Date: Oct 2011
Location: WV
Posts: 750
I found some fingerless mechanics-style gloves at Home Depot I bought, and ended up really liking them. They gave me the fingertip feel of no gloves, but definitely helped keep my hands warmer especially when handling a bunch of cold tools! They did help protect the back of my hands too. I will probably use them more often now.
I'll get a video at some point...I haven't run the car in 3 months and my Aerochambers went back to their non-broken-in state like they were when I first installed them. Gonna have to run the car a bit to get the good sound back.
I'll get a video at some point...I haven't run the car in 3 months and my Aerochambers went back to their non-broken-in state like they were when I first installed them. Gonna have to run the car a bit to get the good sound back.

Thread
Thread Starter
Forum
Replies
Last Post