My 2005 GT, Post-Deployment Kenne Bell build thread.
 06-27-2009, 07:00 AM
#1
1st Gear Member
Thread Starter

Join Date: Dec 2006
Location: Clarksville, TN.
Posts: 109
Just wanted to be able to document my build as soon as I get home in about a month or so...
So here goes.
The Owner: Kevin Miracle (some of you may know me from other Mustang specific forums, by the same user name as it is here), US Army Cavalry Scout, originally from Clarksville, Tennessee, currently deployed to Iraq in support of OIF, and I am one HELL of a car NUT. Anything and all aspects about cars... I LOVE. It runs in my blood, it guides my life, and alot of my money and free time go into it. My current residence is in Iraq, but I will be returning to Colorado after the deployment, and then eventually back to Savannah, TN with my wife of a year and a half, Emily.
The Ride: A Satin Silver 2005 Ford Mustang GT Coupe, 5 speed, with alot of small bolt-ons. The one thing I am proud of most with this car, other than the fact that it's my first REAL performance car... is that everything from being able to soon install the Kenne Bell, cleaning the windows, detailing, oil changes, suspension work, and EVERYTHING else was done by me. And that is something I take pride in.
The Goods:
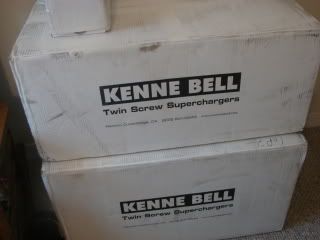
-Kenne Bell 2.6 liter Twin Screw supercharger, intercooled, stage 2, with Kenne Bell Boost-A-Pump
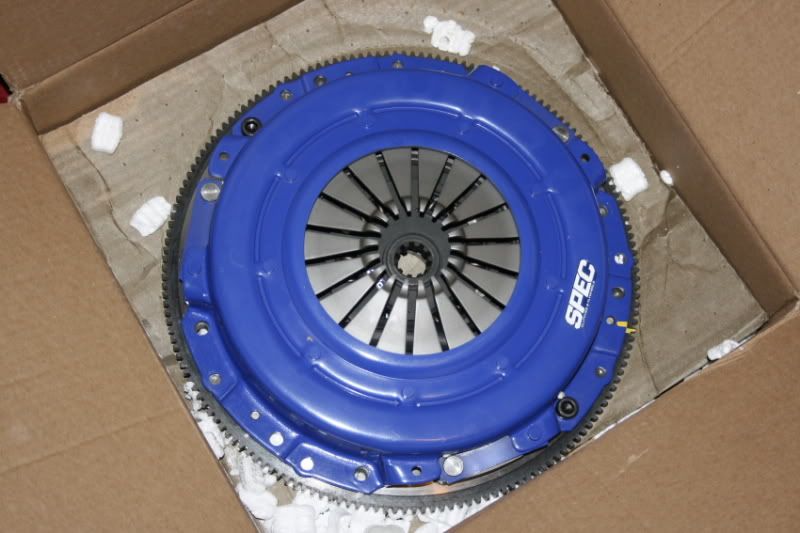
-Spec Stage 2 Clutch and Billet Steel Flywheel (Ordered and Received but not installed yet)
-Steeda Ultra-Lite Springs, BMR Front camber adjusting bolts.
-BMR Tubular Radiator support
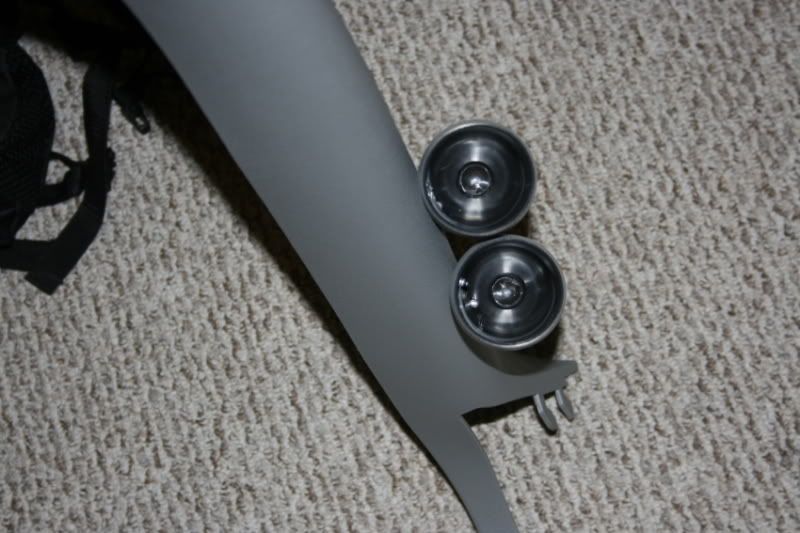
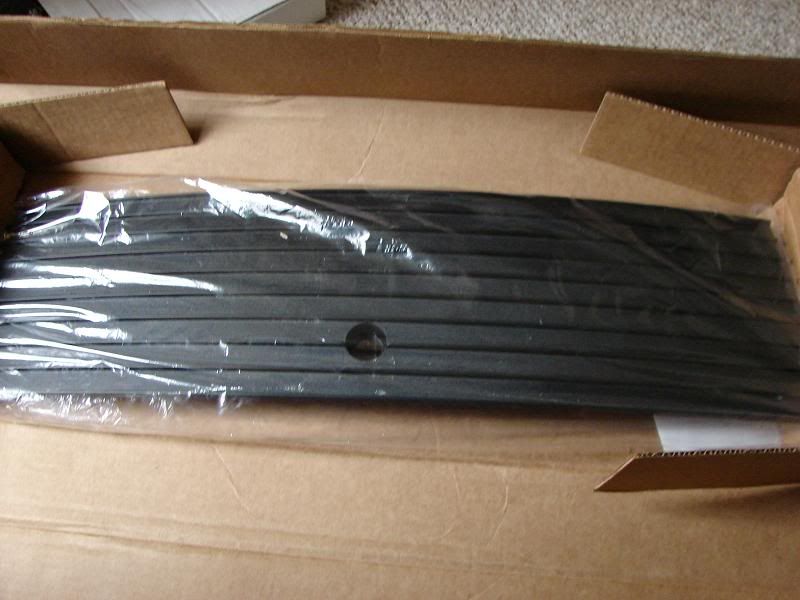
-Tokico DSpec Shocks, fully adjustable, front and rear. (Not installed yet)
-Steeda Lower and Upper rear control arms, non-adjustable.
-Diablosport MAFia (Will be coming off when the supercharger goes on)
-Hurst short throw Billet Plus shifter with Hurst white ball, or Pistol grip ****.
-Bassani Modular X Pipe with the high flow cats installed. Stock mufflers, stock headers.
-Shelby/American Racing Type S1 wheels. 20x9 with 255/35/20 Sumitomo HTRZIII (F) and 20x10 with 275/35/20 Sumitomo HTRZIII (R) On order from Latemodel Restoration
-SCT XCal2 with my own tunes.
-DIY Black powdercoated valve covers
-Brisk Racing 3VR14S Spark Plugs, one heat range colder
-Moroso Coolant, and power steering tanks.
-Moroso Oil catch Can
-Speed of Sound A-Pillar dual gauge pod
-Steeda Belt Tensioner
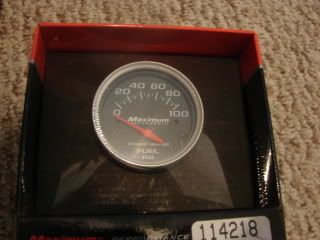
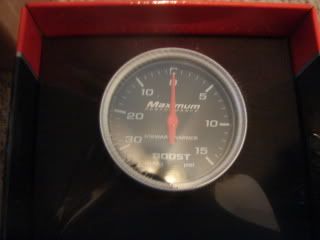
-Stewart Warner boost and Fuel Pressure gauges.
Some of the pics I put up were taken before some of the mods went on the car, just so you guys know that... .
And it begins... this is the first pic of my car... the NIGHT I picked her up, before even signing the paperwork:
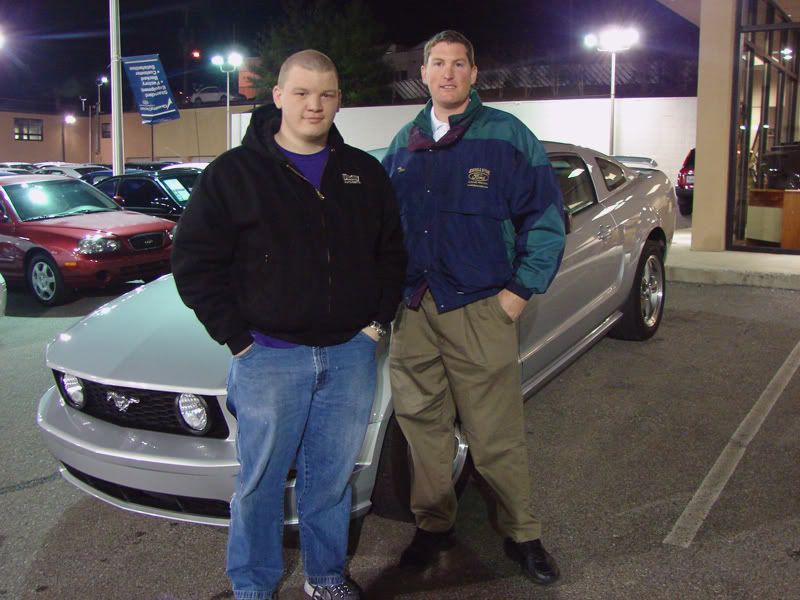
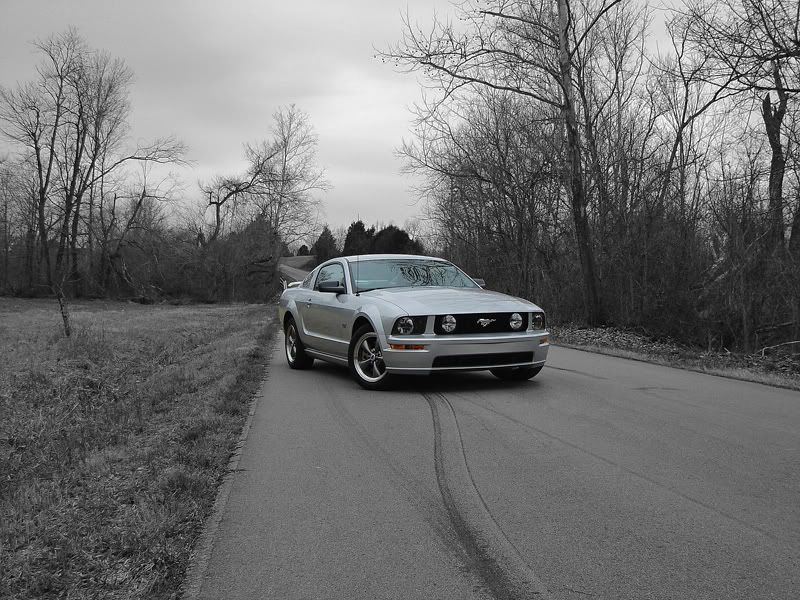
Still looks pretty much the same, for a while it will stay like that as well. I am going with a TOTAL sleeper theme here.
The goodies (some of the ones not installed yet anyways)... And if you look down ladies and gentlemen, you will see the exhibit featuring the newly delivered Kickassimus Importus Maximus.
Known to eat small children, and even larger animals, this creature will leave black marks all over the public roads, if let loose. Should it be let loose just once out in the wild, you will never be able to contain it again.
Spec Stage 2+ and Steel Flywheel:
Speed of Sound 2 gauge A-Pillar pod:
CDC Rear decklid blackout:
Magnaflow Magnapack exhaust:
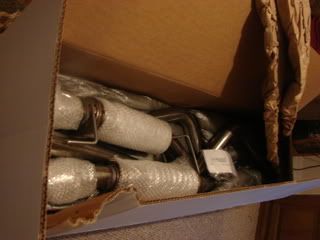
Tokico D Spec adjustable shocks:
Spec 2+ and Billet Steel flywheel:
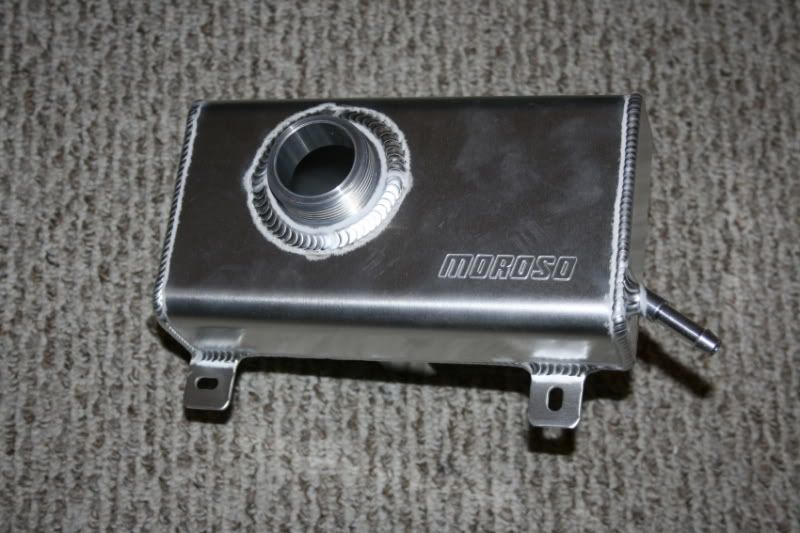
Moroso Coolant tank:
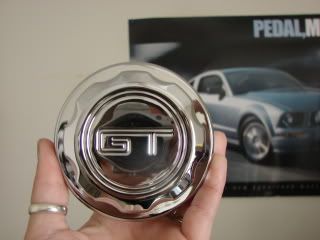
FRPP Chrome coolant tank Cap:
Maximum Motorsports CC plates:
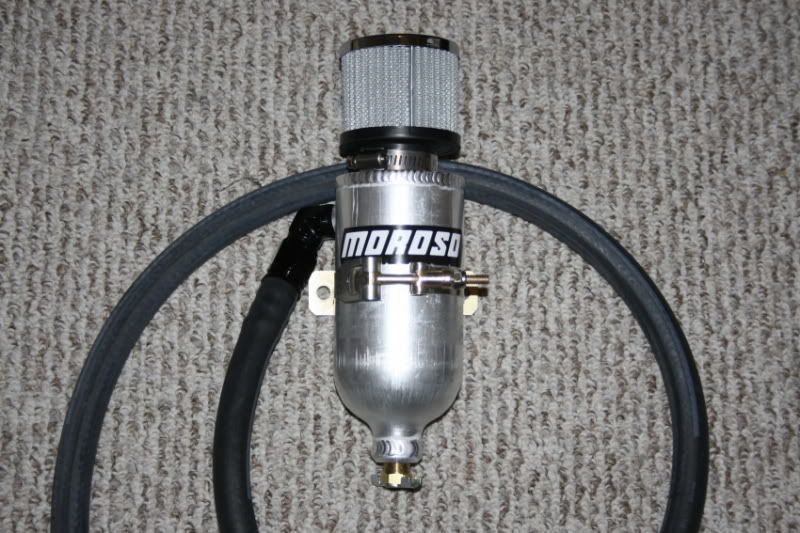
Moroso Oil catch:
The Steeda Tensioner with billet pulley:

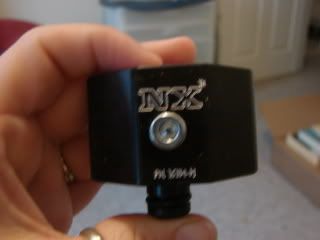
Gauges and sandwich adapter:
So um... wow... I got a LOT of work to do when I get home.
What I want to do eventually:
~Livernois Motorsports Forged 298ci shortblock
~Smaller blower pulley, for more boost
~Heads and head work... new valves, springs, locks and retainers. Ported and polished.
~Comp Camshafts.
~Wheels and tires, Bogarts, Shelby American Racing Razors, or Shelby CS40/CS69's.
So, like I said earlier, anything you wanna know, just ask. Hope to get in with you guys... and make some new friends, and talk about MUSTANGS!!!
So here goes.
The Owner: Kevin Miracle (some of you may know me from other Mustang specific forums, by the same user name as it is here), US Army Cavalry Scout, originally from Clarksville, Tennessee, currently deployed to Iraq in support of OIF, and I am one HELL of a car NUT. Anything and all aspects about cars... I LOVE. It runs in my blood, it guides my life, and alot of my money and free time go into it. My current residence is in Iraq, but I will be returning to Colorado after the deployment, and then eventually back to Savannah, TN with my wife of a year and a half, Emily.
The Ride: A Satin Silver 2005 Ford Mustang GT Coupe, 5 speed, with alot of small bolt-ons. The one thing I am proud of most with this car, other than the fact that it's my first REAL performance car... is that everything from being able to soon install the Kenne Bell, cleaning the windows, detailing, oil changes, suspension work, and EVERYTHING else was done by me. And that is something I take pride in.
The Goods:
-Kenne Bell 2.6 liter Twin Screw supercharger, intercooled, stage 2, with Kenne Bell Boost-A-Pump
-Spec Stage 2 Clutch and Billet Steel Flywheel (Ordered and Received but not installed yet)
-Steeda Ultra-Lite Springs, BMR Front camber adjusting bolts.
-BMR Tubular Radiator support
-Tokico DSpec Shocks, fully adjustable, front and rear. (Not installed yet)
-Steeda Lower and Upper rear control arms, non-adjustable.
-Diablosport MAFia (Will be coming off when the supercharger goes on)
-Hurst short throw Billet Plus shifter with Hurst white ball, or Pistol grip ****.
-Bassani Modular X Pipe with the high flow cats installed. Stock mufflers, stock headers.
-Shelby/American Racing Type S1 wheels. 20x9 with 255/35/20 Sumitomo HTRZIII (F) and 20x10 with 275/35/20 Sumitomo HTRZIII (R) On order from Latemodel Restoration
-SCT XCal2 with my own tunes.
-DIY Black powdercoated valve covers
-Brisk Racing 3VR14S Spark Plugs, one heat range colder
-Moroso Coolant, and power steering tanks.
-Moroso Oil catch Can
-Speed of Sound A-Pillar dual gauge pod
-Steeda Belt Tensioner
-Stewart Warner boost and Fuel Pressure gauges.
Some of the pics I put up were taken before some of the mods went on the car, just so you guys know that... .
And it begins... this is the first pic of my car... the NIGHT I picked her up, before even signing the paperwork:
Still looks pretty much the same, for a while it will stay like that as well. I am going with a TOTAL sleeper theme here.
The goodies (some of the ones not installed yet anyways)... And if you look down ladies and gentlemen, you will see the exhibit featuring the newly delivered Kickassimus Importus Maximus.
Known to eat small children, and even larger animals, this creature will leave black marks all over the public roads, if let loose. Should it be let loose just once out in the wild, you will never be able to contain it again.
Spec Stage 2+ and Steel Flywheel:
Speed of Sound 2 gauge A-Pillar pod:
CDC Rear decklid blackout:
Magnaflow Magnapack exhaust:
Tokico D Spec adjustable shocks:
Spec 2+ and Billet Steel flywheel:
Moroso Coolant tank:
FRPP Chrome coolant tank Cap:
Maximum Motorsports CC plates:
Moroso Oil catch:
The Steeda Tensioner with billet pulley:
Gauges and sandwich adapter:
So um... wow... I got a LOT of work to do when I get home.
What I want to do eventually:
~Livernois Motorsports Forged 298ci shortblock
~Smaller blower pulley, for more boost
~Heads and head work... new valves, springs, locks and retainers. Ported and polished.
~Comp Camshafts.
~Wheels and tires, Bogarts, Shelby American Racing Razors, or Shelby CS40/CS69's.
So, like I said earlier, anything you wanna know, just ask. Hope to get in with you guys... and make some new friends, and talk about MUSTANGS!!!
Last edited by Miracle; 09-27-2009 at 06:21 PM.

 07-02-2009, 03:11 AM
#3
1st Gear Member
Thread Starter
Join Date: Dec 2006
Location: Clarksville, TN.
Posts: 109
07-02-2009, 11:44 AM
#5
1st Gear Member
Thread Starter
Join Date: Dec 2006
Location: Clarksville, TN.
Posts: 109
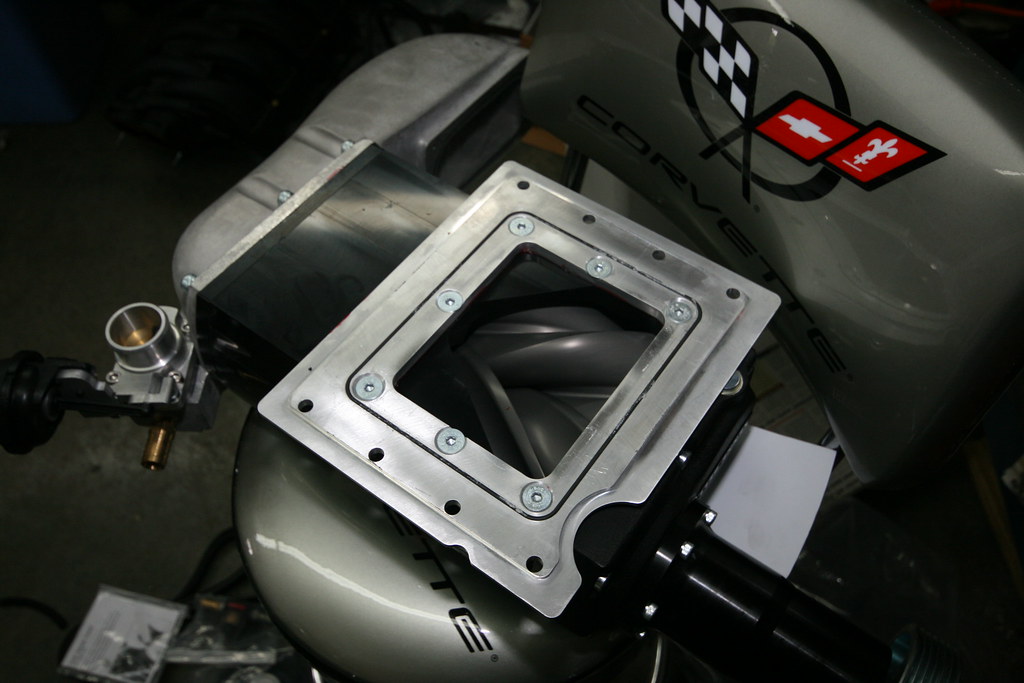
 And the appearance of the Moroso tanks is what prompted me to pick them. I have the GT500 intercooler tank and power steering tanks on the way... so it should look pretty nice as a trio.
Last edited by Miracle; 07-02-2009 at 12:03 PM.
09-26-2009, 02:56 PM
#6
1st Gear Member
Thread Starter
Join Date: Dec 2006
Location: Clarksville, TN.
Posts: 109
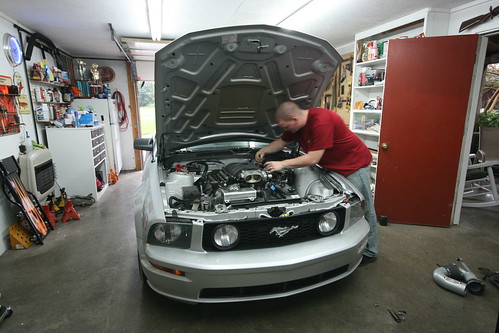
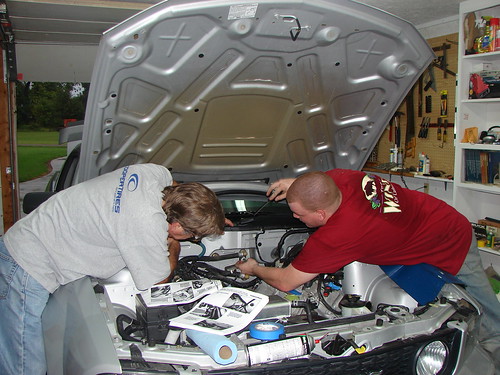
Here are some pics... even though nobody has ever replied to this thread... here's some shots of the install up until the point I am at right now.
Pictures from the install... day 1:
Last shot of the car, in it's "stock" glory. Nothing really TOO impressive, right? Hopefully, that's about to change. Beauty IS in the eye of the beholder, and from what I have seen, these KB kits really do have something to behold to the viewer.
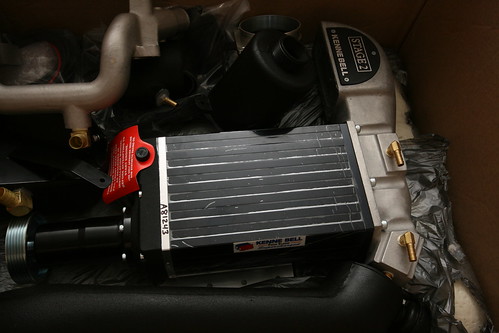
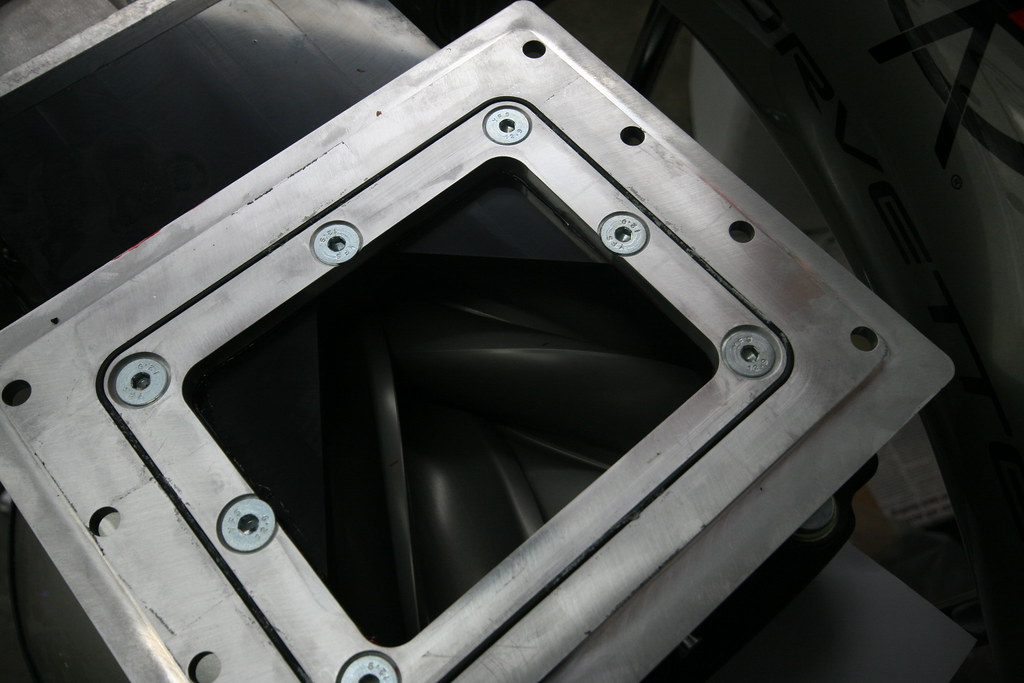
Just a few of the main goodies... blower unit, MAF sensor, intake plenum and tube, water crossover, washer and intercooler reservoir... a few other things...
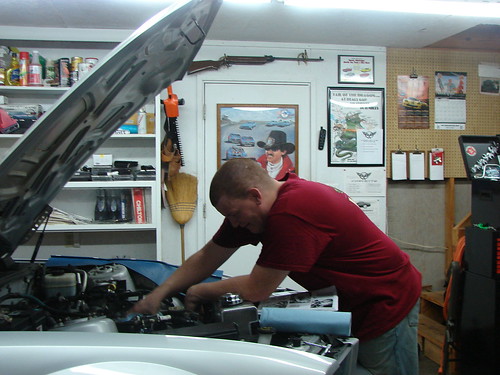
Starting off... getting the coils unplugged, and the fuel lines, PCV lines, vacuum lines, and injectors disconnected...
Intake manifold gone, about 1/3 of the way through disassembly...
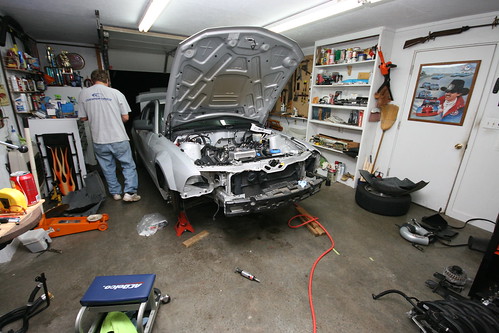
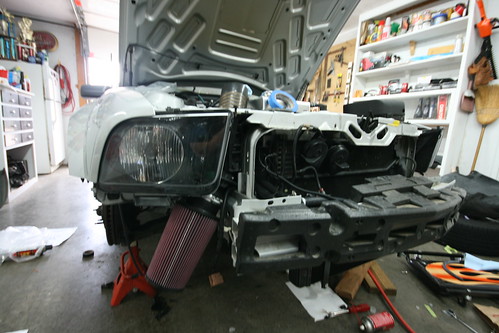
The front end asthetics are off the car now, along with the wheels and fender well linings and the rest of the motor needing to be removed for the install has came off. There were only 2 real hangups, the heater core hoses at the firewall and the so called, "Bolt from hell". The heater core hoses are held on by a wierd connector, and you have to articulate your hands kinda weird to get it off, and there is a trick to it. It's not too bad though once you understand how the connectors work.

The BFH holds the heater pipe coming from the back of the water pump, and attaches along the way to the heater core to the rear of the passenger side cylinder head by a bolt and stud that you need a 1/4 in. 13mm Deep Well socket to get to. It wasn't THAT bad... but it was a pain in the *** still. I just used an open ended 13mm gear wrench... space is VERY tight, but if you focus and take your time, it'll come right out.
So this is how the car looks right now... totally taken apart on the front end, and the engine itself almost down to the bare longblock. Gonna pull the valve covers, spark plugs and alot of other asthetic stuff so I can kill some time productively until the parts store opens. Got an angle head grinder and an air compressor... just neeed a cut off wheel so I can cut about 4 inches of metal out of the radiator support for the air intake tube to pass through. Shouldn't take long at all once I get the parts I need.
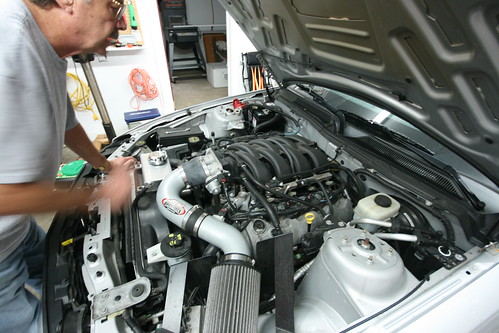
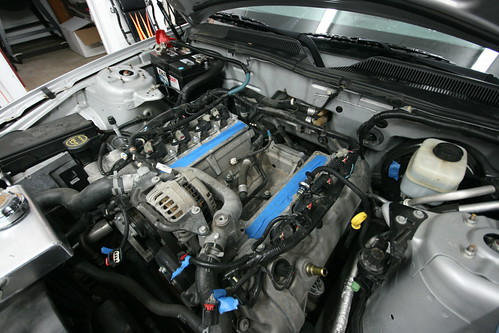
And the motor shot as of right now...

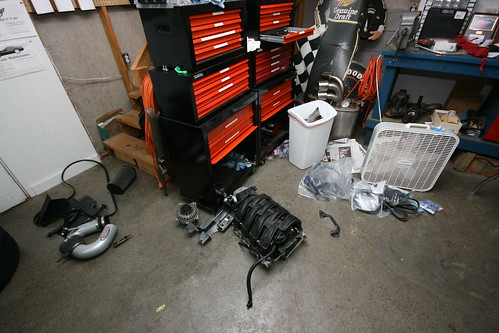
Some of the parts pile, N/A Intake, Intake manifold and throttle body, fuel rails and injectors, alternator, PCM, OEM and new belts, and a few other things. Some of this stuff will either be stored or sold.... haven't made my mind up yet....
Alrighty... day 2 pictures.
Started out with opening up the hole in the radiator and core support to make room for the MAF and air intake tubing:

Had to open up the entire drivers side of the main wiring harness loom to relocate 2 sensors, the fuel rail pressure sensor and the Throttle Actuator Control for the throttle body motor. This is one of the 2 parts of the wiring that had me genuinely worried, but I got it done. You can also see the new water crossover pipe, and the alternator remounted.
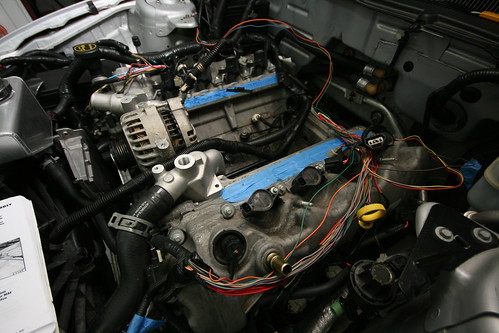
And here is the only cutting of the cars wiring in the whole kit. You have to cut off the OEM plug for the mass air flow (MAF) sensor, to be able to relocate the IAT sensor in the manifold, and the MAF down to the filter below the headlight. A little bit of soldering, and a little small bit of making your own harness plug, and everything else falls into place. I'm not that great with electrical work or wiring, so this part I was worried about. But with a little patience, I got it all back together. Notice the grimacing look on my face... hahaha.

Here is how the filter and MAF set up underneath the passengers headlight. You can see the mounted heat exchanger for the intercoooler peeking out beneath the bumper beam and foam padding. It was all a pretty straight forward nut and bolt on deal for the HE and its pump. Not bad at all.
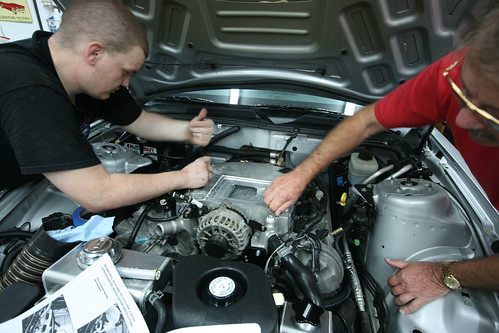
Finally got everything buttoned up inside the valley between the cylinders. Had to cut apart the 2 heater hoses that were held together, and relocate them for the new manifold since it sets closer to the bottom of the valley than the OEM one did. Mounted the new KB discharge manifold and intercooler core. Got all the intercooler lines and pump wiring mounted and ran.
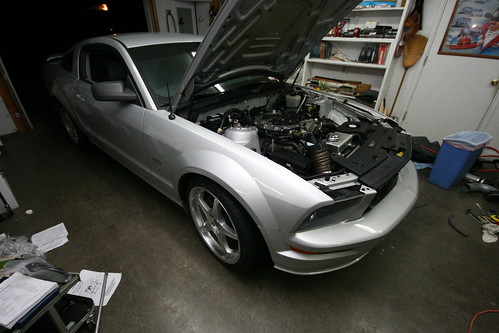
And for the teaser... here's how she looks right now. Notice the "teaser" part? Nothing big I know, but I think they are going to look REALLY good.
But right now everything that was on the car that is staying on the car is back on. Starting to look like a real car again.
And here's the motor shot, as it sits right now... Coils are pulled to do the plugs today, manifold and intercooler are mounted, intercooler lines are ran and mounted, intercooler reservoir mounted, PCM and fusebox relocation bracket mounted, everything torqued down. Not too bad for 2 days work.

Pics from day 3 of working on the car... not much has changed on the outside... but I got a few things done today.
Started off with working on the spark plugs. On these new motors, and you will see what I am talking about, Ford's engineers must have designed these new spark plugs on a holiday or something. They are a 2 piece design, and if you are not careful on taking these things out... they can, and many people have done it, snap off inside the cylinder heads, making for a purchase of a $65 or so tool, or pulling the heads. That makes for a bad day. So you just have to take your time, do it according to Ford's TSB on it, and be SLOW, and GENTLE with removing these things.
Cylinder #1 (Front most plug, drivers side) plug:

Cylinder # 5 (1st cylinder, passengers side)... by far the worst looking, and the hardest to get out:

And Cylinder #6's (3rd from the front, passenger side) plug... this one was VERY noisy coming out. Thought this was going to be the one to snap off... but it came out in all one piece:

As you can see, a very weird design to these things. As you can see the non-threaded shaft that extends past the threads, carbon deposits form on the shaft, and make for a rough exit out of the threads for the plug. You have to spray PB Blaster down into the spark plug well, back off the plugs a half turn, and let the PB soak into the carbon on the shaft. Once it sits for about 15 minutes, you should be able to remove the plugs without issue. Just go VERY slow, and do NOT get in a hurry.
Pictures from the install... day 1:
Last shot of the car, in it's "stock" glory. Nothing really TOO impressive, right? Hopefully, that's about to change. Beauty IS in the eye of the beholder, and from what I have seen, these KB kits really do have something to behold to the viewer.
Just a few of the main goodies... blower unit, MAF sensor, intake plenum and tube, water crossover, washer and intercooler reservoir... a few other things...
Starting off... getting the coils unplugged, and the fuel lines, PCV lines, vacuum lines, and injectors disconnected...
Intake manifold gone, about 1/3 of the way through disassembly...
The front end asthetics are off the car now, along with the wheels and fender well linings and the rest of the motor needing to be removed for the install has came off. There were only 2 real hangups, the heater core hoses at the firewall and the so called, "Bolt from hell". The heater core hoses are held on by a wierd connector, and you have to articulate your hands kinda weird to get it off, and there is a trick to it. It's not too bad though once you understand how the connectors work.
The BFH holds the heater pipe coming from the back of the water pump, and attaches along the way to the heater core to the rear of the passenger side cylinder head by a bolt and stud that you need a 1/4 in. 13mm Deep Well socket to get to. It wasn't THAT bad... but it was a pain in the *** still. I just used an open ended 13mm gear wrench... space is VERY tight, but if you focus and take your time, it'll come right out.
So this is how the car looks right now... totally taken apart on the front end, and the engine itself almost down to the bare longblock. Gonna pull the valve covers, spark plugs and alot of other asthetic stuff so I can kill some time productively until the parts store opens. Got an angle head grinder and an air compressor... just neeed a cut off wheel so I can cut about 4 inches of metal out of the radiator support for the air intake tube to pass through. Shouldn't take long at all once I get the parts I need.
And the motor shot as of right now...
Some of the parts pile, N/A Intake, Intake manifold and throttle body, fuel rails and injectors, alternator, PCM, OEM and new belts, and a few other things. Some of this stuff will either be stored or sold.... haven't made my mind up yet....
Alrighty... day 2 pictures.
Started out with opening up the hole in the radiator and core support to make room for the MAF and air intake tubing:
Had to open up the entire drivers side of the main wiring harness loom to relocate 2 sensors, the fuel rail pressure sensor and the Throttle Actuator Control for the throttle body motor. This is one of the 2 parts of the wiring that had me genuinely worried, but I got it done. You can also see the new water crossover pipe, and the alternator remounted.
And here is the only cutting of the cars wiring in the whole kit. You have to cut off the OEM plug for the mass air flow (MAF) sensor, to be able to relocate the IAT sensor in the manifold, and the MAF down to the filter below the headlight. A little bit of soldering, and a little small bit of making your own harness plug, and everything else falls into place. I'm not that great with electrical work or wiring, so this part I was worried about. But with a little patience, I got it all back together. Notice the grimacing look on my face... hahaha.
Here is how the filter and MAF set up underneath the passengers headlight. You can see the mounted heat exchanger for the intercoooler peeking out beneath the bumper beam and foam padding. It was all a pretty straight forward nut and bolt on deal for the HE and its pump. Not bad at all.
Finally got everything buttoned up inside the valley between the cylinders. Had to cut apart the 2 heater hoses that were held together, and relocate them for the new manifold since it sets closer to the bottom of the valley than the OEM one did. Mounted the new KB discharge manifold and intercooler core. Got all the intercooler lines and pump wiring mounted and ran.
And for the teaser... here's how she looks right now. Notice the "teaser" part? Nothing big I know, but I think they are going to look REALLY good.
But right now everything that was on the car that is staying on the car is back on. Starting to look like a real car again.
And here's the motor shot, as it sits right now... Coils are pulled to do the plugs today, manifold and intercooler are mounted, intercooler lines are ran and mounted, intercooler reservoir mounted, PCM and fusebox relocation bracket mounted, everything torqued down. Not too bad for 2 days work.
Pics from day 3 of working on the car... not much has changed on the outside... but I got a few things done today.
Started off with working on the spark plugs. On these new motors, and you will see what I am talking about, Ford's engineers must have designed these new spark plugs on a holiday or something. They are a 2 piece design, and if you are not careful on taking these things out... they can, and many people have done it, snap off inside the cylinder heads, making for a purchase of a $65 or so tool, or pulling the heads. That makes for a bad day. So you just have to take your time, do it according to Ford's TSB on it, and be SLOW, and GENTLE with removing these things.
Cylinder #1 (Front most plug, drivers side) plug:
Cylinder # 5 (1st cylinder, passengers side)... by far the worst looking, and the hardest to get out:
And Cylinder #6's (3rd from the front, passenger side) plug... this one was VERY noisy coming out. Thought this was going to be the one to snap off... but it came out in all one piece:
As you can see, a very weird design to these things. As you can see the non-threaded shaft that extends past the threads, carbon deposits form on the shaft, and make for a rough exit out of the threads for the plug. You have to spray PB Blaster down into the spark plug well, back off the plugs a half turn, and let the PB soak into the carbon on the shaft. Once it sits for about 15 minutes, you should be able to remove the plugs without issue. Just go VERY slow, and do NOT get in a hurry.
09-26-2009, 02:57 PM
#7
1st Gear Member
Thread Starter
Join Date: Dec 2006
Location: Clarksville, TN.
Posts: 109
Other than the spark plugs, I got the new black powdercoated camshaft covers I have been trying to decide whether or not to install... finally decided to do it, and I think they turned out pretty good.

Also transferred all the throttle body mechanicals (Throttle Pos. Sen. and Throttle actuation motor)over to the new monoblade 130mm KB throttle body that is part of the stage 2 upgrade package. Looks SWEET!

Also replaced the stock OEM injectors with the blue 39#'s that came in the kit. Got the rails and injectors installed, as well as the 2 pulleys that come in the kit as idlers.
Got evertything except the Boost-A-Pump done today...

Blower is on and bolted down, throttle body mounted, air intake in and tightened down, and belt routed properly and on.
She's ready to fire up. Just gotta wait on the tune, and get the Boost-A-Pump wired up. It's gonna be monday before I can... because there was a hang up getting the tuner out from KB... so I play the waiting game for a bit.
Also transferred all the throttle body mechanicals (Throttle Pos. Sen. and Throttle actuation motor)over to the new monoblade 130mm KB throttle body that is part of the stage 2 upgrade package. Looks SWEET!
Also replaced the stock OEM injectors with the blue 39#'s that came in the kit. Got the rails and injectors installed, as well as the 2 pulleys that come in the kit as idlers.
Got evertything except the Boost-A-Pump done today...
Blower is on and bolted down, throttle body mounted, air intake in and tightened down, and belt routed properly and on.
She's ready to fire up. Just gotta wait on the tune, and get the Boost-A-Pump wired up. It's gonna be monday before I can... because there was a hang up getting the tuner out from KB... so I play the waiting game for a bit.
09-27-2009, 12:12 PM
#10
1st Gear Member
Thread Starter
Join Date: Dec 2006
Location: Clarksville, TN.
Posts: 109
Get'cha one for yourself bro...
DOO EET!!!
HAhahahaha. Yeah, if you have ever removed the heater core hoses on these cars, you would know they are a pain in the ***. If you HAVEN'T, and one day WILL... boy are you in for a treat.
DOO EET!!!
HAhahahaha. Yeah, if you have ever removed the heater core hoses on these cars, you would know they are a pain in the ***. If you HAVEN'T, and one day WILL... boy are you in for a treat.