My '91 Camaro build
 05-31-2012, 08:34 PM
#1
2nd Gear Member
Thread Starter

Join Date: Apr 2012
Location: Va
Posts: 170
Hey guys! Been on the forum for a while and decided it's time for me to show what I've been working on for nearly a year now. Back in July 2011, I purchased a 91 Camaro rs (very weak 305 tbi) for the measly sum of $800. I've always been a fan of the third gen camaros and couldn't pass it up, I considered it an early college graduation present for myself lol.
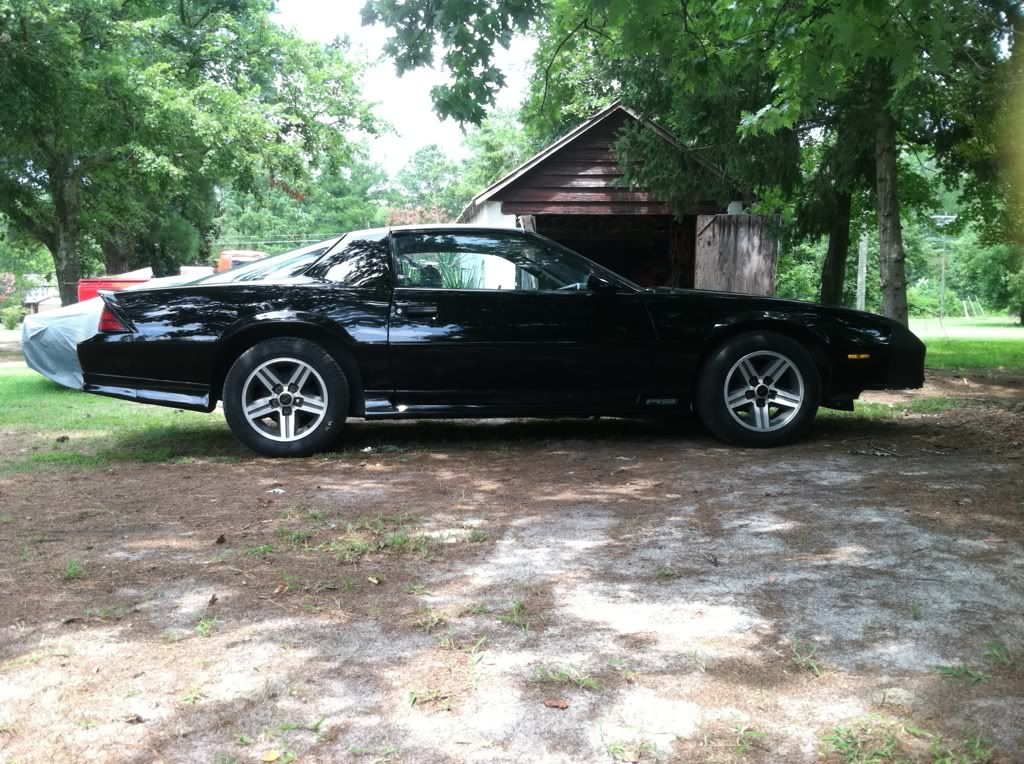
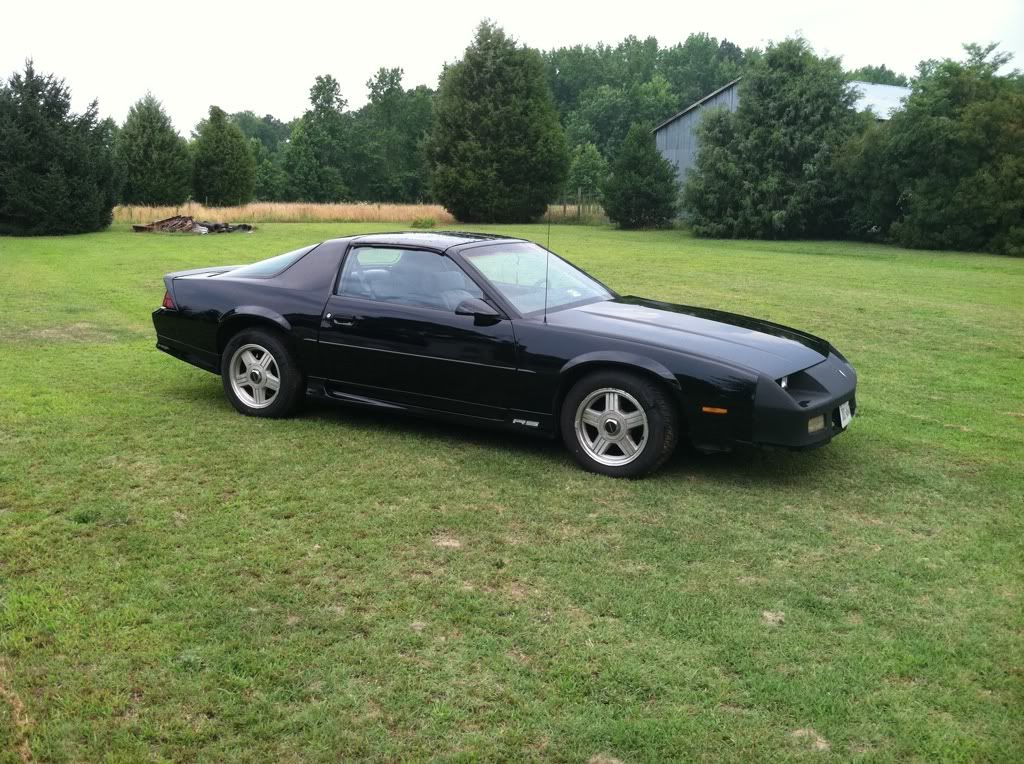
Here's pretty much as she sits today:
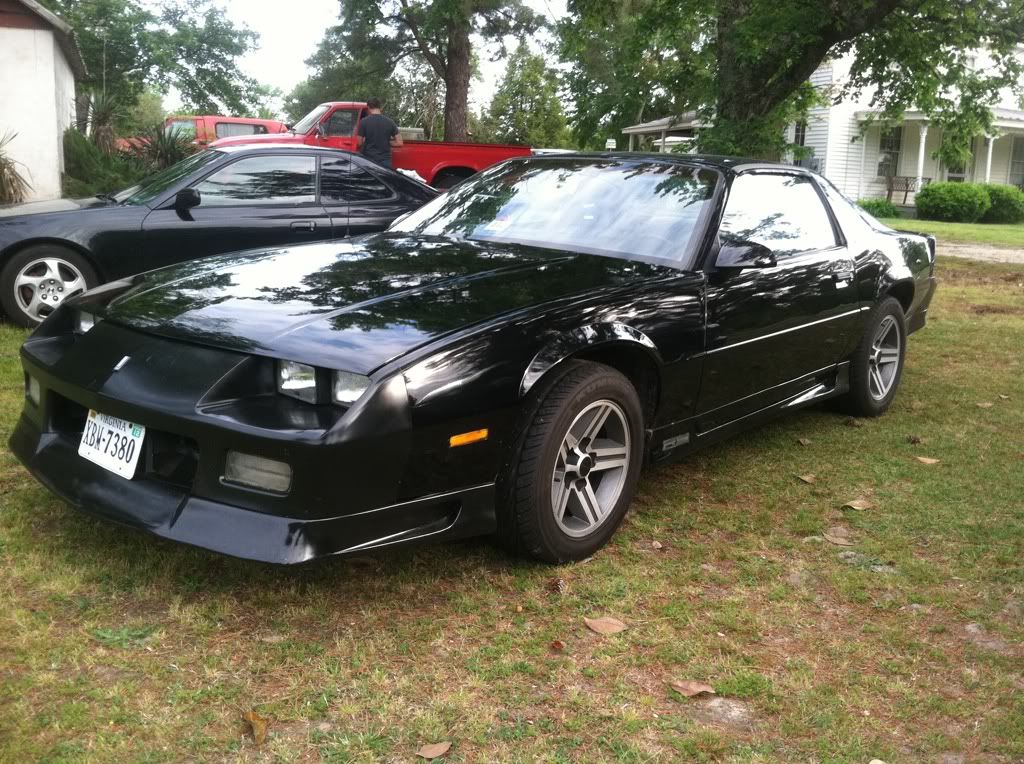
She's still far from perfect, but I figure I'd go ahead and post up my progress and keep it up to date with what I've done
Here's pretty much as she sits today:
She's still far from perfect, but I figure I'd go ahead and post up my progress and keep it up to date with what I've done
 05-31-2012, 08:44 PM
#2
2nd Gear Member
Thread Starter
Join Date: Apr 2012
Location: Va
Posts: 170
To start things off, I first found the car listed on craiglist for $1000 in early July with no pics listed. I'm usually a little skeptical when an ad doesn't contain any pics, but it was in my home town and wasnt too far from where I lived.
Here's a pic from when I first looked at it:
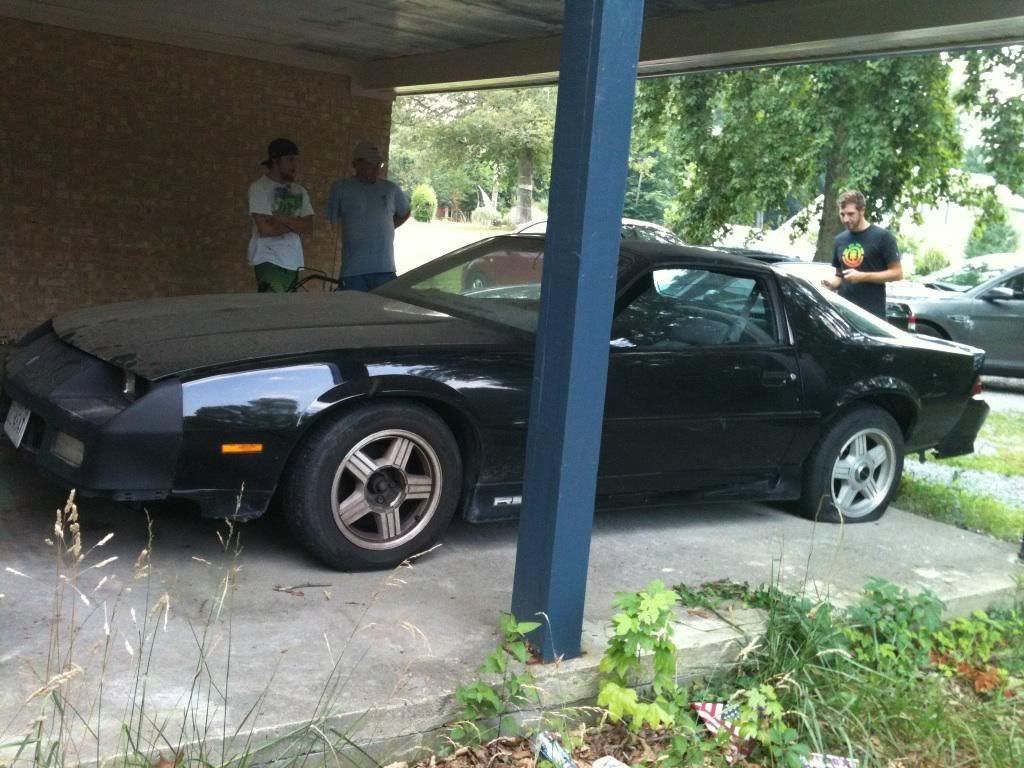
As you can see, it hadn't moved for a while and had a nice layer of dirt over the entire car. One tire was completely flat, and the serpentine belt had been remove due to a bad alternator. Surprisingly, after a few cranks the car wheezed into life and was able to idle, even with stale gas. After just a small amount of haggling, I talked the owner down to $800 and was going to come back the next day and swap the Alts out and throw a new belt on.
Here's a pic from when I first looked at it:
As you can see, it hadn't moved for a while and had a nice layer of dirt over the entire car. One tire was completely flat, and the serpentine belt had been remove due to a bad alternator. Surprisingly, after a few cranks the car wheezed into life and was able to idle, even with stale gas. After just a small amount of haggling, I talked the owner down to $800 and was going to come back the next day and swap the Alts out and throw a new belt on.
05-31-2012, 09:00 PM
#3
2nd Gear Member
Thread Starter
Join Date: Apr 2012
Location: Va
Posts: 170
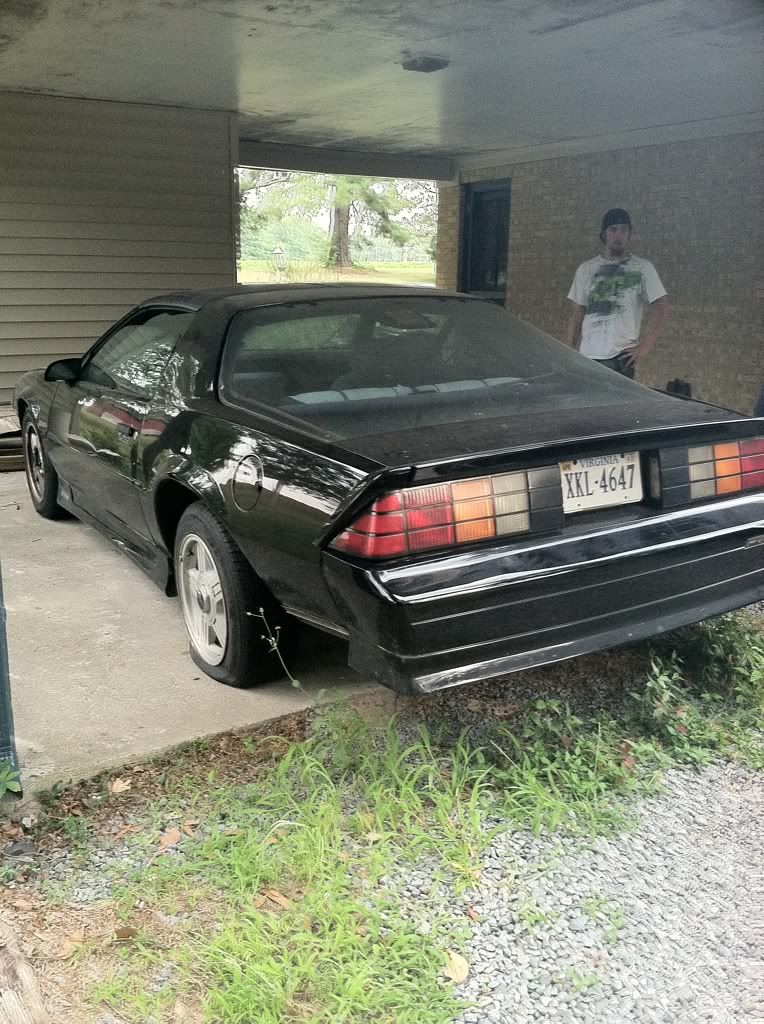
Next day roles around, I show up ealy to the guys house with a good friend and my dad to pick the car up. Get the alternator on and pump numerous cans of fix a flat to the flat tire (no air compressor with us and no key to the locking lug nut on the wheel :/)

* note the broken baseball bat for a hood prop lmao
Well after a short ride home, I notice that car has about as much power as a geo metro running on two cylinders, front brakes are down to the metal, and the shock absorbers are doing no absorbing....oh yeah, in my five mile trip home I'm at negative oil pressure according to my gauges.
^first time at her new home ready for cleaning and damn did she need it! There were tons of pot seeds through the entire car as well as a small pot plant growing in the dingy floor mat. The guy I bought it from didn't even clean out the empty soda and beer bottles in the back...
After an hour or so of cleaning I got her looking like this:
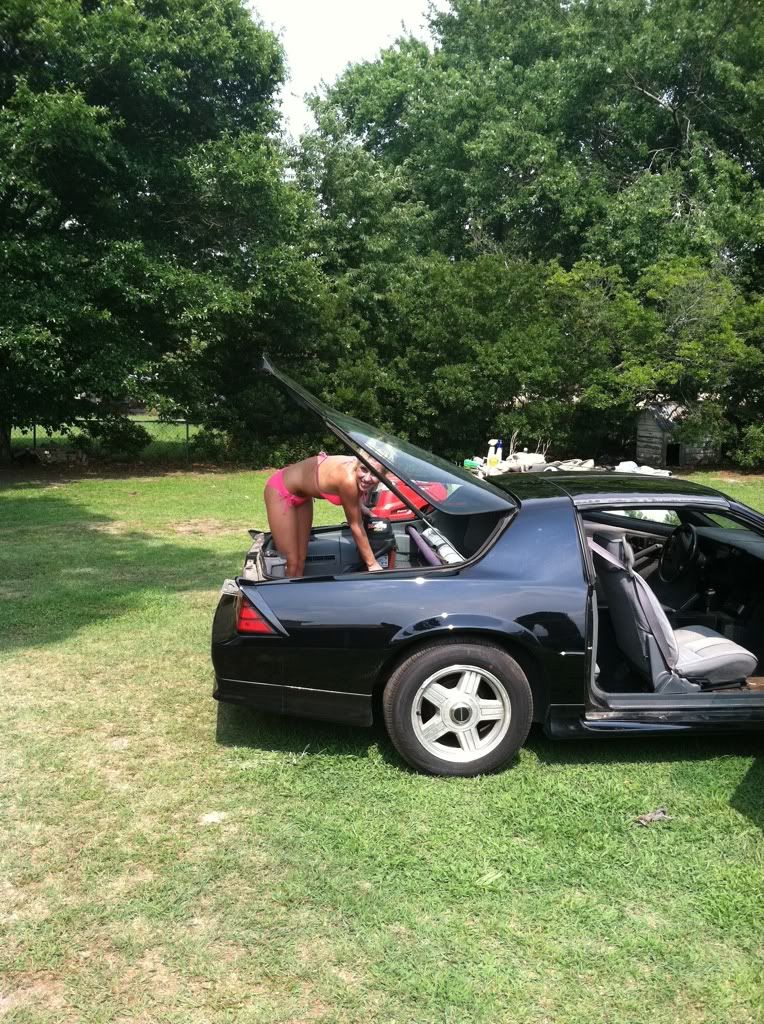
I'm lucky enough to have a beautiful fiance to help me with my auto obsession!
* note the broken baseball bat for a hood prop lmao
Well after a short ride home, I notice that car has about as much power as a geo metro running on two cylinders, front brakes are down to the metal, and the shock absorbers are doing no absorbing....oh yeah, in my five mile trip home I'm at negative oil pressure according to my gauges.
^first time at her new home ready for cleaning and damn did she need it! There were tons of pot seeds through the entire car as well as a small pot plant growing in the dingy floor mat. The guy I bought it from didn't even clean out the empty soda and beer bottles in the back...
After an hour or so of cleaning I got her looking like this:
I'm lucky enough to have a beautiful fiance to help me with my auto obsession!
05-31-2012, 09:15 PM
#4
2nd Gear Member
Thread Starter
Join Date: Apr 2012
Location: Va
Posts: 170
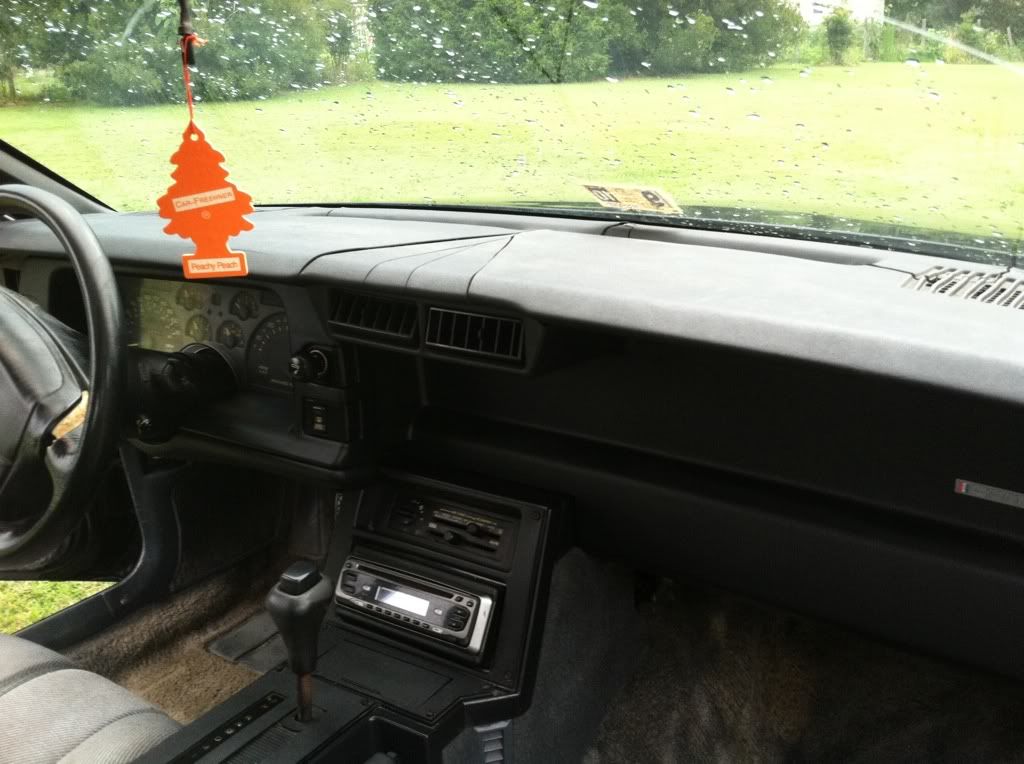
Now to the interior!
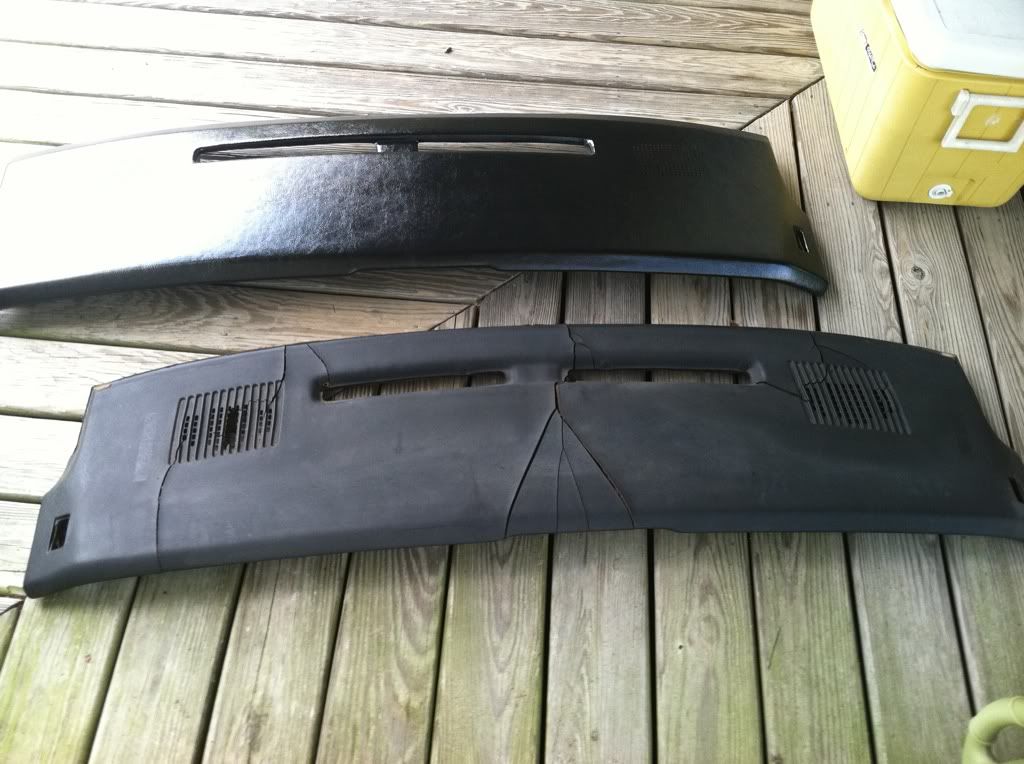
First thing I started with was my dash panel. Almost all third gens develop cracks like mine had done:
Luckily I found a cheap cover on craigslist as well as a set of glass ttops for a little over $100
The next thing on the list was the very ragged headliner
I didn't even feel comfortable knowing that was over my head lol. I found a better made replacement one on the web that was on the expensive side, but much better than getting the old one redone.
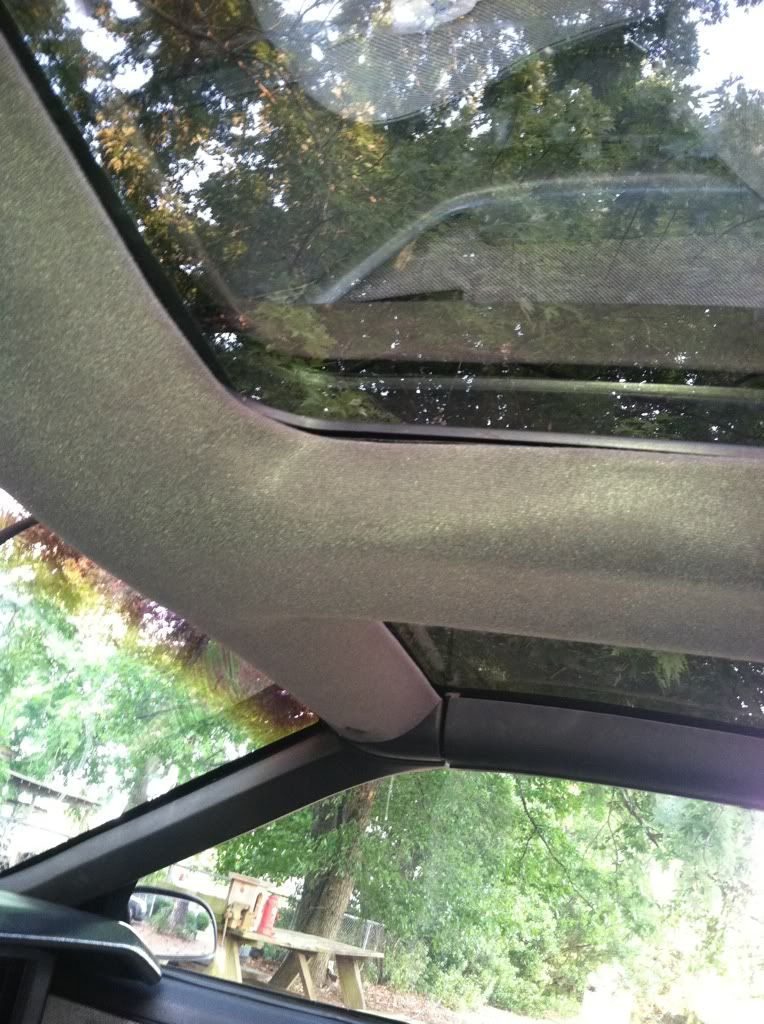
Not the best pic, but much much MUCH better than before.
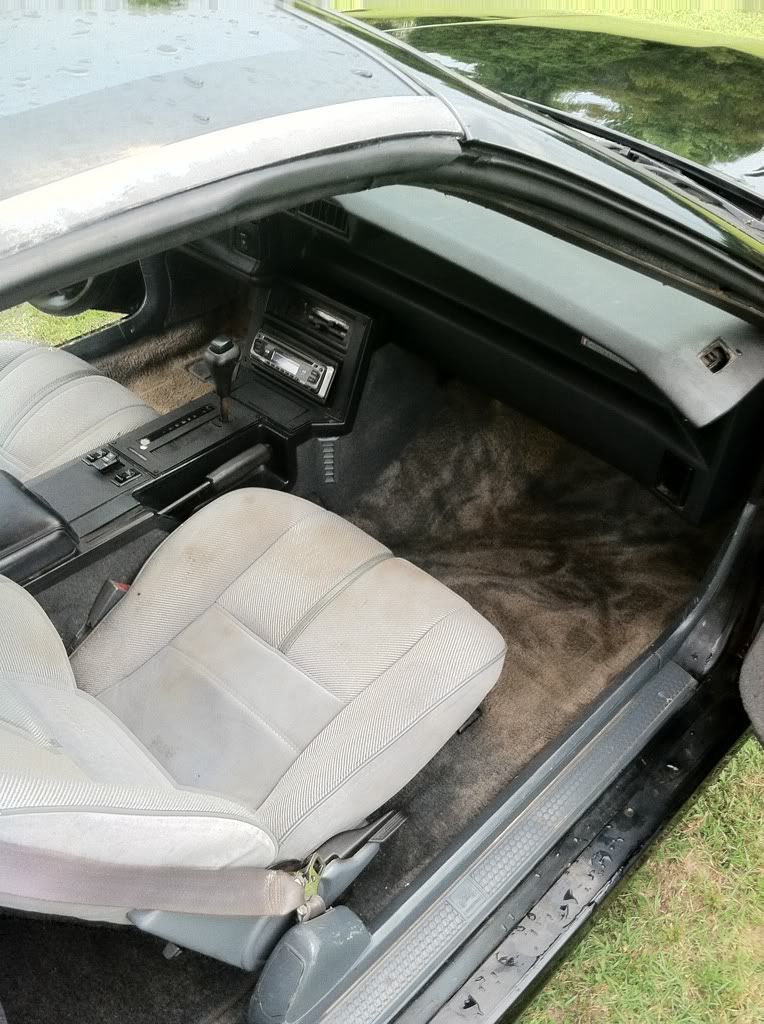
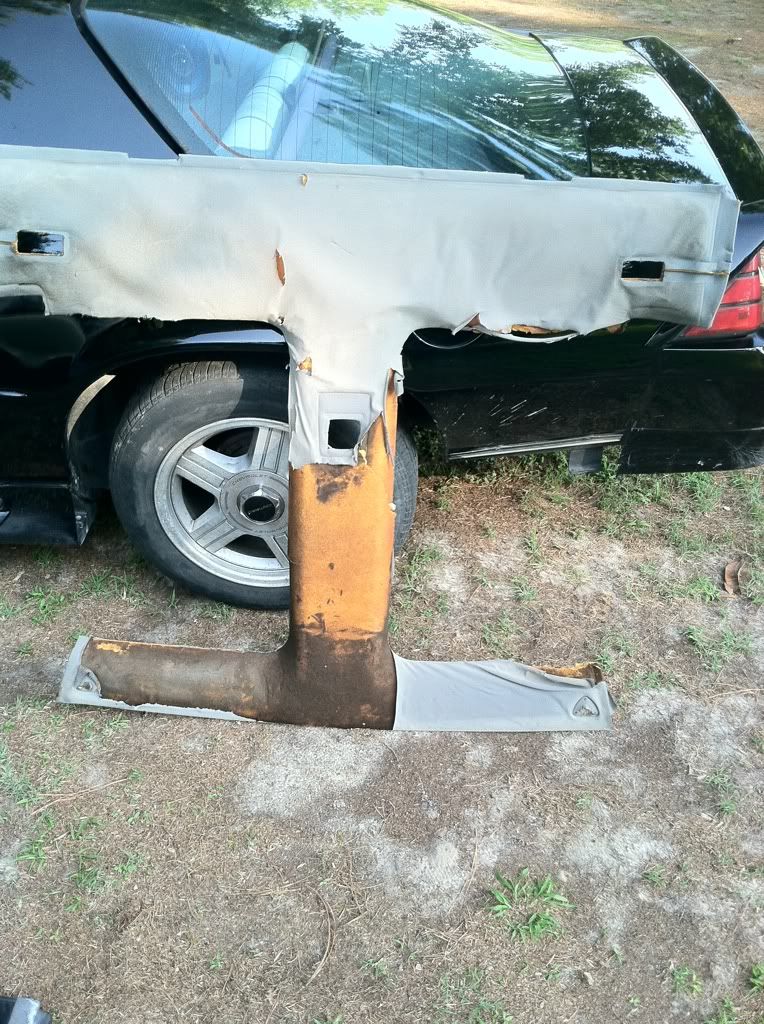
My next goal was to replace the very stained and worn out carpet!
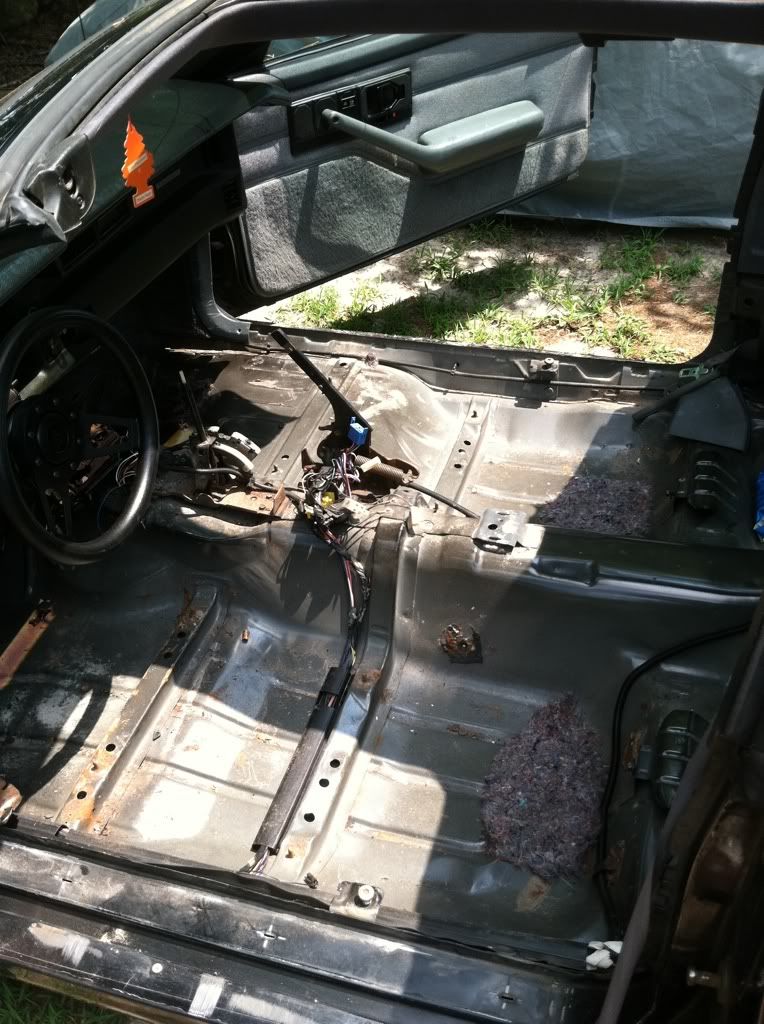
The entire interior was removed and I found a few more half smoken blunts under the seats lmao
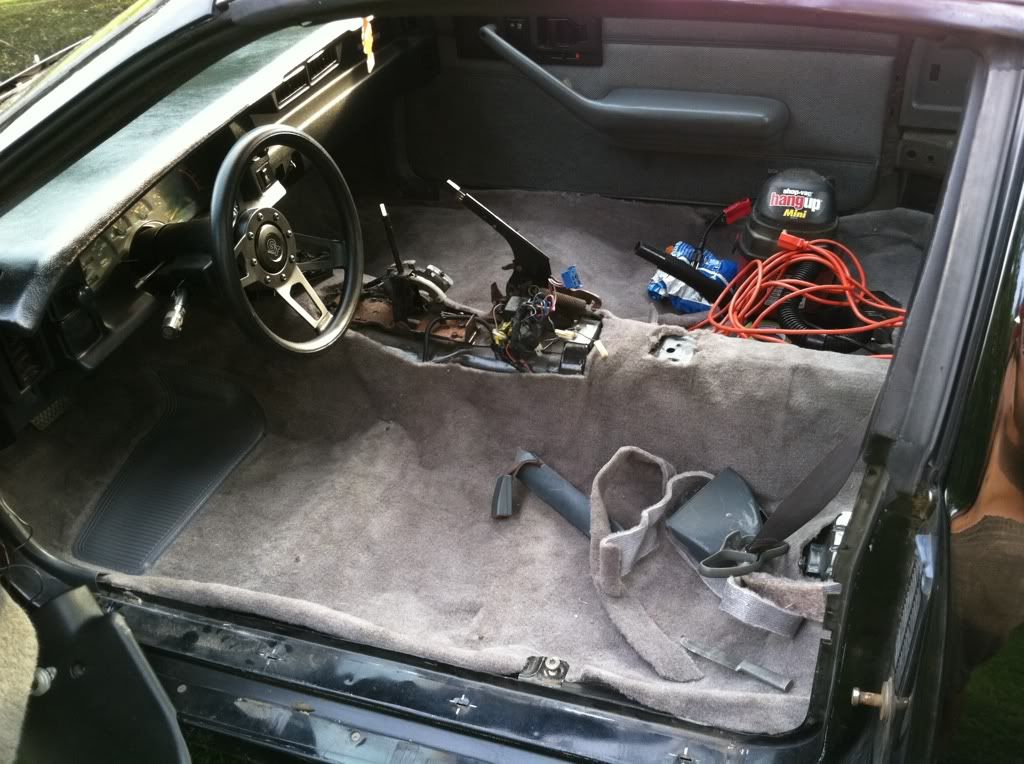
Finally got the carpet put into place and assembled the interior back together.
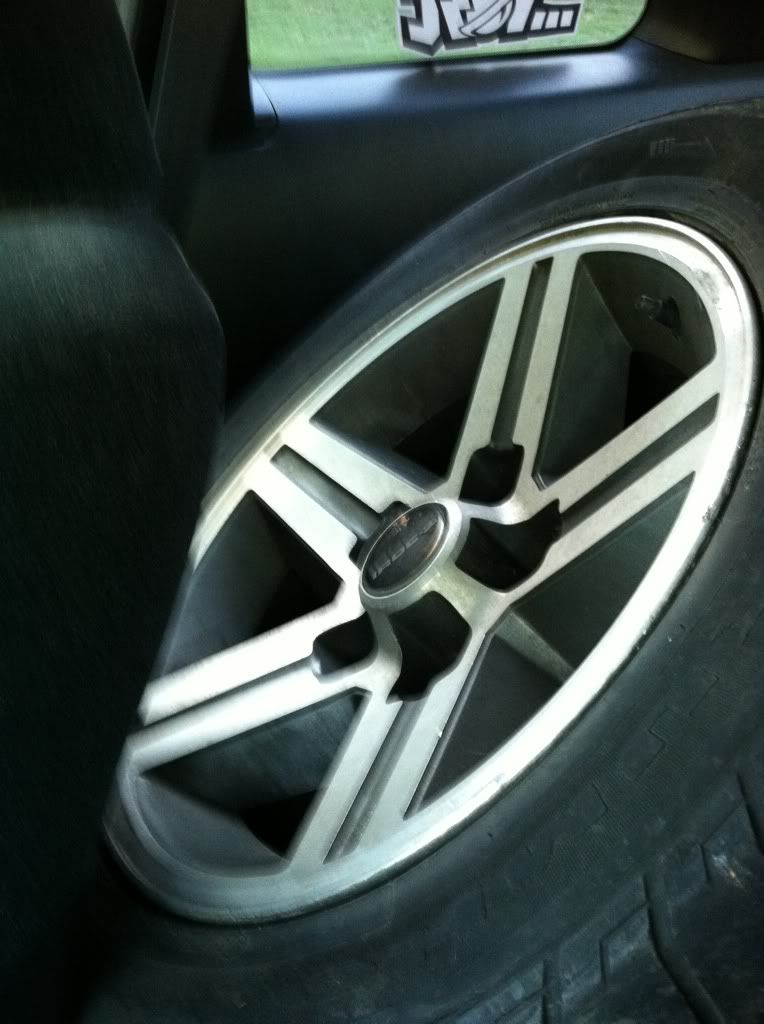
I was never a fan of the stock steering wheel, so I picked this up!
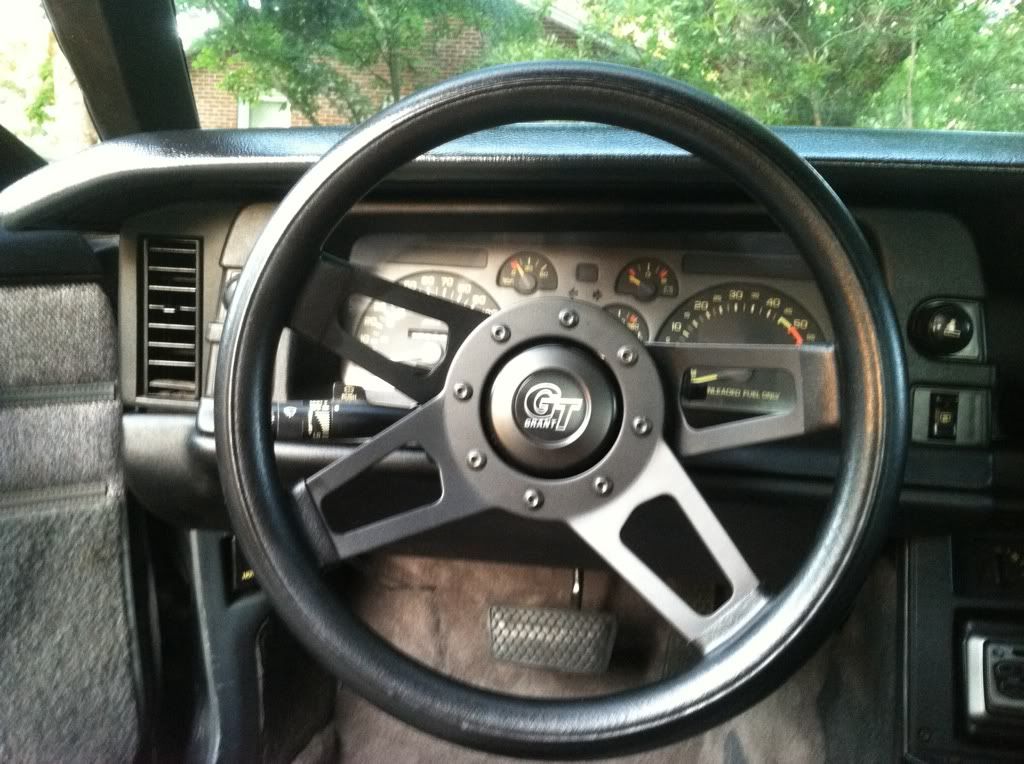
Also the stock tach is a little screwy so I put this in for a little more accuracy
First thing I started with was my dash panel. Almost all third gens develop cracks like mine had done:
Luckily I found a cheap cover on craigslist as well as a set of glass ttops for a little over $100
The next thing on the list was the very ragged headliner
I didn't even feel comfortable knowing that was over my head lol. I found a better made replacement one on the web that was on the expensive side, but much better than getting the old one redone.
Not the best pic, but much much MUCH better than before.
My next goal was to replace the very stained and worn out carpet!
The entire interior was removed and I found a few more half smoken blunts under the seats lmao
Finally got the carpet put into place and assembled the interior back together.
I was never a fan of the stock steering wheel, so I picked this up!
Also the stock tach is a little screwy so I put this in for a little more accuracy
05-31-2012, 09:29 PM
#5
2nd Gear Member
Thread Starter
Join Date: Apr 2012
Location: Va
Posts: 170
Next thing I went on to was my instrument cluster. For the most part my gauges have been far from accurate, so I picked up another cluster from a fellow thirdgenner. I could resist being a little ricer and putting white faces on 
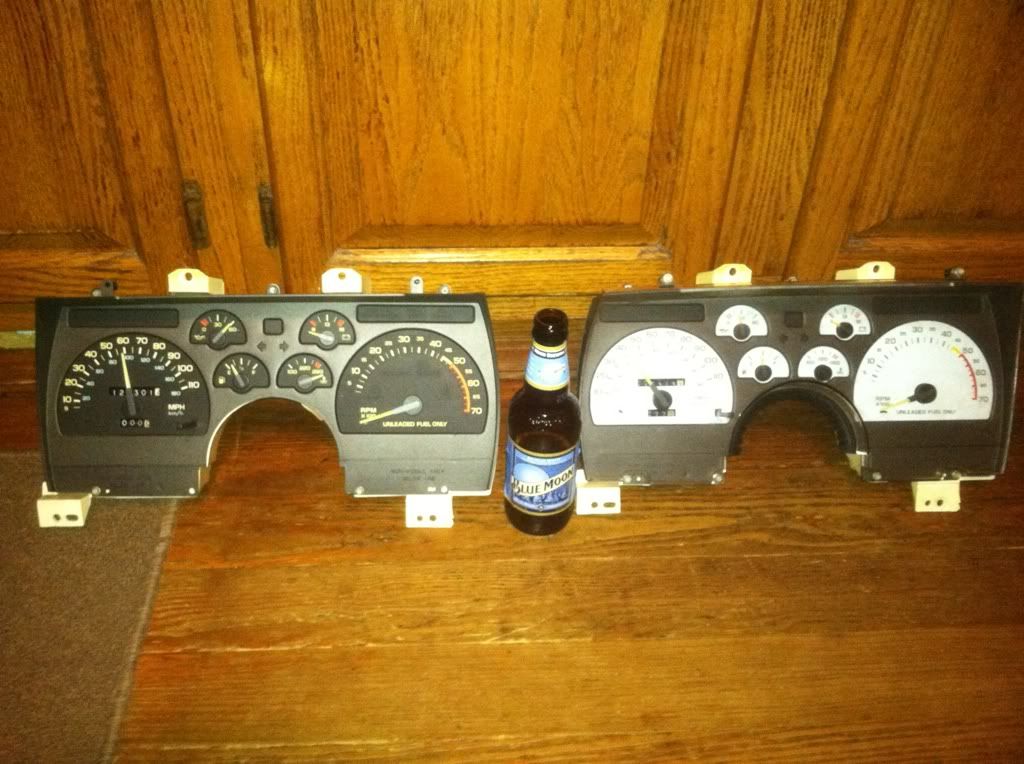
I totally haz racecar nowz...oh yeah! Oil pressure is back up and reading perfecto!
And now for my bargain of the century that completed my interior!!!! Pick and pull was having a half off sale and I went there expecting not to find much at all but surprisingly I found a pair of mint condition 30th anniv seats out of a fourth gen! $13 a piece!
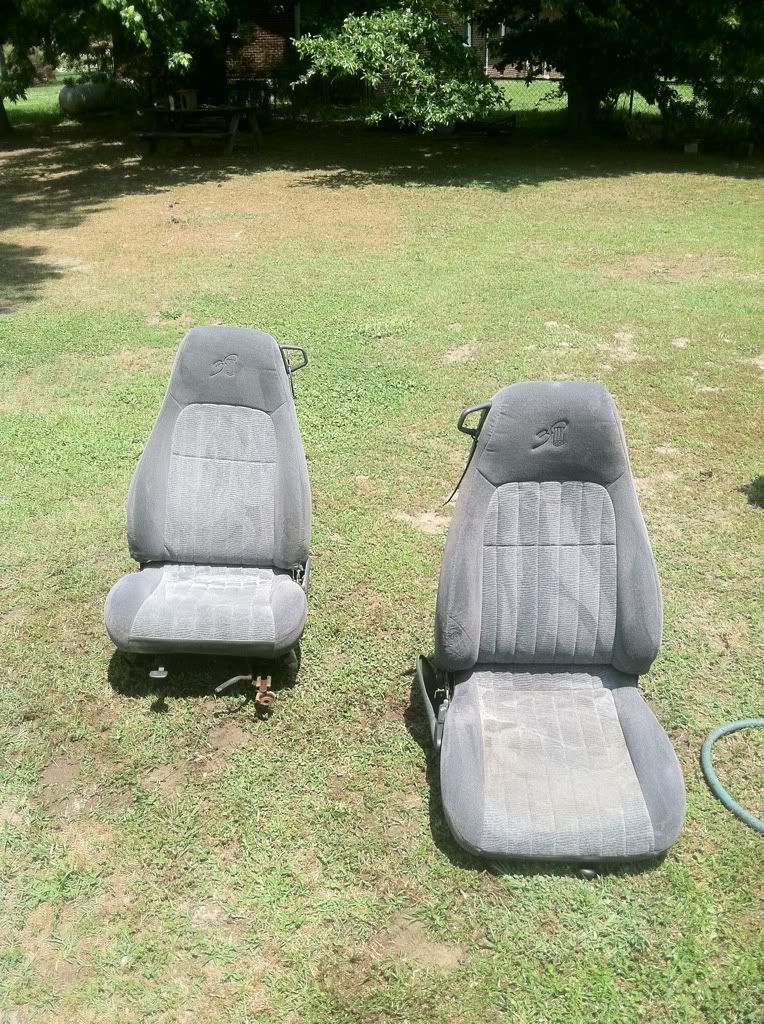
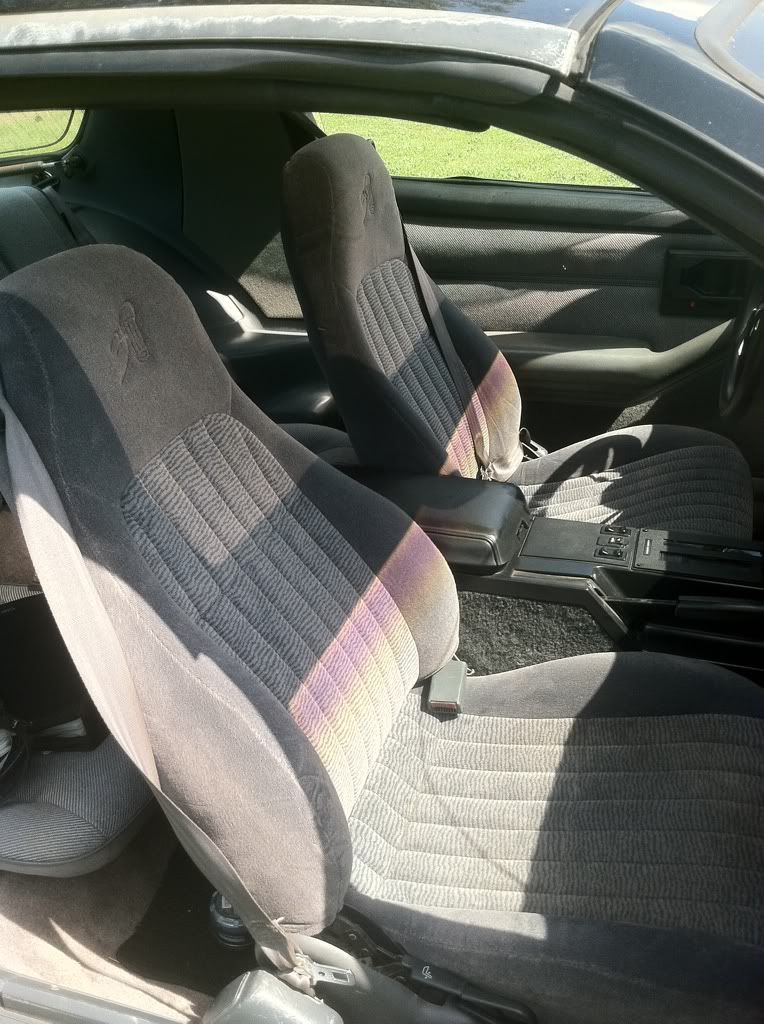
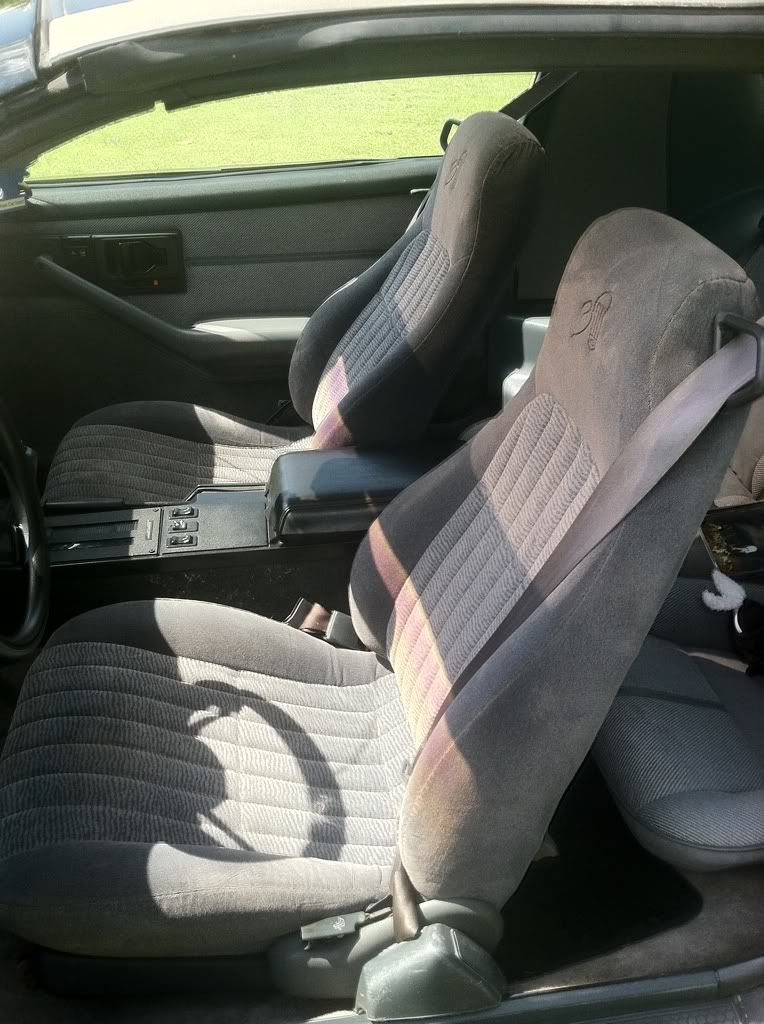
They look damn good in there!
I totally haz racecar nowz...oh yeah! Oil pressure is back up and reading perfecto!
And now for my bargain of the century that completed my interior!!!! Pick and pull was having a half off sale and I went there expecting not to find much at all but surprisingly I found a pair of mint condition 30th anniv seats out of a fourth gen! $13 a piece!
They look damn good in there!
05-31-2012, 09:40 PM
#6
2nd Gear Member
Thread Starter
Join Date: Apr 2012
Location: Va
Posts: 170
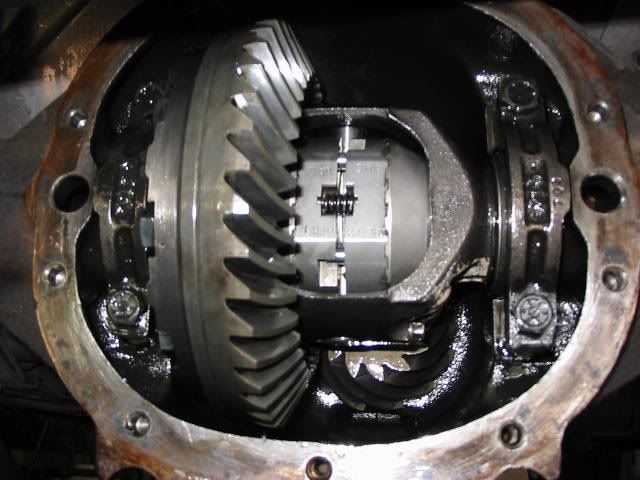
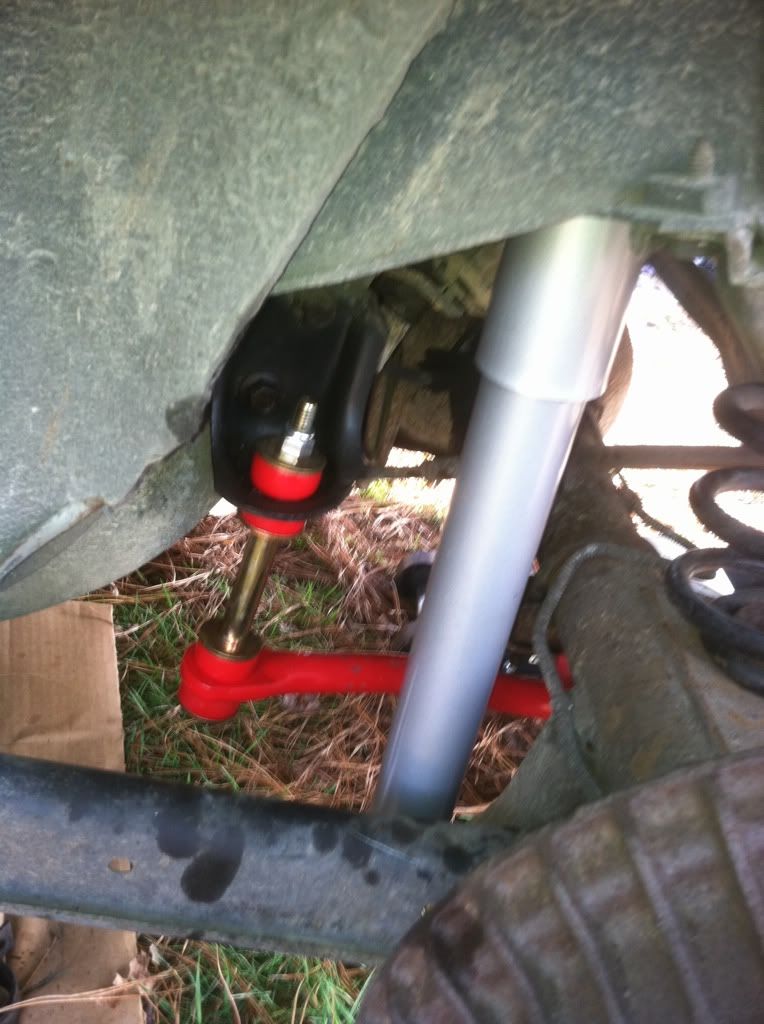
Suspension!
My suspension was shot to say the least, and in the truth of things it was completely unsafe for road duties. First thing I started with was replacing the worn out brake pads that the precious owner threw in with the car.
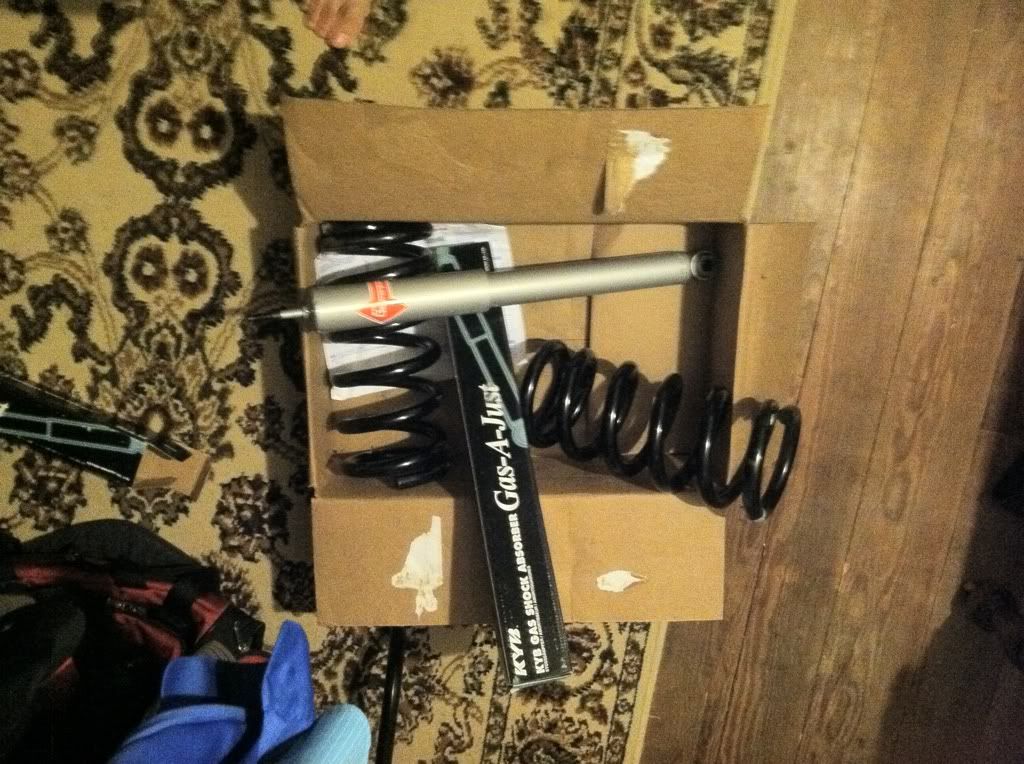
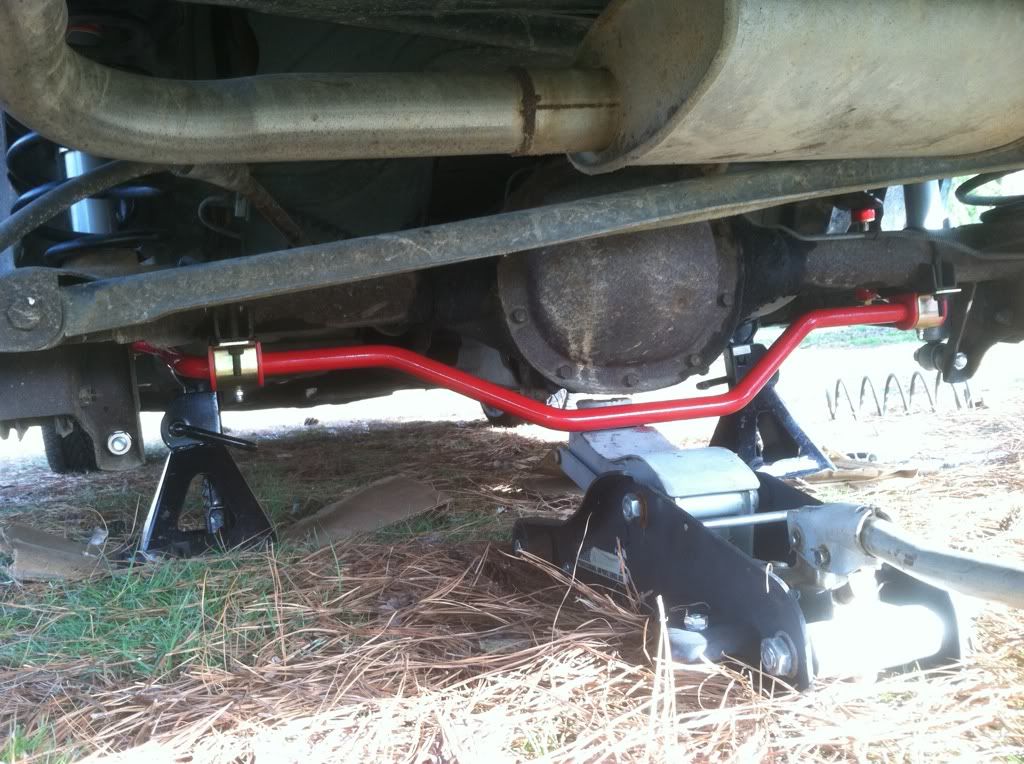
Here's a list of suspension parts I used:
1.) Pair of kyb gr2 shocks for the front
2.) pair of kyb gas a justs for the rear
3.) solid suspension techniques sway bar front
4.) solid u.m.I. Sway bar rear
5.) u.m.I. Wonder bar
6.) front moog springs stock height (same stiffness as ws6)
7.) fourth gen z28 rear springs

My suspension was shot to say the least, and in the truth of things it was completely unsafe for road duties. First thing I started with was replacing the worn out brake pads that the precious owner threw in with the car.
Here's a list of suspension parts I used:
1.) Pair of kyb gr2 shocks for the front
2.) pair of kyb gas a justs for the rear
3.) solid suspension techniques sway bar front
4.) solid u.m.I. Sway bar rear
5.) u.m.I. Wonder bar
6.) front moog springs stock height (same stiffness as ws6)
7.) fourth gen z28 rear springs
05-31-2012, 09:50 PM
#7
2nd Gear Member
Thread Starter
Join Date: Apr 2012
Location: Va
Posts: 170
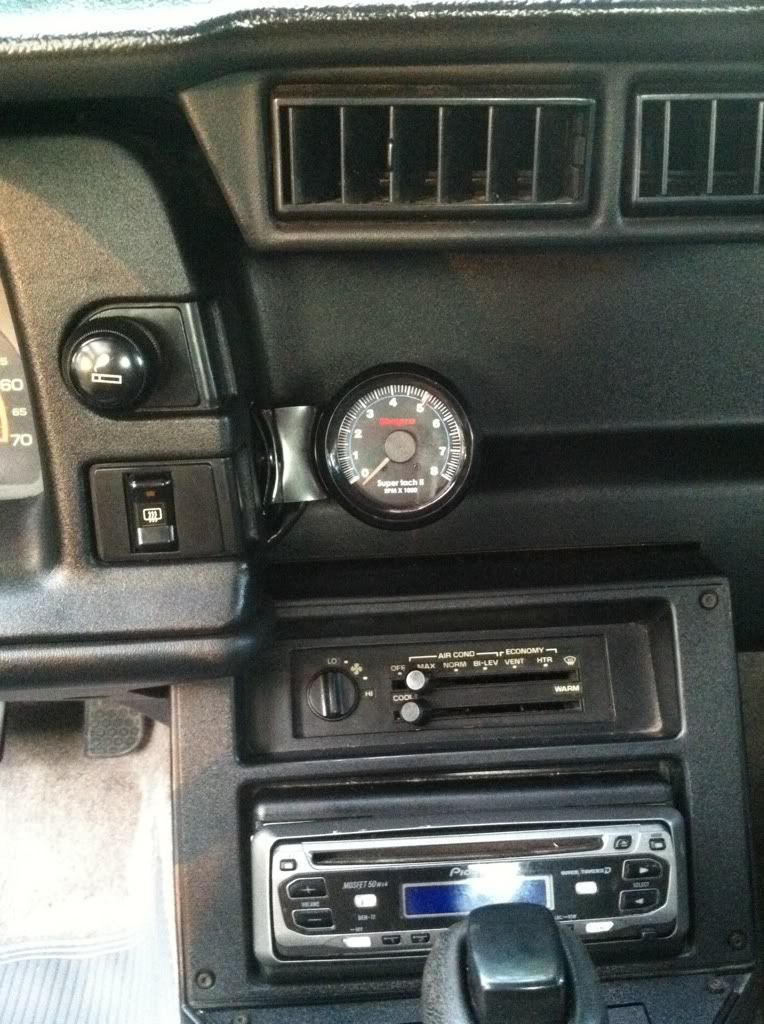
My next step is my on going struggle for power. When I first pick her up, she was definitely in some need for power, so I started with a complete tune up which helped a lot but still it was weak. First power mod was a cheap summit open element:
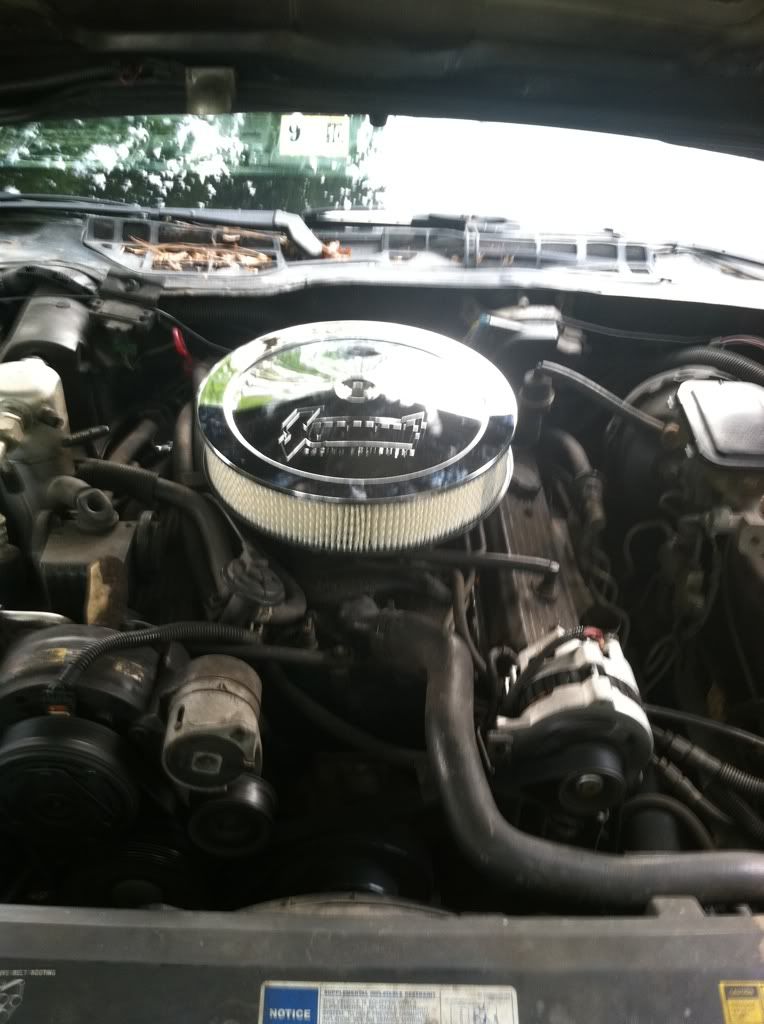
I could definitely feel a sotp difference with this mod, not a lot of power but definitely worth the $30 investment.
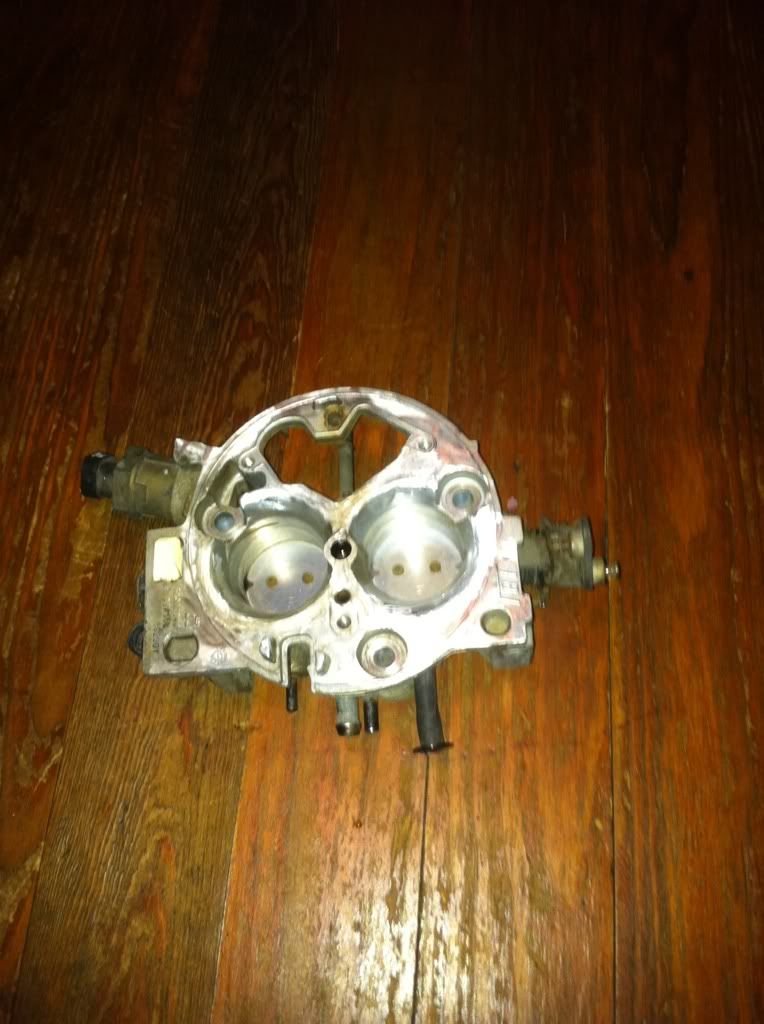
Next mod was what's known as the ultimate tbi mods on chevy sites. This involves grinding out the ridges above the throttle bores and adding an injector spacer. I'm not sure if any power is made through this, but it does increase the cfm of the unit
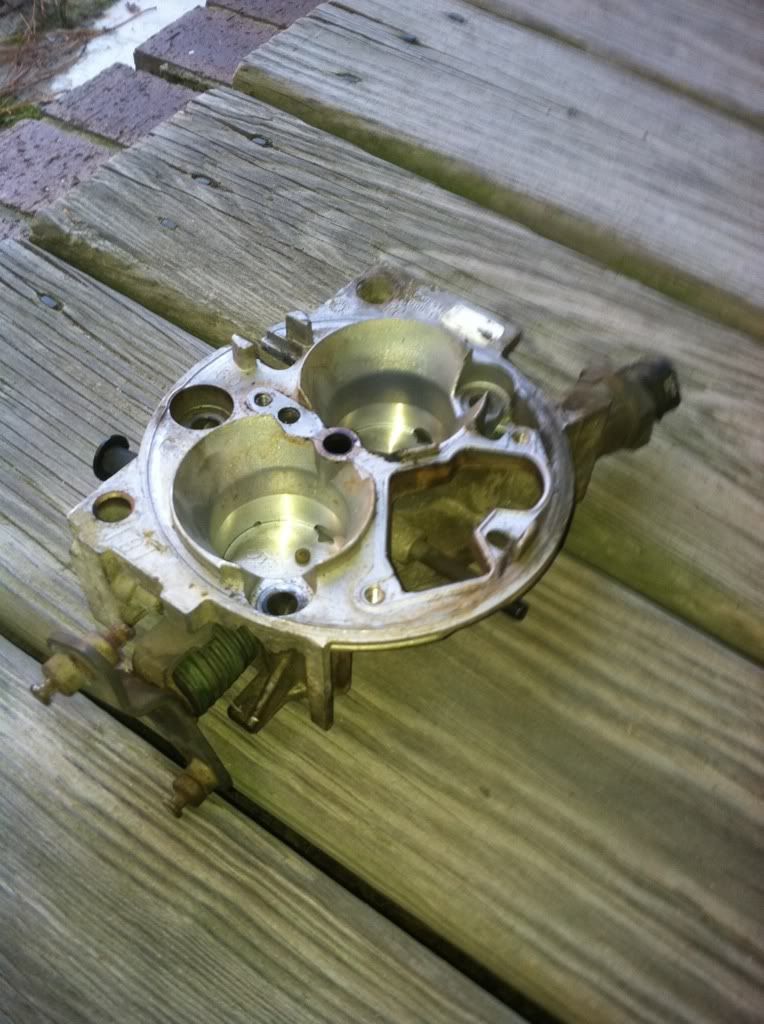
Stock^
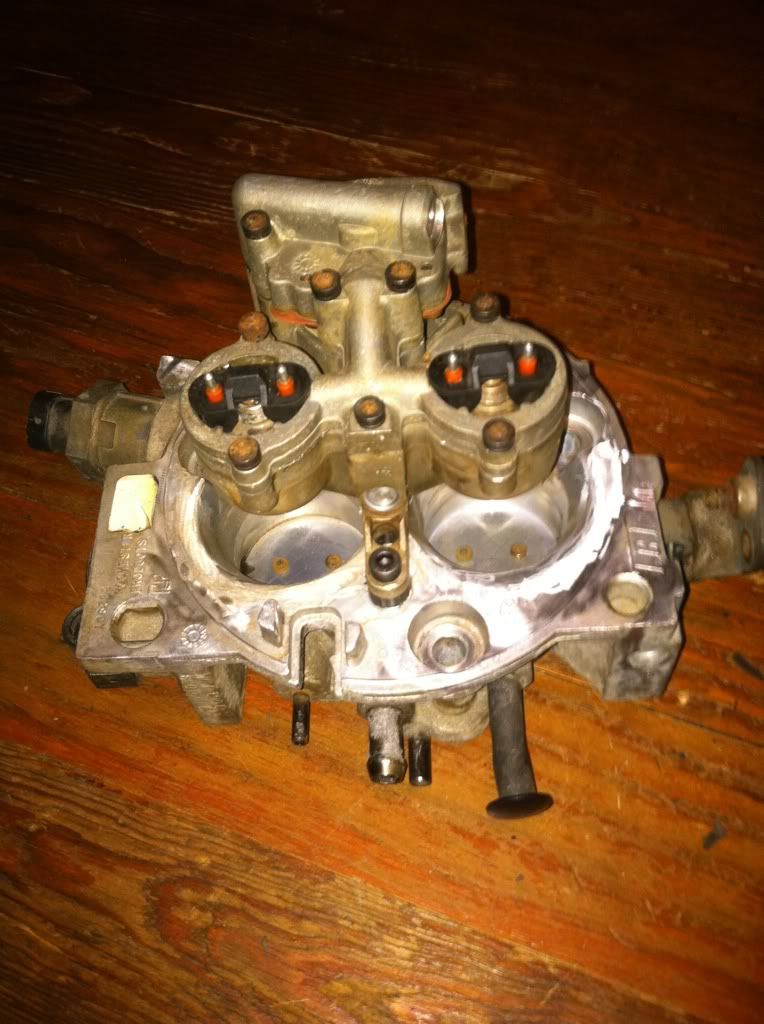
^ridges removed with spacer
I could definitely feel a sotp difference with this mod, not a lot of power but definitely worth the $30 investment.
Next mod was what's known as the ultimate tbi mods on chevy sites. This involves grinding out the ridges above the throttle bores and adding an injector spacer. I'm not sure if any power is made through this, but it does increase the cfm of the unit
Stock^
^ridges removed with spacer
05-31-2012, 10:01 PM
#8
2nd Gear Member
Thread Starter
Join Date: Apr 2012
Location: Va
Posts: 170
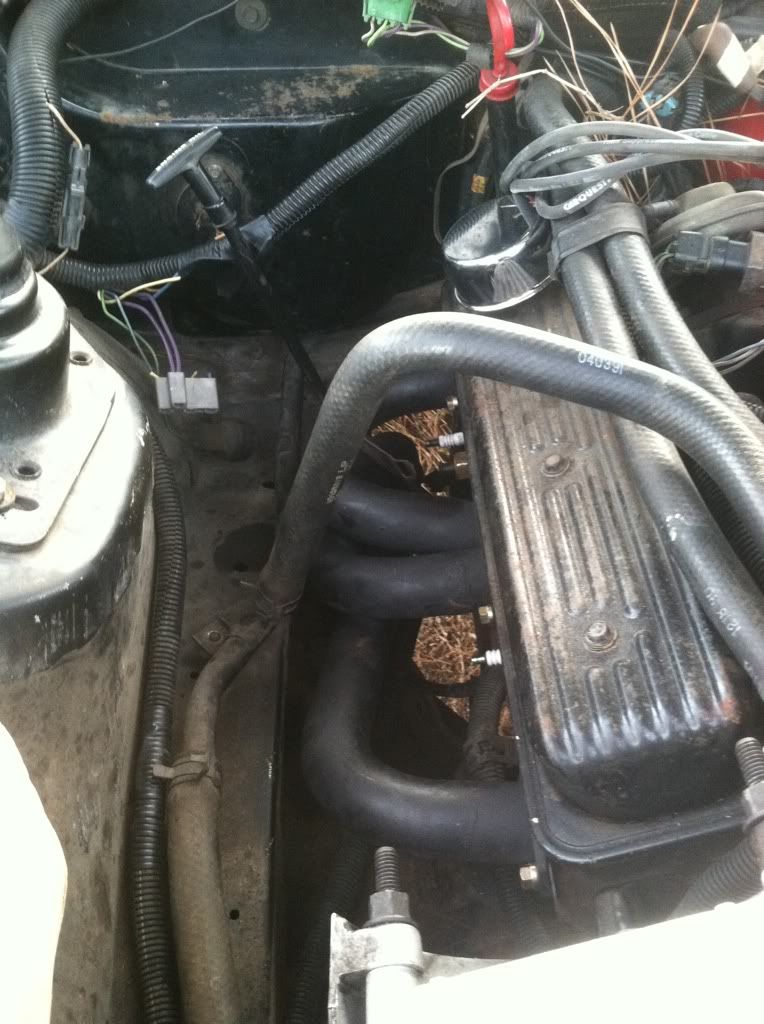
Next thing I started to work on was shedding a little weight. The ac was no longer working, so I decided to ditch it along with the smog pump.
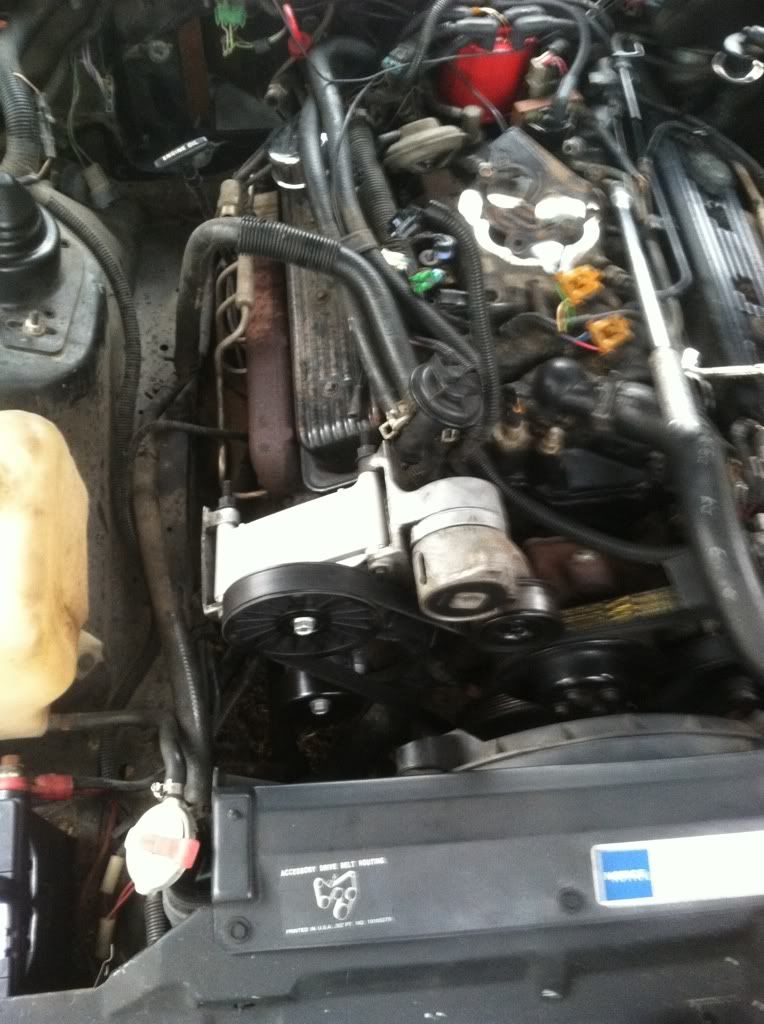
^ac and smog pump delete pullies.
Removed a lot of junk off the front of the car
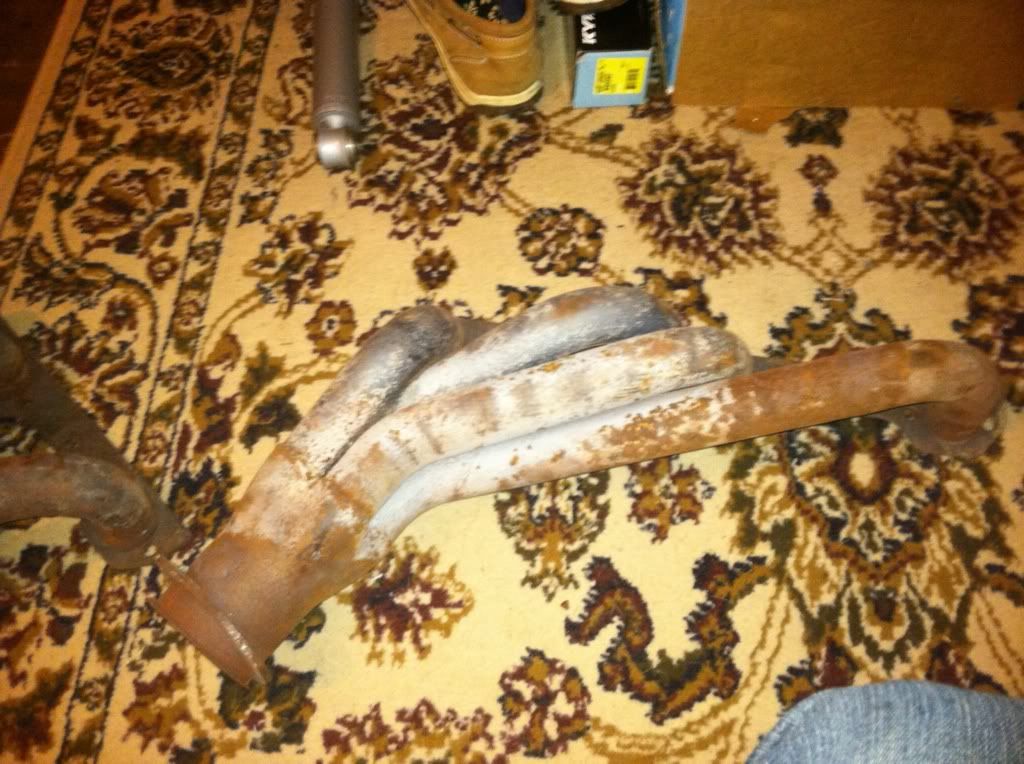
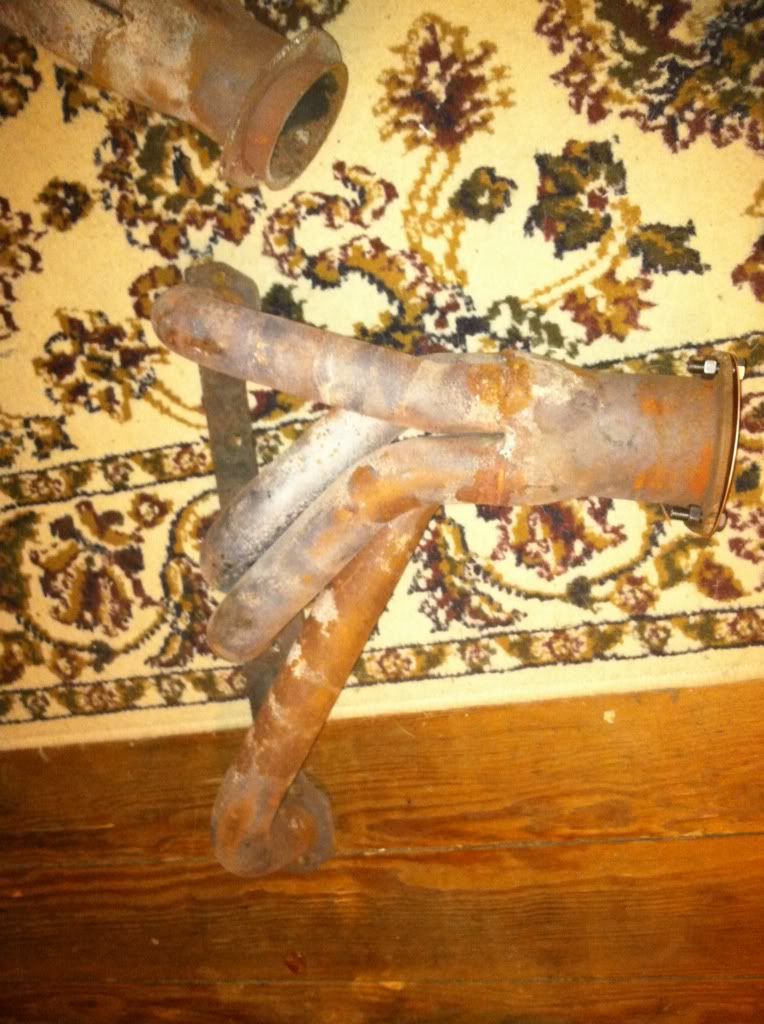
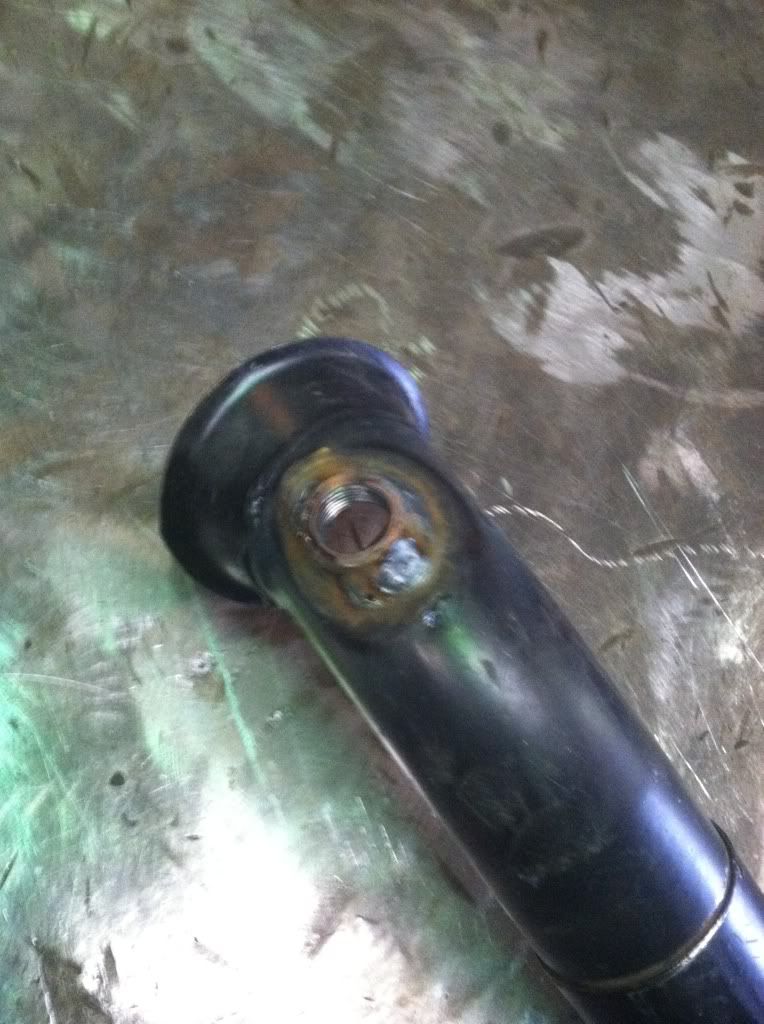
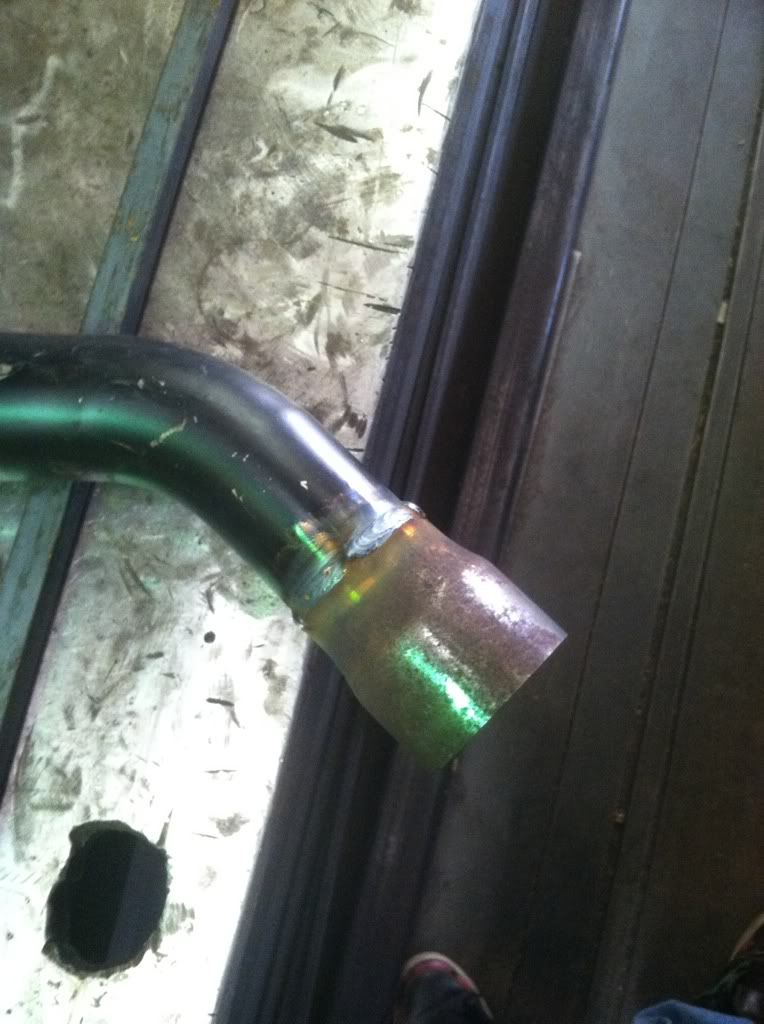
Next thing I picked up was a set of used hedman headers off eBay. I cleaned and painted them and turned out halfway nice. I also bought a hedman y pop which I added an o2 sensor bung and adapter. The rest of the exhaust is a full 3inch mandrel bent jegs brand system
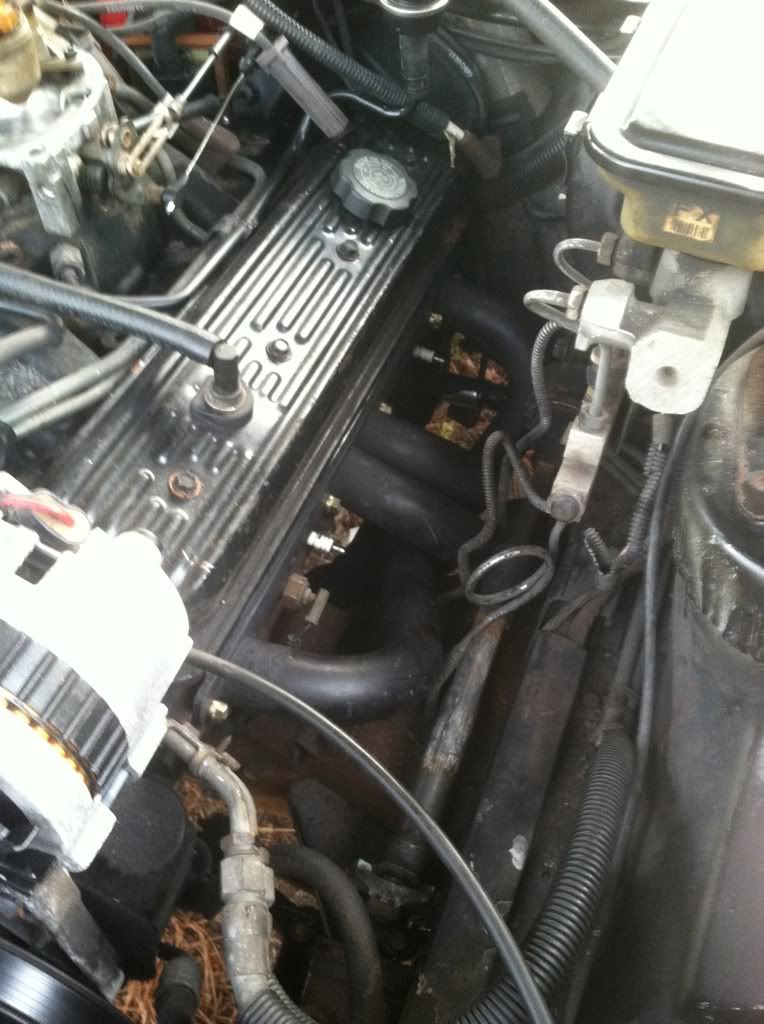
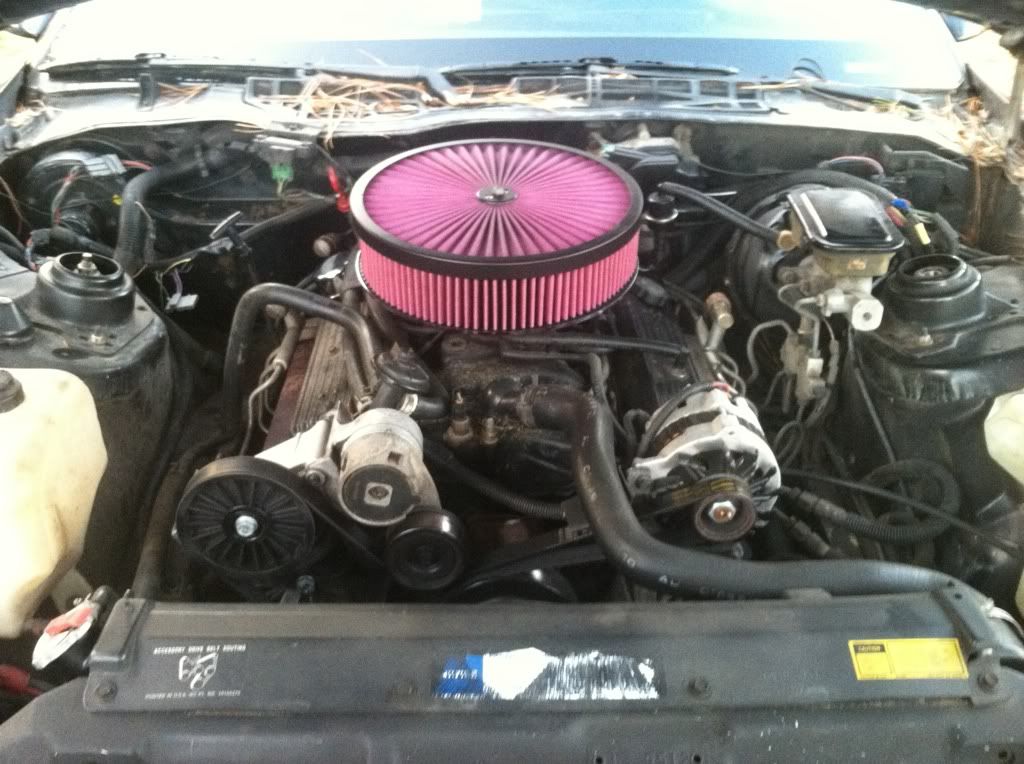
At the same time I added a set of bbk underdrive pullies, 180* thermostat, and advanced the base timing to 6*.
the engine is a whole new beast!!!
^ac and smog pump delete pullies.
Removed a lot of junk off the front of the car
Next thing I picked up was a set of used hedman headers off eBay. I cleaned and painted them and turned out halfway nice. I also bought a hedman y pop which I added an o2 sensor bung and adapter. The rest of the exhaust is a full 3inch mandrel bent jegs brand system
At the same time I added a set of bbk underdrive pullies, 180* thermostat, and advanced the base timing to 6*.
the engine is a whole new beast!!!