
 10-27-2015, 10:37 AM
Last edit by: IB Advertising
See related guides and technical advice from our community experts:
Browse all: Lighting
- Ford Mustang V6 and Mustang GT 1994-2004: How to Install HID Headlights
Step by step instructions for do-it-yourself repairs.
Browse all: Lighting

S197 HID Install by Stangmods.com 56k-no way
04-21-2009, 12:56 PM
#1
5th Gear Member
Thread Starter
Join Date: Feb 2005
Location: Anaheim, California
Posts: 4,205
Howdy Group.....
OK, so the Bullitt got a ton of attention yesterday, so today I turned to the 05...I finally decided to install HID's on the 05. Karen's Bullitt already has the factory HID's, and I love em. I don't believe every Bullitt comes from the factory with HID's, so this kit could be used on the Bullitt as well......
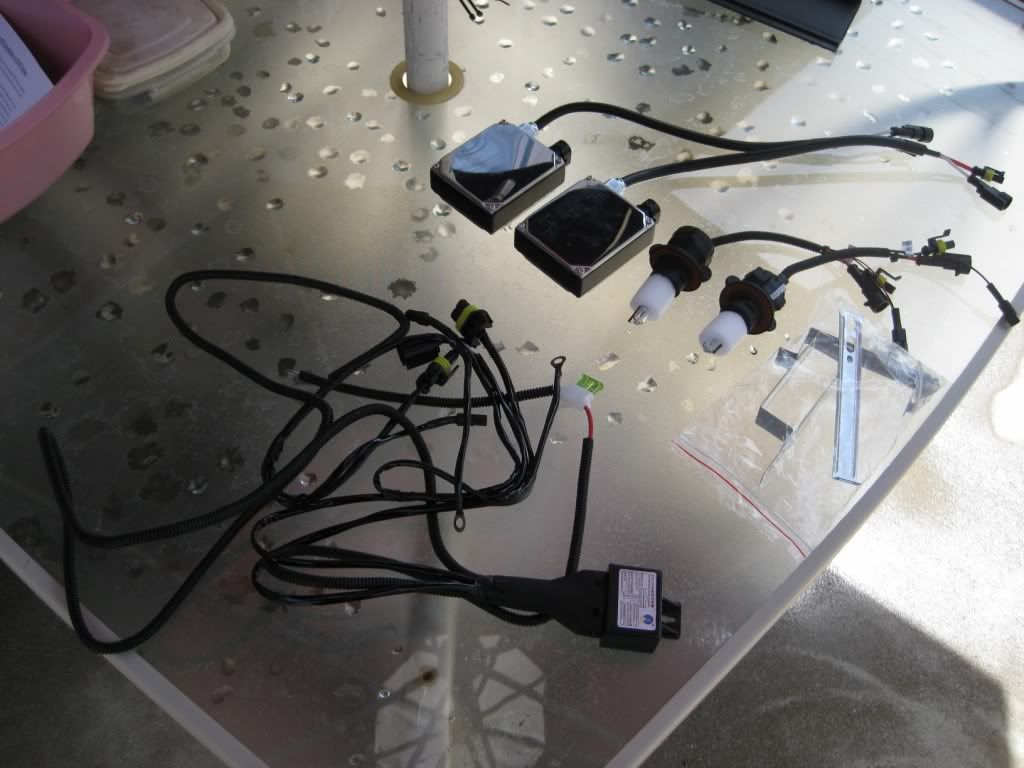
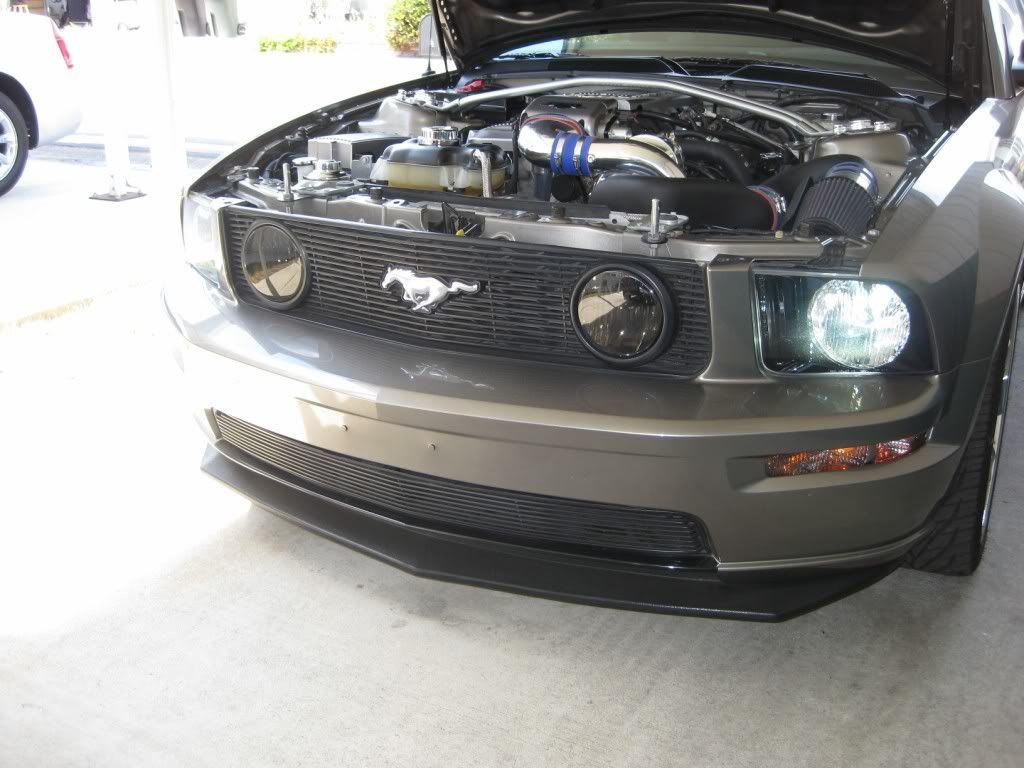
This is the 6000K Bixenon Kit from Stangmods.com The 6000K is a blueish white, without going over the edge to the solid blue....I felt this to be the right choice for me....This is a very complete, plug and play kit, meaning there is no wire splicing involved, just plugs....
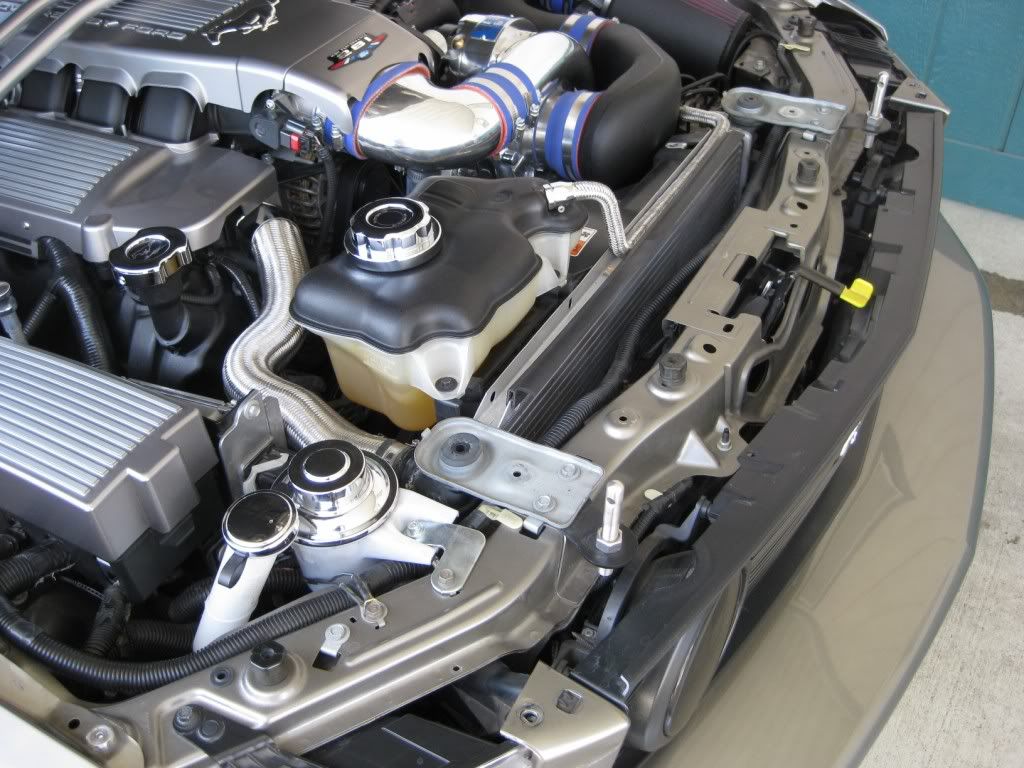
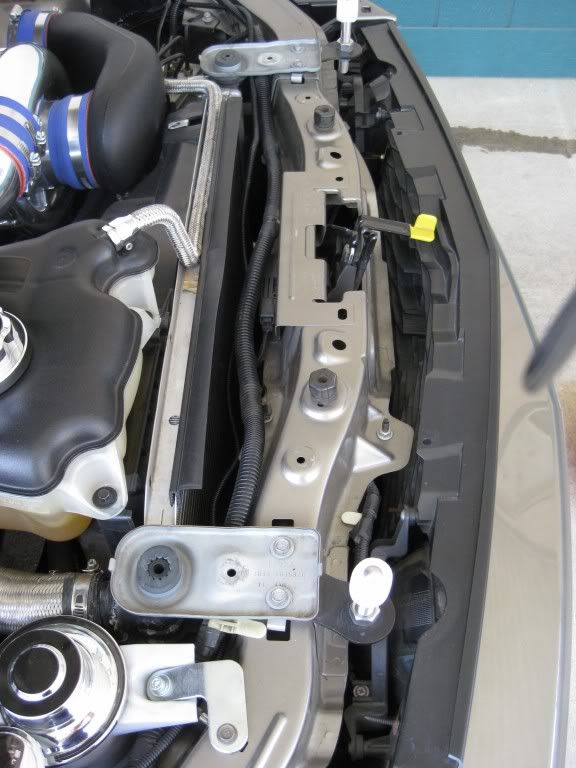
First step for me was to remove the radiator cover, as well as the radiator extensions, if you have them....This gives you all the room you need up front for routing of wires....
Fairly simple to get to the passenger side stock bulb. Remove the factory bulb..

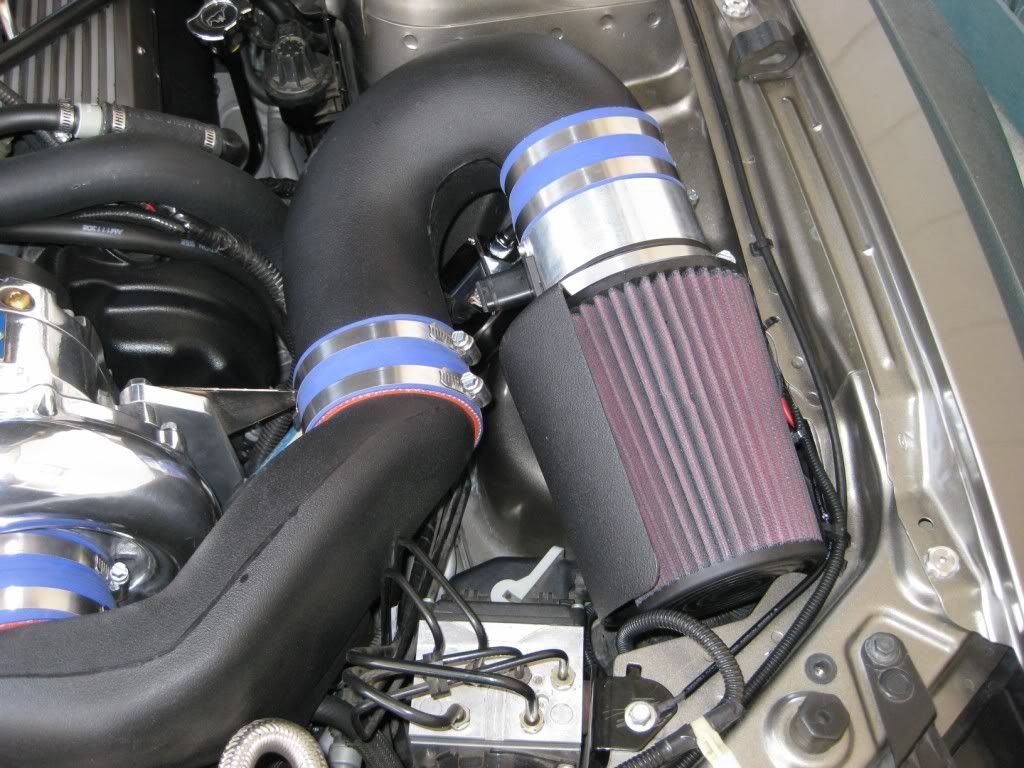
Driver side for me was a bit more complicated, only because of the Vortech CAI...But simple enough to deal with...
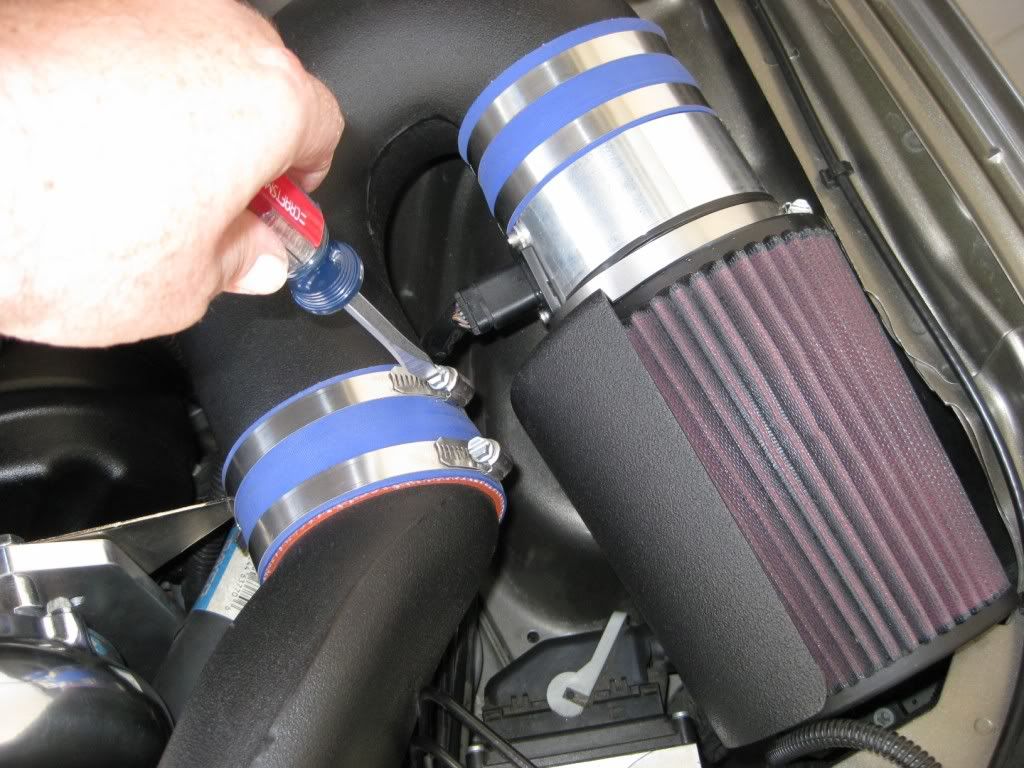
Once the CAI is out of the way, ton of room to get to the factory bulb...

Twist and remove the factory bulb. Take note that there is a very good chance there will be a rubber gasket left behind on the headlight.
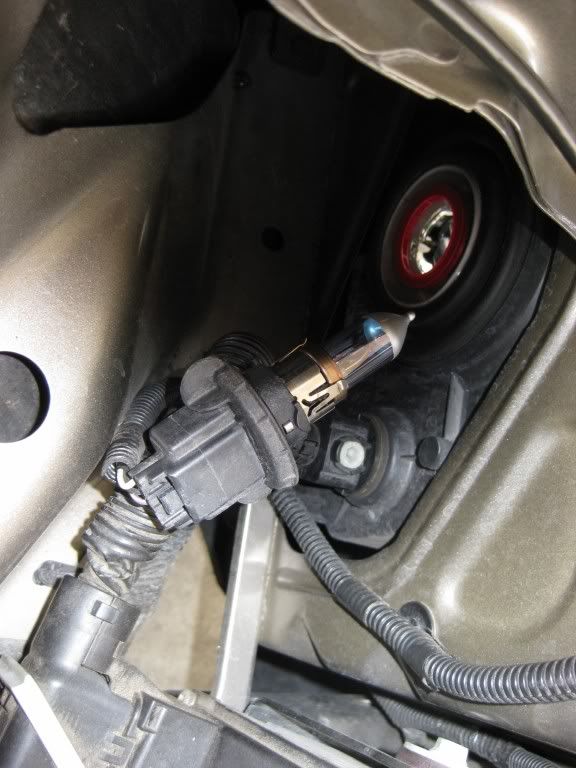
Remove the rubber gasket from either the headlight, or the factory bulb, and transfer it onto the HID base...
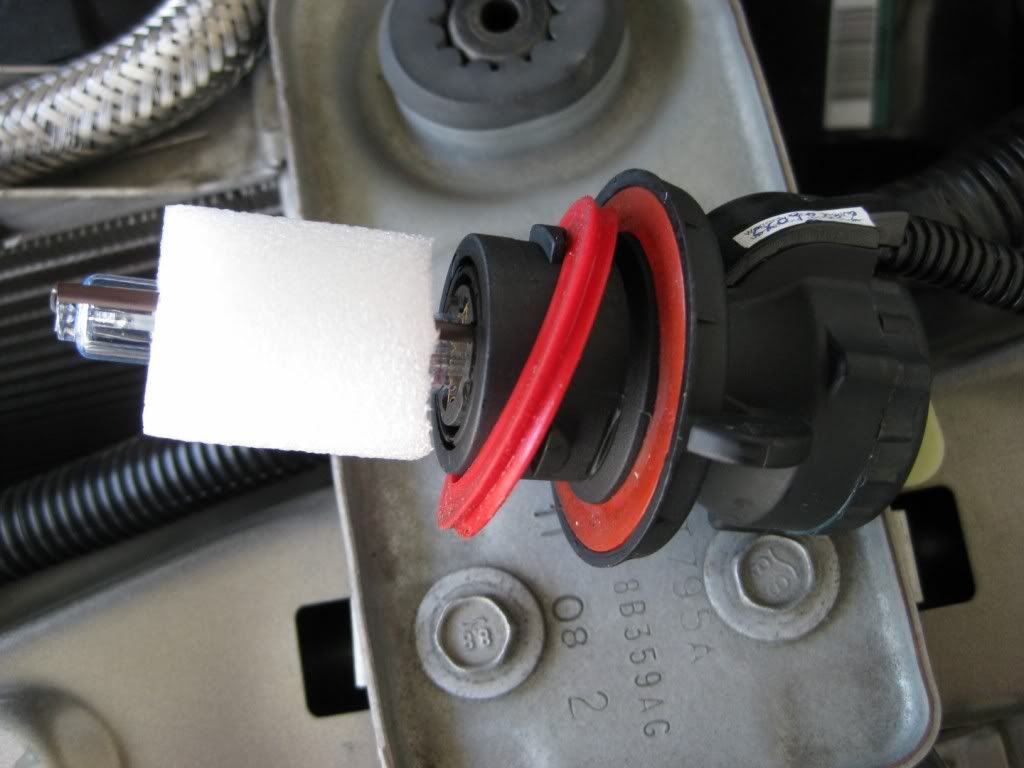
Both sides should now have the stock bulb removed, and the HID bulbs installed...

Now, remove the cover of the fuse box. At the rear of the fuse box, you will see the bolt that carries the main power into the fuse box.
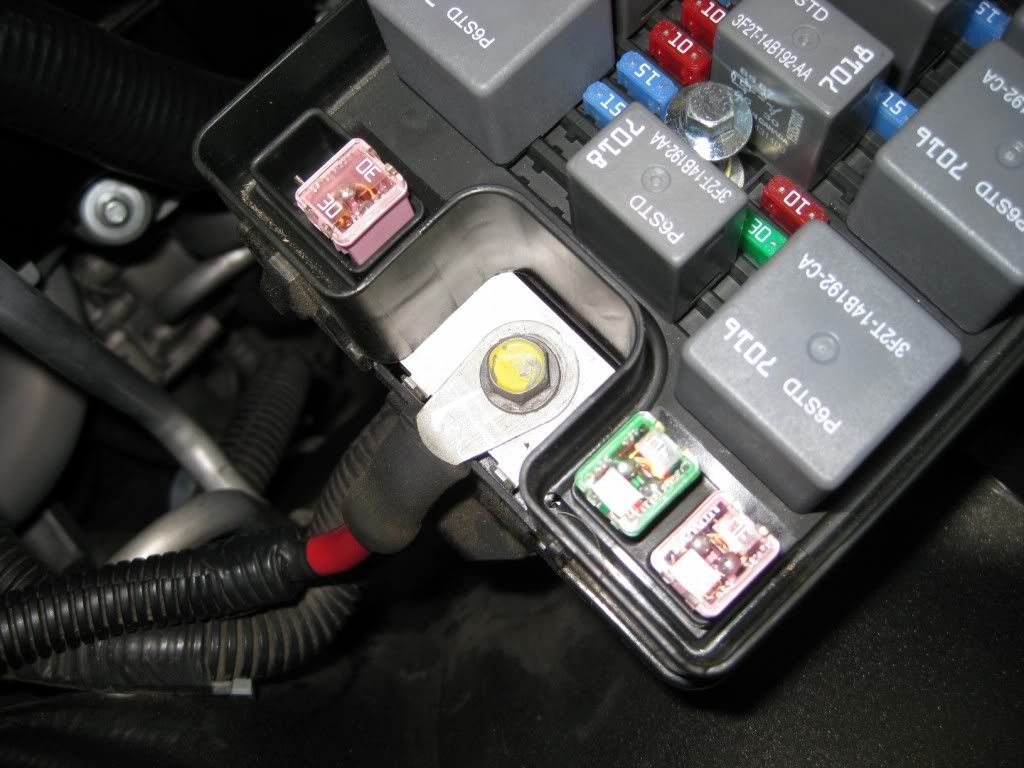
Remove this bolt, and install the supplied power wire from the HID kit...

After this is done, you can re-install the fuse box cover. Down at the base of the fuse box, on the fender well, there are a couple of bolts securing it. This is a great place for your ground lead from the kit...

I opted to use the bolt toward the front grille, so there was enough slack in the HID harness for the other connections...

At this point, this is pretty much what you have on the passenger side of the car...
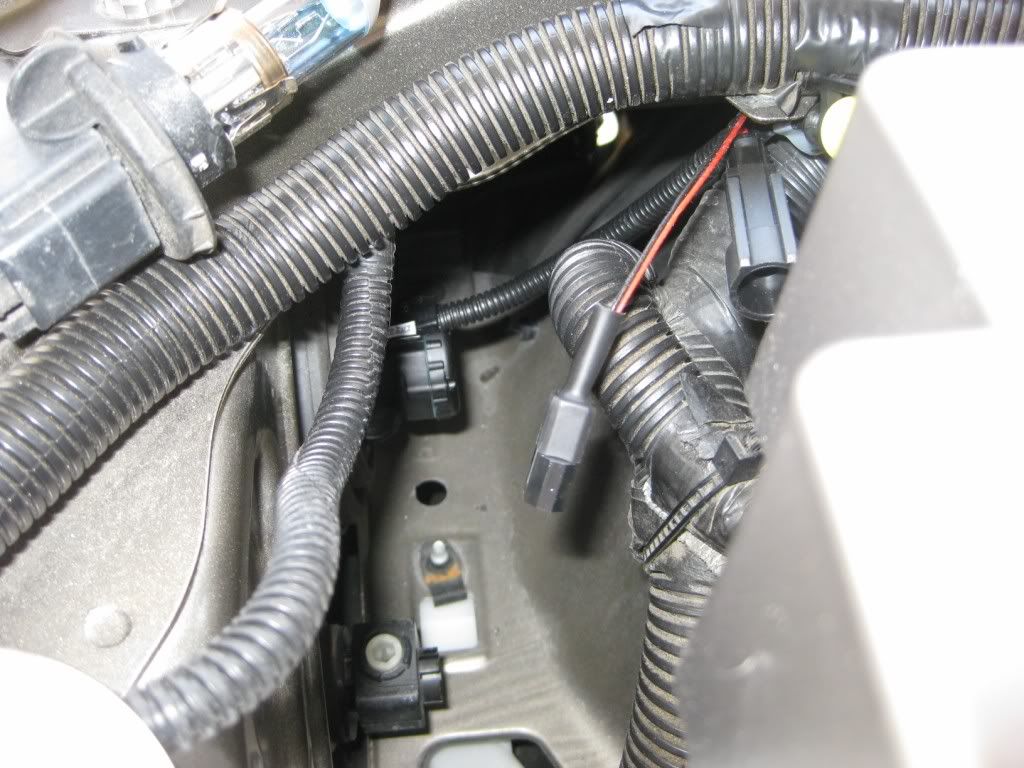
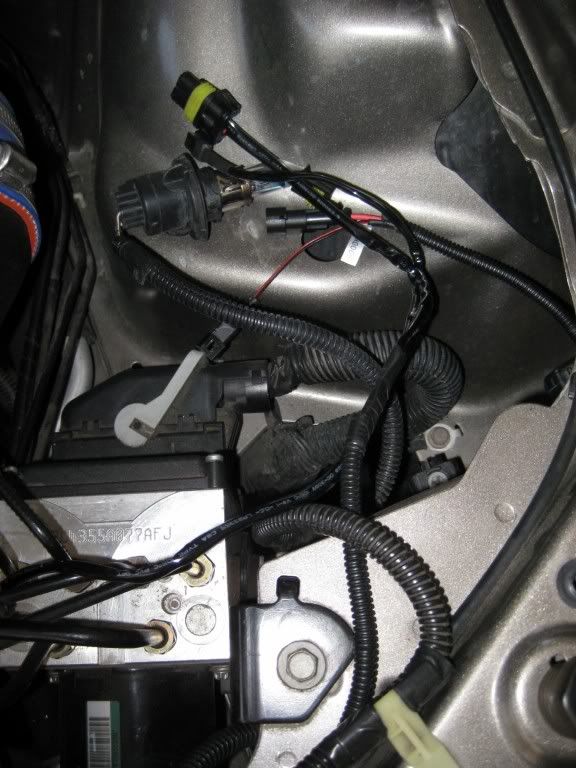
Following the black wire loom that runs across the front of the engine bay, run the other cables from the HID harness over to the drivers side of the car...
CONTINUED NEXT POST.......
OK, so the Bullitt got a ton of attention yesterday, so today I turned to the 05...I finally decided to install HID's on the 05. Karen's Bullitt already has the factory HID's, and I love em. I don't believe every Bullitt comes from the factory with HID's, so this kit could be used on the Bullitt as well......
This is the 6000K Bixenon Kit from Stangmods.com The 6000K is a blueish white, without going over the edge to the solid blue....I felt this to be the right choice for me....This is a very complete, plug and play kit, meaning there is no wire splicing involved, just plugs....
First step for me was to remove the radiator cover, as well as the radiator extensions, if you have them....This gives you all the room you need up front for routing of wires....
Fairly simple to get to the passenger side stock bulb. Remove the factory bulb..
Driver side for me was a bit more complicated, only because of the Vortech CAI...But simple enough to deal with...
Once the CAI is out of the way, ton of room to get to the factory bulb...
Twist and remove the factory bulb. Take note that there is a very good chance there will be a rubber gasket left behind on the headlight.
Remove the rubber gasket from either the headlight, or the factory bulb, and transfer it onto the HID base...
Both sides should now have the stock bulb removed, and the HID bulbs installed...
Now, remove the cover of the fuse box. At the rear of the fuse box, you will see the bolt that carries the main power into the fuse box.
Remove this bolt, and install the supplied power wire from the HID kit...
After this is done, you can re-install the fuse box cover. Down at the base of the fuse box, on the fender well, there are a couple of bolts securing it. This is a great place for your ground lead from the kit...
I opted to use the bolt toward the front grille, so there was enough slack in the HID harness for the other connections...
At this point, this is pretty much what you have on the passenger side of the car...
Following the black wire loom that runs across the front of the engine bay, run the other cables from the HID harness over to the drivers side of the car...
CONTINUED NEXT POST.......
 04-21-2009, 12:58 PM
#2
5th Gear Member
Thread Starter
Join Date: Feb 2005
Location: Anaheim, California
Posts: 4,205
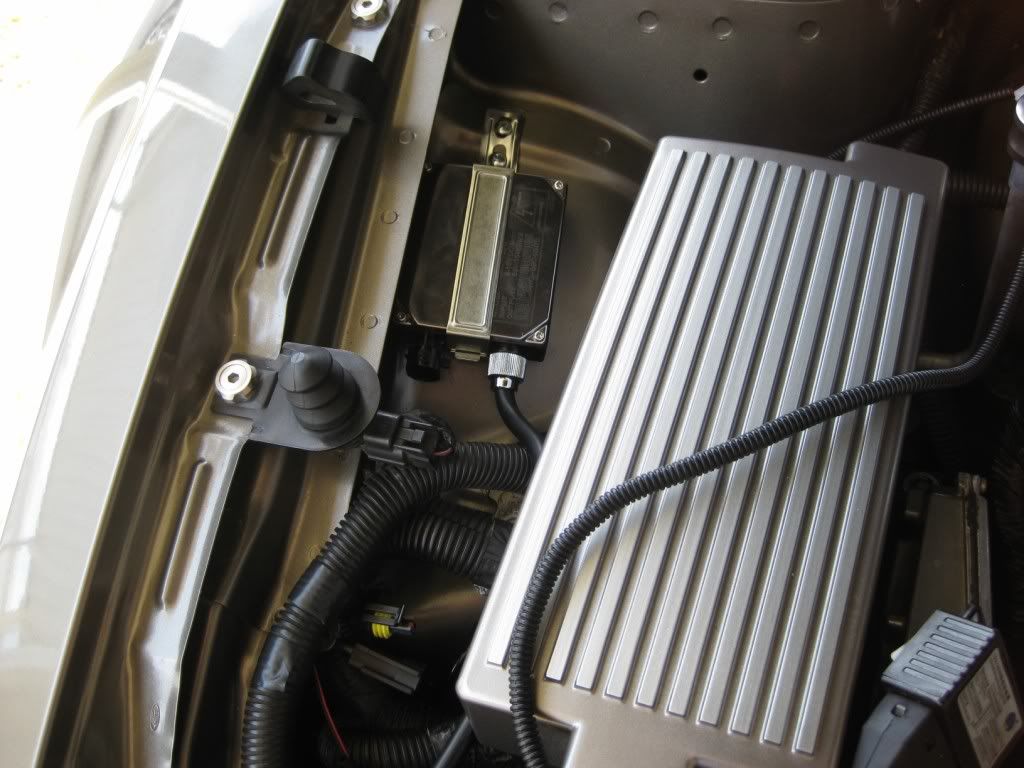
Once all the wires are run across, and the plug from the HID bulb is there, this is what you will have....
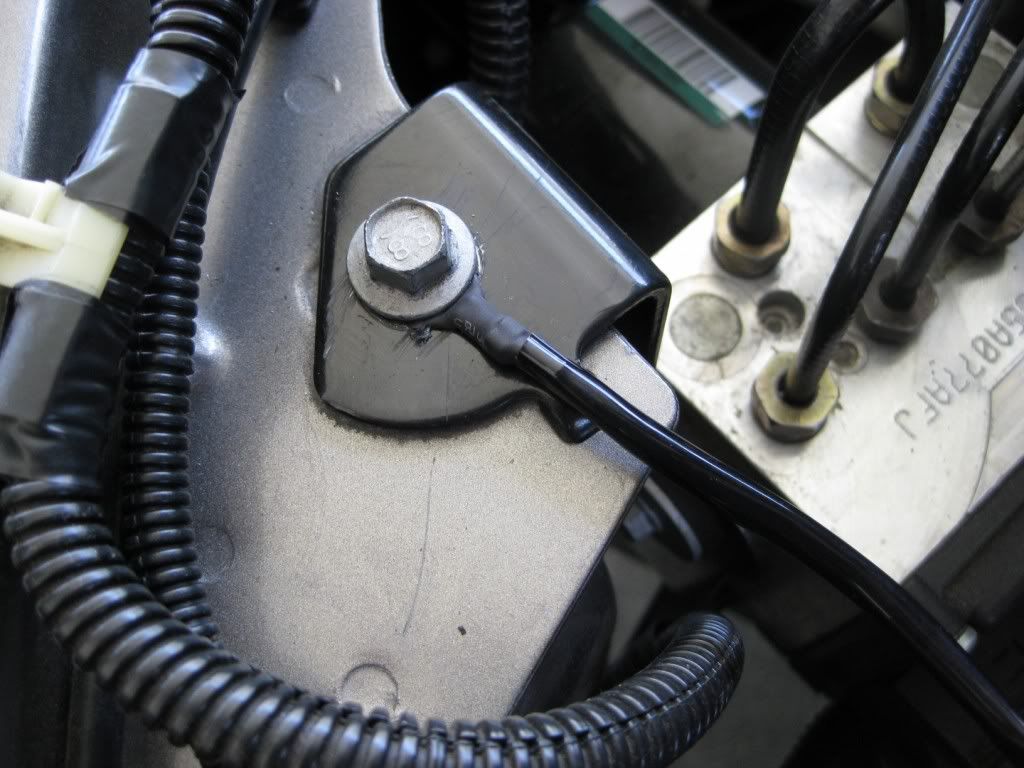
On the drivers side, you will see this bolt right on top. This is an excellent location for the ground that is necessary on the drivers side...
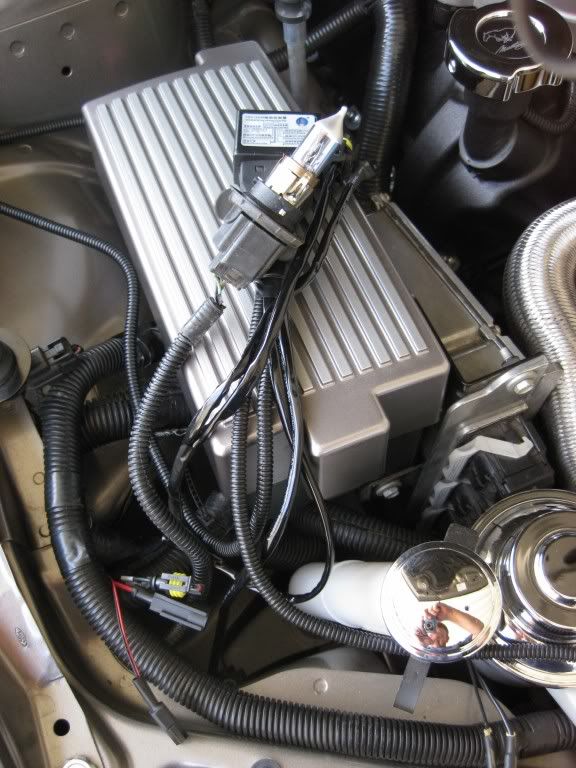
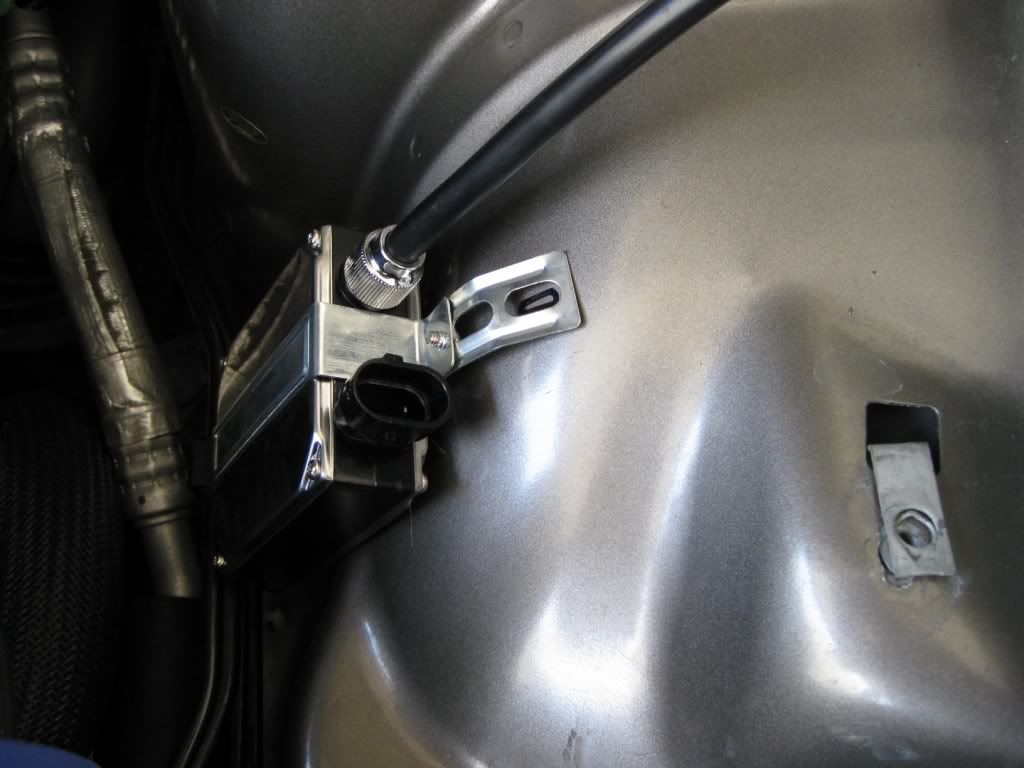
Now, still on the drivers side, it is time to mount the ballast for this side. I had to take into consideration the CAI from the Vortech, but the same would apply for the Bullitt CAI. This was the best location I could find. I bent the install bracket a bit, and marked the location on the wheelwell...
I re-installed the driver's side ballast, and secured it in place....

There are not a lot of options as far as locations on the passenger side. Same process, find your location, drill mounting holes, and secure....
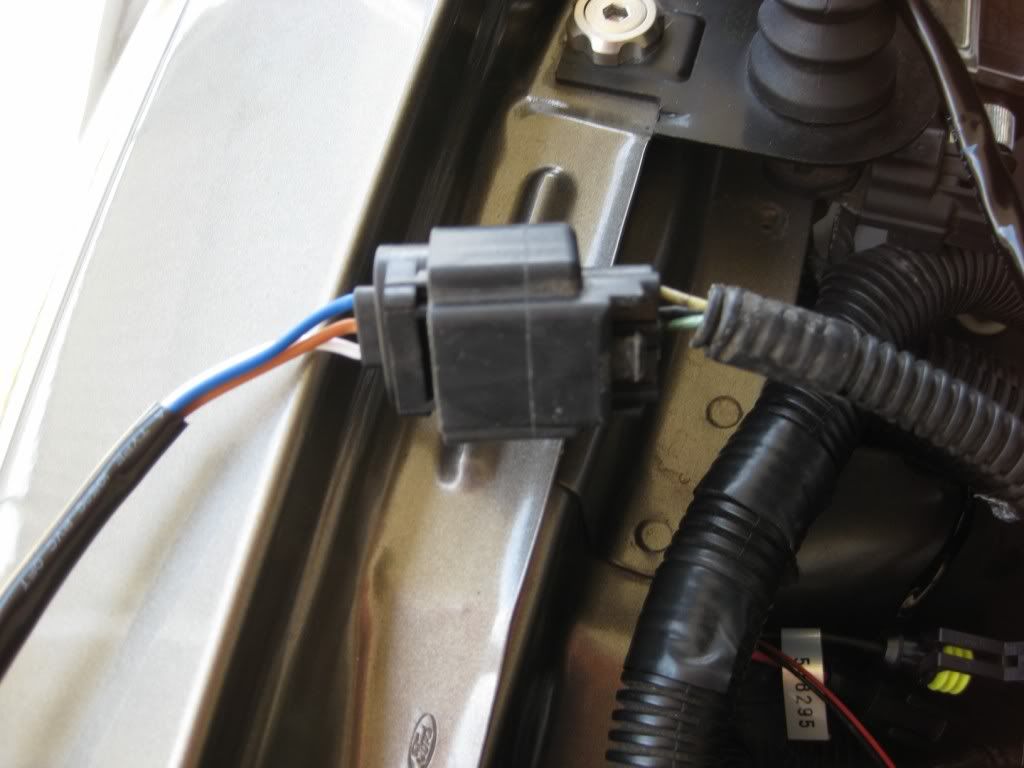
Now, on the driver's side, take the connection that is meant to go to the factory headlight bulb, and plug it into the harness from the HID kit. Note...This same connector on the drivers side DOES NOT plug into a harness, and is not used....
There are three other connectors on the passenger side that all bolt up to the HID harness...
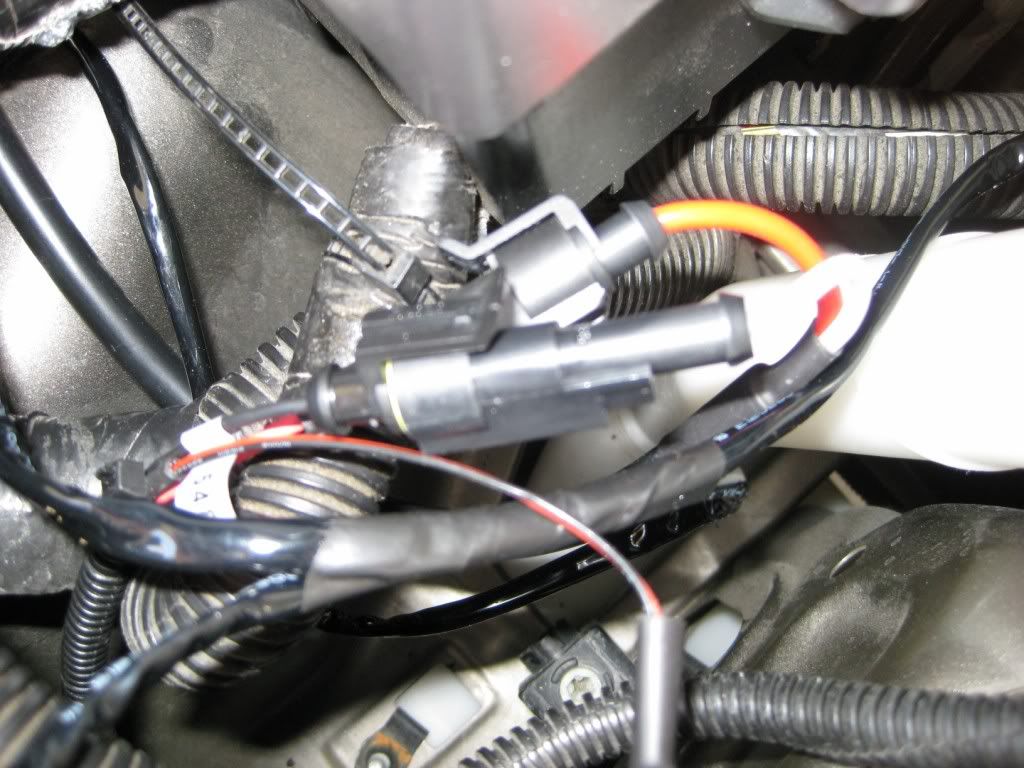
Finally, there is the plug from the HID harness that plugs into the passenger side ballast...
Now, repeat all the same connections on the drivers side. As mentioned earlier, the plug coming from the stock wiring harness that went to the factory headlight bulb does not get used. Zip tie this connector out of the way....

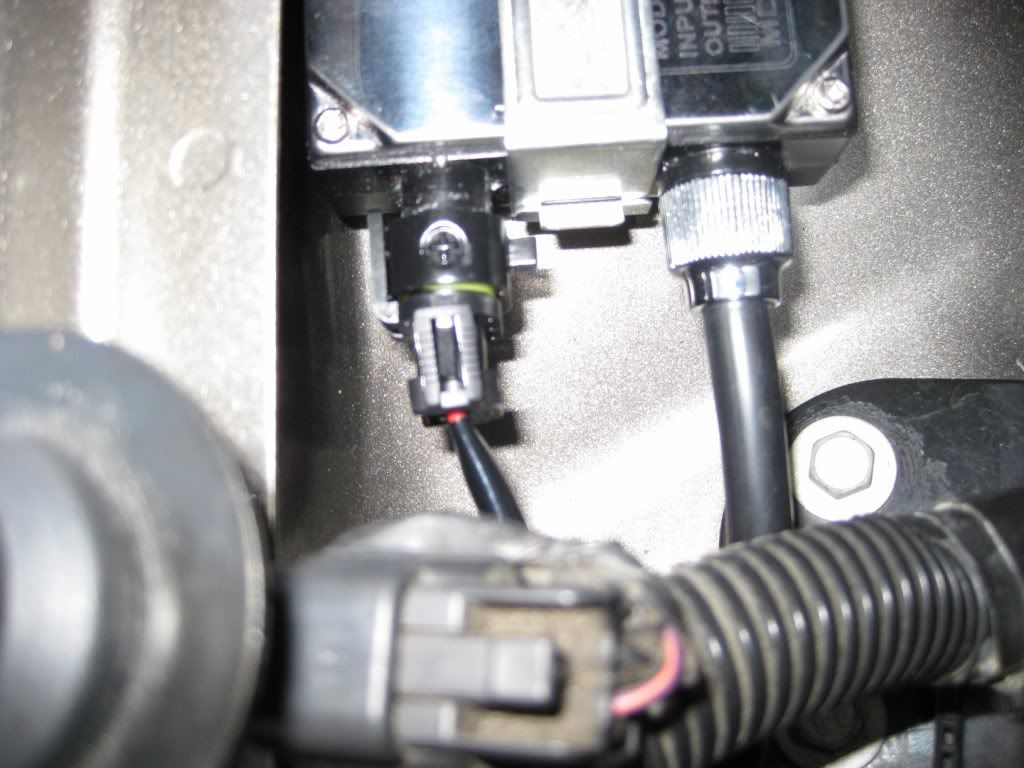
Now, reinstall either your aftermarket, or stock Bullitt CAI after zip tieing all the wires securely....
Make sure all the wires and harness are also zip tied and hidden on the passenger side as well....

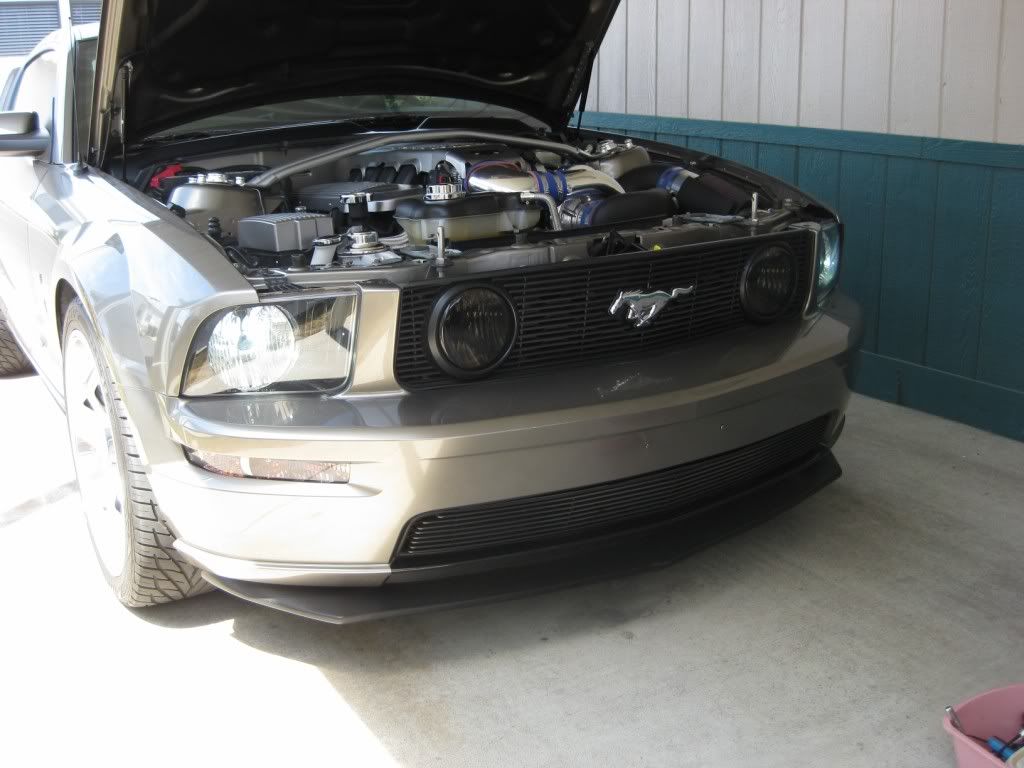
Finally, replace your radiator cover, as well as your radiator extensions, should you be so equipped. Very clean install, and nothing too obvious screaming after market kit....

Here are a few shots of the finished product, in broad daylight. I will try to get some additional pics at dusk that should show them off a bit better.....
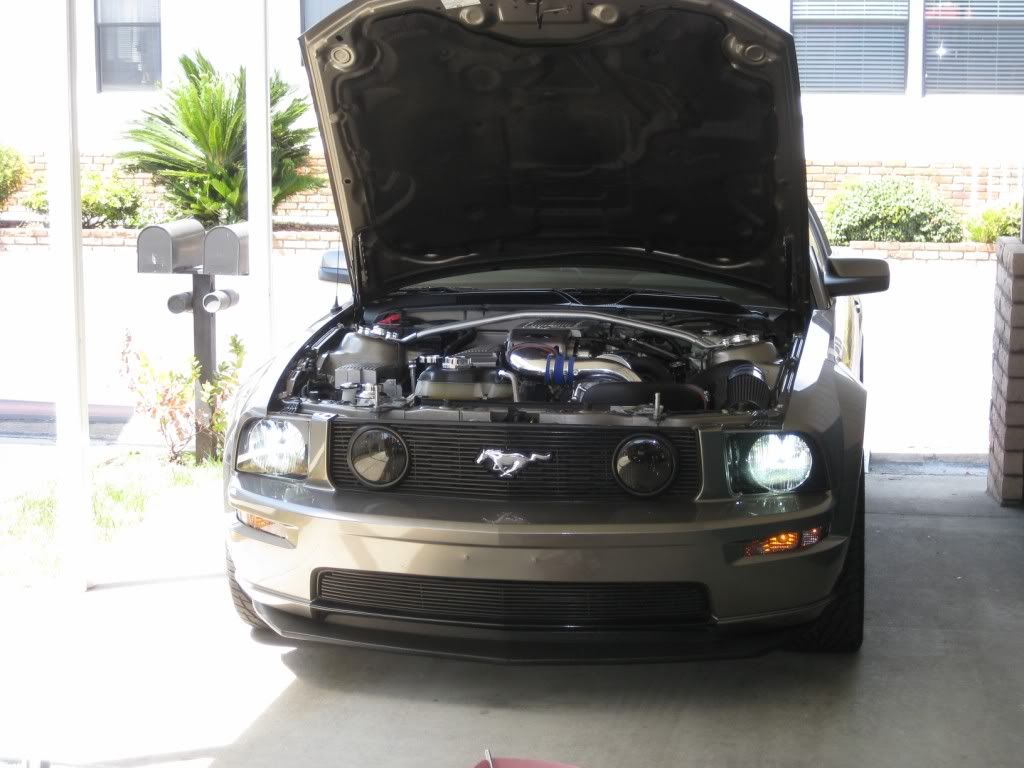
Hope this helps out somebody that does not have the stock HID's. It is a very straight forward install, and looks a ton worse than it really is.....
Good Luck with yours.....
Mike and Karen
On the drivers side, you will see this bolt right on top. This is an excellent location for the ground that is necessary on the drivers side...
Now, still on the drivers side, it is time to mount the ballast for this side. I had to take into consideration the CAI from the Vortech, but the same would apply for the Bullitt CAI. This was the best location I could find. I bent the install bracket a bit, and marked the location on the wheelwell...
I re-installed the driver's side ballast, and secured it in place....
There are not a lot of options as far as locations on the passenger side. Same process, find your location, drill mounting holes, and secure....
Now, on the driver's side, take the connection that is meant to go to the factory headlight bulb, and plug it into the harness from the HID kit. Note...This same connector on the drivers side DOES NOT plug into a harness, and is not used....
There are three other connectors on the passenger side that all bolt up to the HID harness...
Finally, there is the plug from the HID harness that plugs into the passenger side ballast...
Now, repeat all the same connections on the drivers side. As mentioned earlier, the plug coming from the stock wiring harness that went to the factory headlight bulb does not get used. Zip tie this connector out of the way....
Now, reinstall either your aftermarket, or stock Bullitt CAI after zip tieing all the wires securely....
Make sure all the wires and harness are also zip tied and hidden on the passenger side as well....
Finally, replace your radiator cover, as well as your radiator extensions, should you be so equipped. Very clean install, and nothing too obvious screaming after market kit....
Here are a few shots of the finished product, in broad daylight. I will try to get some additional pics at dusk that should show them off a bit better.....
Hope this helps out somebody that does not have the stock HID's. It is a very straight forward install, and looks a ton worse than it really is.....
Good Luck with yours.....
Mike and Karen
04-21-2009, 01:11 PM
#4
5th Gear Member
Join Date: Jan 2009
Location: Mass
Posts: 2,662
A) Nice car!
B) Nice write up, they look great
C) Do you know if we can get HID's for the fog lights? I think it would look weird with HID headlights and the fogs to be halogen. I was considering doing the HID kit for my car, if I don't choose to do the GT500 front end conversion. Thanks!
B) Nice write up, they look great
C) Do you know if we can get HID's for the fog lights? I think it would look weird with HID headlights and the fogs to be halogen. I was considering doing the HID kit for my car, if I don't choose to do the GT500 front end conversion. Thanks!
 04-21-2009, 01:21 PM
#6
5th Gear Member
Thread Starter
Join Date: Feb 2005
Location: Anaheim, California
Posts: 4,205
A) Nice car!
B) Nice write up, they look great
C) Do you know if we can get HID's for the fog lights? I think it would look weird with HID headlights and the fogs to be halogen. I was considering doing the HID kit for my car, if I don't choose to do the GT500 front end conversion. Thanks!
B) Nice write up, they look great
C) Do you know if we can get HID's for the fog lights? I think it would look weird with HID headlights and the fogs to be halogen. I was considering doing the HID kit for my car, if I don't choose to do the GT500 front end conversion. Thanks!
Yes, stangmods also carries the HID fogs in several colors..or intensity...I will be doing those next.....
Thx,
Mike

 04-21-2009, 02:10 PM
#9
5th Gear Member
Thread Starter
Join Date: Feb 2005
Location: Anaheim, California
Posts: 4,205