Not your average interior swap
 08-05-2011, 04:12 PM
#11
Resident Ginger
Join Date: Nov 2006
Location: Cali
Posts: 4,624
The new shifter looks GREAT! I always hated the OEM auto shifts, just to plain for my liking. Also, major props for the DIY dash job! I dont think I would have the ***** to do that haha. Of course I tore half my engine apart to put my 4.2 in soooo....I think I might have bitten off more than I can chew right now.
Matthew
Matthew
 08-05-2011, 07:37 PM
#12
3rd Gear Member
Thread Starter
Join Date: May 2007
Location: Ar
Posts: 555
The new shifter looks GREAT! I always hated the OEM auto shifts, just to plain for my liking. Also, major props for the DIY dash job! I dont think I would have the ***** to do that haha. Of course I tore half my engine apart to put my 4.2 in soooo....I think I might have bitten off more than I can chew right now.
Matthew
Matthew
I've had all kinds of OS moments dealing with this car!!!!!! Worst has to be rear end gear change. My pinion was frozen and 3 grown men couldn't beat it off. Ended up pulling out a torch. That was really scary!!! I'm sure you will do fine on the engine. Take lots of notes because I will probably hit you up for info when it's time to do mine!!!!
08-05-2011, 07:50 PM
#13
3rd Gear Member
Thread Starter
Join Date: May 2007
Location: Ar
Posts: 555
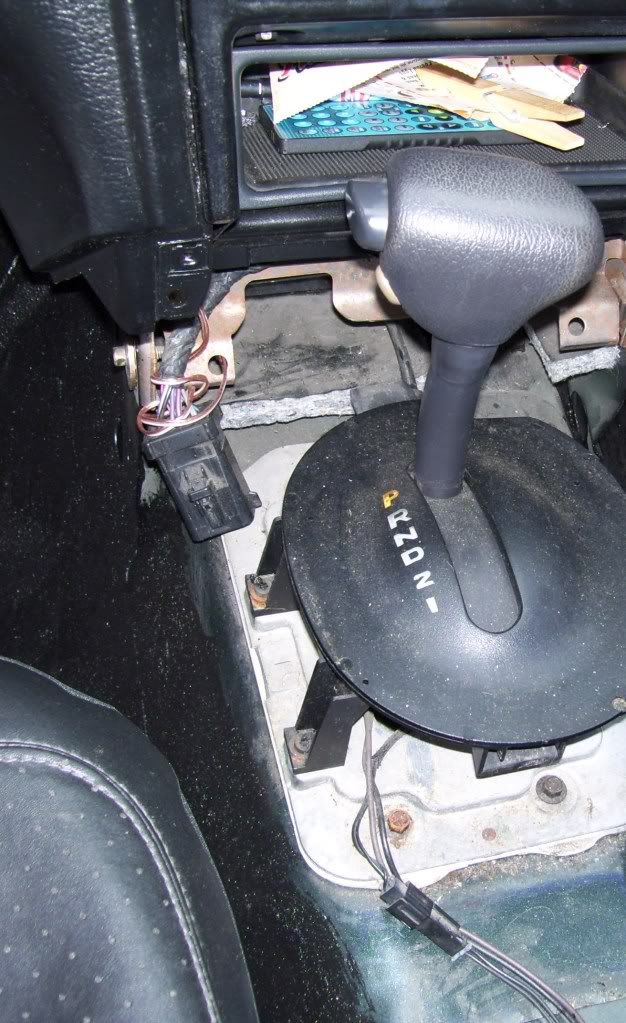
Okay, back on task. After I got the small parts I needed to finish the job, I went out to the car.
It went from this:
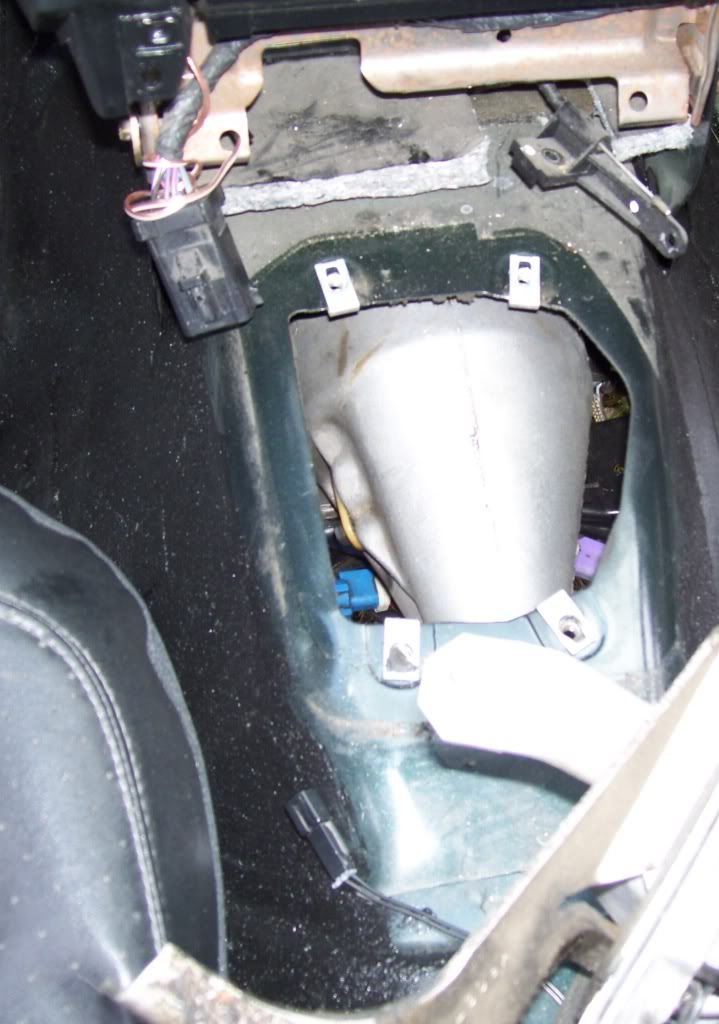
to this:
to this:
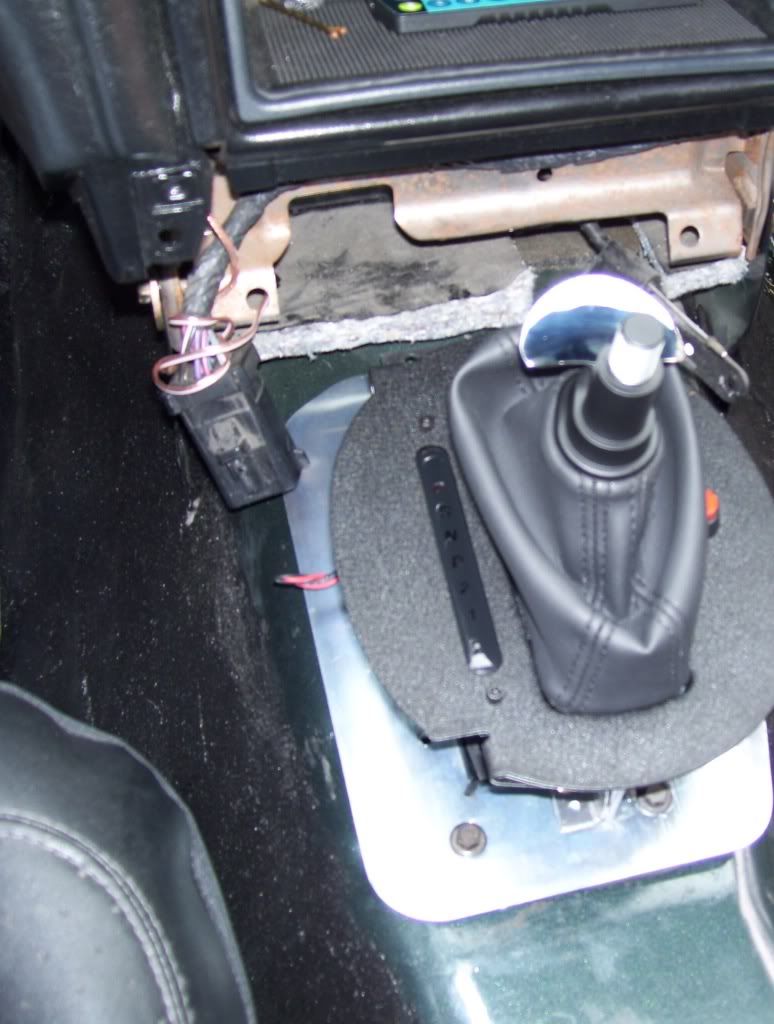
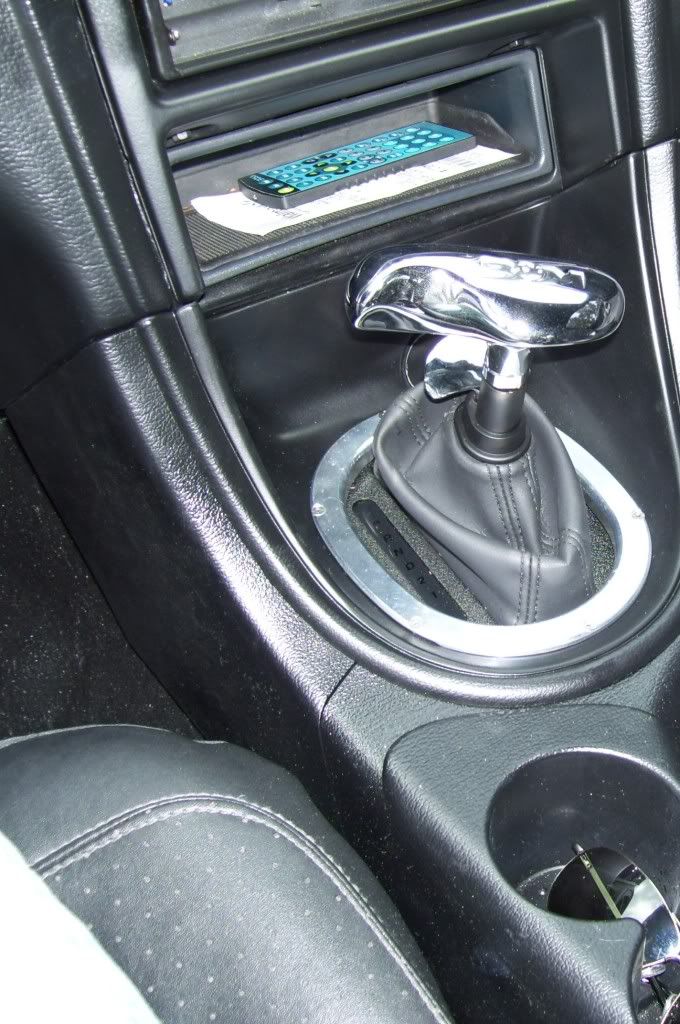
All of it done in one afternoon. You will notice I now have my aftermarket radio and storage box installed. On the radio, it's mid-money junk. 2 years later and it still works great though!! What I really want to talk about it the storage box. Absolute best 20 bucks I ever spent on this car!!!!!!!!!!!!!!!!!!!!! I wouldn't know what to do without it, it feels like it's always been here, I adapted to it that much. Also, def. do buy the rubber mat that comes with it, worth every extra dollar. So, I finally got all the mechanics and electricals hooked up, and added the cherry on top...
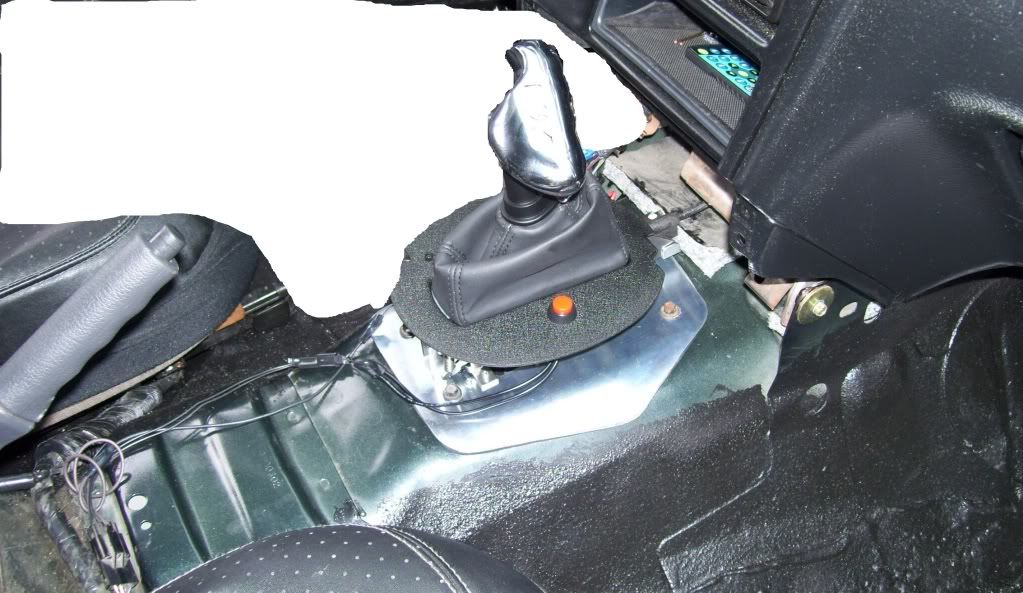
Sorry about the blur job, but there are some secrets over there that will be revealed later. I drove the car just like this for a couple months waiting to find a black console.
It went from this:
to this:
to this:
All of it done in one afternoon. You will notice I now have my aftermarket radio and storage box installed. On the radio, it's mid-money junk. 2 years later and it still works great though!! What I really want to talk about it the storage box. Absolute best 20 bucks I ever spent on this car!!!!!!!!!!!!!!!!!!!!! I wouldn't know what to do without it, it feels like it's always been here, I adapted to it that much. Also, def. do buy the rubber mat that comes with it, worth every extra dollar. So, I finally got all the mechanics and electricals hooked up, and added the cherry on top...
Sorry about the blur job, but there are some secrets over there that will be revealed later. I drove the car just like this for a couple months waiting to find a black console.
08-10-2011, 12:53 PM
#14
3rd Gear Member
Thread Starter
Join Date: May 2007
Location: Ar
Posts: 555
Then it was onto center console. I decided to go with 94-98 interior because I wanted true black. Newer stuff is charcoal. So, lots of bits n pieces you will see come from earlier sn95. I had to verify it would fit and all that. Never did get a straight answer, but straight enough. So I bought one and here it is side by side.
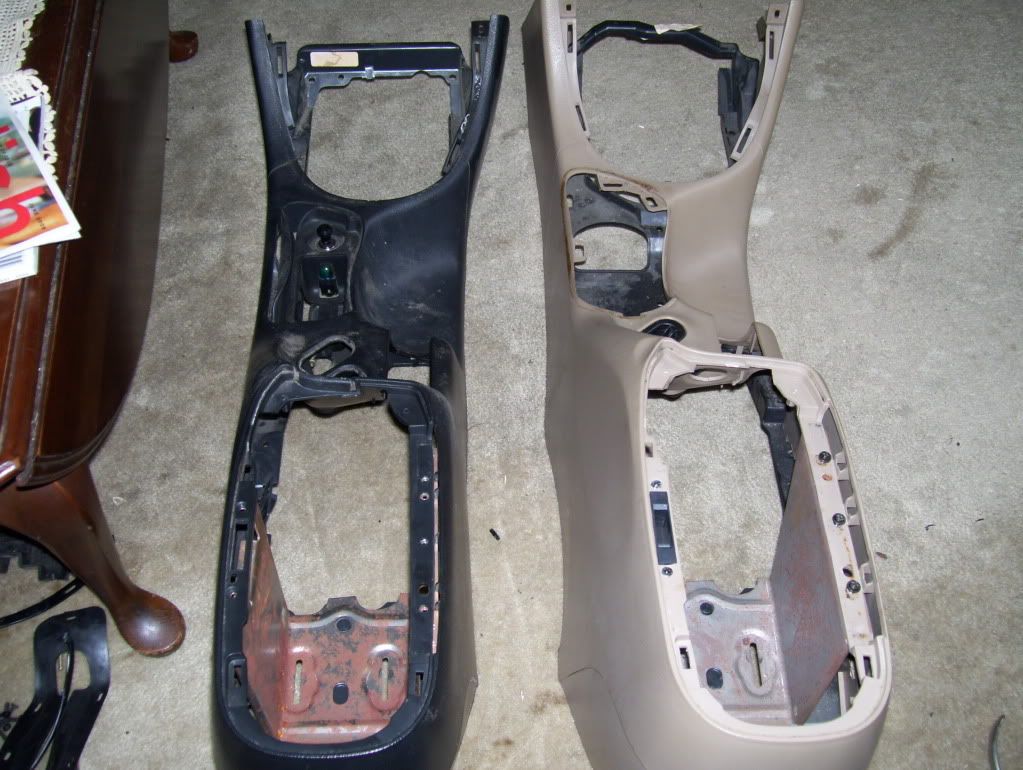
Emergency handle surround is different, cup holder area is obviously different. Actually the 98 has an ashtray. I really liked my 99 cupholder. I've seen the 01+ and didn't care for it. Example like this one:

so I decided I would get all difficult and graft my old one in. The shape of the ashtray was the same as what the old cupholder clicked into, so why not??
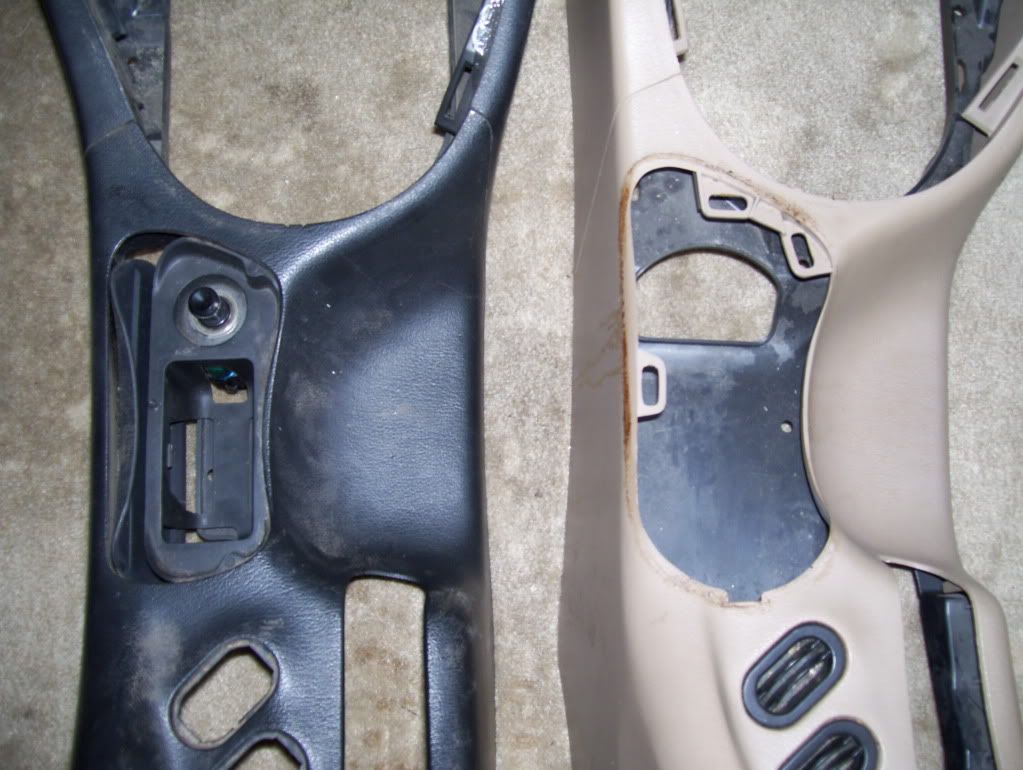
dremel time.
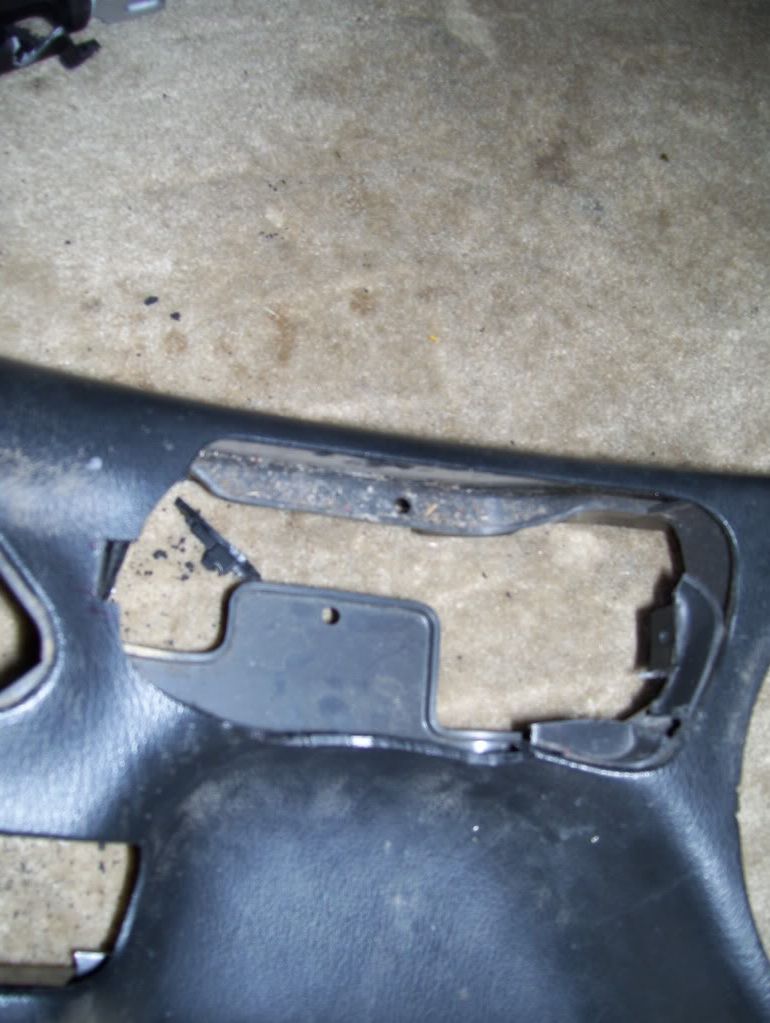
Emergency handle surround is different, cup holder area is obviously different. Actually the 98 has an ashtray. I really liked my 99 cupholder. I've seen the 01+ and didn't care for it. Example like this one:
so I decided I would get all difficult and graft my old one in. The shape of the ashtray was the same as what the old cupholder clicked into, so why not??
dremel time.
08-15-2011, 11:53 AM
#15
3rd Gear Member
Thread Starter
Join Date: May 2007
Location: Ar
Posts: 555
I did a little more wiring. This time I ran a hardwire mount for my radar detector. I'm super pleased with how it came out. I highly recommend doing this instead of having that ugly curly cord flopping around all the time. After I got done with that, I happened upon a remote mounted mute kit for my detector. I absolutely had to have it!!! I get so tired of bumping the mute when I drive down the highway. So, I tried to think of a convenient location..... Well since I was shifting all the time anyways, why not just put it down there?
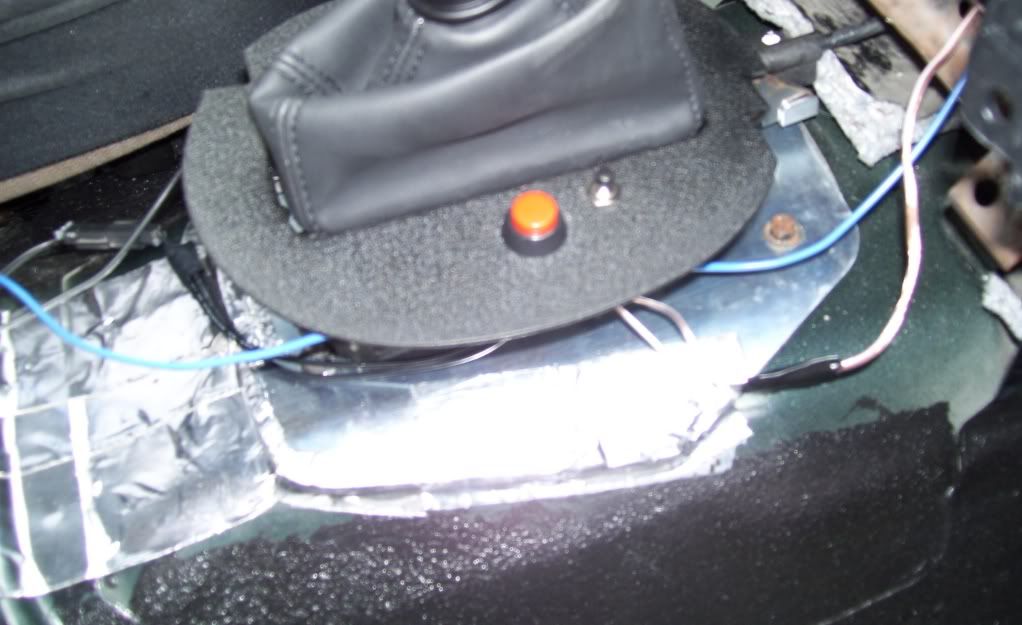
Then I got my black shift surround in the mail. I opted for a '94, again for the color and also because I don't smoke. No need for the unsightly plug if I'm never going to need it. So, I go to put it all together, and now my billet ring won't fit!!! Grrrrr. I had test fitted it and everything on my previous surround. Oh well, there must be a difference in the orientation of the void. So, the only solution I could come up with was to mill out the billet to fit the button. Scary stuff to just start hacking on expensive billet, but I had done scarier stuff already, so I figured I'd make out okay. This pic shows how tight of a fit it was. I prob. could have left it be, but the console does move around a bit, so I figured I'd do it to be safe. Pardon the blurry photo.
So, I took out a good bit a material and dremeled it smooth. Came out pretty good I would say. And interestingly enough, it actually helps to have it recessed in there a bit. It keeps me from accidentally bumping it when I'm hitting that mute button like crazy in speed trap zones!!!! Here is the finished product.
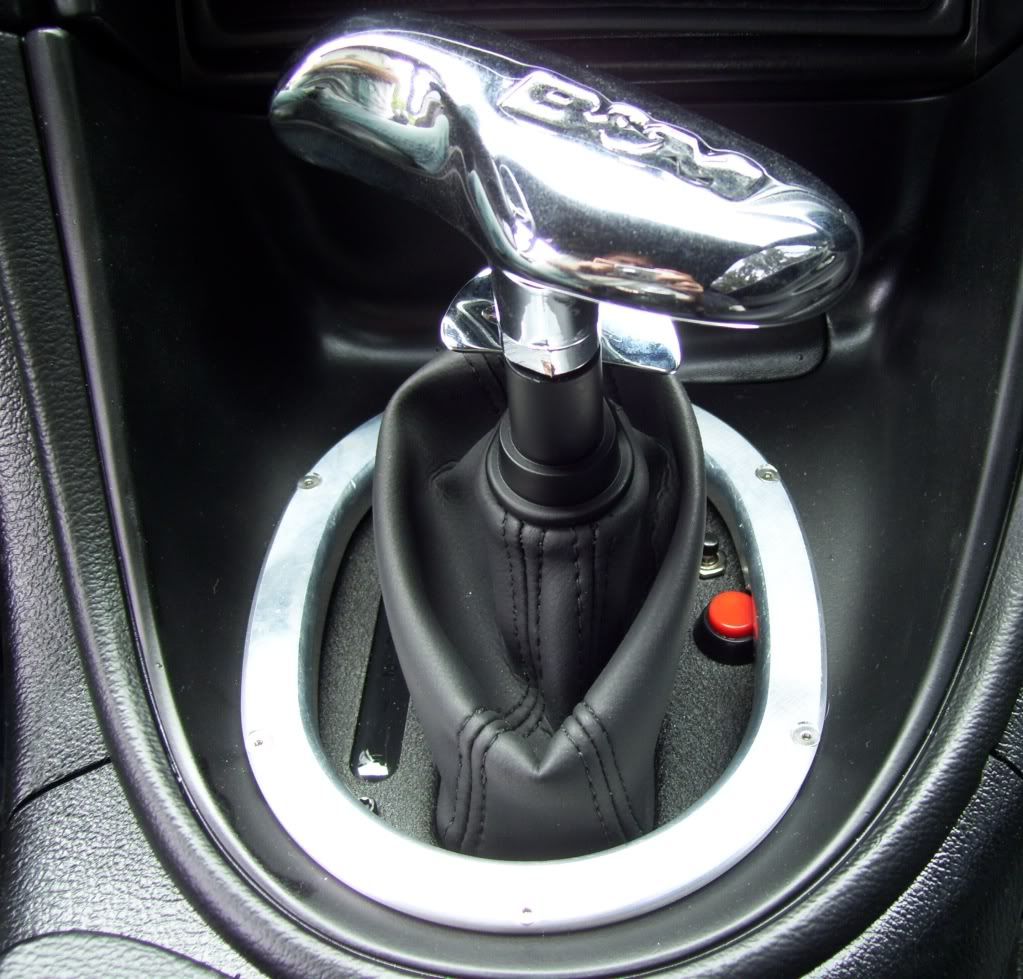
And here is a teaser of how the interior is looking.
Then I got my black shift surround in the mail. I opted for a '94, again for the color and also because I don't smoke. No need for the unsightly plug if I'm never going to need it. So, I go to put it all together, and now my billet ring won't fit!!! Grrrrr. I had test fitted it and everything on my previous surround. Oh well, there must be a difference in the orientation of the void. So, the only solution I could come up with was to mill out the billet to fit the button. Scary stuff to just start hacking on expensive billet, but I had done scarier stuff already, so I figured I'd make out okay. This pic shows how tight of a fit it was. I prob. could have left it be, but the console does move around a bit, so I figured I'd do it to be safe. Pardon the blurry photo.
So, I took out a good bit a material and dremeled it smooth. Came out pretty good I would say. And interestingly enough, it actually helps to have it recessed in there a bit. It keeps me from accidentally bumping it when I'm hitting that mute button like crazy in speed trap zones!!!! Here is the finished product.
And here is a teaser of how the interior is looking.
 08-23-2011, 10:13 AM
#20
3rd Gear Member
Thread Starter
Join Date: May 2007
Location: Ar
Posts: 555
Once I had all of my shifter and console work done, I decided it was time to do the headliner. I pulled mine down, which is a PITA !!!!!!!!. It's really hard to get it down without ripping off a fingernail. If you use tools, there is a high chance that you scratch the paint on the roof. But, it's easy to touch it back up with the headliner off. Since my interior is going black, obviously I wanted a black headliner. I searched around and found a few for sale at decent prices, but the shipping was killing me. Like 100+ bucks killing me......
So, in my typical fashion, I decided to think outside the box. My headliner was in great shape, just not the color I wanted, so...... why not color it?
My initial thoughts were to mix up some RIT dye in a spray bottle and put that on there. But I had childhood memories of my mom using that stuff to dye clothes and the black always turned out a bit purple. My thoughts drifted around a bit and then I realized I had an extra can of that SEM color coat I used to paint my dash. Granted, it says it's for vinyl, but it did such a good job on my dash, I figured I'd give it a shot.
so I made a work area and started spraying.
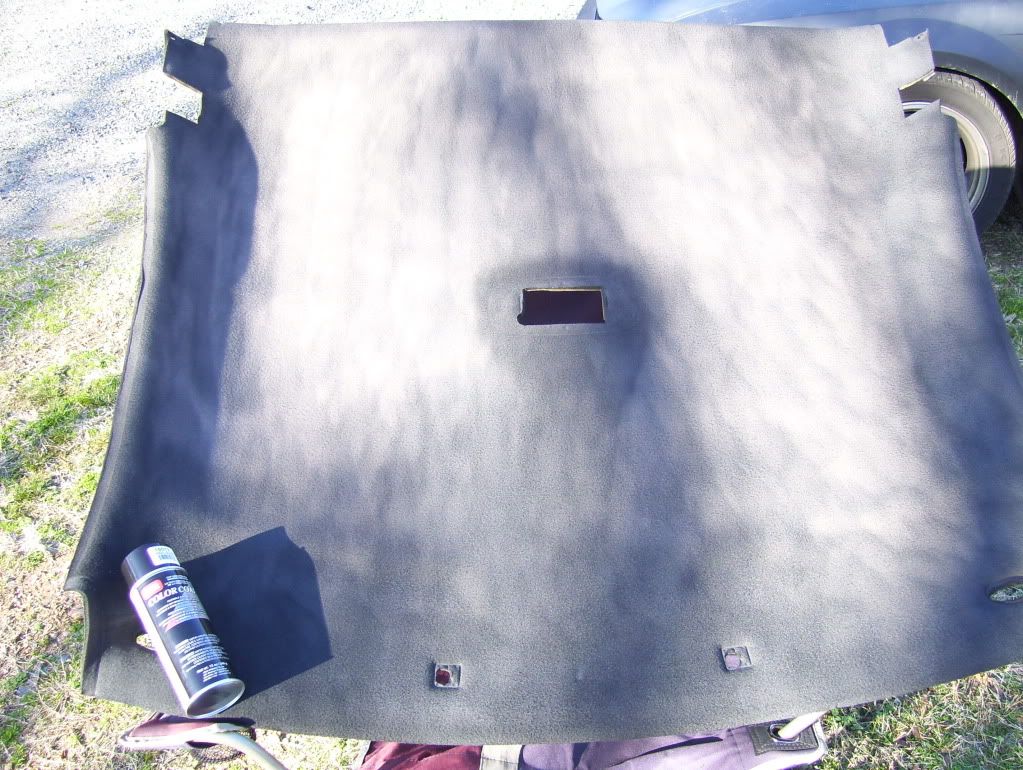
It looks like it is going to hold just fine. It adds a little bit of texture to the fabric, but not too bad.
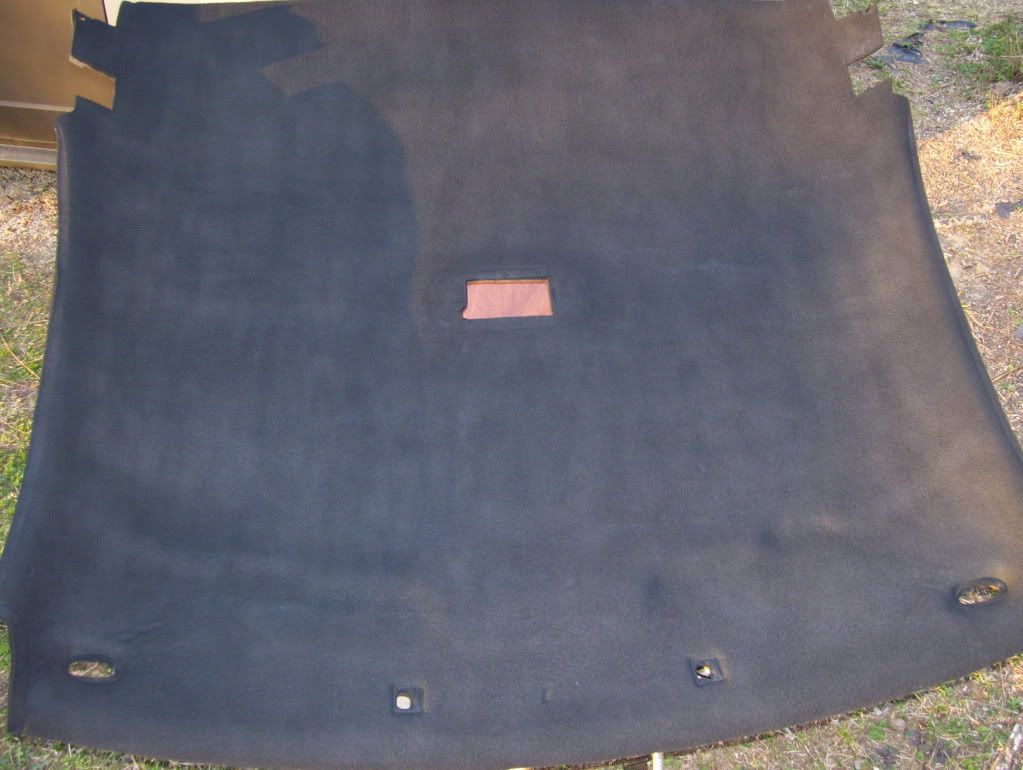
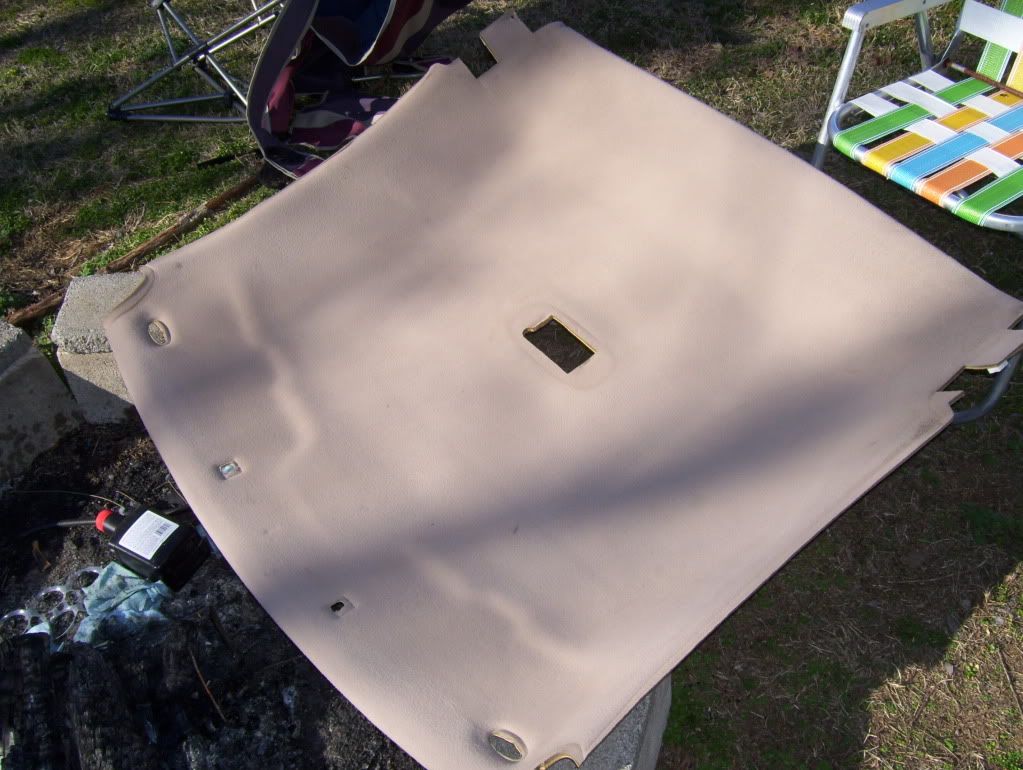
Well, I ran through the can pretty quick, but it did change the color very well. Problem was that I wanted it darker. Seeing as how that spray is super expensive, I would have to seriously debate on how black I wanted it to be.......
After thinking about it for a while, I decided not to buy another can. Instead, I decided to try flat spray paint. The SEM stuff already stunk really strong, so the paint smell wouldn't be any worse. Plus I planned to let it fully air out before re-installing it. I don't have any outside pics, but here is an indoor pic after I used 2 cans of spray paint.
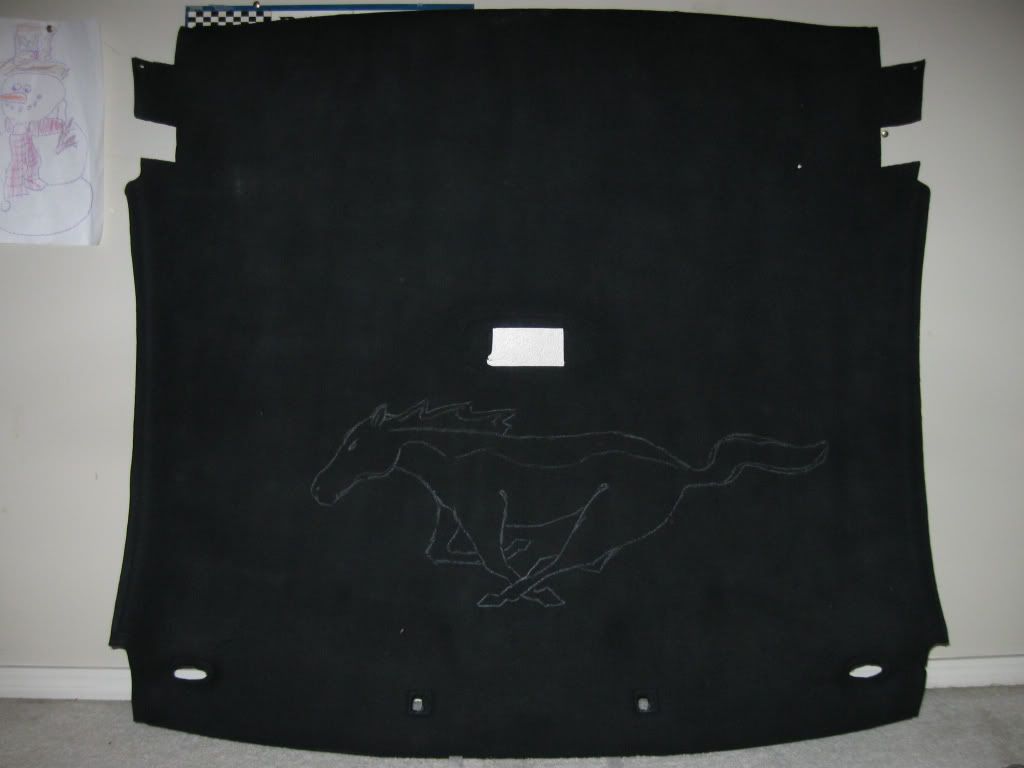
Quite a bit darker!!!! You would never know it was ever tan. I was very happy with how it turned out. I'm not sure if it would have been as good if I had just used spray paint. But, as a finish coat, the paint did just fine. Now, I'm sure some of you are wondering what the horse on there is all about? Well, I decided to do some custom work to it after I got it colored black. I wrote a thread about it here:
https://mustangforums.com/forum/v6-1...-opinions.html
Every single person voted for pony only. So, did I take everyone's advice and leave it finished with only the pony????
You will all just have to wait and see when I reveal the full finished interior at the end of my tale.
So, in my typical fashion, I decided to think outside the box. My headliner was in great shape, just not the color I wanted, so...... why not color it?
My initial thoughts were to mix up some RIT dye in a spray bottle and put that on there. But I had childhood memories of my mom using that stuff to dye clothes and the black always turned out a bit purple. My thoughts drifted around a bit and then I realized I had an extra can of that SEM color coat I used to paint my dash. Granted, it says it's for vinyl, but it did such a good job on my dash, I figured I'd give it a shot.
so I made a work area and started spraying.
It looks like it is going to hold just fine. It adds a little bit of texture to the fabric, but not too bad.
Well, I ran through the can pretty quick, but it did change the color very well. Problem was that I wanted it darker. Seeing as how that spray is super expensive, I would have to seriously debate on how black I wanted it to be.......
After thinking about it for a while, I decided not to buy another can. Instead, I decided to try flat spray paint. The SEM stuff already stunk really strong, so the paint smell wouldn't be any worse. Plus I planned to let it fully air out before re-installing it. I don't have any outside pics, but here is an indoor pic after I used 2 cans of spray paint.
Quite a bit darker!!!! You would never know it was ever tan. I was very happy with how it turned out. I'm not sure if it would have been as good if I had just used spray paint. But, as a finish coat, the paint did just fine. Now, I'm sure some of you are wondering what the horse on there is all about? Well, I decided to do some custom work to it after I got it colored black. I wrote a thread about it here:
https://mustangforums.com/forum/v6-1...-opinions.html
Every single person voted for pony only. So, did I take everyone's advice and leave it finished with only the pony????
You will all just have to wait and see when I reveal the full finished interior at the end of my tale.

