Ford Mustang and Ford Mustang GT 1994-2004: How to Replace Ball Joints
Are all your ball joints knocking? Replacing them is tough, but not as hard as you might think. Here is how to replace your ball joints.
This article applies to the Ford Mustang and Ford Mustang GT (1994-2004).
A ball joint has one purpose on your vehicle, and that is to support the wheel hub. Standard ball joints are comprised of a singular socket and bearing design. The bearing is packed with grease, and protected by a rubber boot. In the most serious situations, a broken ball joint can lead to the wheel coming completely off the chassis, but luckily you will experience some symptoms before anything as catastrophic as that occurs. One of the most common symptoms is hearing a knocking sound as you try to turn the wheel. In order to replace the ball joint, you will need to be press it out of the hub assembly. Although it sounds daunting, we have covered and have provided you all the information required to replace the ball joints on your Ford Mustang.

Materials Needed
- Ball joint removal tool (available for rent from auto part stores)
- 15/16" wrench
- Socket set up to 18mm
- Large breaker bar
- Adjustable wrench
- Hammer
- Pliers
- Sledge hammer
- Pry bar
- Floor jack
- Jack stands
- Penetrating oil
- Grease gun
- Grease
- Zip ties
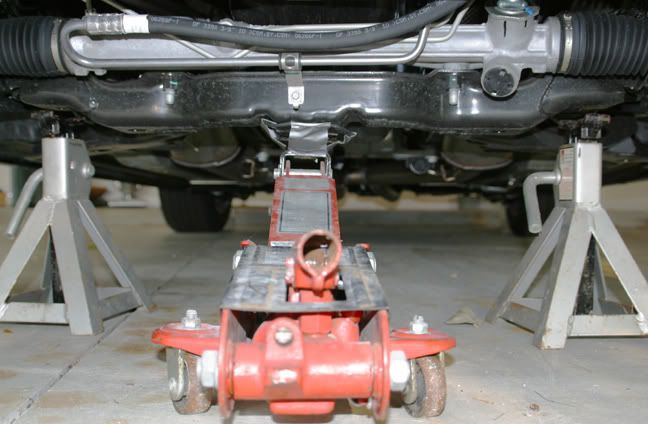
Step 1 – Raise and support the chassis
Depending on the type of tools you have access to, you may want to loosen the lug nuts first. Place some obstructions behind the rear wheels to keep the vehicle from rolling, and engage the emergency brake.
- Raise the chassis using a floor jack.
- Support the chassis with jack stands.
(Related Article: How to Jack Up Your Car - MustangForums.com)
Step 2 – Remove the caliper and tie-rod
- Loosen the two 15mm bolts that hold the caliper to its bracket on the brake rotor.
- Use some zip ties to support the caliper on the chassis while it is removed.
- Take your pliers and remove the pin securing the castle nut from the tie-rod.
- Loosen the castle nut and remove the tie-rod from the wheel hub.

Figure 2. Remove the brake caliper. 
Figure 3. Remove the cotter pin and disconnect the tie-rod.
Step 3 – Remove the strut
- Locate and remove the ABS switch bracket using a 15/16" wrench.
- Use two 13/16" sockets to loosen the strut mounting bolts and remove the assembly from the hub.
- Slowly lower the jack until it allows the coil spring to be removed.
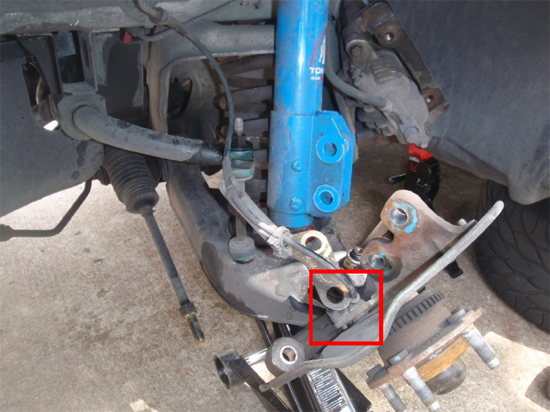
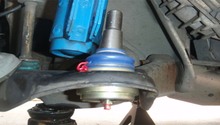
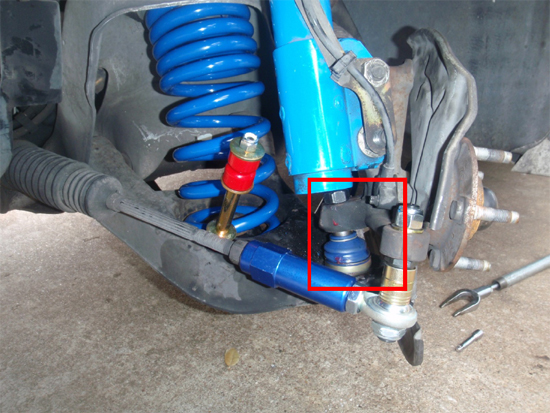
Step 4 – Remove the ball joint
- Loosen the 15mm locking nut holding the ball joint in place.
- Liberally spray some penetrating oil on the ball joint.
- Figure out which attachment combination works best and assemble the removal tool onto the ball joint.
- Tighten the tool down to pop the ball joint out of place.

Figure 5. Remove the 15mm locking nut. 
Figure 6. Press the ball joint out. 
Figure 7. Ball joint removed.
Step 5 – Install the new ball joint
While you are pressing in the new ball joint, make sure to keep the angle straight. Align the ball joint in place and assemble the press tool. Press the ball joint in place until it sits flush in the hub, then install the locking nut to secure it. If the aftermarket ball joints did not come with the grease, fill up the boots using your grease gun.

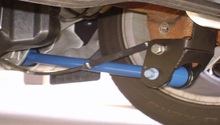
Step 6 – Reinstall the tie-rod, coil spring, and strut
- Slide the coil spring back into position.
- Install the sway bar end-links.
- Mount the ABS sensor (if applicable).
- Install the strut.
- Install the rotor and brake caliper.
All that is left is to repeat the process on the other side and you are finished!
Featured Video: Mustang Ball Joint
-
Part One
-
Part Two
-
Part Three
Related Discussions
- Removing Lower Ball Joint? - MustangForums.com
- Ball Joint Replacement - MustangForums.com
- What Would Happen If Ball Joints Go Out - MustangForums.com
- Upper and Lower Balljoints - MustangForums.com