Ford Mustang V6 1994-2004: How to Replace Oil
Keep your car on the road by performing your own oil changes regularly.
This article applies to the Ford Mustang V6 (1994-2004).
One of the most basic and easiest of all maintenance jobs on almost any vehicle is changing the oil. This is especially true with the Ford Mustang. Changing your oil is a pretty straightforward and easy job to carry out on this car. If you have about 30 minutes and a few tools, you can change your oil as well as save yourself some money from not having to take it to the dealership or to a quick change garage. You need no special tools or mechanical know-how; in fact, the most difficult part of this job just may be choosing which brand and weight of oil you should use. Read on to learn exactly how you perform this job in the comfort of your own garage.

Materials Needed
- Hydraulic floor jack
- Jack stands
- Ramps (optional)
- Oil drain pan
- Filter wrench or strap wrench
- Ratchet and 15mm socket
- Shop rags
- Short stem funnel
Step 1 – Lift the car
Raise the front end of the car with a hydraulic floor jack and place on jack stands. As an alternative, you can use ramps to drive up and get that front end in the air. In either case, make sure that you chock the rear wheels, on the front and back sides of the tires.

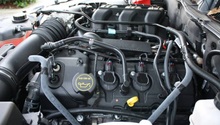
Step 2 – Remove the oil fill cap
Before you start draining your old oil, remove your oil fill cap first. This will prevent a vacuum that will result in a very slow oil drain. You may also want to warm your engine up a little bit to heat up the oil to make it thinner and flow easier. Take care while working around a hot engine if you decide to do this.

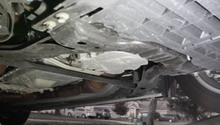
Step 3 – Remove the oil drain plug
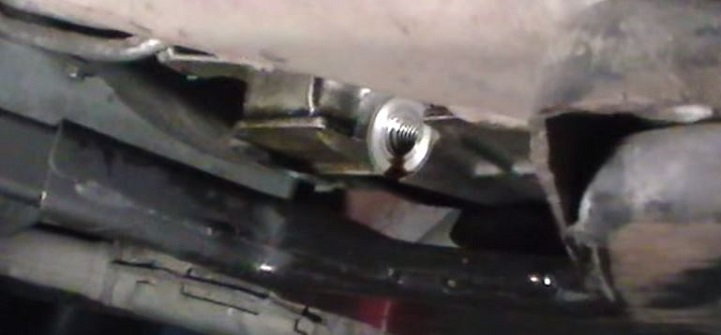
Place your oil pan or other catch-container under the engine on the passenger's side. Position under the oil pan, giving yourself a little room for the oil to come out. It will shoot out a little from the pressure, so you don't want to over shoot your container. Put a 15mm socket onto the plug bolt and remove. Let it drain completely until it is just a slight drip. Now is a good time to inspect the used oil to check its condition. If it smells burnt or has metallic flake in it, you waited much too long to change it. You may want to shorten the interval, or use a pure synthetic if you aren't using this kind already.

Figure 3. Use a 15mm socket to remove the drain plug. 
Figure 4. Be prepared with your drain pan.
Step 4 – Replace the drain plug
Once the oil has completely drained, replace the drain plug. Wipe up any spills, not only on the floor, but on any area right below the drain plug where the oil may have dripped onto the chassis. You can avoid this by making a funnel or guide out of aluminum foil and placing it under the drain plug to channel the oil away from the chassis. Put the plug back in and hand-tighten it only at first to avoid cross-threading it. Once you have it hand-tight, use your 15mm socket to snug it down slightly. You do not need to tighten it with much force at all. It will make your next oil change much easier.
Step 5 – Remove oil filter
This is going to be the messiest part of this job. The oil filter will be holding quite a bit of old oil. When you remove the filter, you will most likely have a bit of spillage. Have a shop rag handy to wipe up any spills. The filter is in a horizontal position on the driver's side near the harmonic balancer. If a professional did the last oil change, it may be on there really tight. A strap wrench is the bet bet to remove it. If you use a K&N filter, they have a bolt built into the bottom of the filter that makes it much easier to put on and take off. If the strap wrench doesn't work, you may be able to use some channel lock pliers, but be prepared for a major spill because the filter is easily crushed. Some folks also use the unconventional method of piercing the filter with a lone bladed screwdriver to gain some torque advantage to breaking it free. These last two are not recommended methods because if that doesn't do the trick, you won't be able to drive the car anywhere to have it removed. When you get it loose, stop turning and let the oil drain down into your pan for a bit. Remove the filter the rest of the way, but be careful when you remove it because it is deceptively heavy since it is filled with oil.

Step 6 – Insert your new oil filter
Before you replace the oil filter, add a bit of fresh oil into the new filter. This will get oil into the engine quicker when you start the car and help avoid any unlikely damage that could occur. Also, apply a bit of oil to the threads of the filter as well as around the rubber gasket using your finger and fresh oil. Take care when starting your new filter into position by hand only. Because of its horizontal position, it is easy to cross-thread the filter. Once you get it started, finish it hand-snug only. You should not need to cinch it down any more than maybe a 1/2 turn with your wrench. The filter fitting will expand a bit as the engine gets hot, so if you tighten it too much, it will be a real bear to take it off at the next oil change interval.

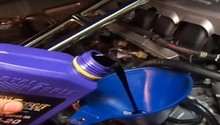
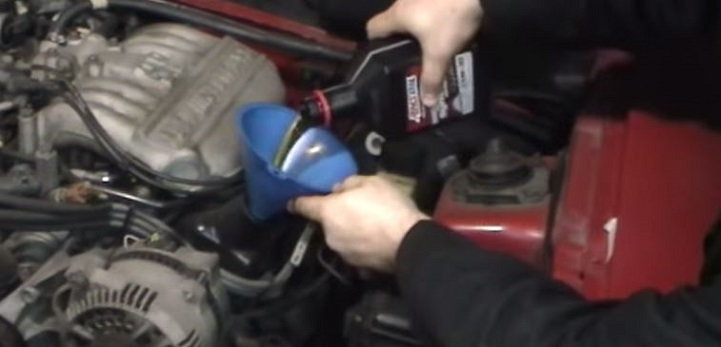
Step 7 – Add new oil to your engine
Place a funnel into the oil fill oil; a short funnel works the best. The V6 engine should take about five quarts of oil with a new filter. You can use any brand you wish, either conventional or synthetic, but follow the manufacturer's recommendation on weight. 5W-30 is recommended; however, in very hot climates, some owners report using a heavier weight for the extreme heat in their locations. If you are unsure, consult the dealership to make sure that you are remaining in compliance with your warranty specifications. Replace your oil cap, check and wipe clean your oil dipstick. Start the car and let it run a few minutes before dropping it and taking off.
Pro Tip
Be sure to dispose of your old oil responsibly. Most oil change garages will take in your used oil at no cost.
Featured Video: How to Change Oil
Related Discussions
- 2000 3.8 Liter Oil Capacity - MustangForums.com
- 03 Mustang Oil/Filter Change - MustangForums.com
- Oil Type for 3.9 - MustangForums.com
- Ramps, Jack or Flat for Oil Changes - MustangForums.com