Ford Mustang V6 and Mustang GT 1994-2004: How to Install Lowering Springs
Lowering your car can make it look even nicer. Continue reading to find out how to do it.
This article applies to the Ford Mustang V6 and GT 4.6L V8 (1994-2004).
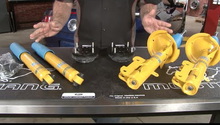
Lowering the Mustang is a quite common modification. A cheap way to get a lower car is to replace the original springs for lowering springs. A more expensive solution is to replace the entire suspension, including both the spring and the shock absorber, with an adjustable suspension. That way you can adjust the ride height depending on the driving situation. For normal street riding, it is, however, most of the time enough to just replace the springs. Replacing the original springs with lowering springs results in both a lower ride height and also a little bit stiffer suspension. This improves the handling of the car to some extent. The negative aspect of a lower ride height is that you risk scraping the lower parts of primarily the cars front in the ground for example when driving over speed bumps.

Materials Needed
- Socket wrenches
- Torque wrenches (you'll need to be able to torque from 15-148 ft/lbs)
- Socket extensions
- 10mm, 13mm, 18mm, and 15mm socket
- 5/16 inch socket
- 21mm open end wrench (or adjustable wrench)
- Jack and jack stands
Step 1 – Jack the car up and remove the wheels
Jack the car up and put it on sturdy jack stands. Once elevated, remove the wheels.

Step 2 – Replace the rear springs
First remove the rear sway bar by unbolting it at each end and also unbolt the two bolts holding the sway bar to the body. The bolts can be removed with a 15mm socket and a ratchet.

Starting on one side of the car at the rear end, remove the bracket holding the brake line to the A-arm. If your car is equipped with ABS brakes, you also have to unscrew the ABS sensor.

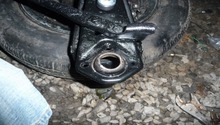
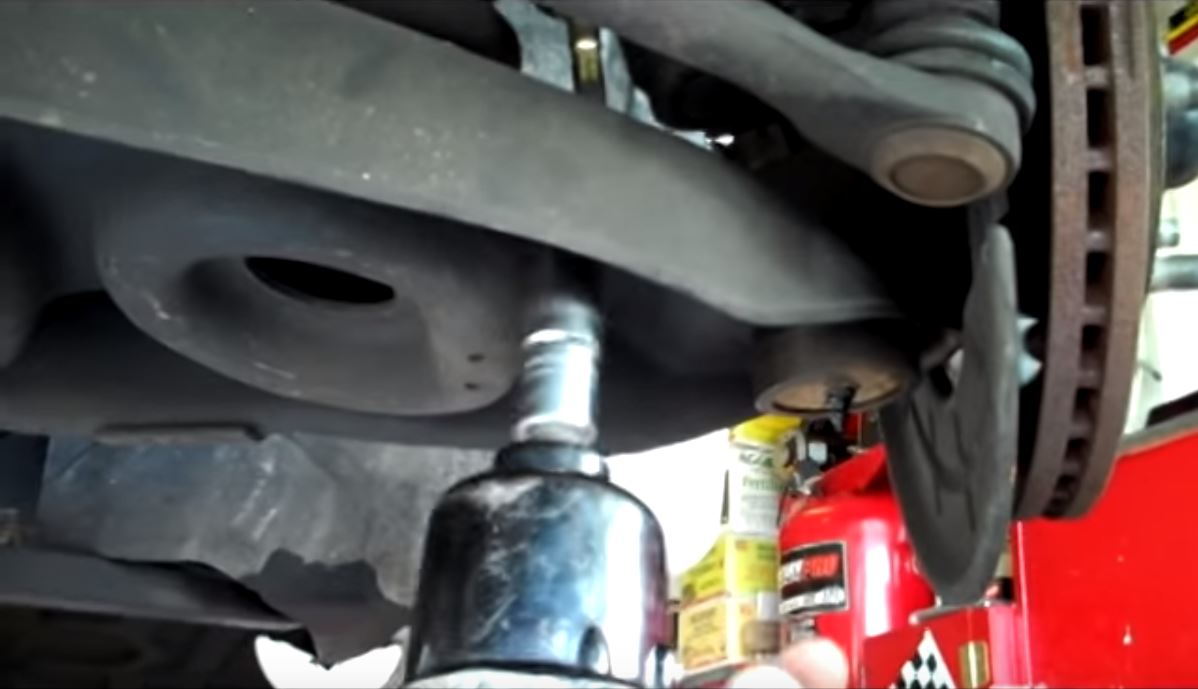
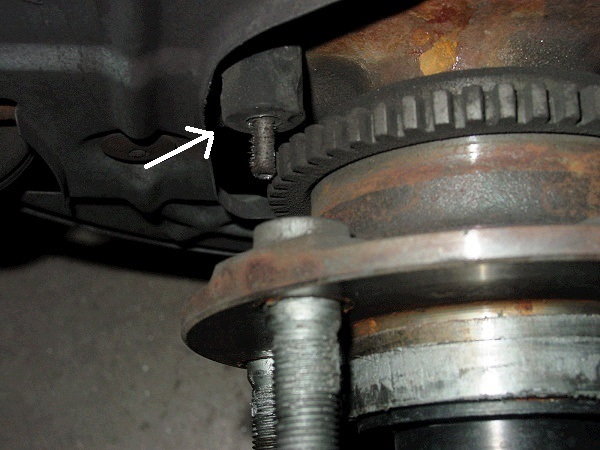
Put a jack under the A-arm and jack it up just enough to let the A-arm rest on the jack to unload the bolt as shown in Figure 4.
Remove the nut for the bolt holding the A-arm at the arrow in Figure 4. You have to stop the bolt from spinning when removing the nut by using a socket and ratchet on the other side of the A-arm, which can also be seen in Figure 4. When nut is off, gently push the bolt out by using a blunt punch and a hammer to hammer the bolt out.
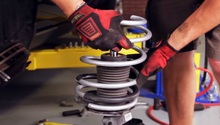
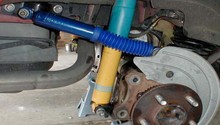
With the bolt removed, you lower the jack to unload the spring. Then it is easy to just remove the old spring and put in the new one. Make sure to remember how the old springs were rotated. Look at the "pig tail" at the lower end of the spring to make sure the rotation stays the same. Also, make sure to mount the rubber "isolators" on the new springs. You could use the rubber from your old springs, or if they look worn, buy new ones.
Now it is time to raise the jack (and the A-arm) until the bolt can be reinstalled again. Then screw back the bracket for the brake line and you are done on this side.
Use exactly the same procedure on the other side of the car, and then reinstall the sway bar.
Pro Tip
Use some plastic tape to make the isolators stay in place while installing them on the car. If the tape comes loose later, it doesn't matter because it is just there to make the isolators stay in place during installation.
Step 3 – Replace the front springs
Replacing the front springs is a little bit more complicated than replacing the rear ones. There are some more things that have to be removed before the springs can be replaced.
First, the the sway bar has to be unbolted on each side by removing the 15mm nuts located under the A-arms.
Then unscrew the ABS sensors on each side of the car. The sensors are located behind the brake rotors.
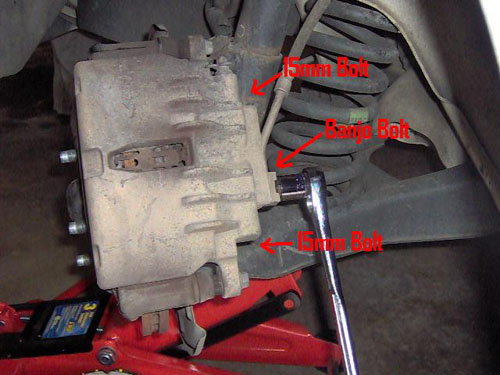
Unbolt and lift off the brake calipers (without unscrewing the brake line) on both sides of the car. The calipers are held in place by two 15mm bolts on the back side of the caliper. There are in total four bolts. The bolts you should remove are the two inward most bolts.
Put a box on the ground and let the calipers rest on it to avoid letting the calipers hang in the brake hoses. Just make sure to have enough space to be able to lower the A-arm. Remove the brake rotors.
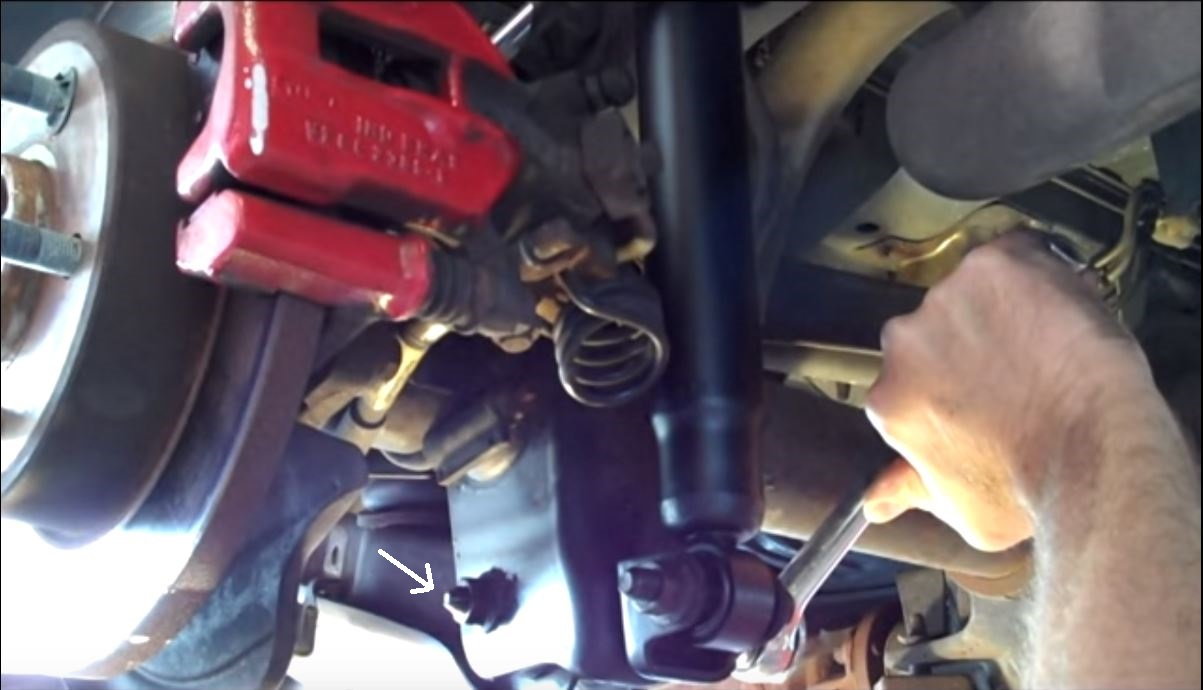
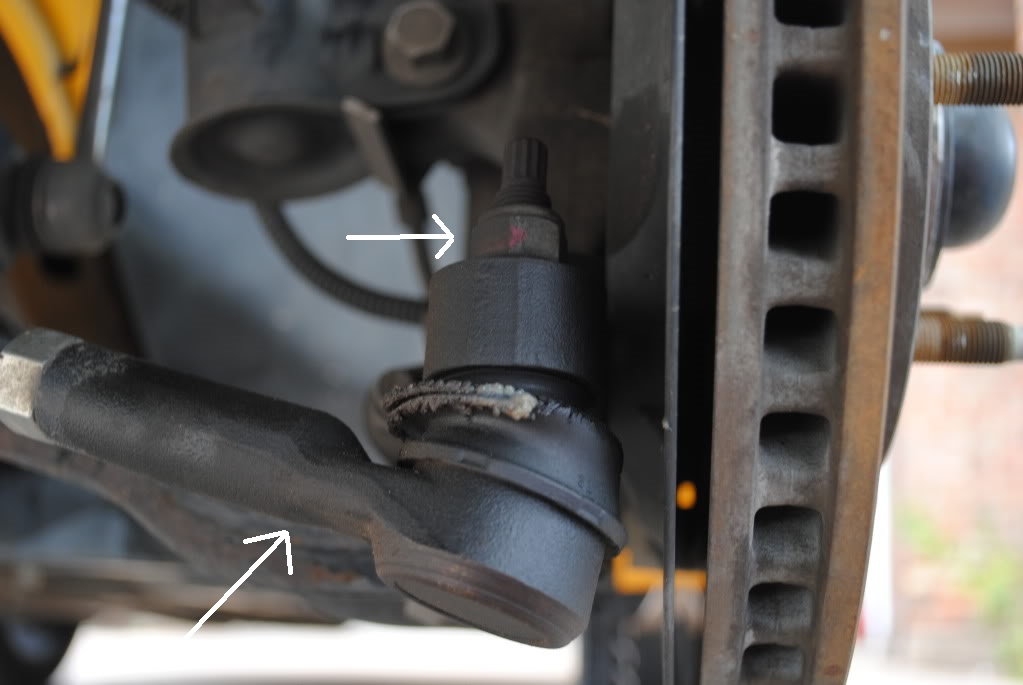
Now, start on one side of the car and put a jack under the A-arm, then jack up until the A-arm rests on the jack. Then remove the nut for the tie-rod using a reverse Torx bits and a spanner. When the nut is off, hit the tie-rod downwards with a mallet until the tie-rod is loose.
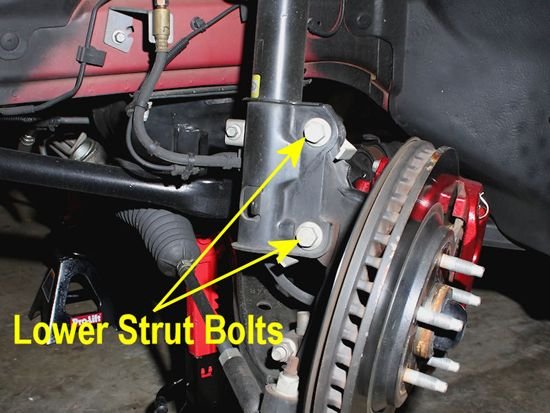
Remove the two lower strut bolts.
Now the jack can be lowered slowly to offload the spring and eventually it is possible to remove the spring in order to install the new one.
Step 4 – Reassemble
- Install the front spring into the spring seat.
- Reconnect the strut to the hub.
- Reinstall the brakes.
- Reconnect the tie-rod ball joint to the bottom of the hub.
- Reconnect the sway bar to the front sub frame.
- Take your vehicle in for a wheel alignment because disassembling all of this stuff ruins your alignment.
Featured Videos: Mustang Lowering Spring How-tos
-
Spring Installation
-
Mustang Lowering How-to
Related Discussions
- Lowering - MustangForums.com
- Lowering Springs - MustangForums.com
- Best Lowering Springs - MustangForums.com
- Outer Tie-Ends - MustangForums.com