Ford Mustang V6 and Mustang GT 1994-2004: How to Replace Power Window Motor Regulator
Learn how to replace your Ford Mustang's power window motor regulator with the help of this article.
This article applies to the Ford Mustang V6 and GT (1994-2004).
The power window regulator motor in the Ford Mustang is an electric motor that is responsible for powering the correct hardware to move your window up and down. The motor regulator will normally operate as dictated by the driver or passenger when they use the window switch. As time and mileage escalates, it's highly likely that the motor regulator will eventually need to be replaced; otherwise, you may hear your window struggle to move, or not move at all. Follow this step-by-step guide to remove and replace the motor regulator in your Mustang.

Materials Needed
- Flat head and Phillips screwdriver (large and small)
- 11mm socket and ratchet wrench
- 10mm wrench
- Needle nose pliers
- Assistant
Step 1 – Disconnect the battery
Before commencing any work, use the 10mm wrench to remove the negative (black) battery terminal. This will make sure working with the motor wiring is safe.

Step 2 – Remove door panel
In order to access the motor and regulator assembly, you must first remove the door panel. Follow these steps to do so:
- Use the flat head screwdriver to pop the body clips located around the perimeter of the door panel.
- Use the flat head screwdriver to pop out the door handle trim piece.
- Disconnect the power window wiring connector.
- Remove the clip behind the side mirror cover.
- Gently pop the door panel out.
- Remove the water shield carefully. (Will be re-used.)
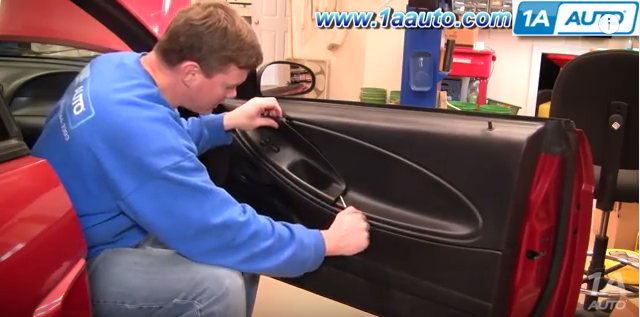
Figure 2. Pop handle trim out. 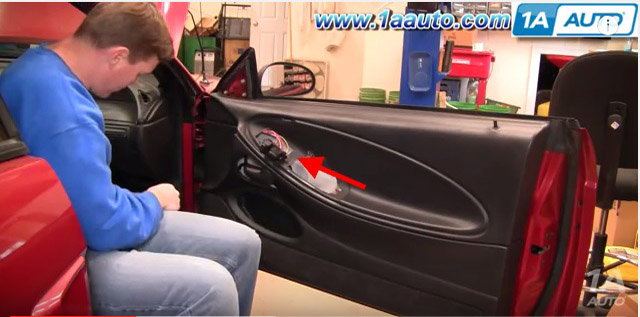
Figure 3. Disconnect wiring connector.
Step 3 – Remove old motor regulator
With the door panel and water shield out of the way, it's time to remove the old and faulty hardware. Follow these steps:
- Use the 11mm socket and ratchet wrench to remove a total of six bolts. Four by the motor and two by the regulator bracket.
- Use the flat head screwdriver to pop out the window weather strip at the top of the door.
- Get your assistant to hold the window and slowly pull it upwards to gain enough clearance to remove the regulator hardware.

Figure 4. Remove four bolts for the motor bracket. 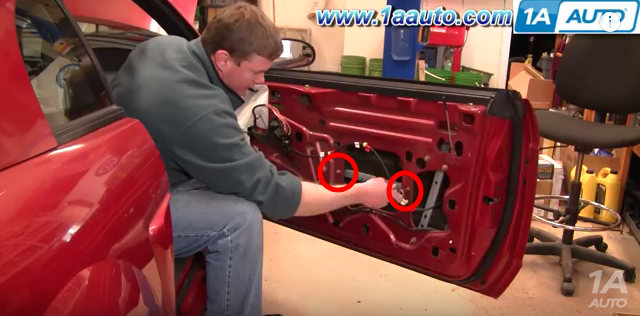
Figure 5. Remove two bolts by the actuator bracket.
Pro Tip
Do not remove the window from the door. Only hang on to it temporarily until the new regulator is mounted in place.
Step 4 – Install new regulator
With the old regulator out of the way and the window still being held up, installing the new regulator works in reverse order as removed. Follow these steps:
- Tighten down the six motor and regulator bolts.
- Set the window back on its track.
- Replace window weather stripping.
- Connect motor.
- Replace water shield.
- Position and set in door panel.
- Replace body clips.
- Connect power window switch wiring connector back in.
- Insert door handle trim.
- Test window.

Related Discussions
- Ford Mustang Power Window Repairs - MustangForums.com
- Fixing Power Window Issues Discussion - MustangForums.com