Ford Mustang V6 and Mustang GT 2005-2014: How to Replace Speakers
Level up those stock speakers for better sound.
This article applies to the Ford Mustang V6 and Mustang GT (2005-2014).
There's nothing better than cruising in your Mustang with your favorite song coming through the speakers, except when you upgrade those stock speakers to get even better sound. Whether you are replacing a blown speaker, or pumping up your entire sound system, this article will help you take care of those front door or rear deck speakers.

Materials Needed
- Ratchet and socket set with 6, 8 and 14mm sockets
- Torx set with T20-30 bits
- Flathead screwdriver
- Trim panel removal tool
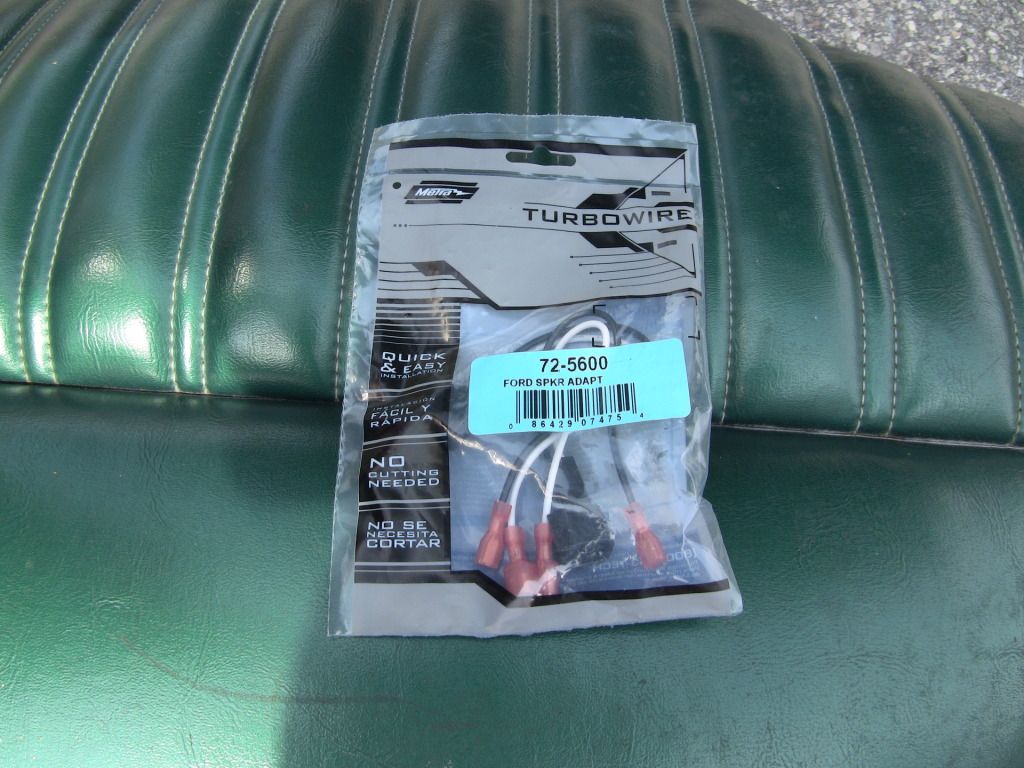
- Speaker wiring adapter kit (optional)
Front Door Speakers
Step 1 – Remove the door trim panel
- Remove the mirror trim panel. Remove the plastic covers from around the door to expose the mounting fasteners.
- Remove the plastic covers to remove the door release handle and arm rest mounting fasteners.
- Remove the door lock trim ring.
- Remove all of the fasteners from the perimeter of the trim panel. Use a trim panel removal tool to pry between the trim panel and the door, making sure to disconnect any mounting clips around the entire perimeter.
- Once all of the fasteners are removed and the panel is free of the door, pull it forward and disconnect all of the wiring harnesses.
- Remove the trim panel and set it aside.

Figure 1. Removing the mirror trim panel. 
Figure 2. Remove the Torx bolt in the door handle. 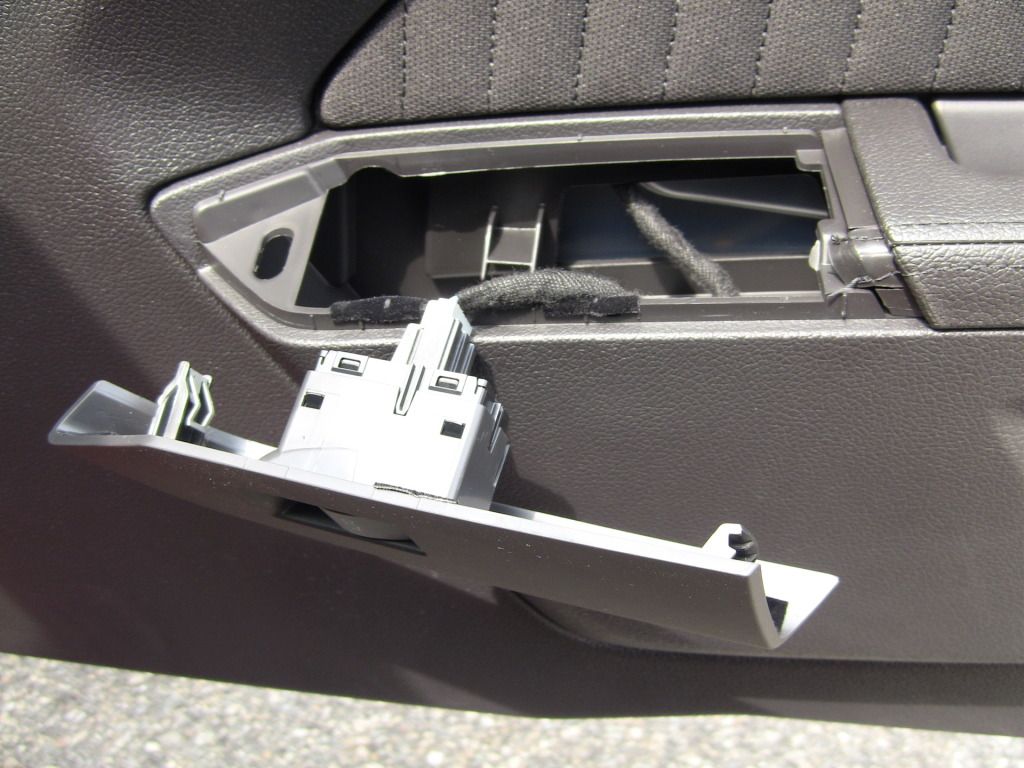
Figure 3. Remove the power window switch panel to access the fastener below (later models). 
Figure 4. Remove the trim panel to access the speaker.
Pro Tip
Make sure you have removed all of the fasteners before trying to remove the panel! If anything breaks, you will have to replace the entire panel.
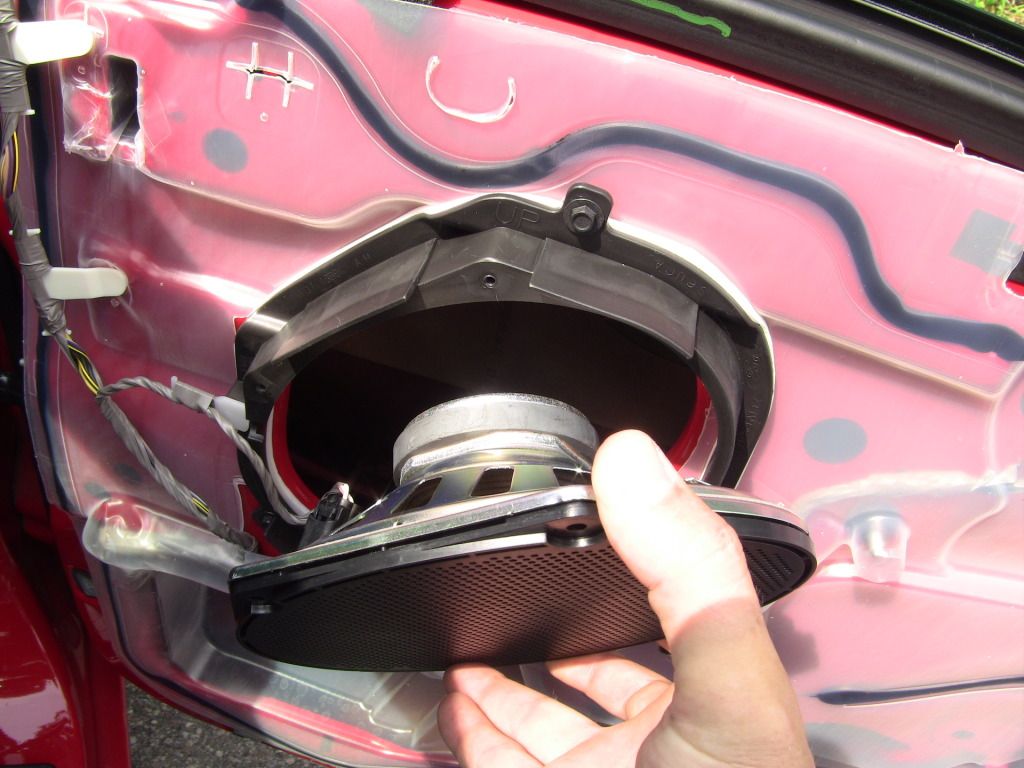
Step 2 – Remove the speaker
- Remove the speaker mounting bolts and pull the speaker from the door.
- Disconnect the speaker wiring and remove the speaker.
Step 3 – Install the new speaker
- Line up the new speaker with the mounting holes. If your new speaker is slightly different, you may have to drill new holes, or trim the weather shield to fit the new speaker.
- Connect the electrical wiring to the new speaker.
- Install the speaker and mounting bolts. Tighten the bolts securely, but do not over-tighten!
- Turn on your sound system and test out the speaker before reinstalling the door trim panel.

Pro Tip
You might want to purchase a speaker wiring adapter to help simplify the job.
Step 4 – Reinstall the door panel
- Reverse the removal steps to reinstall the door panel, making sure any clips are properly engaged.
- Install the remaining trim panels around the door lock and mirror.
Rear Speakers
Step 1 – Remove the trim panels
- Remove the bottom rear seat cushion.
- Use a trim panel tool to remove the rear quarter window trim panels.
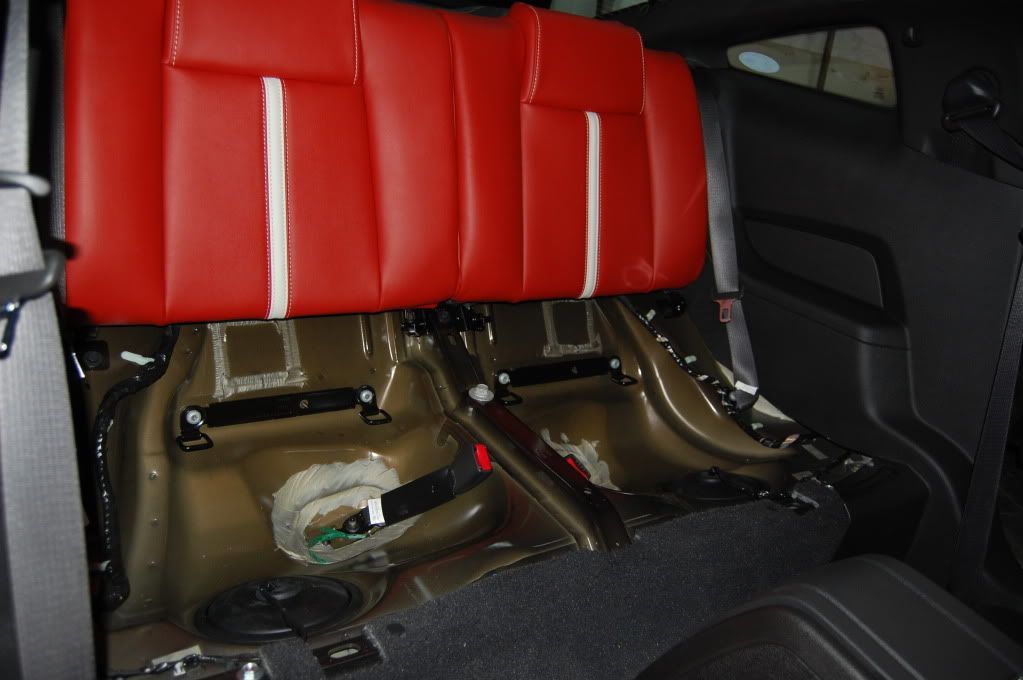
Figure 8. Remove the rear seat cushion to remove the quarter trim panels. 
Figure 9. Remove the quarter trim panels.
Step 2 – Remove the parcel shelf
- Pry up the parcel shelf to access the rear speakers.
Pro Tip
It may be possible to simply pry the shelf out of the way without fully removing it, but due to the limited working room, it's recommended to fully remove it.
Step 3 – Remove the speakers
- Carefully remove the speaker mounting bolts. There is not a lot of room to work here, so be careful when turning the ratchet.
- Lift the speaker from the deck and disconnect the wiring. Remove the speaker.

Step 4 – Install the new speakers
- Line up the new speaker with the mounting holes. If your new speaker is slightly different, you may have to drill new holes.
- Connect the electrical wiring to the new speaker.
- Install the speaker and mounting bolts. Tighten the bolts securely, but do not over-tighten!
- Turn on your sound system and test out the speaker.
Pro Tip
You might want to purchase a speaker wiring adapter to help simplify the job.
Step 5 – Install the trim panels
- Reverse the removal procedure to reinstall the parcel shelf, the rear quarter trim panels and the rear seat cushion.
Related Discussion, Sites and Video
- Front Speaker Install - Allfordmustangs.com
- Front Speaker Replacement - Allfordmustangs.com
- Door Panel Removal - Mikefordmustang.com
- Rear Deck Speakers - Mustangforums.com
- Rear Speaker Replacement - Youtube.com