Ford Mustang V6 and Mustang GT 2005-2014: How to Replace Stereo
If you are ready for a stereo upgrade, then continue reading for the step-by-step instructions.
This article applies to the Ford Mustang V6 or Ford Mustang GT (2005-2014).
Have you found the perfect radio to take advantage of your speakers? Does it have all the features you need? What's left is getting it installed. Well, let's get that taken care of. This how-to will wiz you through the radio replacement process.

Materials Needed
- Phillips screwdriver
- 7mm socket wrench
Step 1 – Remove the center console screws
- LIft the center armrest cover.
- Then remove the two Phillips screws located to the side of the hinges.

Step 2 – Remove the gear shifter trim piece
- Around the gear shifter is a rectangular trim piece cover. Simply lift it up to remove it.

Step 3 – Remove the center console
- Starting at the back of the center console, firmly grasp each side of the compartment and lift it up.
- Make your way to the front, and slide the plastic piece around the parking brake as well as gear shifter to remove it.

Figure 3. Remove the center console compartment cover. 
Figure 4. Removing the entire center console cover.
Step 4 – Remove the stereo dashboard panels
- Reach behind the panels and pull them forward to remove them.
- Once removed, each panel should reveal a plug that is located at the bottom of the radio fascia.
- On the driver's side, pinch the plug to release the clip and unplug the connector.
- On the passenger's side, slide the metallic arm down to release the connector, and then unplug the connector.

Step 5 – Remove the stereo fascia panel
- Remove the six 7mm screws holding the fascia in place.
- Starting at the bottom, peel the fascia forward and then down until you reach the top.
- There are three connectors at the top that need to be pinched to undo their clips. After pinching them, simply pull back to remove.
- The fascia should now be completely free to be removed.

Figure 6. Unscrew the stereo fascia. 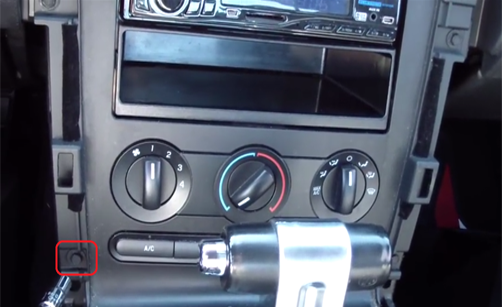
Figure 7. Example of driver's side lower fascia clip and connector. 
Figure 8. Passenger's side lower fascia connector.
Step 6 – Remove the radio
- Unscrew the four 7mm screws holding the radio in place.
- Slide the radio forward until you can easily remove the three connectors on the back of it.

Figure 9. Unscrew the four stereo screws. 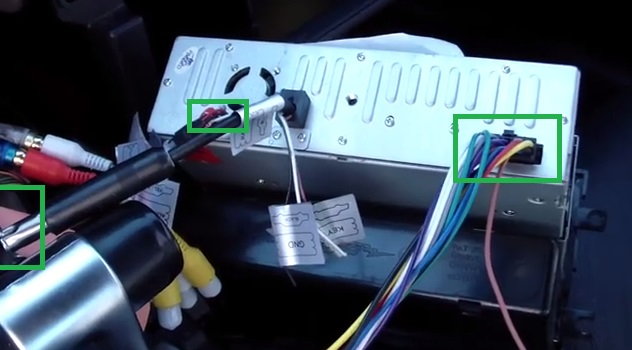
Figure 10. Removing three plugs on back of the stereo.
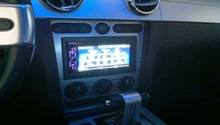
Step 7 – Install new stereo
- Plug the new stereo in, slide it back into place, and fasten the four 7mm screws.
- Plug in the upper three connectors of the radio fascia, replace it, and screw it in.
- Then replace the bottom two connectors.
- Replace the two panels that surround the radio
- Replace the center console, and screw it in.
- Replace the gear shift trim piece.
Now enjoy the new stereo!
Featured Video: How to Replace Car Stereo
Related Discussions and Video
- Best Aftermarket Stereo Replacement for Shaker 500 - MustangForums.com
- 08 Aftermarket Stereo Install - MustangForums.com
- How to Remove Stereo 2005-2009 Mustang - YouTube.com