Door Panel Leather Sagging - **FIX**
 04-26-2013, 12:46 PM
#151

Join Date: Nov 2004
Posts: 3
Wow what a warm welcome, now I know why I never used this forum
My comment was to spend 40 instead of 20 and have it done right by a professional the first time, because it might turn out bad. Sorry to burst a bubble in your inflated ego. Good luck with your forum and thread.
My comment was to spend 40 instead of 20 and have it done right by a professional the first time, because it might turn out bad. Sorry to burst a bubble in your inflated ego. Good luck with your forum and thread.
 04-26-2013, 08:18 PM
#152
5th Gear Member
Thread Starter
Join Date: May 2006
Location: Winter Haven, Florida
Posts: 2,214
No prob, no harm done...no insults were given so why the negative remarks towards me? Doesn't matter, my point was, just because u didn't follow everything as u should have and the process didnt work out for u, u should warn people of your mistake rather than try to convince ppl to disregard this DIY...it has worked so well for so many which is why it's still getting praise for over 3 years...this is just one of those "can't please everyone" situations...congrats for at least taking a stab at it...
04-28-2013, 04:06 PM
#153
S197 Section Modder-ator
Join Date: Sep 2007
Location: Orlando FL
Posts: 13,373
Wow what a warm welcome, now I know why I never used this forum
My comment was to spend 40 instead of 20 and have it done right by a professional the first time, because it might turn out bad. Sorry to burst a bubble in your inflated ego. Good luck with your forum and thread.
My comment was to spend 40 instead of 20 and have it done right by a professional the first time, because it might turn out bad. Sorry to burst a bubble in your inflated ego. Good luck with your forum and thread.
It's not a feast of engineering for a non professional to do this job right.
")
Everybody else here was successful, but then again, there is always a percentage of folks that can't ever do ANYTHING right... Rings a bell?
So one guy's failure over plenty other successful tries would render this thread useless? Don't think so!
The OP's intention was to share something that works and that's what Forums are all about.
Since it's not about you, feel free to refrain from posting here.
After all, you do know why you never use this Forum right?
04-29-2013, 06:12 AM
#154
2nd Gear Member
Join Date: Oct 2009
Location: FL
Posts: 357
Any lawyer will tell you to read the fine print... so yeah, the low temps in the area were your downfall unfortunately. Sorry to hear. Meanwhile, I pursued the fix myself because it didn't seem like it would be beyond my technical ability and I did follow the instructions on the adhesive to the letter. Not that it's ever below 65 degrees here. After I brushed on the last of the adhesive, I set a timer for 20 minutes and went ELSEWHERE... as I know I'm prone to rush things.
Worked out just fine. Sorry to hear that there was such a problem.
Worked out just fine. Sorry to hear that there was such a problem.
04-29-2013, 09:51 AM
#155
6th Gear Member
Join Date: Jan 2007
Location: Southeast Virginia
Posts: 6,409
So the lesson of my story is this: IF YOU HAVE THIS PROBLEM, BRING IT TO A UPHOLSTERY SHOP TO FIX IT!!!!!!!!! It would have cost me $40 to have them reglue the material on 1 door. So now I�m out the $20 in glue, tape and brushes I spent on DIY plus another $250-300 to have a shop fix my mistake and redo both doors from scratch. You�re only saving $20 to DIY, save yourself the hassle. Sometimes the cheapest way is the most expensive, and I�ve proved that here.
I think the lesson learned here is, FOLLOW THE DIRECTIONS TO THE "T"! You made the mistake of trying to use the glue in COLD weather. You should have been more patient and waited until the summer. You also have to remember the cost of upholstery shops are like gas....it's different every where you go! Also this forum is VERY helpful and people here are passionate about their Mustangs. So sorry you had a bad experience, but maybe next time be more cautious about directions.
05-07-2013, 04:46 PM
#156

Join Date: May 2013
Location: California
Posts: 3
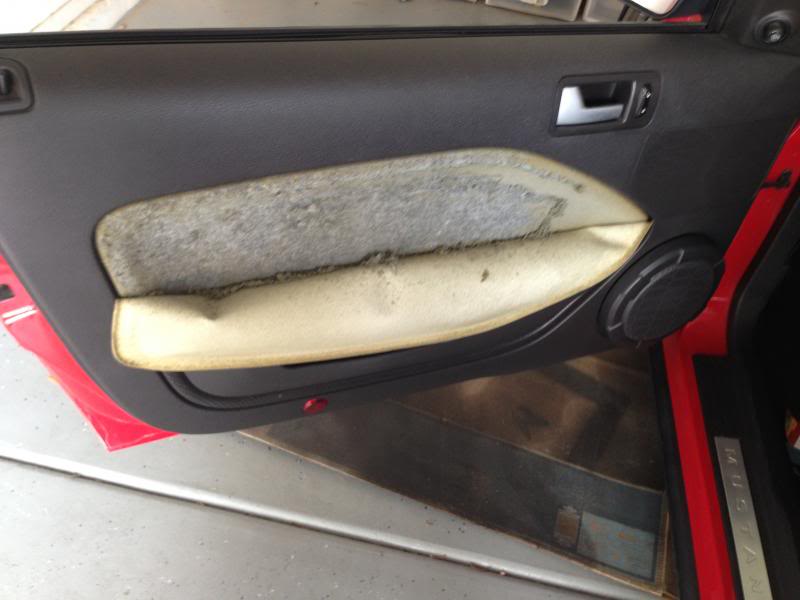
This DIY is great. However as time goes by the door insert will shrink. When it shrunk you will have to take the off the door panel and make a new vinyl insert. Take it to your local upholstery shop and get it done professionally is recommended because the door panels are rather trick for inexperienced do it yourself-er.
For matching vinyl, I highly recommend the Symphony Line Vinyl. Normal price ranges $19.95 to $21.95. The grain and color match perfectly with the seats.
Black Symphony - Grain


For matching vinyl, I highly recommend the Symphony Line Vinyl. Normal price ranges $19.95 to $21.95. The grain and color match perfectly with the seats.
Black Symphony - Grain
05-08-2013, 06:31 AM
#157
2nd Gear Member
Join Date: Oct 2009
Location: FL
Posts: 357
Hmmm..... I'm familiar with shrinkage pursuant to outgassing of volatiles over time. I'm just wondering how long that would take in order for it to be an issue. Mine's an 05 and I noticed little to no shrinkage when I re-attached the panel. Thinking on it, one first must remove the wee amount of foam padding to re-attache... this actually makes the surface of the panel smaller. I had no shortage of material.... but certainly will keep this in mind should I see signs of pullback around the edges.
05-27-2013, 07:13 PM
#158
1st Gear Member
Join Date: Jun 2011
Location: AZ
Posts: 69
wanted to chime in my .02
thanks for the great write up. I literally stopped by the wallymart and for less than a dub i had all I needed. Took no more than an hour for me and I think the results are even better before. I didnt forget to take pics. follow the directions and ur straight.
thanks for the great write up. I literally stopped by the wallymart and for less than a dub i had all I needed. Took no more than an hour for me and I think the results are even better before. I didnt forget to take pics. follow the directions and ur straight.


 06-19-2013, 04:18 PM
#160

Join Date: Apr 2013
Location: Hawaii
Posts: 3
Hi all,
I encountered the same issue in my 06.
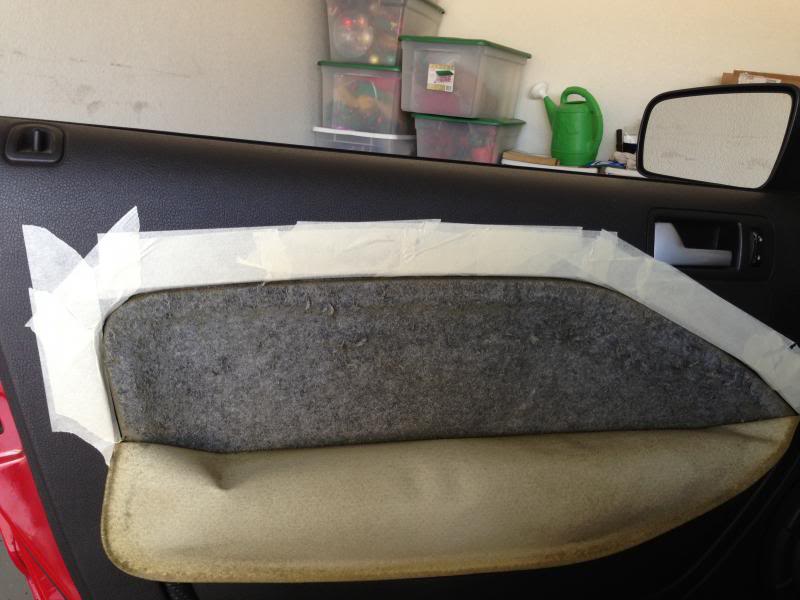
Before I found this post I decided to try fixing the passenger side door panel. As my door panel was coming lose all the way around I had to pull the entire pleather off, scrubbed all the old glue and foam off with a stiff brush, taped it off and, (first mistake) used a spray on adhesive and no dice, it wouldn't hold.
So I pulled it off again and in looking noticed that under the backing Ford put on there is plastic like the rest of the door panel so I decided to pull this off and do something like paint the insert area.
Well the problem with that is that once I started pulling the foam backing off I found that while Ford cheaped out on the glue to attach the pleather, they used the adhesive from hell to attach the foam to the door panel.
I have tried everything I can think of to get this glue and the remaining bits of foam off and nothing works, not rubbing alcohol, denatured alcohol, vinegar, acetone, simple green, goo gone, etc etc. The glue appears to permanently bond to the plastic of the door panel and pits it as well so even if you can get the glue all the way off your still going to have pits in the plastic.
Oh and one more thing the foam between the door handle and the panel is a real bear to get out and you have to remove it to get a good finish and as far as i can tell, (correct me if I'm wrong), but there is no way to remove the door handle without breaking the hot glue mounts on the back.
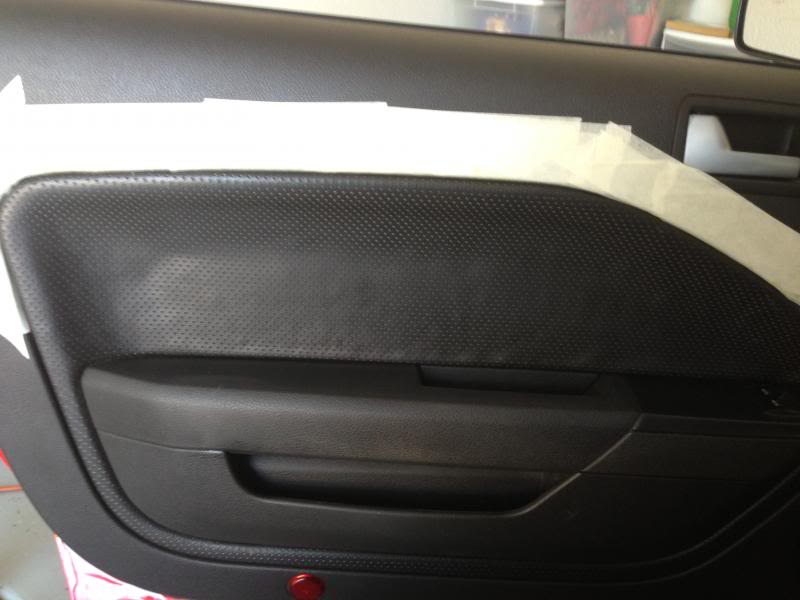
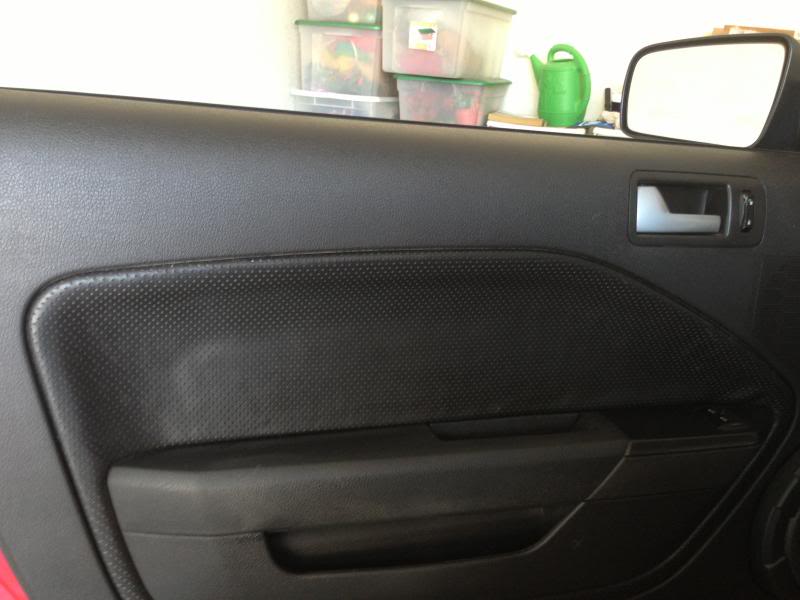
so what I ended up having to do to get a smooth surface is sand it, I know yikes! After I finish sanding it I am thinking of doing one of two things:
1. Prime to get a perfectly smooth finish then paint the inner panel and clear coat it
2. Put the existing pleather or a new piece of material back in place and glue it directly to the plastic.
Another suggestion I saw that you might think about when doing this especially if you have put the whole thing back is
A. buy one of those things they use to push screen door material back into the groove on screens
B. Either buy some piping for the door, (also makes a nice accent) or buy some of the rubber they use on the screen doors
C. Pre-fit the edges and hold them in place with the rubber or piping if you don't get it setup just right you won't have enough material to fit down into the groove properly all the way around.
D. Once you have the bottom edges held in place start gluing the large area of the panel first and then move onto the smaller parts, pulling up the rubber/piping putting glue on it and then pushing it back down and hold it in place with the rubber of piping. Make sure you don't get any glue squeezing out onto the rubber/piping or you'll have a tough time removing it after the fact because it will be glued in place.
Just my two cents, hope it helps somebody.
Gordon
I encountered the same issue in my 06.
Before I found this post I decided to try fixing the passenger side door panel. As my door panel was coming lose all the way around I had to pull the entire pleather off, scrubbed all the old glue and foam off with a stiff brush, taped it off and, (first mistake) used a spray on adhesive and no dice, it wouldn't hold.
So I pulled it off again and in looking noticed that under the backing Ford put on there is plastic like the rest of the door panel so I decided to pull this off and do something like paint the insert area.
Well the problem with that is that once I started pulling the foam backing off I found that while Ford cheaped out on the glue to attach the pleather, they used the adhesive from hell to attach the foam to the door panel.
I have tried everything I can think of to get this glue and the remaining bits of foam off and nothing works, not rubbing alcohol, denatured alcohol, vinegar, acetone, simple green, goo gone, etc etc. The glue appears to permanently bond to the plastic of the door panel and pits it as well so even if you can get the glue all the way off your still going to have pits in the plastic.
Oh and one more thing the foam between the door handle and the panel is a real bear to get out and you have to remove it to get a good finish and as far as i can tell, (correct me if I'm wrong), but there is no way to remove the door handle without breaking the hot glue mounts on the back.
so what I ended up having to do to get a smooth surface is sand it, I know yikes! After I finish sanding it I am thinking of doing one of two things:
1. Prime to get a perfectly smooth finish then paint the inner panel and clear coat it
2. Put the existing pleather or a new piece of material back in place and glue it directly to the plastic.
Another suggestion I saw that you might think about when doing this especially if you have put the whole thing back is
A. buy one of those things they use to push screen door material back into the groove on screens
B. Either buy some piping for the door, (also makes a nice accent) or buy some of the rubber they use on the screen doors
C. Pre-fit the edges and hold them in place with the rubber or piping if you don't get it setup just right you won't have enough material to fit down into the groove properly all the way around.
D. Once you have the bottom edges held in place start gluing the large area of the panel first and then move onto the smaller parts, pulling up the rubber/piping putting glue on it and then pushing it back down and hold it in place with the rubber of piping. Make sure you don't get any glue squeezing out onto the rubber/piping or you'll have a tough time removing it after the fact because it will be glued in place.
Just my two cents, hope it helps somebody.
Gordon