DiMora's Billet Pulley Full Installation / How-To step-by-step
 02-07-2011, 11:40 AM
#1
Thread Starter
Join Date: Sep 2009
Location: GA
Posts: 46
Most of us group our mods into one of two categories: Show and Go.
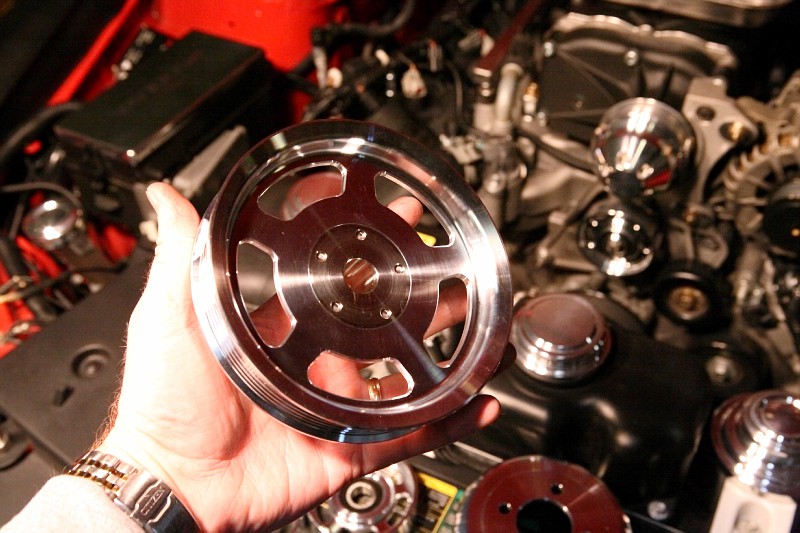
This is a show modification. An awesome one:
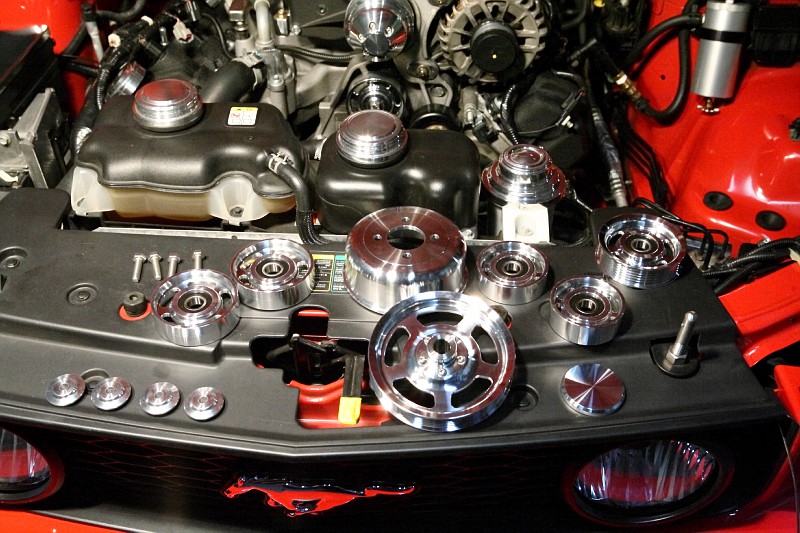
This is my third experience using pulleys custom-made by Carmen Goudey, AKA Redfire427. My first time was with a billet M90 2.57" supercharger snout pulley and idler, my second was a custom TVS 3.47" snout pulley, and this third experience cleaned up the front of my engine with all-billet pulleys except for A/C (which you can't really see anyway).
He can be contacted via PM on this forum, or directly, if you feel the need to display such awesome "Go mods" on your car. For anyone that does car shows, these are a must-have to separate you from the others.
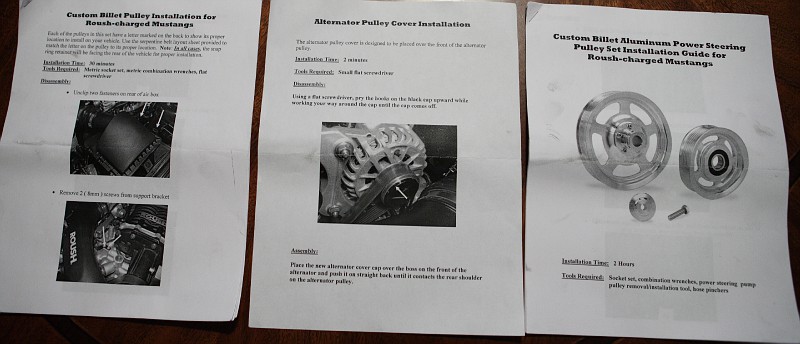
As with all Carmen's products, he included an excellent set of instructions:
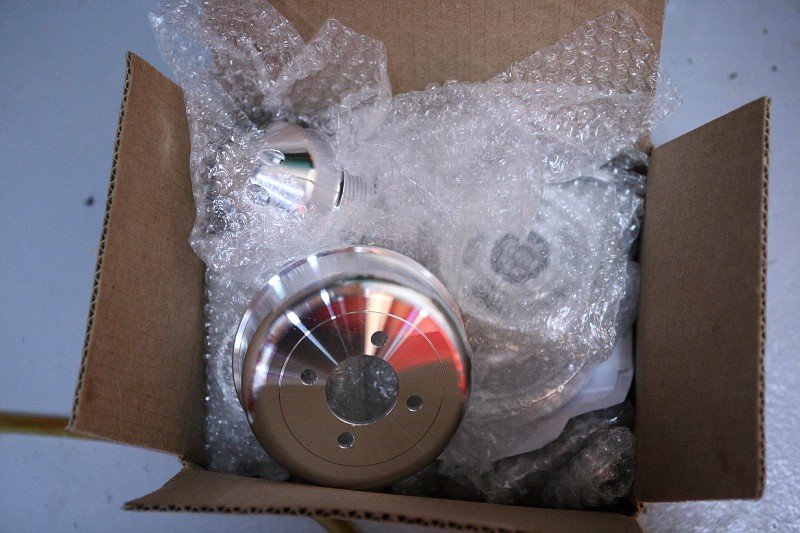
The box they came well-packed in:
Notes:
1) I used a dab of blue Lok-Tite on every bolt I removed and re-installed. It is not required, but I am a big fan of Lok-Tite for both its retention and anti-seize properties for future maintenance.
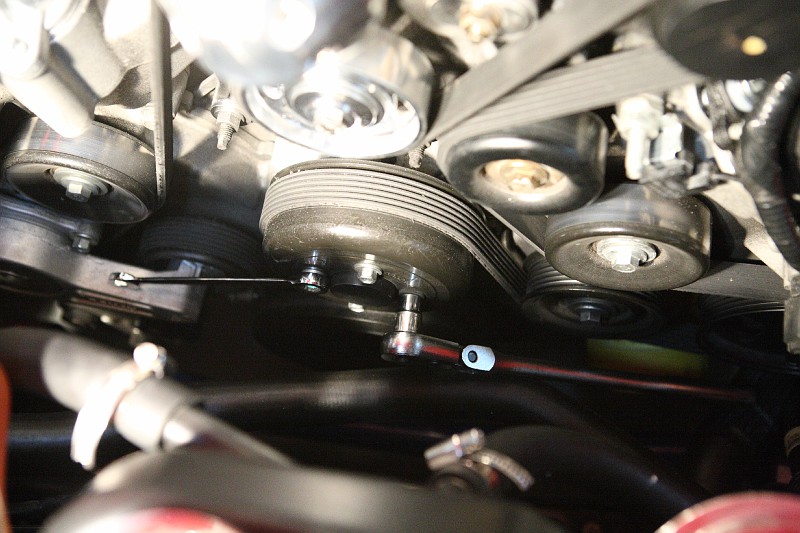
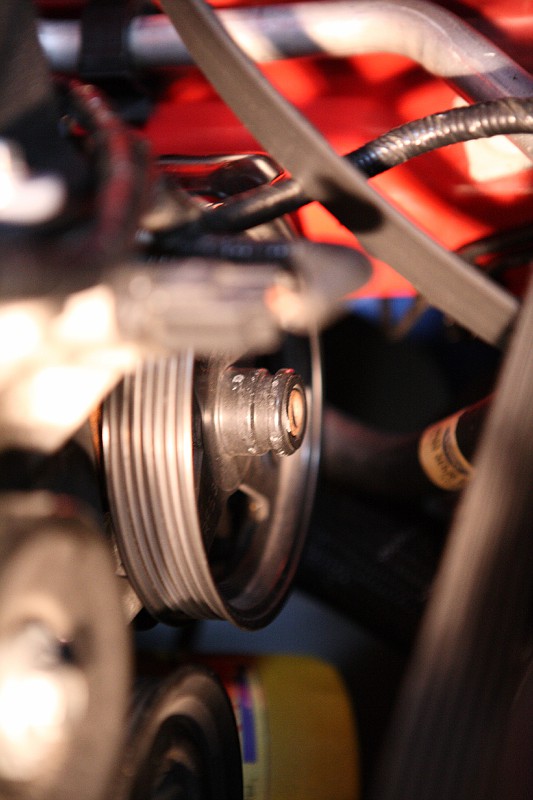
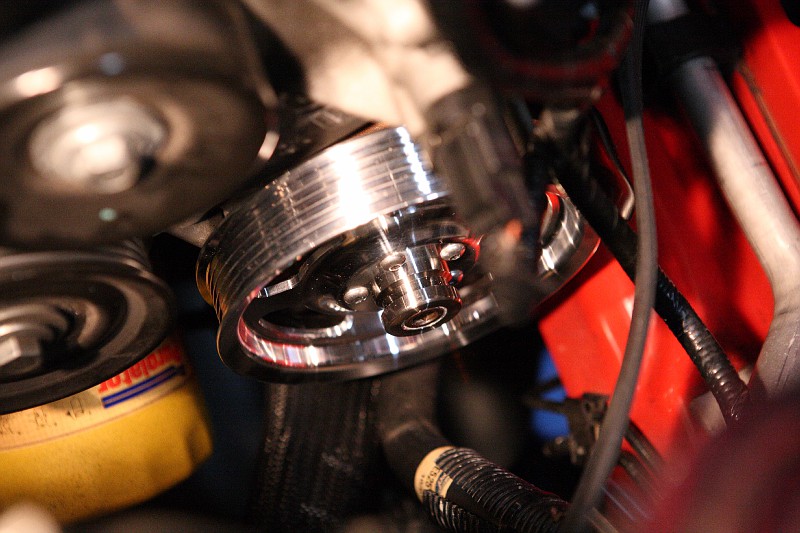
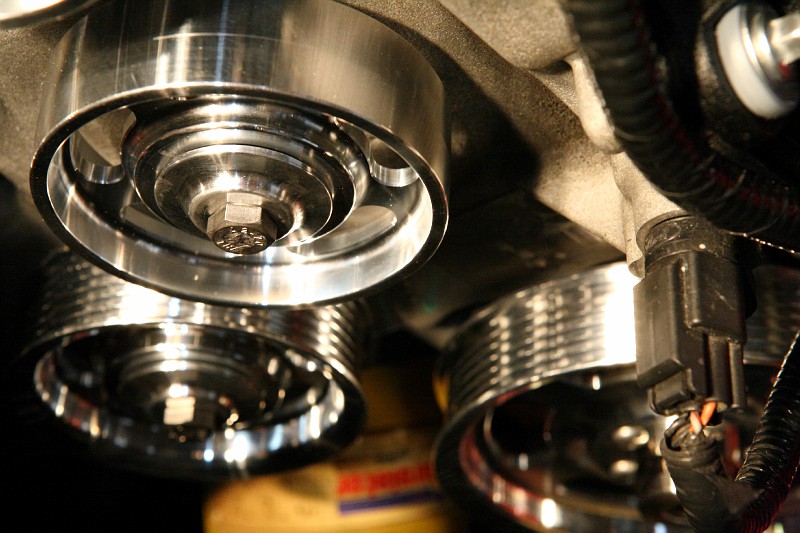
2) ALL the pulleys (except power steering and snout) have a snap-ring...and the snap-ring ALWAYS faces the rear of the car. You can see the snap ring below:

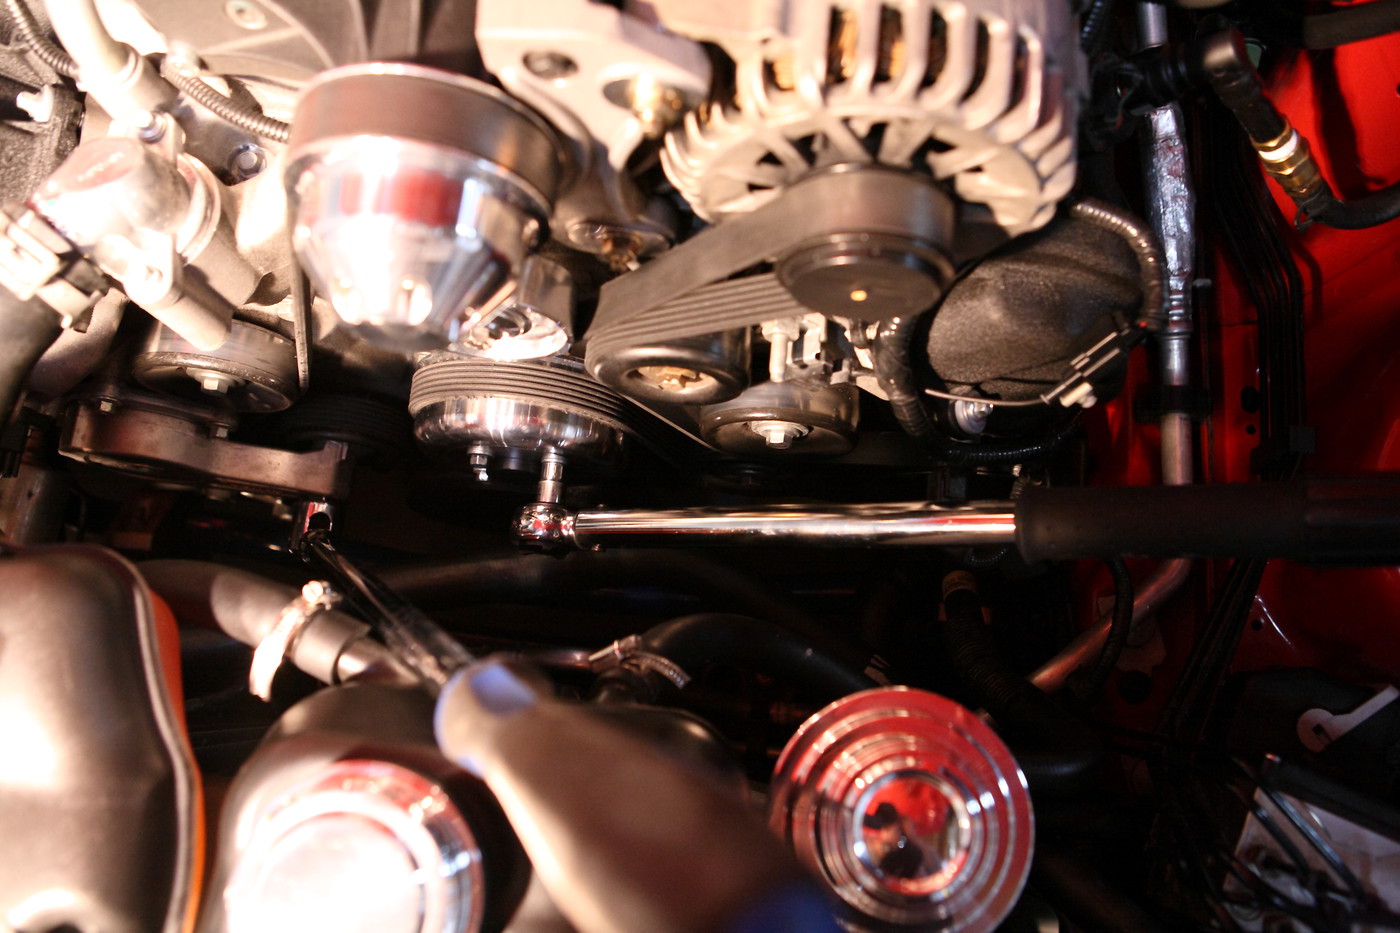
For starters, I loosened (but did not remove) the water pump pulley bolts. Keeping the FEAD belt tight when doing so is the hot-ticket, as the belt helps keep the H2O pump pulley from spinning. If it still spins a bit, add another wrench and you will get the bolts to break loose:
Once I got them all loose, I temporarily released the FEAD pulley off the supercharger pulley using a 1/2" breaker bar, then I removed the old water pump pulley, installed the new one, and once the bolts were snug, I re-installed the FEAD belt so I could torque the bolts to 18 Lb-ft:
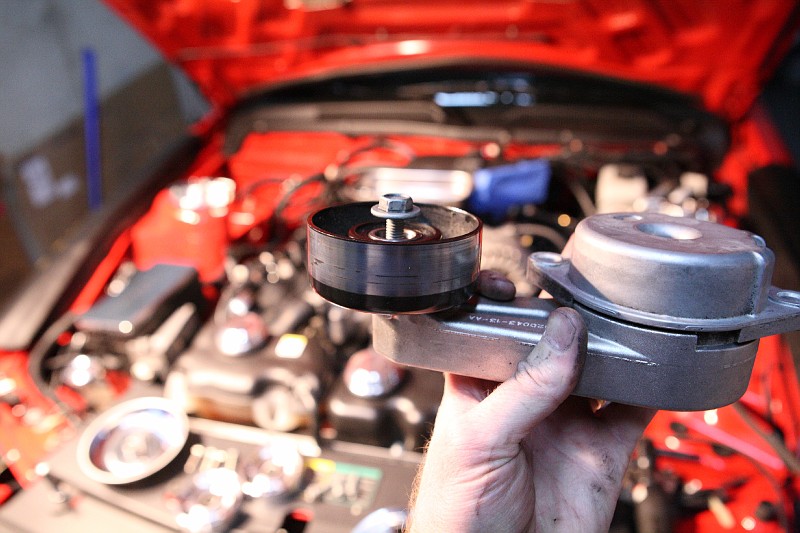
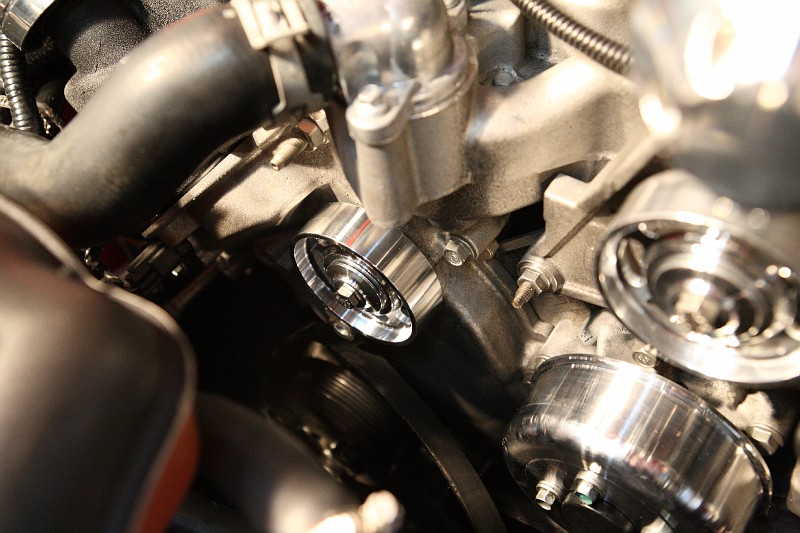
After that, I removed the FEAD belt and tackled the tensioner. My tensioner is the upgraded Roush P-51 tensioner since I run a TVS blower, but it still uses the same diameter pulley as the stocker, so the billet version fit perfect. I gave the pulley center bolt 20 lb-ft of torque (you re-use the OEM bolt on this pulley):
Before:
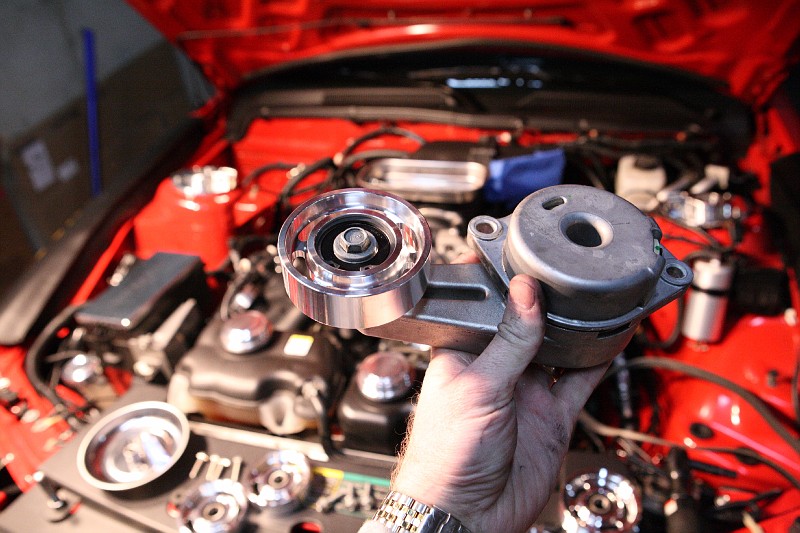
After:
The order that you accomplish the rest of the pulley installation is not critical, but I wanted to get the power steering pump pulley over-with since it requires a specialty tool, so I tackled it next. I used a puller that I had purchased from Napa, but I do not recommend the NAPA brand because the installation bolt wasn't tapped with the correct threads. I hate to say it, but the Chinese-made "OEM" brand one available for rental from Autozone has a perfect thread-pattern (M8x1.25).
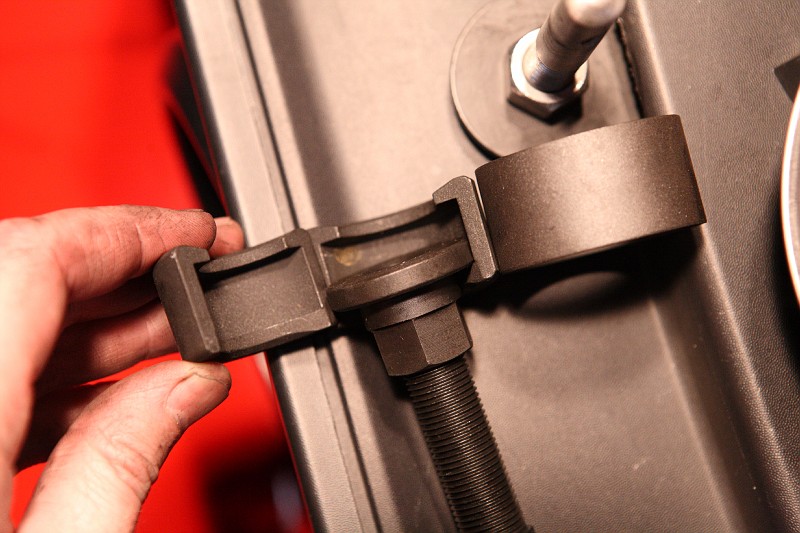
The puller needed looks like this:

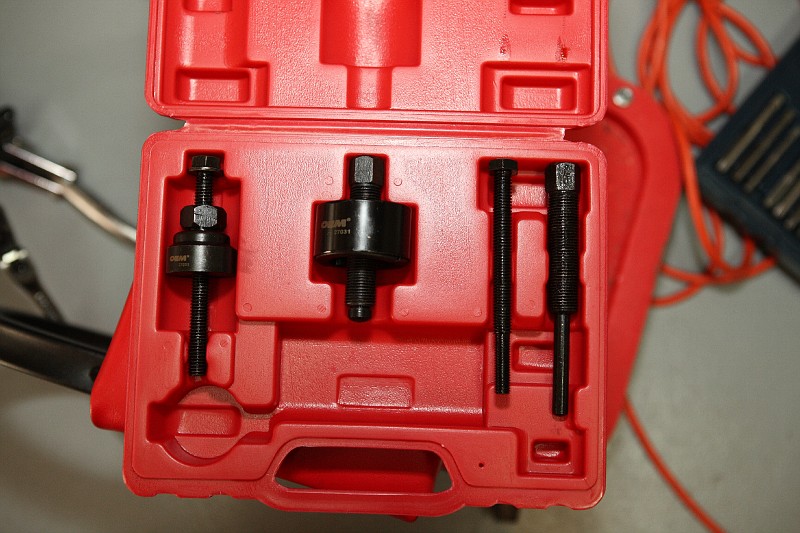
...and you attach it to the grooves on the OEM power-steering pulley:
...ending up like this:
Removal is then a piece-of-cake.
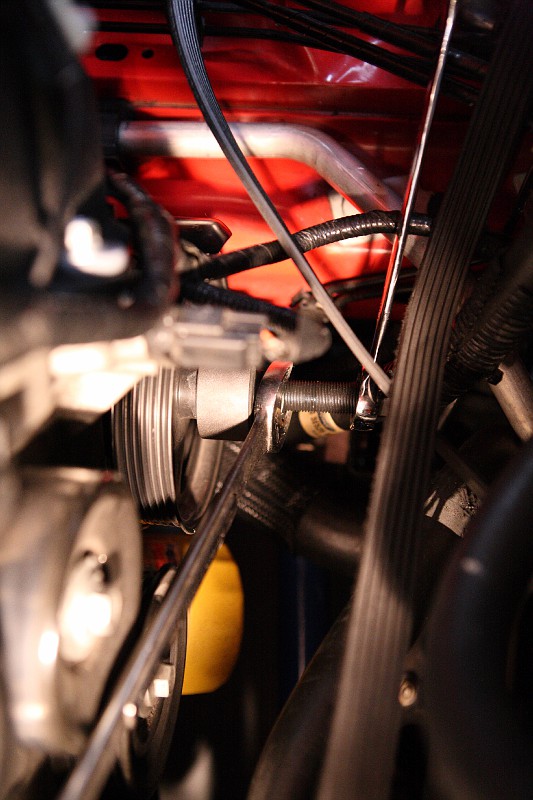
Next, you change tools to the pulley installation tool. This tool threads into the end of the power steering pump shaft on the car.
In addition to the tool and a 14MM gear-wrench (I strongly recommend you buy a 14mm (or whatever size your installer kit uses) gear-wrench for this project) and a ratchet with socket, I also took a medium length screwdriver, covered it in blue painters tape so I wouldn't mar the new power-steering pulley, and inserted it in one of the "spoke holes" on the new pulley to keep it from turning. I used my left hand to hold both the end-ratchet and the screwdriver, whose tip was jammed under the driver's side head, and my right hand to work the gear wrench to press on the new pulley.
There are a couple of techniques for installing press-fit pulleys that are helpful...one is to put the item you are press fitting in the oven for a while to heat it up. You don't have to make it ridiculously hot...200 degrees is usually fine, but that will expand it just a bit so it slips on easier. Just wear some work-gloves so you don't get burned (but still have some finger dexterity). While the pulley is heating up, take some isopropyl alcohol and clean up the shaft so it is spotless. I also put a tiny dab of white lithium grease on the shaft to prevent galling as the pulley slides on...I also put a dab on the pulley opening as well. You don't even need to see it...a thin film will suffice.
Using the above techniques, the pulley pressed on with no drama, although it does take some good effort on the wrenches. This is a good thing - you don't want the pulley coming off, and ONLY the press-fit holds it on. Don't fear the lithium either, - it will not cause the pulley to slip off, and it is displaced as the pulley slides on. That sucker is on there TIGHT. You press it on until it is flush:
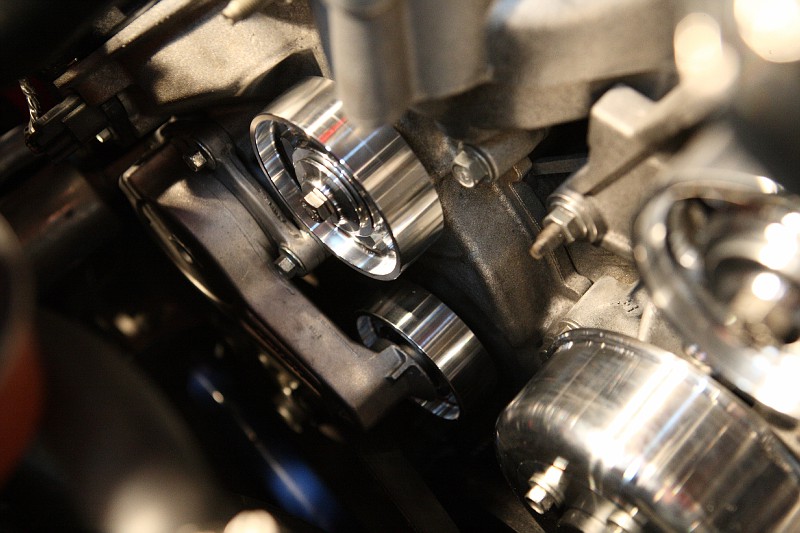
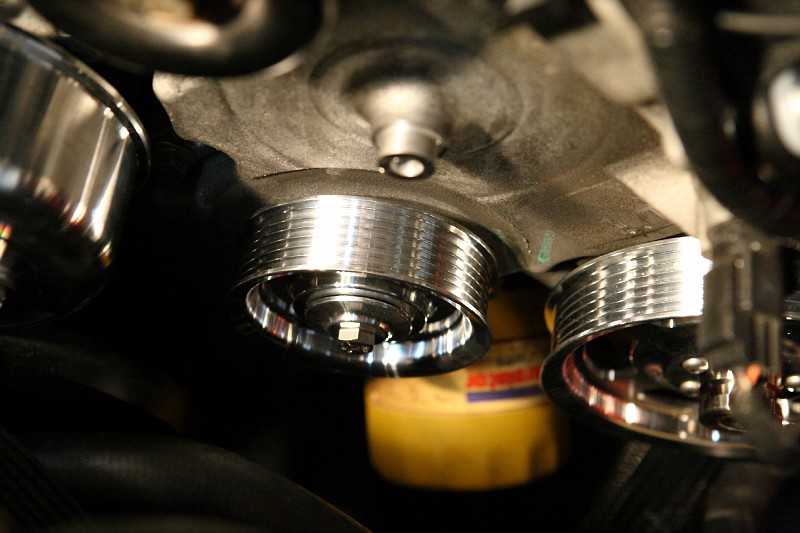
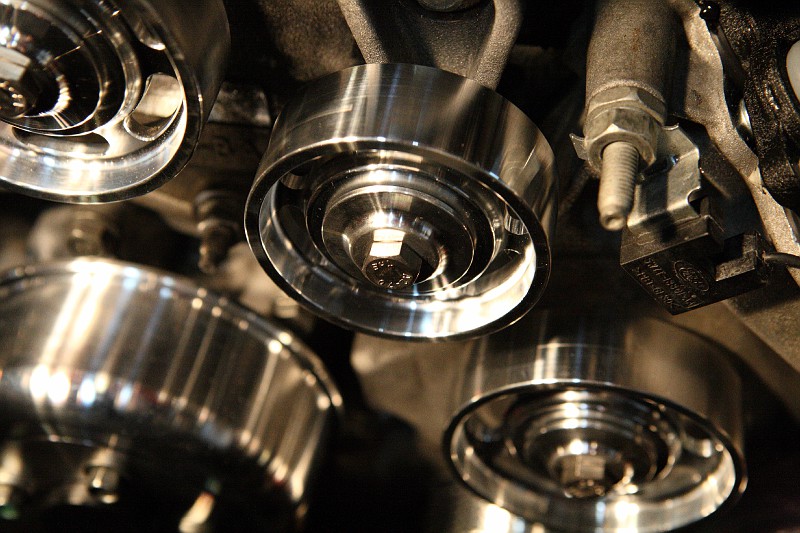
From there, the rest of the mod is very easy...pick a pulley...any pulley...and swap them out one-at-a-time. I recommend one-at-a-time since there are two different size idlers (and one that has grooves) and you don't want to get mixed up.
Note: Every idler pulley has a retainer and replacement bolt (except for the tensioner) that comes in the kit. On one side of the retainer, there is a raised "boss" that faces the pulley - this is clearly shown in the instructions with a picture.
I used the aforementioned blue Lok-Tite on every bolt on the idlers, and gave each bolt 18 lb-ft of torque because I am "detail oriented".
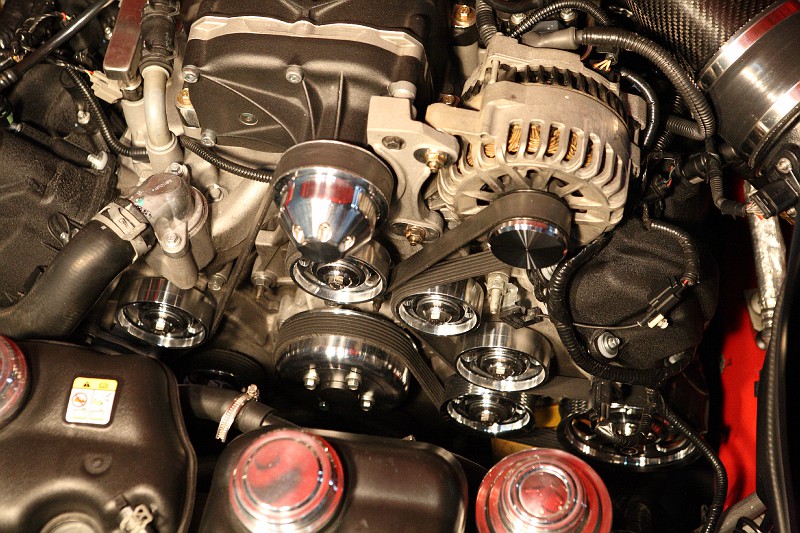
Here they are in the order I put them in:
I re-installed the tensioner with the three bolts I removed, and gave each of them 20 lb-ft of torque (Spec is 20-30 NM on these, so 20 lb-ft is perfect). I also put a little blue Lok-Tite on them.
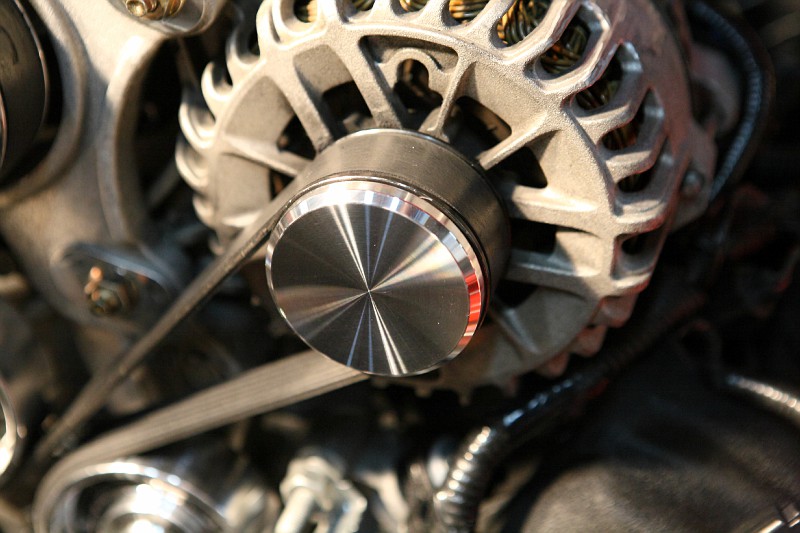
For the Pi�ce de r�sistance the kit comes with a billet alternator cap...which has a nifty black O-ring inside of it in a machined groove that keeps it in place. Custom engraving is available on this piece to personalize your car.
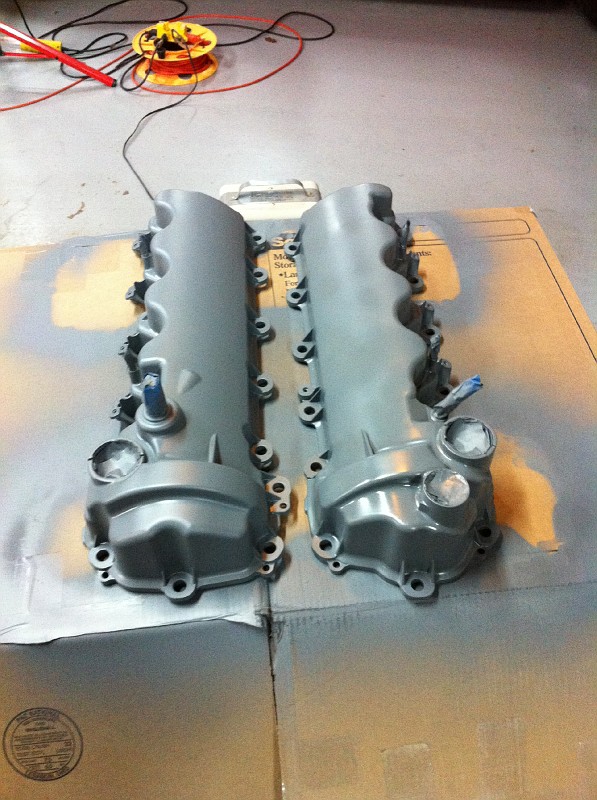
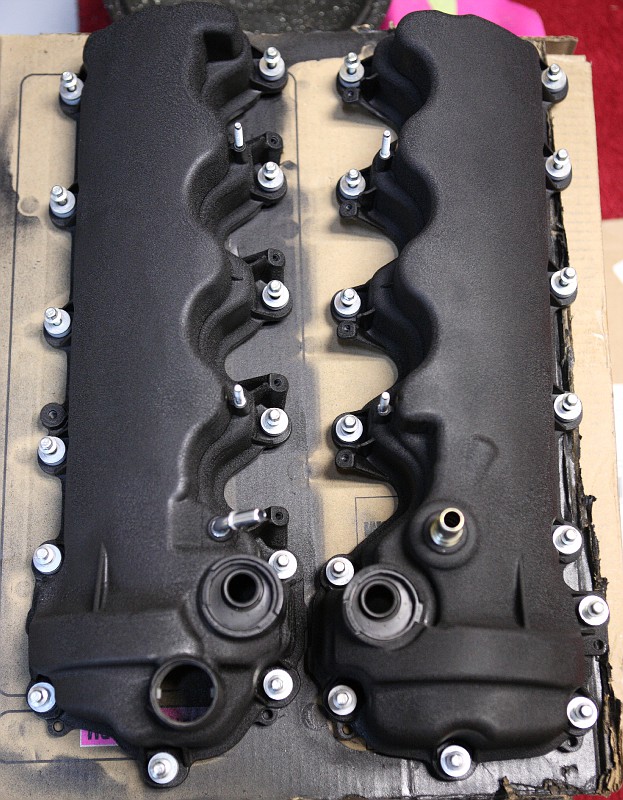
I delayed putting these pulleys on because my cam-covers were so ugly in their OEM oxidizing aluminum finish...so I pulled them before I started pulley installation, degreased them, washed them in the dishwasher, used a 3M scrubbie on them with VHT pre-paint brake caliper cleaner, then primered them with Krylon 500 degree primer, then used VHT black wrinkle-plus paint to match the supercharger's black finish. They turned out nice, and make a nice off-set background to the billety-bling of the pulleys:

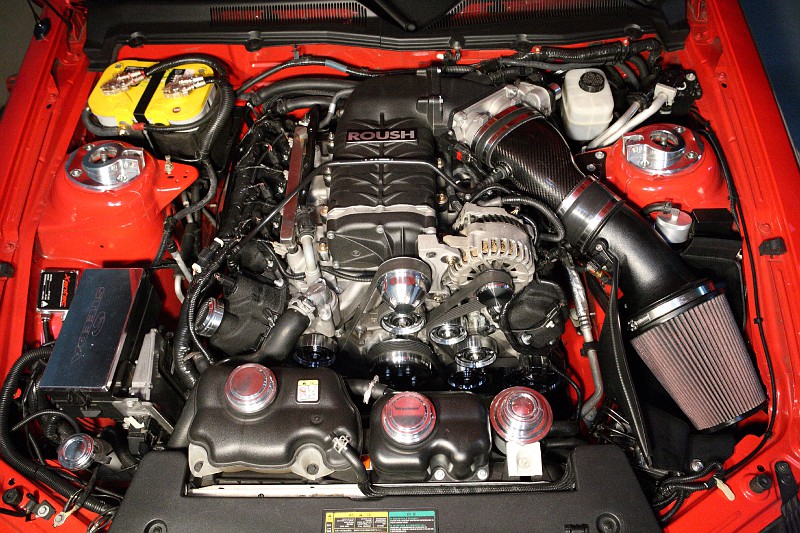
Here is the finished result, ready for show-time!:
Here is how to get in contact with Carmen if you need some pulleys:

This is a show modification. An awesome one:
This is my third experience using pulleys custom-made by Carmen Goudey, AKA Redfire427. My first time was with a billet M90 2.57" supercharger snout pulley and idler, my second was a custom TVS 3.47" snout pulley, and this third experience cleaned up the front of my engine with all-billet pulleys except for A/C (which you can't really see anyway).
He can be contacted via PM on this forum, or directly, if you feel the need to display such awesome "Go mods" on your car. For anyone that does car shows, these are a must-have to separate you from the others.
As with all Carmen's products, he included an excellent set of instructions:
The box they came well-packed in:
Notes:
1) I used a dab of blue Lok-Tite on every bolt I removed and re-installed. It is not required, but I am a big fan of Lok-Tite for both its retention and anti-seize properties for future maintenance.
2) ALL the pulleys (except power steering and snout) have a snap-ring...and the snap-ring ALWAYS faces the rear of the car. You can see the snap ring below:
For starters, I loosened (but did not remove) the water pump pulley bolts. Keeping the FEAD belt tight when doing so is the hot-ticket, as the belt helps keep the H2O pump pulley from spinning. If it still spins a bit, add another wrench and you will get the bolts to break loose:
Once I got them all loose, I temporarily released the FEAD pulley off the supercharger pulley using a 1/2" breaker bar, then I removed the old water pump pulley, installed the new one, and once the bolts were snug, I re-installed the FEAD belt so I could torque the bolts to 18 Lb-ft:
After that, I removed the FEAD belt and tackled the tensioner. My tensioner is the upgraded Roush P-51 tensioner since I run a TVS blower, but it still uses the same diameter pulley as the stocker, so the billet version fit perfect. I gave the pulley center bolt 20 lb-ft of torque (you re-use the OEM bolt on this pulley):
Before:
After:
The order that you accomplish the rest of the pulley installation is not critical, but I wanted to get the power steering pump pulley over-with since it requires a specialty tool, so I tackled it next. I used a puller that I had purchased from Napa, but I do not recommend the NAPA brand because the installation bolt wasn't tapped with the correct threads. I hate to say it, but the Chinese-made "OEM" brand one available for rental from Autozone has a perfect thread-pattern (M8x1.25).
The puller needed looks like this:
...and you attach it to the grooves on the OEM power-steering pulley:
...ending up like this:
Removal is then a piece-of-cake.
Next, you change tools to the pulley installation tool. This tool threads into the end of the power steering pump shaft on the car.
In addition to the tool and a 14MM gear-wrench (I strongly recommend you buy a 14mm (or whatever size your installer kit uses) gear-wrench for this project) and a ratchet with socket, I also took a medium length screwdriver, covered it in blue painters tape so I wouldn't mar the new power-steering pulley, and inserted it in one of the "spoke holes" on the new pulley to keep it from turning. I used my left hand to hold both the end-ratchet and the screwdriver, whose tip was jammed under the driver's side head, and my right hand to work the gear wrench to press on the new pulley.
There are a couple of techniques for installing press-fit pulleys that are helpful...one is to put the item you are press fitting in the oven for a while to heat it up. You don't have to make it ridiculously hot...200 degrees is usually fine, but that will expand it just a bit so it slips on easier. Just wear some work-gloves so you don't get burned (but still have some finger dexterity). While the pulley is heating up, take some isopropyl alcohol and clean up the shaft so it is spotless. I also put a tiny dab of white lithium grease on the shaft to prevent galling as the pulley slides on...I also put a dab on the pulley opening as well. You don't even need to see it...a thin film will suffice.
Using the above techniques, the pulley pressed on with no drama, although it does take some good effort on the wrenches. This is a good thing - you don't want the pulley coming off, and ONLY the press-fit holds it on. Don't fear the lithium either, - it will not cause the pulley to slip off, and it is displaced as the pulley slides on. That sucker is on there TIGHT. You press it on until it is flush:
From there, the rest of the mod is very easy...pick a pulley...any pulley...and swap them out one-at-a-time. I recommend one-at-a-time since there are two different size idlers (and one that has grooves) and you don't want to get mixed up.
Note: Every idler pulley has a retainer and replacement bolt (except for the tensioner) that comes in the kit. On one side of the retainer, there is a raised "boss" that faces the pulley - this is clearly shown in the instructions with a picture.
I used the aforementioned blue Lok-Tite on every bolt on the idlers, and gave each bolt 18 lb-ft of torque because I am "detail oriented".
Here they are in the order I put them in:
I re-installed the tensioner with the three bolts I removed, and gave each of them 20 lb-ft of torque (Spec is 20-30 NM on these, so 20 lb-ft is perfect). I also put a little blue Lok-Tite on them.
For the Pi�ce de r�sistance the kit comes with a billet alternator cap...which has a nifty black O-ring inside of it in a machined groove that keeps it in place. Custom engraving is available on this piece to personalize your car.
I delayed putting these pulleys on because my cam-covers were so ugly in their OEM oxidizing aluminum finish...so I pulled them before I started pulley installation, degreased them, washed them in the dishwasher, used a 3M scrubbie on them with VHT pre-paint brake caliper cleaner, then primered them with Krylon 500 degree primer, then used VHT black wrinkle-plus paint to match the supercharger's black finish. They turned out nice, and make a nice off-set background to the billety-bling of the pulleys:
Here is the finished result, ready for show-time!:
Here is how to get in contact with Carmen if you need some pulleys:
 02-08-2011, 08:34 PM
#4
That looks amazing. Great choice on the pulleys, and redoing the valve covers sets everything off nicely.
I've been having a devil of a time getting a custom billet pulley done for my X-charger. You'd think in this crap economy people would be looking for business, but most places have been too lazy to even return an email. Looks like I'll drop Carmen a note...
I've been having a devil of a time getting a custom billet pulley done for my X-charger. You'd think in this crap economy people would be looking for business, but most places have been too lazy to even return an email. Looks like I'll drop Carmen a note...
 02-09-2011, 08:01 AM
#8
Thread Starter
Join Date: Sep 2009
Location: GA
Posts: 46
Shane

Thread
Thread Starter
Forum
Replies
Last Post