
Steeda Underdrive Pulley install (with pics)

Thread Starter
2nd Gear Member
Joined: Jun 2006
Posts: 415
From:
Steeda Underdrive Pulley installation
I obtained these pulleys from Tillman Speed at a great price.
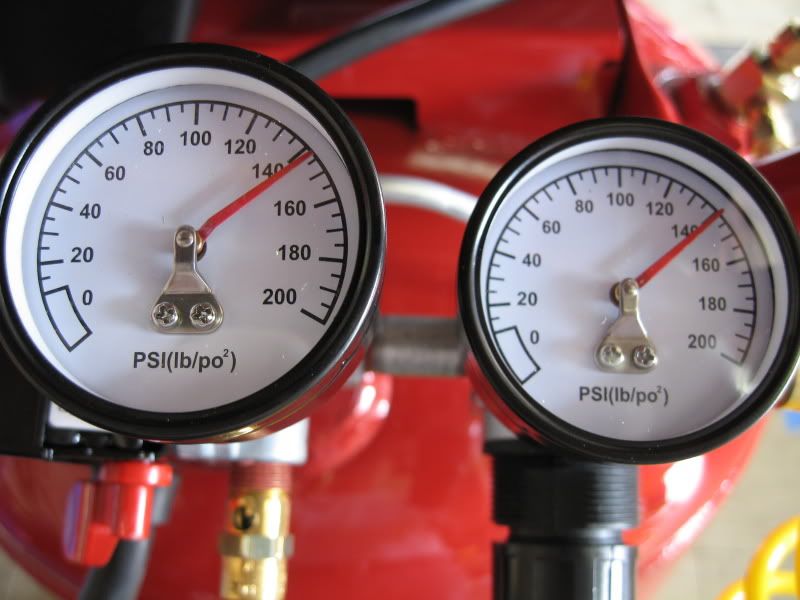
This installation wasn't too bad. The key is to have the right tools and having an air compressor definitely helps, big time.
I have to mention that contrary to several instructions found online, getting the crank pulley off without the aid of an impact wrench was next to impossible. I had the car in gear and e-brake engaged, and the crank would still not lock-up. I had to resort to the impact wrench.
Next up was the water pump pulley bolts. According to the same instructions, they were supposed to crack loose while the pulley was still on the belt. Wrong. There was no way to hold that smooth pulley to loosen those bolts. Again, the impact wrench was utilized.
Steeda U/D Pulleys
Included hardware: Installation Only crank bolt and alternator bracket bolt
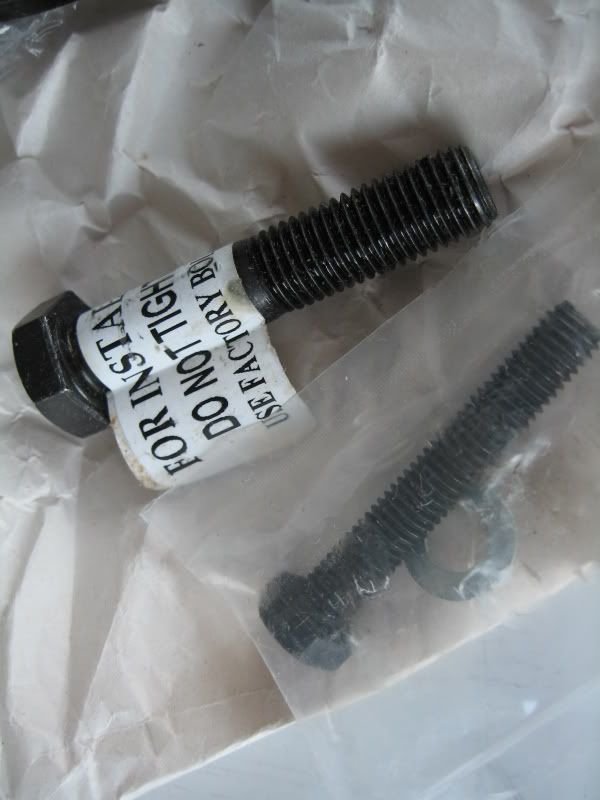
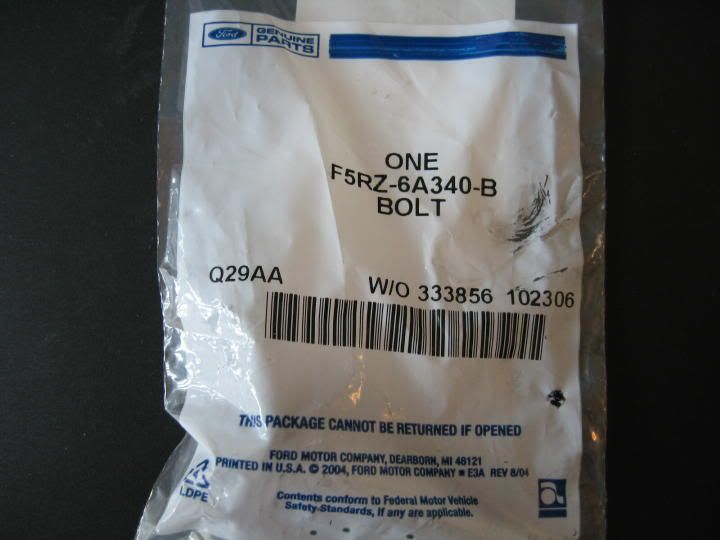
New factory crank bolt purchased through Ford (around $7)
1. Remove factory airbox or CAI.

2. Preparation for electric fan removal. Remove screw holding down the power steering fluid reservoir. Pull straight up and set the reservoir aside toward where the airbox was. Don't worry about tipping it on it's side, nothing will leak out. If so, keep it upright it as much upright if possible.

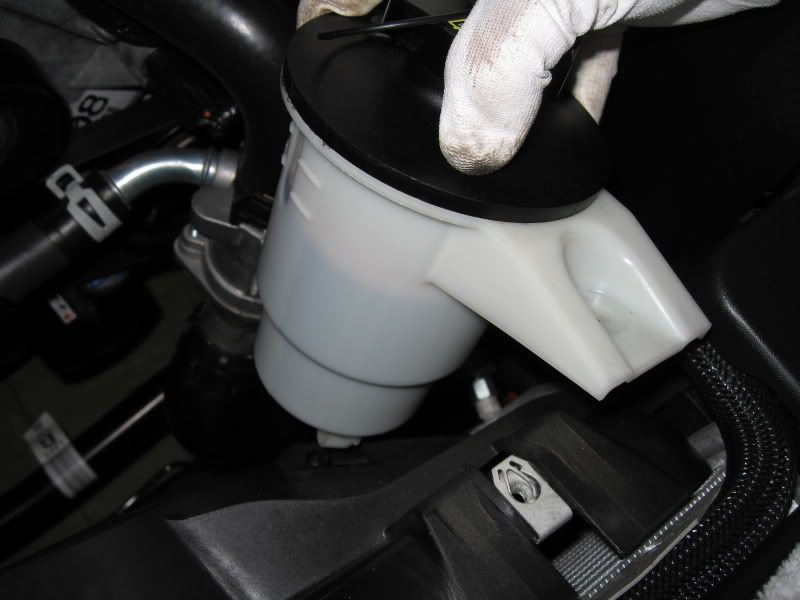
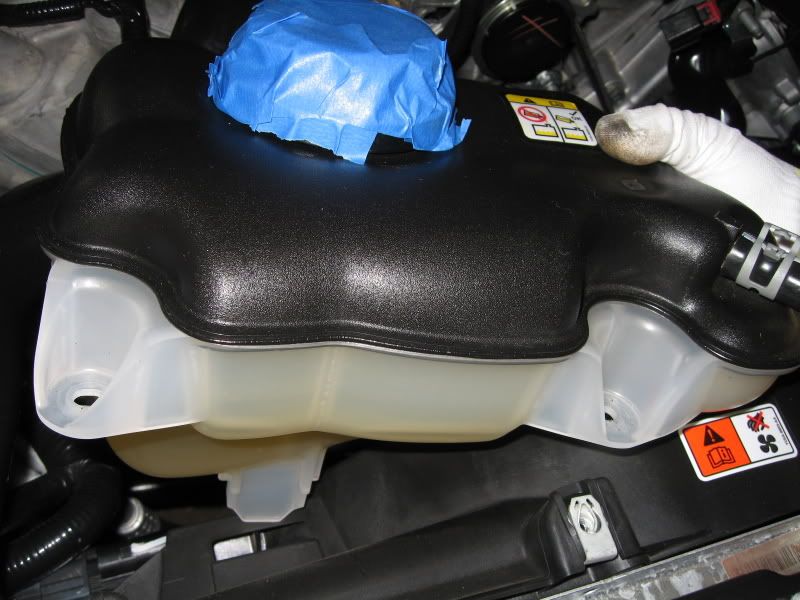
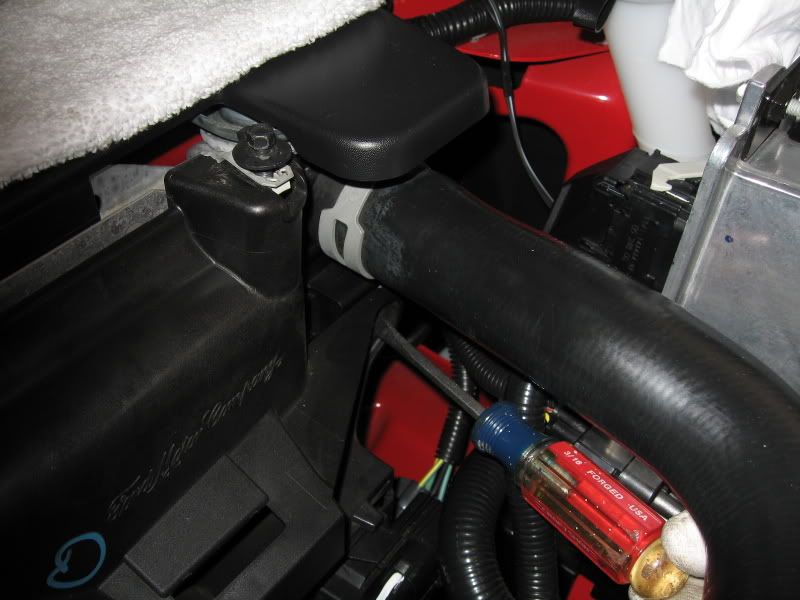
3. Remove the 2 screws attaching the Coolant tank. Pull straight up on the tank and also pull up on the connected black hose from the channel on the radiator. Set the tank aside just like the power steering reservoir.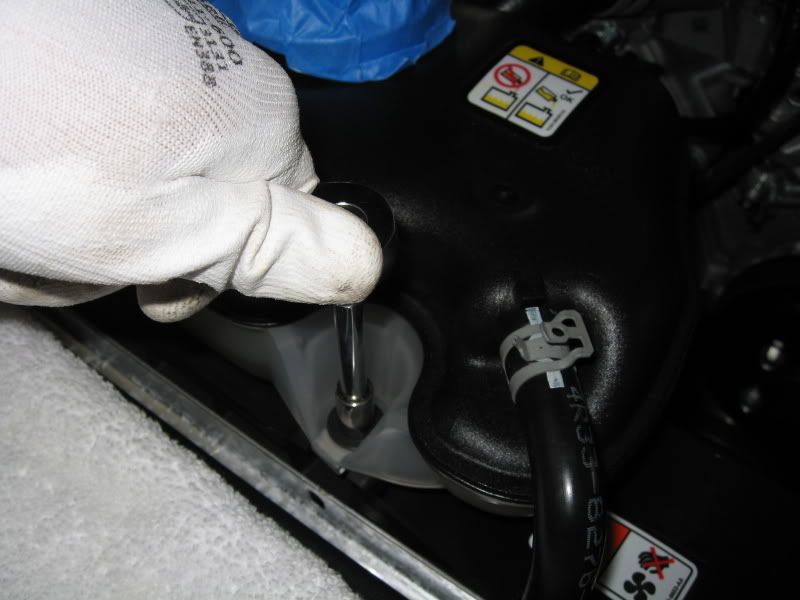
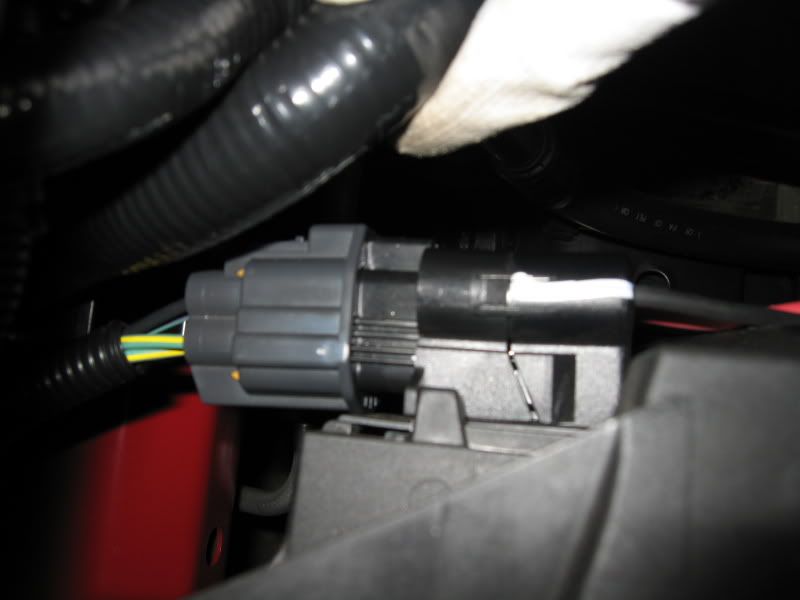
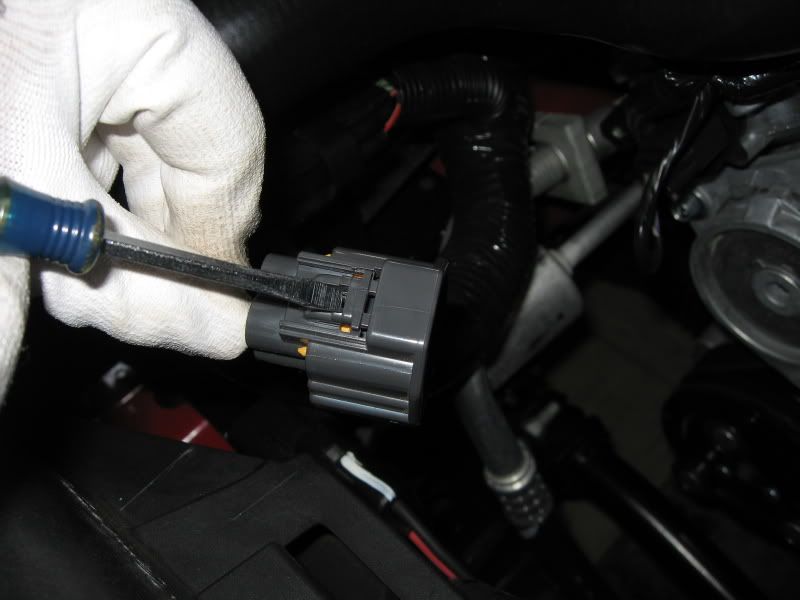
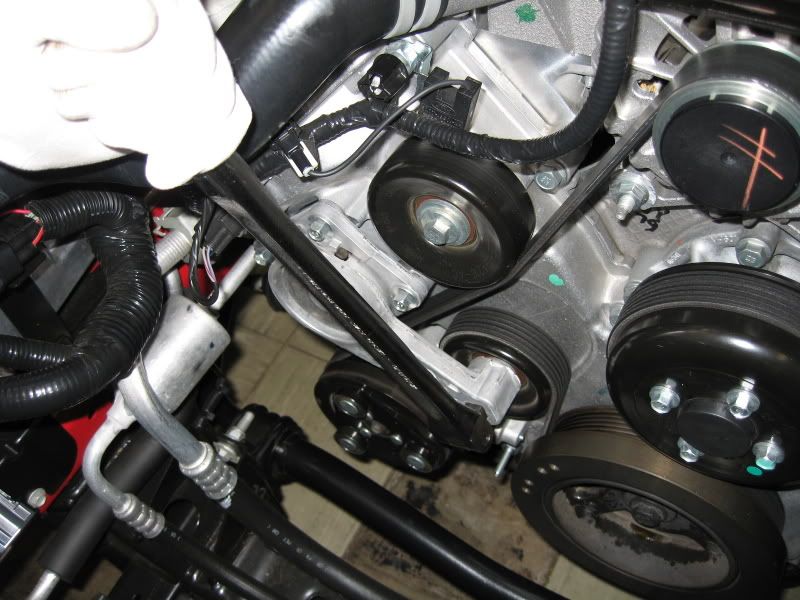
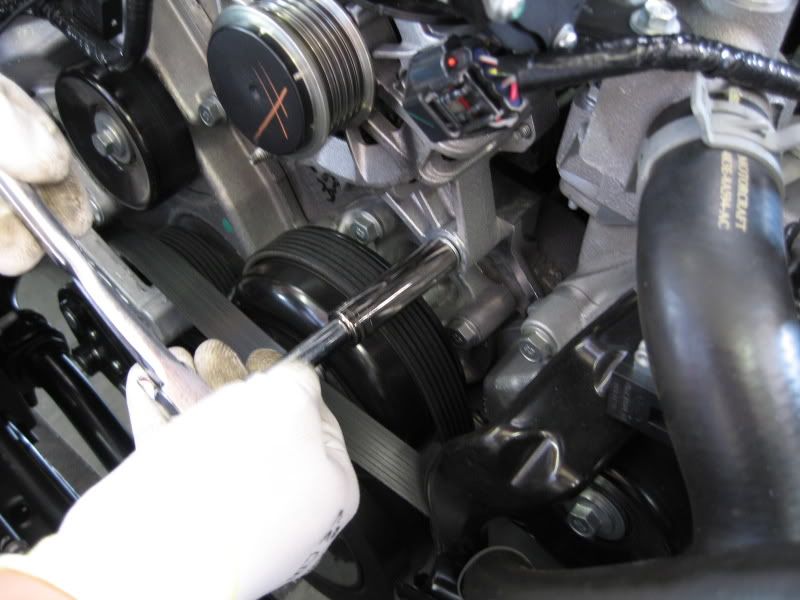
4. Locate the electrical connection plug on the topside of the fan, passenger side. It has a weird disconnect plug that requires you to press down on the area of the 2 tabs shown (screwdriver just used for illustration, do not pry up!), then wiggle it off.
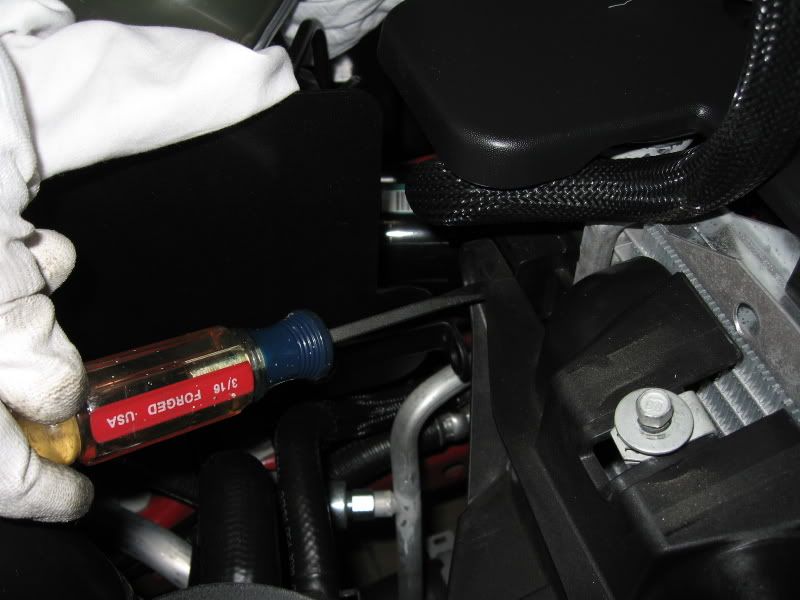
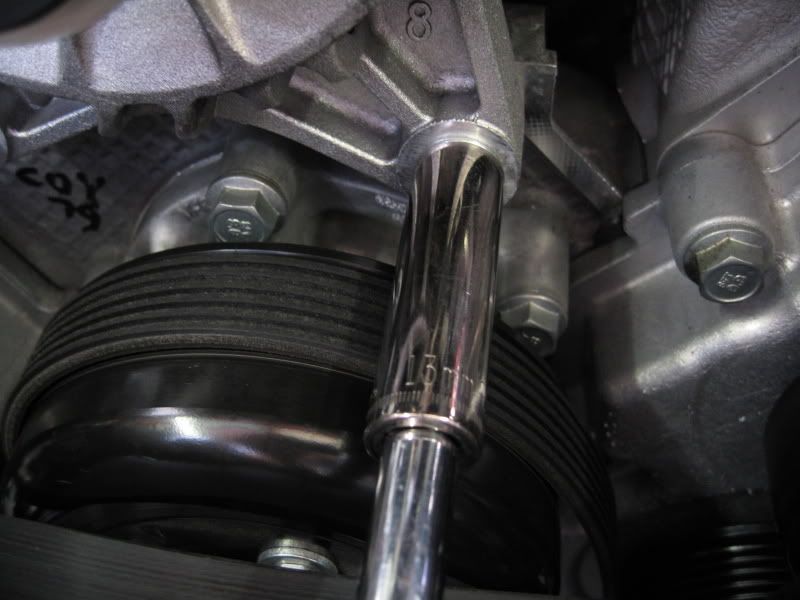
5. Remove the 2 top bolts (1 each side) that hold the fan in place. (Screwdriver used to point out their locations)
6. Carefully remove the fan assembly. Be careful of the upper radiator hose (passenger side), the fan support will ride up into it. You'll need to use your fingers and move the radiator hose the best you can so the fan support will clear. Watch your fingers!
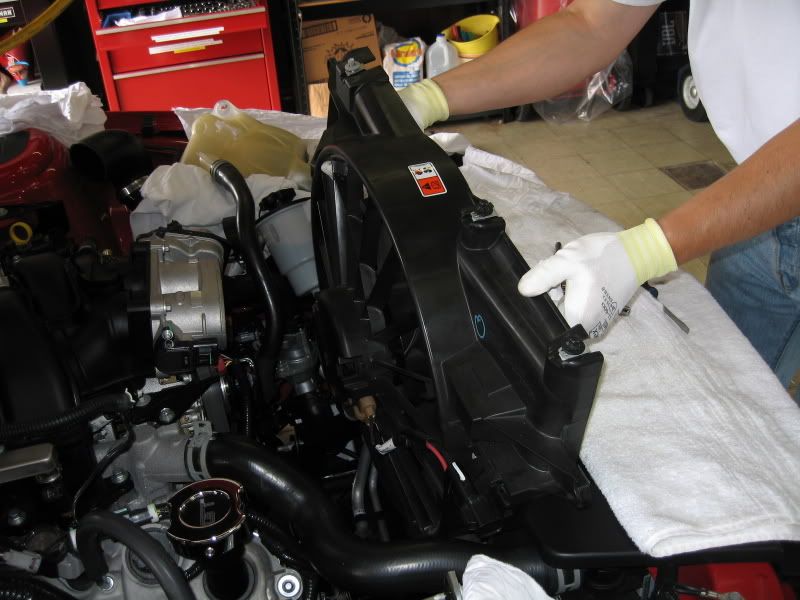
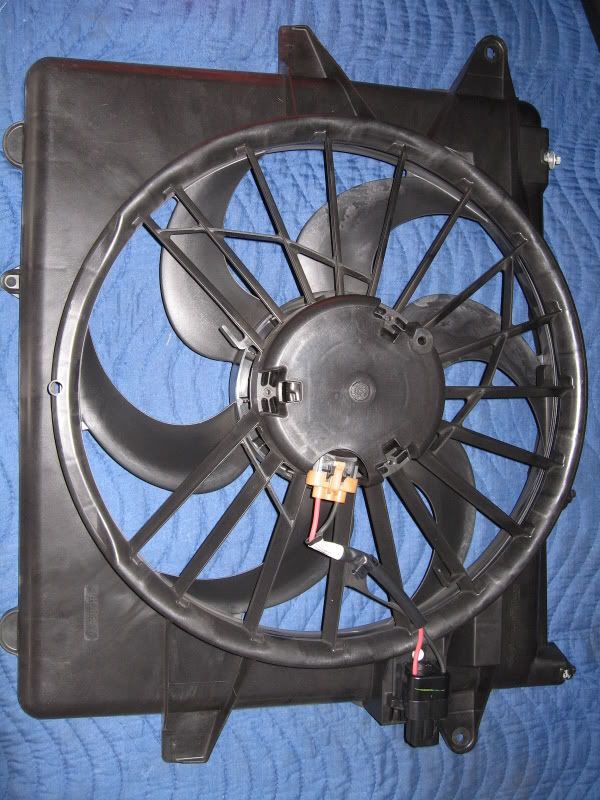
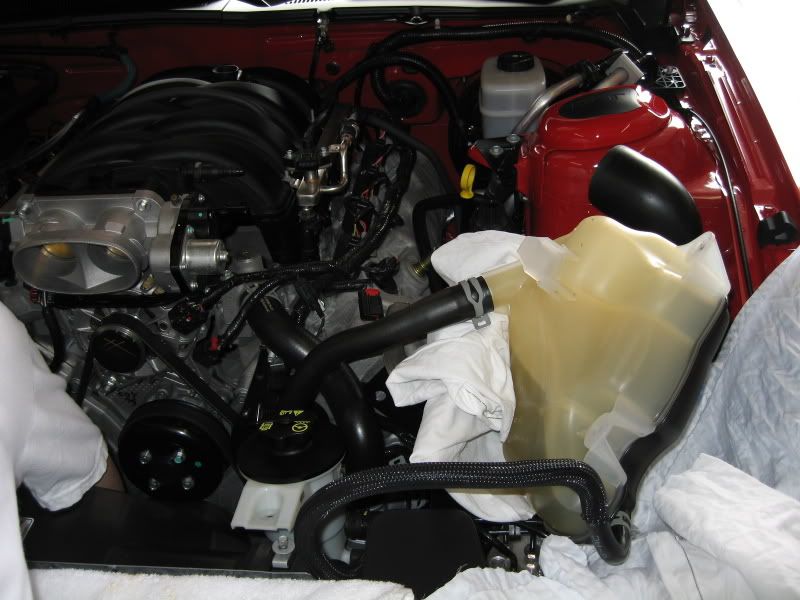
Once the fan is out, there's plenty of room to work.
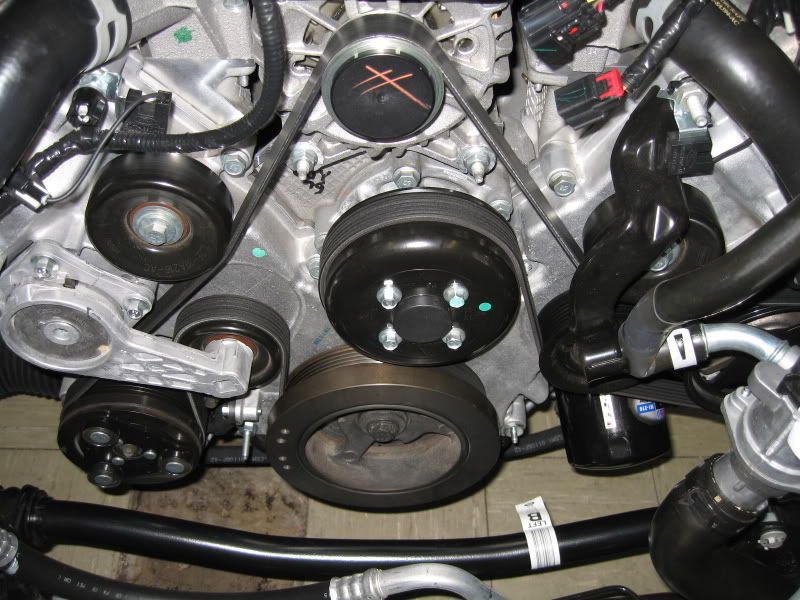
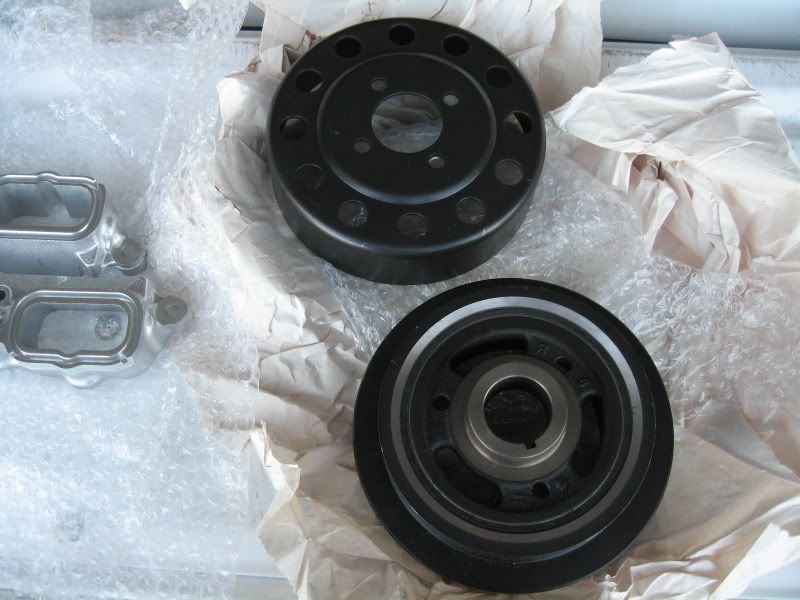
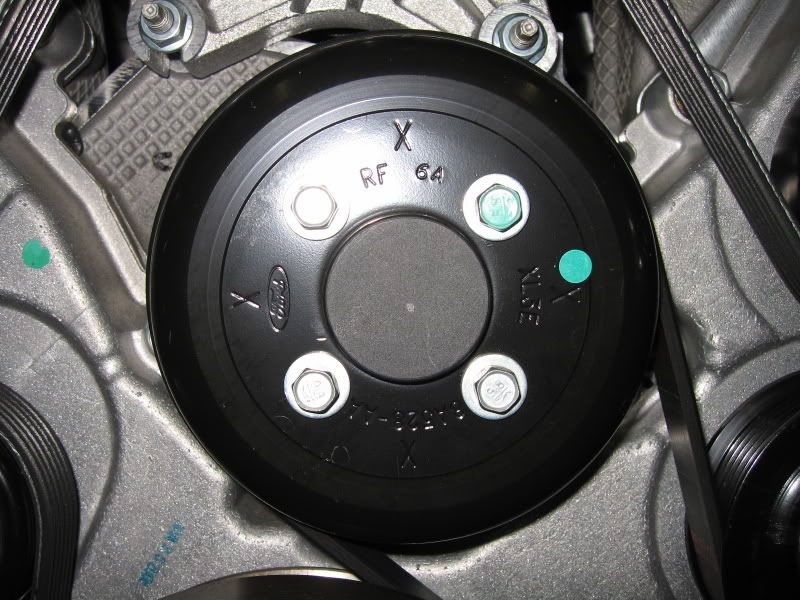
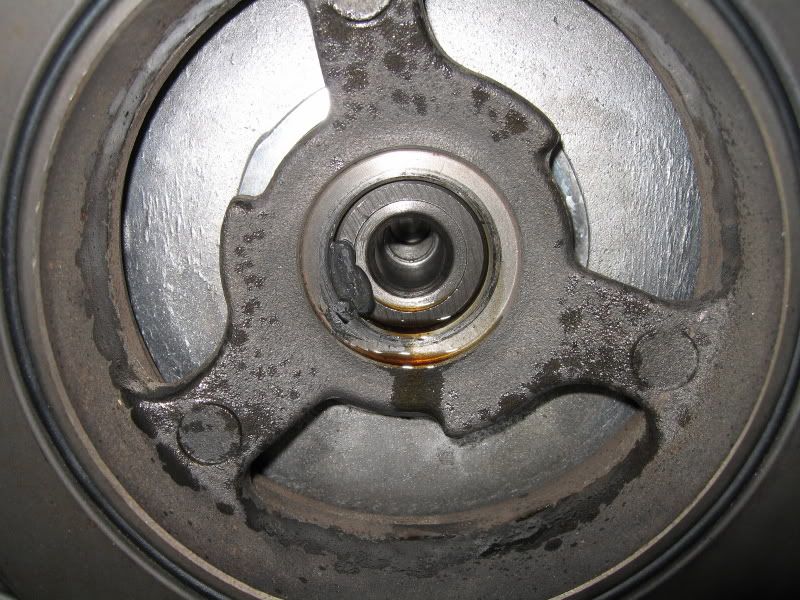
Pictures of the factory crank pulley, water pump pulley, and alternator bracket stud.

7. Loosen the 4 water pump pulley bolts. If you can loosen them using a ratchet and socket, do so. If the pulley turns (like mine did), use an impact wrench, but be careful not to spin the bolts off from the pulley. If they start to thread out, use the ratchet and just snug them back up to keep the pulley on.
Monster break.
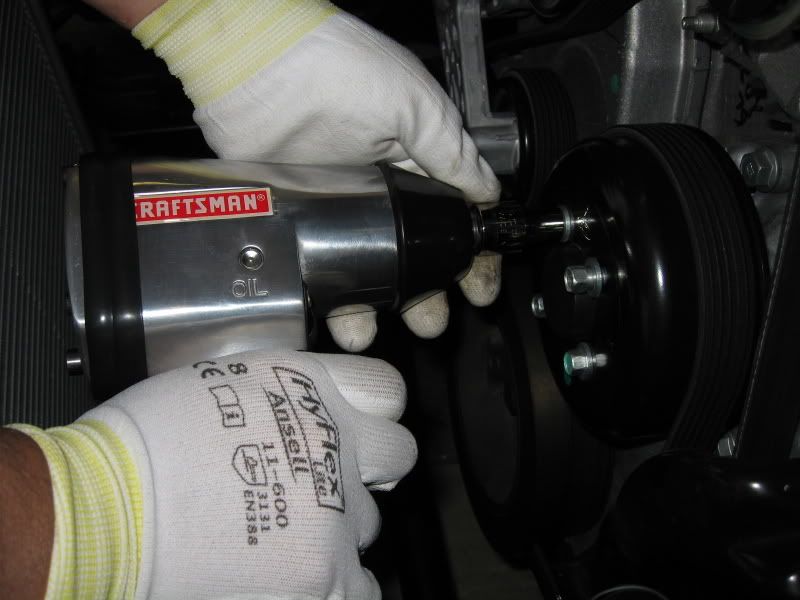
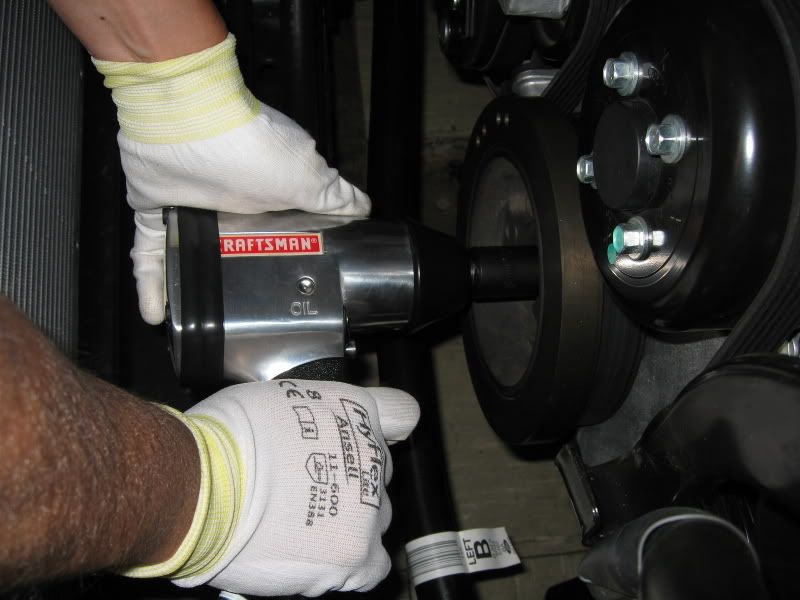
8. Crank pulley bolt removal. If you were successful in removing this bolt using a breaker bar, congratulations. If not so lucky (like me), get your air compressor and crank the output pressure to maximum. Position the impact wrench (with 18mm impact socket) and firmly grip it in place and hit the trigger (make sure it's in reverse). The crank bolt will spin right off.
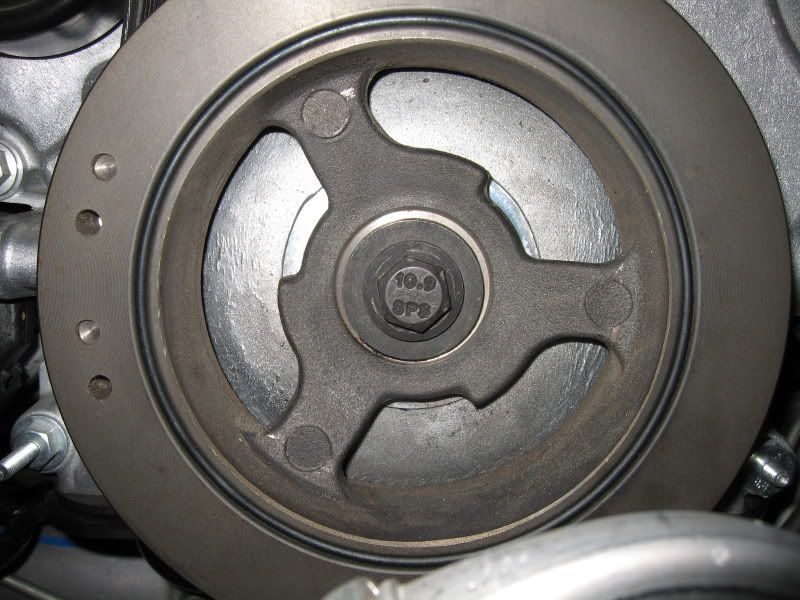
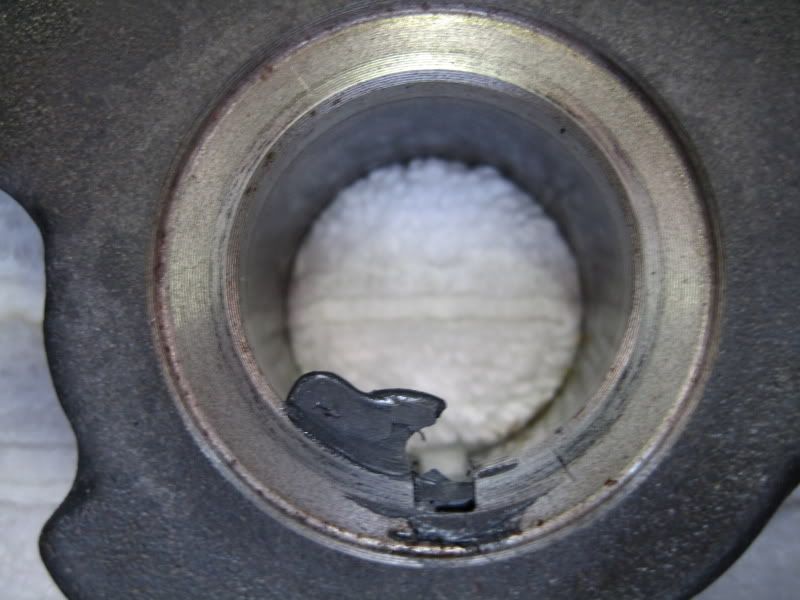
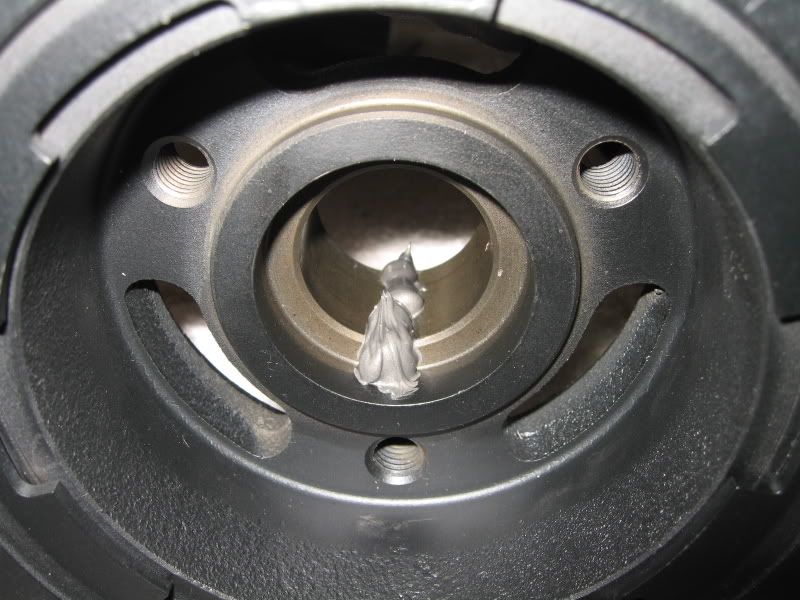
Yes, this is how an oil leak coming through the key way looks like. I'll explain how this happened from the factory later on.
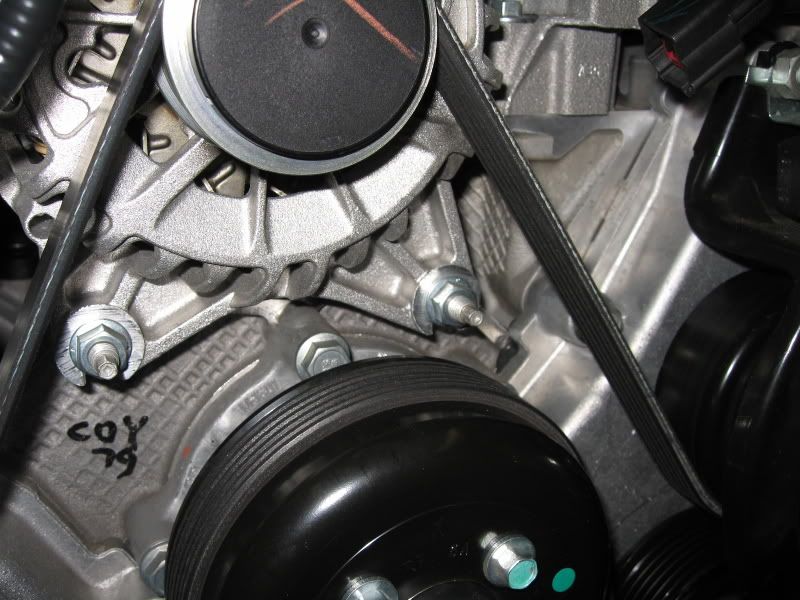
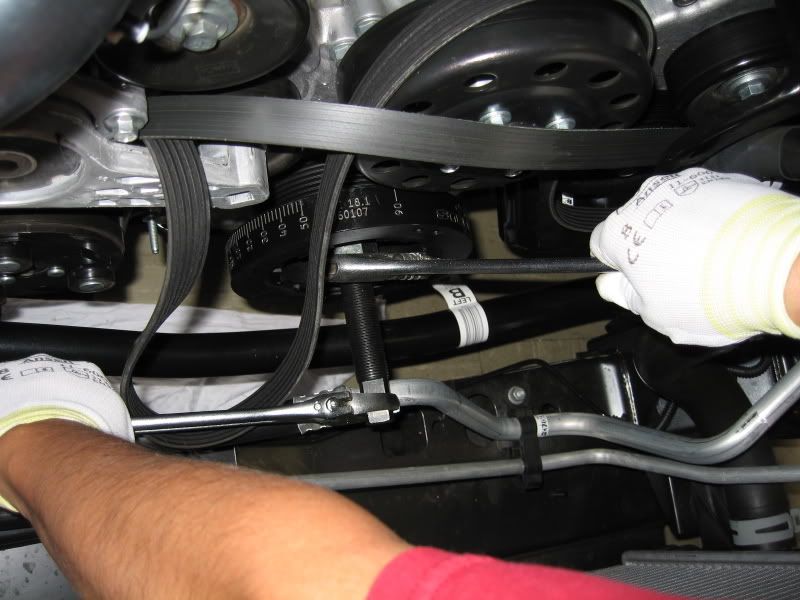
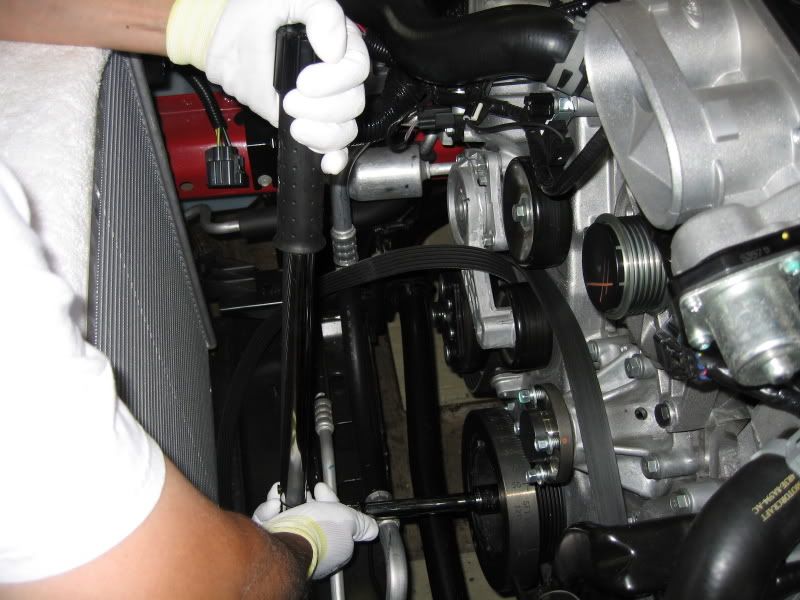
9. Remove the serpentine belt. Using a breaker bar or ratchet, insert it into the square opening in the tensioner arm and rotate it downward. Slip the belt off the alternator pulley (pictured with the orange crayon mark), then slowly let the tensioner arm back up.
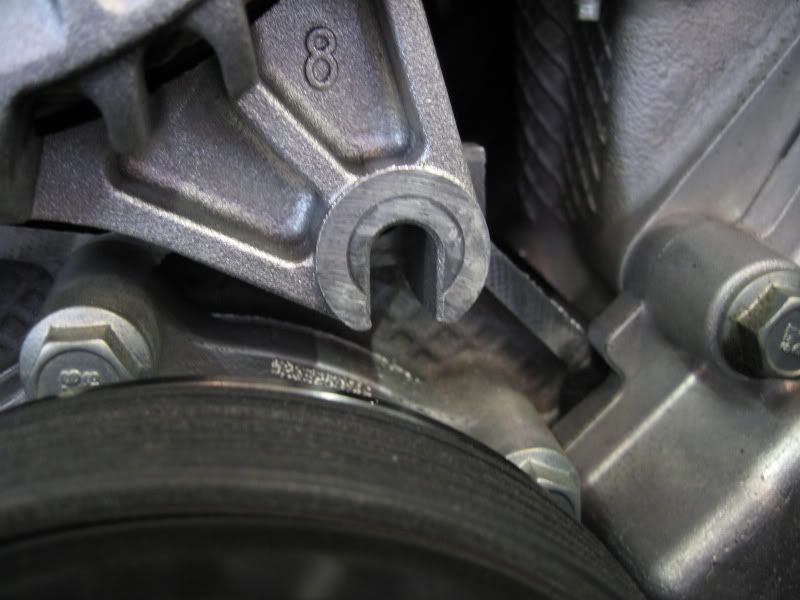
10. Remove the nut off the alternator bracket support stud, then remove the stud.
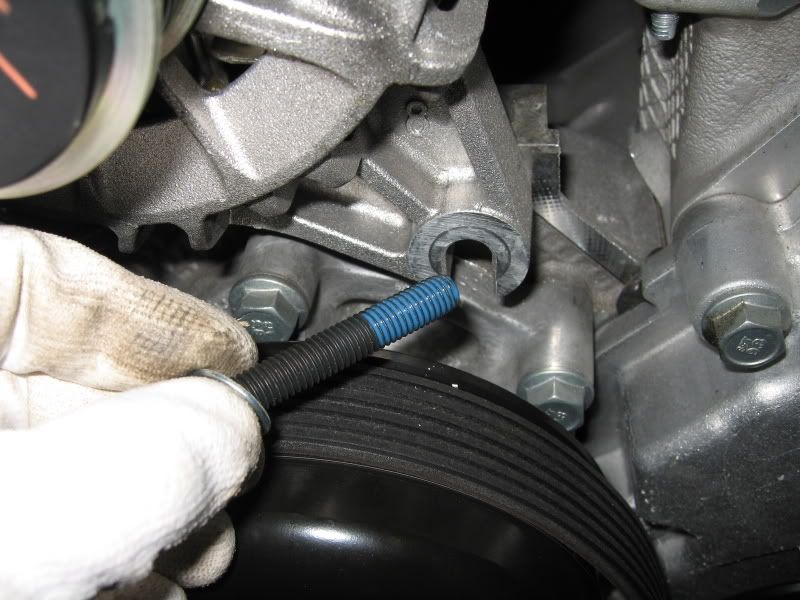
11. Get the Steeda provided alternator bracket bolt and install it where you just removed the stud. I used blue Loctite.
Side-by-side comparison

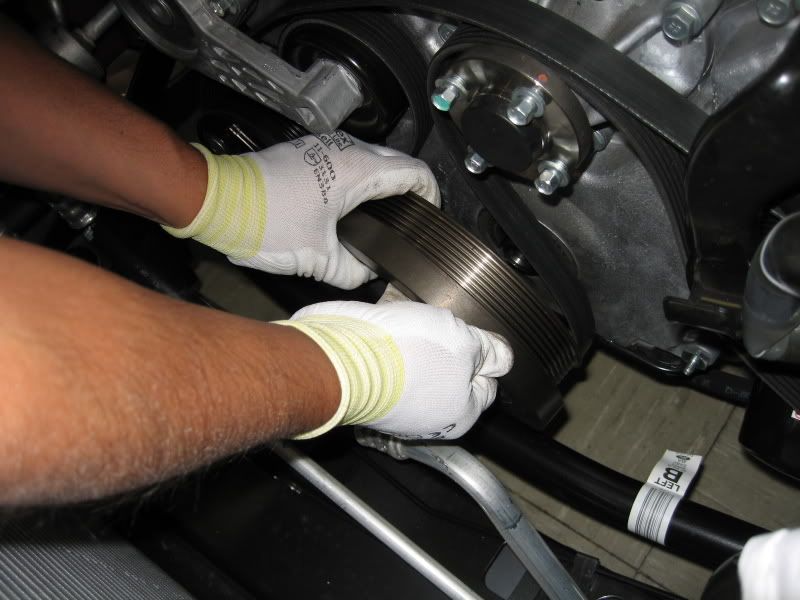
12. Remove water pump pulley. Remove the 4 bolts that you previously loosened. Pulley just slips off.
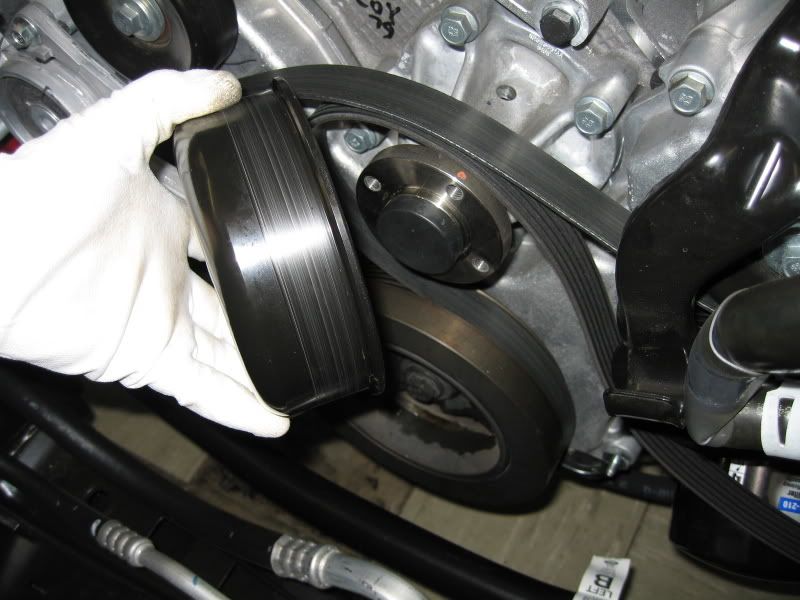
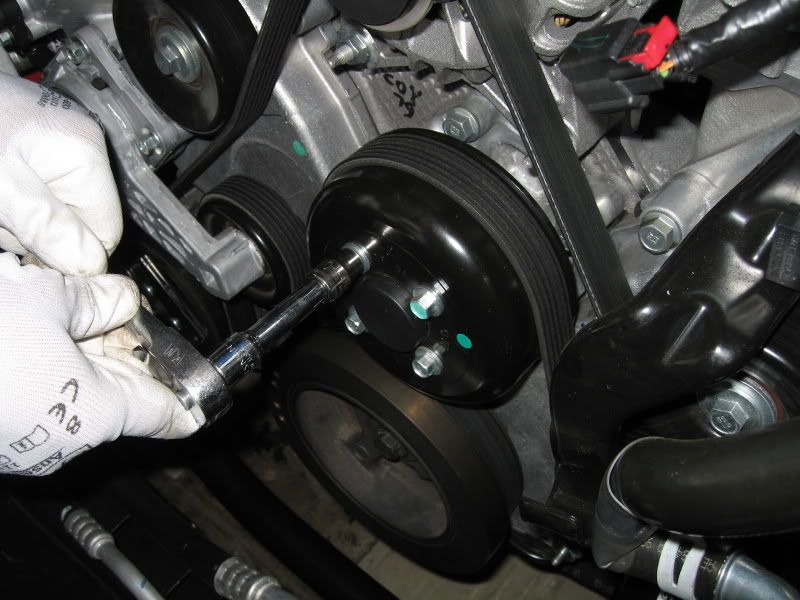
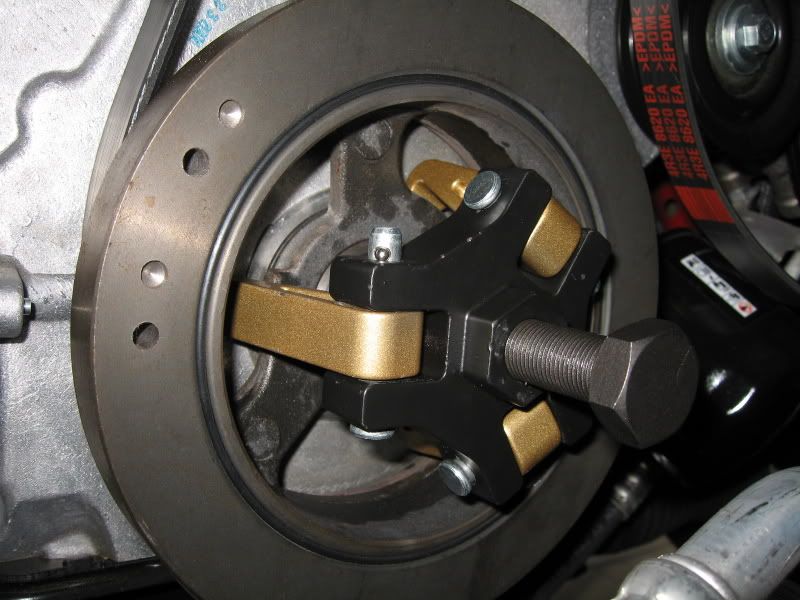
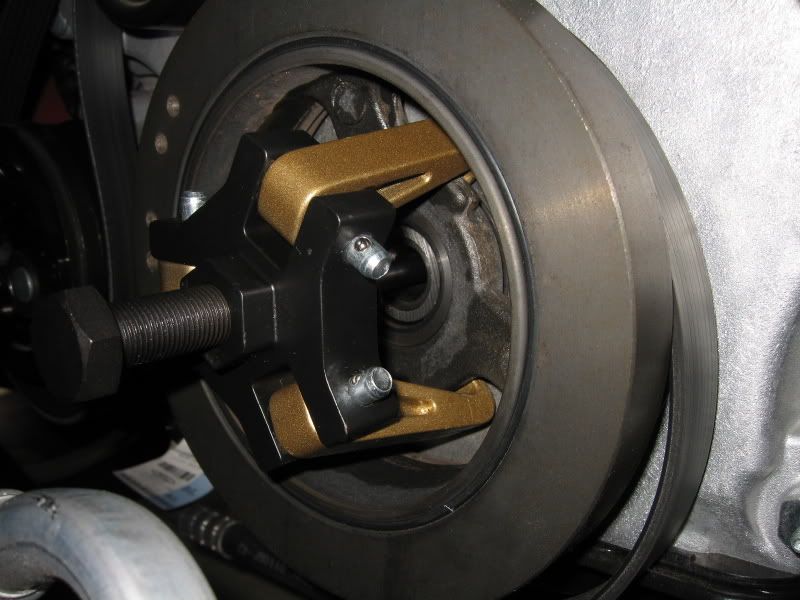
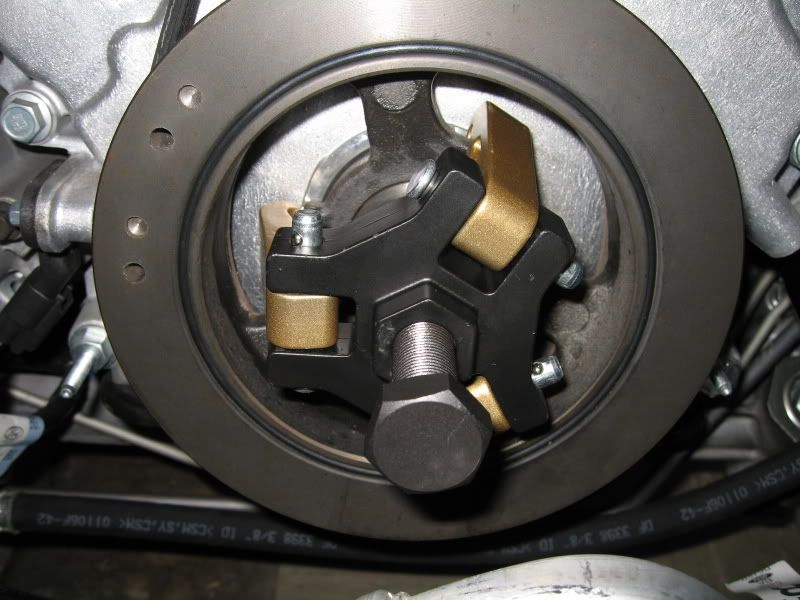
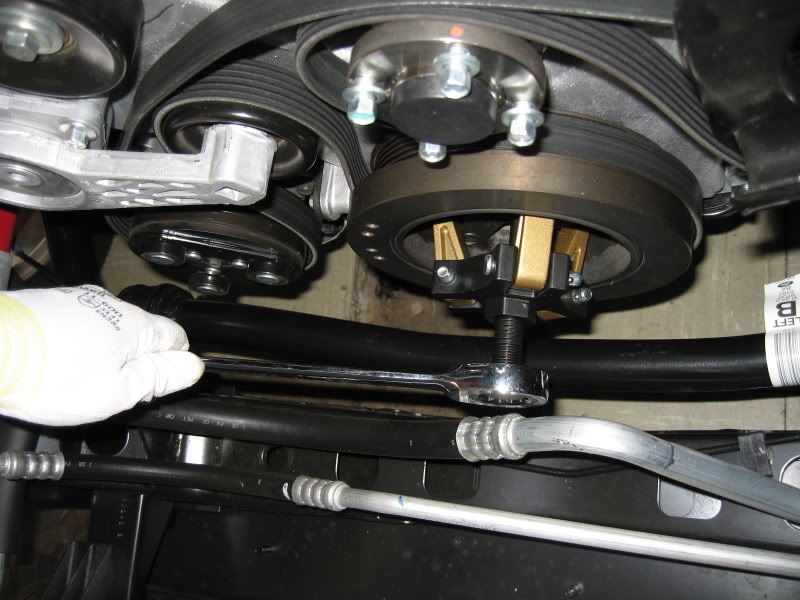
13. Remove the crank pulley. Using a gear puller (I used a 3 jaw type), make sure all jaws have a good bite behind the pulley (has 3 flat surfaces for the jaws to grab onto) and turn the center removal bolt in to pull the pulley off the crank snout.
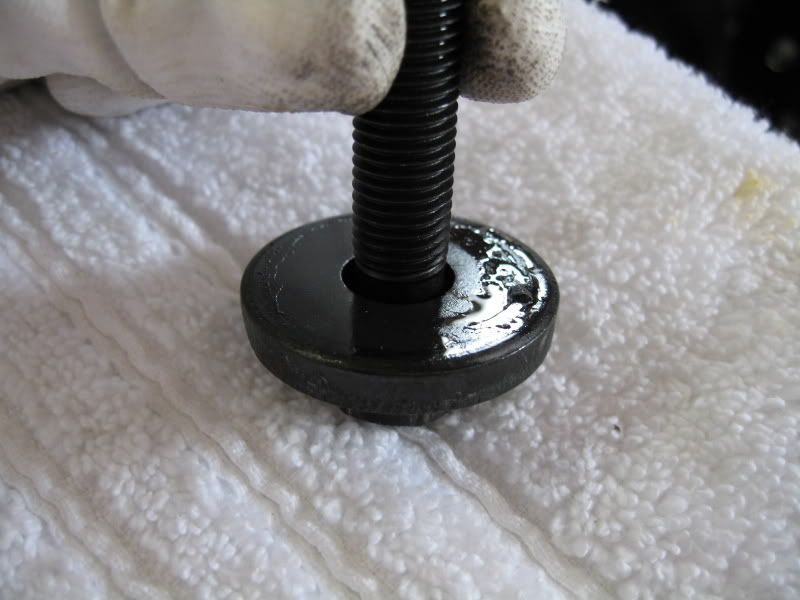
On this particular type of gear puller, there's a rounded steel pin that's inserted into the crank until it bottoms out, and the other end goes into the hollowed out section of the center removal bolt.
Note: If you have to go and rent a puller, get one for a Chrysler pulley.
Upon close examination of the factory crank pulley, I saw that it was slightly leaking oil through the key way and onto the large center washer. Looks like the factory didn't put the end bead of the RTV seal inline with the key way!
14. Clean off the old gasket sealant from the crank snout key. Be careful not to use any sharp objects or risk tearing into the oil seal (this will be a bad thing). I laid down a thin layer of Mobil 1 grease on the face of the oil seal as well as the crank snout (but not in the area of the key way).

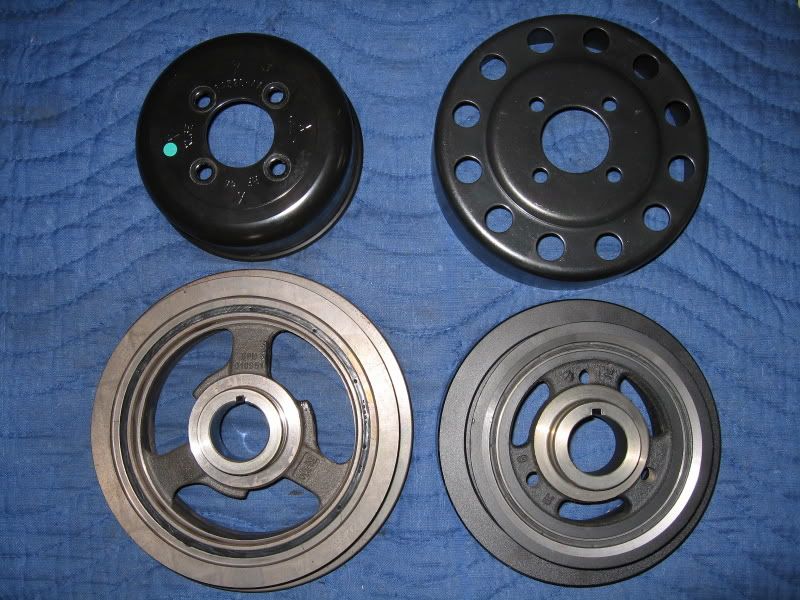
Comparison picture between the OEM pulleys (on left) and Steeda ones (on right).
15. I installed the Steeda crank pulley using a harmonic balancer install tool.
16. If you already haven't done so, put the transmission in 4th gear to lock the crank from turning.
17. I laid down a good bead of RTV into the key way of the pulley. You only have a few minutes before the RTV starts to harden up, so be prepared to install it right away.
18. Here's where I seated the pulley using the harmonic balancer install tool.
Note: I chose this method of installation because it creates the least amount of stress on the crankshaft threads. If you don't have access to this install tool, you can use the alternate method outlined below.
Note: Steeda includes an installation bolt (19mm head) as an alternate method to seat the pulley. If you use this method, place the large area washer under the head of this installation bolt and wrench the pulley on until it's fully seated.
19. After the pulley seats up against the crank snout (tool will bottom out), unscrew the tool and replace with the new Ford crank bolt. Re-using your original bolt is not recommended, but that's your call.
Follow Ford's recommended torque sequence:
Step 1) torque to 66 lb-ft
Step 2) loosen bolt 1 full turn
Step 3) torque to 37 lb-ft
Step 4) tighten bolt an additional 90 degrees
Note: Step 4 can be difficult (even with a breaker bar!). If you have to resort to the impact wrench, it's very important to take note of the socket location before impacting it. Stop when the bolt had rotated 90 degrees.
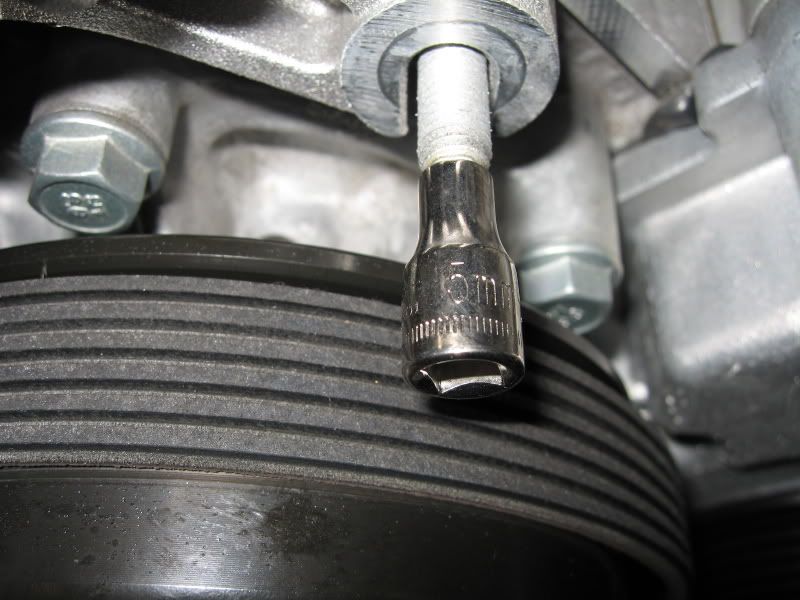
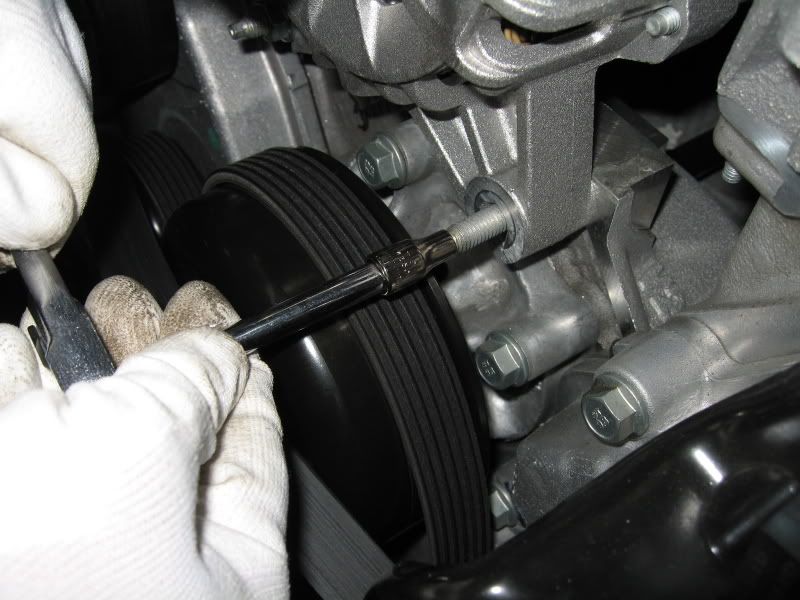
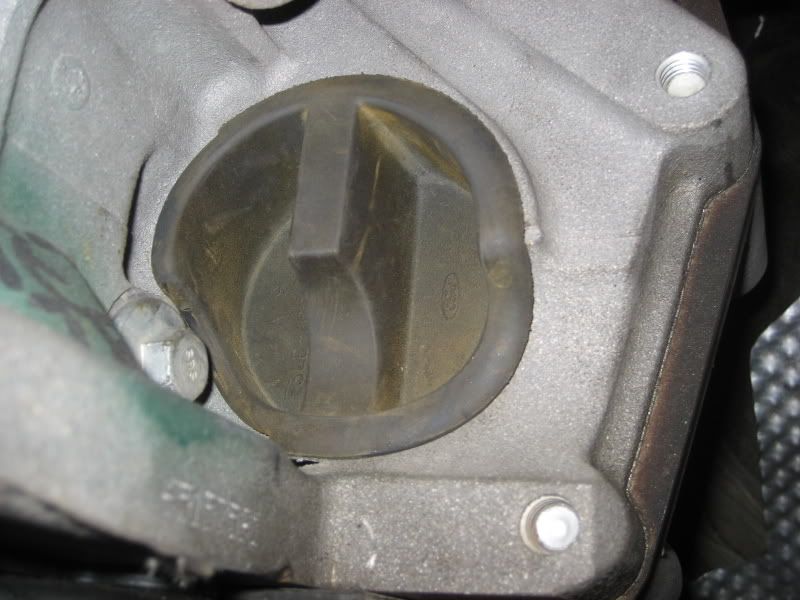
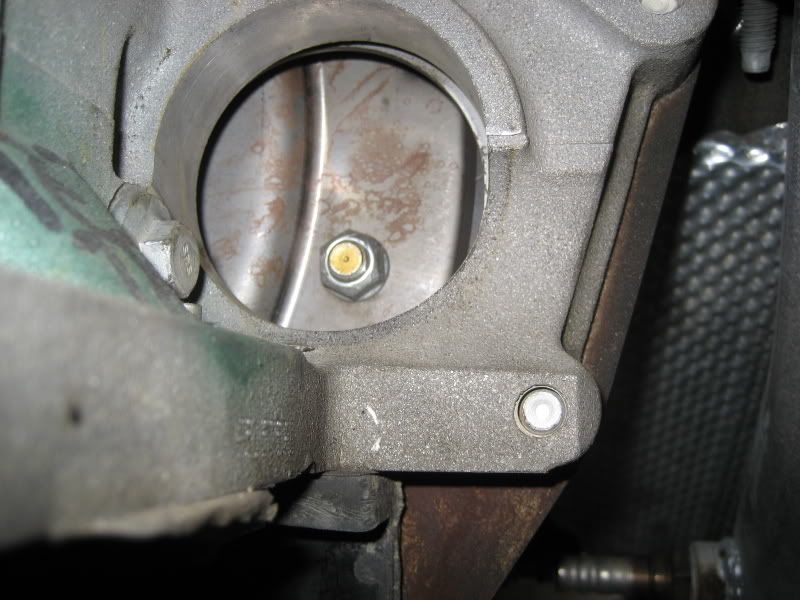
Note: (per Steeda) On Automatic transmission cars, prevent the engine from turning by holding the torque converter. Access the torque converter by removing a plug towards the front Drivers side of the transmission. Hold the torque converter from turning with a 14mm wrench.
NEW!
For Automatic trans folks.. location of torque converter access hole on Drivers side.

Note: It's pretty hard holding a wrench on the bolt while the crank is being torqued. It's possible, just takes patience. If the wrench slips off, rotate the crank bolt until you can get a wrench of the bolt again. This is a 2-man operation!
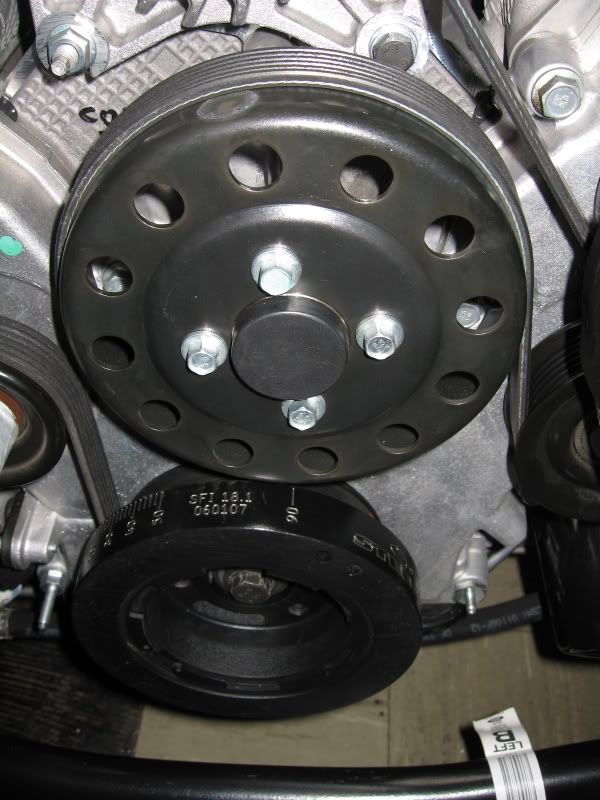
20. Install the water pump pulley. Just snug up the bolts, you'll torque them after the serpentine belt is on.
Re-install the belt making sure the routing is correct. Take note that the new water pump pulley doesn't have an edge lip, so don't position the belt over the edge; just try and keep it inline with the rest of the pulleys.
Torque the water pump bolts to 18 lb-ft.

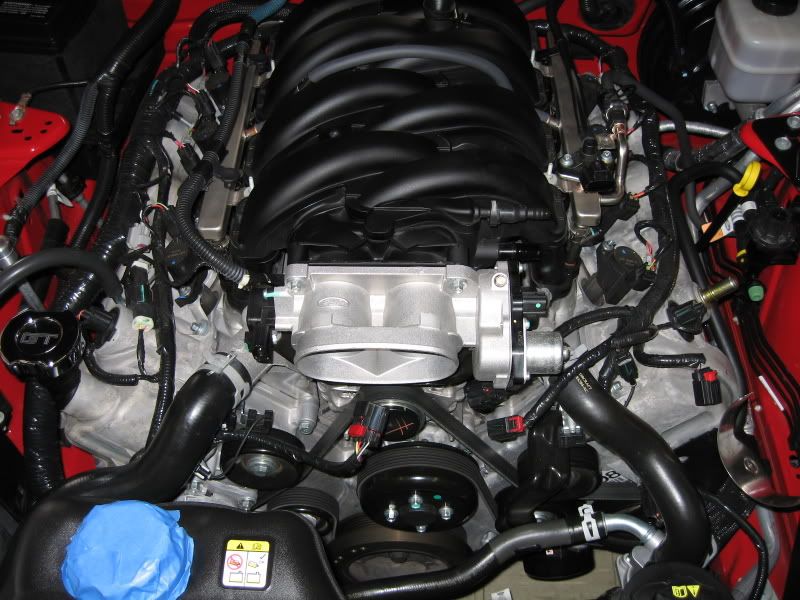
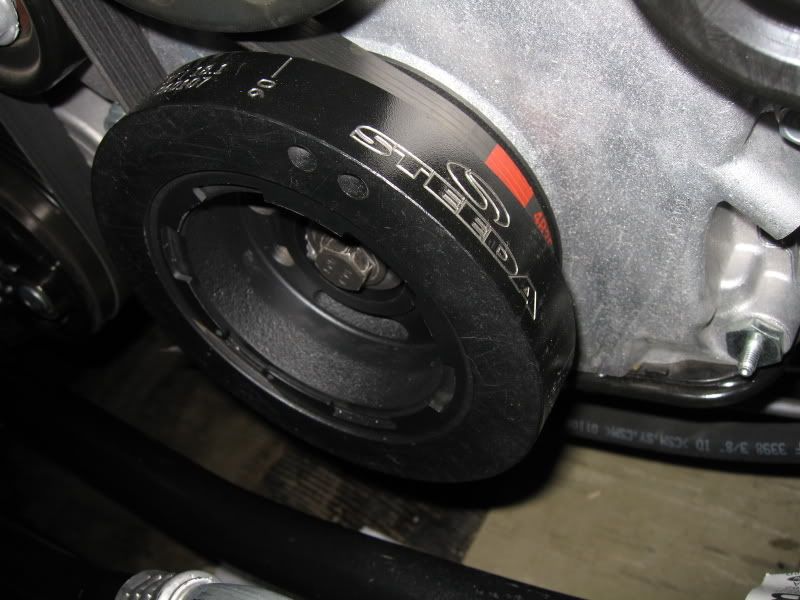
Pulley installation complete!
21. Re-install in reverse order, the fan (remember to re-connect the electrical plug), coolant tank, power steering reservoir, and airbox (or CAI).
22. Clear the engine bay of any tools and rags. Start the engine and check to see that the belt is running and tracking on all pulleys properly. Turn off engine and visually inspect that the belt is aligned.
Job complete.
I obtained these pulleys from Tillman Speed at a great price.
This installation wasn't too bad. The key is to have the right tools and having an air compressor definitely helps, big time.
I have to mention that contrary to several instructions found online, getting the crank pulley off without the aid of an impact wrench was next to impossible. I had the car in gear and e-brake engaged, and the crank would still not lock-up. I had to resort to the impact wrench.
Next up was the water pump pulley bolts. According to the same instructions, they were supposed to crack loose while the pulley was still on the belt. Wrong. There was no way to hold that smooth pulley to loosen those bolts. Again, the impact wrench was utilized.
Steeda U/D Pulleys
Included hardware: Installation Only crank bolt and alternator bracket bolt
New factory crank bolt purchased through Ford (around $7)
1. Remove factory airbox or CAI.
2. Preparation for electric fan removal. Remove screw holding down the power steering fluid reservoir. Pull straight up and set the reservoir aside toward where the airbox was. Don't worry about tipping it on it's side, nothing will leak out. If so, keep it upright it as much upright if possible.
3. Remove the 2 screws attaching the Coolant tank. Pull straight up on the tank and also pull up on the connected black hose from the channel on the radiator. Set the tank aside just like the power steering reservoir.
4. Locate the electrical connection plug on the topside of the fan, passenger side. It has a weird disconnect plug that requires you to press down on the area of the 2 tabs shown (screwdriver just used for illustration, do not pry up!), then wiggle it off.
5. Remove the 2 top bolts (1 each side) that hold the fan in place. (Screwdriver used to point out their locations)
6. Carefully remove the fan assembly. Be careful of the upper radiator hose (passenger side), the fan support will ride up into it. You'll need to use your fingers and move the radiator hose the best you can so the fan support will clear. Watch your fingers!
Once the fan is out, there's plenty of room to work.
Pictures of the factory crank pulley, water pump pulley, and alternator bracket stud.
7. Loosen the 4 water pump pulley bolts. If you can loosen them using a ratchet and socket, do so. If the pulley turns (like mine did), use an impact wrench, but be careful not to spin the bolts off from the pulley. If they start to thread out, use the ratchet and just snug them back up to keep the pulley on.
Monster break.
8. Crank pulley bolt removal. If you were successful in removing this bolt using a breaker bar, congratulations. If not so lucky (like me), get your air compressor and crank the output pressure to maximum. Position the impact wrench (with 18mm impact socket) and firmly grip it in place and hit the trigger (make sure it's in reverse). The crank bolt will spin right off.
Yes, this is how an oil leak coming through the key way looks like. I'll explain how this happened from the factory later on.
9. Remove the serpentine belt. Using a breaker bar or ratchet, insert it into the square opening in the tensioner arm and rotate it downward. Slip the belt off the alternator pulley (pictured with the orange crayon mark), then slowly let the tensioner arm back up.
10. Remove the nut off the alternator bracket support stud, then remove the stud.
11. Get the Steeda provided alternator bracket bolt and install it where you just removed the stud. I used blue Loctite.
Side-by-side comparison
12. Remove water pump pulley. Remove the 4 bolts that you previously loosened. Pulley just slips off.
13. Remove the crank pulley. Using a gear puller (I used a 3 jaw type), make sure all jaws have a good bite behind the pulley (has 3 flat surfaces for the jaws to grab onto) and turn the center removal bolt in to pull the pulley off the crank snout.
On this particular type of gear puller, there's a rounded steel pin that's inserted into the crank until it bottoms out, and the other end goes into the hollowed out section of the center removal bolt.
Note: If you have to go and rent a puller, get one for a Chrysler pulley.
Upon close examination of the factory crank pulley, I saw that it was slightly leaking oil through the key way and onto the large center washer. Looks like the factory didn't put the end bead of the RTV seal inline with the key way!
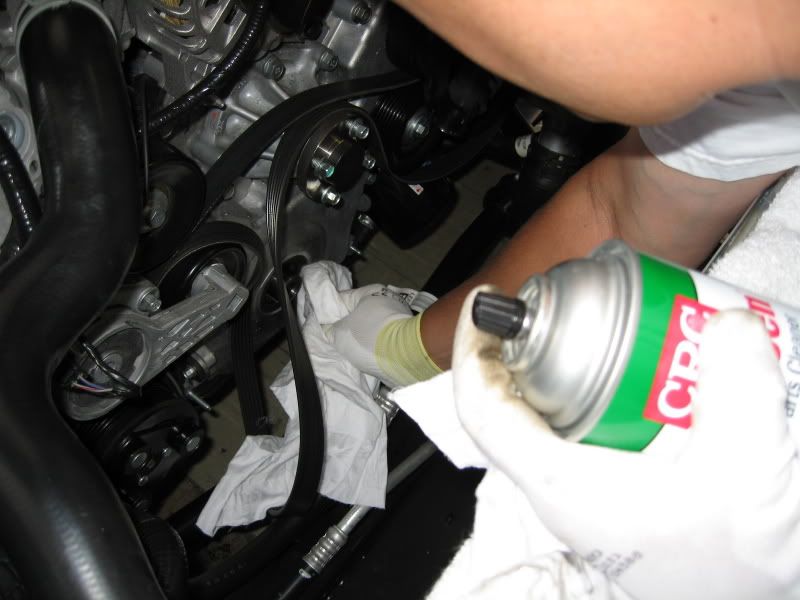
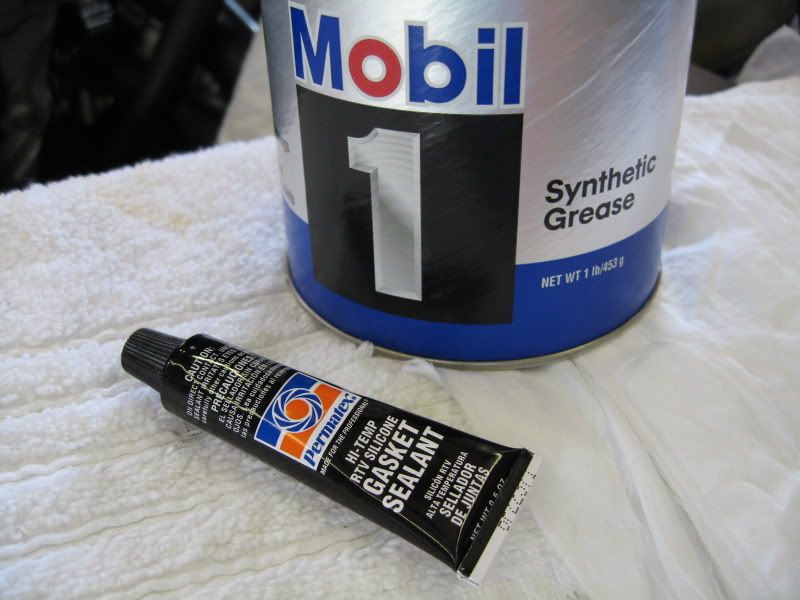
14. Clean off the old gasket sealant from the crank snout key. Be careful not to use any sharp objects or risk tearing into the oil seal (this will be a bad thing). I laid down a thin layer of Mobil 1 grease on the face of the oil seal as well as the crank snout (but not in the area of the key way).
Comparison picture between the OEM pulleys (on left) and Steeda ones (on right).
15. I installed the Steeda crank pulley using a harmonic balancer install tool.
16. If you already haven't done so, put the transmission in 4th gear to lock the crank from turning.
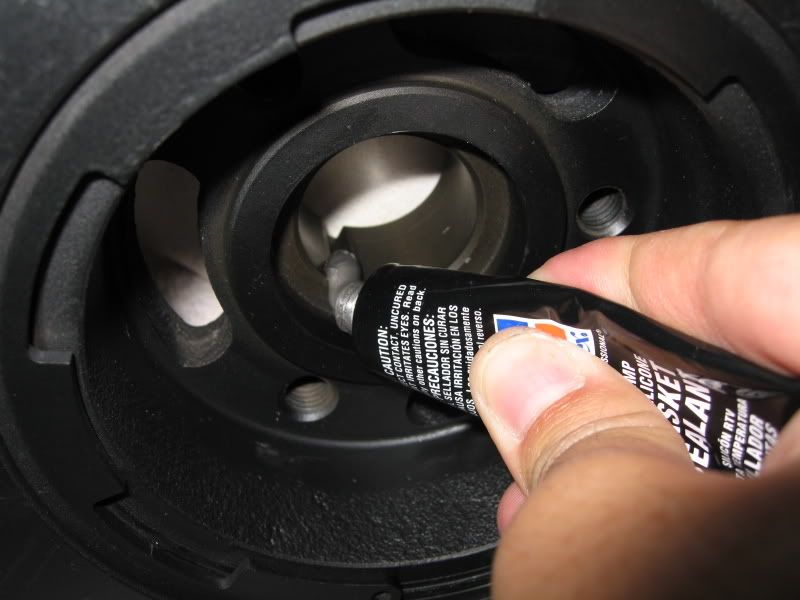
17. I laid down a good bead of RTV into the key way of the pulley. You only have a few minutes before the RTV starts to harden up, so be prepared to install it right away.
18. Here's where I seated the pulley using the harmonic balancer install tool.
Note: I chose this method of installation because it creates the least amount of stress on the crankshaft threads. If you don't have access to this install tool, you can use the alternate method outlined below.
Note: Steeda includes an installation bolt (19mm head) as an alternate method to seat the pulley. If you use this method, place the large area washer under the head of this installation bolt and wrench the pulley on until it's fully seated.
19. After the pulley seats up against the crank snout (tool will bottom out), unscrew the tool and replace with the new Ford crank bolt. Re-using your original bolt is not recommended, but that's your call.
Follow Ford's recommended torque sequence:
Step 1) torque to 66 lb-ft
Step 2) loosen bolt 1 full turn
Step 3) torque to 37 lb-ft
Step 4) tighten bolt an additional 90 degrees
Note: Step 4 can be difficult (even with a breaker bar!). If you have to resort to the impact wrench, it's very important to take note of the socket location before impacting it. Stop when the bolt had rotated 90 degrees.
Note: (per Steeda) On Automatic transmission cars, prevent the engine from turning by holding the torque converter. Access the torque converter by removing a plug towards the front Drivers side of the transmission. Hold the torque converter from turning with a 14mm wrench.
NEW!
For Automatic trans folks.. location of torque converter access hole on Drivers side.
Note: It's pretty hard holding a wrench on the bolt while the crank is being torqued. It's possible, just takes patience. If the wrench slips off, rotate the crank bolt until you can get a wrench of the bolt again. This is a 2-man operation!
20. Install the water pump pulley. Just snug up the bolts, you'll torque them after the serpentine belt is on.
Re-install the belt making sure the routing is correct. Take note that the new water pump pulley doesn't have an edge lip, so don't position the belt over the edge; just try and keep it inline with the rest of the pulleys.
Torque the water pump bolts to 18 lb-ft.
Pulley installation complete!
21. Re-install in reverse order, the fan (remember to re-connect the electrical plug), coolant tank, power steering reservoir, and airbox (or CAI).
22. Clear the engine bay of any tools and rags. Start the engine and check to see that the belt is running and tracking on all pulleys properly. Turn off engine and visually inspect that the belt is aligned.
Job complete.

4th Gear Member
Joined: Apr 2007
Posts: 1,612
From: S.Florida
JUNE 14, 2010 SUPPLEMENTAL INFO
The MF Staff received the following note from a member who had a problem during his installation, and his experience may benefit others:
Apologies to ||dsands|| for hijacking your post - Admin
The MF Staff received the following note from a member who had a problem during his installation, and his experience may benefit others:
Originally Posted by jahudso2
Hello,
I recently attempted to install some Steeda Underdrive Pulleys using Taco Bill's installation instructions, and I ended up damaging the first couple of threads on my crankshaft trying to pull the harmonic balancer off. I do not want other mustang owners to make the same costly mistake which I have made. Is it possible for you to edit TacoBill's writeup and where it mentions the gear puller, you put "Must use Chrysler puller! Regular pullers will damage threads in crankshaft snout!. The "Chrysler" style pulley puller is one which you insert a rod into the crankshaft threads and then the puller pushes against that rod. I did not get the Chrysler style and I tried to push the center bolt off of the crankshaft and it damaged the threads where the harmonic balancer bolt threads in. I may end up having to replace the whole crankshaft because of this careless mistake.
Joe
Apologies to ||dsands|| for hijacking your post - Admin

1st Gear Member
Joined: May 2007
Posts: 58
From: IN
Very good guide!!! Great pictures.
I had the same problem with the crank turning while the trans was in first and the e brake on. I ended up putting the trans in overdrive and was able to get it broke free by hand.
I had the same problem with the crank turning while the trans was in first and the e brake on. I ended up putting the trans in overdrive and was able to get it broke free by hand.
Thread Starter
2nd Gear Member
Joined: Jun 2006
Posts: 415
From:
Step 14 to End has been revised.
Reason: Deleted the crank pulley boil/freeze method and replaced with harmonic balancer install tool method.
If you're planning on doing this install, please note the new changes/revisions.[/align]
Reason: Deleted the crank pulley boil/freeze method and replaced with harmonic balancer install tool method.
If you're planning on doing this install, please note the new changes/revisions.[/align]

