
Vortech Install---my notes & opinions
 12-05-2007, 07:30 PM
#1
3rd Gear Member
Thread Starter

Join Date: Jun 2007
Location: Danville, VA
Posts: 890
Well guys, finally got the sucker in, so here goes. I'll try my best to answer any comments or questions.
I'll start with the basics
Tools needed:
- Complete socket sets in standard & metric. 1/4, 3/8, and some 1/2" drive will help/be easier
- Wrenches again, standard & metric. I highly recommend using Gearwrenchs
- Pliers(needle nose, slip joint, lock jaw, hose clamp will help)
- Torch(small propane or MAPP fuel will work)
- Soldering iron/torch
- Center Punch, 5/8" center punch(see notes)
- NPT Tap 3/8 x 18
- Screwdrivers
- Fuel Line disconnects
- Catch Buckets/ pans
-AIR TOOLS & COMPRESSOR (ratchet, 3/8" impact, die grinder, blow nozzle)
Other Stuff Needed
- Brakleen $3.27x2 = $6.54
-Mobil 1 5w20 $5.99x6 = $35.94
-Mobil 5000 $1.99x6 = $11.94 (going to run engine for 5 mins or so with this, then change oil & filter again--just to be sure )
-Motorcraft FL820 $3.99x2 = $7.98
-Motorcraft Coolant--gallon $6.87(my discount price)x2= $13.74
-Motorcraft Mercon--quart $1.80(my price) $3.60
-Red Locktite $4.99
-Motorcraft Silicon $6.99
My Notes:
First things first. Make sure you have all the tools needed, and I highly recommend getting a table to work on & lay parts on, as there will be many.
Do yourself a favor, get two drainpans if you plan on reusing your fluids. If you are not, one will work fine. The night before you start installation, I recommend draining the coolant and power steering.
Remove the intake & fuel rails---not too hard. 10 bolts on intake & 4 on injector rails. Make sure to use the blow nozzle to remove any debris laying around the intake & to prevent trash from going into the heads. It is not necessary to remove the COPs, only if you are replacing the plugs--again, use the blow nozzle--8mm bolts on these
Remove Belt
There is a place on the drivers side valve cover that you will need to grind down to allow theserp. belt room to run. I used a dir grinder with a Diamond tipped bit for really fast removal. You could use a hacksaw & file I guess if needed.
You will have to tap a hole into the side of the oil pan for the drain line to the supercharger. This is not difficult, it just takes a little time. Vortech recommends using a center punch & a 5/8s center puch to enlarge the hole--not drilling into the pan. I have never seen a 5/8" center punch, so I improvised. I used a round punch for a air-hammer to make the hole. I checked the size of the "chisle" with a digital caliper, and had to grind down the size of it. If you have never tapped anything, I recommend getting a friend that has--you don't want to mess up on this & have to replace the oil pan. I went a little undersized on the hole, and used a deadblow hammer to just get the tapered end of the tap into the hole. I then went about 3/4 of the way through the pan, and used the fitting to finish the tap. This way you get a real secure fitting, that will not leak or work its way out. I also used silicon around the fitting for double protection.
You have to relocate the power steering reservouir & lines-- no big deal. Go ahead and mount the reservoir & install the lines to it. DO not connect them to the factory lines at this point.
After the intake is removed, you will have to disconnect the coolant line that is underneath it. Do this by pressing the line into the fitting & then squeezing the white large-flat side of the fitting in. The line should simply pull out. Before removing the coolant crossover tube, use a 1/4" extension, and remove the factory coolant bleed plug on the right side. Now remove the final two bolts & remove the cross over tube. Remove the gaskets, as they will need to be reused.
The steel extension on the right side of the tube must be removed. This is possibly one of the hardest parts of the install. I used a torch, and still ended up pulling & cutting the fitting out. I used an air-powered jigsaw to remove parts of it. After this step, install the supplied freeze plug to seal the hole. Again, silicon the hell out of the plug & housing before installing. Use a socket that fits the inner part of the plug to install it flush with the surface of the crossover tube. You will re-route & replace most of the coolant hoses on the front of the motor. Remember to leave the hoses a little long, and trim to make the best fitment possible. Install the clamps, but leave them loose until you get everything installed, as this will make it easier to get everything lined up.
Install supercharger bracketry. Not diffiicult, just use the right bolts for proper alignment. You will have to remove the bolts out of two of the factory idler pullies & install some cool looking spacers. You will want to route the belt before you get these bolts installed. Use red loctite on the bolts. MAKE SURE You have the supercharger idler pulley in the proper position, as it is adjustable, and the belt will not go on if it is in the wrong position.
Install the blower drain plug & clamp. Then install the blower to the bracket. Use a gearwrench, otherwise you'll be doing this for a while.
The kit comes with a bunch of hoses that you'll use to rebuild the PVC system. the hose on the right valve cover goes to the intake, while the hose on the left will be relocated to the intake tubing.
Install the intake tubing, as well as the factory mass air meter into the supplied housing that comes with the kit.
The MAF connector will have to be extended, and the kit includes the six extra wires for it. I chose to solder the wiring, but the kit does include crimp connectors if you choose not to solder them(Not recommended)
The fuel pump rebuild sounds bad, but to me, it is more of a pain in the butt to remove the pump & lines than it was to rebuild it. You will have to hollow out the housing to allow the pump that came with the vortech kit to properly fit. I used a die grinder with a long drill bit to get in there. I also chose to solder the new connector to the factory wiring on the pump. IF you do this, please be careful, as you are working around fuel that could combust easily with the heat generated from the soldering iron. Reinstall pump.
TUNE your ride with whatever software you have(Vortech comes with Diablo, but different venders may sell with other tuning software--I.E. Brenspeed kits come with his custom SCT XCAL II tunes)
Do a final check--make sure all hoses are tight, coolant is full, the oil has been changed, etc.
I personally decided to change the oil with Mobil 5000. Ran it for a few minutes, and then changed it again with Mobil 1, just to make sure everything was flushed out of the system, and I wasn't running no crap.
Go out and enjoy!!
Then come back and recheck all your hoses/clamps/etc. I gaurentee that you'll find something you missed.
I then installed an Autometer dash mount gauge pod & guages. This is a whole nother' day of fun.
Total install time for me was approx. 14 hours on the blower itself, then another 5 or so on the guages(I like everything hidden and factory looking---no sloppy installs here)
I most deffinetely would not attempt this install if you think that you mig

 12-05-2007, 08:13 PM
#6
5th Gear Member
Join Date: Feb 2005
Location: Anaheim, California
Posts: 4,205
Great tutorial, and plus one waiting for the pics.....
But, beside the install, what are your impressions of this blower, from a power, street-ability standpoint? Just curious from a standpoint of trying to decide between this blower, and the cost difference for a Saleen...Yeah, I know two different styles of blowers....Just curious of your impressions for a daily driver....
Thx,
Mike
12-05-2007, 10:20 PM
#7
3rd Gear Member

Join Date: Jul 2006
Location: Tucson Arizona
Posts: 732
+1
ORIGINAL: mlcrycc
Great tutorial, and plus one waiting for the pics.....
But, beside the install, what are your impressions of this blower, from a power, street-ability standpoint? Just curious from a standpoint of trying to decide between this blower, and the cost difference for a Saleen...Yeah, I know two different styles of blowers....Just curious of your impressions for a daily driver....
Thx,
Mike
12-07-2007, 05:12 PM
#8
3rd Gear Member
Thread Starter
Join Date: Jun 2007
Location: Danville, VA
Posts: 890
ORIGINAL: mlcrycc
Great tutorial, and plus one waiting for the pics.....
But, beside the install, what are your impressions of this blower, from a power, street-ability standpoint? Just curious from a standpoint of trying to decide between this blower, and the cost difference for a Saleen...Yeah, I know two different styles of blowers....Just curious of your impressions for a daily driver....
Thx,
Mike
Great tutorial, and plus one waiting for the pics.....
But, beside the install, what are your impressions of this blower, from a power, street-ability standpoint? Just curious from a standpoint of trying to decide between this blower, and the cost difference for a Saleen...Yeah, I know two different styles of blowers....Just curious of your impressions for a daily driver....
Thx,
Mike
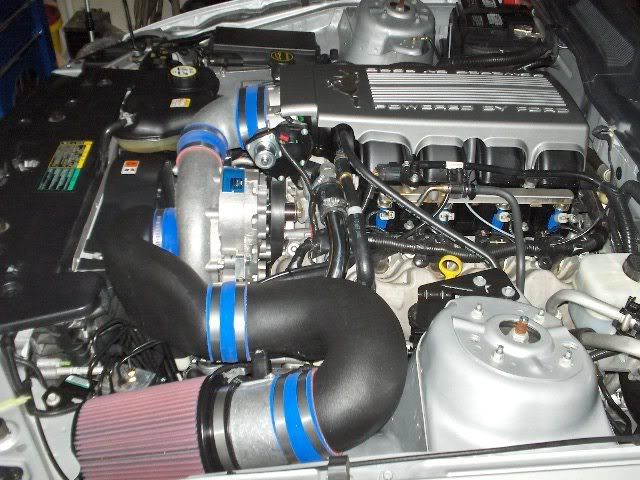
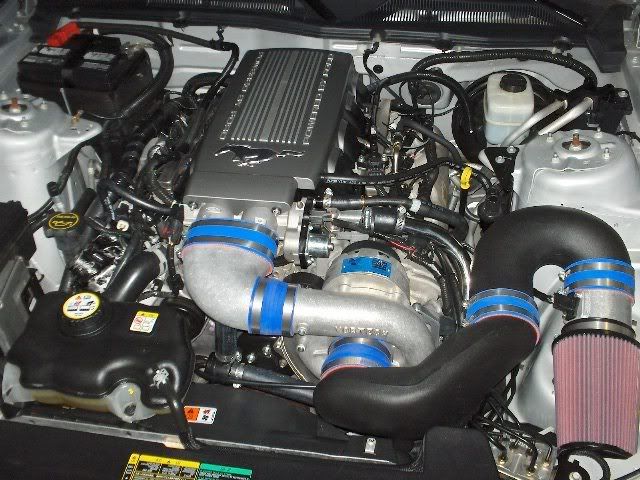
Streetability: Very nice--as this is my daily driver(part of the reason I went centrifugal style blower). If you stay out of the gas, it doesn't make boost, and the car responds like it did before the install. The bypass valve begins opening around 3k RPM with low throttle imput(i.e. normal acceleration). Once you get on it, it spins up quik. From a 30 roll in second gear(approx 3300rpm) the car instantly roast the tires once it starts making boost--which is about 4-5 lbs at 4000 rpm & hits 9lbs at 5600rpm. I set the redline at 6500. So in my opinion, it is very streetable. At WOT, the car pulls like a beast once it hits boost. The best part of all, even though I installed a bigger fuel pump & 39lb injectors, it is still averaging 19.4 MPG after 300miles of in town driving. Before the blower, I averaged around 19.8-20.2 mpg driving the same route, and honestly, the milage will probably go up, because now I'm playing with the power alot more than what I normally would
 . Did I mention that I smooked a bolt-on S197 GT the other night after diner--talked to the guy afterwards, pretty cool guy---says he might buy the nitrous kit that I have for sale----we'll see.
 Anyway, here are a handful of pics:
Supercharger(still need to clean up engine bay)
Autometer Guage Pod w/ Ultralite guages:

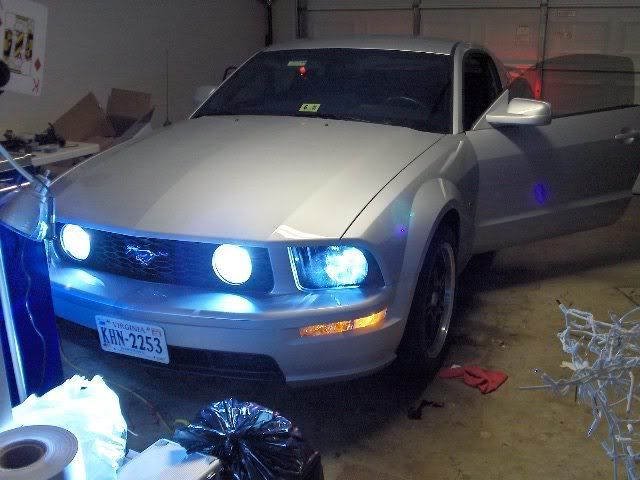
Teaser pic of the 8k HIDs in the head & fog lights
 12-07-2007, 05:19 PM
#9
5th Gear Member

Join Date: May 2006
Location: DBN, MI
Posts: 2,578
Very cool write up and notes on this, I was thinking of doing a Vortech myself, now that I read this I'm glad I didn't. Good luck and enjoy it. Very helpful link here.
12-07-2007, 05:34 PM
#10
3rd Gear Member
Thread Starter
Join Date: Jun 2007
Location: Danville, VA
Posts: 890
Glad it helped--this is why I did it. The install wasn't horrible, just time consuming, and you will need some specialty tools for the install. And, did I mention some time.......and a little patience.

