
how would this look?
 12-13-2007, 06:30 PM
#11
5th Gear Member
Join Date: Nov 2005
Location:
Posts: 2,227
Seamless is a bigger deal than the basic CDC bolt instruction on of the Agressive. There are no instructions but I have a methodology that works (I have no cracks in any of the seams two years later) I have no idea how a shop would do it but I suspect they would be experimenting and not guarantee anything. Agressive also has an issue with warping inthe middle (can't have it baked that's for certain) If I were you (or if I was doing a second car for myself I would just go Classic; 1% of the work of an Agressive seamless install and paint work required on OE fascia there too.) You have to be an agressive personality to go this route... just kidding. But the Classic gets you nearly the same look and for a daily driver I would be even more inclined to go Classic.
(I did the Agressive because I wanted the challenge of the fab work, you don't likely need that )
)
(I did the Agressive because I wanted the challenge of the fab work, you don't likely need that
)

 12-14-2007, 04:03 AM
#13
3rd Gear Member

Join Date: Nov 2005
Location:
Posts: 681
ORIGINAL: fairlane292
Seamless is a bigger deal than the basic CDC bolt instruction on of the Agressive. There are no instructions but I have a methodology that works (I have no cracks in any of the seams two years later) I have no idea how a shop would do it but I suspect they would be experimenting and not guarantee anything. Agressive also has an issue with warping in the middle (can't have it baked that's for certain) If I were you (or if I was doing a second car for myself I would just go Classic; 1% of the work of an Agressive seamless install and paint work required on OE fascia there too.) You have to be an agressive personality to go this route... just kidding. But the Classic gets you nearly the same look and for a daily driver I would be even more inclined to go Classic.
(I did the Agressive because I wanted the challenge of the fab work, you don't likely need that)
Seamless is a bigger deal than the basic CDC bolt instruction on of the Agressive. There are no instructions but I have a methodology that works (I have no cracks in any of the seams two years later) I have no idea how a shop would do it but I suspect they would be experimenting and not guarantee anything. Agressive also has an issue with warping in the middle (can't have it baked that's for certain) If I were you (or if I was doing a second car for myself I would just go Classic; 1% of the work of an Agressive seamless install and paint work required on OE fascia there too.) You have to be an agressive personality to go this route... just kidding. But the Classic gets you nearly the same look and for a daily driver I would be even more inclined to go Classic.
(I did the Agressive because I wanted the challenge of the fab work, you don't likely need that
)
Do you have any more pictures of your front with CDC Aggressive now? The entire seamless ideal that you are discussing here seems to be more a matter of individual driving routine. When the CDC Aggressive is installed and painted, the initial install does come out quite seamless so to speak especially if the entire bumper with the CDC is being painted at once, BUT as soon as the bumper is flexed when scraping due to how low the car is, flex tends to deform the material to a certain extent. This deformable body is what allows the bumper to maintain its shape. The less deformable a solid is, the more it is prone to fracture or buckle, the more flexible it is, the more force it can handle withOUT breaking and without going into the mechanics of strength and materials. This is why using any type of filler etc to fill in the seams does not work unless the car is guaranteed not to scrape etc. Also, in your picture, you cant see the bolt/screw locations, did you paint and/or fill them? The warping is an easy fix, but the seams is another story. Let us know the details of how it came it so impeccable

 12-14-2007, 07:27 AM
#16
4th Gear Member

Join Date: Oct 2007
Location: Schenectady NY
Posts: 1,764
All this talk about seemless...and the CDC aggressive is making me nervous...since I am putting in on in the spring. I know this may be a dumb question but did you guys get it painted before the install...or while it was on the car? The reason I ask is because a buddy of mine just installed a spoiler on a 04 v6 Mustang and he had it painted while it was attached. It did not make much sense to me..what did you guys do?
12-14-2007, 09:38 AM
#17

Definately some things to consider. The one thing I'm not really certain on is what I want to do with the back bumper...any tips on what may look good with the above mentioned parts?
12-14-2007, 12:34 PM
#19
1st Gear Member

Join Date: Oct 2007
Location: springville ut
Posts: 101
12-15-2007, 10:32 AM
#20
5th Gear Member
Join Date: Nov 2005
Location:
Posts: 2,227
ORIGINAL: Stang Skeleton
Hey Fairlane292,
Do you have any more pictures of your front with CDC Aggressive now? The entire seamless ideal that you are discussing here seems to be more a matter of individual driving routine. When the CDC Aggressive is installed and painted, the initial install does come out quite seamless so to speak especially if the entire bumper with the CDC is being painted at once, BUT as soon as the bumper is flexed when scraping due to how low the car is, flex tends to deform the material to a certain extent. This deformable body is what allows the bumper to maintain its shape. The less deformable a solid is, the more it is prone to fracture or buckle, the more flexible it is, the more force it can handle withOUT breaking and without going into the mechanics of strength and materials. This is why using any type of filler etc to fill in the seams does not work unless the car is guaranteed not to scrape etc. Also, in your picture, you cant see the bolt/screw locations, did you paint and/or fill them? The warping is an easy fix, but the seams is another story. Let us know the details of how it came it so impeccable
ORIGINAL: fairlane292
Seamless is a bigger deal than the basic CDC bolt instruction on of the Agressive. There are no instructions but I have a methodology that works (I have no cracks in any of the seams two years later) I have no idea how a shop would do it but I suspect they would be experimenting and not guarantee anything. Agressive also has an issue with warping inthe middle (can't have it baked that's for certain) If I were you (or if I was doing a second car for myself I would just go Classic; 1% of the work of an Agressive seamless install and paint work required on OE fascia there too.) You have to be an agressive personality to go this route... just kidding. But the Classic gets you nearly the same look and for a daily driver I would be even more inclined to go Classic.
(I did the Agressive because I wanted the challenge of the fab work, you don't likely need that)
Seamless is a bigger deal than the basic CDC bolt instruction on of the Agressive. There are no instructions but I have a methodology that works (I have no cracks in any of the seams two years later) I have no idea how a shop would do it but I suspect they would be experimenting and not guarantee anything. Agressive also has an issue with warping inthe middle (can't have it baked that's for certain) If I were you (or if I was doing a second car for myself I would just go Classic; 1% of the work of an Agressive seamless install and paint work required on OE fascia there too.) You have to be an agressive personality to go this route... just kidding. But the Classic gets you nearly the same look and for a daily driver I would be even more inclined to go Classic.
(I did the Agressive because I wanted the challenge of the fab work, you don't likely need that
)
Do you have any more pictures of your front with CDC Aggressive now? The entire seamless ideal that you are discussing here seems to be more a matter of individual driving routine. When the CDC Aggressive is installed and painted, the initial install does come out quite seamless so to speak especially if the entire bumper with the CDC is being painted at once, BUT as soon as the bumper is flexed when scraping due to how low the car is, flex tends to deform the material to a certain extent. This deformable body is what allows the bumper to maintain its shape. The less deformable a solid is, the more it is prone to fracture or buckle, the more flexible it is, the more force it can handle withOUT breaking and without going into the mechanics of strength and materials. This is why using any type of filler etc to fill in the seams does not work unless the car is guaranteed not to scrape etc. Also, in your picture, you cant see the bolt/screw locations, did you paint and/or fill them? The warping is an easy fix, but the seams is another story. Let us know the details of how it came it so impeccable
- I had a destroyed rear bumper from my 2000 Mits and used that to exepriment with a few adhesives. Liquid Nails Heavy Duty was hands down the most agressive and best overall; Regular duty is no good and it;s setup time way to fast.
- all joints and contact points wereadhesived, temp smaller head screws put in(CDC stainless [upper] added after paint and CC], and heavily C-clamped along the joints. Let sit for 48 hrs. Didn't want inner side screws to show as the idea was that this was to look like one unit with the OE fascia. Used 3/8" lag withits agressive thread fromthebackside and later ground off the excess with an air cutoff wheel just below the surface.As I recall I used a soldering gun to seal over the slight recess.These two bolt locations seem almost unecessary.
- Since the adhesive had filled all the seams I carefully exacto'd away any excess. Iused a very small/thin amount of Evercoat polyester glazing in some spots to perfect all minor imperfections.Adhesion promoter on the new CDC CS area and then two medium wet coats of epoxy primer. ...wet sandedwith 400. The shop did their or own primer and base and clear, painting the entire OE fascia and CS.
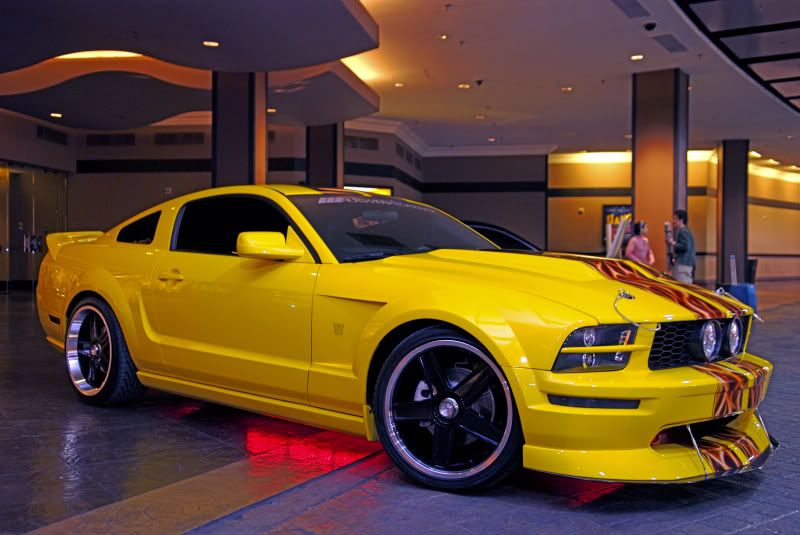
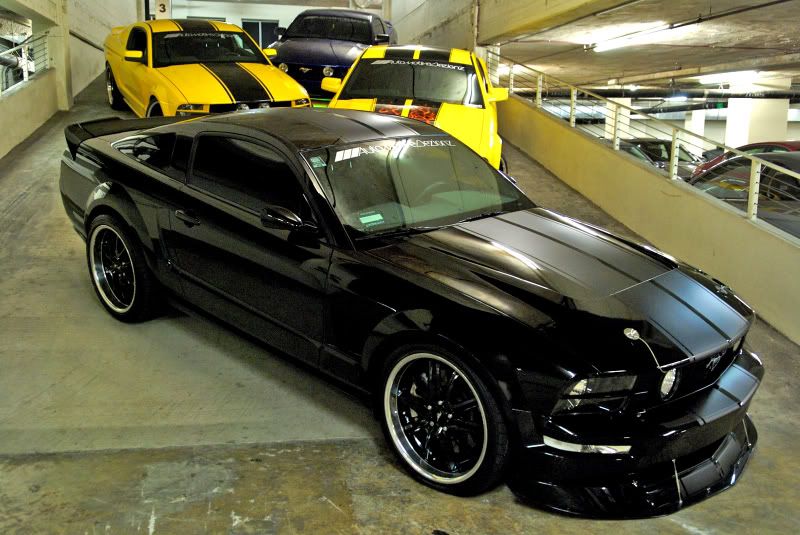
It wil be fine unless/until I slam into something but I can fix or do over as needed. At cruise nights etc I do get mustang guys asking me what body kit nose that is because it looks like a single molded unit. That was what I wanted to achieve. I could have gone Classic but I wanted to do some fab work and challenge myself a bit.
Hope this helps. Nice pick up on the missing inner side screws. I love how CDC in all their pics does not show these. Nice photo shop workguys

[IMG]local://upfiles/24316/358CB047FCA7400DA93CB922C8CCA2D2.jpg[/IMG]
[IMG]local://upfiles/24316/E789B763271F440B97A60776310A29E7.jpg[/IMG]