
Review: tbirddmnd Hoodliner
 09-23-2008, 10:27 PM
#1
3rd Gear Member
Thread Starter
Join Date: Aug 2007
Location: Orlando, Florida
Posts: 518
Sparknotes: The liner is great! Scroll for pics.
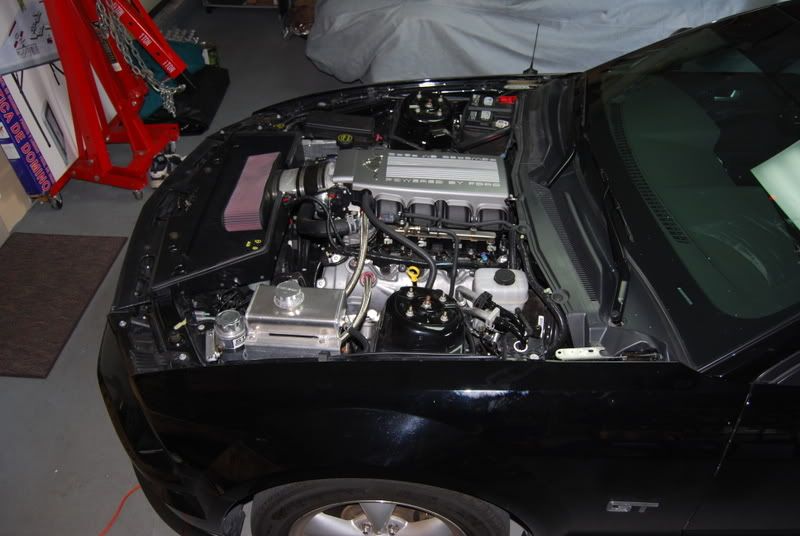
The story begins when I first purchased my WMS Ram Air intake and installed it. It worked like a charm and things were great until I slammed the hood. It didn't latch from the height I normally drop it at, which was unfortunate, it meant things weren't fitting right. I dropped the hood from a little higher and it shut, so I left it at that.
A few months down the road I check on it again and see a huge worn out hole on the factory hood mat right above where the filter was sitting and I could see an imprint of where it was sitting on the filter. That area of the factory mat is puffy and foamy, which interferred with the filter. I thought to myself, this was unfortunate considering WMS designed this intake to work on a factory car. I then realized that since the mat was smothering half the filter, that was half of my intake volume cut off, and the bottom of the filter was already touching the tray underneath it. I decided I had a problem and I had to fix it.
I began thinking of options and narrowed it down to two, take out the hood mat and reangle the filter up a little which would solve the problem, but then I don't have the protection from heat that the factory liner offers for the paint on the top of the hood. I decided the only other option would be to replace the hoodliner with another one.
I began looking at options and discovered there weren't many. In fact, there was only one at the time. I ordered the WMS Sleek Hoodmat with the mindset that, since WMS made it, it has got to work. I even asked them if it would work with the factory engine cover and was told yes. I received it, centered the running horse sticker on it and installed it on the hood with the double sided tape supplied around the edges. It's ABS plastic so it's stiff and attaches with the factory push pins and tape. I drove it around for a while and looked under the hood to find wear marks on the liner where it was resting on the engine cover and boy was I pissed. I took off the engine cover for the time being to avoid any further damage to it and decided later I would reinstall the liner with more tape in the middle to stop it from sagging.
I did just that, and low and behold it did not change the situation. I had literally covered the entire underside with double sided high temp exterior tape from Home Depot and it would not work. The problem was that in the center area of the hood, it goes up, which the plastic liner wont contour to. The mat had solved the problem of the factory mat rubbing on the filter because it was thin, but now created a new one. I needed something that contoured to the hood and would raise up in the middle to allow for the cover to be installed.
After doing more research I happened to come across some posts on some older mustang forums about an eBay member who produces very nice looking mats for Fords. I located his eBay ID "tbirddmnd" and contacted him and found that he had never produced a mat for an S197 but I offered to help. The guy was great and had outstanding communication. Soon, he had one prototyped on a local mustang and once I saw pics of it installed, I was sold on it. I placed the order and soon it arrived at my house.
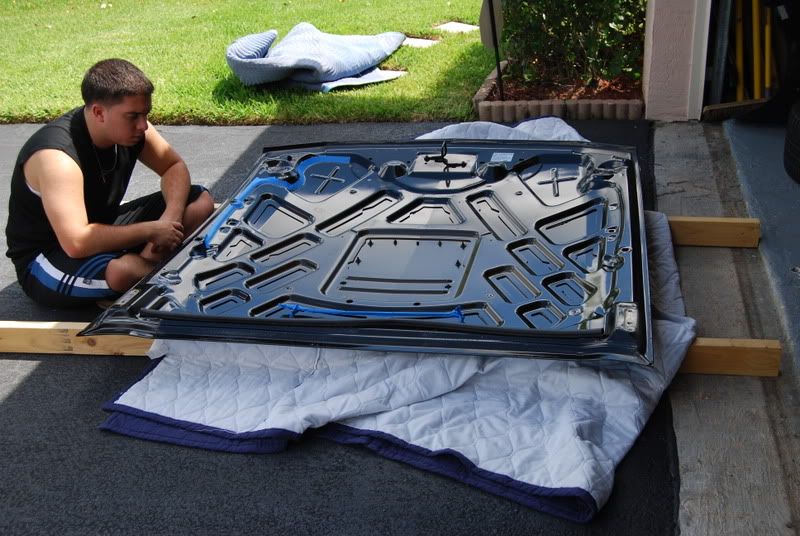
I read over the instructions and narrowed the install options down to two; either install it with the hood on the car, or take the hood off the car and install it like that. I decided on the later because you needed to glue the liner on and shape it to the hood which would prove difficult if done while the hood was on the car. I drilled two 1/8" holes in each hinge on the hood before taking it off then unbolted it. I grabbed two long 2x4's from the garage and laid them on the floor and draped a comforter over it and placed the hood down. I uninstalled the WMS liner, and masked off the area where I didn't want glue to go and got the mat ready. started in the center then worked my way out to the sides and soon it was done. I reinstalled the hood by starting the nuts on the hood, then placing four drill bits in the holes to align it perfectly then cinched down the nuts.
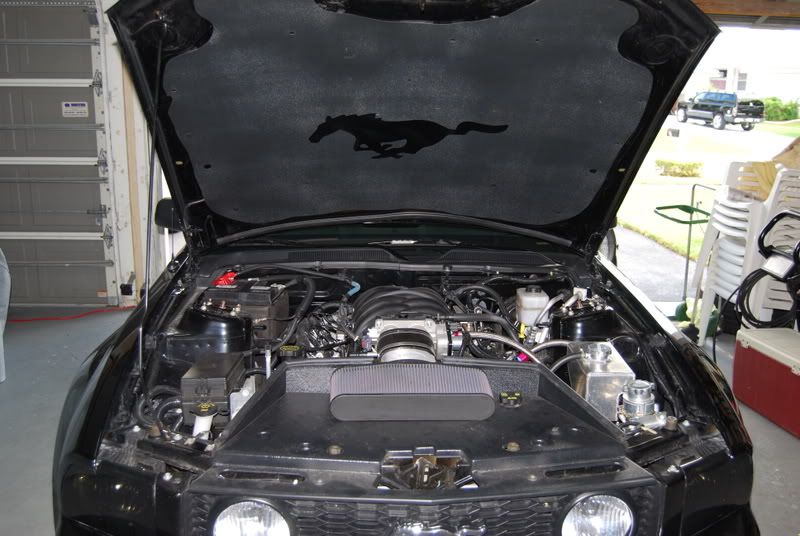
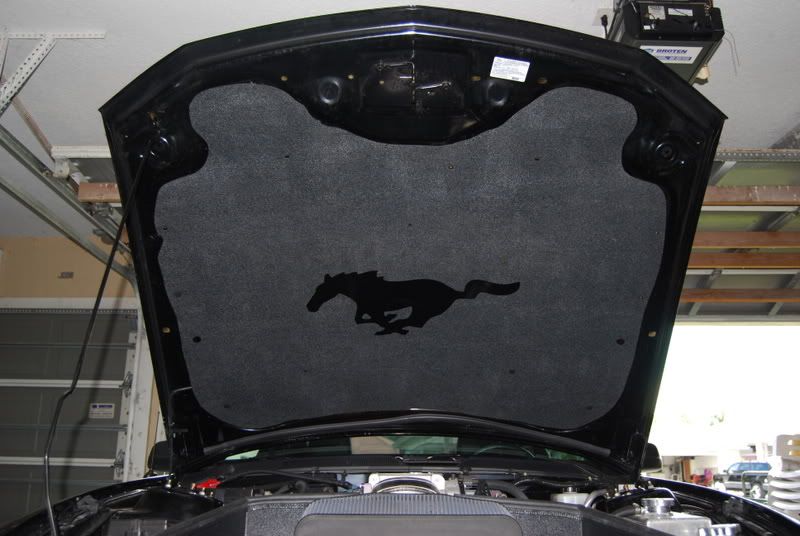
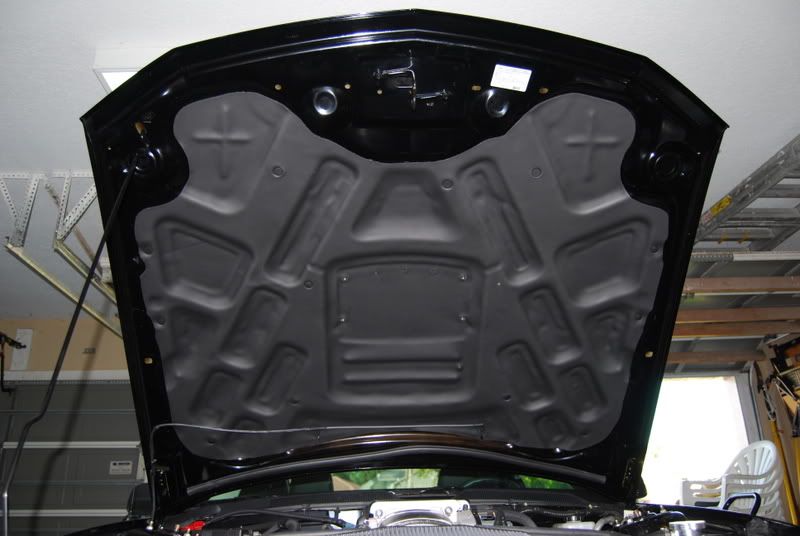
All in all, the mat is PERFECT! Solved all of my problems and install was not that big of a deal. I dabbed touch up paint on the holes I drilled and for those who will say that water will get into the hood, it wont, there are breather holes all over the underside along the sides of the hood from the factory. I included pics for everyone to see! He also can do custom decals for you if you'd like. I had a "GT" decal made as an after thought and should receive it soon, I will update the post with a pic once its on the liner. In short, the liner solved all of my problems and it sure is a great piece.
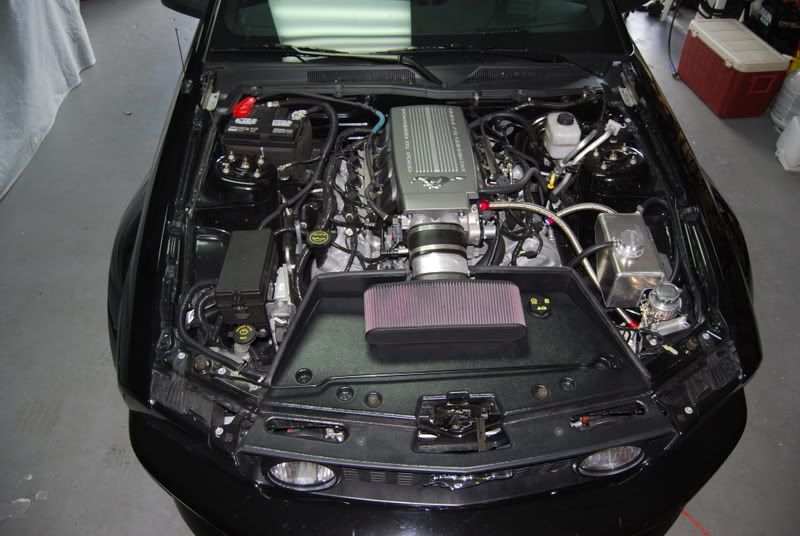
WMS Hoodliner (notice the engine cover is off)
Hood off car:
Me masking:
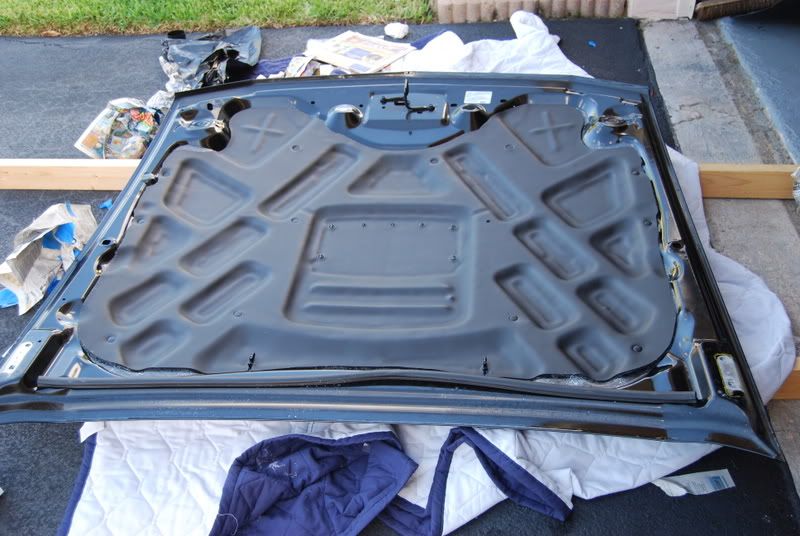
Mat glued down before cleanup of excess glue around edges. To clean it up you need Goo-Gone or anything or that sort:
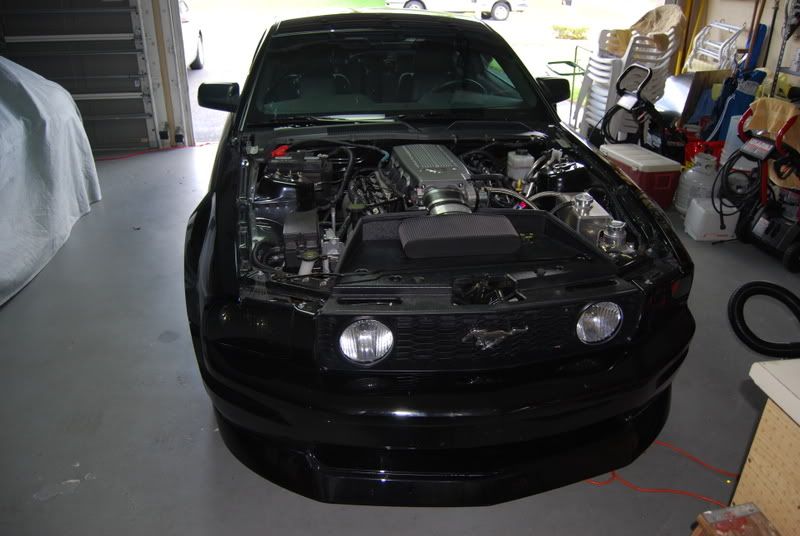
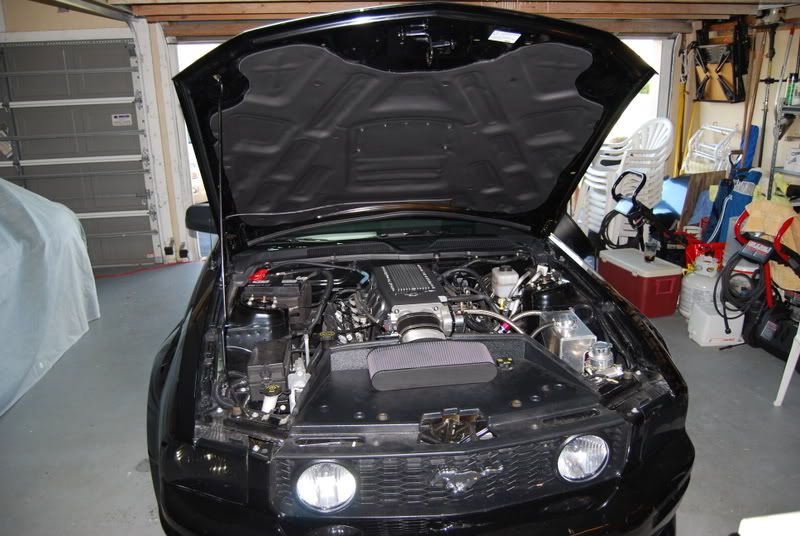
Installed back on the car:
The story begins when I first purchased my WMS Ram Air intake and installed it. It worked like a charm and things were great until I slammed the hood. It didn't latch from the height I normally drop it at, which was unfortunate, it meant things weren't fitting right. I dropped the hood from a little higher and it shut, so I left it at that.
A few months down the road I check on it again and see a huge worn out hole on the factory hood mat right above where the filter was sitting and I could see an imprint of where it was sitting on the filter. That area of the factory mat is puffy and foamy, which interferred with the filter. I thought to myself, this was unfortunate considering WMS designed this intake to work on a factory car. I then realized that since the mat was smothering half the filter, that was half of my intake volume cut off, and the bottom of the filter was already touching the tray underneath it. I decided I had a problem and I had to fix it.
I began thinking of options and narrowed it down to two, take out the hood mat and reangle the filter up a little which would solve the problem, but then I don't have the protection from heat that the factory liner offers for the paint on the top of the hood. I decided the only other option would be to replace the hoodliner with another one.
I began looking at options and discovered there weren't many. In fact, there was only one at the time. I ordered the WMS Sleek Hoodmat with the mindset that, since WMS made it, it has got to work. I even asked them if it would work with the factory engine cover and was told yes. I received it, centered the running horse sticker on it and installed it on the hood with the double sided tape supplied around the edges. It's ABS plastic so it's stiff and attaches with the factory push pins and tape. I drove it around for a while and looked under the hood to find wear marks on the liner where it was resting on the engine cover and boy was I pissed. I took off the engine cover for the time being to avoid any further damage to it and decided later I would reinstall the liner with more tape in the middle to stop it from sagging.
I did just that, and low and behold it did not change the situation. I had literally covered the entire underside with double sided high temp exterior tape from Home Depot and it would not work. The problem was that in the center area of the hood, it goes up, which the plastic liner wont contour to. The mat had solved the problem of the factory mat rubbing on the filter because it was thin, but now created a new one. I needed something that contoured to the hood and would raise up in the middle to allow for the cover to be installed.
After doing more research I happened to come across some posts on some older mustang forums about an eBay member who produces very nice looking mats for Fords. I located his eBay ID "tbirddmnd" and contacted him and found that he had never produced a mat for an S197 but I offered to help. The guy was great and had outstanding communication. Soon, he had one prototyped on a local mustang and once I saw pics of it installed, I was sold on it. I placed the order and soon it arrived at my house.
I read over the instructions and narrowed the install options down to two; either install it with the hood on the car, or take the hood off the car and install it like that. I decided on the later because you needed to glue the liner on and shape it to the hood which would prove difficult if done while the hood was on the car. I drilled two 1/8" holes in each hinge on the hood before taking it off then unbolted it. I grabbed two long 2x4's from the garage and laid them on the floor and draped a comforter over it and placed the hood down. I uninstalled the WMS liner, and masked off the area where I didn't want glue to go and got the mat ready. started in the center then worked my way out to the sides and soon it was done. I reinstalled the hood by starting the nuts on the hood, then placing four drill bits in the holes to align it perfectly then cinched down the nuts.
All in all, the mat is PERFECT! Solved all of my problems and install was not that big of a deal. I dabbed touch up paint on the holes I drilled and for those who will say that water will get into the hood, it wont, there are breather holes all over the underside along the sides of the hood from the factory. I included pics for everyone to see! He also can do custom decals for you if you'd like. I had a "GT" decal made as an after thought and should receive it soon, I will update the post with a pic once its on the liner. In short, the liner solved all of my problems and it sure is a great piece.
WMS Hoodliner (notice the engine cover is off)
Hood off car:
Me masking:
Mat glued down before cleanup of excess glue around edges. To clean it up you need Goo-Gone or anything or that sort:
Installed back on the car:
Last edited by KLO; 03-19-2009 at 10:18 PM.
 09-23-2008, 11:10 PM
#2

Join Date: Nov 2007
Location: Central New Jersey, but I live in Michigan now!
Posts: 47
Kevin! That looks GREAT! You really took the time to ensure that the liner adhered to the underhood contours - I'll bet the rubbing issues are gone.
Just so everyone knows, I make these liners personally by hand, out of aircraft firewall material and it's rated from -70 F to over 225 F. It's FAA-approved and is made for G forces and temperature fluctuations that our cars won't ever experience. If it's great for airplanes it's going to be superb for cars. Any car, in fact.
Please note: this is not a "one-size-fits-all", I have a few different templates available to me to make liners for each listed body style of Mustang. I can provide for:
1) The 1979 through 1982 Mustangs - including the Turbo/Pace Car
2) The 1983 through 1986 Mustangs (shared the same liner)
3) The 1984 through 1986 Mustang SVO (shared the same liner, it has the section cut out for the intercooler.)
4) The 1987 through 1993 Mustangs (shared the same liner, GT, V6 and 4 cylinders.)
5) The 1994 through 1998 Mustangs (shared the same liner - the '94 and '95 Cobra Mustangs used this liner too)
6) The 1996 through 1998 COBRA Mustangs (shared the same liner)
7) The 1999 through 2004 Mustangs (shared the same liner)
8) The 2003 and 2004 COBRA Mustangs (shared the same liner)
9) The 2005 through 2009 Mustangs (share the same liner)
My liners really blow the stock liners away, not to mention that WMS plastic. Heat-resistant vinyl decals are available as well, Kevin is just waiting for a silver GT emblem that I'm going to send. I have silver running ponys available now, 14 inches across.
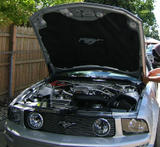
Here below are some other cars I've done myself - click the images to view them larger. The silver 2005 GT belongs to the Vice President of the Mustang Owner's Club of Southeastern Michigan (MOCSEM), then there's a 2001 GT and a 2000 GT.
Would you like one for yours? Do you have rubbing issues that you'd like to take care of or a dirty stock liner? Send me an e-mail!


Just so everyone knows, I make these liners personally by hand, out of aircraft firewall material and it's rated from -70 F to over 225 F. It's FAA-approved and is made for G forces and temperature fluctuations that our cars won't ever experience. If it's great for airplanes it's going to be superb for cars. Any car, in fact.
Please note: this is not a "one-size-fits-all", I have a few different templates available to me to make liners for each listed body style of Mustang. I can provide for:
1) The 1979 through 1982 Mustangs - including the Turbo/Pace Car
2) The 1983 through 1986 Mustangs (shared the same liner)
3) The 1984 through 1986 Mustang SVO (shared the same liner, it has the section cut out for the intercooler.)
4) The 1987 through 1993 Mustangs (shared the same liner, GT, V6 and 4 cylinders.)
5) The 1994 through 1998 Mustangs (shared the same liner - the '94 and '95 Cobra Mustangs used this liner too)
6) The 1996 through 1998 COBRA Mustangs (shared the same liner)
7) The 1999 through 2004 Mustangs (shared the same liner)
8) The 2003 and 2004 COBRA Mustangs (shared the same liner)
9) The 2005 through 2009 Mustangs (share the same liner)
My liners really blow the stock liners away, not to mention that WMS plastic. Heat-resistant vinyl decals are available as well, Kevin is just waiting for a silver GT emblem that I'm going to send. I have silver running ponys available now, 14 inches across.
Here below are some other cars I've done myself - click the images to view them larger. The silver 2005 GT belongs to the Vice President of the Mustang Owner's Club of Southeastern Michigan (MOCSEM), then there's a 2001 GT and a 2000 GT.
Would you like one for yours? Do you have rubbing issues that you'd like to take care of or a dirty stock liner? Send me an e-mail!


 09-24-2008, 09:45 AM
#5
3rd Gear Member
Thread Starter
Join Date: Aug 2007
Location: Orlando, Florida
Posts: 518
It's a Western Motorsports Ram Air system. It's an EXCELLENT system and made very noticeable gains. Works best on the highway when the air is moving at it, a dyno doesn't do it justice. Plus it makes an awesome sounds when revved!
09-24-2008, 04:15 PM
#8
2nd Gear Member

Join Date: Dec 2006
Location: San Diego
Posts: 259
How's cleaning on these as compared to the stock one? My main concern is buying one and going through all this hassle only to have it get dirty like the stock one and not be able to clean it. Also how about making one for us Shaker guys with the center hole pre-cut?
Last edited by leo_06gt; 09-24-2008 at 04:18 PM.
09-24-2008, 05:56 PM
#9
3rd Gear Member
Thread Starter
Join Date: Aug 2007
Location: Orlando, Florida
Posts: 518
Where exactly did your stock one become dirty? This hoodliner can be rather delicate and if you rub it with anything sharp is will leave a line on it. The material is almost like rubber/foam and the exposed surface is completely smooth. I assume cleaning is possible but have never had my factory or this liner become dirty so I have never had to try it.
09-25-2008, 12:58 PM
#10
Join Date: Nov 2007
Location: Central New Jersey, but I live in Michigan now!
Posts: 47
leo_06gt - The liner is extremely easy to clean IF it gets dirty. Mine has been on my '97
Thunderbird for a year and a half and so far the only thing that's gotten on it
are some "dust specs" that I clean with a terry cloth towel moistened with some
water. My car is a daily driver so it sees snow, rain, mud, etc. You can use
some Windex if you want or any cleaner, but spray it on a terry cloth towel and
then wipe the liner. Try THAT with the factory liner!
I'd love to make a liner for the owners who have Shaker hoods! However I don't have a template for a Shaker. What I can do right now is send you a full liner and then you'd cut your Shaker section out with an X-Acto knife, but very carefully - it can be done.
KLO's situation is a great example of dealing with rubbing and clearance issues.