
DIY Write-Up: Suede Headliner, Pillars, Accents Finished! (Pics) 56k, GTFO
 01-26-2010, 02:44 AM
#1
5th Gear Member
Thread Starter

Join Date: Nov 2006
Location: Alabama
Posts: 2,935
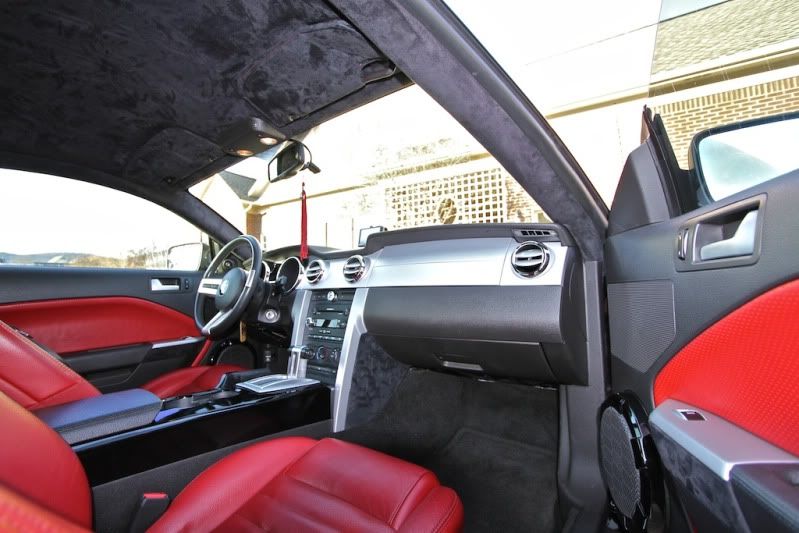
I have been wanting to do this for a long time. As for my background experience with any kind of interior work or wrapping fabric... none. I had 3 of my friends come over to help. The headliner was definitely the easiest part... not very hard at all and it turned out great. Wrapping the a-pillars was a PITA even with 4 people... but we got it done.
Materials Used:
-3 Cans of 3M 90x Spray Glue (Only 2 needed for Headliner and pillars)
-4 Yards of Ultra Plush Black Suede (you'll only need to get 2 yards for the headliner)
First off... removing the interior is a LOT easier than it looks. We were all exclaiming "America! **** yeah!!" while simply pulling all the plastic panels off. Sooo simple. Almost everything is held on with pressure clips that seem to hold up to some abuse.
Step 1: Start at the rear of the a-pillar, grip it with your fingers, and simply pull it off working your way to the front windshield. Slide it and remove.
Step 2: Take a flat-head screw driver and wedge it between the headliner and the dome light. Pry it loose, then work it out with your fingers. Don't be afraid to use some even smooth force to get it off. Un-clip the electrical switch.
Step 3: Unscrew the 6 screws holding in the sunvisors and clips. The headliner should hang loose in the front.
Step 4: Go to the back seat and remove the 2 black pins in the rear of the headliner.
Step 5: Refer to the service manual here:
http://iihs.net/fsm/?dir=441
for removal of the "Quarter Trim Panel Coupe" and the "Quarter Window Panel". It's hard to explain without a nice diagram like the manual. You do NOT have to do this on both sides to get the headliner out. I did the passenger side only. Yes, you have to unbolt the top seatbelt bolt. At first I was like ueeehhh... but it's not a big deal.
Your interior should now look like this:
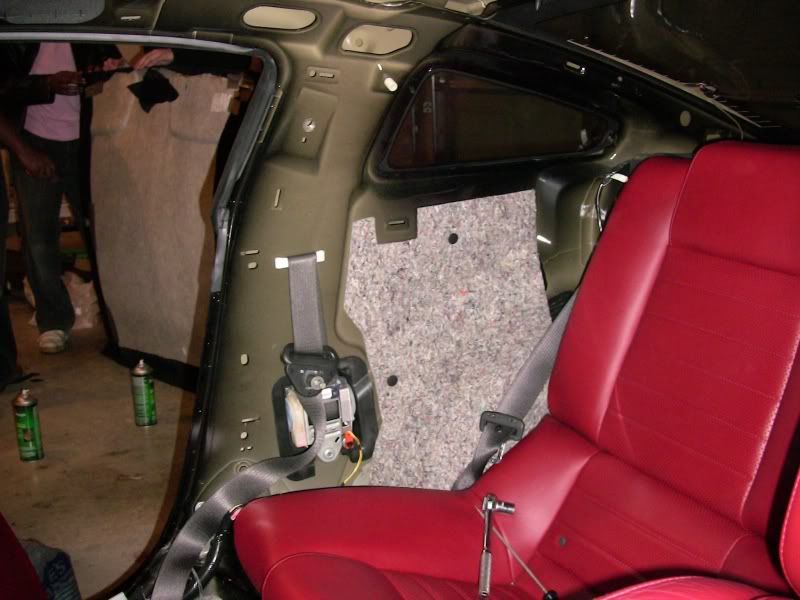
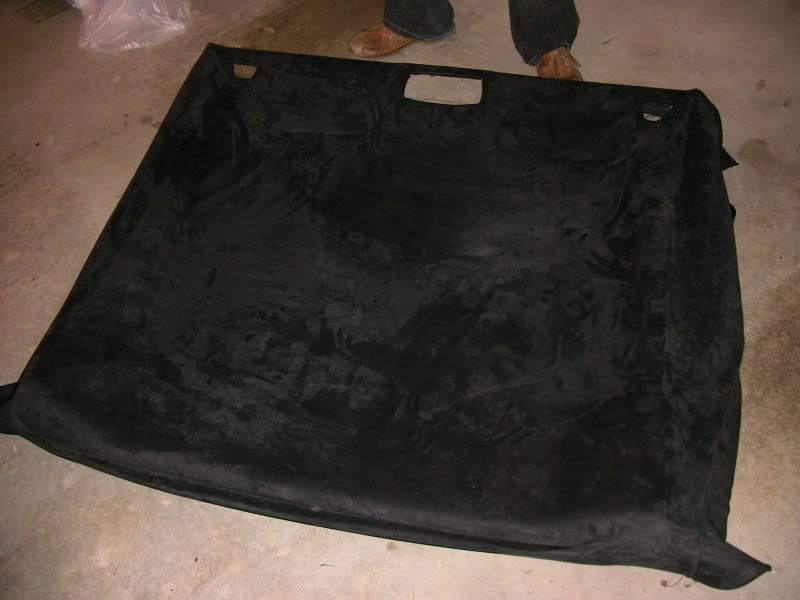
After you have removed those, the headliner will be able to come out. You do NOT have to fold or bend the headliner to get it out. We put the front of the headliner down by the shifter and lifted up on the rear part of the headliner and it was able to fit out the door opening with the windows down.
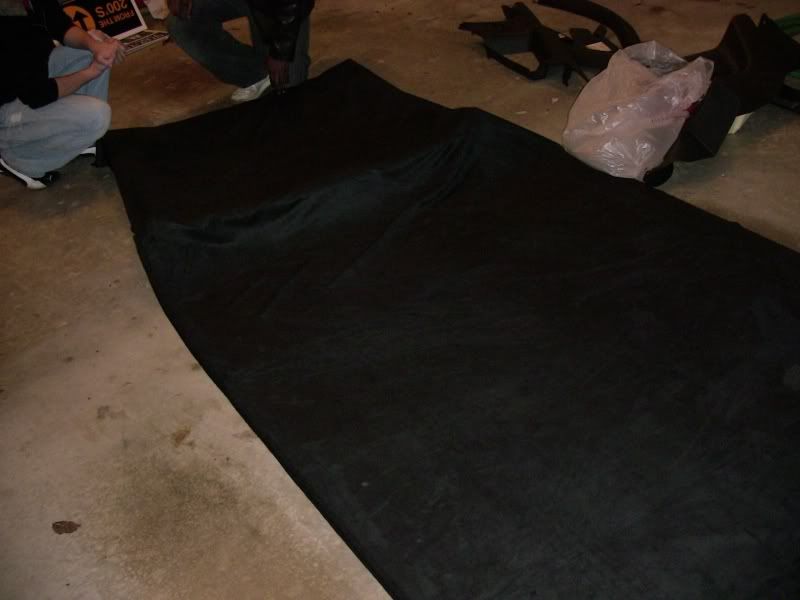
After this, lay your headliner down cloth side up. Removal of the old cloth is not necessary. In fact, it provides an ultra-soft padded feel after the suede is on. Lay your suede over it and trim off the excess, however leave a fair amount of material to wrap around the edges.
I got a lot of suede, lol.
Then we took the 3M glue and sprayed it in about 6 or 7 long strips. We applied a nice even coat to the headliner, a very thin coat to the back of the fabric, and layed it down while immediately smoothing it out. Don't spray TOO glue much or it may bleed through. DO NOT spray the whole thing at once and try to lay it down at one time. The glue dries way too fast for that... speaking from experience.
After you have done the whole surface of the headliner, flip it over. Pull the excess suede tight up around the edges and glue it to the back surface. I have to admit I used some *ahem* duck tape for additional reinforcement in some places.
Then find your holes and cut an X in them. Fold the material back like this:
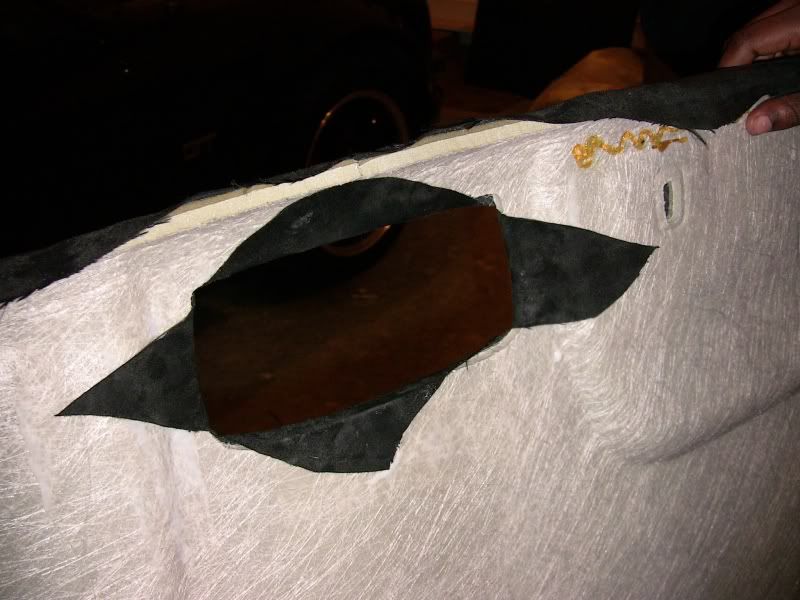
Be sure and remember to poke holes for the rear two pins.
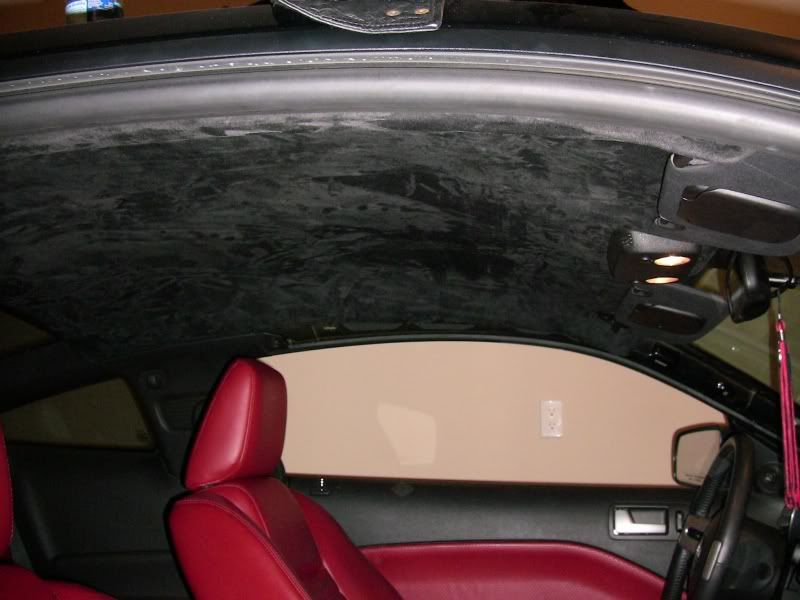
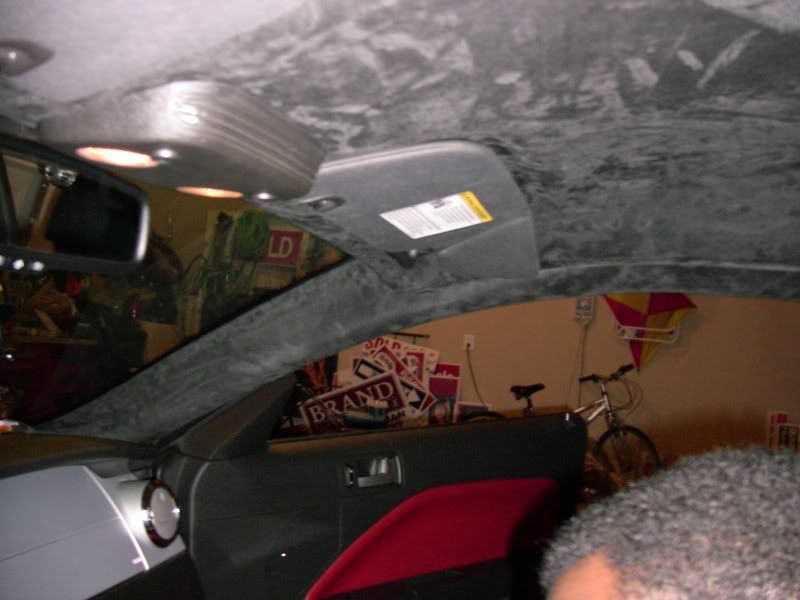
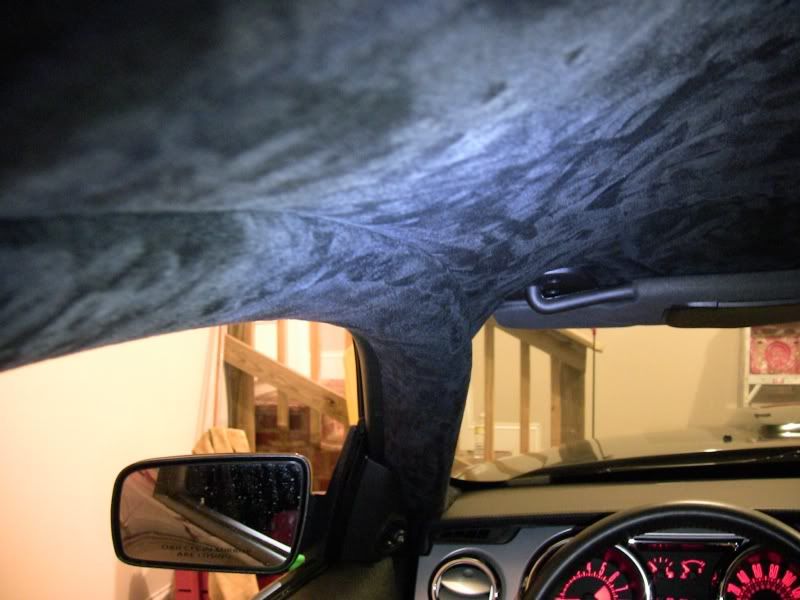
Then BOOM. Headliner's done. Fairly easy IMO. Pop it back up there and put the sun-visors and stuff back in.
NOW THEN.
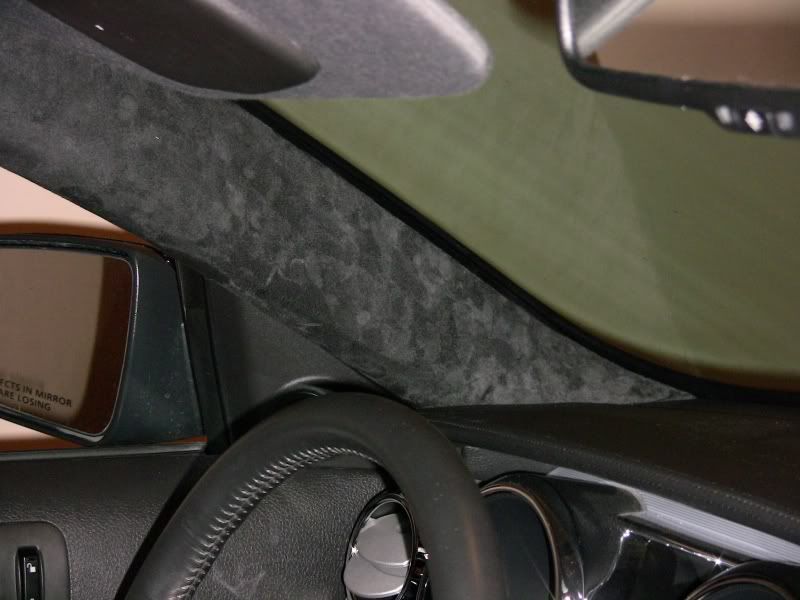
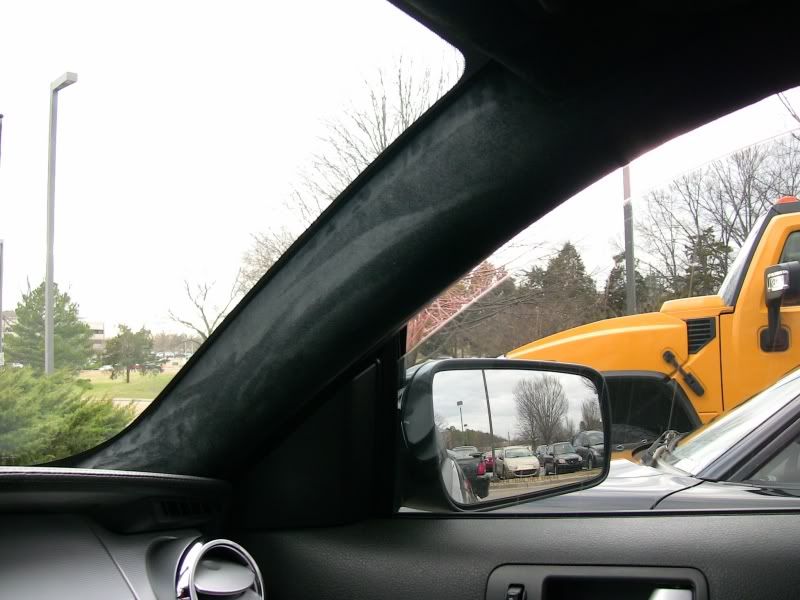
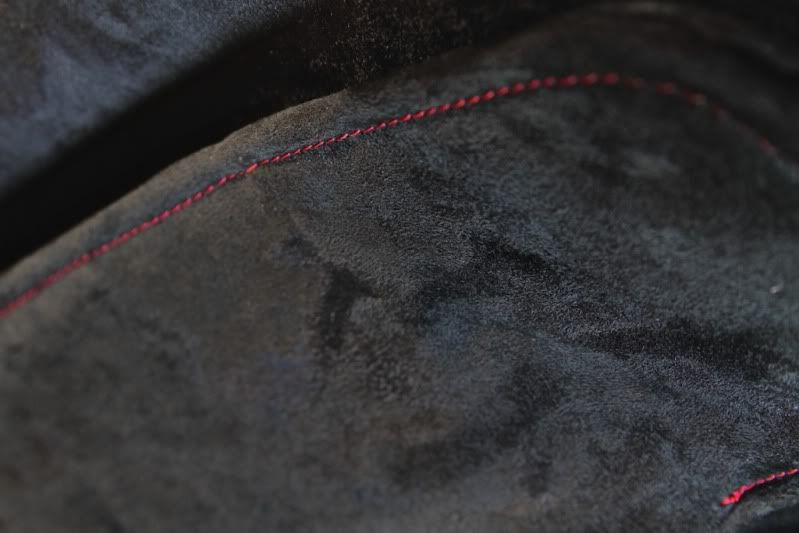
Onto the hard(er) part. The A pillars. You basically just try your best to wrap them taking it slow one part at a time. Spray one part, then glue it down and smooth it out. The curved section is the part that gave us a little trouble. We cut some slits in the part of the fabric that would be wrapped around the back so it didn't wrinkle as bad on the surface.
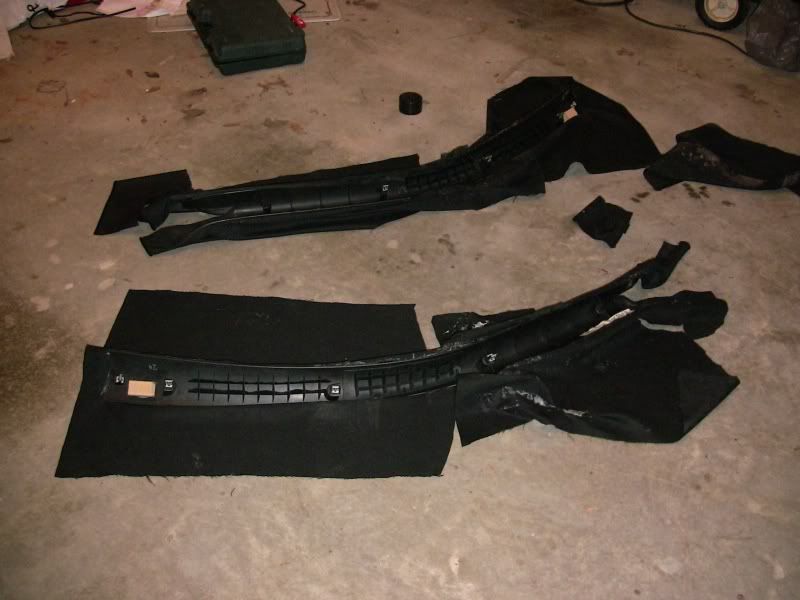
Basically just feel it out. They didn't come out PERFECT, but they still look excellent. There are just a few wrinkles in one spot. Not noticeable until you feel them. Then pop them back up and you're done!
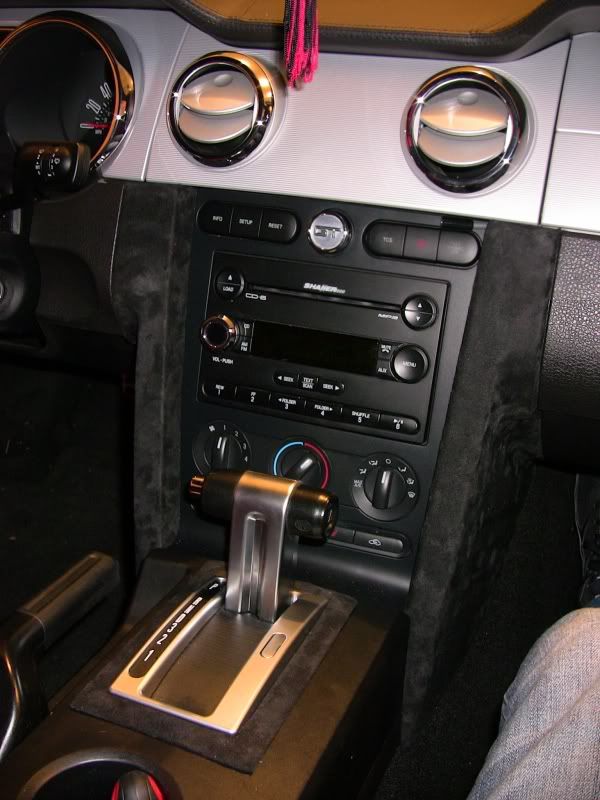
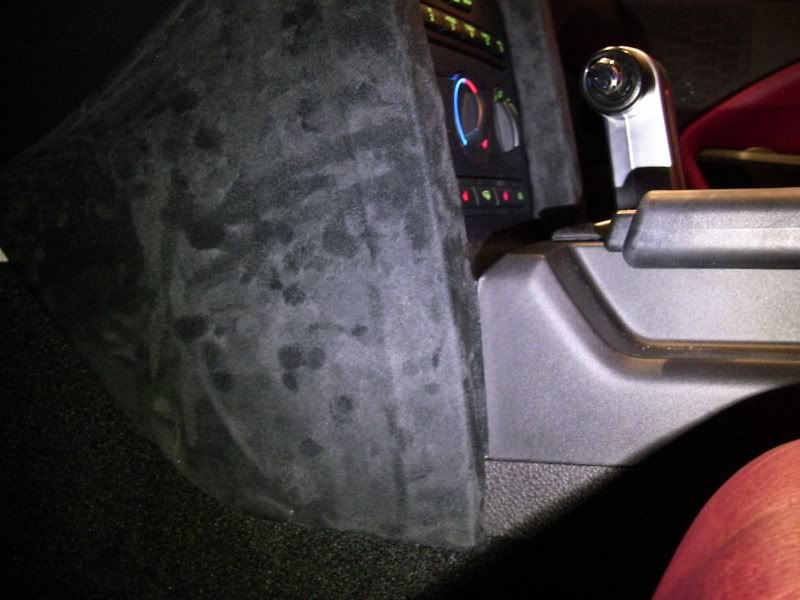
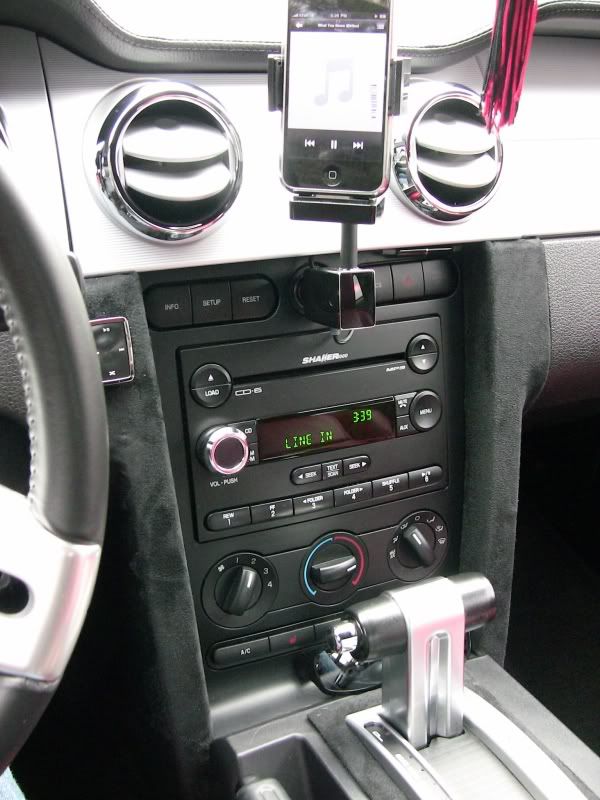
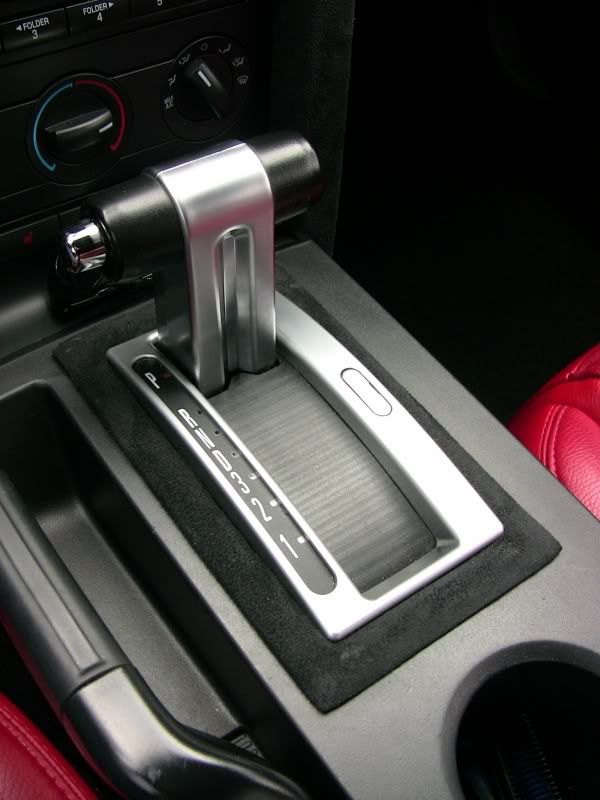
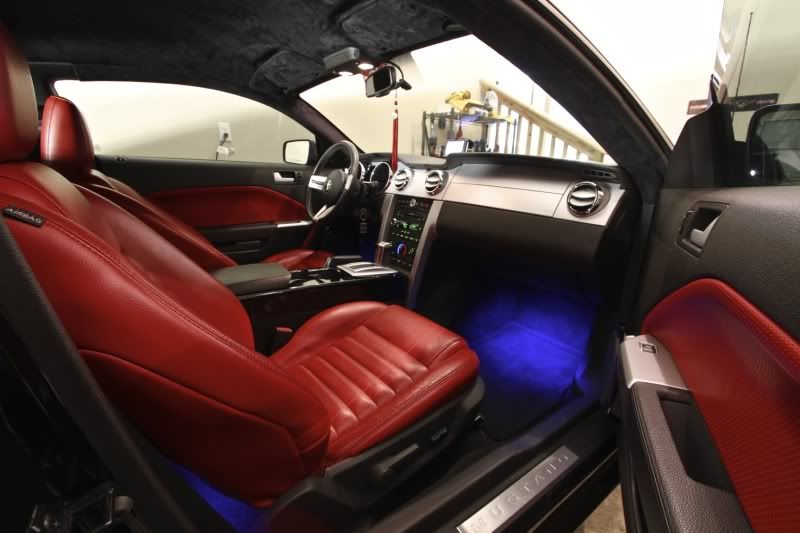
So the next day I realized how much suede I had leftover and got the fever again. I thought I would tie everything in with a few accents around the car. So I popped out the shifter trim and the two pieces that surround the radio.
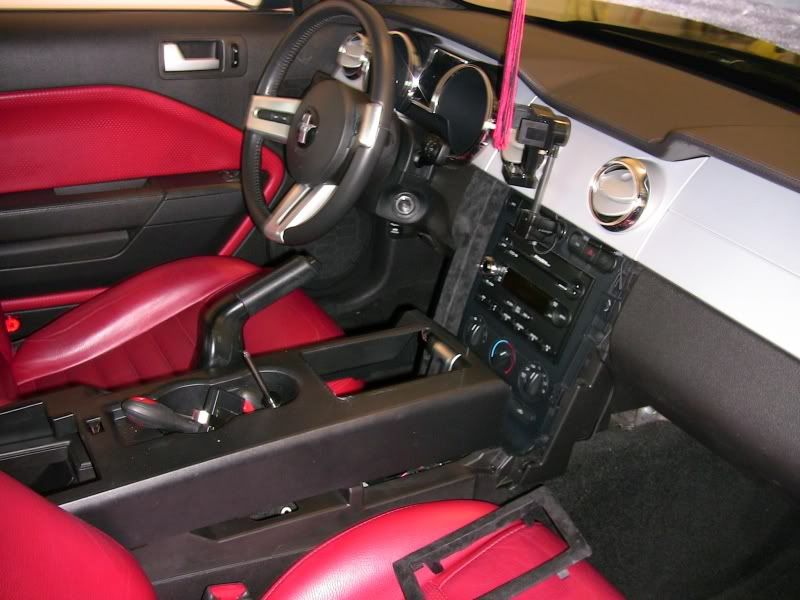
Wrapped them using the same method as the pillars... just kind of work it out. Cut the shape of the object, glue it in portions, smooth it, and wrap it around the edges.
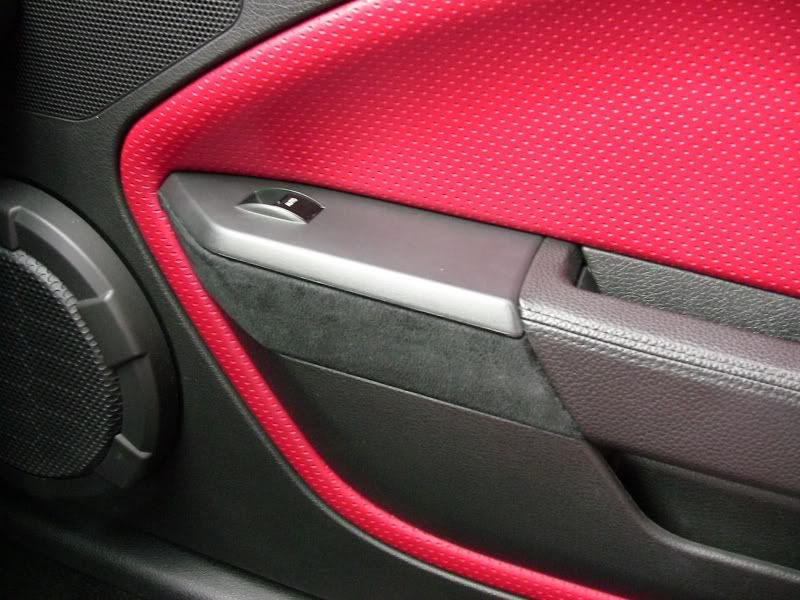
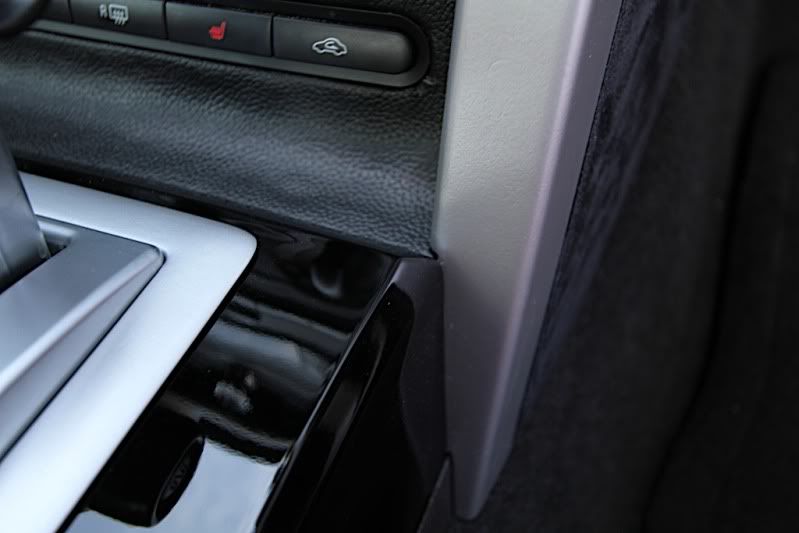
I thought I would tie it into the doors somehow too, so I popped off the window switch trim... I figured the top piece would be too hard to wrap, so I wrapped the plastic piece under it. I'll probably get some nice looking covers to go on the cheap window switch part.
I'll be sure and get some good pictures of it in broad daylight tomorrow with my good camera... and probably a video of the interior.
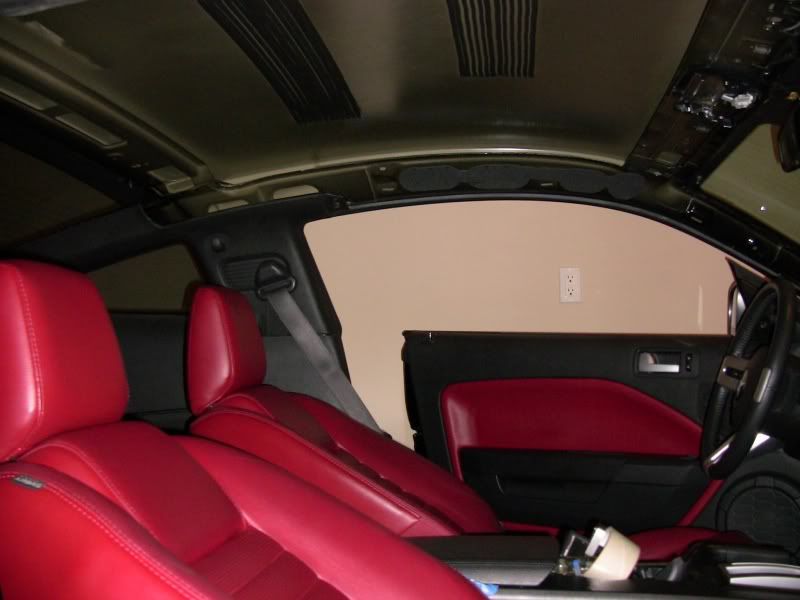
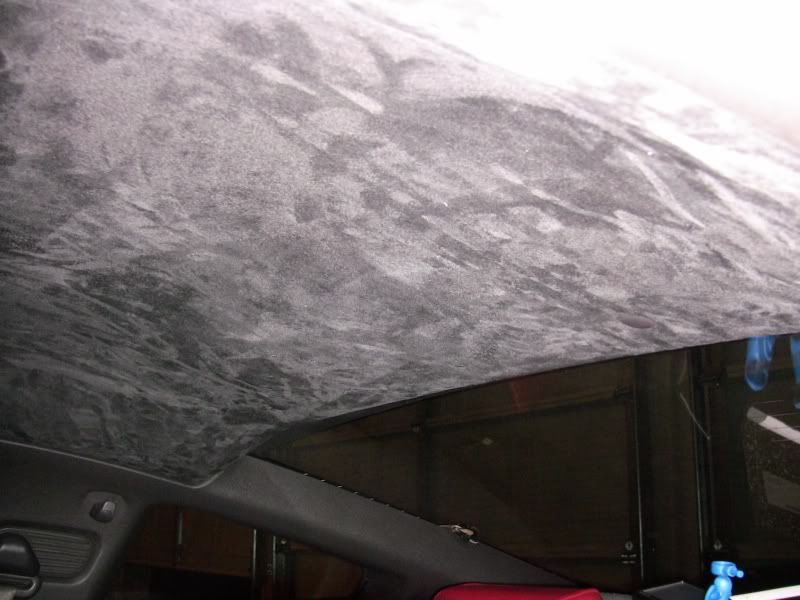
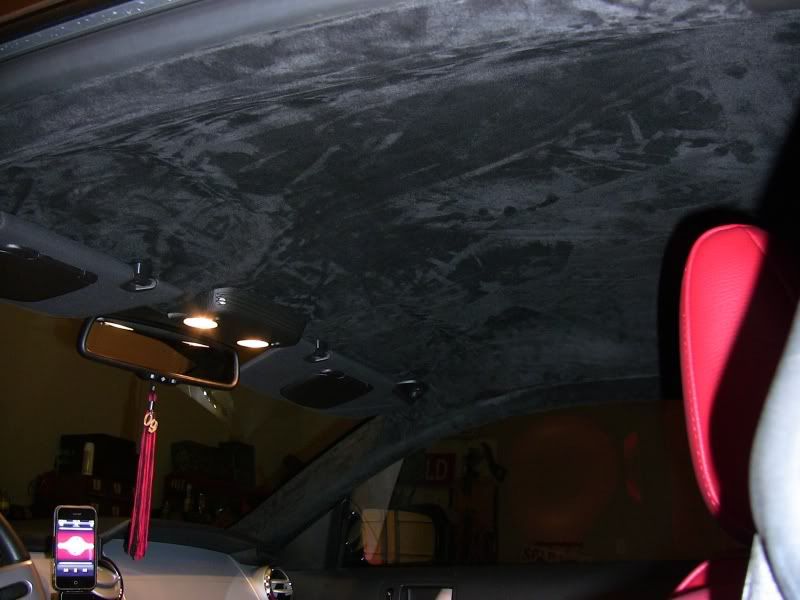
Keep in mind this whole thing only cost me under $75 and I still have some material left. I got the highest quality suede I could find too. (Hancock Fabrics just happened to be having a huge 40% off sale that day. Score!) Makes the interior feel MUCH more... idk, luxurious, cool, sick, 'oh **** dude you've got suede on the roof!'... ya know. I'm quite happy with it. It really doesn't feel like a cheap plastic interior anymore. and did I mention how GOOD IT FEELS!? I need to get some females in there ASAP.
Update 4/3/2011: I realized how overboard I went with the suede in a few places, so I just wanted to show how it looks now, a year later.

Materials Used:
-3 Cans of 3M 90x Spray Glue (Only 2 needed for Headliner and pillars)
-4 Yards of Ultra Plush Black Suede (you'll only need to get 2 yards for the headliner)
First off... removing the interior is a LOT easier than it looks. We were all exclaiming "America! **** yeah!!" while simply pulling all the plastic panels off. Sooo simple. Almost everything is held on with pressure clips that seem to hold up to some abuse.
Step 1: Start at the rear of the a-pillar, grip it with your fingers, and simply pull it off working your way to the front windshield. Slide it and remove.
Step 2: Take a flat-head screw driver and wedge it between the headliner and the dome light. Pry it loose, then work it out with your fingers. Don't be afraid to use some even smooth force to get it off. Un-clip the electrical switch.
Step 3: Unscrew the 6 screws holding in the sunvisors and clips. The headliner should hang loose in the front.
Step 4: Go to the back seat and remove the 2 black pins in the rear of the headliner.
Step 5: Refer to the service manual here:
http://iihs.net/fsm/?dir=441
for removal of the "Quarter Trim Panel Coupe" and the "Quarter Window Panel". It's hard to explain without a nice diagram like the manual. You do NOT have to do this on both sides to get the headliner out. I did the passenger side only. Yes, you have to unbolt the top seatbelt bolt. At first I was like ueeehhh... but it's not a big deal.
Your interior should now look like this:
After you have removed those, the headliner will be able to come out. You do NOT have to fold or bend the headliner to get it out. We put the front of the headliner down by the shifter and lifted up on the rear part of the headliner and it was able to fit out the door opening with the windows down.
After this, lay your headliner down cloth side up. Removal of the old cloth is not necessary. In fact, it provides an ultra-soft padded feel after the suede is on. Lay your suede over it and trim off the excess, however leave a fair amount of material to wrap around the edges.
I got a lot of suede, lol.
Then we took the 3M glue and sprayed it in about 6 or 7 long strips. We applied a nice even coat to the headliner, a very thin coat to the back of the fabric, and layed it down while immediately smoothing it out. Don't spray TOO glue much or it may bleed through. DO NOT spray the whole thing at once and try to lay it down at one time. The glue dries way too fast for that... speaking from experience.
After you have done the whole surface of the headliner, flip it over. Pull the excess suede tight up around the edges and glue it to the back surface. I have to admit I used some *ahem* duck tape for additional reinforcement in some places.
Then find your holes and cut an X in them. Fold the material back like this:
Be sure and remember to poke holes for the rear two pins.
Then BOOM. Headliner's done. Fairly easy IMO. Pop it back up there and put the sun-visors and stuff back in.
NOW THEN.
Onto the hard(er) part. The A pillars. You basically just try your best to wrap them taking it slow one part at a time. Spray one part, then glue it down and smooth it out. The curved section is the part that gave us a little trouble. We cut some slits in the part of the fabric that would be wrapped around the back so it didn't wrinkle as bad on the surface.
Basically just feel it out. They didn't come out PERFECT, but they still look excellent. There are just a few wrinkles in one spot. Not noticeable until you feel them. Then pop them back up and you're done!
So the next day I realized how much suede I had leftover and got the fever again. I thought I would tie everything in with a few accents around the car. So I popped out the shifter trim and the two pieces that surround the radio.
Wrapped them using the same method as the pillars... just kind of work it out. Cut the shape of the object, glue it in portions, smooth it, and wrap it around the edges.
I thought I would tie it into the doors somehow too, so I popped off the window switch trim... I figured the top piece would be too hard to wrap, so I wrapped the plastic piece under it. I'll probably get some nice looking covers to go on the cheap window switch part.
I'll be sure and get some good pictures of it in broad daylight tomorrow with my good camera... and probably a video of the interior.
Keep in mind this whole thing only cost me under $75 and I still have some material left. I got the highest quality suede I could find too. (Hancock Fabrics just happened to be having a huge 40% off sale that day. Score!) Makes the interior feel MUCH more... idk, luxurious, cool, sick, 'oh **** dude you've got suede on the roof!'... ya know. I'm quite happy with it. It really doesn't feel like a cheap plastic interior anymore. and did I mention how GOOD IT FEELS!? I need to get some females in there ASAP.
Update 4/3/2011: I realized how overboard I went with the suede in a few places, so I just wanted to show how it looks now, a year later.
Last edited by 07BLACKGT; 04-03-2011 at 08:14 PM.

 01-26-2010, 05:18 AM
#4
Looks great! Now run a comb over that thing and make it uniform! 
If I had a S197 I would have stopped with the headliner and door, I think that would have been just enough.
Very good tech article.
If I had a S197 I would have stopped with the headliner and door, I think that would have been just enough.
Very good tech article.


