
The Undead Saleen - Rebuild Started
 05-24-2010, 01:43 AM
#101
1st Gear Member

Join Date: Apr 2010
Location: NY
Posts: 113
Nice motor- I look at this motor and all your hard work going into your car. I view this as a great upgrade. You make me and many of the Saleen guys proud. You could have went the cheap way out and just dropped a used motor in your car, but you�re doing it the Saleen way, turning your negative into a positive and coming out with a better car in the end, nice job. You should also post the photos of the bad motor on a Saleen web site. Let them see your story �.
Thanx-Muzzy 04 S281SC Convertible #355
42#
JLT cold air
JDM SCT 93 oct tune
90mm maf
75mm TB
Ported and Polished SC by PSE
Mosaleen pulley sys
Gaterback belt
NGK tr6 @034
2.9 pulley
Chicane ss braded IC lines
Carbon fiber dash kit and shift ****
1 bottle of water wetter (haha)
Thanx-Muzzy 04 S281SC Convertible #355
42#
JLT cold air
JDM SCT 93 oct tune
90mm maf
75mm TB
Ported and Polished SC by PSE
Mosaleen pulley sys
Gaterback belt
NGK tr6 @034
2.9 pulley
Chicane ss braded IC lines
Carbon fiber dash kit and shift ****
1 bottle of water wetter (haha)


 05-26-2010, 12:19 AM
#106
5th Gear Member
Thread Starter
Join Date: Oct 2009
Location: Oregon
Posts: 2,645
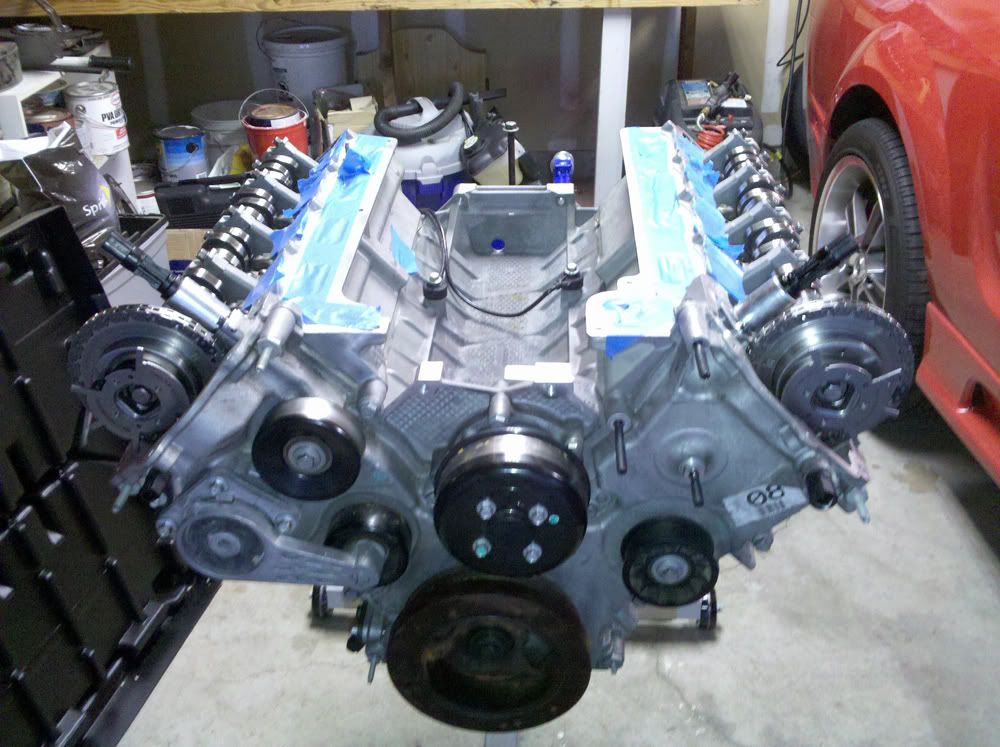
Part 3 - The Cover Up!
Here is the timing cover on with all the pulleys and water pump. Almost everything gets torqued to 18 ft.lbs, and if you're like me, you own a torque wrench that starts at 20ft.lbs so be sure and have your neighbor handy!
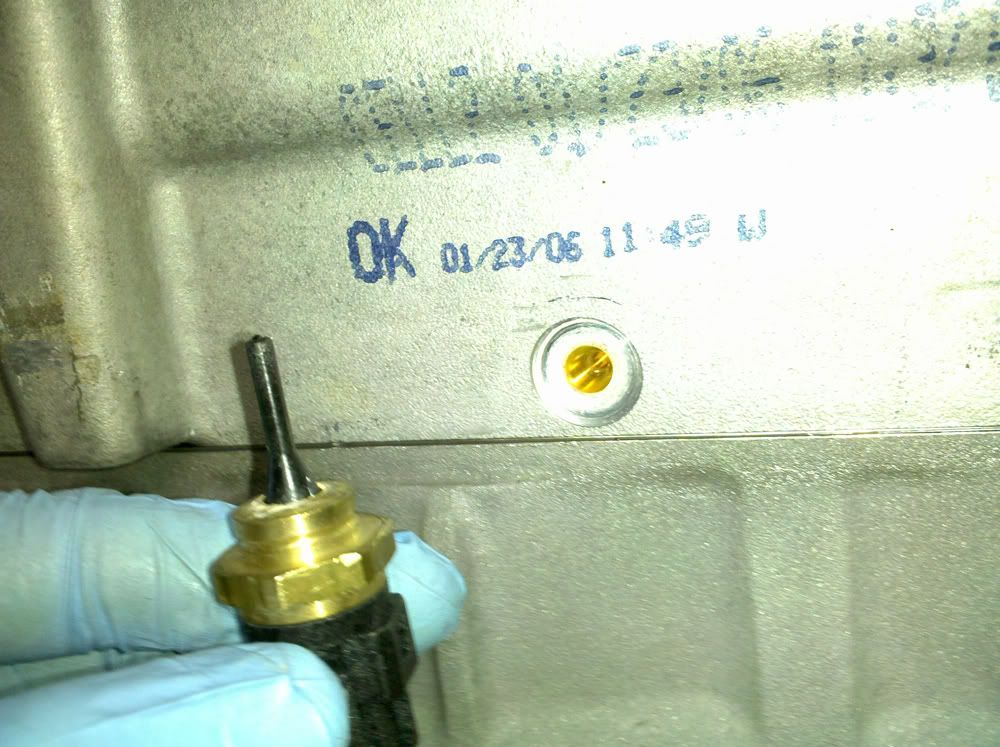
Part 4 - The F Bomb
Whats an engine project without some kind of screw up? I'll tell ya, it's a fantasy. Here is where I went just a LITTLE too far with a temp sensor.
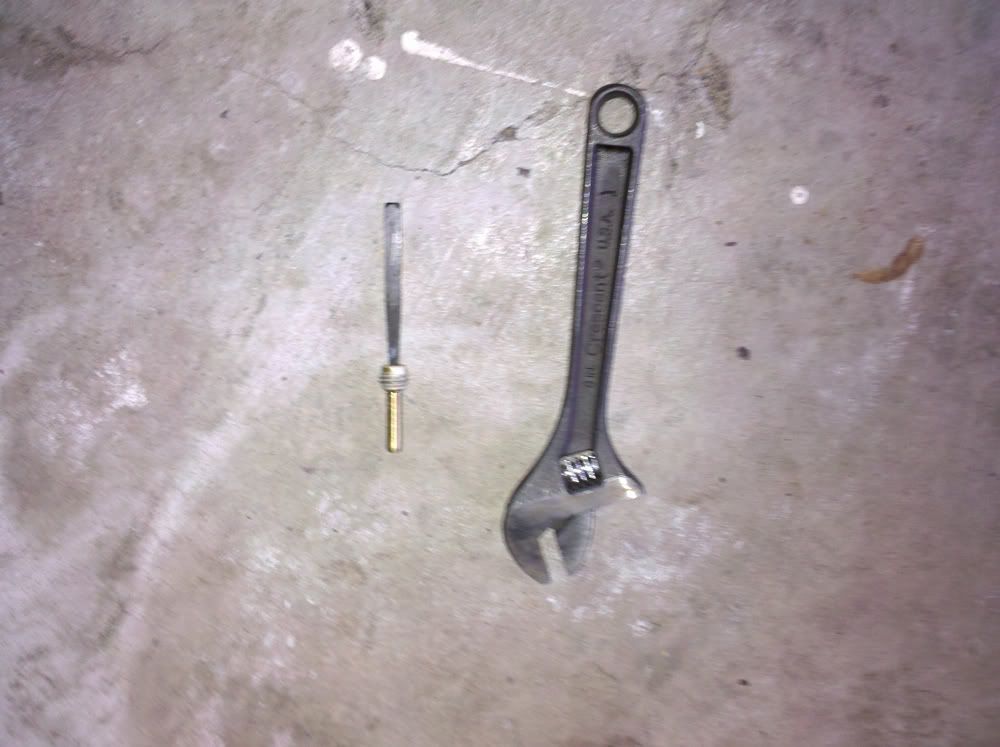
And here is how I got it out. I just tapped the extractor in since the part that got stuck is tapered, and then used a crescent to pull it out. Well, actually my dad pulled it out since my hands were full with the camera and a Sprite.

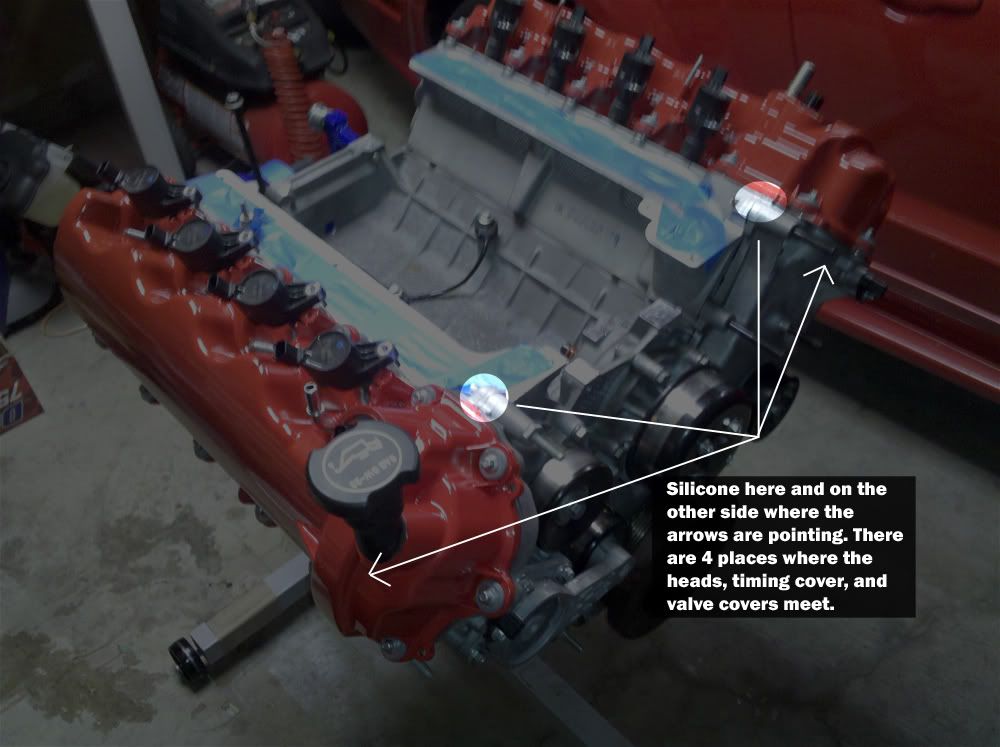
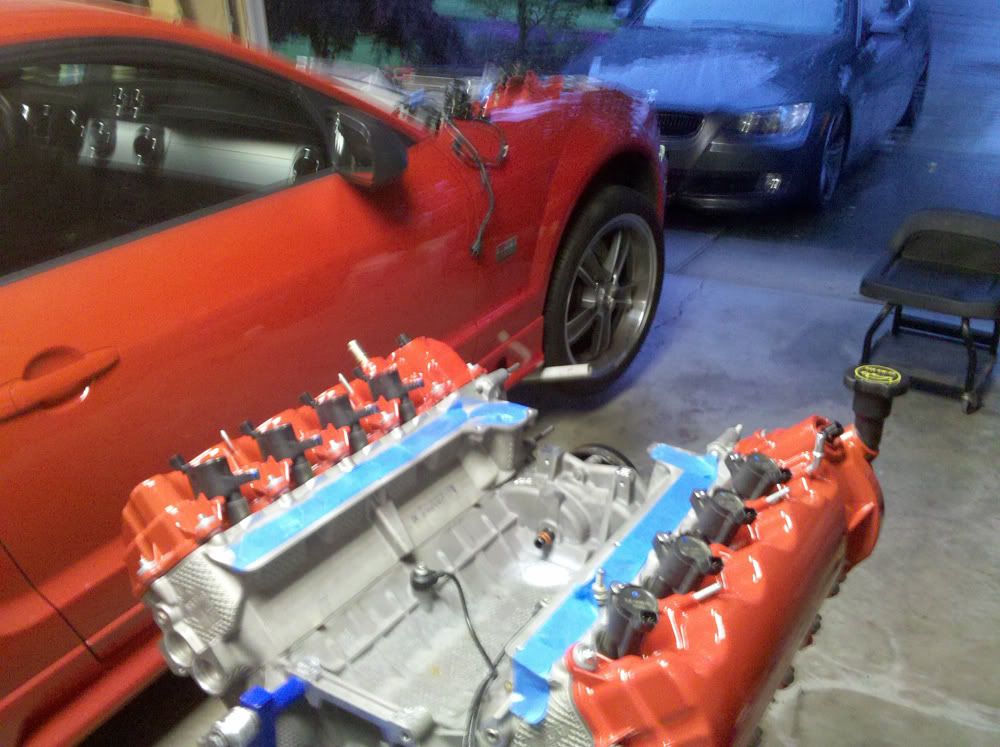
Part 5 - We got the red on dead on . . . well almost.
So the valve covers went on and I must say my GF did a good job picking the color. It's pretty freaking close. Don't forget to lay a little silicone down where the timing cover, heads, and valve cover meet. There IS a torque spec and pattern to these things, so beware of that.

All for now. Should have more Thursday night or Friday. Provided I can get that sensor, should still be on track for firing it up this weekend!
Here is the timing cover on with all the pulleys and water pump. Almost everything gets torqued to 18 ft.lbs, and if you're like me, you own a torque wrench that starts at 20ft.lbs so be sure and have your neighbor handy!
Part 4 - The F Bomb
Whats an engine project without some kind of screw up? I'll tell ya, it's a fantasy. Here is where I went just a LITTLE too far with a temp sensor.
And here is how I got it out. I just tapped the extractor in since the part that got stuck is tapered, and then used a crescent to pull it out. Well, actually my dad pulled it out since my hands were full with the camera and a Sprite.
Part 5 - We got the red on dead on . . . well almost.
So the valve covers went on and I must say my GF did a good job picking the color. It's pretty freaking close. Don't forget to lay a little silicone down where the timing cover, heads, and valve cover meet. There IS a torque spec and pattern to these things, so beware of that.
All for now. Should have more Thursday night or Friday. Provided I can get that sensor, should still be on track for firing it up this weekend!
Last edited by siggyfreud; 05-26-2010 at 12:28 AM.
 05-26-2010, 12:31 AM
#109
5th Gear Member
Thread Starter
Join Date: Oct 2009
Location: Oregon
Posts: 2,645
It's okay. After dropping $12 a pop on two little o-rings, I probably won't be phased by whatever it costs.
After it's all done and I know I did it right I'm gonna rewrite this thing with more technical info so it will be more complete. We should get all of us who are doing or have done a build and create a Performance 4.6 rebuild Wiki or something.
After it's all done and I know I did it right I'm gonna rewrite this thing with more technical info so it will be more complete. We should get all of us who are doing or have done a build and create a Performance 4.6 rebuild Wiki or something.