KB 2.6 stage 1 - install
 10-01-2010, 11:16 AM
#11
6th Gear Member
Thread Starter
Join Date: Nov 2007
Location: Montaner
Posts: 6,193
lol same here. Beautiful weather this last week or so. And will continue for a while... Until of course I get finished with the install lol then it will rain for sure. 
Part of the reason for the late start is I had some prep work to do. Crank pulley had to be changed out. Midpipe had to come off for a bung and then put back on. My battery tray was destroyed from corrosion (leaky batt) and I had to buy a new one and new battery. Also had to sand down and clean off some corrosion from the battery inside there and re-paint over it with rustoleum. Was a bit of work just to get ready to install this thing.
Part of the reason for the late start is I had some prep work to do. Crank pulley had to be changed out. Midpipe had to come off for a bung and then put back on. My battery tray was destroyed from corrosion (leaky batt) and I had to buy a new one and new battery. Also had to sand down and clean off some corrosion from the battery inside there and re-paint over it with rustoleum. Was a bit of work just to get ready to install this thing.
 10-01-2010, 08:00 PM
#14
6th Gear Member
Thread Starter
Join Date: Nov 2007
Location: Montaner
Posts: 6,193
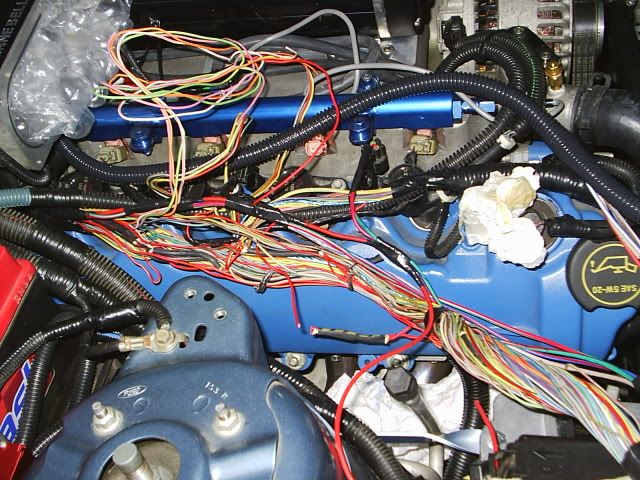
These are from last night. Here's a photo of the oil that dripped down from the stock manifold after it sat on the table overnight. Think I'm getting some blow-by? lol!

Uploaded with ImageShack.us
Alternator off in this one.

Uploaded with ImageShack.us
Having stayed up until 1AM then got up for work at 6:30 the last two days in a row.
I may be calling it an early night tonight if I can just get the heater core hoses off and
get the "bolt from hell" out.

Uploaded with ImageShack.us
Alternator off in this one.

Uploaded with ImageShack.us
Having stayed up until 1AM then got up for work at 6:30 the last two days in a row.
I may be calling it an early night tonight if I can just get the heater core hoses off and
get the "bolt from hell" out.
 10-01-2010, 09:13 PM
#16
5th Gear Member

Join Date: Jul 2008
Location: ......
Posts: 2,057
These are from last night. Here's a photo of the oil that dripped down from the stock manifold after it sat on the table overnight. Think I'm getting some blow-by? lol!
Uploaded with ImageShack.us
Alternator off in this one.
Uploaded with ImageShack.us
Having stayed up until 1AM then got up for work at 6:30 the last two days in a row.
I may be calling it an early night tonight if I can just get the heater core hoses off and
get the "bolt from hell" out.
Uploaded with ImageShack.us
Alternator off in this one.
Uploaded with ImageShack.us
Having stayed up until 1AM then got up for work at 6:30 the last two days in a row.
I may be calling it an early night tonight if I can just get the heater core hoses off and
get the "bolt from hell" out.
10-01-2010, 11:14 PM
#18
5th Gear Member
Join Date: May 2007
Location: Central Texas
Posts: 2,388
Ah, yes. Fond, recent memories.
I just installed the same setup, sort of.
Take your time, you still have a long way to go. But you'll get there.
There's a lot of experience with these KB installed here, so feel free to ask questions or if you're missing something!
At some point ,it may look something like this:
Ok well, eventually more like these:
http://i224.photobucket.com/albums/d...complete-1.jpg
http://i224.photobucket.com/albums/d...complete-3.jpg
Last edited by tx_zstang; 10-01-2010 at 11:17 PM.
10-02-2010, 01:44 AM
#19
6th Gear Member
Thread Starter
Join Date: Nov 2007
Location: Montaner
Posts: 6,193

I ended up having to get my friend to do the heater core hoses. I could not get them to click for me. I tried pushing up into the foam and pressed down but it just didn't want to work.
The "bolt from hell" is easy to remove. Putting it back in when the time comes may be a bit more difficult.
What a mess all the coolant was. When I removed the heater tube it spilled everywhere in the valley and made a huge mess. I'm not sure why there was so much left in there.
10-02-2010, 11:29 PM
#20
6th Gear Member
Thread Starter
Join Date: Nov 2007
Location: Montaner
Posts: 6,193
Spent some more time on this tonight. Made it up to step 100 on disassembly process.
Here is the thermostat housing ready to be pulled apart. I took the upper hose off even though the instructions don't ask you to do this. It was in the way as was the power steering reservoir which I also temporarily moved out of the way. BTW - good luck getting a torque wrench on those two bolts when you put them back. They go in from underneath and are in a tight spot.

Uploaded with ImageShack.us
Here is the new thermostat in place. Also, instructions say it is a 160 degree part. But as you can see that is not the case. It is a 170 degree thermostat.

Uploaded with ImageShack.us
Here's a picture of the passenger side radiator hose which was removed. As you can see the stock clamp is trashed. There is a nice crack there. I will need to pickup a replacement.

Uploaded with ImageShack.us
PCM is ready to come out. Looms and connectors have been pulled off the bracket and pushed over to the tensioner area to keep them out of the way per the instructions.

Uploaded with ImageShack.us
Where I quit for the night. Thermostat done, PCM + bracket out, and fuse box bracket removed.

Uploaded with ImageShack.us
Last edited by Riptide; 10-02-2010 at 11:31 PM.