How to: Spring Install
 06-02-2007, 10:38 PM
#1
3rd Gear Member
Thread Starter

Join Date: Feb 2007
Location:
Posts: 531
Ok, this is my first how to. It's going over the majority of a spring install, I only have the front for now. Any feedback would be appreciated. Also, I thought it would be a good idea to have a subforum with nothing but how-to's and guides. Just to make it easier to find them.
Materials: Basic hand tools, jack stands, floor jack, 13/16 and 15/16 socket or wrench. Spring Compressor. Air compressor and impact tools make it a lot easier. You can get by w/o a spring compressor, but it's dangerous and difficult.
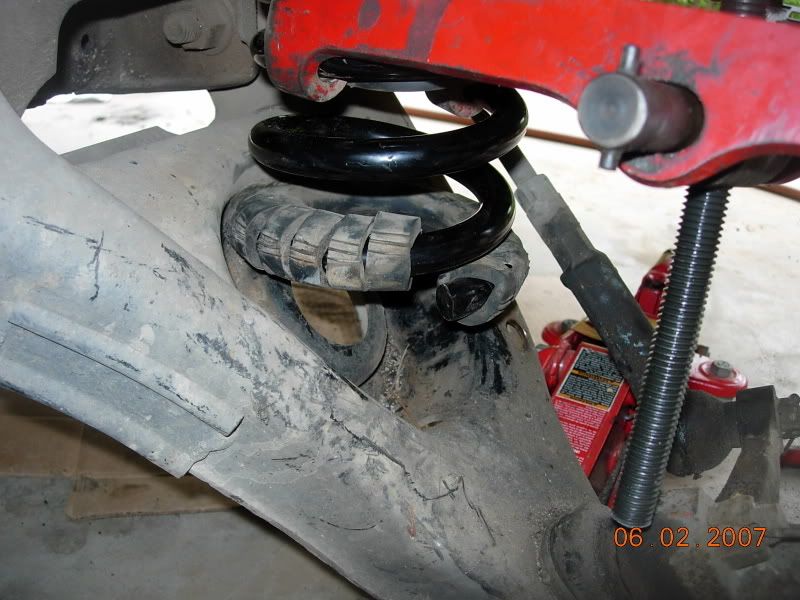
Okay, heres a few pics with my terminology, some people call things diff things, but these are the ones I'm going to be using in this tutorial.
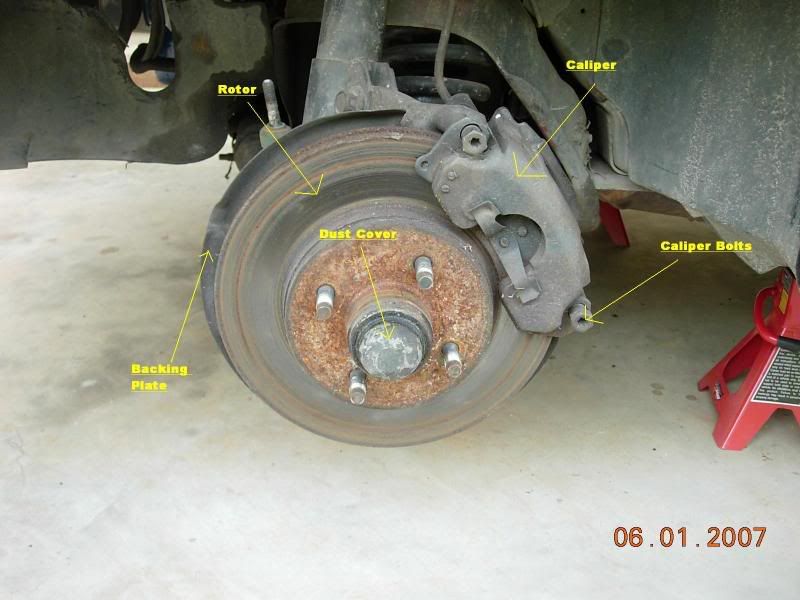
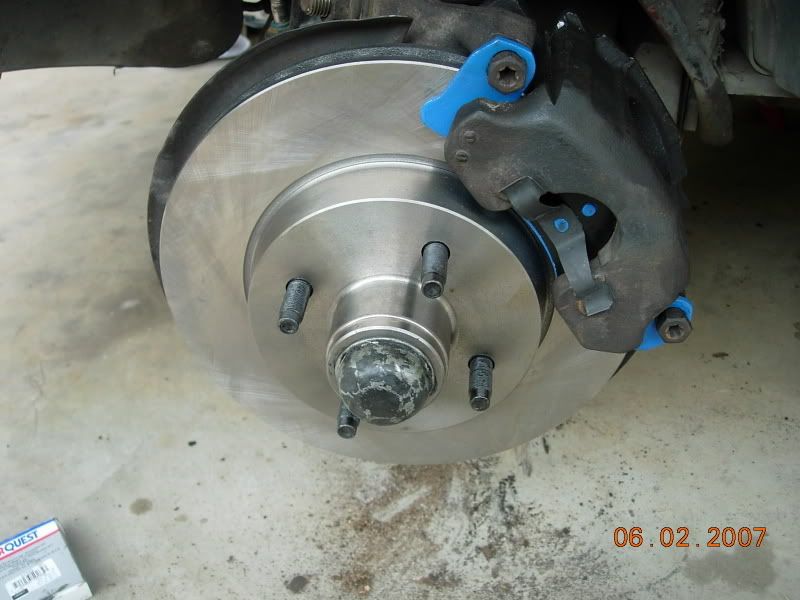
Break the lugnuts loose, then jack the car up, and remove the wheels. Start by removing the caliper. Remove the two big bolts, they are 17mm. Pull the caliper and pads off the rotor, and then disconnect the brake line from the caliper. It is a 10mm banjo bolt, make sure you keep the washers that come off the banjo bolt. Then remove the dust cover from the rotor. Inside there is a cotter pin, remove this, and then take the nut and star washer out. There is a washer with a notch behind this, and the outer bearing is behind that. Just pull the rotor out a bit, then push it back in. This makes getting those two out easy. To remove the inner bearing and the oil seal(rear on the rotor) thread the nut back on the spindle a little bit, then grab the outside of the rotor, and pull it fast, forcing one side to drag the nut. The bearing will catch on the nut and it will pop the oil seal off.
These are the bearings and parts before cleaning.
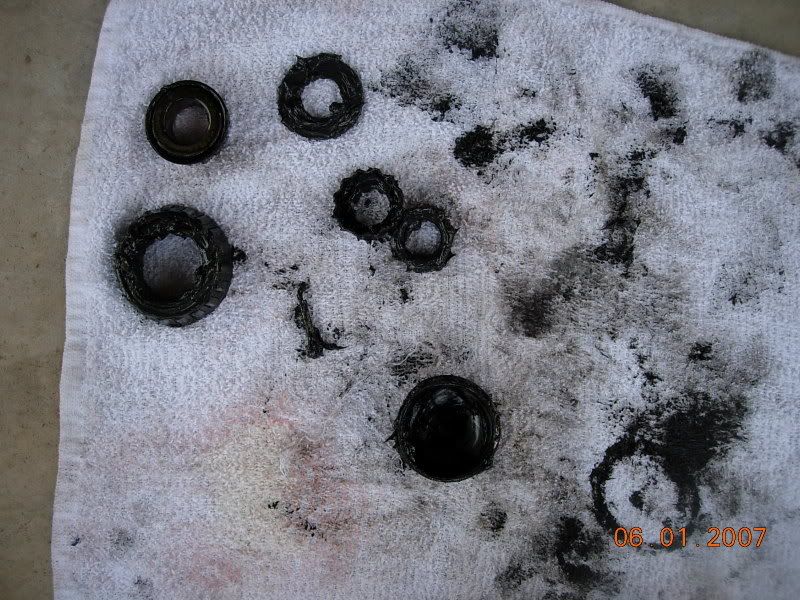
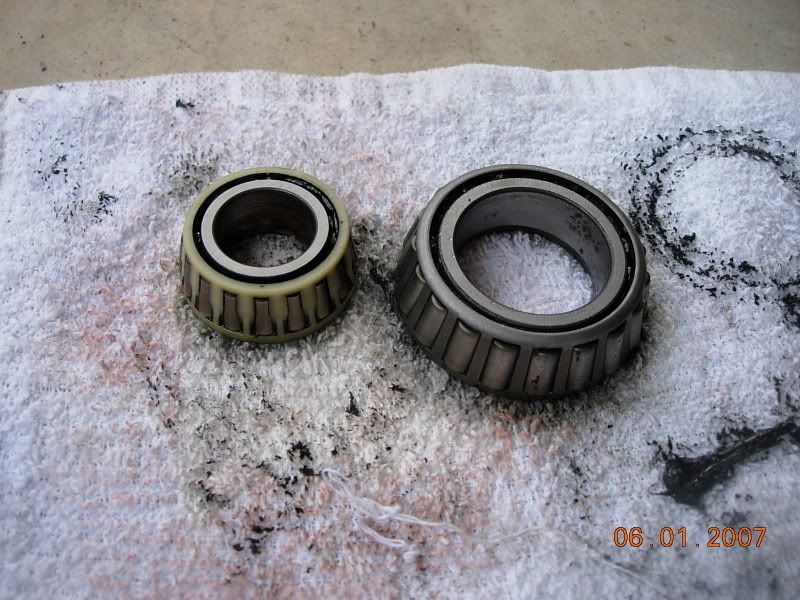
You need to clean these parts, and repack the bearings. Or just buy all new parts. Here's the bearing after cleaning.
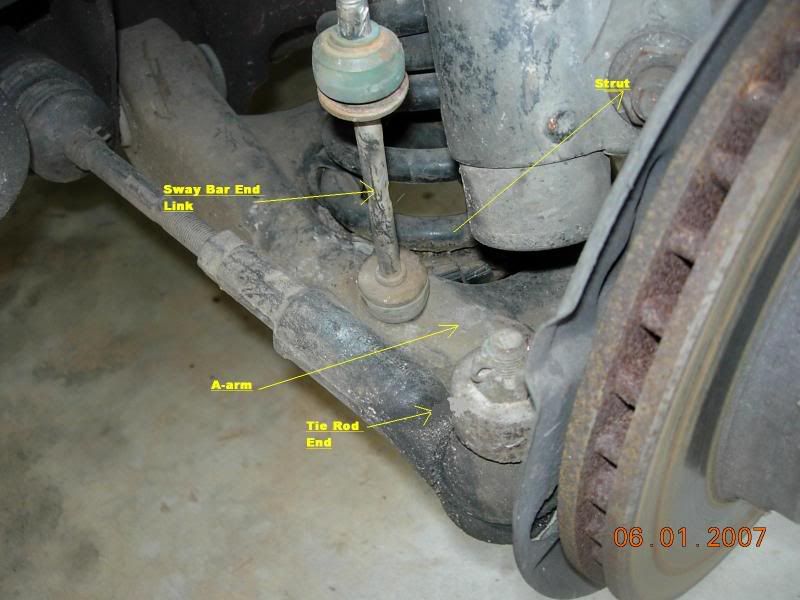
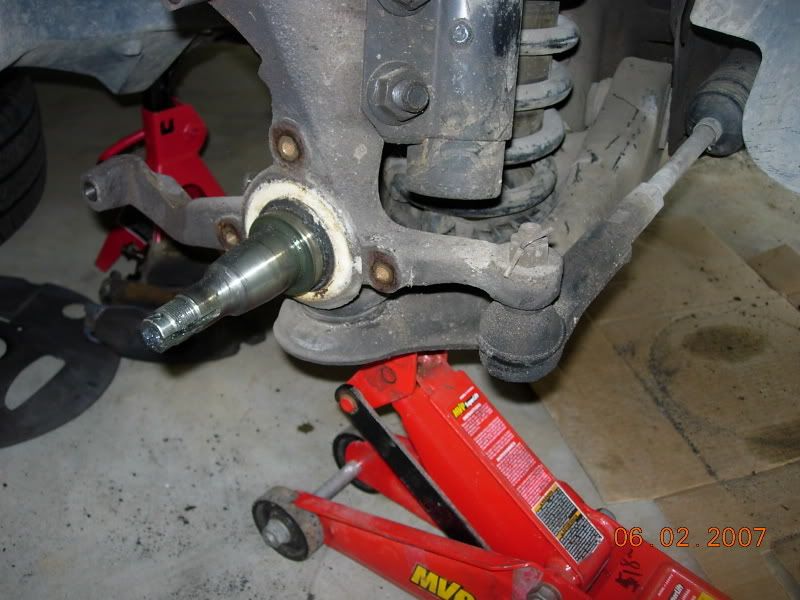
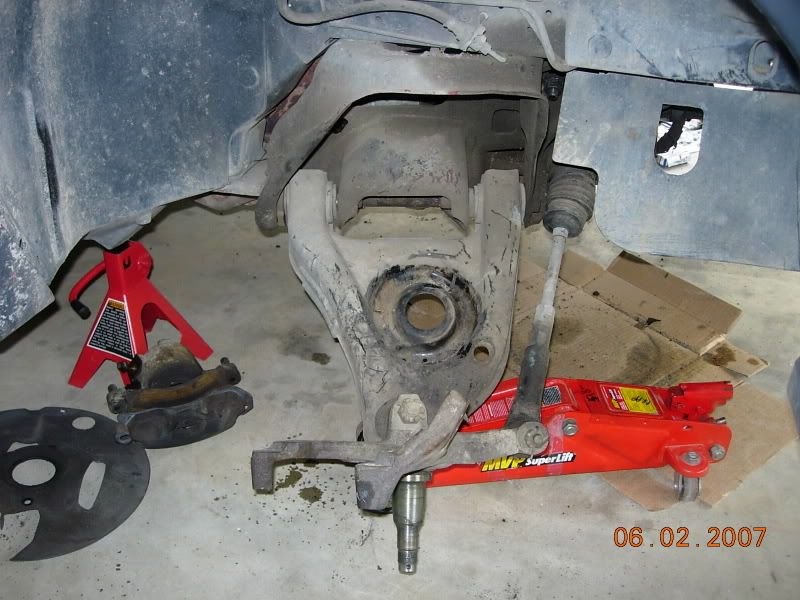
Next, remove the three bolts holding on the backing plate. They are 10mm if i remember correctly. Now you have a bare spindle, which provides you with room to maneuver the springs and compressor. Next, put a floor jack under the a-arm and jack it up enough to put some tension on the spring.
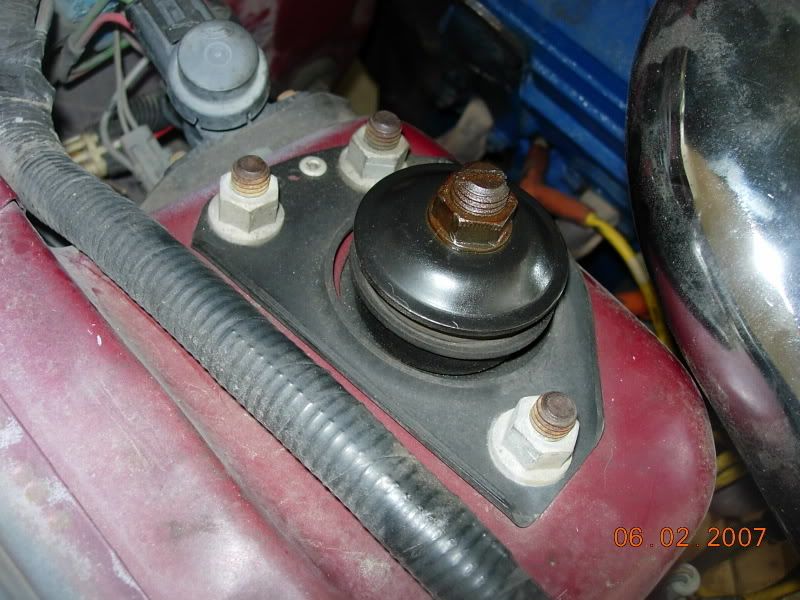
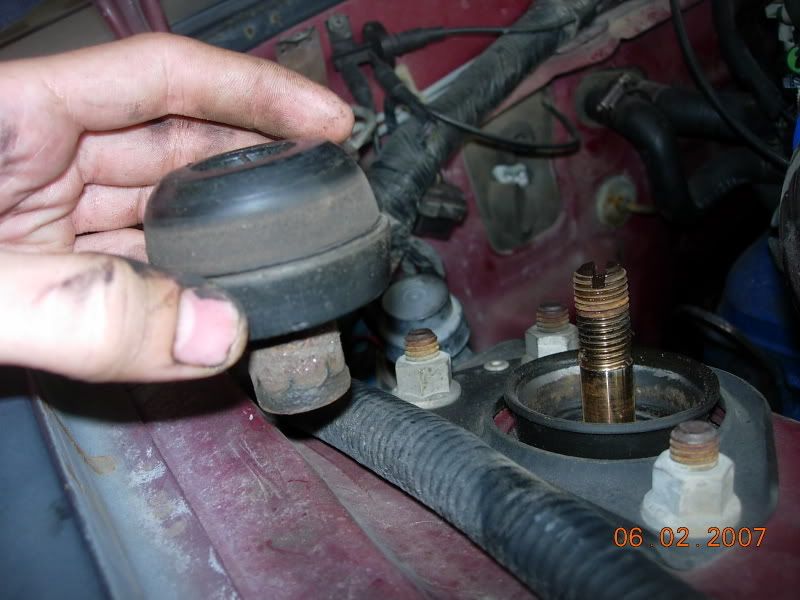
Thrn remove thenut on top of the strut. Its under the hood, right near the fender. Make sure you keep the sleeve, the rubber bushing, and the metal cap. I think the nuts a 13/16 or 7/8.
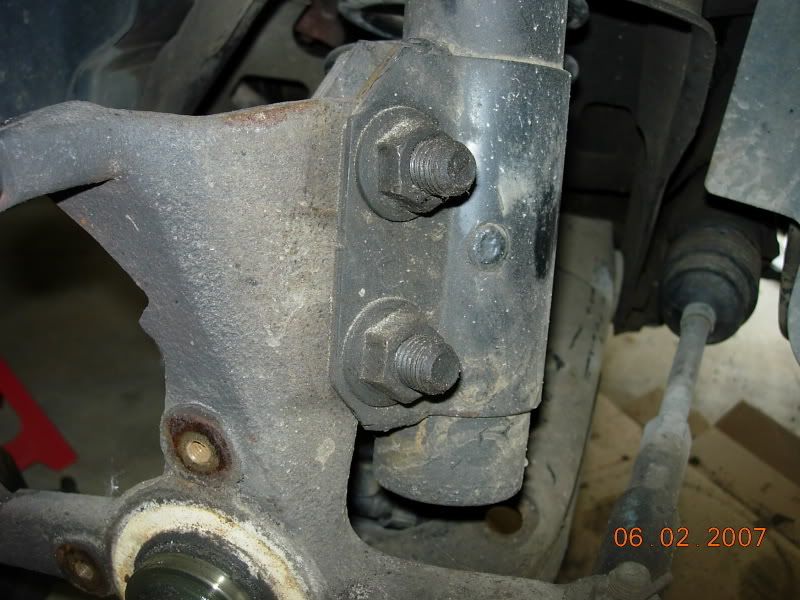
Then remove the two big bolts and nuts on the lower shock. They are 13/16, and 15/16.
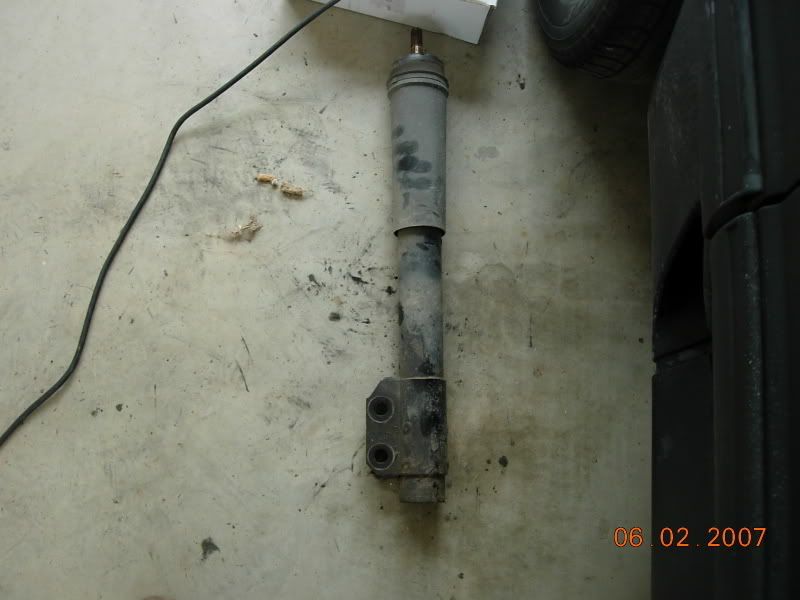
Remore the strut by taking the bottom end loose, then sliding the top out of the hole. This is the strut removed.
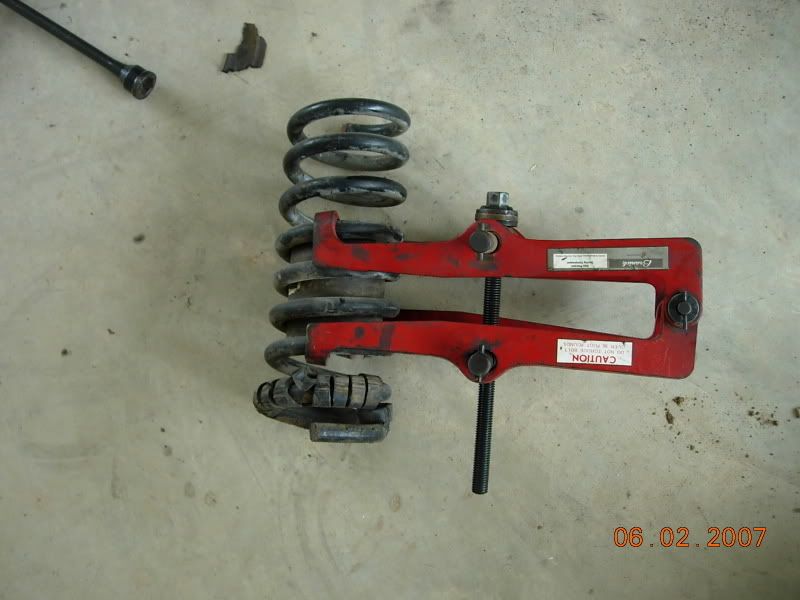
Then put the spring compressor on the old spring, and compress it just enough to have pressure. Let the assembly down slowly with the jack, when you get it far enough, remove the spring. The place where the spring mounts will tilt, but I'll tell ya how to put the spring in later.
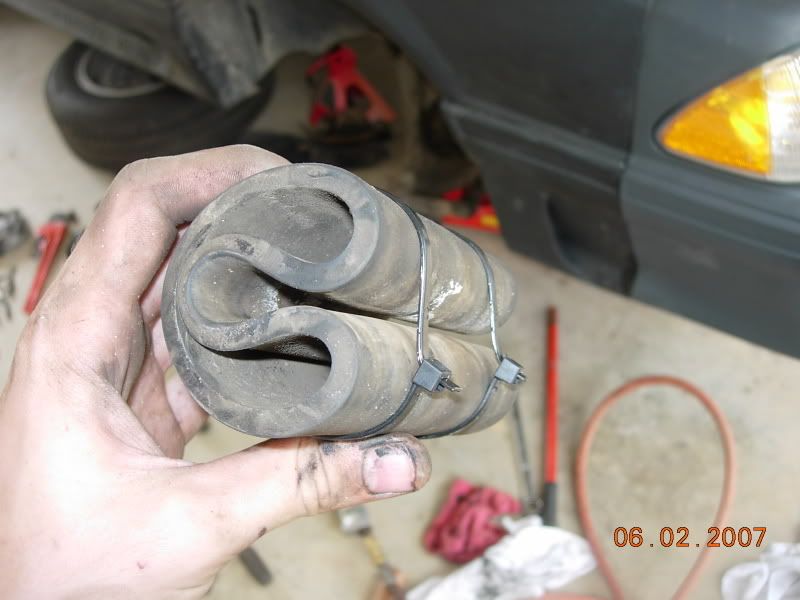
Transfer the rubber inner sleeve, and the one that slides on the bottom of the spring. The best way to get the sleeve out, is to stick a big pry bar in the spring, and fold the sleeve, then put zipties on it, like this
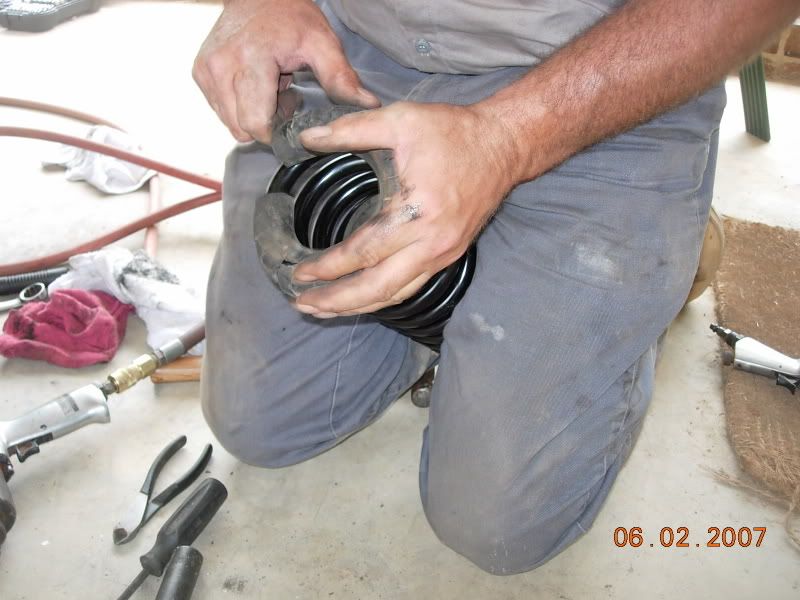
To remove the sleeve you just kinda have to manhandle it, it slides off fairly easy, just stick the spring between your legs and twist the rubber thing until it comes off.
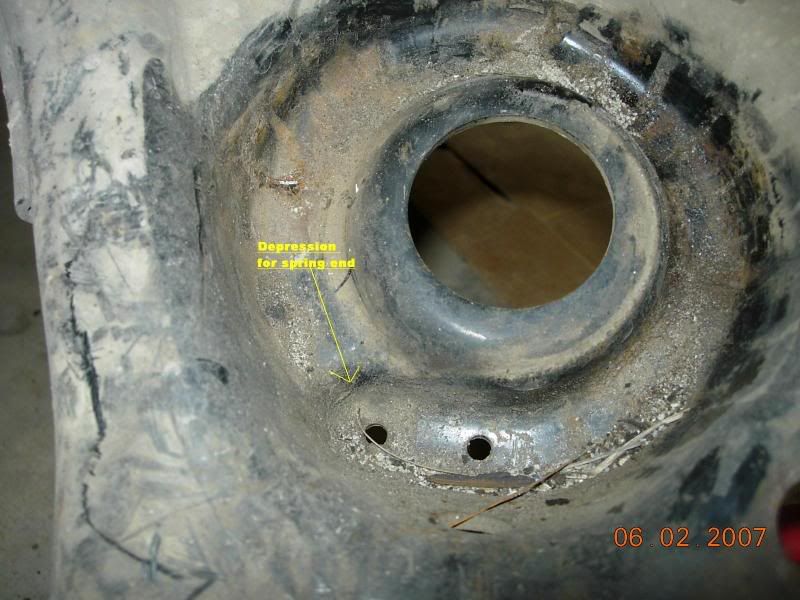
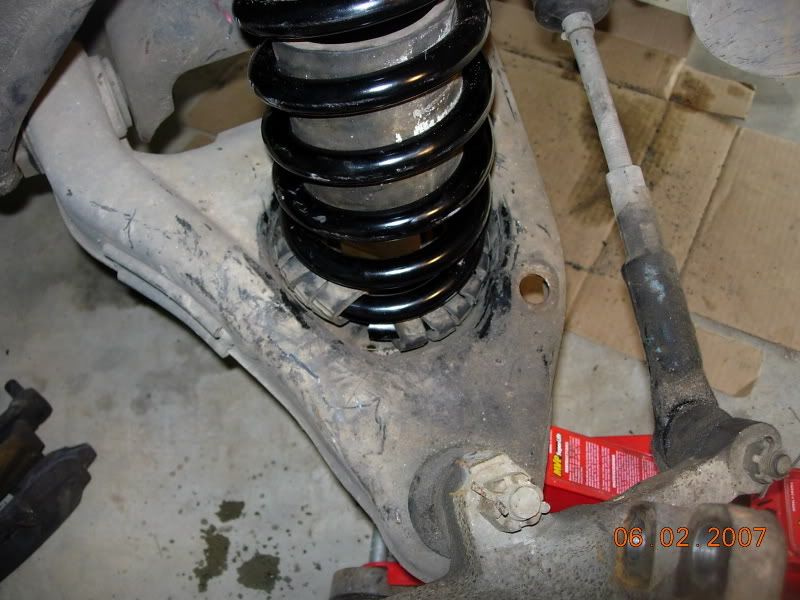
Put the sleeve and rubber thing on the new spring, cut the zipties on the sleeve, and pull it to make sure its fully expanded. Then put the spring compressor on the spring. There is a certain way to install the spring, the bottom has an indentaion you have to get close.
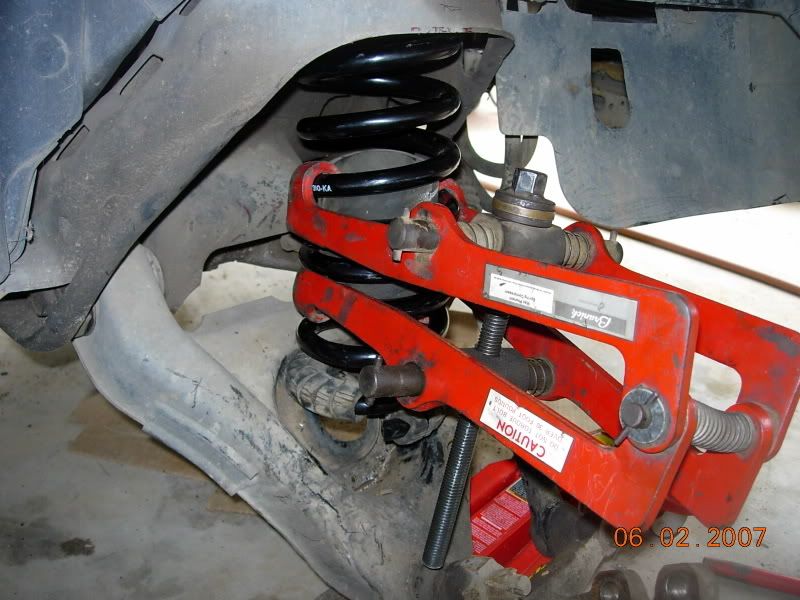
Make sure you put the compressor in a place where you can loosen it and take it off without hitting anything. Right behind the spindle is the best place.
The spring likes to twist some when you loosen the spring compressor, so I put the spring about an inch counter-clockwise from the indentation. Put the top in, and just push the bottom part on the far side, like this.
Notice the spring is about an inch counterclockwise from the depression.
Jack the assembly up enough to check that you have the spring aligned right. Then let it down some to make removing the spring compressor easier. You have to twist it around and use a pry bar at points.
After this, jack it up just enough to get the strut back in. Once that's in you can put everything back together. Hope this helps, and remember, any feedback or suggestions are appreciated. There's a couple of pics I didn't use, they are all at http://s114.photobucket.com/albums/n...ing%20Install/ That should work.
Materials: Basic hand tools, jack stands, floor jack, 13/16 and 15/16 socket or wrench. Spring Compressor. Air compressor and impact tools make it a lot easier. You can get by w/o a spring compressor, but it's dangerous and difficult.
Okay, heres a few pics with my terminology, some people call things diff things, but these are the ones I'm going to be using in this tutorial.
Break the lugnuts loose, then jack the car up, and remove the wheels. Start by removing the caliper. Remove the two big bolts, they are 17mm. Pull the caliper and pads off the rotor, and then disconnect the brake line from the caliper. It is a 10mm banjo bolt, make sure you keep the washers that come off the banjo bolt. Then remove the dust cover from the rotor. Inside there is a cotter pin, remove this, and then take the nut and star washer out. There is a washer with a notch behind this, and the outer bearing is behind that. Just pull the rotor out a bit, then push it back in. This makes getting those two out easy. To remove the inner bearing and the oil seal(rear on the rotor) thread the nut back on the spindle a little bit, then grab the outside of the rotor, and pull it fast, forcing one side to drag the nut. The bearing will catch on the nut and it will pop the oil seal off.
These are the bearings and parts before cleaning.
You need to clean these parts, and repack the bearings. Or just buy all new parts. Here's the bearing after cleaning.
Next, remove the three bolts holding on the backing plate. They are 10mm if i remember correctly. Now you have a bare spindle, which provides you with room to maneuver the springs and compressor. Next, put a floor jack under the a-arm and jack it up enough to put some tension on the spring.
Thrn remove thenut on top of the strut. Its under the hood, right near the fender. Make sure you keep the sleeve, the rubber bushing, and the metal cap. I think the nuts a 13/16 or 7/8.
Then remove the two big bolts and nuts on the lower shock. They are 13/16, and 15/16.
Remore the strut by taking the bottom end loose, then sliding the top out of the hole. This is the strut removed.
Then put the spring compressor on the old spring, and compress it just enough to have pressure. Let the assembly down slowly with the jack, when you get it far enough, remove the spring. The place where the spring mounts will tilt, but I'll tell ya how to put the spring in later.
Transfer the rubber inner sleeve, and the one that slides on the bottom of the spring. The best way to get the sleeve out, is to stick a big pry bar in the spring, and fold the sleeve, then put zipties on it, like this
To remove the sleeve you just kinda have to manhandle it, it slides off fairly easy, just stick the spring between your legs and twist the rubber thing until it comes off.
Put the sleeve and rubber thing on the new spring, cut the zipties on the sleeve, and pull it to make sure its fully expanded. Then put the spring compressor on the spring. There is a certain way to install the spring, the bottom has an indentaion you have to get close.
Make sure you put the compressor in a place where you can loosen it and take it off without hitting anything. Right behind the spindle is the best place.
The spring likes to twist some when you loosen the spring compressor, so I put the spring about an inch counter-clockwise from the indentation. Put the top in, and just push the bottom part on the far side, like this.
Notice the spring is about an inch counterclockwise from the depression.
Jack the assembly up enough to check that you have the spring aligned right. Then let it down some to make removing the spring compressor easier. You have to twist it around and use a pry bar at points.
After this, jack it up just enough to get the strut back in. Once that's in you can put everything back together. Hope this helps, and remember, any feedback or suggestions are appreciated. There's a couple of pics I didn't use, they are all at http://s114.photobucket.com/albums/n...ing%20Install/ That should work.