Engine bay update


 02-01-2008, 11:27 AM
#12
3rd Gear Member
Thread Starter
Join Date: Oct 2006
Location: Michigan
Posts: 679
Your engine looks great, I may still fill in the holes. I have nothing but time for this car and my engine is far from done.
I was just joking about the extra weight guys!!!!
I was just joking about the extra weight guys!!!!
 02-02-2008, 09:31 AM
#15
4th Gear Member
Join Date: May 2007
Location: Calif
Posts: 1,926
DoctorD415
I'm not sure it’s the proper way to fill the holes in the engine bay but its what worked for me 8 yrs ago and I know many morewho have followed what I did simply because they asked me how I did mine.
Pull the engine.
Clean and degrease the entire engine bay.
Take a wire wheel on an electric drill and clean all the old paint off around near the hole you’re going to weld up.
Get yourself some 22 ga metal (20 ga metal is easier to find and will work also) to make some patch pieces just slightly smaller as the same diameter of the hole your weld up. Weld the patch piece into place. Weld and fill any hole larger than a dime in that manner (dime size and smaller hole you can weld closed by making a few passes to fill those small holes).
Grind down all the welds then use a body filler (I used all-metal not bondo) to filled in any low spots in the engine bay due to either warped fenders, welding or grinding, spot welds, or any screw holes. When using any body filler always try keeping it to a minimum thickness by following instruction on the can or label. You’ll need to fill the low and uneven spots probably 2 or 3 times before you have enough buildup to sand the body filler smooth and flat. I used a long board and 4” sanding block to make mine as smooth as I possibly could. I found that if you buy the sand paper sheets for the body filler from any Auto Supply paint store your time spent sanding will be cut in half versus getting sheets of wet-dri course sand paper from your local hardware store, but that’s just me. At this time you’ll also need to scuff the entire engine bay with a medium scuffing pad, and then clean the engine bay of any dust by either air or tack cloth.
Next prime: Once the primer is dry you’ll need to sand the entire engine bay with 360 grit wet-dri sandpaper. After that you’ll need to remove any primer dust by either air or a tack rag. Next apply finishing putty such as (Evercoat Glaze Coat) to fill in any small pin holes that the body filler or primer did not fill earlier. Sand the finishing putty with 360 or 400 grit wet-dri sandpaper, at this time if you see and small pin holes or recessed areas that you may have missed earlier or that didn’t fill properly fill with the finishing putty one more time. Remove any finishing putty sanding dust with air and while doing that making sure at this time that you have completely eliminated all dust and any debris that could fly up during painting process. Last and final time tack rag the whole engine bay out, and now your ready to paint.
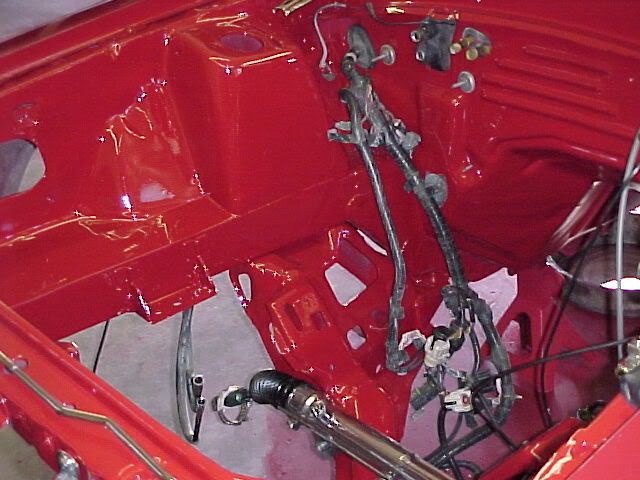
Welded

Ready for primer

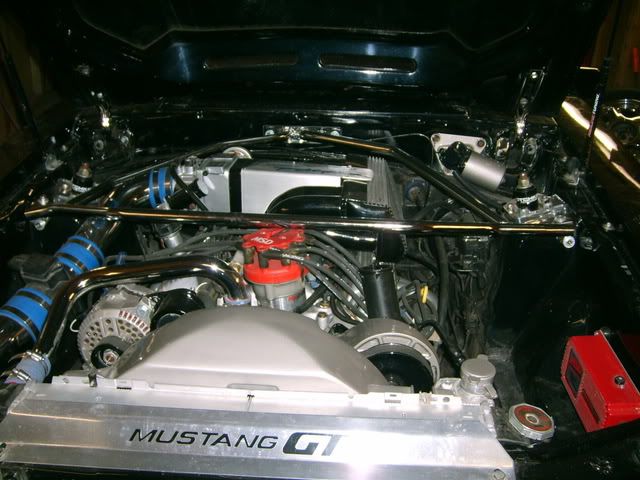
Painted

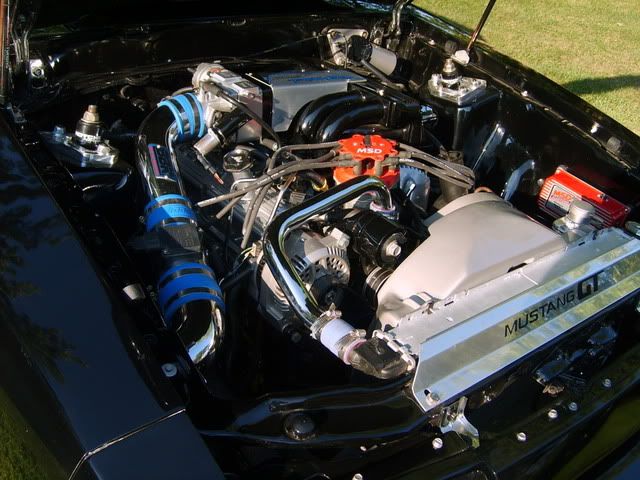
Finished

I'm not sure it’s the proper way to fill the holes in the engine bay but its what worked for me 8 yrs ago and I know many morewho have followed what I did simply because they asked me how I did mine.
Pull the engine.
Clean and degrease the entire engine bay.
Take a wire wheel on an electric drill and clean all the old paint off around near the hole you’re going to weld up.
Get yourself some 22 ga metal (20 ga metal is easier to find and will work also) to make some patch pieces just slightly smaller as the same diameter of the hole your weld up. Weld the patch piece into place. Weld and fill any hole larger than a dime in that manner (dime size and smaller hole you can weld closed by making a few passes to fill those small holes).
Grind down all the welds then use a body filler (I used all-metal not bondo) to filled in any low spots in the engine bay due to either warped fenders, welding or grinding, spot welds, or any screw holes. When using any body filler always try keeping it to a minimum thickness by following instruction on the can or label. You’ll need to fill the low and uneven spots probably 2 or 3 times before you have enough buildup to sand the body filler smooth and flat. I used a long board and 4” sanding block to make mine as smooth as I possibly could. I found that if you buy the sand paper sheets for the body filler from any Auto Supply paint store your time spent sanding will be cut in half versus getting sheets of wet-dri course sand paper from your local hardware store, but that’s just me. At this time you’ll also need to scuff the entire engine bay with a medium scuffing pad, and then clean the engine bay of any dust by either air or tack cloth.
Next prime: Once the primer is dry you’ll need to sand the entire engine bay with 360 grit wet-dri sandpaper. After that you’ll need to remove any primer dust by either air or a tack rag. Next apply finishing putty such as (Evercoat Glaze Coat) to fill in any small pin holes that the body filler or primer did not fill earlier. Sand the finishing putty with 360 or 400 grit wet-dri sandpaper, at this time if you see and small pin holes or recessed areas that you may have missed earlier or that didn’t fill properly fill with the finishing putty one more time. Remove any finishing putty sanding dust with air and while doing that making sure at this time that you have completely eliminated all dust and any debris that could fly up during painting process. Last and final time tack rag the whole engine bay out, and now your ready to paint.
Welded
Ready for primer
Painted
Finished

Thread
Thread Starter
Forum
Replies
Last Post
AmericanMuscle4.6GT
2005-2014 Mustangs
7
11-10-2015 02:06 PM
TfcCDR
V6 (1994-2004) Mustangs
1
09-14-2015 12:08 PM